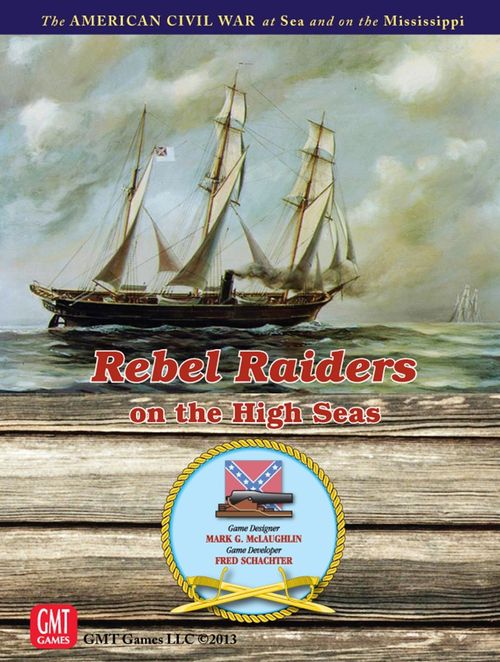
Rebel Raiders on the High Seas
Rebel Raiders on the High Seas Rulebook
Table of Contents
Table of Contents
- Contents
- The Game Map
- Basic Game Setup
- Turn Sequence
- Counters, Spaces, Stacking & Fleet Command Box Markers
- Movement
- Raiding
- Blockade Runner Cargo Load/Unload
- Naval Combat
- Assault
- 11.1 Union Assaults During a Turn
- 11.2 General Rule Union Amphibious Assault
- 11.3 Pre-requisites for an Amphibious Assault
- 11.4 Overland Assault
- 11.5 Assault and Ship Movement Intermingling
- 11.6 Assault Combat Sequence
- 11.7 Multiple Assaults on the Same Target / from the Same Land Space
- Summary of Assault VP Effects (cumulative); 11.67
- 11.8 Sequential Assaults
- 11.9 Confederate Counterattack
- Invading Kentucky
- Confederate Supply
- Confederate Build Phase
- Union Build Phase
- Victory
- Cards
- Index
- Playing Piece & Key Rules Quick Check Table
Contents
Inventory of Overall Game Contents
- One 22" x 28" map
- One Rule Book
- One Play Book
- One player aid card
- Eight six-sided dice
- Two decks that total 110 cards
- Six plastic stands with rectangular Union/Confederate Naval Leader inserts
- Two die-cut counter sheets
- Thirty red translucent plastic tokens
| Counter Mix Limits | CSN | USN |
|---|---|---|
| Raiders | 6 | – |
| Blockade Runners | 17 | – |
| Screw Sloops | – | 30 |
| Ironclads | 12 | 20 |
| Gunboats | 18 | 30 |
| Batteries * | 30 | – |
| 2 VP Cargo Marker | 6 | – |
| 1 VP Cargo Marker | 13 | – |
* Eleven Battery pieces serve a dual purpose. They are also used for the "Union Resolve" Optional Rule 18.41.
Counters in Summary
Ocean-going Ships: Confederate Blockade Runner, Confederate Raider, Union Screw Sloop.
Coastal/River Ships: Confederate Ironclad, Confederate Gunboat, Union Ironclad, Union Gunboat. May enter Port, Fort and Blockade Stations only.
- Exception: A Union Ironclad may enter a Coastal space if towed by a Screw Sloop (7.32, 7.34, 7.6).
- Exception: Union Gunboats may enter Coastal spaces.
2.23 Counters and Sample Information Markers: Confederate Battery, Union Control, Confederate Militia, Cargo 1, Cargo 2, Resolve 1, Hunt's Artillery, Union Cannon Pawn, Confederate Cannon Pawn, Amphibious Assault (back of Cannon pawn), Confederate Arsenal, Confederate General, Johnston Available, Union General, Union Control Cities/Ports, Union Admiral (Farragut), Confederate Admiral (Buchanan), Turn marker (front and back), VP x1 marker, VPs x10 marker, Union Fort Control (front) and Isolated Fort (back), Emancipation Proclamation, Royal Navy, Union Resolve Cities and Fail Union Resolve (lose one card), Battle marker, Maximillian, Yankee Guns, Louisville Benefit Used/Control, Arsenal Razed! (back of Arsenal marker), Confed. Engine Breakdown, Dupont Naval Attack Benefit Used, Grant Benefit Used, Sheridan Benefit Used, Loose the Fateful Lightning Used, Mortar Boats Benefit Used, Red River Fiasco, Union Siege Train Benefit Used, Storm! Ships in Port, Union Admiral (Farragut), Confederate Admiral (Buchanan).
The Game Map
Map Spaces
The map is divided into several types of spaces for movement purposes.
- Blockade Station. Is a space linked to an accompanying Ocean Port. Ships must move to and from a Port via its Blockade Station to which it is connected by a thin line (exception, New Orleans whose Station connects to "Jackson and St. Philip").
- Ocean Port. Is a City located on a Coastal Sea Zone which has a Blockade Station associated with it.
- River Port. A city with at least one blue River LOC attached to it. Three Confederate River Ports on the Mississippi: Memphis, Vicksburg, and New Orleans are Special VP Cities (see 11.68).
- Chattanooga. Chattanooga is a special Confederate Inland City (as below) but is connected by a blue river line to Fort Henry and Donelson. The red "X" on the river indicates that no ships may move in or out of Chattanooga, and the red "X" in the square indicates that no ships may be built there. The river is used to allow a Union Assault from the Henry and Donelson Fort space to Chattanooga; as well as to allow the Fort—while in Confederate possession—to be supplied and thus not "wither on the vine" (per Supply, 13.1).
- Confederate Inland Cities. Note that Inland Cities have no corresponding Blockade Station. Any city that does is an Ocean Port, not an Inland City. Richmond & Atlanta, due to containing the Confederacy's few iron works & major arsenals, are depicted by hexagons. The two other inland Cities, Montgomery and Chattanooga, are squares.
- Union City. These are four Union City boxes: three are River Ports (St. Louis, Cairo, Cincinnati), and one is an Inland City (Washington). Union City boxes are slightly larger than the Confederate city boxes for ease of identification.
- Confederate Fort. There are ten Confederate Fort spaces (Baton Rouge, Henry and Donelson, Corinth, Meridian, Forts Jackson and St. Philip, Island No. 10, Augusta, Goldsboro, Kennesaw Mountain, and Fredericksburg). River Forts are depicted by a Fortress star symbol; inland Forts are shown as rectangles.
- Louisville, Kentucky. Neither Union nor Confederate at the 1861 start of the game, Louisville is "up for grabs" to the first player willing to pay the price to claim it (12.).
- Neutral Ports. Most Neutral Ports spaces have the appropriate national flag(s) within them showing which European Power(s) controls the Port.
- Whaling Grounds. The Whaling Grounds Sea Zone (a key target of opportunity for Confederate Raiders). It is a separate Zone within and only accessible to/from the Pacific Ocean.
Sea Zones. There are two types of Sea Zones: Coastal and High Seas.
- Coastal Sea Zones. There are six Coastal Sea Zones with Blockade Stations (e.g., Hatteras). Two unique European Coastal Zones surround the France & England and Spain Neutral Ports. These lack Blockade Stations.
- High Sea Zones are those without Blockade Stations (e.g., Azores, North Atlantic, Cuban Coast, etc).
Navy Yards: A unique Union Port for placement of their ships. It may not be entered by any Confederate ship.
3.2 Lines of Communication
Some map spaces are connected to others via "Lines of Communication" (LOCs). Where applicable, there are two types of LOCs:
3.21 River. Depicted in blue. Only the Union may make an Assault (11.1) using this LOC.
3.22 Land. Depicted in red. The Union or Confederacy may make an Assault (11.1, 11.9) using this LOC.
3.23 Ocean Ports. Some Ocean Ports (e.g., Key West) are not connected to any other spaces via river or land LOCs. The only ship entrance and egress for such a Port is via its Blockade Station and then out to that Station's surrounding Coastal Zone.
New Orleans is an exception to the usual River Port or Ocean Port. It is considered sea-entered from the (Fort) Jackson & St. Philip space to its southeast (7.21). An Amphibious Assault (11.2) is required to capture New Orleans from this approach.
- The Union may conduct an Amphibious Assault (11.2) to capture an Ocean Port. An Ocean Port that has no river or land LOC (e.g., Key West) can only be captured by the Union via Amphibious Assault.
Basic Game Setup
After choosing sides, but before setting up the Basic Game, experienced players should decide if they wish to use any of the game's Optional Rules (section 18 in the game's Play Book). There are rules specifically described as "Pro-union" or "Pro-Confederate," so players should carefully consider their game balance effect when deciding which to add.
Experienced players may also wish to play the 1862 Game Set-Up Scenario (Play Book section 19), with its options, rather than the standard 1861 Basic Game Setup.
4.1 Confederacy
4.11 Cards. Shuffle the Confederate (butternut) deck. Draw the top three cards.
4.12 At Start Playing Pieces. Sort out the following initial forces—nine Batteries, three Gunboats, six Blockade Runners, one Raider—and place them as follows:
- Confederate Batteries: Place one Confederate Battery at each of the following four "Star Fort" positions: Island No. 10, Forts Henry & Donelson, Baton Rouge and Forts Jackson & St. Philip. Place one Confederate Battery at each of the following five ports: Norfolk, Charleston, Mobile, Savannah and Pensacola.
- Confederate Gunboats: Place one Confederate Gunboat at each of the following three ports: Memphis, Norfolk and Vicksburg.
- Confederate Blockade Runners: Place one Confederate Blockade Runner at each of the six following ports: Galveston, New Orleans, Mobile, Savannah, Charleston and Wilmington.
- Confederate Raider: Place one Confederate Raider in New Orleans.
4.13 Game Marker Placements
- "VP x10" marker set at 10. "VP x1" marker at zero.
- The Cities/Port Control Tally marker has no Southern Cities or Ports lost (yet). Set this marker aside (it should find use at some point during the game).
- Place the Richmond and Atlanta Arsenal Markers on their respective hexagonal City spaces.
- Turn marker set at April 1861.
4.2 Union
4.21 Cards. Shuffle the Union (blue) deck. Draw the top three cards.
4.22 At Start Playing Pieces. Sort out the following initial forces: two Gunboats and six Screw Sloops, and place them as follows:
- Union Gunboats: Place one Union Gunboat at Cairo and one in the Northern Navy Yards box.
- Union Screw Sloops: Place one Union Screw Sloop in each of the following five Sea Zones: West Gulf, East Gulf, South Atlantic, North Atlantic, Pacific—and one in the Northern Navy Yards box.
- See the Play Book's Setup Map for a graphic reference to pieces for the 1861 at-start placement.
4.23 Union Game Marker Placement. The Union player takes two of the blue Cannon pawns; these are used to indicate available Assaults (11.) for the April 1861 Turn.
Turn Sequence
A game normally has 12 turns (with the possibility of a 13th, if card #36, If it takes all Summer…, is successfully played). Each turn is played in a series of six phases. Each phase must be completed before the next begins. At the conclusion of the sixth phase, if the game has not ended, the Turn marker is advanced one space.
The six phases are:
- Confederate Move & Combat (including a possible Counterattack Assault, per 11.9)
- Confederate Supply (13.)
- Confederate Build (14.)
- Union Move & Combat (including Assaults, per 11.)
- Union Build (15.)
- Victory Determination (16.)
After phase 6, return cards which had been previously set aside (as per that card's instruction; 14.43) to the appropriate deck.
Counters, Spaces, Stacking & Fleet Command Box Markers
6.1 Ship Counters
Refer to the Ship Summary on the back cover of this manual for each ship type's game-relevant information.
6.11 Map Spaces. A map space is defined as any square, hexagon, star-shaped (Fort), rectangle (inland Fort, Navy Yards/Neutral Port/Whaling Zone), Blockade Station or Sea Zone.
6.12 Stacking:
- No more than three Batteries may exist in a Port, City or Fort space.
- No more than six warships of any combination (Gunboats, Ironclads, Screw Sloops, and Raiders) of each side may be in a City/Port*, Blockade Station, Fort or Sea Zone space. Towed Union ships (7.6) count toward this limit.
- Each limit is separate. Therefore, as a Confederate example, a space may have both three Batteries and six warships*. A Command counter (6.2) does not affect stacking.
- Exception: There is unlimited stacking in the Navy Yards box.
- A player may voluntarily eliminate a piece to accommodate the stacking limit. The choice of which piece to eliminate is the owner's.
* Unique for the Confederates are Blockade Runners, which separately stack while in Port or at sea; e.g., the Confederacy may stack up to six Blockade Runners in each of its friendly and/or Neutral Ports.
6.2 Fleet Command Boxes
Six Fleet Command Boxes are printed on the map (Foote, Farragut, Thatcher and Porter for the Union; Montgomery and Buchanan for the Confederacy). These correspond to available stand-up Command markers (also referred to as a 'Command counters') which may be inserted into game-provided bases. For ease of play, all ships of one side in the same space may be placed on the map's Command Box with its corresponding stand-up Command marker, representing those ships, placed on the map.
Movement
7.1 General Rule
7.11 Confederate Batteries and Union Control markers never move. Batteries may be destroyed (removed from a space) as a result of Naval Combat (10.), Assault (11.), or Withering on the Vine lack of supply (13.11).
- The Confederate player may voluntarily remove (scrap) a Battery to place it elsewhere as a new build (see 14. Confederate build phase).
- Union Control markers indicate spaces that have been conquered by the Union. They may only be removed if the Confederates succeed in a land Assault (11.9) or by "Withering on the Vine" (13.1).
7.12 Only ship counters or their corresponding Stand up Command marker (6.2) may move.
- Ships move by expending MPs. Different types of ships have differing numbers of MPs, along with restrictions on how those points may be expended (see Table at the back of this Rule Book).
- Movement is between adjacent spaces.
7.2 Adjacent Spaces
7.21 A Blockade Station is adjacent to the Ocean Port of the same name, and to the surrounding Coastal Sea Zone.
Example: Norfolk, Norfolk Blockade Station, Chesapeake Coastal Sea Zone.
Ships moving between a Coastal Sea Zone and a Port must first move through the corresponding Blockade Station.
Special Exception: New Orleans and its Blockade Station are not adjacent. There is an intervening Fort space: "Jackson and St. Phillip". The Fort is adjacent to both New Orleans and to its Blockade Station. It is connected by River Lines.
- Neutral Ports do not have Blockade Stations. Neutral Ports are adjacent to their surrounding High Seas Zone or special Coastal Zones for Europe.
Example: Havana is adjacent to the Cuban Coast.
7.22 Coastal and High Seas Zones are adjacent to all Coastal and High Sea Zones with which they share a common border. The two European Coast spaces are the Channel and Bay of Biscay.
Example: The Cuban Coast is adjacent to The Keys, South America, Caribbean and the Brazilian Coast.
- Pacific Whaling Grounds: The Pacific Ocean Sea Zone is adjacent only to the Indian Ocean and the Whaling Grounds.
7.23 A River Port is adjacent to any Port or Fort (star-shaped Fort symbol) to which it is connected by a River Line.
Example: Vicksburg is adjacent to the Fort at Baton Rouge as well as to the Ports of Arkansas Post and Memphis.
7.24 An Inland City is adjacent to the Fort or any other Inland City to which it is connected by a red Land Line.
Example: Montgomery is connected to Atlanta as well as to Mobile and Meridan.
- Some spaces are connected by both River and Land Lines to adjacent spaces.
Example: Vicksburg connects by River as above and by Land to Mobile and Meridan.
- Reminder: While Chattanooga is connected by River Line to Forts Henry and Donelson, no ships may move between those two spaces nor may any ships be built in Chattanooga (as indicated by the red X's on the River and in the Chattanooga square).
7.3 Ship Movement Costs
7.31 It costs 1 MP to enter any Sea Zone, Port, Blockade Station or River Fort. Confederate Raiders and Blockade Runners, as well as Union Screw Sloops, may not move north of Vicksburg.
7.32 Ironclads do not expend any MPs while being towed in Sea Zones. They may not move independently on the turn they are towed (7.6).
7.33 For a Blockade Runner to load Cargo in a Neutral Port costs 1 MP; for a Blockade Runner to unload Cargo in a Confederate Port costs 1 MP (see section 9. for additional details).
7.34 For a Raider to Raid in a Coastal or High Seas Zone, or in the Whaling Grounds space, costs 2 MPs (see section 8.).
7.35 For a Screw Sloop to search in a Blockade Station, Coastal or High Seas Zone, or in the Whaling Grounds space, costs 2 MPs.
7.36 For a Union Gunboat to search in a Blockade Station costs 2 MPs.
7.4 Command Counter Movement, Placement and Removal
Command counters (6.2) may be removed or placed at any time during a player's move.
7.41 A Command counter that is removed may not be placed on the map during the same turn.
7.42 A Command counter moves at the movement rate of its slowest ship.
7.5 Stacks and Command Counters: Ship Pick up and Drop Off
7.51 Blockade Runners and Raiders move individually. They may not move together or as part of a stack or Command counter.
7.52 All other ships may move individually, as a group in a stack, or as part of a Command counter.
- Ships that begin the move in a stack or as part of a Command counter may leave that stack/counter singly or in groups provided the stack or counter has not yet moved.
- Ships may be dropped off as the group moves. Being dropped off completes their move if at least 1 MP has been spent (7.55).
A Command counter or stack may pick up ships as it moves, provided those ships have not yet moved. Further movement is per the ship(s) with the least remaining MPs.
7.53 A Command marker or stack may enter a space containing another Command counter and pick up any of the ships with that counter, provided those ships have not yet moved and those ships do not exceed the limit that may be stacked with that counter (normally six, unless additional ships are allowed by play of Union card #33, The Grand Fleet).
- A Command counter may pick up another Command counter to take advantage of any attached cards; (e.g., Farragut absorbs Porter to use card #2, David Dixon Porter & His Little Mortar Boats). That counter becomes a "subordinate" and is placed in the appropriate Fleet Command Box. As long as it is with another Commander, the subordinate ceases to function as a Command counter and any ships on the subordinate's box must be placed on the map in the new Fleet Commander Box.
- At the start of a player's movement, before a Commander has moved, a subordinate Commander may resume all functions of a Command counter by either leaving the space containing the Commander or by being left behind in the space by the Commander.
7.54 With exception of moving into Combat (7.7 & 10.; as Combat must be immediately conducted), once a ship or ship group halts moving, other ships may be added to that ship or ship group for convenience.
7.55 Ship Movement Completion Marking
- As a game of Rebel Raiders progresses and the map becomes populated by many ship pieces, players may find it convenient to mark ships which completed movement. This helps avoid potential confusion (or worse, disagreement) as to which pieces moved or are allowed to move.
- After a Commander, ship or stack of ships has moved or must halt further movement for a turn (e.g., after a retreat, 10.36), place a marker atop or near it (one of the small red-colored translucent "bingo chips" provided with the game) to indicate it may not move.
- After all movement is complete, a player should remove all chips to the playing map's perimeter for their next use.
- As an alternative to using chips, players may keep all ships oriented consistently to one map edge at the beginning of movement (e.g., north) and then rotate them to the opposite map edge when each ship, or stack of ships, movement is complete.
7.6 Union Ironclad Towing
7.61 In order to move into and through a Coastal Sea Zone, Union Ironclads may be towed by Screw Sloops. Each Screw Sloop may tow one Ironclad.
- Screw Sloops may move up to their full MP limit but may neither Search nor Intercept while towing (7.35).
- A Screw Sloop may take part of its move, conduct actions that require expending MPs, and then pick up an Ironclad to tow for the Sloop's remaining move. The opposite sequence also applies: tow, drop off an Ironclad, then resume movement.
7.62 Ironclads may not independently move, either before or after being towed.
7.63 Ironclads may be towed into an enemy Port or Blockade Station for purposes of Combat, provided the Sloop towing them also moves into the Port.
7.7 Movement Restrictions and Functions
7.71 Enemy Forts and/or Ports with or without Batteries, all Enemy Ports, or the presence of enemy warships in a Blockade Station (Gunboats, Ironclads, Screw Sloops and Raiders, but not Blockade Runners) impede movement.
7.72 Fort/Port Spaces Without Batteries But Which Contain Enemy Ships
- Union ships entering Fort/Port spaces that contain Confederate Gunboats, Ironclads and/or Raiders must do so within context of an Assault (11.) and immediately conduct Naval Combat against those ships. The Union may not delay the combat to move additional forces into the space (see rules section 10.3, Ship vs. Ship). Any Confederate Raiders present may elect to participate in the Naval Combat.
- Confederate Raiders in a Fort/Port space when Union ships enter it may elect not to participate in the combat and may immediately retreat to an adjacent Confederate space (10.36) as if a Blockade Runner.
- Blockade Runners must, if possible, retreat to an adjacent Confederate space (10.36).
- If no Confederate Port or Fort is adjacent, the Raiders/Blockade Runners await the outcome of the combat or immediately seek to escape per this rule's next bullet point. If the Union is victorious (all Confederate warships involved in the combat are destroyed), the Raiders/Blockade-Runners may also be destroyed if found by a post-combat Search per the below bullet point.
- Union ships that capture (11.) Fort/Port spaces that contain only Confederate Blockade Runners, and/or combat-evading Raiders, force those ships to make a Speed Roll to evade (without a +2 Runner, or +3 Raider bonus). Those that successfully evade must vacate the Port with their next move. If the Raider/Blockade-Runner's evasion is unsuccessful, the ship is destroyed.
7.73 Confederate Fort Spaces with Batteries and Confederate Ports (with or without Batteries)
- Confederate ships (Ironclads, Gunboats, Raiders and Blockade Runners) may always enter Confederate-controlled Fort spaces or Port Cities, provided the ships have MPs to do so.
- For Union ships to enter a Confederate Fort space or any Port City, whether Batteries are present or not, the Union must declare an Assault on that Port or Fort space (see section 11.). Once such a space is entered, the Assault must be immediately resolved. No other ships may enter that space nor move anywhere else on the map.
- If the Union player does not have the requisite Cannon pawn to conduct an Assault, the player may not move Union ships into a space requiring an Assault (e.g., Confederate Fort spaces or Confederate Ports, with or without Batteries and/or ships).
- The Union is usually limited to two Assaults per turn (one for each Cannon pawn), no more than one of which may be amphibiously directed against an Ocean Port (exception, card #24, From Sea to Shining Sea). The Union may receive, through Builds or card play, additional Assaults, although again, usually not more than one Amphibious Assault may be directed against an Ocean Port during a turn.
- Victorious Union ships after an Amphibious Assault (11.3) may continue moving provided they have MPs remaining. The player may use a die as a reminder of how many MPs remain.
7.74 Confederate Ships Forbidden to Enter Union Controlled Ports. IMPORTANT! Confederate ships may never enter the Navy Yards or any Port that begins the game in Union control (Cairo, St. Louis, and Cincinnati); nor may Confederate ships enter any Port or Fort containing a Union control marker.
7.75 Blockade Stations and Coastal Sea Zones containing Enemy Ships
- Union ships entering a Blockade Station containing Confederate Gunboats and/or Ironclads must initiate Naval Combat (see 10.3 Ship vs. Ship). IMPORTANT! It does not require a Cannon pawn for either player to attack one or more enemy ships within a Blockade Station or on the seas.
- Union Screw Sloops entering or present in a Coastal Sea Zone or Screw Sloops and/or Gunboats in a Blockade Station containing only Blockade Runners/Raiders may either continue moving or may conduct a search to attempt bringing about a Naval Combat (see 7.5, and Union Search, 7.78).
- Confederate Blockade Runners and Raiders entering a Blockade Station containing Union Gunboats and/or Screw Sloops must temporarily stop and make a successful "Speed" roll to avoid being "caught" (which triggers Combat for the Raider and automatic elimination of a Blockade Runner). This also applies to said Confederate ships entering a Coastal Sea Zone occupied by one or more Screw Sloops. However, Union Gunboats in a Coastal Zone are ignored for this function.
- Blockade Runners or Raiders beginning movement within a Blockade Station or Coastal Zone containing Union Gunboats and/or Screw Sloops do not need to make a successful "Speed" roll to leave that Blockade Station. They may freely depart it.
- Union Screw Sloops in Coastal Sea Zones may, during their Movement Phase, Search for Confederate Blockade Runners and Raiders in the same Zone. Each Screw Sloop or stack of Screw Sloops expends 2 MPs to conduct a Search. Each Screw Sloop or stack of Screw Sloops must chose one, and only one, Blockade Runner or Raider as subject of its Search. If a second Search is conducted, that same or another Blockade Runner or Raider may be selected as target of the Search for a cost of two additional MPs. Also see "Intensive Search" (7.76, fourth bullet point).
- Union Ironclads may not Search nor participate in any Search.
- Gunboats may only conduct Searches within Blockade Stations.
7.76 Union Searches
- Blockade Runners ignore Sloops in High Seas Zones and the Whaling Grounds since Sloops may not Search for Blockade Runners in these map spaces.
- Raiders that move into or attempt to Raid in a High Seas Zone or the Whaling Grounds with one or more Union Screw Sloops are present must first make a Speed Roll. If unsuccessful, Naval Combat ensues (see 10.3 Ship vs. Ship). If the Raider successfully evades, it may continue moving or attempt to Raid in that Zone (8.1); which would require another speed roll for the Raid, provided the Raider has sufficient MPs remaining to do so.
- Moving Union Screw Sloops in the High Seas Zones and the Whaling Grounds may Search for any Raiders present. Each Screw Sloop or stack of Screw Sloops expends 2 MPs to conduct a Search. Each Screw Sloop or stack of Screw Sloops must chose one, and only one, Raider as the subject of its Search. If a second Search is conducted, that same or another Raider may be selected as Search target at a cost of two additional MPs.
- Intensive Search: Alternately, a Screw Sloop (or stack of Screw Sloops) may expend additional MPs—at the rate of 2 MPs each +1—for a positive die roll modifier to a single Search; e.g., spend 4 MPs for a +1 or all six for a +2 to the Search Roll (these examples include the 2 MPs for the Search itself).
- The Speed Roll die for either side and for individual ships may be modified by the play of specific cards. Any cards affecting a Search or Speed roll must be played before the die is rolled, unless the card otherwise states.
- The Union player should roll first, then—if needed—the Confederate rolls the die to learn if the Search target evades capture/combat. There's no need for a Confederate evasion die roll if the Union has no chance to succeed.
7.77 General Rule: Speed Rolls (Evasion):
- Raiders which fail their Speed Roll must engage in combat (as per rules section 10.).
- Blockade Runners which fail their Speed Roll are immediately destroyed (eliminated).
7.78 Procedure: Search & Speed Rolls For Ships & Stacks
- In Coastal and High Seas Zones, each Union Screw Sloop rolls one die.
- In Blockade Stations, each Union Screw Sloop and/or Gunboat present may roll a die or the entire stack of Screw Sloops and Gunboats may roll one die. In the case of a stack rolling a single die, choose one ship, then add one to the die for each additional Gunboat and/or Screw Sloop present to a maximum of +3.
Example: If a Screw Sloop and two Gunboats are present, the Union player chooses the Screw Sloop and adds two to the die: one for each Gunboat. Or the Union player may elect to roll three dice: one for the Screw Sloop and one for each Gunboat. All intercepting Union Ships in a Blockade Station stack which roll a single die to Search, engage in Naval Combat together in battle against a Raider, as may individual ships whose respective die rolls exceeds the Raider's Speed Roll result.
- For a Speed Roll, the Confederate player always rolls one die and only one die per Blockade Runner and Raider.
- If the Union player rolls multiple dice, only those ships whose dice results exceed the modified Confederate die are successful. In the case of a stack of Union Sloops searching for Raiders in a High Seas or Coastal space, those Sloops which roll exactly the same Speed Roll result may intercept together (as a stack) if their result is higher than a Raider's Speed Roll. Otherwise, Union Sloops with Speed Roll results higher than a Raider's intercept individually and engage in Naval Combat sequentially with the highest Speed Roll ship(s) fighting Battle first, followed by the next successful highest Speed Roll if a Raider survives this first Naval Combat (10.36). No retreat is possible until all successfully intercepting Union ships are fought. Union ships with the same Speed Roll results fight together.
- If more than one Confederate Raider and/or Blockade Runner is present, the Union must declare which is the subject of its Search.
- A Confederate Blockade Runner in a Blockade Station or Coastal Sea Zone adds two (+2) to its die and wins ties.
Important Note: The Union may not search for a Blockade Runner while it occupies a European Coastal Zone or any High Seas Zone. Blockade Runners in such spaces are invulnerable!
- A Confederate Raider in a High Seas Zone, Coastal Sea Zone or the Whaling Grounds adds three to its die and wins ties.
Reminder: Blockade Runners and Raiders do not receive their normal +2/+3 bonus to Speed Rolls when in Port/Fort spaces. They do retain their advantage of winning ties.
Raiding
8.1 How to Raid
Confederate Raiders may conduct a special move known as "Raiding." A successful Raid, representing the seizure or sinking of abstractly-represented Union cargo vessels, earns the Confederates 1 or 2 VPs.
8.11 Raiding may be conducted in any Coastal Sea Zone, the Whaling Grounds, or in any High Seas Zone other than those marked "Europe" (Channel and Bay of Biscay).
- MP Cost: Each Raid attempt costs 2 MPs.
- For Raids not conducted in The Whaling Zone: Roll one die when making a Raid Attempt. On a die roll of 4-5 the Raid is successful with 1 VP earned. On a die roll of 6 the Raid is successful with 2 VPs earned (a particularly juicy prize).
- For Raids conducted in the Whaling Zone: Roll one die when making a Raid Attempt. On a 4-6 the Raid is successful with 2 VPs earned.
8.12 Intensive Search for Raiding Prey. A Raider may expend additional MPs to improve the chance of making a successful Raid. For every additional 2 MPs expended, add one (+1) to the die result for each Raid made in that Zone.
8.13 A Raider may conduct as many Raids as it has MPs to Expend, with the following exceptions:
- If a Raider conducts a Raid in a Sea Zone (per 8.11) where one or more Union Sloops other than those towing Ironclads are present, it must first make a successful Speed Roll to do so. This roll must be taken before each Raid in the Sea Zone
- If a Raider makes a second Raid attempt in the same Sea Zone during a turn, its normal +3 Speed Roll bonus is reduced by one.
- If a Raider makes a third Raid attempt in the same Sea Zone in a turn, its Speed Roll bonus is reduced by two: to a +1.
- Each Raid succeeds on a die roll result of 4, 5, or 6 insofar as potential VP are concerned. Consequently, an unopposed Raider could make as many as three "simultaneous" Raids, each costing 2 MPs, in a Sea Zone unoccupied by a Union Sloop.
8.2 Raiders and Combat
A Raider that fails its Speed Roll must immediately resolve Combat (10.3) against any enemy vessel(s) whose Speed Roll exceeded that of the Raider (7.78).
Blockade Runner Cargo Load/Unload
9.1 Loading Cargo
9.11 Each Blockade Runner may usually (9.3) load one Cargo counter at a Neutral Port.
9.12 A Cargo counter loaded in either European Port may be of 2 VP value (France and England is one of the European Ports, Spain the other). Cargo loaded in all other Neutral Ports is worth 1 VP (unless otherwise specified by card play. Use the appropriate numbered marker to indicate the value of the Cargo).
9.2 Unloading Cargo
9.21 Cargo unloaded in Confederate Ports immediately convert into VPs (one or two, as determined by the counter, or as modified by card play).
9.22 Blockade Runners expend one of their 8 MPs to load Cargo, another to unload Cargo. This includes loading and unloading two 1 VP Cargo pieces under play of cards #93, Herrera & Co., and #94, To the Dark Shores (e.g., it costs but a single MP to load two Cargo counters).
9.23 Blockade Runners may combine loading, movement and unloading actions in any combination the player desires during the same turn, up to the limit of their MPs. However, Cargo may only be unloaded at a friendly Confederate Port.
9.3 Cargo Counter Limitations
Unless otherwise specified by card play, each Blockade Runner may carry one Cargo counter. Cargo counters are limited in both number and type to what is provided with the game counter-mix (e.g., playing both CSN cards #93, Herrera & Co., and #94, To the Dark Shores, simultaneously could use the entire pool of available 1 VP Cargo markers and result in the Confederate player not getting the full value of those two cards).
- In order to load a Cargo, there must be a Cargo counter available.
- Blockade Runners that are otherwise eligible to load a 2 VP Cargo may elect to load a 1 VP Cargo either by choice or if no 2 VP Cargo markers are available.
Note: Cargo markers become available for reuse immediately upon being unloaded.
Naval Combat
There are three types of Naval Combat:
- Ship vs. Ship
- Ship vs. Battery
- Combined Ship & Battery
Naval Combat takes place within the context of movement and a given battle may consist of multiple rounds (10.35).
Note: Initiating Naval Combat against a River Fort or Port space requires expenditure of a Cannon pawn (11.) or card. No Cannon pawn or card expenditure is required to initiate Naval Combat in any other eligible space.
10.1 Initiating Naval Combat
10.11 The player whose turn it is to move and/or conduct combat is the attacker. The other player is the defender.
- Players may use the game's "Battle" marker for the convenience of marking a combat's location on the map.
- If a card has been played to make a particular ship unique (e.g., USS Hartford, CSS Tennessee) its particular playing piece must now be placed instead of the appropriate ship counter of that type before either side allocates fire. The generic ship counter is set aside and may not be used while the named ship that replaced it remains in play.
- When a Naval Combat concludes, surviving pieces—unless otherwise specified by card play—are returned to the map in their original form and the "Battle" marker removed until needed for the next engagement.
10.12 Ship vs. Ship & Battery. In instances where a Confederate defender has both Batteries and ships present in the same Port or Fort: the defender chooses which type of battle/combat will be fought each round. The tactics decision may change round to round. Confederate choices:
- Shelter Behind a Battery: A defender may shelter ships behind one or more Batteries, in which case the attacker must fight the Battery(s) and only the Battery(s). See 10.2, Ship vs. Battery.
- Ship Sortie: A defender may elect to defend Battery(s) by a sortie. In this event, the defending ships solely fight the attacking ships. The Battery is "protected" and may not be attacked. If all defending ships are destroyed, the attacker may continue the battle against the Battery(s) with the next round of combat.
Note: Mortar Boat Card: If the Confederate player decides to sortie, the Ship vs. Ship battle round(s) must be complete before the Union may play, if available, the David Dixon Porter & His Little Mortar Boats card (#2) against any Batteries.
- Combined Ship & Battery Combat: The defender risks Ships and Battery(s) together. The attacker allocates fire from ships among defending Ships and Batteries.
- If all Batteries are destroyed, or a round of combat concluded, the attacker may elect to withdraw (retreat) or fight the defender's ships (presuming they don't withdraw) with the next round of combat. See 10.36.
10.2 Ship vs. Battery
10.21 Union Naval Shield
- The Union player attacking a Battery may use Ironclads to shield ("Protect") Screw Sloops. Each Ironclad may shield one Sloop, which may still participate in combat, albeit with one rather than two dice (10.23).
- The player may use a Screw Sloop to protect a Gunboat from a Battery. Each Screw Sloop may shield one Gunboat.
- When laying out the ships for the battle, indicate this by placing the ship in front of the ship it is protecting. Note that Ironclads may not protect Gunboats. A Sloop that is protected by an Ironclad, however, may protect a Gunboat.
- The decision to shield must be made before the Confederate player announces any decision regarding whether or not to shelter his ships behind his Batteries (10.12).
10.22 The Confederate player receives two dice for each Battery present.
- Targeting: The Confederate player with a Battery then selects any Ironclads and/or unprotected targets desired from the enemy ships present. The player must designate the target of each die; individual ships may be the target of multiple dice.
- Once targeting is completed, the player rolls each die as designated. It is possible for a die roll to be "wasted" if more than one die is designated to a target and that target is destroyed by a preceding die resolution.
10.23 The Union player with ships attacking one or more Batteries receives:
- One die for each Ironclad and unprotected Gunboat (protected Gunboats may not fire),
- One die for each protected Screw Sloop and
- Two dice for each unprotected Screw Sloop (at a single Battery only, may not split fire at two targets)
10.24 Combat resolution is simultaneous.
- To indicate how fire will be allocated, the defending player first lines up ships and Batteries opposite selected targets. As Batteries may split fire between two targets, the order of ships in the line of targets may be adjusted to indicate which unprotected vessels are being fired upon. There is no limit to the number of ships or Batteries that may combine fire on a single target, nor must every potential target be fired upon.
- The defender selects target(s) and rolls dice being applied to those unprotected targets (10.23). The Defender scores one hit for each six rolled against an Ironclad, each 5 or 6 against a Screw Sloop, and each 4, 5 or 6 rolled against a Gunboat.
- After the defender has conducted fire, any attacking vessels that have been sunk are turned upside down ("sunk" side) or have a translucent chip placed atop it. The attacking player may then freely allocate vessels to conduct fire as above.
- The Attacker rolls dice. A 6 scores a hit on the Battery and destroys it.
- At the conclusion of the attacker's fire, all ships and Batteries that have been hit (destroyed) are removed from the table and returned to the counter mix, from which they are available to return into the game via Building or card play.
10.25 At the end of a round of combat, if there are solely Confederate Battery(s) left, the attacker must either fight another round of Naval Combat or the attacker must resolve the Union Assault per 10.42.
10.3 Ship vs. Ship
10.31 General Rules
- Combat is simultaneous. After the defender has conducted fire, any attacking vessels that have been sunk are turned upside down ("sunk" side) or have a translucent chip placed atop it.
- Each ship fires individually.
10.32 Targeting. Each ship fires at one enemy ship, and only one enemy ship. It must announce its target before any die is rolled.
10.33 Two or more ships may fire at the same enemy ship, but must announce they are doing so before firing.
- Gunboats, Ironclads and Raiders each roll one die in combat.
- A Gunboat may not be protected against enemy ships, only against Batteries.
- Screw Sloops each roll two dice in combat. Screw Sloops—even those protected by an Ironclad—are not protected against enemy ships, only against Batteries.
- It is possible for a die roll to be "wasted" if more than one die is designated to a target and that target is destroyed by a preceding die resolution.
10.34 Scoring "Hits" (one hit destroys a target)
- Ships firing upon Ironclads score a hit for each 6 they roll.
- Ships firing upon Screw Sloops and Raiders score a hit for each 5 or 6 rolled.
- Ships firing upon Gunboats score a hit for each 4, 5 or 6 rolled.
- After all dice have been rolled, each ship that has been hit is removed from play.
10.35 Additional combat rounds. If either player has ships remaining, that player may either retreat (10.36) or elect to continue combat. The attacker must first choose whether to continue combat (including new choices of naval tactics for each round of Naval Combat) to another round or retreat to the Port/Blockade Station from which the attacker entered the Battle (see 10.41 for VP penalty). Then the defender chooses whether or not to retreat.
10.36 Retreats. An attacking player always has the option to retreat after the first round of combat. The defender's ships may retreat only:
- If the combat is being fought in a River Port or Fort space which is immediately adjacent to a friendly River Port or Fort space. If not, the defender may not retreat.
- For combat fought in a Blockade Station, the defender may retreat to a Blockade Station's immediately adjacent friendly Port or Fort (New Orleans only) or, if Union, Coastal Sea Zone. Each Union Ironclad retreating into a Coastal Sea Zone requires a Screw Sloop to tow it or it may not retreat. If an insufficient number of Sloops are present to tow the Ironclads, only those that may be towed may retreat. The remaining Ironclads must remain to fight another round of combat until victory or elimination.
- A Raider, in addition to the preceding, may also retreat to any adjacent Coastal/Sea Zone, even one occupied by Union vessels (no Union Search is triggered). The choice of where to retreat is the Confederate player's. This also applies to the special Confederate Ironclad, Albemarle (card #75) for those Coastal Zones it is permitted to enter.
- However, a Raider may not retreat from a Coastal or High Seas space where it has been successfully intercepted by multiple Union Screw Sloops. It must fight each Screw Sloop whose Speed Roll is superior to its own sequentially, per 7.78. Only after surviving the first Round of Battle against the last successfully intercepting Screw Sloop(s); may a Raider retreat to an adjacent Sea Zone, Neutral Port or Confederate Fort or Port space.
- Remember, attacking ships retreat to the adjacent Port, Fort, Blockade Station or Sea Zone from which they entered the battle.
10.37 If both players wish to remain to fight, another round of combat is fought, as per 10.35, until either or both retreat or are eliminated.
10.4 Port/Fort Naval Combat and VP Gain/Loss
10.41 A Union attacker must destroy or compel the retreat of all the Confederate defender's Gunboats, Ironclads, and combat-involved Raiders in a Confederate Port or Fort in order to make an Assault (11.). Even a single enemy warship prevents the Assault. As a result of the Union naval defeat, the Confederate player rolls two dice and is awarded the difference, if any, in VPs. The Cannon pawn is expended and may not be used again that turn.
10.42 A Union attacker who has destroyed or compelled the retreat of all the Confederate defender's Gunboats, Ironclads and combat-involved Raiders in a Port or Fort must immediately resolve an Assault (11.) against that Port or Fort.
- If the Union wins the Assault, some or all of the Union ships may remain in the Fort or Port or retreat to its Blockade Station (in the case of Ocean Ports) at the Union player's discretion. Alternatively, such ships may continue moving with any remaining MPs.
- Union ships remaining in a captured Port/Fort conduct an immediate Search for any Blockade Runners or non-combat involved Raiders in the space. Each Confederate ship must make a successful Speed Roll to escape. Those caught are destroyed; those that are not caught must move out with the Confederate player's next Movement Phase; see 7.72.
10.43 A Union "after Ocean Port capture Search" is conducted per the Blockade Station Search Procedure (7.78).
10.44 If the Union does not win the Assault, Northern ships must retreat to the Blockade Station or, if the Port does not have a Blockade Station, to the adjacent Port or Fort from which Union ships entered combat. Those ships may move no further that turn (place a "Movement Complete" marker upon them).
10.5 Command Marker Loss in Combat
If all ships in a Fleet Command Box are destroyed, the Command counter is removed from the map and any cards that have been placed with that Commander are discarded. The Command counter itself is available for placement during the owning player's next Movement Phase (7.41).
Assault
It is through Union Assault that Confederate controlled land spaces on the map may be captured by the Northern player. The South has an option to launch a Counterattack Assault to recapture former Confederate controlled spaces (see 11.9).
11.1 Union Assaults During a Turn
The Union may normally conduct two Assaults per turn. The Union receives two Cannon pawns to indicate this limit.
Exception: See 15. Union Build Phase, during which the Union is allowed to reallocate Build Points to buy one or two additional Cannon pawns.
- Furthermore, there are cards that allow the Union additional Assaults. These additions—by card play and build—are cumulative.
Example: Union card #6, War is Cruelty, card #34, Loose the Fateful Lightning and card #46, One More Effort Boys!, each provide a "free" Assault. These could result in the Union having as many as seven Assaults during a single turn.
11.2 General Rule Union Amphibious Assault
The Union may conduct no more than one Amphibious Assault against a single Ocean Port each turn, regardless of the number of Assaults gained through Build or card play. Card #24, From Sea to Shining Sea, is the sole exception to this limit as it allows up to three Assaults on Ocean Ports during a single turn.
- The Union player may Assault a Port from its Land or River side if in a position to do so. This type of attack does not apply against the limit of one Amphibious Assault against an Ocean Port each turn (exception 3.23, New Orleans).
- Such an Assault is defined as being launched by any adjacent Union-controlled map space via a connecting River (blue) or Land (red) LOC; see 11.4.
11.3 Pre-requisites for an Amphibious Assault
The Union player may conduct an Amphibious Assault against a Confederate Ocean or River Port or Fort provided the following conditions apply:
- The Union moved ship(s) into the Port and
- At the conclusion of Naval Combat there are no Confederate Gunboats, Ironclads or combat-participating Raiders in the Port. A single surviving Confederate Gunboat, Ironclad, or Raider, which participated in combat, remaining in the space will cancel the Union Assault whose Cannon pawn must still be expended (10.41).
- Since no dice were rolled to resolve the Assault per 11.6, the cancelled Assault does not count for any card event purposes or for Optional Rule 18.32, Union Draft Riots.
- If the Port, either after Naval Combat or without Naval Combat, is solely defended by none, or one or more Confederate Battery(s), the Amphibious Assault must be resolved.
- Should an Assault fail to capture the Port, any surviving Union ship(s) must immediately retreat out of it and move no further that turn (10.44).
11.4 Overland Assault
The Union player may conduct an Assault over a Land LOC (a red line) against a Confederate Ocean or River Port or Fort, regardless of the presence of Confederate ships or Batteries in that Port or Fort.
11.41 Any Confederate ships in the space are ignored and, if the Union attack succeeds, those ships must immediately retreat (10.36).
11.42 The Union player may conduct an Assault against a Confederate Inland City, only if that target city is immediately adjacent to a Union-controlled Inland City, Fort or Port (of any kind).
11.5 Assault and Ship Movement Intermingling
Assaults are conducted during the Union and Confederate player's respective turn's Movement Phase. There is no requirement when an Assault may be conducted as long as it takes place during a Movement Phase.
11.6 Assault Combat Sequence
11.61 Assault Designations:
- First, the Union designates its Assault target by expenditure of a Cannon pawn (or per card event) and then rolls die/dice to resolve the Assault (11.62, 11.63).
- Then the Confederate rolls two dice (11.64) plus gaining one additional die for each Battery (up to a maximum of three) and possibly more die/dice through card play.
- Special: The Confederate defender always gains another die when defending Richmond.
11.62 Primary Assault Dice Roll Resolution - Union
- For the Union, determine the year in which the attack is taking place. In 1861, the Union rolls one die. In 1862 the Union rolls two dice. In 1863 the Union rolls three dice. In 1864, the Union rolls four dice. In comparison, the Confederacy has a consistent two primary dice minimum for defense throughout the game.
- The highest of the dice rolled becomes the attack die.
- If the Union rolled doubles it will add one to its Attack for each double rolled, if it rolled triples it will add two and if it rolled quadruples (i.e., all four dice the same*) it will add three to its total.
* In the event the Union player rolls a pair of doubles, two is added, one for each pair, to the Attack die. In the event—through card play—that the Union is allowed to roll five dice, and rolls both a double and a triple, the player adds one for the double and two for the triple to the Attack die. Should the Union player roll six dice and gain three doubles or two triples that would add one for each double or two for each triple).
| Die Roll Result (each result cumulative) | Resultant Bonus Effect |
|---|---|
| Each doubles dice (e.g., 3,3) | Add one to the Attack die |
| Each triple dice (e.g., 4, 4, 4) | Add two to the Attack die |
| Each quadruple dice (e.g., 1,1,1,1) | Add three to the Attack die |
- Only use the above table. Should more than a quadruple occur, use the table result(s) which generates the highest possible die roll bonus effect.
11.63 Union Tactics
- The Union player has the unique option of trading some primary Assault dice (11.62) to gain a bonus to the high die result. Additional dice awarded by card may not be converted into this bonus (e.g., for card #48, Siege Train, and/or card #50, William Tecumseh Sherman).
- The Union player must always roll at least one die. The Union may elect to roll fewer than the number allowed dice. For each unrolled die +1 is added to the attack die.
- Three is the maximum possible Union Tactics die roll modifier (e.g., during 1864).
Example: The Union is allowed to roll three dice this 1863 Turn. The Union elects to roll only one die. In doing so, the Union will add +2 to the attack die, the high die result, (one for each of the two dice the Union elected not to roll).
Note: In using the Union Tactics option when dice rolling, the Union both gains and loses certain advantages and in effect trades numbers for concentration of force with the certainty of a die roll result bonus versus the uncertainty of 11.62's procedure—not that there's no risk—there is, it is just risk of a different kind.
- The Union decision to roll fewer dice in return for bonuses to the Union's high attack die must be taken before either side rolls any of its combat dice. Remember, the Union always rolls its die/dice before the Confederate defender rolls.
11.64 Assault Dice Roll Resolution - Confederate
- The highest of the Confederate dice becomes the defense die.
- For modifiers to that defense die see 11.62 Table.
11.65 Assault Resolution
- Cards may allow players to re-roll or otherwise modify their die/dice.
- Compare the modified attack and defense die. If the Union total is higher, the City, Fort or Port being attacked falls to the Union. Place the appropriate Union control marker there.
- Otherwise, the Union loses the Assault and the City, Port or Fort attacked remains Confederate. Remember: The Confederacy wins ties!
11.66 If the Union loses an Attack, the Confederates gain VPs equal to the difference between the modified attack and modified defense die. In the event of a tie, the Union fails but does not lose any VPs. This difference can be modified by card play; e.g., card #102, Matthew Brady.
11.67 If the Union wins a Fort, Port, or City Assault the Confederacy loses VPs equal to the difference between the modified attack and modified defense dice.
11.68 Additionally, should the victorious Assault result in the capture of a City or Port, the Confederacy loses VPs equal to roll of one die. Furthermore, roll for once per game Bonus VPs which are deducted from the Confederates if the following occurs: one die when the last Confederate Port on the Mississippi falls to the Union: Memphis-Vicksburg-New Orleans, two dice if Atlanta, three dice if Richmond.
- Note the loss on the Confederate Cities & Ports Lost Tally. Move the marker up one space on the table to show the number of lost Confederate controlled Cities and Ports.
- If the Union win an Attack on a Confederate Fort, a VP loss is assessed per 11.67 but the Confederate Cities & Ports Tally marker is not moved.
Exception: Louisville. Even if controlled by the Confederacy, Louisville (see Invading Kentucky; 12.) is not considered a Confederate City or Port for either Victory Loss or Tally Purposes. Should the Confederacy control Louisville and then lose it to the Union, it does not take any VP loss for doing so other than 11.67.
11.7 Multiple Assaults on the Same Target / from the Same Land Space
11.71 The Union player may make more than one Assault on the same River Port, Fort or Inland City. A Union player may still, however, make only one Amphibious Assault on one Ocean Port during a turn. Card #24, Sea to Shining Sea, is the exception to this limit.
11.72 The Union player may make more than one Assault from a Land space: e.g., from Atlanta.
Summary of Assault VP Effects (cumulative); 11.67
| Occurrence | VP Effect |
|---|---|
| Assault Victory | Difference between victor's and loser's highest die roll results; 11.66, 11.67, 11.92 |
| Repulse Union Naval River or Amphibious Assault due to Confederate warship survival | Difference between two dice is the VP effect; 10.41, 11.3 |
| Capture a Port or City through Union Assault or Confederate Counterattack | One die for VP; 11.68, 11.92 |
| Capture a "Withering on the Vine" (13.11) Fort | Difference between two dice is the VP effect; 13.12 |
| Confederate loss of the Mississippi: Memphis-Vicksburg-New Orleans | One die for bonus VP* |
| Confederate loss of Atlanta | Two dice for bonus VP* |
| Confederate loss of Richmond | Three dice for bonus VP* |
| Louisville neutrality violated | Difference between two dice is the VP effect; 12.2, 12.31* |
* This is a once per game occurrence.
11.8 Sequential Assaults
After a successful Assault on a Port, Inland City or Fort space, the Union may launch additional Assaults from that conquered space. Such Assaults may be launched only if the Union player has the requisite Cannon pawn(s) or card(s) available to make such Assaults.
Example: The Union has three Cannon pawns. In a single turn, if successful, a sequential series of Assaults which captures 1) Forts Henry & Donelson, 2) Nashville and then 3) Chattanooga is possible.
Exception: The Union may not launch another attack from an Ocean Port captured through Amphibious Assault on the same turn it is taken.
Example: A successful Union Amphibious Assault captures Savannah. The Union may not expend another Cannon pawn to launch a sequential Assault on inland Fort Augusta or to adjacent Ocean Port Charleston that same Turn.
11.9 Confederate Counterattack
Through card play and/or through purchase of a Cannon pawn during its Build Phase, the Confederacy may gain the opportunity to make a Counterattack.
- A Confederate Counterattack may be launched solely over a red land connection from one Confederate-controlled Port, Fort or Inland City against an adjacent Union-controlled Port, Fort or City. Exception: Confederate card #103, Uprising!
- However, no space which begins the game in Union control, e.g., Washington DC or Cairo, may be Counterattacked.
Design Note: Once an area was secured, Union naval power, not represented by individual ship counters, was such that any type of Confederate water-borne Counterattack became impossible—other than through play of card #103, Uprising! or card #107, The South Shall Rise—which should be considered an Assault from land around the Confederate Assault target not depicted upon the map.
11.91 For a Counterattack during 1861 and 1862, the Confederacy rolls two dice. As of 1863 on, the Confederate player rolls three dice for a Counterattack (defense remains two dice).
- The Union defensively rolls the number of dice it would roll in an Assault of its own that turn, as printed on the Turn Record Track (i.e., if the Counterattack took place in August 1863 the Union would roll three dice, as noted on the track).
- All rules of Assault apply, including the play of cards, Union Tactics (11.63), bonuses awarded for the throw of doubles, Confederates win ties, etc.
11.92 If the Confederacy wins its Counterattack, remove the Union control marker from the Port, Fort or City chosen as target.
- The Port, Fort or City reverts to Confederate Control.
- First, the Confederacy gains a number of VPs equal to the difference between its modified high die and the Union's modified high die.
- Next, if the Confederacy regains a City or Port by its Counterattack, it gains a number of VPs equal to the roll of one die and adjusts the City & Port Loss Track to show it has regained that City or Port.
11.93 If the Confederacy loses its Counterattack, it loses a number of VPs equal to the difference between its modified high die and the Union's modified high die. This may be modified through card play; e.g., card #89, John Bell Hood.
11.94 Should the Confederacy regain a Port or Fort through a Counterattack; any Union ship(s) in that Fort or Port must Retreat (10.36) to an adjacent friendly Port or Fort or, in the case of an Ocean Port, to that Ocean Port's immediately adjacent Blockade Station. Choice of retreat destination(s), if any, is the Union player's. Ships unable to retreat are eliminated.
Invading Kentucky
12.1 The Unique Kentucky Map Space
Kentucky (represented by the River Port of Louisville) is neither Union nor Confederate at the 1861 start of the game. It is uncommitted (neutral) to either side.
12.2 How the Union May Control Kentucky
The Union may take control of an uncommitted Louisville by declaring Louisville to be the target of a Land Assault during a turn.
- That attack on an uncommitted Louisville is always successful. Dice are not rolled.
- Place a Union control marker on it.
- Roll two dice. The difference (if any) is the number of VPs the Confederacy gains from the Union violation of Kentucky's neutrality.
12.3 How the Confederacy May Control Kentucky
The Confederacy may take control of an uncommitted Louisville by placing a Battery there during a Build Phase (see 14.). If that Battery is subsequently eliminated, but Louisville remains under Confederate control, use the "Confederate Louisville Control" marker.
12.31 Roll two dice. The difference (if any) is the number of VPs the Confederacy loses for violating Kentucky's neutrality.
12.32 Taking over Louisville may cost a player VPs, but doing so offers the Union a strategic bridgehead into the Confederacy, or allows the Confederacy to block certain Union moves along the Ohio River.
- Neither the Union nor Confederacy may build ships in Louisville.
- The Union may move ships through a friendly Louisville.
- The Confederacy may place Batteries in a friendly Louisville, provided the Confederacy also Controls all of Nashville, Chattanooga and Atlanta.
Confederate Supply
13.1 Withering on the Vine
Applies to both Confederate- and Union-Controlled Forts.
13.11 Any Confederate Fort that is not connected by Land or River line to a Friendly Confederate City or Port at a Confederate Supply Phase's start "Withers on the Vine."
- Remove any Batteries and ships there and place a Union "Fort Control" marker on the Fort.
- Should a Union-controlled Fort become similarly isolated, e.g., via a Confederate Counterattack (11.9); its Union Control marker is immediately flipped to its "Isolated Fort" side and removed with the space reverting to Confederate control if still isolated at the start of the Union Build Phase (15.). Unless able to move out of an isolated River Fort, Union Ships there are eliminated when the Fort reverts to Confederate control.
- Fort Jackson & St. Philip, if in Union control, is immune to this. That Fort space is considered supplied from the New Orleans Blockade Station.
13.12 When a Fort falls to "Withering on the Vine", the victorious player rolls two dice. The difference, if any, is the number of VPs the Confederacy loses for a lost "Withering on the Vine" Fort or gains if a Union Fort so falls.
13.13 Ports and Inland Cities, whether Confederate or Union controlled, are always considered to be in supply and are not subject to "Withering on the Vine."
13.2 Confederate Supply Phase: VPs
13.21 In this phase, to represent the wear & tear of war, the Confederate player rolls one die. The Confederacy rolls an additional die for each of the following that apply:
- The Confederacy does not control at least one of the following: Memphis, Vicksburg or New Orleans ("The Mississippi").
- The Confederacy does not control Atlanta.
- The Confederacy does not control Richmond.
- Total the numbers rolled on all dice the Confederacy is required to roll. The result is the number of VPs lost. Adjust the Victory Point Track accordingly.
13.22 The Confederate total may be reduced to a negative number, but never lower than negative 5 (–5; see track) whether through Supply or loss of battles and/or spaces on the map.
13.23 At the end of the Confederate Supply Phase, the Confederate VP marker must be adjusted to depict a maximum of 50 points; any points in excess of 50 are lost. Prior to that, the Confederate player may have any number of VP in excess of 50. To indicate when the Confederacy has over 50 VP, flip the "x10 Union Tally Marker" to its reverse side to indicate "x10 +50VP".
Confederate Build Phase
The following steps are conducted in the order indicated.
14.1 Draw Cards
- The Confederate player normally draws three cards.
- If the Confederacy has negative or zero VPs, the Confederate player draws only two cards.
14.2 Card Play and Newly Built Confederate Piece Placement
14.21 Either player may play any card that states "Production" or "Play at the Start of the Confederate Build Phase." Such cards may be played at this point and only at this point. In addition, any card that specifies a piece may be placed free of cost could be played now (17.24).
14.22 Take any Confederate Ironclads built during the previous turn (see Assign Builds, below) from the current space on the Turn Record Track. Place it in any Confederate Port with no more than one new Ironclad added to any port during a single turn (unless through card play).
14.23 Determine Confederate Builds
- The number of Builds available to the Confederate player is dependent on how many of the original 20 Confederate Ports and Cities remain under the Confederacy's control. This is noted by the Tally marker on the map's Confederate Ports & Cities Track.
- As indicated by the Track, if the Confederacy has lost four or fewer Cities/Ports, it has five Builds. If it has lost five to eight Cities/Ports, it is reduced to four Builds, etc.
- In addition to its Builds, the Confederates receive one Battery for each of Atlanta and Richmond in their control.
Important: Should either Atlanta or Richmond be captured by the Union, immediately flip the "Arsenal" counter to its reverse "Arsenal Razed" side on the map. That City, even if re-captured by Confederate Counterattack (11.9), may not again generate a Battery for the duration of the game. If Richmond's Arsenal is razed, Card 95, "Tredegar Iron Works", is removed from the game and the Confederate deck is reshuffled.
14.24 Assign Builds
- To build a Raider requires the expenditure of one Build and 1 VP. Raiders are not built in Confederate Ports. A Raider may only be built in one of the European Neutral Ports. These ports are "Spain" and "France & England." A "Free" Raider acquired by card (e.g., card #63, CSS Alabama) does not consume a Build Point nor inflict a Confederate VP penalty. If the Confederates do not have a VP (13.22), a Raider may still be built at a cost of two Builds.
- Unless allowed by card play, no more than one Raider may be built/placed during a turn.
- A Battery, one each representing Atlanta's and Richmond's respective arsenal production, may be placed in any Fort, City or Port space in Confederate control. Unless allowed by the play of a card or Special Build Points (14.3), no more than one Battery may be placed in a Fort, City or Port in any Build Phase. Instead of being placed on the map, a Battery may be used to aid the construction of an Ironclad.
- To build an Ironclad requires the expenditure of one Build and one Battery. In addition, Ironclads are not immediately available. Place any Ironclad on the next box on the Turn Record Track.
- To build a Gunboat or Blockade Runner requires the expenditure of one Build. Gunboats and Blockade Runners are placed in Confederate Ocean or River Ports. Unless allowed by card play, no more than one Gunboat and one Blockade Runner may be placed in any Port in the same Build Phase.
Exception: The Confederate Player may build one Blockade Runner each 1861 turn in a European Port. Additionally, as the game progresses, Blockade Runners may also be built in any Neutral Port, including a second European Port, as long as the first one for the turn is built in Europe. No more than one Blockade Runner per Neutral Port:
| Year | Blockade Runners Buildable Outside CSA |
|---|---|
| 1861 | 1 |
| 1862 | 2 |
| 1863 | 3 |
| 1864+ | 4 |
Important: Other than through card play, no more than one ship of any type may be built in any Confederate Port in the same turn. This includes a Port where an Ironclad is placed. If an Ironclad is placed in a Port this turn, no other ship of any type may be built there this turn.
Design Note: The Confederacy had a limited industrial base, particularly for ship building, and this limitation is a way of how that is reflected.
- The game's counter-mix of unnamed ships is an absolute limit for each type of vessel. For that reason some cards read "designated ship" since the player is designating an unnamed ship in lieu of the card's named vessel. For example, at no time may the Confederates have more than six Raiders on the map (e.g., a named Raider such as the Alabama would be one of those six).
- To Purchase a Counterattack the Confederacy expends three Builds or all Builds (Confederate player's choice.). It receives the Confederate "Stars & Bars" Cannon pawn, which is placed on the next space of the Turn Record Track. The Confederacy may use this pawn to conduct a Counterattack (11.9) during its next Movement Phase.
Remember: Cards that allow a vessel to be placed free of charge do not restrict a player from building or placing another vessel in that Port.
14.3 Special Confederate Exchange of VPs for Build Points
14.31 In addition to regular Builds (14.23), during the Confederate Build Phase, the Confederate player may optionally exchange VPs for Special Build Points at a rate of 5 VPs = 1 Special Build Point.
14.32 These Special Build Points may be spent as follows:
| Cost | Buys |
|---|---|
| 4 (20 VPs) | Battery (this may be placed in addition to any other Battery(s) placed in a space) |
| 4 (20 VPs) | Ironclad (next turn, no expenditure of a Battery required) |
| 3 (15 VPs) | Counterattack (next turn) |
| 2 (10 VPs) | Card (to a maximum of two per Build Phase)* or for one Militia (Optional Rule 18.31) |
| 1 (5 VPs) | Gunboat, Blockade Runner or Raider (with usual Raider build loss of 1 VP per 14.24) |
* A card so purchased may not be played during the current Confederate Build Phase.
14.33 Except for Batteries, all normal "Assign Builds" restrictions (14.24) apply; e.g., only one Raider or Counterattack Assault pawn in total may be acquired during a single Build Phase.
14.4 Discard Excess Cards
14.41 April & August Turns. If after playing or acquiring cards a player has more than six cards in hand, that player must discard down to a maximum of six.
14.42 Each December Turn (Special "Winter Quarters" Hand Refresh). In addition to discarding cards to a maximum of six, the player may voluntarily discard as many cards as desired, up to all, and replace each card with a new one drawn from the deck.
14.43 Return Cards to the Deck. Each turn, players should keep track and return, as appropriate, any cards held aside for return to the deck via re-shuffle (e.g., card #88, P.G.T. Beauregard, which is a card with "Reshuffle into deck at end of next turn when played.").
- This means if it is played August 1862, it is returned into the deck via reshuffle at the end of the December 1862 Turn and would be available for possible selection from the Confederate draw pile as of the April 1863 Turn.
- Should the deck be reshuffled during the intervening turn (e.g., through "Emancipation", 17.3, or a card such as Cotton is King, card #87), any held-aside card would be immediately included in the reshuffle.
Union Build Phase
The following steps are conducted in sequence:
15.1 Draw Cards
15.11 During 1861, 1862, and 1863 Turns, the Union draws three cards from the deck.
15.12 During 1864 Turns the Union player draws four cards from the deck.
15.2 Card Play and Newly Built Union Piece Placement
15.21 Either player may play any cards that state "Production" or "Play at the Start of the Union Build Phase." Such cards may be played at this point, and only at this point. In addition, any card that specifies that a ship may be placed free of cost, at any time, could also be played now (17.24).
15.22 Take any Union Screw Sloops and Ironclads built on the previous turn (see Assign Builds, below) from the current space on the Turn Record Track.
- No more than one Ironclad may be placed in any Union River Port. There is no limit to the number of Ironclads that may be placed in the Navy Yards.
- Screw Sloops are placed only in the Navy Yards. There is no limit to the number of Screw Sloops that may be placed in the Navy Yards.
15.3 Determine Number of and Allocation of Builds
15.31 The Union ability to Build increases as the game goes on (see Turn Chart). The Union player receives a number of Builds as printed on the Turn Record Track.
Example: Five builds in each of the first two turns, six the next two turns etc, up to a maximum of ten Builds for Turns 11 and 12.
15.32 The Union player places two Cannon pawns on the next turn of the Turn Record Track; i.e., in the Union Build Phase of Turn 1, the Union places two pawns in the Turn 2 space.
15.33 The Union player receives two Gunboats, free of Build charge, each turn. One Gunboat is placed in Cairo, the second in the Navy Yards.
15.34 Newly acquired ships may not be placed in a River Port in violation of the six ship stacking rule.
15.4 Naval Builds and Limitations
15.41 The Union expends one Build to produce a Gunboat or Screw Sloop, and two Builds to produce an Ironclad.
15.42 The Union may build a maximum of two Gunboats or one Ironclad in each of its original River Ports (St. Louis, Cairo, and Cincinnati). An unlimited number of ship pieces may be placed in the Navy Yards.
Example: The Union places one Ironclad in Cairo, one Ironclad in St. Louis and two Gunboats in Cincinnati). If the Union placed an Ironclad in a Port at the start of the Build Phase, it may not also build Gunboats in that Port.
Note: Rule 15.33—as well as cards allowing a ship to be placed free of charge—does not restrict a player from Building or placing another ship in a Union River Port (suggestion: flip such pieces upside down, or place a translucent chip upon them, until all placements are complete). The placement of a free Gunboat in Cairo does not restrict a player building or placing another Union ship in that Port.
15.43 Screw Sloops and Ironclads do not appear on the turn they are built. They are placed on the next Box on the Turn Record Track and are so placed at the start of the Union player's Build Phase that turn.
15.44 The Union player may allocate Naval Builds to other purposes:
- Four Builds to purchase an additional Land Assault (Cannon pawn).
- Players note the purchase by placing a Union Cannon pawn on the next space of the Turn Record Track. That Assault must be expended during that turn and only during that turn—it may not be saved for another turn.
- The Union player is limited to purchasing a maximum of two Assaults (as there are only four Cannon pawns in the game, two of which are given to the Union each Build Phase).
- Two Builds may be used buy an additional card (to a maximum of two cards per turn)*.
* A card so purchased may not be played during the current Union Build Phase.
15.5 Discard Excess Cards
A player may have a maximum of six cards; see 14.4.
15.6 "Use It or Lose It" and other Special Build Notes
15.61 Ironclad Date. Neither player may Build an Ironclad on turn one, nor may an Ironclad be placed on the map through a card event.
15.62 Counter Limits
- The game's counter-mix of unnamed ships is an absolute limit for each type of vessel. For that reason some cards read "designated ship" since the player is designating an unnamed ship in lieu of the card's named vessel.
Example: At no time may the Union have more than thirty Screw Sloops on the map; e.g., a named Screw Sloop such as the Hartford would be one of those thirty.
- If a player wishes to build a Battery or build/place a type of ship and there are no unplaced pieces available, that player may voluntarily remove such a Battery or ship from elsewhere on the map so as to make a piece available for a new Build or placement.
15.63 Saving Builds from Turn to Turn. Neither player may save Builds from turn to turn. Builds that are not used are lost.
15.64 Saving Assaults & Counterattacks from Turn to Turn. The Union player may not save unused Assaults (Cannon pawns) from turn to turn. Assaults that are not used on the turn they are available are lost. The Confederate player may not save an unused Counterattack (Cannon pawn) from turn to turn. A Counterattack that is not used on the turn it is available is lost. This does not apply to Assaults awardable through card event.
Victory
16.1 Victory Determination
16.11 Victory is determined at the end of each Union turn.
- The game ends with "Sudden Death Union Victory" at the end of any Union turn in which the Union controls the Mississippi (Memphis/Vicksburg/New Orleans), Atlanta and Richmond, while the Confederacy has a negative VP total.
- If this condition is not met, the game continues to the next turn.
- At the conclusion of Game Turn 12, the Union wins if it fulfills either the condition stated above or the Union controls 16 or more Confederate Inland and Port Cities, one of which must be either Richmond or Atlanta, with control of the Mississippi (Memphis/Vicksburg/New Orleans) and the Confederacy has a negative VP total.
16.12 If at the conclusion of Game Turn 12, the Union has not met either of the above conditions, the Confederate player wins the game.
16.2 Possible Turn 13
There is a card in the deck which allows a potential 13th turn: card #36, If it takes all Summer... Should this card be successfully played and a 13th turn occurs, the Union has until the end of that 13th turn to meet one of the above victory conditions. If the Union fails to do so, the Confederate player wins.
Note: The 13th Turn does show Union Builds for a possible 14th Turn (August 1865). A 3Ci GMT magazine article may cover this "what if" possibility.
Cards
17.1 Two Decks of Cards
Rebel Raiders on the High Seas includes two decks of cards: a Union (blue) deck of 55 cards with card back "USN," and a Confederate ("butternut") deck of 55 cards with card back "CSN". These cards represent famous (or infamous) ships, individuals and events that occurred or may have occurred during the American Civil War.
17.2 Card Features
17.21 Cards may modify the die/dice used with ship speed and combat rolls, add or remove ships and Batteries, and can have an effect on a variety of game phases. Unless a card states otherwise, any use of a card to modify die/dice rolling must be made before any die/dice are rolled.
17.22 Cards are drawn and kept secret from the opposing player. After drawing cards, the player may play any that are allowed to be played during the Build Phase (including cards that may be played 'at any time', as specified on the card).
17.23 Cards may be restricted as to their year of play. That is, a card may note a year or years during which that card may not be played.
Example: At the game's April 1861 start, the Confederate player draws card #79, Longstreet, which notes "May not play in 1861". Therefore, the Confederate Player could not play the Longstreet card until the April 1862 Turn at earliest.
17.24 Cards may only be played in the phase noted on the card. Unless otherwise specified per the following rules, cards may be played "any time".
- The Moving player must declare any cards being played, to resolve an Assault or Naval Action, prior to the Non-Moving player. However, there are cards whose text allows their use to be withheld in exception to this principle (e.g., USN card #45, Three Cigars, CSN card #90, Frankly My Dear…, or any cards allowing one or more dice to be rerolled).
Example: The Union player announces which cards are being played for a Naval Assault upon a Confederate stack of five Gunboats defending Savannah. The Confederate player plays card #72, CSS Gaines, which converts one Rebel Gunboat into an Ironclad as well as card #70, CSS Virginia, which adds a second Ironclad for the coming battle. The Union player could then immediately play card #47, Engine Breakdown; since the defending stack now has at least one Ironclad.
- In the event both players wish to play cards during the same phase, play is considered simultaneous. In the unlikely event two cards conflict, the player whose phase it is determines which of those cards is played first. Players should exercise good gaming etiquette to prevent disputes.
- A card deck is reshuffled when so stated by a card in play or if there are no more cards left to draw. If there are no cards left to draw, shuffle the discards and form a new deck.
- Cards that say "Reshuffle into deck" mean reshuffle that card and only that card into the deck; this does not mean reshuffle discards into the deck (other cards allow for that).
17.25 Cards that allow a re-roll require that the player accept the results of the re-roll. A player can't "go back in time" to accept the original die roll result.
17.26 Card Combinations
- Cards which create a uniquely identified ship may not be combined with any other card which also creates a uniquely identified ship; e.g., no ship can have "multiple identities".
Example: Combining card #19, USS Monitor, with card #20, USS Roanoke is not allowed.
- General use cards may be combined.
Example: Card #101, Ring of Fire with card #110, Hulks, Rafts, & Chains. The Confederate player would get a free Battery and it, plus any other Battery(s) in the space, would roll three dice each rather than the usual two dice, with +1 to each die roll during the first round of Naval Combat (a rather devastating combination to inflict upon the Union).
17.27 Card "Reminder" Counters
Some cards have "reminder" counters associated with them for players' convenience (e.g., counters for generals such as Longstreet, Johnston, Grant, Sherman), for Special Confederate Raider (e.g., Dare Devil Raider), or for cards influencing assaults (e.g., Loose the Fateful Lightning, Siege Train, Samuel Francis Dupont Naval Attack).
17.28 Special Card Designations for the 1862 Optional Game Start
See Play Book section 19.5.
Emancipation Proclamation
17.31 Emancipation Proclamation is a card event not reflected by a physical card, but through this special rule. It is a constant possibility in every game of Rebel Raiders and placing it in the Rule Book freed up space for another game card.
17.32 The Emancipation Proclamation event may not be triggered during 1861 and 1862.
17.33 As of 1863 and later, this event is immediately played after the Union captures any Confederate Port or City or defeats a Confederate Counterattack. The following takes place:
- Remove two 2 VP Cargo markers from play (if all markers are on the map (e.g., aboard Blockade Runners) remove the two, one at a time, after they're unloaded and the Confederate player scores his VPs).
- Remove cards Trent Affair (card #83), Maximillian (card #61), and Royal Navy (card #62) from the game. If any of these events are in play, their effects are cancelled and any Union Sloops on the Royal Navy card are immediately placed in the Navy Yards space.
- The Union draw and discard decks are combined into a single refreshed draw pile and thoroughly reshuffled.
- The Confederate draw and discard decks are combined into a single refreshed draw pile and thoroughly reshuffled.
Index
- Adjacent Spaces — 7.2
- Amphibious Assaults — 11.2, 11.3
- Arsenals — 3.1, 14.23
- Assaults (Overland) — 11.4
- Assaults (City) — 11.67
- Assaults (Multiple and Sequential) — 11.7, 11.8
- Atlanta — 3.1, 11.68, 12.32, 13.21, 14.23, 16.11
- Batteries — 4.12, 6.12, 7.1, 7.73, 10.12, 10.2
- Battle Marker — 10.11
- Blockade Runners — 2.21, 3.1, 4.12, 7.51, 7.72-7.78, 9.22, 9.23, 10.42, 14.24
- Blockade Station — 3.1, 3.13, 6.11, 7.21, 7.31, 7.75-7.78, 10.36
- Builds: Confederate Builds — 14.0; Union Builds — 15.0
- Cannon Pawns — 4.23, 11.1, 15.32, 15.64
- Cards — 17.
- Card Features — 17.2
- Cargo — 9.1-9.3
- Chattanooga — 3.1, 7.24
- Coastal/River Ships — 2.22
- Combat (Naval): Ship vs. Battery — 10.12; Ship vs. Ship — 10.3
- Command Counters — 7.4, 7.5, 10.5
- Confederate Build Phase — 14.0
- Control Markers — 7.11, 11.65
- Counterattacks (also see Cannon Pawns) — 11.9, 14.24
- Discarding — 15.5
- Emancipation Proclamation — 17.3
- European Ports — 9.12, 14.24
- Fleet Command Boxes — 6.2
- Forts — 3.1, 6.1, 7.71-7.73, 10.4, 13.11, 13.12
- Fort Jackson & St. Philip — 3.1, 13.11
- Gunboats — 2.22, 7.75, 10.23, 10.33, 10.34, 15.31, 15.33
- Hits — 10.34
- Inland Cities — 3.1, 7.24
- Ironclads — 2.22, 7.32, 7.6, 7.75, 10.23, 10.24, 10.36, 14.24, 15.42, 15.61
- Kentucky — (see Louisville, Kentucky)
- Lines of Communication — 3.2
- Louisville, Kentucky — 3.1, 12.0
- Movement — 7.0
- Naval Combat — 10.0
- Naval Yard (Union) — 15.22, 15.33, 15.42
- Neutral Ports — 3.1, 6.11, 7.33, 9.11
- New Orleans — 3.2, 11.68, 13.11, 13.21, 16.11
- Ocean-going Ships — 2.21
- Ports: Ocean Ports — 3.13; River Ports — 7.23
- Raiders and Raiding — 2.21, 7.72, 7.76, 7.77, 8.0
- Red Bingo Markers — 7.55
- Reminder Counters — 17.27
- Reshuffle — 14.43, 17.24
- Retreats — 10.36
- Richmond — 3.31, 11.61, 11.68, 14.23, 16.11
- Rivers — 3.21
- Screw Sloops — 2.21, 7.75, 15.4
- Sea Zones: Coastal — 3.1; High Sea — 3.1
- Searching and Search Rolls — 7.75, 7.76, 7.78
- Shelter Behind Battery — 10.12
- Ship Counters — 6.1
- Ship Movement — 7.3
Playing Piece & Key Rules Quick Check Table
| Playing Piece | Cost Build/pts (Confed: 14.32) | Turns to Build | Movement Points (MPs) | Enter Coastal Zone? | Enter High Seas Zone? | Move North of Vicksburg? | Speed Modifier | Combat Dice | Hit (eliminated) on die roll of |
|---|---|---|---|---|---|---|---|---|---|
| Battery | –/4 | 1 | – | – | – | – | – | – | 6 |
| Gunboat | 1/1 | 1 | 3 | USN only | No | Yes | – | 1 | 4, 5, 6 |
| Ironclad | USN: 2 / CSN: 1 + Battery/4 | 2 | 3 | USN only (if towed) | No | Yes | – | 1 | 6 |
| Raider | 1/1 (–1 VP) | 2 | 6 | Yes | Yes | No | +3¹ (win ties) | 1 | 5, 6 |
| Screw Sloop | 1 | 2 | 6 | Yes | Yes | No | – | 2¹ | 5, 6 |
| Blockade Runner | 1/1 | 1 | 8 | Yes | Yes (safe in High Seas) | No | +2¹ (win ties) | – | Eliminate if caught in Speed Roll |
Notes:
- No +2/+3 in Port or Fort spaces; cards may modify these. May not fire if Protected. If the Confederates have no VP, a Raider may be built for 2 Build Points. Only one die if Protected by Ironclad. May not fire on protected and/or shielded Union warships (10.21, 10.22).
Land Combat: Confederate Defense = 2 dice (3 for Richmond). Highest Die applies = add one (+1) die per Battery present. Union Attack/Defense: Depends on game turn (see Turn Record Track). Either side rolls doubles: +1 to highest die (rolling two different doubles would add 2 to highest die). Either side rolls triples: +2 to highest die. Either side rolls quadruples: +3 to highest die. Possible modifier to highest die roll through use of Union Tactics rule. The Confederacy wins ties. Note possible card effects.
VP Loss (Assault): Difference between attacker and defender's final high die rolls is VP result. Richmond: 3 dice VP loss (one time). Atlanta: 2 dice VP loss (one time). 3 Mississippi Ports: 1 die VP loss (one time). Other Port/City: 1 die VP loss each occurrence. Withering on Vine lost Fort & if Union naval attack fails: difference between 2 dice as VP loss.
Confederate Supply VP Loss: One die (always) as well as: +1 die if 3 Mississippi Ports lost, +1 die if Atlanta lost, +1 die if Richmond is lost. A maximum of 4 dice could be rolled whose result is deducted from Confederate VP total.
IMPORTANT: The Confederate player may never have less than –5 VPs nor more than 50 VP at end of the Supply Phase. Any excess VP losses or gains are ignored.