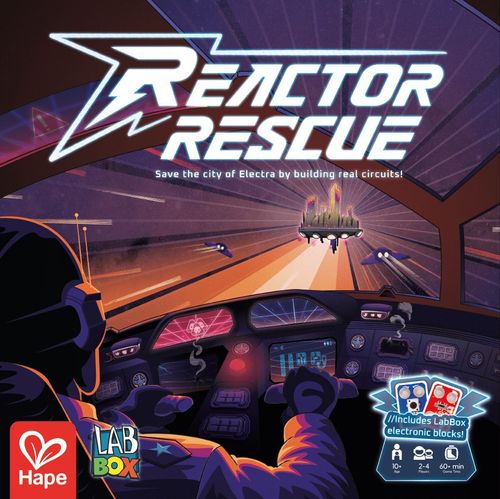
Reactor Rescue
Reactor Rescue Rulebook
Table of Contents
Table of Contents
- Game Components
- Setup
- Goal of the Game
- 3 Ways to Play
- How to Play
- Building a Circuit
- Repair Tokens & Upgrades
- Test Your Circuit
- Event Cards
- Malfunction Cards
- Solo Mode: Emergency Run-Up
- Circuit Specialist Mode
- Glossary & Tips
- Appendix - Understanding Labbox Blocks
- Labbox Blocks Anatomy
- Meet the Labbox Blocks
- Block Indicator Info Sheet
- Series Circuits - The One-Way Loop
- Parallel Circuits - Multiple Loops
- About the Game
- Warning
Game Components
- 4 Spacecraft Control Panels - 1 per player (p/p)
- Reactor - 1 p/p
- 85 Repair Tokens - 21 per player (p/p):
- Radial Interface - 5 p/p
- Control Lever - 4 p/p
- Commando Grid - 4 p/p
- Data Screen - 4 p/p
- Slide Control - 4 p/p
- Circuit Board
- 112 Gameplay Cards: 17 Malfunction Cards, 80 Resource Cards, 15 Event Cards
- 69 Circuit Cards and 69 Circuit Challenge Cards. Learning mode (book icon) cards are marked on the Circuit Cards. Difficulty: 34 Easy (1 bolt), 20 Medium (2 bolts), 15 Hard (3 bolts) of each type.
- Labbox electronic Blocks & Wires: Plastic Holder, USB C Cable, Battery Bank, Power block, Signal Wire Extension, Bulb, RGB-Light, Motor, Motor Wheel, Distance Sensor, Labbox Wires (4 Blue, 3 Red, 3 Yellow), Wire Extensions, Dimmer, Switch.
Setup
- Attach all Labbox Blocks as shown on the setup diagram. Make sure you connect the Power Block to the Battery Bank, and add two wires on the Power block (Red for Positive, Blue for negative). This is known as the Default Mode. Important note: During gameplay, you're not allowed to move the blocks around.
- Sort Circuit Cards by difficulty, shuffle each stack, then reveal 9 Circuit Cards on the Circuit board (4 Easy, 3 Medium, 2 Hard).
- Shuffle the Resource, Event, and Malfunction cards separately and place them face-down on their own decks. Then turn the top five cards from the Resource deck face-up.
- Give each player a Spacecraft Control Panel and matching set of 21 Repair Tokens. Place one Reactor Token next to the Circuit Board. Place all other Reactor Tokens back in the box. These serve as spare parts.
- Have a timer ready (from your phone, or a physical timer).
Connect the Power Block to the battery bank with a USB-C cable, switch the bank on, and ensure both green lights are lit. Please use Alkaline Batteries, a USB charging adapter, or your computer. See page 10 for more info.
Circuit Cards in the diagram are for demonstration only; shuffle your own deck and use any with the correct difficulty.
Motor setup: Mount the motor into the holder, connect it to the motor block, and then attach the wheel.
Optional: If you'd like to play a shorter game, each player chooses 7 random Repair Tokens to give to the player on their right. You can't select more than 2 of the same type of token.
Setup for 4 players (diagram): each player has a Spacecraft Control Panel with their unclaimed tokens beside it; the Circuit Board is in the centre; the Resource Card pile, Resource discard pile and the five Claimable Resource Cards are placed around it.
Goal of the Game
Be the first player to install all 21 Repair Tokens on your spacecraft, then lock in the Reactor Token to relaunch your spacecraft and win the game.
- Collect Resources - Draw Resource cards to gather what you need to build a circuit.
- Build Circuits - When you have the resources, which represent Labbox electronic blocks, use them to complete real circuit challenges. Each working circuit earns you tokens to rebuild your spacecraft.
- Launch Your Ship - The first player to fix their spacecraft by earning all the required Repair Tokens wins the Reactor Token and gets back on mission to save the city!
3 Ways to Play
Learning Mode
This is the standard game mode, we highly recommend you start playing using the learning (book icon) Circuit Cards to learn and build with confidence. Choose the Deck of Circuit Cards with the learning icon for this game mode. Store the other deck of Circuit cards, they won't be used in this mode.
Circuit Specialist Mode
You feel confident in your circuit building skills? Use the Circuit Specialist Cards for this game mode, and show off your circuit building skills. See page 12 for instructions.
Solo Mode
Play at your own pace, learn, test and level up your circuit skills. See page 12 for instructions.
How to Play
The youngest player begins, then the game proceeds clockwise. To start the game, each player draws 4 Resource Cards from the deck.
On your turn choose between 2 actions: Draw or Build.
- Draw 2 Resource Cards: Take one face-up card or draw blind from the top of the deck. If you take a face-up card, flip a new one face-up from the Resource Card pile. Then draw a second card the same way. If you draw a COSMIC OVERRIDE from the face-up cards, you may only draw one card this turn. If its replacement is a Cosmic Override, you cannot take it. If three of the five face-up cards are Cosmic Overrides, discard all five exposed cards and reveal five new cards. Note: If you draw a Cosmic Override in a blind draw, it counts as one card and you may still draw a second card that turn.
- Build 1 Circuit - Attempt 1 Circuit Card if you have the required resource cards (see below).
Optional Trade at the end of your turn: Once per turn, when the main action is completed, you may discard 2 Resource Cards to draw 1 New Resource Card.
Call for Assistance: Up to three times per game, you may forego your Main Action to draw 1 Event + 1 Malfunction card. You must read the Event card first and play its action, followed by the Malfunction card.
Building a Circuit
When choosing the 'Build 1 Circuit' Action, perform the steps in this order:
-
Claim a Circuit Card - To claim a circuit card you must provide the resource cards needed by the circuit card. The COSMIC OVERRIDE card can be used in the place of any other resource card as a joker. Discard the resource cards, and place the circuit card next to you. The Power Block is always available, no card needed.
-
Build - Use the electronic blocks on the Circuit Board shown on the card, plus the Power Block, to wire the circuit as indicated on the Circuit Card. You have 2 minutes. You may freely connect and disconnect wires. Testing starts when either you call "Initiate Testing!" or the 2-minute timer ends and the timer player calls it. From then on, the circuit is locked and can only be tested, no wire changes allowed. First-timers may play without a timer, advanced groups may shorten the time limit.
-
Test your circuit - If your circuit passes the test (see page 10, Test Your Circuit), place the Repair Tokens shown on the card into your panel and keep the Circuit Card next to your Spacecraft Control Panel. If you already have all of the tokens of one type, ignore, you may only place the tokens you're still missing.
If the circuit fails or time runs out, draw 1 Malfunction card and perform its action; keep the Circuit Card for a mandatory retry next turn.
- Next turn: This is your second try turn - you must retry the same circuit (no other actions allowed).
- If you succeed on your second try - place tokens as usual. If you fail again, discard the Circuit Card (no Malfunction this time).
Repair Tokens & Upgrades
Each token type represents a vital subsystem of your spaceship.
When you fill every slot of a token type on your Control Panel, immediately:
-
Take the matching Resource Card as Permanent Resource Card from the Resource Discard Pile. Place it face-up next to your Spaceship Control Panel, so that all players can see your permanent resource.
Then
-
Draw 1 Event Card and resolve it.
| Token | Required | Permanent Resource Card |
|---|---|---|
| Radial Interface | 5 | Bulb |
| Slide Control | 4 | Dimmer |
| Data Screen | 4 | RGB-Light |
| Control Lever | 4 | Motor |
| Commando Grid | 4 | Pick any Resource Card of your choice, and use it as a Permanent Resource Card. You may not choose the COSMIC OVERRIDE |
Test Your Circuit
When you test a circuit, you're doing two things:
- Setting the blocks correctly (Configuration Check)
- Proving the circuit behaves exactly like the Circuit Card (Functional Test)
Configuration Check
Confirm the blocks are in their default working state:
- Motor - Switch must be to the left or right. (Middle = OFF). Note: the Motor needs a second or two to start.
- RGB-Light - Sliders should not be at the bottom. (Down = OFF)
The green light on the Battery Bank and the Power Block must be ON. If the Battery Bank light turns red the batteries are low and should be replaced. If the Battery Bank light is red, it may not have enough power to run the Motor.
The colors of the wires are not important - all wires have the same function. Their colors are there to help you stay organized when building a circuit. Red for (+) Plus, Blue for (-) Minus and Yellow for Signal(s).
Functional Test
Your circuit has failed if either of these have happened:
- Card Match Rule (no extra active blocks): Only the blocks shown on your Circuit Card may be active. If any other block is connected and produces an output, even by mistake, the circuit fails.
- Red Blocks output test: If the polarity indicator is lit on any Red Block in your circuit, your circuit has failed (miswired Motor, RGB-Light or Bulb). If your circuit does not include blue blocks and your red blocks are not responsive, your circuit has failed. Note: Dim light still counts as active, pay attention!
- Blue Blocks input check (if your card includes blue blocks): Interact with each Blue Block on your Circuit Card and watch for the expected reaction. If interacting with a Blue Block produces no reaction from a Red Block, your circuit fails. Examples of "no reaction": flipping the switch does nothing; turning the dimmer has no effect; moving near the distance sensor does nothing. Important: Red blocks only activate when Blue is triggered. Depending on the Circuit Card, one Blue may control one, several, or all Red blocks.
- Power Block short-circuited: If the Power Block is showing the yellow indicator, you have short-circuited your circuit, which counts as a fail.
Event Cards
Moments of genius, surprise supply drops, or sudden reactor surges - events can turn the tide! Most bring good news: extra tokens, bonus cards, or even a second chance. But remember, Electra is unpredictable... anything can happen.
Every time you build a circuit with an Event Trigger, you draw and resolve the action of an Event Card. Discard the Event Card after you perform its action.
You cannot skip an Event Card, nor can you save it for later. Sometimes the effects of a card are not applicable, in that case ignore its action and discard the Event Card.
Malfunction Cards
Glitches, shorts, and power spikes - malfunctions throw obstacles in your path! They challenge your gameplay and force new limitations on you.
Every time you fail to build your circuit, you draw a Malfunction Card. If a Malfunction doesn't apply to you, simply ignore it. When the Malfunction deck runs out, reshuffle the discard pile to form a new deck.
Solo Mode: Emergency Run-Up
Goal: Complete your Spacecraft Control Panel before time defeats you. You can play using either the Learning Mode cards or the Circuit Specialist cards.
- Choose a difficulty (1-3 bolts) and shuffle the corresponding Circuit Cards as one deck.
- Set a 15-minute timer.
- Place 7 Repair Tokens of your choice (no more than 2 of the same type).
- Draw the top Circuit Card, and build (don't skip cards). Success: Tokens earned; place the Circuit Card on your right side. Fail: No Tokens; place the Circuit Card on your left side - no retry.
- Continue until you complete your Control Panel, or until time runs out.
Circuit Specialist Mode
In Circuit Specialist Mode, gameplay is identical to Learning Mode, but there are no wiring instructions on your Circuit Challenge Cards. Swap Circuit Cards (learning icon) with the Challenge Circuit Deck. Your goal is to complete the circuit build so that:
- All Blue Blocks shown on the Circuit Challenge Card are used to control at least one of the red blocks
- All Red Blocks shown on the Circuit Challenge Card must activate.
Tip: Be mindful of the + and - of the blocks, see Appendix for more info.
Glossary & Tips
- Circuit Board - Board where Labbox's electronic blocks are used to wire circuits.
- Permanent Resource - stays available; never discard.
- Hand Limit - None. Hoarding has risks; Malfunctions love big hands!
- Trade Timing - You may trade two resource cards for one, once per turn, only after your Main Action.
- House Rule - For quicker games, lower the token requirement to 14 by placing any 7 tokens of your choice at game start (no more than 2 of the same type).
Appendix - Understanding Labbox Blocks
Welcome to the Circuit Tinkering Zone! Beyond the game, you can use the Labbox blocks to build your own creations, so Reactor Rescue isn't just a board game, it's also a hands-on electronics set. In this appendix, you'll get a quick introduction to each Labbox block, what the indicator lights mean, and the two most common circuit types you'll use.
Understanding Labbox Blocks
Each Labbox block is an electronic function that you can use to build working circuits.
- Blue blocks are input blocks. They control the red output blocks. (Switch, Dimmer, Distance Sensor)
- Red blocks are output blocks. They do something. (Bulb, RGB-Light, Motor)
Labbox Blocks Anatomy
Basic Blocks
Each Basic Labbox block has two snaps at the top. They're usually marked + (plus) and - (minus). Think of them like a one-way road for electricity:
-
- is where the power leaves the battery
-
- is where the power must return
If a block isn't marked with + and -, it isn't polarity-sensitive, so you can connect it in either direction. (Diagram labels: Polarity Signs, Indicators.)
Signal Blocks
Some Labbox blocks have three snaps instead of two. The top two snaps are the + and - snaps (same as the Basic blocks). The third snap is the Signal snap, it's used to send/receive a control signal.
How to use the Signal snap:
- Signal-to-Signal connection (recommended) - Connect a Signal to a Signal between blocks. The input into the Blue Block, directly Controls the Output of the Red block.
- Signal snap used like + or - (only when needed) - If you're connecting a three snap signal block to a Basic block (which doesn't have a signal snap), you can still use the Signal snap as a normal circuit connection: Treat the Signal snap as either + or -, depending on the desired function. Try it out!
Meet the Labbox Blocks
- Power Block - Gives 5V power. Green light = ON. Without it you don't have electricity! Always use the power block.
- Switch - The Switch is a small and easy way to turn your creations on and off. It has a lever you can flip back and forth.
- RGB-Light - The RGB block is a light that shines many different colors. Slide the levers up and down to generate different color lights that are a combination of Red Green and Blue.
- Motor - The Motor blocks turns and spins at different speed. It makes things move.
- Wire Extension - Splits the electricity. Similar to an electricity extension cord.
- Dimmer - The Dimmer Block is a knob you can turn to control other blocks.
- Distance Sensor - You can measure how far things are with the Distance Sensor Block. When you turn it on, a row of lights shows how close an object is.
- Bulb - The Bulb Block shines bright. It's a cool choice when you need to light up your projects.
Feel free to mix and match! Each circuit is also printed on its matching Circuit Card so you can spot it fast.
Block Indicator Info Sheet
- Power Block - Green Indicator: Power is ON and healthy. You can connect other blocks now.
- Switch - No Light Indicator: You can connect it either way.
Block Indicator Info Sheet (continued)
- RGB-Light - Red Indicator: If you mix up the + and the -, the RGB will not work as the electricity is flowing in the wrong direction - you made a mistake.
- Bulb - Red Indicator: If you mix up the + and the -, the Bulb will not work as the electricity is flowing in the wrong direction - you made a wiring mistake.
- Motor - Green Indicator: You have connected the block correctly. Red Indicator: If you mix up the + and the -, the motor will not work as the electricity is flowing in the wrong direction - you made a mistake.
- Distance Sensor - Green Indicator: You have connected the block correctly - If you place your hand near the block you will see it senses you by showing it through the bar of lights. Red Indicator: If you mix up the + and the -, the Distance Sensor will not work as the electricity is flowing in the wrong direction - You made a mistake. Orange Indicator: If you connect the block correctly, however the sensor is not reading any values, because the sensor is not picking up on anything, it shows this through the orange indicator. If you want to control other blocks with the distance sensor, you need to connect the third snap to another block.
- Dimmer - No Light Indicator: You can connect it either way - make sure you use the third snap to control other blocks.
- Wire Extension - No Light Indicator: It's just a bridge!
Series Circuits - The One-Way Loop
A series circuit is when all the blocks are connected one after another in one loop, so the electricity has only one path and must pass through every block.
Try out the Circuit card shown (Power Block, Bulb, Switch) as a tutorial for building Series Circuits. When you flip the switch, the bulb lights up because the loop is closed (complete).
Parallel Circuits - Multiple Loops
In a parallel circuit, the blocks are connected in more than one loop, so electricity has different paths it can travel. Each loop works on its own, so if one loop stops working, the other loops can still work.
To make parallel circuits, we use Wire Extensions. They work like extension cords, when you connect something to one snap, the same connection is passed to all the other snaps. This lets electricity go into different loops.
Try out the Circuit card shown as a tutorial.
About the Game
- Ages: 10+
- Playtime: 60+ min
- Players: 1-4
- Category: Family Game, Educational, Strategy
- Mechanics: Hand Management, Matching, Open Drafting, Pattern Recognition, Race, Scenario / Mission / Campaign Game, Set Collection
Warning
This product contains small magnets. Swallowed magnets can stick together across intestines causing serious infections and death. Seek immediate medical attention if magnets are swallowed or inhaled.
- Most LabBox parts are small. DO NOT allow children under 3 years old to play with or near this product. NEVER connect any LabBox blocks or circuits to any AC electrical outlet.
- Do not touch or hold any moving parts of LabBox while they are operating.
- Keep conductive materials (such as aluminum foil, staples, paper clips, etc.) away from the circuit and the connector terminals.
- Always turn off circuits when not in use or when left unattended.
- Never use LabBox blocks in or near any liquid. Never use in any extreme environments such as extreme hot or cold, high humidity, dust or sand.
- LabBox blocks are subject to damage by static electricity. Handle with care.
- Some LabBox blocks may become warm to the touch when used in certain circuit designs. This is normal. Rearrange modules or discontinue using if they become excessively hot.
- Discontinue use of any LabBox blocks that malfunction, become damaged or broken.
- Important note on the wires - always grab them by the connector head, not the middle, and avoid bending them too much. Repeated bending can cause them to break!
Very important note: Several projects in this box involve the use of a box cutter, grill skewers and/or a hot glue gun. These tools should be used ONLY under direct adult supervision and ONLY by children capable of using them safely.
Instructions: We recommend connecting the Power block according to the instruction provided. If you use batteries in the battery holder, use batteries that are standard alkaline or standard rechargeable batteries. Properly discard and replace exhausted battery. Do not connect the two battery terminals with any conducting material.
Care and cleaning: Clean LabBox blocks ONLY by wiping with a dry cloth. If necessary, isopropyl alcohol on a cloth may be used sparingly, and then wipe with a dry cloth. DO NOT use any other cleaning products on LabBox modules.