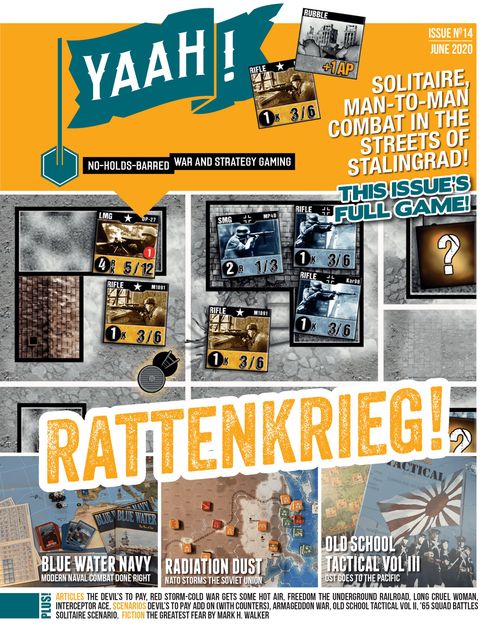
Rattenkrieg (2020)
Rattenkrieg (2020) Rulebook
Table of Contents
Table of Contents
Dice
You will need a single, colored six-sided die, and multiple white six-sided dice to play this game.
Game Components
- 1 x Countersheet
- 4 x Map sectors
- Various player aids
Abbreviations and Conventions
- Adjacent: an orthogonally adjacent zone.
- Group: one or more units of the same nationality.
1. Game Overview
Units
Each unit has the following attributes:
- Weapon type
- Short and Long Range firepower of the weapon
- The Rate of Fire (ROF) of the weapon. If the ROF is circled in red, the weapon causes explosive damage
- The AIM die effect
Some units also include an Out of Ammo value.
Group
Up to five units of the same nationality stacked together form a group. If one of the units is equipped with an LMG, only four units can be grouped together.
Map
The map is created by assembling two rectangular Sectors. Since the four sectors provided in the game are isomorphic, you can freely rotate the sectors before assembling the map. You can use any of the four sectors for each scenario, configured according to the rules of the scenario.
Each Sector is composed of several rectangular Zones; a zone can include one or more Buildings. The space in the zone not occupied by a building is referred to as Open. Zones with no buildings are considered a Road zone (in addition to being Open terrain).
Units are always placed so that the counters are:
- inside a building, OR
- on an open space of the current zone
In order to be placed in the open, there must be enough space in the zone to place the unit so that the unit counter doesn't touch or overlap the buildings in the zone. Several zones do not allow placement of units in the open (see the movement rules for more details), so the player must always place units inside a building in those zones.
Building types
There are three types of buildings in the game:
- Standard building
- Small building (with a yellow square in building)
- Heavy buildings (with a red square in building)
Multi-Zones Buildings
Some buildings occupy more than one zone. In those cases, a broken line divides the building in different internal areas. When entering a multi-zone building, always place the units on an internal area adjacent to the open space of the current zone.
Rubble
Rubble markers represent collapsed buildings. A building with a rubble marker provides the same protection as the original building, but has a different movement cost. Treat rubble as a standard building for LOS purposes.
Manholes and ladder
A black circle on a zone represents a manhole. These are used with Sewer Movement rules only in some scenarios.
Line of Sight (LOS)
LOS is normally traced from the center of a unit to the center of the target. LOS is blocked if this imaginary line touches any building on the map.
When a unit or EM is inside a building, the LOS is considered clear if it can be traced from the center of the starting unit to any one of the corners of the building (units inside a building are considered to occupy all sides of the building).
Units inside the same multi-zone building have a clear LOS only when adjacent.
Blind Walls: the shared walls between adjacent buildings are defined as 'Blind Walls.' Any Line of Sight (LOS) is considered blocked if it passes through a Blind Wall.
Distance
The distance between two units A and B is calculated as the minimum number of zones required to reach the zone where B is located from the zone where A is located (not counting the starting zone). Only count the zones that are orthogonally (i.e. not diagonally) adjacent.
2. Sequence of Play
Each session of play is composed of several phases. The Mission Phase is the core of the game session. This phase is composed of a series of Game Turns. Game Turns are repeated until your squad completes the Mission Objective (defined by the current Scenario) or until you abort the mission.
Sequence Outline
- Briefing Phase
- Scenario Selection
- Squad Preparation
- Scenario Setup
- Mission Phase
- Game Turn
- Draw new Activation Marker
- Execute Activation Marker
- Player Activation
- Enemy Activation
- Game Turn
3. Briefing Phase
Scenario Selection
Select one of the available Scenarios. Each scenario includes the following information:
- Map layout
- Scenario objective
- Entry Zone of player units
- Event Markers, their placement and associated effects
- Enemy Presence Table
- Hidden Enemy Table
Squad Preparation
Select the nationality of your units (German or Soviet). Consult the corresponding [Squad Composition] box to determine the units under your control during the Scenario.
Roll on the [Ammo Table] to determine the number of grenades and/or demo charges received in this scenario. Each unit can only be equipped with a maximum of two grenades plus one demo charge.
Roll on the [Support Table] to determine the additional forces provided by the Platoon or Company HQ. Supporting SMG and Rifles are always equipped with a Grenade each.
Some Scenarios can provide extra units or equipment to your squad.
Scenario Setup
Player Unit setup: Place your units following the scenario instructions. Unless specified otherwise, units can be freely placed inside the starting zone (i.e., you can create one or more groups and place them inside a building or in the open).
Event Markers (EM): Event markers are placed on the map to represent potential contact with enemy forces and the many events happening on the battlefield. Follow the Scenario Instructions to place the Event Markers on the map. In any case, EM cannot be placed adjacent to the player's units.
Activation Markers: Place the four Activation Markers (two "PL" and two "EN") inside an opaque cup.
4. Mission Phase
The Mission Phase is composed of a series of Game Turns. Game Turns are repeated until your Squad completes the Scenario Objective or until you abort the Mission.
Game Turn
- Draw a new Activation Marker.
- Activation Segment: execute the drawn marker, either Player Activation or Enemy Activation.
- End Turn.
Draw an Activation Marker
Draw a random activation marker (AM) from the cup. The marker label and color will determine if you can activate your units, or instead if you must proceed with enemy activation.
If there are no AM in the cup, place all the discarded AMs back in the cup and draw a new AM.
Activation Segment
If the AM draw is labelled PL, you can activate one of your groups. Select the group and proceed with the Player Activation.
If the AM draw is labelled EN, you must proceed with the Enemy Activation.
Place the AM near the activated group after the activation as a reminder.
5. Player Activation
When a PL Activation Marker is drawn you can activate one of your groups. Each group can include a max of five units (four units if the group contains a LMG).
Two markers, labelled G1 and G2, are provided for the players who want to keep the map clean. Place the unit counters belonging to Groups 1 and 2 near the map, and use the Group Counters on the map.
In any case, you can decide not to activate a whole group but instead activate some of the soldiers, creating a smaller group. As an example, with a PL Activation Marker you can activate only 3 units in a 5-unit group.
Every unit has 6 Action Points (AP) for its activation. Listed below are the available actions for your unit (the cost in AP for each action is in parenthesis):
- MOVEMENT (variable AP)
- FIRE (3 or 5 AP)
- ENTER CLOSE COMBAT (2 AP)
- SPOTTING (2 AP)
- RALLY (4 AP)
- SPECIAL WEAPON ACTION (variable AP)
- EXCHANGE EQUIPMENT (1 AP)
- HIDE (4 AP)
The activated unit(s) can perform any combination of these actions, up to the total number of AP available with three restrictions:
- The activated units must move together.
- The activated units must fire against the same target.
- You cannot execute any other action after firing (in other words, the FIRE action must be the last one executed by the group).
Movement
Movement costs are the following:
- 1 AP to move in the same zone (OPEN to OPEN, OPEN to/from BUILDING, inside the same BUILDING)
- 2 AP to move in the same zone to/from RUBBLE
- 2 AP to move to a different area of a multi-zone BUILDING
- 2 AP to move to an orthogonally adjacent zone (OPEN to OPEN)
In order to be placed in the OPEN, there must be enough space in the zone to place the units so that the counter doesn't touch or overlap the buildings in the zone. Several zones do not allow the placement of units in the OPEN, so you must always place the units inside a building in those zones. In order to enter these types of zones, you need three AP (two to enter the zone, the third to enter the Building inside the zone). If you only have one or two APs remaining, you cannot enter a zone with no OPEN areas.
Some buildings are very close, so it is not possible to position a unit between them. Nevertheless, if two buildings are not adjacent, it is always possible to move between them without stopping.
A group cannot move if it contains any Pinned unit. Exception: a group with Pinned units in the OPEN in a zone with no space for a valid placement may move inside a Building in the zone or move to an adjacent zone with enough space to be deployed.
Example #1. The German Rifleman moves from the Building in the OPEN on the same Zone (1 AP), then moves to the adjacent Zone (2 AP, still in OPEN) and finally enters the Building (1 AP). The total movement cost is 4 APs.
Example #2. In this case, the Rifleman moves from the Building to the OPEN in the same Zone (1 AP). The unit cannot be placed here, since there is not enough space. The Rifleman is then moved to the ROAD (2 AP).
Example #3. The Rifleman is moving inside a multi-zone building. All movements cost 2 AP, regardless if the movement is executed in the same Zone or in two different Zones.
You can mix movement and other actions, if you have enough AP. For example, you can spend 2 AP to move, execute a SPOTTING attempt (2 AP), and then spend the remaining 2 AP to move again.
All activated units must move together: you cannot "drop" units while moving or split the initial activated group in two different directions.
Design Note: this represents the units following an order of the Squad Leader; if you want to split your units you must then use two different Activation Markers and execute two different activations.
Event Markers
If the active group starts its movement, or moves, adjacent to a zone containing a face down Event Marker, you must immediately reveal it. The Scenario Event Table will define the effect of the revealed EM (if any).
If an Event Marker contains the words "Enemy Presence Check," you must roll on the [Enemy Presence Table] found on the Scenario Sheet, and place the required enemy units on the map. The value between parentheses after the string "Enemy Presence Check" represents a dice roll modifier to apply when rolling on the Enemy Presence Table.
When placing an enemy on the map, always place the enemy forces inside one building if possible. In addition, place the enemy units so that they have a LOS to your units (and vice versa).
Event Markers moved adjacent to a Player unit (normally as a result of the [Hidden Enemy Table]) are immediately revealed; EM moved in LOS of a Player unit but not adjacent to it are not revealed.
If revealing an EM triggers the placement of new enemy units on the map and both Enemy Activation Markers have been drawn, place one Enemy AM back in the cup.
If the Event Marker requires an Immediate Activation of the newly deployed units, immediately interrupt the active group activation and proceed with the activation of the enemy forces that just entered the map (see the Enemy Activation paragraph for more details). Place a discarded Enemy Activation Marker near the Enemy group as a reminder of its activation. Draw an Enemy Activation Marker from the cup if none has yet been selected. After the Enemy activation, you can complete the activation of the player group that triggered the Event Marker.
Movement in the OPEN
To represent the difficulties (and the danger) of moving in the Open in an urban environment, the following rules are applied immediately after a movement action to a different zone (before any other action).
- If the active group is in LOS of a non-pinned enemy group: roll on the "MOVEMENT IN LOS" Table.
- If the active group is not in LOS of a non-pinned enemy group: roll on the "EXPOSED MOVEMENT" Table.
In both cases, the active Group is considered to be in the OPEN (or in the ROAD if on a ROAD Zone) until the Movement in the Open effects are completed.
Event Markers are revealed after the Movement in the Open check.
Spotting
By spending 2 AP, you can attempt to remove a HIDDEN marker from an enemy group in LOS of the active unit(s).
Roll one die: if the result is greater than the enemy group range, remove the HIDDEN Marker.
A single spotting attempt is possible for each group.
Hide
A group inside a building can spend 4 AP to gain the HIDDEN marker. This action is only possible if there are no enemy groups or EM currently in LOS. A player unit stays Hidden until:
- it is spotted by an enemy unit, OR
- it ends its movement in OPEN in LOS of an enemy unit or EM.
Fire
The active group can spend 5 AP to execute a fire attack against an enemy in LOS, or 3 AP to execute a quick fire.
In any case, the activated units must fire against the same target.
Player units can execute a Fire attack by spending 5 AP for a standard attack or 3 AP for a Quick Fire. Enemy units attack as a result of their activation. In any case, a group can only perform one single attack per activation.
Rally/Morale Check
A Rally action is used to remove the Pinned status from a unit. In order to rally a unit, it must undergo a successful Morale Check. Spend 4 AP and roll one die: if the result is 3 or more, the check is successful, and you can remove the Pinned status.
Only one Rally check can be made per activation per unit.
To resolve any other Morale Checks (for example as a result of an Event) follow the same procedure. Roll one die: the check is successful if the result is 3 or more.
6. Enemy Activation
Enemy units are activated with the support of a "BOT," i.e., a set of instructions represented on a flowchart. The activation is straightforward. You begin the activation in the box labelled START and follow the arrows, selecting the right path of instruction based on the BOT's questions.
Unless specified otherwise, use the "BOT A" for enemy activation. Scenario rules will specify if/how other BOTs will be used.
Enemy Activation Procedure
- If there is one or more non-activated enemy group on the map, select the enemy group nearest to the player units and use the BOT to activate the enemy group.
- If there are no enemy units on the map, and at least one player group is adjacent to an event marker, reveal this event marker. Repeat this procedure for all the EM's adjacent to a player group.
- Otherwise, roll on the [Hidden Enemy Table] found in the Scenario Sheet and follow the instructions.
Enemy BOT instructions
The BOT contains the following elements:
- Rectangles represent actions of the enemy forces. Apply the instructions in the rectangle using the standard rules.
- Diamonds represent Yes/No questions. Depending on the answer to the question you will follow the YES or NO arrow.
- A Die requires the roll of one die. Based on the result, follow the corresponding arrow. Example: if the die includes one arrow with a (1-3) label and the result is 2, you must follow this arrow.
- A Black Triangle represents a "Stop Activation."
Arrows connect the different elements: Begin the enemy activation from the "START" box and follow the arrows. Diamonds (Y/N questions) and Die (random elements) will allow the selection of the correct path based on the current status of the activated enemy unit.
Enemy Actions
The enemy BOT can select the following actions:
-
MOVE one/two zones toward the nearest player group. Movement is only possible if there were no PINNED units at the beginning of the activation. Enemy units will not end their movement on a ROAD zone. If such is the case, select a different zone to move into even if it is not decreasing the distance to the player units. Enemy Groups with a MG won't move. Ignore the order in this case.
If there are multiple eligible areas, move Enemy Units or EM using this priority:
- Heavy Building
- Largest Building
- Building
- Open Area
-
FIRE against Largest/Nearest TARGET. The Enemy Group will attack the specified target (the nearest group or the group in range with the largest number of units in it). Enemy units will always execute a standard attack (no modifiers). Exception: An Out-of-Ammo HMG will reload then execute a Quick Fire.
-
CLOSE COMBAT ATTACK. The Enemy Group will enter the area of the specified target (default: the nearest group) and will attack it in Close Combat.
-
RALLY Pinned units. Roll one die for each Pinned Enemy unit: if the result is 3 or more the Check is successful and you can remove the Pinned status.
7. FIRE Combat
In order to attack, the target of the firing unit must be in LOS and not Hidden. In addition, the target must be within the LONG range of the firing weapon.
Player units can execute a Fire attack by spending 5 AP for a standard attack or 3 AP for a Quick fire. Enemy units attack as a result of their activation. In any case, a group can only perform one single attack per activation.
Attack Procedure
Each attack is started by rolling one colored die (the "AIM" die) and a number of white dice equal to the Rate Of Fire of the firing unit (ROF dice). After this roll, generate the Attack Results by adding the result of the AIM roll to each ROF die. Each unit will then generate Attack Results equal to its ROF.
Example: An LMG with ROF=4 is firing. The player rolls one AIM die plus four ROF dice with the following results:
- AIM#: 4
- ROF#: 1, 2, 4, and 6
The Attack Rolls are then calculated (AIM+ROF):
- First Attack Roll: 4+1=5
- Second Attack Roll: 4+2=6
- Third Attack Roll: 4+4=8
- Fourth Attack Roll: 4+6=10
The Attack Rolls are now modified as follows:
- +2 Target in ROAD
- +2 Flamethrower fire (ignore any other modifier)
- +1 Target in OPEN
- +1 Firer on Second Floor, target on Ground floor
- +1 Scoped Rifle
- -1 Target in Heavy BUILDING
- -1 Quick Fire
- -1 Attacker is Pinned
Calculate the Range from the firing unit and the target. Each weapon has a Short and a Long Range attribute:
- If the Target is within the Short Range of the Weapon, you score a HIT if the modified Attack Roll is equal to or greater than 8.
- If the Target is within the Long Range of the Weapon, you score a HIT if the modified Attack Roll is equal to or greater than 10.
For each Hit, one random unit in the Target group is Pinned: flip the unit to mark its status. A Pinned unit that receives a second Pinned result is instead Killed (eliminated).
Groups with a pinned unit are unable to move and suffer negative modifiers in combat (see the combat tables for more details).
Explosive Damage
If the ROF is circled in RED, the weapon causes Explosive damage. Each HIT in this case will generate 1d6 Pinned results instead of a single one. Damage is randomly distributed.
AIM die special effects
If the AIM die is equal to 6, and the unit is NOT performing a Quick Fire, the special effect(s) associated with the firing weapon are triggered. The possible effects are:
- K (Killed). The first Hit allocated caused the elimination of the target unit.
- R (Reroll). You can reroll one of the ROF dice (potentially transforming a miss roll to a HIT).
Out of Ammo (OOA)
If the AIM die is equal to 1 and the firing weapon is a MG, the weapon is out of ammo (rotate the unit counter as a reminder). An out of ammo MG cannot fire until reloaded. A unit must spend 2 AP to reload an OOA weapon.
Machine Guns have a red box with a "1" inside on their counter as a reminder of this rule.
If the AIM die is equal to 1 and the firing weapon is a Flame Thrower, after resolving the damage reroll the AIM die. If the AIM die reroll is a 1 or a 2, the Flame Thrower is out of fuel. Remove the Flame Thrower unit from the map at the end of the game turn unless engaged in close combat.
Grenades and Demo Charges
Instead of using its standard weapon, a unit can use an equipped Grenade or Demo Charge to execute an attack. Grenades and Demo Charges can only be used to attack the same zone or an adjacent one.
Use the standard attack procedure considering the Range and ROF/Aim die effects of the selected weapon. Discard a "1" Grenade or Demo Charge marker after use. Rotate a "2" Grenade marker to the "1" side.
8. Close Combat
When one group is moved to a Building or OPEN area containing units of a different nationality, a Close Combat attack is immediately executed. Both groups are now considered ENGAGED.
While ENGAGED, a group can only perform a close combat attack when activated.
To resolve a close combat attack, roll one die for each group and apply the following modifiers, considering each unit in both groups:
- +3 if the group is HIDDEN (only for the first round of close combat)
- +1 for each Unit participating to the Combat
- +1 for each Unit equipped with a SMG
- -1 for each PINNED Unit
- -1 for each Unit equipped with a Flame Thrower or HMG
The Group with the highest value is considered the winner of the Close Combat, while the other Group is considered the loser.
If the total of the winner is 2x or more the total of the loser, the losing group must suffer 2d3 PINNED results (must be distributed as equally as possible). If the total of the winner is simply higher (less than two times the loser's result), the losing group suffers 1d3 PINNED results (must be distributed as equally as possible).
In the case of a tie, both groups immediately suffer one PINNED result, to be allocated to a random unit (not PINNED units first, then PINNED units).
9. Advanced rules
Add these rules to the game only after playing a few scenarios with the basic rules. The advanced rules will add more tactical options and detail to the game at the expense of slightly increased complexity.
Multi-Level buildings
All buildings, except small buildings (with yellow squares), have two levels: the ground level and the second floor. You always enter a building on the ground level. Moving to/from the second floor requires the expenditure of an additional MP.
Groups on the ground level and on the second floor of the same building are considered in two adjacent areas of the current zone. Fire is possible between those units. To enter close combat, the two groups must be on the same level.
Units firing from a second floor to a target on the ground level of a different building or in the Open have a +1 DRM to their attack roll.
LOS Impact. LOS is not changed when introducing Multi-Level buildings with one single exception: Rubble does not block LOS for a unit located on the second floor.
Adjacent Buildings Special Movement
You can spend 3 AP and discard one Demo Charge to allow movement from one building to an adjacent one. In other words, instead of exiting the current building and re-entering the new one, you may execute a direct movement from building to building.
This move is also possible with adjacent buildings located in two different zones. When using this special movement, you will remain at the same level in the destination building (ex: if the moving units were located on the second floor, the units will directly move to the second floor of the destination building). This special movement does not trigger movement in the OPEN checks.
Standard move between two adjacent buildings in different zones: The unit must spend 4 AP and will trigger the Movement in the OPEN check after spending the 2 AP for a move to a different Zone.
By spending one Demo Charge and 3 AP, the unit can move to the adjacent building without triggering any Movement in the OPEN checks.
Heavy Machine Guns (HMG)
A unit equipped with a HMG has only 5 AP available for Movement. A HMG cannot fire in the same turn that it moves.
Suppression Fire
Suppression Fire is the main mechanism to reduce the fire capability of enemy units on the Map.
A group can spend 3 AP to perform a Suppressive Fire attack. Suppressive Fire is performed as a standard attack with these additional special rules:
- Apply a +1 DRM to the Attack Roll, in addition to the standard modifiers.
- Increase the ROF of a LMG or HMG by one.
- Do NOT apply any AIM special weapon effect.
Each HIT, instead of causing one PINNED result, generates one point of Suppression on the target. Use a die or a suppression counter as a reminder of the Suppression Points accumulated by the target.
When resolving the fire attack of a group with Suppression Points, round down the Suppression points by half, then use this value as a negative dice roll modifier. Remove the Suppression Points die after the attack or when the unit moves.
Cover Fire
Several events and tables generate attacks against your units by enemy units not visible on the map. Cover Fire allows you to reduce the effects of those attacks.
Every time one of your groups is under attack by an enemy force not present on the map (e.g., a Fire Attack generated by the Exposed Movement table), if there is another friendly group that:
- Is not yet activated
- Is composed of at least two units or a MG
- Has a LOS on the active friendly group
You can apply a -2 DRM modifier (-3 in case of a MG) to the enemy attack. The covering group is considered as activated for the current turn (rotate the counters or place an Activated marker on the group as a reminder).
Cross Fire
Cross Fire represents the advantage of firing at the same target from two different directions.
If two groups fire against the same target in the same turn, the second group gets a +1 DRM to the attack roll.
Sewer Movement
Sewer movement is only possible when the scenario explicitly states it and is normally restricted to one side.
A group located in a zone containing a manhole can spend 1 AP to enter the sewer system. Place the Sewer Movement marker as a reminder.
A group with the "Sewer Movement" marker can spend 2 AP to move to any adjacent zone, regardless of the terrain, enemy units, or Event Markers present. A group with the "Sewer Movement" marker never triggers an Event Marker.
While moving in the sewer, a group can only move or rally. No other action is allowed. A Group in the sewer cannot be attacked nor can it be spotted.
In order to exit the sewer system, a group must be located in a zone with a manhole and roll on the "Sewer Exit Table".
Night Rules
When a Scenario is played during the night, the following special rules apply:
- Visibility is limited to 3 Zones. Single units can only be seen at a 2 Zone distance.
- Add a +1 DRM to the [Hidden Enemy Table] rolls.
- -1 DRM to any Spot attempt.
- AI Bots can include special rules that apply only in Night Scenarios.
Command
Two units in the squad are in command of your soldiers:
- The Squad Leader (SL), normally a Sergeant.
- The Assistant Squad Leader (ASL), typically a Corporal.
Both the SL and the ASL can be recognized by the presence of a rank insignia on their counters.
Squad Leader. The Squad Leader provides the following benefits:
- Units grouped with the Squad Leader gain a +1 DRM to the Rally roll.
- The Squad Leader can forfeit its attack to provide a +1 ROF to a LMG fire (if the LMG is stacked with the SL).
In addition, any player group or unit that is more than 2 zones of distance from the Squad Leader or the ASL is considered out of command: double the costs of any action for an out of command group/unit.
If the Squad Leader is eliminated, the ASL is automatically promoted to the SL role (ASL is not replaced).
Battle Events
If an entry on a table or an Event Marker contains the words "Roll for a Battle Event," you must roll a D66 on the [Battle Event] table and apply the results. To roll a D66, roll two six-sided dice where one die is designated as the tens digit, while the other die is designated as the ones (units) digit. The result is a two-digit number ranging from 11 to 66.
Note: the Battle Event table itself is not included in this document (see the Table of Contents).