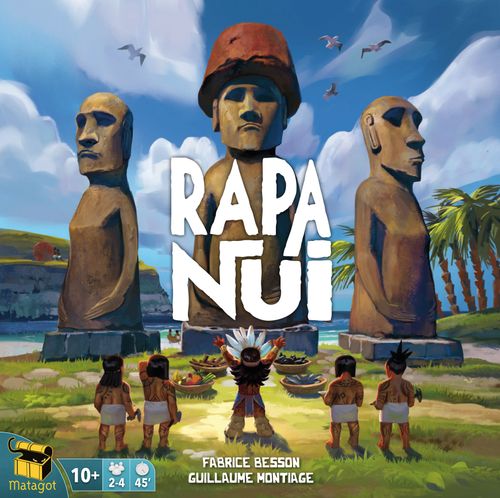
Rapa Nui
Rapa Nui Rulebook
Table of Contents
Table of Contents
Concept and Goal of the Game
Sculpt, transport, and erect moai to gain resources, then transform these resources into offerings by adding headdresses to the statues. Whoever has accumulated the most valuable offerings at the end of the game wins!
Contents
- 1 double-sided board representing the island of Rapa Nui
- 21 Moai figurines in 3 different sizes and colors (6 large, 7 medium, 8 small)
- 20 Pukao pieces
- 2 gray Villager figurines
- 27 Offering tiles, including 7 Outstanding Offering tiles
- 29 Ahu tiles
- 2 Ahu & Improvement Tile summaries
- 1 Master Stone Carver token
In each player color:
- 7 figurines (5 Villagers, 1 Sorcerer, 1 Chief)
- 1 player board
- 4 Improvement tiles
- 1 Rongorongo Tablet tile
- 4 Resource cubes
- 1 Animal Totem token
Setup
- Place the board in the middle of the table, with the side corresponding to the number of players (2, or 3-4) face up.
- Each player chooses an animal totem (turtle, dolphin, moray eel, or octopus) and takes the corresponding token. Take the 4 Villagers of your color, your Sorcerer figurine, player board, 4 Resource cubes, 4 Improvement tiles, and 1 Rongorongo Tablet tile.
- You each begin the game with 1 Resource of each type (Reeds, Eggs, Wood, Pearls). Place a Resource cube on the first space of each of these 4 Resource inventory rows on your player board.
- You each place your Chief figurine and your fifth Villager figurine on the Village.
- Place all of the Moai figurines and the Pukao pieces in a supply beside the board, along with the Master Stone Carver token.
- Place a random Ahu tile face down on each of the 21 Ahu spaces on the board. Return the rest of the Ahu tiles to the box. Now flip the Ahu tiles on the board face up.
- Stack the Offering tiles in 5 face-up stacks by type (Hut, Chicken, Hatchet, Boat, Necklace), sorted with the lowest value on bottom and the highest value on top. Place each stack on its designated space on the board. Also place the 7 Outstanding Offering tiles (the ones with a nail in each corner) on their spaces, which are beside the matching Offering tile stacks.
- Place the Animal Totem tokens randomly on the turn order track.
- Place 1 gray Villager figurine on the Crater and 1 on the Pukao Quarry.
Playing the Game
A game of Rapa Nui lasts several rounds, each of which comprises the following 3 phases:
- Place figurines (Villagers, Sorcerers, and eventually Chiefs)
- Change turn order and sculpt Moai
- Transport Moai and Pukao
Play each phase in turn order as determined by the positions of the Animal Totem tokens on the turn order track. Note that the turn order will change according to the positions of the Sorcerer figurines at the beginning of phase 2. Select a player to be the Master Stone Carver, who takes the Master Stone Carver token. This player is in charge of announcing the next player on the turn order track at the end of each player's turn.
Phase 1: Place Figurines
Each player has 3 different types of figurines: 1 Sorcerer, whose purpose is to modify the turn order, 5 Villagers, who serve as Transporters and Sculptors, and 1 Chief, who enters the game through an effect of an Improvement tile (the Chief tile).
On your turn, place one of the following:
- 1 of your Villagers on an island space or on the Moai Quarry.*
- Your Sorcerer on a star-shaped space of the turn order track.
* In addition, if you have already added the Chief Improvement tile to your board, you can place your Chief on the Moai Quarry.
Then it is the next player's turn, and so on until everyone has placed all of their figurines.
Note:
- Sorcerers can only be placed on the turn order track.
- A Villager placed in the Moai Quarry becomes a Sculptor.
- A Villager placed on an island space becomes a Transporter.
1/ Placing Your Sorcerer
Each player must eventually place their Sorcerer on one of the empty star-shaped spaces on the turn order track. However, the first player cannot use their first action to place their Sorcerer on the first space of this track.
This turn, as their first action, the Moray player (yellow) can place their Sorcerer on the first space because they were not the first player last turn. On the other hand, the Turtle player (green) cannot place their Sorcerer on the first space for their first action because they were the first player last turn.
2/ Placing a Sculptor
The Moai Quarry comprises 3 columns where Sculptors can be placed. Each column corresponds to a different size of Moai (small, medium, large).
- To sculpt 1 small Moai, place a Sculptor in the first column.
- To sculpt 1 medium Moai, place a Sculptor in BOTH the first column AND the second column.
- To sculpt 1 large Moai, place a Sculptor in each of the three columns.
If you can place your Chief on the Moai Quarry (if you have already added the Chief Improvement tile to your board), you place it below any of the 3 Moai depicted. In this case, the Chief is considered a Sculptor participating in sculpting this Moai.
The Dolphin player (blue) can sculpt 1 large Moai, the Turtle player (green) can only sculpt 1 small Moai, and the Moray player (yellow) can sculpt 1 small Moai and 1 medium Moai.
Note:
- You can only place one Sculptor per space.
- You can place a Sculptor on a column even if you have not placed a Sculptor on the preceding column.
- You can sculpt several Moai in the same turn (see Sculpting Moai in Phase 2).
The Moray player (yellow) can now sculpt 2 medium Moai instead of 1 small Moai and 1 medium Moai.
3/ Placing a Transporter
You can place Transporters on any space of the board, except the Pukao Quarry and the Crater that represents the Moai Quarry. During setup, a gray, neutral Transporter was placed in each of these two spaces. These neutral Transporters are freely available for anyone to use in Phase 3.
You are not allowed to place a Transporter on a space occupied by an opponent's Transporters, but you are welcome to place several in the same space.
The Place Figurines phase is complete once everyone has placed all of their figurines on the board (whether on island spaces, the Moai Quarry, or the turn order track).
The Chief: You can only use your Chief once you have chosen to acquire the Chief Improvement tile that allows you to place your Chief in the Moai Quarry. Through the Lend a Hand Ahu tile, the Chief can also become a Transporter.
Phase 2: Change Turn Order and Sculpt Moai
1/ Changing the Turn Order
Set the turn order according to how the Sorcerers have been placed. Place each Animal Totem token in front of the Sorcerer of its color on the turn order track.
This turn, the Moray player (yellow) becomes the first player, and the Turtle player (green) becomes the third player. The Dolphin player (blue) remains second.
2/ Sculpting Moai
In turn order, as determined by the new positions of the Animal Totem tokens on the turn order track, each player takes the Moai, to which they are entitled based on the positions of their Sculptors in the Moai Quarry columns, from the supply beside the board.
- For each Sculptor you have in the first column, take 1 small Moai.
- For each set of 2 Sculptors you have (1 in the first column AND 1 in the second column), take 1 medium Moai. If there are no more medium Moai available, take a small one instead.
- For each set of 3 Sculptors you have (1 in the first column AND 1 in the second column AND 1 in the third column), take 1 large Moai. If there are no more large Moai available, take a medium or small one instead.
Each Sculptor can only participate in sculpting one Moai. For example, if a Sculptor in the first column was used to sculpt a small Moai, that Sculptor cannot help a Sculptor in the second column sculpt a medium Moai.
If you only have Sculptors in the first and third columns, you can only take small Moai.
If you have no Sculptors in the first column, you cannot take any Moai.
The Dolphin player (blue) can take 1 large Moai, the Turtle player (green) can only take a small Moai, and the Moray player (yellow) can take 2 medium Moai. The Octopus player (red) cannot take any Moai.
Phase 3: Transport Moai and Pukao
Starting with the 1st player, each player must EITHER transport one thing OR drop out of this phase.
To transport a Moai or Pukao, you need a continuous chain of Transporters (of the same or different colors) from the Crater or Pukao Quarry to the destination Ahu space. A Transporter chain is continuous if it follows a path of orthogonally adjacent spaces (i.e. crossing at the sides, not at the corners).
Note:
- On your turn, you can transport either 1 Moai or 1 Pukao.
- If you drop out, you end your participation in this phase, and can no longer transport Moai or Pukao.
- Moai come from the Crater; Pukao come from the Pukao Quarry.
- Over the course of this phase, you may transport several Moai and several Pukao.
1/ Transporting a Moai and Gaining Resources
The Moai's Journey: On your turn, you can move your Moai (sculpted in Phase 2) from the Crater, space to space along whatever path you choose. Each space along this path must be occupied by at least one Transporter (whether yours or another player's). A single Transporter suffices to transport any Moai, regardless of the size of the Moai (small, medium, large). When you transport a Moai with your own Transporters, you earn nothing. For each space the Moai traverses that is occupied by an opponent's Transporters, the Transporters' owner earns the Resources indicated by the Transporter's space on the board (advance the Resource cubes on your player board accordingly). Certain spaces allow that player to choose among several types of Resources (options are separated by /).
Once the Moai arrives on the destination Ahu space, you erect the Moai you were transporting.
Erect the Moai: To erect a Moai, you must have a non-fatigued Transporter (see below) of your own color on the destination Ahu space.
When you erect a Moai, you must do the following:
- Take the Ahu tile from the destination Ahu space. You can use this tile right away, or set it aside to use later, at any time during one of your turns.
- Stand the Moai on the ahu depicted on the space, facing inland.
- Take one or more Resources according to the size of the Moai: 1 Resource for a small Moai, 3 Resources for a medium Moai, and 5 Resources for a large Moai. Which Resources you get are indicated on the space upon which the Moai is erected. Advance your Resource cubes on your player board to indicate the Resources gained (while a Resource cube is in the rightmost space, you cannot gain any more of that Resource).
- Lay the figurine of the Transporter, who erected the Moai, on its space. This Transporter is considered fatigued.
During Phase 2, the Moray player (yellow) sculpted a large Moai, and the Dolphin player (blue) sculpted a small Moai and a medium Moai. In the depicted situation during Phase 3, the Moray player (yellow) can transport their large Moai without earning the Dolphin player (blue) any Resources. The Moray player (yellow) earns 5 Reeds for erecting a large Moai on this space, and lays the Transporter there down.
Fatigued Transporter: A fatigued Transporter can still transport Moai and Pukao, but no longer has the strength to erect a Moai or to put a Pukao on a Moai's head. This Transporter continues to earn the Resources indicated in the space when transporting a Moai or Pukao for an opponent.
Note: Sculpted Moai that are not erected by the end of Phase 3 return to the common supply of Moai.
On the other hand, the Dolphin player (blue) transports their small Moai along a path that earns the Moray player (yellow) 1 Reed. The Dolphin player (blue) earns 1 Egg for erecting a small Moai on this space, and lays the Transporter there down. On a later turn, the Dolphin player (blue) transports their medium Moai along a path that earns the Moray player (yellow) 1 Reed. The Dolphin player (blue) earns 3 Eggs for erecting a medium Moai on this space, and lays the Transporter here down.
2/ Transport a Pukao to Style a Moai and Transform Resources into Offerings
On your turn, you can take a Pukao from the supply (you do not need a Sculptor to acquire a Pukao). You must then transport it from the Pukao Quarry to a destination Ahu space, on which at least 1 unstyled Moai has been erected. As with transporting Moai, you need a chain of Transporters to move a Pukao.
To transport a Pukao, the same rules for earning Resources apply as when transporting Moai, with one exception: The Resource your opponents earn when you use their Transporters is always Reeds, no matter what is depicted in the space.
To style a Moai, you must have a non-fatigued Transporter of your own color on the destination Ahu space. Then place the Pukao atop any unstyled Moai in the space, and lay the Transporter down to indicate the Transporter's fatigue.
Now you can perform a single exchange of 4 Resources for 1 corresponding Offering tile. Keep these Offering tiles face down. Offering tiles earn you 6-14 victory points, depending on the tile.
- By spending 4 Reeds, you get the top Hut Offering tile from the stack.
- By spending 4 Eggs, you get the top Chicken Offering tile from the stack.
- By spending 4 different Resources, you get the top Hatchet Offering tile from the stack.
- By spending 4 Wood, you get the top Boat Offering tile from the stack.
- By spending 4 Pearls, you get the top Necklace Offering tile from the stack.
Move your Resource cube(s) left on your player board accordingly. You can spend your last one of a Resource by removing its cube from your player board. Put it back when you gain some again.
Note:
- In this exchange of Resources for Offering tiles, the Resource depicted on the Ahu space is irrelevant (for example, you can offer Wood on a space depicting Reeds).
- You can only style a Moai if you can exchange Resources for an Offering tile.
IMPORTANT: When you place a Pukao, you may convert any number of Resources into an equal number of lower-value Resources to obtain an Offering tile. The descending value of Resources is as follows: Pearls > Wood > Eggs > Reeds.
When everyone has dropped out, this Moai and Pukao transport phase is complete.
The Dolphin player (blue) can transport a Pukao to the small Moai along a path that would earn the Moray player (yellow) 1 Reed. The Dolphin player (blue) styles this Moai, and lays the Transporter there down. Now this player can exchange Resources for an Offering tile. They decide to exchange 4 Pearls for a Necklace Offering tile (which is worth 12 victory points).
Assume that the Moai in this example were erected in Phase 3 of a prior round. In the depicted situation during Phase 3, the Moray player (yellow) can transport a Pukao to the medium Moai along a path that would earn the Dolphin player (blue) 1 Reed. The Moray player (yellow) styles this Moai, and lays the Transporter there down. Now this player can exchange Resources for an Offering tile. They decide to exchange 4 Eggs for a Chicken Offering tile (which is worth 8 victory points).
End of the Round
- Everyone retrieves the figurines they played during their turns: Villagers, Sorcerer, and Chief (for those who already have their Chief Improvement tile on their board).
- The erected Moai and Pukao stay where they are.
- Moai that were not erected return to the supply beside the board (unless an Ahu tile overrides this rule).
- Start a new round, using the turn order determined by the positions of the Animal Totem tokens on the turn order track.
Ahu Tiles
You can decide to use an Ahu tile immediately after acquiring it, or keep it in front of you to use later. You can keep and play as many as you wish, even playing several at once if you like. Unless indicated otherwise, you play Ahu tiles on your turn, and return them to the box once they're played.
Rest (4 copies) — During the Transport Phase, stand a fatigued Transporter up (do not move it to another space).
Barter (4 copies) — Exchange 3 of one type of Resource for 3 of another type of Resource of your choice. Example: Convert 3 Eggs into 3 Pearls on your player board.
Skimp (4 copies) — When styling, spend only 2 Resources to obtain an Offering tile. For the Hatchet Offering, you can choose which 2 different Resources you spend.
Chip In (4 copies) — When evaluating Moai sculpting, you have an additional virtual Sculptor that you can place in any column, even if all of the spaces in the Moai Quarry are occupied.
Take Three More (2 copies) — When you erect a Moai, take 3 additional Resources matching the color of the space. You can combine this effect with the Fervent Improvement tile.
Take Your Pick (2 copies) — From now on, when styling, you can take an Outstanding Offering tile of the color you want (if any are still available). Do not discard this tile; its effect is permanent.
Change Jobs (3 copies) — After determining turn order, transform your Sorcerer into either a Sculptor (by placing it in the quarry, even if all spaces are occupied), or a Transporter (on a space on the board that is either empty or occupied by your Transporters).
Lend a Hand (3 copies) — Once the Moai are sculpted from the quarry, take one of your Sculptors or your Chief (if you have already added the Chief Improvement tile to your board) and place it as a Transporter on a space on the board that is either empty or occupied by your Transporters. The Chief doesn't become fatigued from erecting and styling Moai.
Gain Favor (1 copy) — This tile is worth 3 victory points at the end of the game.
Take Two More (2 copies) — When you erect a Moai, take 2 additional Resources matching the color of the space. You can combine this effect with the Fervent Improvement tile.
Rongorongo Tablet (1 copy per player) — You receive this Ahu tile at the beginning of the game. By discarding it, you can copy the power of any Ahu tile (in play or not) except Take Your Pick, and play it immediately. If you still have your Rongorongo Tablet tile at the end of the game, it will be worth 3 VP.
Improvement Tiles
At any moment during your turn, you can decide to add an Improvement tile to your player board. To do this, spend the Resources indicated on the Improvement tile you choose, and place the tile in one of the notches of your board. Now this tile will benefit you for the rest of the game. You can even add several during the same turn; however, note that you can only add 3 of the 4 Improvement tiles to your board.
Fervent (Cost: 2 Reeds, 1 copy per player) — When erecting Moai, you can take Resources of the next-higher value, instead. Example: You can take Wood when you erect a Moai in an Egg space.
Artistic (Cost: 2 Eggs, 1 copy per player) — When styling Moai, you can take an Offering tile of the next-higher value, instead. Example: When you style, you can spend 4 Eggs, but take a Hatchet Offering tile.
Popular (Cost: 2 Wood, 1 copy per player) — You get an additional Villager for the rest of the game. Take your Villager from the village.
Chief (Cost: 3 Pearls, 1 copy per player) — You get a permanent Sculptor: the Chief. When evaluating Moai sculpting, place your Chief in the quarry below the column of your choice, regardless of available spaces. Just like normal Sculptors, the Chief must have Sculptors in the preceding columns in order to sculpt medium and large Moai.
End of the Game
Endgame Condition
At the end of a round, if the number of ahu with no Moai is less than or equal to the number of players, the game is over, and it's time for final scoring. For example, in a 4-player game, if there are 4 or fewer ahu with no Moai at the end of the round, the game is over.
Final Scoring
Each player adds up their victory points earned through Offering and Outstanding Offering tiles. To this total, add the following:
- 1 victory point per Resource remaining on your player board.
- 3 victory points for your Rongorongo Tablet, if you have not used it.
- 3 victory points if you have the Gain Favor Ahu tile.
The player with the most victory points wins. In a tie, the tied players share the victory.
For Your First Game
The first time you play Rapa Nui, we suggest you only use a subset of the Ahu tiles to familiarize yourself with the game more easily:
- Use only the 21 following Ahu tiles: Rest x4, Barter x4, Skimp x4, Chip In x4, Take Three More x2, Take Two More x2, Gain Favor x1.
- Do not give anyone their Rongorongo Tablets.
Two-Player Game
When playing a two-player game, use the modifications below:
Board: Use the back of the board, specifically designed for a two-player game.
Victory points: For each type of offering, remove 1 of the 2 same-value Offering tiles, and return it to the box.
Moai: Return 1 large Moai, 1 medium Moai, and 2 small Moai to the box.
Ahu tiles:
- Randomly place Ahu tiles on the board locations. Set the rest nearby face up as a display.
- Starting with the second player in turn order, each player chooses 1 Ahu tile from the display, and sets aside tiles that are identical to the chosen one.
- Now do that again, so each player ends up with 2 distinct Ahu tiles.
- As usual, all Ahu tiles (even those set aside) are available for Rongorongo Tablets to copy.
End of the game: The game ends if there are 3 or fewer ahu with no Moai at the end of the round.
All other rules remain unchanged.