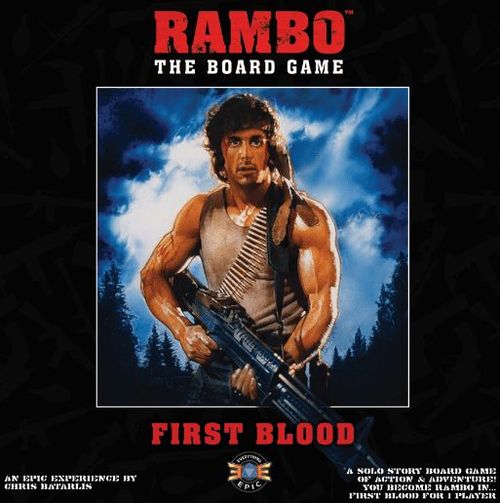
Rambo: The Board Game – First Blood
Rambo: The Board Game – First Blood Rulebook
Table of Contents
Table of Contents
Playing the Campaign
The First Blood Mission Book gives you everything you need to play through a full narrative campaign.
The Mission Book is divided into Story Chapters, where you experience the story from Rambo's point of view and make decisions about how to move forward, and Missions, where you set up and play a tactical scenario.
Once you're familiar with the basic rules in this rulebook, you can begin a campaign by reading the Introduction at the start of the Mission Book, then proceeding as directed based on your choices.
Whenever you successfully complete a Mission, you'll be directed to the next Story Chapter. Any Damage or Wounds you suffer on a Mission stays with you until you find a way to heal them (See "Health & Damage"). You will also unlock new Gear Cards (See "Gear") and earn Valor tokens (See "Using Valor") that you can use on future Missions.
If you fail any Mission, you can either replay that Mission, or restart the campaign from the beginning.
(See "Using the Mission Book" for more detail.)
Components
- 1 Hero Board
- 1 Rambo Figure
- 1 Stance Marker
- 4 Enemy Figures
- 5 Enemy Cards
- 5 P.O.I. Tokens
- 3 Junior Deputy Tokens
- 5 Item Tokens
- 1 Hidden Token
- 1 Deployment Zone (DZ) Token
- 3 Wounded Tokens
- 20 Damage Tokens
- 5 Valor Tokens
- 5 Armor Tokens
- 3 Gear Counters
- 10 Tactics Cards
- 7 Gear Cards
- 6 Gunshot Cards
- 1 Battlefield Condition Track
- 1 Round Marker
- 1 Mission Book
- 1 Rulebook
Mission Setup
A. Find Mission. Open the Mission Book to the correct Mission. Place the book on the table so that the printed Map is flat. It will act as your "game board" for this Mission.
B. Prepare Enemy Track. Find the Enemy Cards shown in the Enemy Track section and place them in a face-up row near the Map. If there is space, you can place them directly on the Mission Book.
C. Place Enemies. Place an Enemy figure on each space marked with an Enemy icon on the Map. The letter on the icon tells you which Enemy Card the figure corresponds to on the Enemy Track.
For example, in the Mission shown, "Junior Deputy" is in the "A" position on the Enemy Track. This means you will place a Junior Deputy on each "A" icon on the board.
D. Place Rambo. Place your Rambo figure on the space marked as Hero Start on the Map.
E. Place Map Tokens. Place the correct numbered Point of Interest (P.O.I.) tokens and Deployment Zone (DZ) tokens on the spaces marked on the Map.
F. Set Battlefield Condition. Place the Battlefield Condition Track near the Map and set the Round Marker in the "1" slot.
Continue to Hero Setup.
Hero Setup
A. Prepare Hero Board. Place your Hero Board in front of you and place your Stance Marker nearby.
If you have any Damage or Valor tokens carried over from previous Missions or Story Chapters, add these to your Hero Board. If any of your Stances are Wounded, place Wounded tokens on them. (See "Health & Damage.")
- Damage Tokens: Damage carried over from previous Missions is placed on your Health Track. (See "Health & Damage.")
- Wounded Stances: Wounds you've suffered prevent you from using Stances. You may remove 1 Wound at the start of each Mission. (See "Health & Damage.")
- Stance Marker: This will be used to select your Stance each round. Do not place it on a Stance just yet. (See "The Game Round.")
- Valor Tokens: You can spend Valor tokens you've earned to gain bonuses. Any Valor tokens you don't use are kept for the next Mission. (See "Using Valor.")
B. Remove 1 Wound. Remove up to 1 Wounded token from a Stance of your choice.
C. Prepare Gear. Refer to the Mission Book to see how many Gear Cards you may equip. Choose up to this many pieces of Gear from your Gear Stash (See "Gear") and place them face-up near your Hero Board.
D. Prepare Tactics Deck. Find the numbered Tactics Cards the Mission Book tells you to use for this Mission. Each Tactics Card's number is printed in the bottom left of the card. Shuffle the Tactics Cards you will be using and place them in a face-down pile next to your Hero Board. This is your Tactics Deck.
E. Draw Tactics Cards. Draw the top 2 Tactics Cards from your deck. This is your starting hand.
F. Read Briefing & Start Mission. Read the Briefing section of the Mission, then start the first round!
Using the Mission Book
Missions let you use your guerrilla training to face off against the Sheriff and his Deputies. When you reach a Mission, use the Setup guide (See "Mission Setup") to prepare the Mission and read your Objectives.
Mission Objectives. Each Mission has Objectives that must be completed to win. When you complete an Objective, read the associated Mission Trigger to progress the story forward.
Mission Triggers. The Mission Triggers section of each Mission covers events that occur during the Mission. It includes the following kinds of events:
- Points of Interest: Triggered by reaching or using actions at P.O.I. tokens on the Map.
- Objective Triggers: Triggered when Objectives are completed.
When you activate a Mission Trigger, read and resolve its narrative and effects.
Mission Success. If a Mission Trigger says "Mission Success," this means you have completed the Mission. Read the Mission Success section, then follow the prompt to the next Story Chapter.
When you complete a Mission, any Damage or Wounds you suffered stays with you until you find a way to heal them (See "Health & Damage"). You also get to keep any Gear Cards you've unlocked (See "Gear") and Valor tokens you've earned (See "Using Valor").
You do not get to keep Tactics Cards – these must be discarded at the end of each Mission (See "The Game Round").
Mission Failure. Each Mission lists conditions under which you fail the Mission. If any Mission Failure condition is met, the game immediately ends and you lose!
If you fail any Mission, you can either replay that Mission, or restart the campaign from the beginning. Good luck!
Story Chapters let you experience the events of Rambo: First Blood from Rambo's perspective. As you read, you'll get to make choices about how Rambo's story unfolds.
Story Choices let you decide how Rambo reacts to situations. When you reach a Story Choice, select one of the available options, and follow the prompt that tells you which section to read next.
Collecting Story Items. Some choices let you acquire Story Item tokens. Once you've acquired a Story Item token, you can choose Story Choice options that require that Item.
Gunshot Cards. Your choices have consequences. When an enemy takes a shot at you, you'll be told to draw and resolve a Gunshot Card. When this happens, shuffle together the 6 Gunshot Cards and draw 1 of them. Immediately suffer any effects of the card (See "Health & Damage"). After you resolve a Gunshot Card, remove it from the deck. (The next time a Gunshot happens, Gunshots you previously resolved are not shuffled in.)
Campaign Endings. Certain choices lead to early endings – some good, some bad. If you're not satisfied with your ending, try playing again to see how different choices change the outcome...
Headband Rule. When a rule in this rulebook is contradicted by the Mission Book or a component such as a Tactics Card, always follow the new rules in the Mission Book or on the component.
The Game Round
Each round has 5 steps:
- Activate Enemies: Activate each Enemy Card.
- Clear Effects: Clear all effects with a Persistent icon.
- Choose Stance: Choose a Stance and gain its immediate bonuses.
- Movement and Actions: Use your Stance's movement and actions; play up to 1 Tactics Card.
- Battlefield Condition: Advance the Round Marker.
Step 1: Activate Enemies
The Enemies pursuing you get a chance to act first.
At the start of each round, each Enemy Card on the Enemy Track activates, one at a time from left to right.
When an Enemy Card activates, each Enemy figure matching the card executes all Activation Behaviors listed on the card, in numbered order.
Each Activation Behavior is a move or attack. Enemy movement and attacks are detailed in "Enemies." (See p. 14.)
Example: "Deputy Mitch" is the first Enemy Card in the Initiative Row, designated Enemy A in Mission Setup. At the start of round 1, Mitch activates first. Mitch first moves towards Rambo, then attempts to attack him. If he is not in Range of Rambo, or Rambo is Hidden, he is unable to attack. (See "Enemies.")
Sheriff Teasle is next on the Enemy Track. Once Mitch has finished his behaviors, Teasle activates. Teasle is the last Enemy on the track, so after he finishes his behaviors, the Enemy Activation step is over.
Step 2: Clear Effects
Any lasting effects you played last round expire.
Discard all cards in play that have the Persistent icon on them. (This icon means the effect lasts for 1 full round.)
Also discard any Armor tokens you have.
Once a card or component is discarded, its effect is no longer active.
- Armor Tokens: Return all unused Armor tokens on your Hero Board to the supply.
- Tactics Cards: If you played any Tactics Cards with Persistent effects on your last turn, discard them.
Step 3: Choose Stance
After Enemies have acted, you choose a Stance, which determines the actions, movement, and bonuses available to you this turn.
Place your Stance Marker on the Stance you want to use on your Hero Board. The Stance you choose must be different than the one you used last round, and must not have a Wounded token on it (See "Health & Damage"). Note that on the first round, you may use any Stance.
Once you've chosen your Stance, you immediately gain its bonuses:
- Heal: Remove this many Damage tokens from your Hero. (See "Health & Damage.")
- Valor: Gain this many Valor tokens. (See "Using Valor.")
- Armor: Gain this many Armor tokens. (See "Health & Damage.")
The four Stances on the Hero Board are:
| Stance | Actions | Movement | Armor | Valor | Heal |
|---|---|---|---|---|---|
| On the Run | 1 | 3 | 1 | – | – |
| Guerrilla Training | 2 | 1 | – | – | – |
| Draw Blood | 1 | – | – | 2 | – |
| Recovery | – | 1 | 1 | – | 1 |
- Actions: How many actions you may take when you choose this Stance.
- Armor: How many Armor tokens you gain in this Stance.
- Movement: How far you may move when you choose this Stance.
- Valor: How many Valor tokens you gain in this Stance.
- Heal: How much Damage you may remove in this Stance.
Step 4: Movement and Actions
Once you've chosen a Stance, you may use its movement and actions.
You may do some or all of the following, in any order:
- Move Rambo
- Take actions
- Play 1 Tactics Card
Moving Rambo. Your Stance's Movement Stat is the total number of spaces you may move on your turn. (If your Stance does not have a Movement Stat, you may not move on your turn.)
Movement Rules.
- A. You may move orthogonally or diagonally.
- B. You may interrupt your movement to take an action or play a Tactics Card, and finish your move afterward.
- C. Impassable Terrain: You may not move through red Impassable Terrain lines, or off of a Map edge.
- D. You may not move into a space occupied by another figure.
Impassable Terrain. Red lines on the Map mark Impassable Terrain. Neither Heroes nor Enemies can cross any Impassable Terrain line. Impassable Terrain lines also block Line-of-Sight between an attacker and target. (See "Line-of-Sight.")
Diagram notes: You MAY NOT move through terrain marked in red. You MAY move diagonally around red corners.
Taking Actions. If you choose a Stance that has 1 or more actions, you may perform any combination of actions from the following list.
You may use the same action more than once per turn.
- Attack Enemy: Make an attack using an equipped Gear Card. (See "Attacking.")
- Draw Tactics Card: Draw 1 card from your Tactics Deck and add it to your hand.
- Activate P.O.I.: Use a special Point of Interest (P.O.I.) action while adjacent to a P.O.I. Available actions for each P.O.I. are detailed in the Mission Triggers section. (See "Using the Mission Book.")
Playing a Tactics Card. Tactics Cards provide you with special abilities to make big moves or get out of tough situations.
You may play 1 Tactics Card each turn from your hand, at any time during your movement and actions (in any Stance). If the card you wish to play has requirements (for example, "Play while you are Wounded") you must meet them in order to play the card.
After you play a Tactics Card, discard it face-up next to your Tactics Deck. If it has a Persistent effect, instead place it face-up above your Hero Board. Its effect remains active until the Clear Effects step of the next round.
Your Tactics Deck is constructed at the start of the game. You can spend actions to draw more Tactics Cards.
New Tactics each Mission. At the end of each Mission, you must discard all unused Tactics Cards. You will always shuffle your Tactics Deck and draw 2 fresh Tactics Cards at the start of each Mission.
Using Valor
Valor tokens allow you to go above and beyond the call of duty.
You gain Valor tokens by using certain Stances or making some decisions during Story Chapters.
You may spend Valor tokens you've collected to enhance your abilities in any of the following ways:
- Enhance Attack: When you make an attack, you may spend Valor to increase the Damage you deal. Each token spent adds +1 Damage. (See "Attacking.")
- Block Damage: When you take Damage from any source (such as an attack or Threat Card), you may spend Valor to block the Damage you take. Each token spent blocks 1 Damage. (See "Health & Damage.")
- Enhance Movement: At any time during your movement and actions, you may spend Valor to move additional spaces. Each token spent gives you +1 Movement. (Note you must spend 2 Valor to move into a Tough Terrain space.) (See "Movement and Actions.")
Unspent Valor. Any Valor tokens you don't use on a Mission are kept for the next Mission. There is no limit to the number of Valor tokens you can have on your Hero Board.
Time is running out! On most Missions, you must complete your objectives in a certain number of rounds. If you don't win before the Battlefield Condition step of the final round, you lose!
Step 5: Battlefield Condition
Move the Round Marker to signal the start of a new round.
After you finish all movement and actions, advance the Round Marker 1 space on the Battlefield Condition track. Then begin the next round with the Enemy Activation step.
Gear
Gear Cards are useful items that you can use to attack Enemies and complete your Mission.
You will equip some Gear at the start of each Mission, and can discover additional Gear during the Mission.
Weapons show the following stats on the card:
- Range: How far away you can target an Enemy. (See "Attacking.")
- Targets: How many Enemies you can target with each attack. (See "Attacking.")
- Damage: How much Damage each attack does. (See "Attacking.")
- Special Effect: Any special bonuses or extra actions the weapon provides.
Utility Effects. Utilities provide ongoing or one-time use effects. They can be activated at any time on your turn (unless stated otherwise).
Heavy Weapons. Some weapons are Heavy and require more effort to carry. Heavy Weapons take up 2 of your available Gear Slots, but are the same as other weapons otherwise.
Example: on a Mission with 3 Gear Slots available, you could carry 1 Heavy Weapon and 1 Utility.
Gear Stash. Any Gear Cards that you acquire during the Campaign are permanently added to your Gear Stash. Once a piece of Gear is in your Stash, it can be equipped at the start of any Mission.
Any Gear that you discard during a Mission is returned to your Stash, and can be used again on the next Mission.
Storing your Stash. Between play sessions, Gear in your Stash should be kept separate from the general deck of Gear Cards, which remain locked until you acquire them.
Gear Slots. The Mission Book tells you how many Gear Slots are available on each Mission.
Each Gear Card you equip takes up 1 of your available Gear Slots (except for Heavy Weapons, which take up 2 Gear Slots – see "Heavy Weapons"). At no time during a Mission may you exceed your available Gear Slots.
Finding New Gear. If you find Gear while on a Mission, you may choose to immediately equip it. If you have no open Gear Slots, you may choose to discard a piece of equipped Gear to your Stash, and replace it with the new piece of Gear.
If you decide not to equip the new Gear, instead discard it to your Stash. You may choose to equip it at the start of a future Mission.
Locked Loadout. Once a Mission has started, you may only change your Gear when you find new Gear. You may not access Gear that you left behind in your Gear Stash, or that you discarded.
Gear cards illustrated in the rulebook (pages 5 and 10):
- Rambo's Knife (Weapon – Melee). Range A, Targets 1, Damage 3. Special Effect: When you are Hidden, this weapon deals +2 Damage (instead of +1 Damage).
- Bulletproof Vest (Utility). Special Effect: When you would be Wounded by an attack, you may discard this card to take no damage or Wounds from this attack.
- Rifle (Weapon – Firearm). Range 2, Targets 1, Damage 2. Special Effect: If you have not moved this turn when you attack with this weapon, you may ignore Resistance. If you do, you may not move again this turn.
Tactics cards illustrated in the rulebook (pages 5 and 10):
- Kill. Period. (Tactics 1/10). Gain 1 Armor. Persistent: Each time you defeat an enemy, gain +1 Valor.
- Field Medicine (Tactics 3/10). Suffer 2 Damage to remove 1 of your Wounds.
- Burning Rage (Tactics 8/10). Play while you are Wounded. Gain +3 Movement. Persistent: Your attacks have +1 Targets and +2 Damage.
Health & Damage
Health. Your Health Track tells you your max Health as well as how much Health you have remaining.
Whenever you take Damage, you add Damage tokens to your Health Track. If your Health Track is ever full, you are immediately Wounded.
Example: After an Enemy attack, Rambo's Health Track is full. Once his Health Track is full, he cannot take any more Damage from the attack. Rambo must place a Wounded token on a Stance. He chooses to place it on "Guerrilla Training." He can no longer use this Stance. After taking a Wound, Rambo clears all Damage from his Health Track.
Wounds. When you are Wounded, place a Wounded token on a Stance that does not already have a Wounded token. You can no longer use this Stance.
Then, clear all Damage from your Health Track (you are restored to full Health).
Story Wounds: When you are Wounded during a Story Chapter, you still clear all Damage you have taken and choose a Stance to be affected.
Tracking & Removing Wounds. Health and Wounds persist at the end of each Mission. When you end a play session, be sure to record your current Damage, and each of your Stances that is Wounded.
Each time you start a new Mission, you may remove 1 Wound from a Stance of your choice. Some story choices also allow you to remove Wounds.
However, Wounds cannot be removed by Heal effects from Stances or Tactics Cards (even if your Health Track has no Damage tokens on it).
Death. If you ever have 4 Wounds, you die!
You can either replay the Mission (or Story Chapter), or restart the campaign from the beginning.
Armor. Some Stances provide you with temporary Armor tokens, which block incoming attack Damage. Whenever you gain Armor, place the indicated number of Armor tokens on your Hero Board.
When you are attacked, you first apply Resistance, then discard your Armor tokens to block any remaining Damage. Each Armor token you discard blocks 1 Damage.
You must use any Armor you have when you are attacked (you can't choose to "save" it). If you are able to block all incoming Damage with Resistance and Armor, you may save any leftover Armor tokens for the next attack.
Like Resistance, Armor can only be used when you are attacked. It has no effect on Damage from other sources.
Example: Rambo is hit with an attack that deals 2 Damage. Rambo has 1 Armor on his Hero Board, which he must discard to block 1 Damage. The remaining 1 Damage is placed on Rambo's Health Track.
Armor only lasts for 1 round! All Armor tokens you don't use must be discarded during the "Clear Effects" step.
Attacking
Attack Overview. Making an attack has 3 steps:
- Choose Weapon
- Choose Target(s)
- Deal Damage
This section covers Heroes attacking Enemies. For attacks against Heroes, see "Enemy Attacks" (p. 15).
Step 1: Choose Weapon
If you have multiple weapons equipped, choose one of them to make your attack.
During this attack, you will use the stats printed on the weapon's Gear Card (plus applicable bonuses from Tactics and other Gear).
No Weapon? You cannot make unarmed attacks. You must have an equipped weapon to attack!
Step 2: Choose Target(s)
Choose an Enemy figure that is within your weapon's Range Stat and clear Line-of-Sight.
If your weapon's Targets Stat is greater than 1, you may choose multiple targets that are each within Range and clear Line-of-Sight.
Attacking multiple times? If your Stance has multiple actions, you may attack multiple times in the same turn. You may use the same weapon or a different one for each attack.
Range. Range is always counted in Map Areas (large printed squares), rather than spaces.
- Range 1: At Range 1, Rambo may target an Enemy within his Area.
- Range 2: At Range 2, Rambo may target an Enemy in his own or an adjacent Area.
- Range 3: At Range 3, Rambo may target an Enemy up to 3 Areas away (counting his own Area).
- Range A: A Range A Weapon can only target an Enemy in an adjacent space.
Adjacent Targets. If an attacker is in an adjacent space to their target, the target is always considered in Range, regardless of the attacker's Range Stat or the area the target occupies.
If an attacker's Range is reduced below 1 by an effect, they may still attack targets in adjacent spaces. (Range "0" is effectively Range "A," see below.)
Example: Rambo and an Enemy are in different Areas, but they are in adjacent spaces. This means Rambo is in Range of the Enemy, even if he is using a Range 1 Weapon (which can normally only target his own Area).
Step 3: Deal Damage
Each target Enemy figure takes Damage equal to your weapon's Damage Stat, with any modifiers applied (see below).
Mark Damage to the Enemy figure by placing Damage tokens next to them on the Map. (See "Enemies.")
Damage Modifiers.
- Bonus Damage: Add bonus Damage from Gear, Tactics Cards, or other active effects.
- Resistance: If the Enemy has a non-zero Resistance Stat, reduce your Damage by this amount.
- Valor: If you have Valor tokens, you may discard them to deal +1 Damage per token.
Example: Rambo fires the Rifle at a Deputy Mitch. It has a Damage Stat of 2. Mitch has 1 Resistance, reducing Rambo's Damage by -1. Rambo decides to spend 2 Valor to increase his Damage by +2. Mitch takes a total of 3 Damage, which is placed next to him on the Map.
Line-of-Sight. Heroes and Enemies may not attack an opponent if their Line-of-Sight passes through a red line marking Impassable Terrain. No other objects or terrain block LOS.
The Two-Corner Rule. You can test Line-of-Sight by drawing two imaginary lines from any one corner of the attacker's space to two adjacent corners of the target's space. If it is possible to do this without either line crossing Impassable Terrain, then the attacker has clear Line-of-Sight.
- Impassable Terrain blocks LOS.
- Other figures do NOT block LOS.
- Rambo has clear LOS.
- Rambo's LOS is blocked.
Enemies
Enemy Cards list the stats, special abilities, and Activation Behaviors of different types of Enemies. The stats are:
- Targets: How many Heroes the Enemy targets with each attack.
- Damage: How much damage the Enemy does with each attack.
- Health: How much Damage the Enemy can take before being killed.
- Range: How far away the Enemy can attack.
- Movement: How far the Enemy moves when they activate.
- Resistance: How much Damage the Enemy ignores when attacked.
- Activation Behaviors: Detailed rules for what the Enemy does when activated.
Some Enemy figures use the same Enemy Card, but damage to each individual Enemy figure is always tracked separately. Whenever Damage is dealt to a figure, place Damage tokens next to them on the Map.
If the total Damage to a figure ever equals or exceeds the Health Stat on its Enemy Card, it is defeated and removed from the Map.
Enemy Cards are never removed from play, even if there are no figures of that type left on the Map.
Example card, Deputy Galt: Targets 1, Range 2, Damage 3, Movement 2, Resistance 2, Health 5. Activation Behaviors: 1. If Rambo is within 2 spaces, move away from him. 2. Attack Rambo.
Enemy Activation
When an Enemy Card activates, each Enemy figure matching the card executes all Activation Behaviors listed on the card, in numbered order.
Each Activation Behavior is a move or attack. Each Enemy figure executes as much of each behavior as it is able to.
If there is ever a conflict due to multiple Enemies of the same type activating at the same time, the Enemy closest to Rambo acts first.
Enemy can't move/attack. If it's not possible for an Enemy figure to follow a behavior (for example, if an Enemy can't attack Rambo because he's Hidden), they skip that behavior, but still execute the remaining behaviors on their list.
Enemy Movement
Whenever an Enemy figure moves towards you or another destination, it must respect the following rules:
- A. Each time an Enemy moves, they move their full Movement Stat towards their destination, if able.
- B. Enemies always choose the shortest possible route to their destination. The Enemy takes the shortest possible route to reach Rambo.
- C. Enemies cannot occupy the same space as another figure.
- D. If an Enemy reaches their destination (or an adjacent space if they are moving towards a figure), they stop moving.
- E. Impassable Terrain: Enemies cannot move through red lines on the Map, and will instead move around them, if able. (See p. 8.)
Diagram notes: This Enemy has a Movement Stat of 2, so it travels 2 spaces each time it moves. The Enemy takes the shortest possible route to reach Rambo. This Enemy also has 2 Movement, but stops after 1 Movement, since it is adjacent to Rambo and cannot move into his space.
Enemy Attacks
In order for an Enemy to make an attack on you, all of the following must be true:
- Visible: You are not Hidden (See "Hidden Token.")
- In Range: You are within the attacking Enemy's Range Stat R (See "Attacking," p. 12.)
- Clear Line-of-Sight: The attacking Enemy's Line-of-Sight is not blocked (See "Line-of-Sight," p. 13.)
When an Enemy successfully attacks you, you take Damage equal to the Enemy's Damage Stat, with any bonus Damage or reductions applied (such as Armor or Valor). Mark this by placing Damage tokens on your Health Track. (See "Health & Damage.")
If an Enemy is unable to attack you, they do not attack. They still execute any remaining behaviors.
Junior Deputies have a Range Stat R of A, meaning they must be adjacent to attack. The Deputy on the left can attack, but the Deputy on the right cannot.
Hidden Token
When you have the Hidden Token, enemies will not move towards or attack you.
You lose the Hidden token as soon as you use an action or end a move adjacent to an Enemy.
While Hidden, your attacks deal +1 Damage. (But remember, as soon as you attack, you lose the Hidden token.)
If Rambo is Hidden, Enemies won't attack him regardless of Range or LOS.
Spawning New Enemies
On some Missions, you will be instructed to spawn new Enemy figures at a Deployment Zone. When this happens, place the new figure on the numbered DZ token (see below). If there is already another figure there, instead place the new figure in the nearest legal space. If there are multiple legal spaces, you may choose one.
When an Enemy spawns at a DZ #2, place them on the DZ token with a "2" on it. If there is another figure there, place them in an adjacent space.
Out of Enemy figures? If you are instructed to spawn an Enemy figure and there are no figures or tokens of that type remaining, nothing happens.
Game Icons
- Actions (C): How many actions this Hero can take.
- Movement (M): How far this figure can move.
- Health (H): How much Damage this figure can take.
- Armor (O): Used by Heroes to block Damage.
- Valor (V): Used by Heroes to gain special bonuses.
- Resistance (N): How much this figure reduces Damage from incoming attacks.
- Targets (T): How many figures this attack targets.
- Range (R): How far the target can be from the attacker (measured in areas, not spaces!).
- Damage (D): How much Damage this attack deals to the target.
- Persistent Effect (P): This effect lasts until the start of the active Hero's next turn.
Note on Persistent: the Game Icons entry above describes a Persistent effect as lasting until the start of the active Hero's next turn, while the Clear Effects step (p. 7) and the Tactics Cards section (p. 9) say it lasts until the Clear Effects step of the next round. Both wordings are as printed.