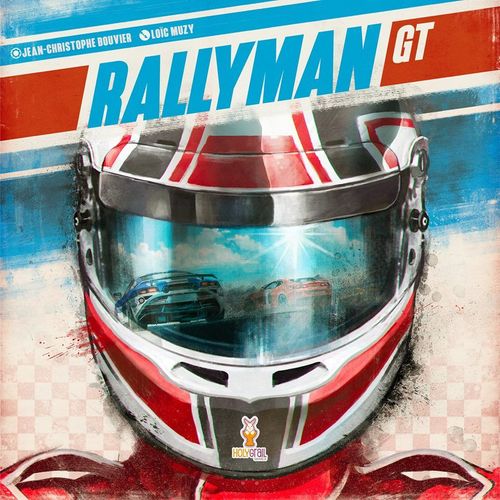
Rallyman: GT
Rallyman: GT Rulebook
Table of Contents
Table of Contents
Components
- 1 Rulebook
- 12 Dashboards
- 6 Driver cards
- 6 Gaming aids
- 31 double-sided Track tiles
- 1 Pit Stop tile
- 1 Round marker
- 1 Damage token bag
- 160 Focus tokens
- 6 cars
- 48 Gear Markers
- 11 Dice: 6 black Gear dice, 3 red Brake dice, 2 white Coast dice
- 42 Damage Tokens: 6 "minus 1 Gear" (dark/black) tokens, 6 "minus 1" red tokens, 6 "minus 1" white tokens, 12 green flag tokens, 6 yellow flag tokens, 6 weather change tokens
Gaming Aid
Dice
- Gear Dice (black): numbered 1 to 6. Allows you to move one space whilst changing speed. Must be played in ascending and/or descending order.
- Coast Dice (white): allows you to move one space whilst maintaining the same speed.
- Brake Dice (red): allows you to move one space while skipping one or more Gears to reduce your speed drastically. Must be rolled at the same time as the Gear die of your desired speed.
Each Die may only be rolled once per turn.
Tokens
- Focus token: Earned when rolling a Flat Out movement (ie. all your dice at once). May be spent to secure dice rolls.
- Gear Markers: The number indicates the Gear in which the car finished its previous turn. The colour (black/white) indicates whether the car has played this round or not.
- 00: The car in question must skip its next turn. Replace this with a 0 marker after doing so.
Setup
1. Build Your Track
The hexagonal tiles in Rallyman: GT allow you to build a track for any occasion. Feel free to let your imagination run wild as you build your own dream circuit!
When building your own circuit
Here are a few guidelines to help you:
- Short race ~ 30 minutes: 15 tiles in 1 lap
- Medium-length race ~ 45 minutes: 18 tiles in one lap or 12 tiles in 2 laps
- Long race ~ 60 minutes: 21 tiles in 1 lap or 16 tiles in 2 laps
(Estimations based on a 4-player game)
You can also find ready to play track designs later on in this rulebook (See page 24).
Note: The Pit Stop tile should be placed adjacent to your track, but is not part of it.
2. Focus Tokens
Place the Focus tokens in piles close to the track, so that all of the players can reach them easily.
3. Damage Tokens
Put the Damage tokens into the Damage token bag and place it close to the track.
4. Colour
Each player chooses a colour and takes the corresponding car model, Driver card, Gear markers, and Asphalt tire Dashboard. Each player arranges these in front of them, with their Dashboard showing the Sunny weather condition.
For your first game
We recommend starting with the Asphalt tires and Sunny weather. Later on however you can choose the starting weather conditions for your track and tires for your car (See page 21).
The other Dashboards are placed to one side. Players can change their Dashboard during the game by making a Pit Stop.
5. Determining the Starting Order
To determine the starting order, take one Gear marker from each player and draw them randomly one by one. The cars are placed onto the starting grid as they are drawn. The first player's car is placed in Pole Position. Pole Position is the first row space of the inside lane (as determined by looking ahead to the first corner tile of the track.)
Example: In this example, the Blue player's token was drawn first, so they start in Pole Position. Red is second, Yellow is third, Green is fourth and so on.
6. Gear and Round Markers
Each player places their "0" Gear marker white side up next to their car. The Round marker is placed on the table white side up, visible to all players.
The first player takes the dice and the race can now begin! Drivers, start your engines!
The Game
In Rallyman: GT, players will be racing each other around the track, vying to be the first car across the finish line!
Rounds
In Rallyman: GT, the order of play isn't constant - it can, and will, change each round, depending on how the race progresses. To help you to keep track of rounds, we've split them into "white" rounds and "black" rounds.
A game of Rallyman: GT is made up of alternating "white" and "black" rounds. Each player gets one turn each round.
The Round marker has a white side and a black side, as do the Gear markers.
Gear markers allow you to keep track of the speed of a vehicle in between turns. At the end of their turn each player puts down a Gear marker of the colour of the next round. This allows you to immediately tell who has already played their turn this round.
This Round marker is there to remind you which round is in play and therefore which Gear markers indicate if a car has or hasn't played yet. At the end of a round the Round marker is flipped over and a new one can begin.
Example: Here we can see that it is the black round and therefore, the Red and Green cars have already played (as they're showing white, the colour of the next round) and the Yellow and Blue cars still have to play this round.
At the beginning of each round, you must first determine the order of play.
Determining Order of Play
In Rallyman: GT, it's all about speed! Even the smallest difference in your speed or positioning can mean going first in a round or not. Going first gives you the chance to get ahead of your opponents and potentially outmanoeuvre them, whereas going last can free up a lot of the track in front of you, giving you more options for your movement. Managing when you want to play in a round can open up some great opportunities during a race!
Order of play at the start of each round is determined by speed, then by the position of each car in case of a draw.
Order of priority: SPEED > DISTANCE > POSITION
- Speed - Start by identifying the fastest car. The car with the highest Gear marker always plays first, no matter where they are on the track.
- Distance - If two or more cars are going at the same speed, then order of play is determined by how far along the track they are. The car furthest ahead plays first.
- Position - In case of a draw in terms of speed and distance, the car situated on the inside lane of the next corner plays first. A "corner" is a section of track with speed limitations (See Corners page 10).
In this example, order of play is as follows:
- The Blue car plays first - of the two cars in 5th Gear, the Blue car is on the inside of the next corner.
- The Yellow car plays next as it is also in 5th Gear.
- The Red car plays next - of the two cars in 2nd Gear, it's the furthest along the track.
- The Green car will play last.
The Turn
During their turns, players will be using the dice available to them to move their car around the track, navigating turns and other drivers whilst pushing themselves as far as possible!
Once order of play has been established, each player takes their turn one after the other.
During their turn a player will do the following:
- Choose their dice.
- Roll their dice and move their car.
Choosing Your Dice
During their turn, players will use dice to accelerate, brake, and coast their way around the track. As long as you follow a few simple rules, you're free to combine these dice as you please. Getting creative with your dice combinations is the key to getting ahead!
During the game, a player can find all the information they need for their car on their Dashboard.
The Dashboard
The Dashboard indicates your car type (A), as well as the Tires you're using (B), and the current weather conditions (C).
During a race, this translates into how many dice the player will have at their disposal (D), the number of Warning (exclamation-mark triangle) results the player can roll before suffering a Loss of Control (E), and its consequences (F) (See page 16). Any Damage suffered during the race will also be shown on the Dashboard via Damage tokens and can modify these values.
There are two types of Tires
- Asphalt Tires: Tires that perform very well in dry conditions, but will lose grip in the rain.
- Rain Tires: Tires that can maintain good grip in rainy conditions, but won't perform as well as Asphalt Tires in dry conditions.
You can change your Tires or perform repairs during a race by making a Pit Stop, which allows you to switch your Dashboard with another of your player colour and/or remove any Damage tokens (See page 18).
Standard Dashboard - "Asphalt Tires in Sunny conditions":
- Six Gear dice (Black), two Coast dice (White), and three Brake dice (Red) are available to the player.
- Loss of Control occurs if the player obtains 3 Warning symbols (See Loss of Control).
- The table indicates the consequences of a Loss of Control.
During their turn, a player can use as many dice as their Dashboard allows them. However, each individual die can only be used once per turn.
- The Black Dice or "Gear" dice are used to accelerate or decelerate progressively.
- The White dice or "Coast" dice are used to maintain the same speed.
- The Red dice or "Brake" dice are used to brake hard, slowing your car by more than one gear at a time.
All of the dice have Warning symbols. These symbols have no effect until the player accumulates the amount shown on the Dashboard during their turn, in which case they will lose control of their car! (See Loss of Control.)
You can combine acceleration, deceleration, braking, and coasting in any way you like during your turn to get the best out of your car!
To help plan their trajectory, players lay the dice out on the track in order to indicate their movement for the turn.
Example: Here we can see that the Blue Driver is going to brake as they go into their first turn. They'll then accelerate as they come out, moving to the inside lane in preparation for the next turn!
Rules for Using the Dice
1. Black Gear Dice
Gear dice are used to move whilst accelerating or decelerating progressively.
The six faces of the Gear dice show the numbers 1, 2, 3, 4, 5 and 6.
The black dice represent the gears of your car.
Going up or down through Gear dice is often referred to as "changing gears" or being "in" a certain gear.
Each die allows you to move your car forward one space, whatever the result of the roll (number or Warning symbol).
Gear dice must be played in ascending and/or descending order.
Example: Raphael starts the race at a speed of 0. He must use his Black Gear die with a value of 1 to put his car into 1st Gear. He can then move into 2nd Gear, and so on.
When starting your turn at a speed higher than 0; however, your first die may be:
- one Gear higher than your initial Gear.
- the same Gear as your initial Gear.
- one Gear lower than your initial Gear.
Example: It's Olivier's turn. He is currently in 4th Gear. He decides to start with the 5th Gear dice before decelerating down through 4th, then 3rd, then 2nd as he heads towards a sharp corner.
2. White Coast Dice
Coast dice are used to move while maintaining the same speed.
Each Coast die allows you to move your car forward one space while remaining in your current Gear, whatever the result of the roll (blank face or Warning symbol).
A Coast die can be used at the start of your turn, during your movement, or at the end of your turn. You can even choose to only use Coast dice during your turn. You can alternate between black and white dice as you see fit.
Note: You cannot use a Coast die if your current speed is 0 or 00.
Example: Owen takes a tricky corner in 3rd Gear and uses his white Coast dice to maintain his speed instead of accelerating.
3. Red Brake Dice
Brake dice are used to drastically reduce speed when combined with another die.
Using one or more red Brake dice combined with a black Speed die allows you to move forward one space while reducing your speed by more than one Gear.
To do this, you must play as many Brake dice as the number of gears you wish to "skip" along with the Gear die of the speed you wish to slow down to.
Example: Georgina brakes before a corner, going from 5th Gear to 2nd Gear. To do this, she'll have to roll her 2nd Gear die, along with two Brake dice, as she's skipping 2 Gears (4th and 3rd).
Example: JC. brakes before a corner, going from 3rd Gear to 1st Gear. He'll have to roll his 1st Gear die along with one Brake die, as he's skipping one Gear (2nd Gear).
Note: A player cannot use dice to reduce their speed to "0" - the minimum speed is 1st Gear.
Putting it all together
By combining different dice in clever ways, you can overcome any obstacle the track - or your opponents - can throw at you. You can even accelerate and decelerate with your Gear dice in the same turn. Just remember the golden rule: each die can only be used once per turn.
Example: Patrick starts his turn in 4th Gear. He then uses the 4th Gear dice to start his movement, accelerating up to 6th. Next, he uses two Brake dice to slow down into 3rd Gear before reaching a corner. He then opts to decelerate even further down through 2nd and 1st. This means he may play last next round, but he's in a good position for his next turn: his car is blocking a strategic corner space, which could make things more difficult for other drivers. Of course, he could, if he so wished, use his Coast dice to continue moving forward in 1st Gear.
Note: You must move your car at least one space per turn, if you are able to do so.
The Rules of the Road
Because a track is never just a straight line, and you'll be sharing the road with other drivers, there are a few rules you'll have to bear in mind when planning your trajectory!
Moving
There can only be one car on any space at a time.
Cars must always move forwards, either in a straight line (along the same lane) or diagonally (changing lanes), but never laterally.
You can change lanes as many times as you like during your movement.
Note: In Rallyman: GT, the edge of a tile always represents the edge of a space.
Corners
"Corner" spaces have special restrictions, represented by a number and/or a Warning symbol.
Normal Corners
Your tracks will include plenty of standard corners, and navigating them efficiently can give you a real advantage.
A number inside a circle, placed in the centre of a space, indicates the highest Gear a player can be in whilst occupying this space.
You may of course be in a lower Gear than the one indicated with no penalty.
Entering this space at a higher Gear than the one indicated results in an immediate Loss of Control.
You may accelerate whilst leaving this space.
Example: Quentin moves into a Corner space. The speed limit shown in the centre of the space is "2" and he is currently in 2nd Gear. He therefore suffers no penalty and accelerates up to 3rd as he leaves the corner space.
Dangerous Corners
Dangerous corners require more of a risk. You'll need to choose between tackling them at a slower speed or taking your chances to get ahead of your opponents.
A number inside a triangle with a "!" placed in the centre of a space indicates the highest Gear a player can be in whilst occupying this space.
However, if a player occupies this space at the maximum speed allowed, they must immediately add a Warning symbol to the result of their roll. This additional Warning symbol may cause an immediate Loss of Control, depending on their previous roll results for the turn.
You may of course be in a lower Gear than the one indicated with no penalty.
Entering this space in a higher Gear than the one indicated results in an immediate Loss of Control.
You may accelerate whilst leaving this space.
Example: Kayla moves into a corner space with a dangerous speed restriction of 5!. She is in 5th Gear when entering, and so does not suffer an immediate Loss of Control. However she is at the maximum speed allowed; therefore, the corner space forces her to take an additional Warning result on top of her dice rolls. If she has already accrued some Warning results this turn, it could spell trouble!
Sharp Corners
Particularly sharp corners require you to take a perfect line through them or slow down even further.
A number positioned on a dotted line at both ends of a space - along with a circled number in the centre - indicates that depending on how the player enters this corner space, the speed limit shown in the centre of the space can change.
If a player enters one of these spaces and their trajectory would have them cross the dotted line directly (meaning via the same lane), then the number shown in the center is replaced by the one on the dotted line.
Additionally, if a player leaves this space and their trajectory would have them cross the dotted line directly (meaning without changing lanes), they must treat the next space as having a speed restriction equal to the number on the dotted line.
However, players may avoid these restrictions by moving in and out of these zones diagonally.
The perfect line
This represents the idea of the "perfect line" used in real racing. By moving in and out of these corners diagonally, players can take the corner at a much softer angle. That is, if your opponents have left you enough space of course!
Note: The speed limit in the centre of the corner space always applies, even if a player enters it diagonally.
Example: Eric is coming up to a sharp corner. His opponent has placed themselves so that Eric must cross the dotted line directly, meaning that Eric must treat the speed limit of the Corner space as a 2. As there is space at the end of the corner however, Eric can exit it by moving diagonally. Since his move does not cross the dotted line directly, he does not need to apply the same speed limit to the next space, meaning he can accelerate out and continue on with his movement.
Additionally, there are sharp corners with a "!" placed at both ends of a space instead of a number. Following the same rules, a player whose car crosses the dotted line directly whilst entering or leaving this space must immediately add a Warning symbol to the result of their roll. These are cumulative, so crossing both (and taking the corner VERY sharply) in one turn would add two Warning symbols to a player's roll.
As above, you can move in and out of these spaces diagonally to avoid these effects.
Triple lane corners
Corners which feature a double inside lane (like the one shown here) represent particularly sharp turns. On such corners, you may not move outwards from the inside lane when moving into the corner space. You must move directly forward and therefore suffer the penalties shown.
Special cases
We've tried to give you as much variety as possible with the track tiles in Rallyman: GT so that you can build some truly exciting racetracks! We've also tried to be as throrough and precise as possible when explaining the rules to all these elements. However, it is possible that you may come across unusual cases that may not be specifically covered here.
In situations like these, we recommend using the most logical solution possible. If players don't agree, take a vote on it. If you still can't reach a concensus, flip a coin. Whatever the case, don't let a small detail slow down your race!
Overtaking
Your opponents represent a far greater challenge than any corner! Getting past other drivers and preventing them from blocking your way can be tricky...
To enter a space adjacent to another player's car, you must use a Gear die equal to or higher than the current Gear of the opponent's car. Once your car is beside theirs, the rest of their movement can be at any speed.
For example, a car in 3rd Gear can be alongside a car in 1st, 2nd or 3rd Gear. However, it cannot move next to a car in 4th, 5th or 6th Gear.
You may overtake by moving diagonally between two cars.
Example: The red player's car is in 5th Gear as it pulls up alongside the blue car. It accelerates again to 6th and moves diagonally as it moves adjacent to the yellow car. The player has matched or beaten the Gears of the other cars as they move, so they're allowed to overtake.
Now that their vehicle is beside the yellow car, the player may continue their movement as per normal, which should give them a chance to slow down before the next turn!
Blocked
Whilst moving, if you cannot reach the speed necessary to overtake other cars on the track, or you find yourself impeded in some other fashion then you are blocked. Your movement ends immediately in your current space and in your current Gear - flip over your Gear marker to show that you have played your turn.
Example: Here the Yellow car cannot overtake the Blue and Green ones as they are taking up all of the track.
Example: Here the Red car cannot overtake as they do not have enough space to accelerate and pull up alongside the Orange car.
Be aware of everything on the track; your dice, the corners, and even your opponents can be used to your advantage.
Some clever driving will catch your opponent off guard, letting you blaze your way to the top of the podium...
ONCE YOU'VE PLANNED OUT YOUR TURN, IT'S TIME TO BURN RUBBER!
Rolling the Dice and Moving Your Car
With your dice now laid out, do you play it safe OR do you risk it all to leave your opponents in the dust?
Once you've chosen your dice and placed them on the track to plan your movement, you must now choose whether to roll your dice one at a time, or all at once!
1. Rolling Dice One by One
This is the safe option. It brings no further rewards but, if things are looking bad, you can end your movement whenever you please in order to avoid spinning out.
Once a player has planned out their move, they may roll their dice one by one (except for any Brake dice, which must be rolled at the same time as a Gear die). The player's car is moved one space along the track per die rolled, whatever the result.
Rolling the dice one by one allows players to keep an eye on how many Warning signs they roll, allowing them to end their turn prematurely to avoid a Loss of Control.
Any dice that roll a Warning symbol are kept to one side. If a player reaches the Warning limit shown on their Dashboard, they suffer a Loss of Control (See page 16). If this happens, their car is moved to the space where the final Warning symbol occurred, then the Loss of Control is resolved.
Don't forget to add any additional Warning symbols that you may encounter during your movement (such as on corner spaces) to your roll.
2. Going Flat Out!
This is a risky option, but risks are always rewarded in Rallyman: GT! Rolling all your dice at once means that you're taking a calculated risk, but it also means you'll be able to generate Focus tokens, which can be very helpful later on in the race.
If you're feeling lucky, you can choose to roll your dice all at once! This is called going Flat Out.
To go Flat Out, a player lays out their trajectory as normal. They then mark the space where their movement is supposed to end with the relevant Gear marker.
Then, the player takes all of the dice they planned to use and rolls them all at once.
Once they've made their roll, they check their results. If the player rolls less than the Warning limit shown on their Dashboard, they've made it! The player moves their car to the space marked with their Gear marker and their movement ends.
Don't forget to add any additional Warning symbols that you may encounter during your movement (such as on Corner spaces) to your roll.
If the player rolls equal to or more than the limit of Warning symbols shown on their Dashboard they suffer a Loss of Control!
Before resolving the Loss of Control, the player must first take all of the dice they rolled (without modifying their results) and lay them back out on the track as if they were planning a normal move. They do not have to follow the same path as they originally planned, or use all of their original dice, as long as enough are placed to cause a Loss of Control.
The dice must still be placed as per the normal rules however.
Once the dice are laid out, the Loss of Control will be resolved on the space where the Warning symbol that caused the Loss of Control occurs, whether because it was rolled or imposed by corners or other effects.
This allows the player some choice as to where and at what speed they will resolve their Loss of Control (See page 16).
Example: After planning his trajectory, Gareth decides to make a Flat Out roll! On his roll he suffers a Loss of Control. Gareth decides to reorganize his trajectory, deciding to not move as far along the track in order to avoid the effects of a dangerous track section (with a red sign) when resolving his Loss of Control.
However, whether your roll is successful or not, going Flat Out will gain you Focus tokens!
Focus Tokens
Focus tokens represent your driver's daring, skill, and concentration! These can be collected during a race when performing risky Flat Out moves. They can then be spent to ensure the success of even the most dangerous manoeuvre later on.
You gain one Focus token for each black or white die used in your Flat Out roll (even those with a Warning sign). These tokens are taken from the piles placed on the tabletop.
Red Brake dice do not gain any Focus tokens.
Going Flat Out is the only way to gain Focus tokens.
In the above example, despite the fact that his turn ended in a Loss of Control, Gareth still takes his 5 Focus Tokens. These will help him get back in the race after his crash!
Using Focus Tokens
Focus tokens allow you to "secure" your dice. This means that you don't have to roll them and, therefore, can avoid any possible Warning results.
A player may only use Focus tokens on their dice when rolling them one by one, not during a Flat Out move.
Players may use Focus Tokens on their dice at any time before a dice is rolled. A rolled die may never be modified.
Generally, it's a good idea to use Focus tokens when you've already rolled a dangerous amount of Warning symbols during your turn, to avoid suffering a Loss of Control.
A player can secure as many dice as they like during their turn, as long as they can pay for them:
- The first die each turn costs one Focus token to secure.
- The second die costs two Focus tokens to secure.
- The third die costs three Focus tokens to secure.
- And so on...
When securing a die, a player must discard the required number of Focus tokens back to one of the piles located on the tabletop before removing the dice from the track. They may then continue on with their turn, rolling or securing their dice as they see fit.
A Focus Token does not allow you to ignore a Warning symbol imposed by a corner or other effects.
Players may use Focus Tokens to secure a dice roll involving Brake dice. However, you must secure all of the dice that are part of that roll. If the player does not have enough tokens, they may not secure that roll.
Jonathan wants to secure a Brake roll involving one Gear die and two Brake dice. There are three dice that are part of this roll, so it will cost him 6 Focus tokens (1+2+3) to secure it. If he had already secured other dice during his turn, this would cost him even more!
Loss of Control
Racing is an intense sport and in the heat of the moment, mistakes can send you careening off the track! This can lose you precious time and damage your car.
If a player rolls as many or more Warning symbols than the limit indicated on their Dashboard, or does not respect the speed limit on a Corner space, then they suffer a Loss of Control.
Important: A Loss of Control is always resolved on the space where the final Warning symbol that caused the Loss of Control was obtained, whether it was rolled on a die, received from the track, or the result of other effects.
A Loss of Control immediately ends a player's turn after resolving its effects.
To resolve a Loss of Control, the player checks their Dashboard. Both the speed of the car and the Danger Level of the tile where the Loss of Control occurred contribute to its effects.
The column on the left indicates the Gear the car was in when the Loss of Control occurred. It will indicate what speed a player's car will be placed in following the Loss of Control:
- 0 Gear: The car skids out! Turn the car to face the wrong way, but leave it in its space on the track. The player places the "0" Gear marker next to the car. The car may be turned around and played normally next turn.
- 00 Gear: The car spins off the track! The car is placed to the side of the track, closest to the space where the Loss of Control occurred. If this space is in the centre of the track, the player may choose which side they spin off. The player places the "00" Gear marker next to the track. During their next turn the player may place the car back onto the track, facing the wrong way (see above) and place the "0" Gear marker but may perform no other actions. The car may be turned around and played normally the turn after.
If a player tries to place their car back onto the track and another car is occupying the space, they may not come back onto the track that turn! Flip the "00" Gear marker over and lose another turn.
The three other columns indicate the Danger Level of the tile where the Loss of Control occurred. Each tile has colored panels at each end of the track which indicate their Danger Level.
The speed of the car and the Danger Level of the tile will indicate whether the vehicle takes damage or not. For each black square in the corresponding space, the player must draw one Damage token from the bag.
Example: Jamie suffers a Loss of Control whilst in 4th Gear and on a tile with an orange Danger Level. He must therefore draw one Damage token and skip his next turn. His car is placed on the side of the track where the Loss of Control happened, along with the "00" Gear marker and he draws one Damage token.
Damage Tokens
Damage tokens represent a variety of consequences that may befall you should your luck run out!
When drawing a Damage token, it is placed on your Dashboard.
Gear Damage
The number of Gear dice the player may use each turn (no matter their value) is reduced by one for each of these tokens present on their Dashboard.
Brake Damage
The number of Brake dice the player may use each turn is reduced by one for each of these tokens present on their Dashboard.
Coast Damage
The number of Coast dice the player may use each turn is reduced by one for each of these tokens present on their Dashboard.
These tokens may reduce the availability of dice to a minimum of 0. Any further tokens that would reduce this further are still kept even if they have no further effect.
Note: Weather and Tires affect the number of dice available. So if one of these changes, you may find yourself with more or less dice than you thought!
Example: Andrew starts his turn with a Gear Damage token and a Brake Damage token. During his turn he'll only be able to use five Gear dice (no matter their value), two Brake dice and two Coast dice.
Weather Change
All players flip over their Dashboards, taking note of the new Warning limit and available dice.
Yellow Flag
A Yellow Flag token is placed next to the player's car when drawn, not on their Dashboard.
Whilst on the track, the Yellow Flag restricts overtaking.
A player may not move alongside another player's car during this time.
However, players move past cars at 0 or 00 speed (including the car with this token) freely.
Once the car with the Yellow flag moves, the Flag token is removed and placed on the player's Dashboard.
Green Flag
If a Green Flag is drawn, you got lucky! Green Flags have no effect.
Pit Stops
If your car starts taking too much damage or your tires can't cope with the weather conditions, never fear - you can always make a Pit Stop!
To make a Pit Stop, the player must end their turn in 1st Gear in a space with no speed or Warning restrictions (meaning not on a corner space) and at the edge of the track (meaning not in the central space on a section with three lanes).
The Player May Then...
- Place the 0 or 00 Gear Marker (depending on the option chosen) next to the space where their car ended its movement.
- Place the car in one of the three lanes on the Pit Stop tile (which does not need to be adjacent to where the car ended its movement), as listed below:
Pit Stop Lanes
-
Tire Change: This lane allows the player to change their Tires by swapping out their Dashboard for another of the same colour and category, but with a different Tire type.
Place the 0 Gear marker next to the track if you choose this action. The player may place their car back onto the track at the start of their next turn and move normally.
-
Repairs: This lane allows the player to remove Damage tokens from their Dashboard. The player takes all the Damage tokens on their Dashboard and mixes them back into the Damage token bag.
Place the 00 Gear marker next to the track if this option is chosen. During their next turn, the player may only replace the 00 Gear marker with a 0 Gear marker and place their car back on the track. They may play as normal on the turn after.
-
Repairs and Tire change: This lane allows the player to change their tires and perform repairs. The player takes all the Damage tokens on their Dashboard and mixes them back into the Damage token bag. Then, they may swap out their Dashboard for another of the same colour and category, but with a different Tire type.
Place the "00" Gear marker next to the track if this option is chosen. During their next turn, the player may only replace the 00 token with a 0 token and place their car back on the track.
If a player tries to place their car back onto the track and another car is occupying the space, they may not come back onto the track that turn! Flip the 00 Gear marker over and lose another turn.
Note: As a Loss of Control ends your turn, you may not perform a Pit Stop immediately after a Loss of Control.
End of the Turn
A player's turn ends when...
- They have finished their move action.
- They are blocked.
- They suffer a Loss of Control.
Whatever the cause, the player places a Gear marker showing their final speed and the colour of the next round next to their car.
If the player did not suffer a Loss of Control, the player places a Gear Marker equal to the value of the last Gear (black) die they rolled that turn.
If the player only rolled Coast (white) dice this turn or did not move at all because they were blocked, they keep the same Gear marker, turning it over to the colour of the next round.
If the player suffered a Loss of Control this turn, they place a 0 or 00 Gear marker, depending on the results of their Loss of Control.
Example: Patrick starts his turn in 5th Gear on a black round and, after a successful move, ends his turn in 2nd Gear. He places his 2nd Gear marker down with the white side showing to indicate that he has already played this turn.
Once all players have had a turn during the round (so all the Gear markers are showing a colour different from the Round marker), the Round marker is flipped over. A new round begins with players determining the new order of play, and the race continues!
End of the Game
A Game of Rallyman: GT is composed of one or more laps around your chosen circuit.
The first player to cross the line during their turn is the winner!
You may of course continue the race so that the other racers can compete for 2nd, 3rd, 4th place, and so on.
CONGRATULATIONS ON YOUR VICTORY!
Advanced Rules
Once you're familiar with the core rules for Rallyman: GT, you can try out these additional rules!
Setting Up the Race
You may decide to start the race in the weather condition of your choice: Sunny or Rain.
In this case, you may also allow Drivers to choose which Tires they wish to start with.
Make sure all players have their Dashboards flipped to the correct weather side at the start of the race!
Flying Start
With Flying Start, you can go straight to 2nd Gear instead of 1st Gear when starting from 0.
When a player starts their turn in Gear 0, they may go straight to their 2nd Gear dice, ignoring the standard rules and skipping 1st Gear.
When the player resolves their move, whether rolling one by one or moving Flat Out, check the result of the 2nd Gear die: if it's a Warning symbol the player's turn ends immediately. They move forward one space and end their turn in 2nd Gear. They do not suffer a Loss of Control.
If the player was going Flat Out and would have suffered a Loss of Control as well as this effect, the Loss of Control is ignored.
Note: You can perform a Flying start on the starting line or when coming back on from a Loss of Control.
You can secure the 2nd Gear die with Focus tokens.
Qualifiers
To prepare for a particularly important race, you may decide to play a qualifying round instead of drawing the starting order at random.
Each player completes one lap of the track using the Solo rules below. The player with the fastest time starts in Pole Position. The player with the second fastest time starts in second position, and so on.
If they own their own copy of Rallyman: GT, players can perform their qualifying lap prior to the race, saving you some time for the big event!
Solo Mode
In Solo Mode, there's just you and the track. Push your driving skills and your luck to the limit in order to achieve the fastest score possible!
Setup
Follow the normal setup stages as described at the start of this book. You'll then need a score sheet to keep track of your time. You can photocopy the score sheet on the page 23 or download it from the holygrail.games website.
On your score sheet, note down:
- The track name
- Your name
- Your car category
- Your Tire choice
- The weather
- The date
YOU'RE READY TO GO!
Rules
The Solo Mode follows exactly the same rules as a standard game of Rallyman: GT with two exceptions:
- You may not perform Pit Stops
- Any weather tokens drawn from the Damage bag count as a Green Flag.
Note: The weather is normally fixed for Solo laps. If you wish, you may choose to include the random weather changes in your lap. If you do so, ignore the rule above.
The Turn
Your turn plays out exactly as it would in a normal game of Rallyman: GT. You choose your dice, roll them and move your car.
At the end of your turn however, after placing down your Gear marker next to your car, record your turn on your score sheet. Each turn, tick the box that corresponds to your final speed (the one shown on your Gear marker).
Note: If you're playing with random weather changes, you can write a S (sunny) or R (rain) instead of an X in each box to indicate the weather in effect during that turn.
Each turn will add time to your score. The higher the Gear you finish your turn in, the less time will be added.
It's up to you to decide when to push for a higher speed and when to take a few extra seconds on one turn in order to go big on your next one!
End of the Game (Solo)
At the end of the game, add up the total time for each row. This is equal to the number of times you ended a turn in a specific Gear, multiplied by the seconds it represents. Once you've done this for each gear and totalled them up, you get your "Track" Time.
In the example above, JC finished in 6th Gear three times (on his 1st, 7th, and 8th turns), which adds a total of 10 x 3 = 30 seconds to his overall time.
Gaining Seconds
At the end of a Solo lap, you reduce your time for each Focus token you possess. So you'll need to decide whether Focus tokens are best used to secure dice, or to lower your overall time.
Count your Focus tokens at the end of the lap. Each token represents 1 second.
Final Time
To obtain your final time, subtract the seconds gained with your Focus tokens from your track time. This is your final lap time.
Note your final time at the bottom of your score sheet. Now all you have to do is try and beat it...
There are solo challenges taking place every month online where drivers can compete against one another for the best time for a specific track. Be sure to drop by the holygrail.games website or other big board gaming forums and see what challenges await you!
Solo Mode Score Sheet
You can photocopy the score sheet on this page or download it from the holygrail.games website.
Header boxes to fill in: track name; driver name; date. Weather checkboxes: Sunny / Rain. Car category checkboxes: GT6 / GT6 BOP / GT5 / GT5 BOP / GT4. Tire checkboxes: Asphalt Tires / Rain Tires / Soft Tires.
The grid has one row per final speed (6, 5, 4, 3, 2, 1, 0, 00) and one column per turn (T1 through T12), plus a time column:
| Final speed | Time per turn |
|---|---|
| 6 | x 0:10 |
| 5 | x 0:15 |
| 4 | x 0:20 |
| 3 | x 0:30 |
| 2 | x 0:40 |
| 1 | x 0:50 |
| 0 | x 1:00 |
| 00 | x 2:00 |
Totals at the bottom: Track Time = , Seconds gained = , Final Time = .
Ready to Play
Track 1
- 1 x 101a
- 1 x 10²b
- 1 x 10³b
- 1 x 10⁴b
- 2 x 10⁵b
- 2 x 10⁶b
- 1 x 10⁹b
- 1 x 110b
- 2 x 111b
- 1 x 112b
- 1 x 114b
- 1 x 115b
Track 2
- 1 x 101a
- 1 x 10²a
- 1 x 10³a
- 2 x 10⁴a
- 2 x 10⁵a
- 1 x 10⁶a
- 2 x 111a
- 2 x 112a
- 2 x 115a
- 1 x 116a
- 1 x 117a
Track 3
- 1 x 101a
- 1 x 10²b
- 1 x 10³b
- 1 x 10⁴b
- 1 x 10⁵b
- 2 x 10⁶b
- 1 x 10⁹b
- 2 x 111b
- 1 x 112b
- 1 x 114b
- 2 x 115b
- 2 x 116b
Track 4
- 1 x 101a
- 1 x 10²a
- 2 x 10³a
- 1 x 10⁵a
- 2 x 10⁶a
- 1 x 110a
- 1 x 111a
- 1 x 112a
- 1 x 113a
- 2 x 115a
- 2 x 117a
- 1 x 118a
Track 5
- 1 x 101a
- 1 x 10²a
- 1 x 10³a
- 1 x 10⁴a
- 1 x 10⁵a
- 1 x 10⁶a
- 1 x 10⁶b
- 1 x 10⁷b
- 1 x 10⁸b
- 1 x 10⁹b
- 1 x 111b
- 1 x 112b
- 1 x 113b
- 1 x 117b
- 1 x 118b
- 1 x 119b
- 1 x 120b
Track 6
- 1 x 101a
- 1 x 10²a
- 2 x 10³a
- 2 x 10⁴a
- 1 x 10⁵a
- 1 x 10⁶a
- 1 x 10⁷a
- 1 x 10⁹a
- 1 x 111a
- 1 x 112a
- 1 x 113a
- 1 x 116a
- 1 x 117a
- 1 x 118a
Track 7
- 1 x 101a
- 1 x 10²b
- 2 x 10³b
- 1 x 10⁴b
- 1 x 10⁵b
- 2 x 10⁶b
- 1 x 10⁷b
- 1 x 10⁸b
- 1 x 10⁹b
- 2 x 111b
- 1 x 112b
- 1 x 113b
- 1 x 114b
- 1 x 116b
- 1 x 117b
Track 8
- 1 x 101a
- 1 x 10²a
- 3 x 10³a
- 3 x 10⁴a
- 2 x 10⁵a
- 1 x 10⁶a
- 1 x 10⁷a
- 1 x 110a
- 1 x 111a
- 1 x 113a
- 1 x 114a
- 1 x 117a
- 1 x 118a