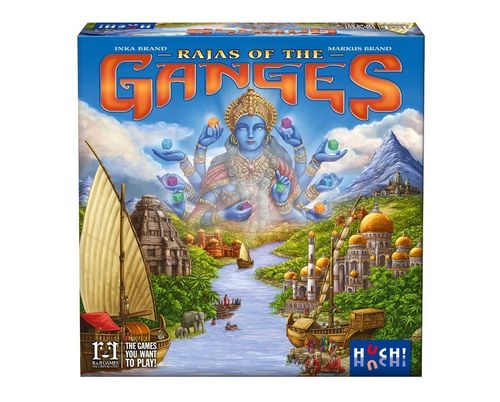
Rajas of the Ganges
Rajas of the Ganges Rulebook
Table of Contents
Table of Contents
- Contents
- Object of the Game
- Set-up
- Course of the Game
- I. Building action (quarry)
- II. Market action (market place)
- III. Actions at the palace
- IV. River action (harbor)
- Karma
- Get new workers
- Bonuses on the scoring tracks
- End of a Round
- End of the Game
- Notes
- Navaratnas Version
- For Mixed Player Groups
- The Ganga Module
- Mogul Lexicon
Contents
- 1 (double-sided) gameboard (2 players / 3 and 4 players)
- 4 "Kali statue" boards
- 4 province boards
- 48 dice (12 per color)
- 64 province tiles (16 per color)
- 24 workers (6 per color)
- 4 boats (1 per color)
- 4 money markers (1 per color)
- 2 cover tiles (for the 3-player game)
- 4 bonus markers
- 20 cubes (5 per color: 4x upgrade and 1x karma)
- 4 fame markers (1 per color)
- 1 starting player elephant (to be put together before the first game)
- 30 yield tiles (8 in white, 9 in yellow, 6 in red, 7 in brown)
- 8 river tiles
Object of the Game
Your task is to develop your province with the help of your workers and the clever use of your accumulated dice. In the end, you must win the race with a combination of wealth and fame. The fame track and the money track run parallel to each other in opposite directions around the gameboard. The fame markers are moved clockwise, the money markers, counter-clockwise.
As you build and expand, you attempt to increase both your fame and wealth so that your fame marker and your money marker intersect. The first player to have his fame marker and his money marker converge or even pass each other on their tracks, has a good chance to win.
Set-up
Place the gameboard in the middle of the table with the side that corresponds to the number of players facing up ("2 players" or "3 and 4 players"). In a 3-player game, cover the marked spaces with the cover tiles.
Put all 48 dice next to the gameboard as a general supply.
Mix the 8 white yield tiles and put them as a face-down stack on the temple.
Sort the province tiles, first by colors and then by the symbol on their backs (snake, cow, tiger) so that you get 12 stacks. Mix the 12 stacks separately and put them face up next to the gameboard, well visible to everybody.
Not needed: the yellow, red, and brown yield tiles (you use them only for the Navaratnas version) and the 8 river tiles (for the Ganga-Module).
Each player gets a province board and the player's components in one color: one Kali statue board, 6 workers, 1 boat, 5 cubes (karma and upgrade), 1 money marker and 1 fame marker, plus 1 bonus marker for the money track.
- Place 3 workers on the applicable spaces on the record tracks (fame: 15, money: 20) and on the river (bridge).
- Put the Kali statue and the province board with the depicted sides facing up in front of you.
- Place 3 of your workers below your Kali statue.
- Put your boat on the starting space of the river.
- Place your karma cube on level 1 of the karma path.
- Put 1 upgrade cube in the left column (value 2) of each "Building development" scroll.
- Put your fame marker on space 0 of the fame track.
- Put your bonus marker for the money track with the river space side up on the first bonus space of the money track (space 12).
Determine the starting player: Each player takes one die in each color, rolls these 4 dice, and puts them, with the rolled result facing up, on any unoccupied arms of his Kali statue. The player who has rolled the lowest total value becomes the starting player. In case of a tie, it's the player who ate Indian food last. He places the starting player elephant by his Kali statue and puts his money marker on space 3 of the money track.
The player to his left (i.e., in player order) puts his money marker on space 4, the player to the left of that player puts his on space 5, and so on; consequently, the player to go last in the first round starts with the most money.
Course of the Game
The game proceeds over several rounds, each of which consists of several stages. In each stage, players, in turn – in clockwise order, beginning with the starting player – place one worker, pay the costs, if required, and immediately carry out the associated action. This continues until nobody can place a worker any more. After that, each player takes his workers back, and a new round begins.
Workers can be placed in the following areas on the gameboard:
- I. At the quarry, in order to carry out building actions on your province board.
- II. At the market place, in order to receive money through market scorings later in the game.
- III. In the Great Mogul's palace, in order to get various benefits there.
- IV. At the harbor, in order to advance on the river and thus reach lucrative river spaces.
At the quarry and at the harbor, workers are always placed row by row from left to right. At the market place and in the palace, you can choose any (unoccupied) action space.
While advancing on the fame and money tracks and developing your province board, you will have chances to obtain valuable bonuses.
Placing workers and carrying out the associated actions
The placement of workers always proceeds in this order:
- Place a worker
- Pay costs, if required: give up money and/or dice
- Carry out the action
Costs: Depending on what action space you place a worker on, you might have to pay costs for being allowed to carry out the applicable action. Some spaces are for free; for others, you have to give up dice or money. How much it costs to place a worker on an action space is shown on the action space itself. Costs may be: cost-free, 1 money, or 1 die of the applicable color.
On each action space there may be only one worker. Dice are never placed onto the board, but always into the (general or personal) supply!
Pay money for an action: Every time you have to pay money for an action (e.g., at the harbor or the quarry), you move your money marker back on the money track accordingly – 1 space for each money you have to pay. If your marker is sitting on 0, you have no money left and temporarily cannot carry out any actions that cost money. The same applies to actions for which you have to pay dice – if you don't have any (suitable) dice, you can't carry out the applicable action.
The dice
Dice are the most important resource in this game. Whenever you get a die from the general supply, you roll it immediately and, with the rolled number facing up, add it to your own supply, i.e., on your Kali statue. The value of the die conforms to the number rolled (from 1 to 6).
Attention! You may store only as many dice as Kali has free hands – that means, in the basic game you may own a maximum of 10 dice. If you get into a situation that would get you more dice, you either take fewer dice or put dice from your Kali statue back into the general supply before taking new ones.
If a die color is temporarily unavailable in the supply, you can't take this color at that moment.
I. Building action (quarry)
Place a province tile in your province and get fame points and/or money for this.
In order to develop your province, you need to send workers into the quarry. Depending on the space where you place the worker, you pay 1 to 4 money on the money track. In return, you acquire one of the 12 province tiles on open display.
On the top left of the tiles you can see what dice with which total minimum value you have to give up in order to take the tile. Put dice of the respective color back into the supply. Their total value has to be at least as high as the one shown on the tile. When building, you are allowed to overpay. That means: In order to acquire a tile with the value "blue 7," you can pay with a blue 3 and a blue 5, for example.
Besides the costs, the tiles also depict roads, buildings and/or markets. Once you acquire a province tile, you immediately have to place it onto your province board.
The province boards
The province board shows the territory that you, being a raja, control and strive to expand. Your residence is in the middle on the top; from there, 3 roads lead into the country. Every time you add a new province tile, the end of one of its roads has to connect to an already-existing road, so that there is a connection to the residence.
You can turn the new tile in any direction. You may also orient a tile in such a way that it cuts off a road of an adjacent tile; not all road ends need to be connected – it is sufficient that each tile is connected to the residence through at least one road. Once placed, the tiles cannot be relocated later on. Be careful not to cut off all roads, so that you always have good possibilities for placing a tile.
Scoring for the tile
When you have added a new tile to your province, you immediately score money and/or fame for it. Some tiles show one or two market tents with certain goods (silk, tea, or spices) of a certain value; other tiles show one or two buildings (temple, palace, fort, or mill); and a few tiles show a combination of both.
- When you add a tile with one or two markets to your province, you immediately receive the amount of money indicated on that tile.
- When you add a tile with one or two buildings, you immediately receive 2, 3, or 4 fame points for each building, depending on where your upgrade cube is on the scroll for the corresponding building on the gameboard.
Special yields
There are yields printed on the edge of the province boards (symbolically, for special gains due to trade relations you have established). You get these immediately when you have connected them to your residence via a road, after scoring for the province tile itself.
Of course, it is also possible to place a tile without creating a connection to the special yield. In this case, you don't get anything extra.
Example: Leila puts a province tile with a bend in the corner on the left. Since the ends of the road on the tile connect to both adjacent yields and are thus connected to the residence, Leila is allowed to take any 1 die from the supply and advance her money marker 5 spaces.
The upgrades of the buildings
The 4 types of buildings that you can erect in your province are shown on the gameboard. At the beginning of the game, your upgrade cubes lie on the first level of each building – i.e., you earn 2 fame points when you add a province tile with 1 building (or, likewise, 4 fame points for 2 buildings).
Upgrades enable you to improve your constructional skills and to earn 3 (or 4) points for a certain building type in later building actions.
You can acquire upgrades from the raja at the palace by giving up a value-4 die there (see "The Chambers"). In addition, there is a river space that allows you an upgrade. And you may upgrade a building automatically after you have crossed the applicable bonus space (space 5) on the fame track or connect the applicable special yield on your province board. When you are allowed to upgrade, you choose one of the four building types and move your upgrade cube one space to the right in the corresponding row.
Attention! Upgrades don't count for buildings on tiles that are already lying in your province, but only for buildings that you add after upgrading.
II. Market action (market place)
Collect money for certain markets in your province.
Every time you send a worker to one of the market spaces, you generate income for the markets laid out in your province. There are markets with 3 kinds of goods: silk, tea, and spices. And there are 2 types of market spaces:
Assorted goods – when you place a worker here, you may score for exactly one market per kind of good.
Example: There are 4 markets on display in Rajesh's province – three of them with tea and one with silk. If he places one of his workers on this market space, he can score for 2 markets: the silk market plus one of the 3 tea markets. For this, he gets 5 money.
Goods of one kind – when you place a worker here, you have to give up any one die. Then you may score for up to a maximum of as many markets of one kind of good as corresponds to the value of the die.
Example: If Rajesh places his worker on this market space and gives up a die with a value of 4, he can score for all 3 tea markets and gets 7 money for this.
Attention! In the 3- or 4-player game, you may place only one of your workers on the assorted goods market in a round; that means, if you have placed a worker on the first space, the second space is no longer available to you in this round. It can then only be used by another player. However, you still have the possibility to place workers on the other market type.
III. Actions at the palace
Give up a die, if required, and get a benefit.
When you place a worker in the Great Mogul's palace, this can be without cost or may require giving up one die – a die of either a specific color or an exact number.
The palace has the following areas:
The outer terrace (cost: free)
Take 2 money. You may also reroll as many of your dice as you want.
The terrace (cost: free)
Take 1 die of the applicable color from the supply.
Example: Leila takes one orange die from the supply, rolls it and puts it on her Kali statue.
The balconies (cost: 1 die of a specific color)
Give up 1 die of a specific color and get 2 dice of a different color.
Example: Rajesh gives up one blue die (of any value) and takes 2 orange dice; he rolls them immediately and puts them on his Kali statue.
The chambers (cost: 1 die of any color with an exact number)
- Great Mogul – Give up one die showing a "1." In return, you get 2 fame points and become the starting player in the next round.
- Dancer – Give up one die showing a "2." In return, you take any 2 dice from the supply and draw a face-down white yield tile. You immediately earn the yield of the tile (1 die, 3 money, 1 upgrade, or 1 karma). Then the yield tile is put aside to form a discard pile. When you run out of tiles, reshuffle the used ones and form a new supply.
- Yogi – Give up one die showing a "3." In return, you get 2 karma and 1 die of your choice (see the explanations of karma).
- Raja Man Singh – Give up one die showing a "4." In return, you upgrade a building type of your choice and earn 3 money.
- Master builder – Give up one die showing a "5." Cover any tile in your province with another one from the supply. All tiles still need to have a connection to the residence. You cannot use the master builder if you have no matching tiles or dice. Important: The new tile has to be more expensive than the old one; just pay the difference by giving up 1 (or more) dice in the color of the new tile. You may overpay. When covering a tile, you do not receive any special yield again. You may cover every province tile only once.
- Example: Leila gives up a green value-5 die. She wants to overbuild the tile with the orange "4" by covering it with the tile with the violet "6." To do so, she has to give up a violet die with a value of at least 2.
- Portuguese – Give up one die showing a "6." In return, you advance exactly 6 unoccupied spaces on the river and get the applicable earnings. Attention! When you have advanced to the last 6 spaces on the river, you may not use the Portuguese anymore.
IV. River action (harbor)
Give up a die showing a 1, 2, or 3 and advance up to three unoccupied spaces on the river.
The river action can be used only if you give up a "1," "2," or "3." Every time you place a worker at the harbor, you may advance your boat up to three unoccupied spaces on the river, depending on the number on the die you have given up. The harbor provides space for several workers. The first worker placed here doesn't cost anything; workers placed later cost 1 or 2 money.
If you give up a die showing a "1," you advance exactly one unoccupied space; if you give up a "2," you advance one or two unoccupied spaces; if you give up a "3," you may advance up to three unoccupied spaces. Spaces occupied by other players' boats are not included in the count but are skipped. So there can never be more than one boat on any particular river space. The only exceptions to this are the starting space and the final river space where multiple boats may rest.
You immediately get the earnings of the space where you stop your boat.
Example: Leila places a worker at the harbor. For this, she has to pay 1 money. Then she gives up a die showing a "2" and advances her boat 2 spaces. She doesn't include the space that is occupied by another player's yellow boat in the count. She earns an upgrade of one building type. She moves her upgrade cube at the mill from "3" to "4."
Explanation of the earnings on the river
- Take 2 dice of any colors from the supply, roll them, and put them on your Kali statue.
- Increase your karma 2 levels (see the explanations of karma).
- Receive the amount of money indicated; advance accordingly on the money track.
- Choose any of the palace actions 2 - 6 (Dancer, Yogi, Raja, Master builder or Portuguese) and carry it out immediately without placing a worker in the palace or giving up a die (the space in the palace may even be occupied).
- For each level of karma that you have at this moment, take one die in the depicted color (so receive 0 to 3 dice).
- Receive the number of fame points indicated; advance accordingly on the fame track.
- Upgrade a building type 1 level (e.g., move your temple cube from 2 to 3).
- Receive 1 money for each market that you have built in your province so far (if you have 5 markets, for example, you advance your money marker 5 spaces on the money track).
- Conduct a market scoring for up to a maximum of markets of assorted goods. Collect the money for up to 3 different markets (see the explanation of the markets).
- Conduct a market scoring for goods of one kind that you have in your province, up to the maximum indicated on the river. If you have 4 silk markets, for example, you can score for all of them and advance on the money track accordingly. You do not have to give up a die for this (see the explanation of the markets).
- Receive 1 fame point per building upgrade that you have done up to now (if you have already upgraded buildings 3 times, for example, you advance 3 spaces on the fame track).
- Receive 2 money per building upgrade that you have done up to now (if you have already upgraded buildings 3 times, for example, you advance 6 spaces on the money track).
- Receive 2 fame points per karma that you have at the moment (if your karma is at level 2, for example, you advance 4 spaces on the fame track).
When you have arrived at the final river space, you can no longer use the river action.
Karma
Give up 1 karma and turn a die to the number on the opposite side.
You can influence the result of a die roll through karma. One karma allows you to turn any die on your Kali statue to the opposite side when you place it; that means a "1" can turn into a "6" and vice versa, a "2" into a "5," etc.
You start the game with karma at level 1. Over the course of the game, you can improve your karma – for instance, by sending a worker to the Yogi in the palace (see "The Chambers" "Yogi") or by stopping your boat on the applicable river space (see "River action"). Besides this, there is a bonus space on the fame track (space 24) that increases your karma 2 levels if your fame marker stops on that space or crosses it. The highest karma level is 3; that means you may have a maximum of 3 karma.
In order to use karma, you don't have to place any worker – you may use your karma anytime during your turn when giving up a die. For each karma you use, you move your karma cube 1 level down. So the karma can even go down to zero.
Get new workers
Move forward on the scoring tracks or on the river and receive more workers.
At the beginning of the game, each player has 3 active workers at his disposal. During the course of the game, you can get up to 2 additional workers. If you have advanced far enough on the respective scoring tracks (money: space 20; fame: space 15) or on the river (bridge), you receive extra workers.
Important: As soon as you have received your second inactive worker (no matter whether on one of the tracks or the river), you immediately take your extra one off the board and remove him from the game.
The fame and the money tracks as well as the river each have one space with an inactive worker per player color. The spaces on the scoring tracks with the inactive workers are regular spaces; at the moment when your money marker or fame marker stops on the respective space or crosses it, you take the worker of your color. With this, he becomes active. The inactive worker on the river doesn't have his own river space (the bridge doesn't count as a river space); that means, when your boat has passed the bridge, you take the worker of your color.
You never lose a worker once you have activated him this way, even if your marker falls back (which can happen only on the money track). You can place a new worker even in the same round in which you have obtained him.
Bonuses on the scoring tracks
Arrive at the space and receive the bonus.
Besides the inactive workers, the two scoring tracks also have special spaces; when you reach or cross them, you immediately get the corresponding bonus.
The fame track has 3 bonus spaces:
- Space 5: You receive an upgrade of a building type of your choice. (This upgrade counts from your next turn on.)
- Space 24: You may increase your karma 2 levels.
- Space 31: You may move your boat to the next unoccupied river space and get the applicable earnings.
The money track has 4 bonus spaces:
- Spaces 12 and 44: You may move your boat to the next unoccupied river space and get the applicable earnings.
- Spaces 33 and 55: You may take any 2 dice from the supply, roll them, and put them on your Kali statue.
Since you pay money and can thus fall back on the money track, there is a special bonus marker of your color that indicates which bonus you'll get next on the money track. When you reach or cross space 12 for the first time and get the applicable bonus, you take the marker of your color, turn it over and put it on space 33 (die side facing up). When your money marker reaches or crosses this space as well, you turn the marker back and put it on space 44 (river space side facing up), etc. After you have crossed the last bonus space on the money track, you remove your marker from the game.
Attention! A bonus applies only to the track where it is printed. If, for example, your money marker passes a bonus space printed on the adjoining fame track, you don't get the bonus from there, of course.
End of a Round
After you have placed all of your active workers and carried out the applicable actions, the round ends. If one of the players has placed a worker at the Great Mogul, he now gets the starting player elephant and becomes the starting player of the following round. If nobody has sent a worker to the Great Mogul, the elephant goes from the previous starting player clockwise to the next player.
All players take all their active workers off the gameboard and put them back below their Kali statue. After that, the starting player begins the new round.
End of the Game
As soon as one player manages to have his fame marker and his money marker converge or pass each other, the end of the game is triggered. The current stage will still be completed – i.e., all players who are sitting between the player who has triggered the end of the game and the current starting player still have a chance to win and may place one more worker (provided they have any left) and carry out the applicable action.
After that, players check who has won. If there are two or more players whose markers passed each other on their final turn, each of the players involved counts the difference of fame points between his money marker and his fame marker; the player with the most points wins the game. In case of a tie, the first player whose two markers passed each other wins.
(To find out who is second and third, etc., count the number of fame points that are still separating your fame marker from your money marker.)
Example: Rajesh's money marker has passed his fame marker. His money marker is now on space 65 of the money track, his fame marker on space 30 of the fame track. Then Leila has her final turn. She also manages to have her two markers pass each other. Her money marker ends up on space 52 of the money track, her fame marker on space 37 of the fame track. So Rajesh and Leila both have a difference of 2 fame points (it doesn't matter where the money marker is). Since Rajesh was the first to have his two markers pass each other, he ekes out the win.
Notes
In order to develop your province successfully and to win the race, you primarily need money, dice, and workers. It is important to make sure that you don't run out of dice or of money and don't have to make do with fewer workers than the other players for too long.
To summarize in brief:
- Gain additional workers by advancing on the two scoring tracks and on the river.
- Generate money primarily through markets; build them in your province and use workers to activate them. Additionally, bonuses on your province board, on the river, and from the raja in the palace are good sources of money. Such bonus spaces can get you extra dice as well. The palace also provides opportunities to obtain and exchange individual dice.
- To fulfill the winning conditions, you need to establish a well thought-out road network within your province and gain as many special yields as possible. To this end, you will use the building action on the gameboard, for which you pay money and dice. Buildings in your province give you fame points; markets give you money.
Navaratnas Version
Play with 6 workers, 8 dice, and upgraded special yields.
After having played the basic version for one or more games, you can opt for the "Navaratnas" version for advanced players (English "The Nine Gems"; see the Mogul Lexicon, Raja Man Singh I). Here, the following modifications apply:
- You can activate all 3 inactive workers. So you may play with up to 6 workers.
- You play with the back of your Kali statue and you may store only up to 8 dice.
- You play on the back of your province board. Here also, special yields are printed on the edge of the province board, which you can connect to your road network. However, these are only minor yields, but you can improve them during the course of the game.
At the beginning of the game, mix the brown yield tiles. Each player randomly picks one, reveals it and puts it on one of the two possible spaces on his province board. You decide which of the special yields on the board you wish to cover.
Now place the remaining brown yield tiles as well as all other yield tiles face up on the buildings of the same color on the gameboard. You may get them during the game to enhance the special yield you can get from your province board.
At the moment when you connect them, the brown yield tiles give you a special yield that depends on the progress you have made so far in a specific field:
- 1 fame point for each tile in your province that has at least 1 market
- 1 fame point for every 3 river spaces you have advanced so far (the starting space doesn't count)
- 1 money per building in your province
- 2 money for each yield tile you have connected
- 2 fame points for each bend that you have built in your province
- 2 money per upgrade you have made so far
- 1 fame point for each active worker you have
The white, yellow, and red yield tiles give you special yields as follows: Dice (1 or 2 of specific colors or of your choice), Money, 1 building upgrade, 1 boat move (onto the next unoccupied river space), Karma (1 or 2).
Attention! Always score for the province tile first before you take the special yield. You may not move or cover yield tiles already placed on the board.
There are 2 ways to obtain additional yield tiles during the game:
a) When you are at the dancer – Every time you place a worker at the dancer and give up one value-2 die of any color, you may take 2 dice of your choice from the supply and choose any yield tile. You immediately put this tile face up on an (as yet) unoccupied space of the corresponding color on your province board. Different from the basic game, here you earn the yield not immediately but only when you have connected the yield tile to a road on your province board.
b) When you have fewer active workers than other players – If, for example, you have a total of 4 active workers, but at least one of the other players already has 5 workers at his disposal, you get 1 yield tile in the fifth stage of the current round if it were your turn to place a worker but you don't have any left. You immediately decide on which unoccupied space of your board you want to place the new yield tile (face up and color-matching). If at least one other player even has 2 more active workers than you, you take another yield tile and place it as if it were your turn to place a worker but you can't place any for the second time.
Attention! You may only take yield tiles in a color for which you still have space available on your board. You may also refrain from taking a yield tile.
For Mixed Player Groups
For advanced players who play with a group that includes beginners, it is also possible to play with handicaps. In this case, the advanced players use the Navaratnas side of their board and the back of their Kali statue, whereas the beginners use the basic side of their board and the front of their Kali statue. You can have up to 5 workers. The yellow, red, and brown yield tiles stay in the box. You play according to the basic rules and use only the white yield tiles for which you get a yield only at the dancer (as in the basic game) to use immediately.
The Ganga Module
Modify river spaces using river tiles.
For this version, you add the 8 river tiles to the game. They modify the river earnings. At the beginning of the game, shuffle the river tiles face down. Roll a die, count the spaces, beginning with the first space after the starting space, draw the first tile blindly and place it face up on the corresponding river space. For example, if you roll a "2," you place the first river tile on the second space and, in doing so, replace the 2 karma shown there.
Roll again, count the next spaces and place a tile until either you run out of tiles or the river ends. The final space may never be covered by a river tile. Return remaining river tiles to the game box.
The river tiles:
- Take as many dice of any colors from the supply as you have karma at this moment (e.g., 3 dice of the same color or of different colors, if your karma is at level 3).
- Take 3 dice, one of each color shown.
- Take the palace action, depending on the character shown (see "The Chambers").
- Conduct a market scoring for goods of one kind. Collect the money for up to 3 markets of one type in your province, for which you do not have to pay an extra die (see the explanation of the markets).
- Advance up to 3 unoccupied spaces on the river and collect the earnings of the space where you stop.
Mogul Lexicon
Mogul empire (1526-1858) – The Mogul empire was a great empire that developed in the Indus-Ganges plain in North India. At the peak of its power (17th century), it comprised almost the entire India (as we know it today) and some parts of Afghanistan. In 1858, the remaining part of the empire was occupied by the British and ceased to exist. A rich heritage of architecture, painting, and poetry shaped by Persian and Indian artists have been preserved to the present day. The empire was named after its rulers, the Great Moguls.
Great Mogul – Also called 'Mogul' or 'Mogul Emperor.' The name probably came to Europe through the Portuguese (in Portuguese, Grão Mogol) who were the dominating power in the Indian Ocean territory at that time. The word Mogul is derived from the Persian mughul, which means 'Mongol,' referring to the fact that some Mogul's ancestor had married into the clan of Genghis Khan. The most prominent Mogul ruler in history was Akbar the Great (reign: 1556-1605); he brought the empire to prosperity in military, political, and economic terms. Under Shah Jahan (reign: 1627-1658), the Mogul empire reached its cultural peak. At that time, the Taj Mahal, the Red Fort (Delhi), and the Shalimar Gardens in Lahore were established – all of them inscribed as UNESCO world heritage sites (in 1982, 2007, and 1981). This game symbolically deals with the era from Akbar to Shah Jahan.
Kali – A Hindu goddess that represents destruction and renewal. Her destructive power, however, mainly targets demons and the injustice of the world. Popular belief is that she can grant wishes.
(Blue) Peafowl – Since 1963, the blue peafowl has officially been ranked among the national animals of India (besides the Bengal tiger and the Ganges river dolphin). Originally, it came from the Indian subcontinent where it is considered a sacred animal since it gives warning of tigers and severe weather and kills (young) poisonous snakes, among other things. Whereas the western world often associates the peafowl not only with beauty but also with arrogance and vanity, Indians primarily consider it a symbol of regality and immortality. Therefore, peacock statues were prominently designed also on the throne of the Mogul emperors.
Peacock Throne – The Peacock Throne was a throne chair decorated with an abundance of pearls, gold, and gems (more than 26,000) that was manufactured by order of Shah Jahan and inaugurated in 1635. The production took seven years and was said to have been twice as expensive as the construction of the Taj Mahal; this was considered very extravagant even for a Mogul emperor. Since the Red Fort (Delhi) was plundered in the 18th century, the Peacock Throne has been presumed lost.
Ashoka Pillar – The present coat of arms of India shows the adapted capital of an Ashoka pillar, the famous "Four Lions of Sarnath." Erected around 250 BC under Ashoka, the Indian ruler at that time, who had numerous monumental pillars set up during his reign at many strategic places, such as border towns and trade routes. Their capitals were used to proclaim his edicts. Some of these then-numerous and widespread pillars have been preserved down to the present day. They are silent witnesses of the bygone Great Indian Empire whose cultural heritage has stood the test of time.
Raja Man Singh I – Raja Man Singh I was an important commander of the imperial armed forces. As a governor of several provinces, he had forest areas cultivated for agricultural progress, commissioned a variety of palaces, forts, and temples to be built, and was even engaged as a city founder. Additionally, Man Singh I gained a high reputation for being a member of the Navaratnas, the "Nine Gems" of Akbar, a small group of extraordinary personalities at the Mogul emperor's court.