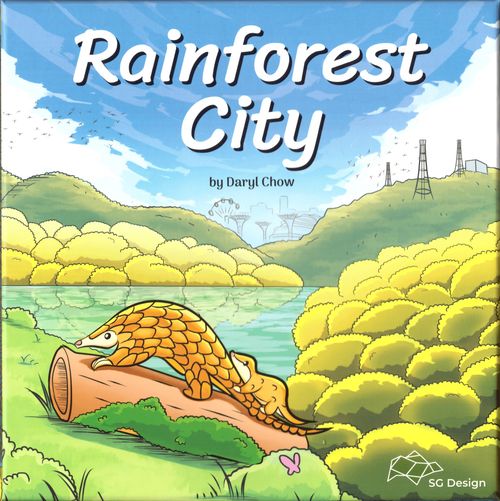
Rainforest City
Rainforest City Rulebook
Table of Contents
Table of Contents
Components
- 174 Flora and Fauna tokens
- 48 Flora and Fauna cards (FF)
- 48 Terrain cards (T)
- 9 Starting Terrain cards (ST)
- 4 Player Aid cards
- 1 Fruit dial
- 12 Objective cards
- 4 Fruit markers x 4 player colours
- 3 Globe markers
Setup
- Place the Fruit dial in the middle of the playing area.
- Shuffle the Flora and Fauna cards to form a deck. Shuffle the Terrain cards to form a deck. Place the decks in the reach of players and deal cards face-up around the Fruit dial as in the diagram on the left.
- Place all the Flora and Fauna tokens in a pile in reach of all players.
- Give each player: 1 Fruit marker, 1 Player Aid card, and 2 Starting Terrain cards. Place the Fruit marker on top of the Player Aid card as indicated. Shuffle the 2 Starting Terrain cards face down and flip them face-up to form a 4 x 3 starting area. Take the corresponding Flora tokens stated on the Starting Terrain cards, and place them on the squares that show them. Leave an empty space for about 5 cards in each direction in front of each player.
- Determine a Starting Player, preferably the last player who last planted anything. Give this player the Globe markers in a stack with the numbers in descending order. For a 2/3/4 player game, the highest number showing will be 6/4/3. You are ready to begin!
Example 1: Common Setup. Shows the Fruit dial in the middle of the playing area, with the Flora and Fauna (FF) and Terrain (T) decks and the dealt cards laid out around it, and the Flora and Fauna tokens in a pile.
Example 2: Player Setup (Starting Player, 2P). Shows each player's 2 Starting Terrain (ST) cards forming the 4 x 3 starting area, the Flora tokens placed on the squares that show them, and the Globe markers held by the Starting Player.
Flow of the Game
The game takes place over 12 total turns, tracked by the Globe markers. Starting from the player with the Globe markers and going clockwise, players will choose Terrain and/or Flora and Fauna cards to place into their Landscape, creating habitats and food chains. At the end of 12 turns, all players will score their Landscapes. The player with the most points will win the game.
Flow of a Turn
Each turn consists of the following steps. Each step will be explained in detail below:
- Rotate the Fruit dial.
- Place cards.
- Refresh and Rotate.
1. Rotate the Fruit Dial
The active player (the player with the Globe markers) will rotate the Fruit dial, pointing their arrow to the set of 2 cards that they want. The active player then takes both cards to place into their Landscape in any sequence. All other players then have to choose only ONE of the 2 cards that their arrow is pointing to. All unchosen cards will be left in place for the next turn.
2. Place Cards
Each player places their cards into their Landscape at the same time. There are two types of cards: Terrain cards and Flora and Fauna cards.
A. Terrain Cards
Terrain cards represent the different terrain that the flora and fauna of Singapore need to live on to survive.
- Each Terrain card is made up of 6 Terrain squares. Players strategically place them such that they can support plants and animals.
- When placing Terrain cards, 1 Terrain square of the new card must border at least 1 other Terrain square in your Landscape.
- You may rotate Terrain cards to any orientation before placing them.
- Terrain squares and cards may not overlap.
- When a Terrain card shows a Flora and Fauna token, take a matching token from the supply and place it on the Terrain square that shows it.
- Adjacent squares of the same terrain type (Rainforest - Green; Mangrove Forest - Brown; Ocean - Blue) form a HABITAT.
- If the Terrain card has a House icon, the player returns 1 Flora or Fauna token anywhere on their Landscape matching the type stated back into the common pool (not the Compost Heap). If they do not have a matching token, they ignore the effect.
- Any Flora and Fauna token that would cover a House is immediately composted.
- Houses do not count as any Terrain for the purposes of objectives.
Make sure your habitats are large enough so you can house all 3 elements of a food chain: plants, herbivores, and carnivores!
Example 3: Terrain Card Placement. The Starting Player for turn 1, Vanda, chooses to take the set of 2 Terrain cards and adds them to her Landscape. She then expands an Ocean Habitat, a Mangrove Forest Habitat, and a Rainforest Habitat. She then places Flora and Fauna tokens on the Terrain squares that display them.
Example 4: Placing a House. In turn 2, Vanda adds 1 Terrain card. It contains a House that forces her to remove a Rainforest token from somewhere in her Landscape. Currently, the house will be worth 3-1 = 2 at the end of the game because it is adjacent to a Crab token.
This removal of wildlife symbolises the destructive effect of humans on the environment. Make sure you build your houses away from plants and animals!
B. Flora and Fauna Cards
Flora and Fauna cards show the position of Flora and Fauna tokens to be placed onto Terrain cards.
- Flora and Fauna tokens must be placed in the formation that is shown on the card. You may rotate the card to any orientation, but the token positions may not be mirrored.
- Flora and Fauna cards are only used for orientation purposes and do not go into your Landscape. The cards are stacked in a discard pile after the tokens have been placed.
- Flora and Fauna tokens can only survive when placed on the matching terrain type (Otters are wild and can be placed on any Terrain square). If they do not match the terrain, they are immediately discarded to the Compost Heap, below the Player Aid card. Tokens that are placed outside of the Landscape are also immediately discarded to the Compost Heap. These tokens will be worth -1 point each at the end of the game.
Example 5: Flora and Fauna Token Placement. At the start of round 2, turn 3, Vanda selects the set of 2 Flora and Fauna cards to add to her Landscape. Finding a horizontal orientation, Vanda places the Reef and Termite tokens from her first Flora and Fauna card (FF 1). However, the Crab token falls outside her Landscape and is discarded. She also manages to place both the Otter and Rainforest Tree tokens from her second Flora and Fauna card (FF 2).
- If a token overlaps a previously placed token, it replaces it and the old token is composted. However, if the new Flora or Fauna token does not match the terrain it is placed on, it is immediately composted and will not replace the existing token.
- Fauna tokens need to be SUPPORTED to score points at the end of the game. Within the same Habitat, a Herbivore (2) is supported by a Plant (1) and a Carnivore (3) is supported by a Herbivore (2).
- For example, in the Mangrove Forest Terrain, a Herbivore (2) can only be scored at the end of the game if there is a Plant (1) in the same Habitat. Each Flora and Fauna token can only support one other token (i.e. 2 Carnivores (3) in the same habitat can only be supported by 2 Herbivores (2) in the same habitat. These 2 Herbivores (2) will in turn need to be supported by 2 Plants (1).
Mangrove flora and fauna can only live on the Mangrove terrain and so on. However, we otters are adaptable and can live on any terrain! I especially like to visit homes with koi :)
3. Refresh and Rotate
- Refill the empty cards in the display such that there are 8 cards of the stipulated types available for the next turn (follow the same configuration as Example 1).
- Then, move the Globe markers to the next player clockwise; they will now be the active player for the next turn. If the Globe markers come back to the player who started the game (i.e. all players have had a chance to be the active player in that round), flip the number to the next lower number (e.g. 3 to 2, 2 to 1).
As the game takes place over 12 turns regardless of the player count, the round number on the Globe will let you know how many rounds left there are in the game. The game ends at the end of 6/4/3 rounds for a 2/3/4 player game.
End of the Game and Scoring
At the end of the 12th turn, the game is over. Specifically, the game ends at the end of the round when the Globe marker is showing the number 1. Skip the Refresh and Rotate step of the last turn.
Players now count up their points in the sequence below:
- Each Flora matching the terrain type it is placed on scores 1 point.
- Each Fauna that is supported scores 2 or 3 points. Unsupported Fauna score 0 points.
- Each House scores 3 points, but suffers a -1 penalty for each supported or unsupported Flora and Fauna token adjacent to the House icon.
- Each token in the Compost Heap is worth -1 point.
To help you along, you can remove the tokens from your Landscape as you count!
The player with the most points has reconstructed the most successful Landscape and is the winner of the game. In the case of a tie, the player with the least tokens in their Compost Heap wins. If this is still tied, then all tied players win the game!
Example 6: Scoring Example. After 6 rounds between Vanda and Calla, the game ends. Let's have a look at how many points Vanda's Landscape scores.
Breakdown of Vanda's Score of 12
- Flora: 8 points
- Supported Fauna: 10 points
- Houses: -1 point (3 points per House, but -4 points for the adjacent Flora and Fauna)
- Compost Heap: -5 points
Co-operative Variant
In the co-operative variant of the game, players will work together rather than compete to fulfill objectives for the greater good! There will be no individual winner - players either all win or all lose.
Setup
Follow steps 1-5 as usual. Then, sort the Objective cards by type, dealing one Objective card of each type to each player. All players should have a total of 3 Objective cards, placed face-up in front of each player. Unused Objective cards should be returned to the box. The rest of the setup and turn flow follows the standard game, with the goal change below.
Goal of the Game
Points will not be scored in the co-operative variant. Instead, players will need to meet the objectives on their cards to win the game. An objective is considered met if a player fulfils the condition on their own Landscape. Players may only fulfil their own objectives.
Win Condition
At any point, players declare a win if all players meet the following total number of objectives:
| No. of Players | Two | Three | Four |
|---|---|---|---|
| Easy (Flora) | 3 | 4 | 6 |
| Medium (Herbivore) | 4 | 6 | 9 |
| Hard (Carnivore) | 6 | 9 | 12 |
E.g. in a 3 player game at medium difficulty, all players will need to meet a total of 6 objectives to win the game (e.g. 2 per player). Note that the moment you meet an objective, you may treat it as permanently met, even if you lose the conditions in future turns.
Lose Condition
If any player has 5 or more unmatching tokens (4 for Hard Mode) in their Compost, all players immediately lose the game. Unsupported tokens do not count towards this total.
Solo Variant
The solo variant is very similar to the co-operative variant, except that one player needs to manage two Landscapes. This variant is only recommended for expert players who are familiar with the game!
Setup
Follow steps 1-5 as usual, setting up for a 2 player game. Then, sort the Objective cards by type, dealing 1 Objective card of each type face-up to each of the two starting Landscapes. Unused Objective cards should be returned to the box.
The rest of the setup and turn flow follows the standard game. In the solo game, the player will be building two separate Landscapes, and they will need to fulfil objectives separately for each Landscape to win the game. On the first turn, they rotate the Fruit dial to pick 2 cards for any one of their two Landscapes (this will be known as Landscape A), and pick one of the 2 cards for their other Landscape (Landscape B). From the second turn onwards, they will pick 2 cards for Landscape B and one of two for Landscape A on the even numbered turns, and 2 cards for Landscape A and one of two for Landscape B on the odd numbered turns.
Win Condition
At any point, the player declares a win if they meet the following number of objectives:
| Difficulty | EASY (Flora) | MEDIUM (Herbivore) | HARD (Carnivore) | EXTREME (Omnivore) |
|---|---|---|---|---|
| No. of Objectives to win | 3 | 4 | 6 | 6, plus both Landscapes need to fulfil 1 objective from the other Landscape |
Note that the moment you meet an objective, you may treat it as permanently met, even if you lose the conditions in future turns.
Lose Condition
If any player has 4 or more unmatching tokens (3 for Extreme) in their Compost Heap for either Landscape, they immediately lose the game. Unsupported tokens do not count.
Introductory or Simple Variant
For an easier game (for new or younger players), you may adopt the following rule change:
- Treat squares with House icons as wild terrain (i.e. you may place any Flora or Fauna token on them). House icons have no effect and score 0 points.
Advanced Variant
In the advanced variant of the game, players will have the opportunity to race against the other players to meet objectives for big points!
Setup
Follow steps 1-5 as usual. Then, add these extra steps:
- Sort the Objective cards into the 3 types (Terrain, Flora, and Fauna). Shuffle each type and draw 1 for each type for a total of 3. Place these 3 Objective cards face up in the middle of the playing area. The rest of the Objective cards should be returned to the box.
- Give each player 4 Fruit markers instead of 1.
Every turn, at the end of step 2 (Place Cards), each player checks if they have completed one or more of the 3 objectives. If they have met any objective, they may place one of their Fruit markers on the unclaimed space with the highest value. If more than one player claims the same objective in the same round, they may both claim the same space. Even if players lose the objective condition in future turns, their Fruit marker will stay in place for scoring.
Objective cards shown in the advanced variant:
- "2 surrounded / 2 x 1 island" (Terrain objective; shown with values 10, 8, 6 and 4 on the card's spaces)
- "4 Habitats with 2+ Flora" (Flora objective; shown with values 10, 8, 6 and 4)
- "2+ Carnivores in 1 Habitat" (Fauna objective; shown with values 10, 8, 6 and 4)
End of the Game and Scoring
After scoring 1-4, add the Objective points on the Objective cards to each player's score.
Objective Cards Glossary
The rules of the Objective cards are described here in greater detail.
Terrain Objectives
- A. Have one Habitat that includes a straight line of at least 10 squares. It can be bigger than a 10 x 1 area.
- B. Have two adjacent Habitats of 10 or more squares each.
- C. Have a size 2 x 2 Habitat (4 squares) that is completely surrounded (including diagonals) by any of the other 2 terrain types.
- D. Have 2 separate size 2 x 1 Habitats (2 squares) that are completely surrounded (including diagonals) by any of the other 2 terrain types.
Flora Objectives
- E. Have 3 Habitats that have at least 3 Flora tokens each.
- F. Have 5 Habitats that have exactly 1 Flora token each.
- G. Have 4 Habitats that have at least 2 Flora tokens each.
- H. Have 1 Habitat that has at least 5 Flora tokens.
Fauna Objectives
- I. Have at least 6 different types of supported Fauna in your Landscape. Otters count as a distinct type.
- J. Have 1 Habitat that has at least 2 supported Carnivore tokens (one or both may be Otters).
- K. Have 1 Habitat that has at least 3 supported Fauna tokens of the same type.
- L. Have 2 Habitats that have exactly 2 supported Herbivore tokens each.