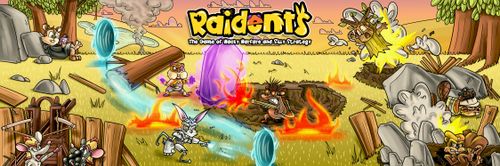
Raidents
Raidents Rulebook
Table of Contents
Table of Contents
Components
30 Tiles:
- 4x Home Tiles
- 26x Field Tiles
Tier 1 Components:
- 8x Spawnpoints
- 8x Blams
- 12x Mounds
Tier 1 Miniatures:
- 2x Rabbots
- 2x Hamsterrain
- 2x Engineaver
Tier 2 Miniatures:
- 2x Gophert
- 2x Squerrilla
Tier 3 Miniatures:
- 2x Chipmonk
- 2x Ratillery
- 2x Porcupyro
Tier 4 Miniatures:
- 2x Copybara
- 2x Moustermind
- 2x Chinzhilla
Note: The Field Tile backs have features like summaries and the Queue.
Setting Up Your First Game
- 2x Castle Home Tiles.
- 4x Field Tiles (backs labelled A, H, N, V).
- 2x ‘Cano Home Tiles.
Give each player: a Rabbot, Hamsterrain, and Engineaver, 4 Spawnpoints, and 4 Blams.
Place 12 Mounds in a shared location.
Determine who will be the Castle player, and who will be the ‘Cano player. The ‘Cano player has the first turn, and then each player will alternate taking turns until someone wins.
You’ll be using the following 3 Raidents: Rabbot, Hamsterrain, Engineaver.
How to Win
The first player to place one of their Spawnpoints in one of their foe’s Home Tiles wins the game.
Gameplay
On your turn, each of your 3 Raidents, in any order, can independently perform 1 of 4 actions. The 4 actions to choose from are: spawning, moving, their unique main ability, or their unique burrow ability. Burrow abilities can only be performed while a Raident is in a Burrow or friendly (your) Home Terrain.
Spawning
A Raident not on the board, uses its action to appear onto unoccupied friendly Home Terrain. Occupied squares contain either a Raident or Mound.
Moving
A Raident uses its action to move to an unoccupied adjacent square. An adjacent square can be vertical, horizontal, or diagonal. A Raident cannot move onto an Obstacle.
Movement Example: The Rabbot cannot move to either the squares occupied by the Mound or Hamsterrain or the squares containing an Obstacle.
Obstacle variety is only aesthetic.
Main Abilities
The Rabbot’s Main Ability: Spawnpoints
A Rabbot can use its action to place a Spawnpoint in an adjacent square. Spawnpoints can never be placed onto Obstacles.
A Spawnpoint transforms the terrain of the square it’s placed on to become friendly Home Terrain.
Since it doesn’t occupy its square it can be placed ‘underneath’ Raidents, Mounds or Blams. Once placed, a Spawnpoint cannot be removed, but it can be replaced by a foe’s Spawnpoint. The Rabbot cannot use more than the 4 Spawnpoints in its pool. Therefore, one must be kept in reserve to win.
The Hamsterrain’s Main Ability: Mounds
A Hamsterrain can use its action to place and/or remove 1-8 Mounds in unoccupied adjacent squares.
A Mound blocks Raidents moving or spawning on its square. The Hamsterrain cannot use more than the 12 Mounds in the shared pool. They can be placed on Obstacles.
Interaction with terrain, by what is placed (columns are Spawnpoint, Mound, Blam, Raident):
| Interaction with Terrain | Spawnpoint (placed by Raidents) | Mound (placed by Raidents) | Blam (placed by Raidents) | Raident |
|---|---|---|---|---|
| Changes the Terrain | ✓ | ✗ | ✗ | ✗ |
| Occupies the Terrain | ✗ | ✓ | ✓ | ✓ |
The Engineaver’s Main Ability: Blams
An Engineaver can use its action to place a Blam in a “L” shape away: two squares in one direction, and another square perpendicular to that.
A Blam remains where it has been placed until it explodes. A Blam immediately explodes when it’s placed onto a Raident, Mound, or Blam. A Blam also explodes by having a Mound placed or a Raident move onto it. A Blam can be placed onto an Obstacle without exploding.
When a Blam explodes, it removes everything except Spawnpoints, and explodes other Blams in the 5 squares that make a “+” shape.
Removal: An effect that takes something off the board, and returns that component to the pool it initially came from regardless if it was friendly or foe (friendly fire is always on).
Raidents in range of multiple Blam explosions will experience multiple removals.
If a Hamsterrain explodes a Blam with its Mounds, the Hamsterrain is unable to place more Mounds.
The Engineaver cannot use more than the 4 Blams in its pool.
Burrow Abilities
The Rabbot’s Burrow Ability: Shield
The Rabbot uses its action so that until the start of your next turn, it requires 2 removals to be removed instead of just 1.
The Hamsterrain’s Burrow Ability: Rotation
A Hamsterrain uses its action to rotate the Tile it’s on 90° in either direction. However, friendly Raidents on the same Tile get dizzy and can only do their action before rotation, not after.
The Engineaver’s Burrow Ability: Drone
An Engineaver uses its action to move a placed friendly Blam 1 square vertically or horizontally (Drones get dizzy from rotation).
Burrow Ability Example: The Castle Rabbot creates a shield, temporarily protecting it against 1 Blam explosion, the action is done before the Castle Hamsterrain rotates the Tile 90° clockwise. The ‘Cano player would lose the game, unless the Engineaver uses a drone so that there are 2 Blam explosions that can remove the Rabbot.
Example Gameplay
The following example demonstrates a possible sequence for the ‘Cano player’s first 3 turns.
As the game objective is to get the Rabbot to the opposite end of the field faster than your opponent, the ‘Cano player realises that the Rabbot moves the quickest by being in the corner of a rotating Tile. The ‘Cano player uses their first turn to spawn their Raidents, and their second turn to move them. On their third turn the Engineaver places a defensive Blam and the Rabbot placed a Spawnpoint so that the Hamsterrain can use its burrow ability to rotate the Tile. They have to do their actions before the Tile is rotated and they become dizzy, which would forfeit their actions.
The example is shown in the rulebook as diagrams for Turn 1, Turn 2, Turn 3 (before rotation) and Turn 3 (after rotation).
Summary Tile Symbols
- The cancel symbol indicates that using the action may result in the loss of actions for other Raidents.
- The sand timer indicates an action has a temporary effect that only lasts until the beginning of your next turn.
- A repeated symbol means the action’s effect applies to multiple squares in the Raident’s range. These effects must target every square they reach, except for Hamsterrain’s Mounds, which allows you to choose.
Your Second Game: Board Configuration
- Create a shuffled stack of the 26 Field Tiles. Keep the Home Tiles in the same positions.
- The Castle player obtains a random Tile and can place that Tile in any of the 4 available slots, in any orientation.
- The ‘Cano player obtains a random Tile and likewise places it in one of the remaining slots.
- The Castle player now obtains 2 new Tiles and chooses 1 of them to be placed in one of the remaining slots.
- The ‘Cano player also obtains 2 new Tiles and places 1 of them in the last slot. The ‘Cano player still has the first turn of actions.
Your Third Game: The Queue Expansion
You’ll be using 5 Raidents; everything from previous games in addition to each player’s Gophert and Squerrilla.
- Each player cannot have more than 3 Raidents on the board. But all Raidents can still perform their action if they’re able to.
- When one of your Raidents have been removed off of the board, they’re pushed to the end of your Queue.
- You can only spawn the Raident that’s in front of the Queue.
- Unqueued Raidents are considered equally in the ‘0’ position.
- When multiple Raidents would enter the Queue at the same time, the current action taker chooses the order they enter.
- The Queues are implemented on some of the Tile backs.
The Castle Queue is printed on the Tile backs (positions 1 to 4).
Gophert
The Gophert’s Main Ability: Squeak Attack. A Gophert can remove 1 Raident from an adjacent square.
The Gophert’s Burrow Ability: Fossorial. A Gophert can travel to any unoccupied Burrow or friendly Home Terrain on the board.
Squerrilla
The Main Ability: AKORN47. A Squerrilla can use its action to remove all Raidents from 3 squares vertically or horizontally away from its position.
The Burrow Ability: Arboreal. Only arboreal Raidents can use abilities while on an Obstacle. An arbor is a network of adjacent Obstacles and/or Mounds. The Squerrilla can use its action to travel to any unoccupied Obstacle of an arbor, while it’s adjacent to part of the arbor. A Blam on an arbor only explodes if the Squerrilla ends its action on it.
Arboreal Example: The table below shows which squares can access which arbor.
| Square | Arbor 1 | Arbor 2 |
|---|---|---|
| Burrow A | ✓ | ✓ |
| Spawnpoint B | ‘Cano Only | ‘Cano Only |
| Burrow C | ✓ | ✗ |
Summary Tile Symbols: A black arrow indicates that something else will be transported as a result of the action, whereas a grey arrow indicates that the Raident itself will be transported. A white arrow indicates a transformation will take place. A cross symbol indicates a Raident removal action.
Your Fourth Game: The Veil Expansion
After the custom board configuration, each players first turn of spawning Raidents will be conducted simultaneously secretly behind each player’s Veil (using the box lids or the rulebook). Each player holds their Veil between their Home Tiles and the centre Field Tiles. Once both players have simultaneously conducted their first turn, lift the Veils, and continue the game as before, with the ‘Cano player taking the first set of actions.
Veil Example: The board has just been configured. Both players put their Veils between their Home Tiles and the Field Tiles. Behind their Veils, they place up to 3 Raidents each. They both agree that they’ve finished and lift their Veils. The game will not use Veils anymore.
You’ll be using 8 Raidents; everything from previous games in addition to each player’s Chipmonk, Ratillery, and Porcupyro.
Chipmonk
The Chipmonk’s Main Ability: Pacify. A Chipmonk can use its action to temporarily pacify all Raidents in an inverted “T” shape of 4 squares from its position. This range can be applied either vertically or horizontally. All pacified Raidents are unable to perform any actions until the start of your next turn, regardless if they’re friendly or foe.
The Chipmonk’s Burrow Ability: Penal Substitution. A Chipmonk can use its action to spawn a friendly Raident that is currently not on the board to replace the Chipmonk’s position. The Chipmonk will then be pushed to the end of the Queue. The spawned Raident cannot perform its action this turn.
Ratillery
Both the main ability and the burrow ability of the Ratillery affect all squares in a 2×3 area, 4 squares away from its position. This range can be applied either vertically or horizontally.
The Ratillery’s Main Ability: Ballista. A Ratillery can use its action to remove all Raidents from one of its ranged areas.
The Ratillery’s Burrow Ability: Cover Fire. A Ratillery can use its action to transform all Grass Terrain in its range into Burrow Terrain. This temporarily lasts until the start of your next turn, allowing Raidents to perform their burrow abilities in those squares, including fossorial to access the squares.
Porcupyro
The Porcupyro’s Range. A Porcupyro’s range depends on the Tile’s terrain. Abilities that transform terrain (e.g. cover fire) will also modify the Porcupyro’s range. Friendly Raidents in range are also removed, and possibly even including the Porcupyro itself.
The Porcupyro’s Main Ability: Hot Cross Bunnies. A Porcupyro can use its action to remove all Raidents within its Tile that are not in Burrow Terrain.
The Porcupyro’s Burrow Ability: Scorched Earth. A Porcupyro can use its action to remove all Raidents within its Tile that are not in Grass Terrain.
Both of the Porcupyro’s abilities ranges always include the Obstacle and Home Terrain on its Tile.
Your Fifth Game: The Win-Con Expansion
You’ll be using all 11 Raidents; everything from previous games in addition to each player’s Copybara, Moustermind, and Chinzhilla. The new Raidents allow for additional ways to win the game, and also for Raidents to exist on an Obstacle. It still holds true that only arboreal Raidents can use their abilities while on non-kaijujitsu’d Obstacles [kaijujitsu is on pg. 16]). There is still no situation that allows a Spawnpoint to exist on an Obstacle.
Formality with a Chess Clock (or App)
Below are some recommendations for players that mutually decide to use a Chess Clock for faster and fairer games:
- Time Control: 5 minutes per side, which results in a loss for the player that uses it all, include a 60 second delay per turn.
- Same Hand: You touch the clock with the same hand that touched the game’s components.
- The Castle player decides which side the clock will go on.
Copybara
The Copybara’s Abilities: Symbiotic Simulation. The Copybara’s can use its action to dynamically simulate the main and burrow abilities of the Raident in the Queue’s 4th position, as if that Raident were in the Copybara’s position. While the Queue is empty, the Copybara has no abilities, and when the Queue changes, the Copybara simulates the new Raident. If the Copybara simulates a Squerrilla, it is also an arboreal Raident.
Moustermind
The Moustermind’s Main Ability: Puppeteer. A Moustermind can use its action to move an adjacent Raident or Spawnpoint (friendly or foe) to an adjacent square.
Puppeteering friendly Raidents makes them dizzy this turn, thus they can only do their action before being moved, not after.
The last Spawnpoint no longer needs to be reserved, as it can be puppeteered into the foe’s Home Tile to win.
Placement of the puppet:
| Puppet | Placed On Mound | Placed On Obstacle |
|---|---|---|
| Raident | ✗ | ✓ |
| Spawnpoint | ✓ | ✗ |
The Moustermind’s Burrow Ability: Scamper. A Moustermind can use its action to travel up to two adjacent squares away in any direction. The Moustermind is able to directly access the square it travels to without interacting with anything along the way. It can end on an Obstacle but not on a square occupied by a Mound or Raident.
Chinzhilla
The Chinzhilla’s Range. Both the main ability and the burrow ability of the Chinzhilla affect all squares in a 3×3 area centred around the closest Obstacle in a vertical or horizontal line away from its position. Two of the Chinzhilla’s possible ranges are shown in the rulebook, both horizontal. The Chinzhilla’s horizontal range wouldn’t change if it were in any of the white highlighted squares.
The Chinzhilla’s Main Ability: Baby Don’t Herd Me. A Chinzhilla can use its action to remove all Raidents within its range, in some situations this may include the Chinzhilla itself.
The Chinzhilla’s Burrow Ability: Kaijujitsu. A Chinzhilla can use its action to transform all terrain in its range into Grass. The effects below last until the start of your next turn:
- Allow Raidents to move and use main abilities on ‘Obstacles’.
- Modify the range of abilities that require a specific terrain.
- Prevent burrow abilities while on ‘Burrow’ or ‘Home’ Terrain.
- Prevent spawning in ‘Home’ Terrain.
- Prevent Spawnpoints from being placed or puppeteered into and from kaijujitsu’d squares.