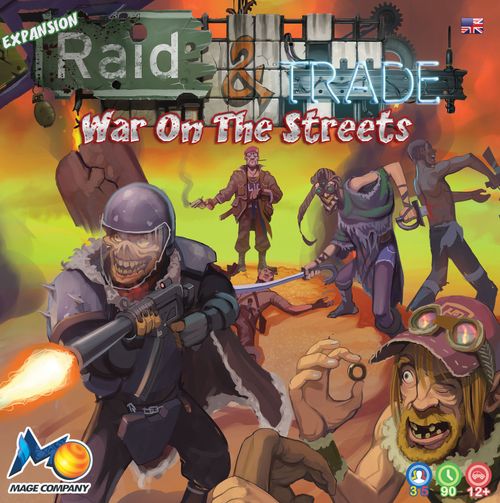
Raid & Trade: War on the Streets
Raid & Trade: War on the Streets Rulebook
Table of Contents
Table of Contents
Components
- 4 Character Boards
- 9 Suburb Map Tiles
- 1 Outpost Map Tile
- 48 Item Cards
- 1 Resource Die
- 1 Strike Die
- 4 Combat Dice
- 1 D20 Die
- 6 Source Tokens
- 4 Survivor Miniatures: James, Angela, Daphne, & Casey
- Rat Gangs Miniatures: 1 Commander, 3 Rogues, 5 Deformers, 6 Scavengers
War on the Streets
It is time to explore these ruined suburbs further, but be careful – they say the streets here are very dangerous. Game elements included in the War on the Streets expansion are detailed below.
1. Barricades
Barricades are marked in red. They make travel through the city more difficult. In order to pass over a barricade, you must spend 1 additional Action Point exactly like in the base game.
2. Underground Tunnel
There is one underground tunnel in War on the Streets. You can travel from one entrance to the other by spending 1 Action Point. A symbol denotes each entrance to the tunnel and these appear on two separate tiles. These tiles should be placed some distance from each other during set-up to maximise the distance a character can cover for a single Action Point.
3. Marked Houses
In the base game all the House locations are marked in white, but in War on the Streets House some locations are marked in Red, Green and Orange. At the beginning of the game you place the Houses on House locations as the rules indicate in the base game. However, when you raid a house on a coloured location there is specific effect based on the colour.
Red House: This House is located on a bad neighbourhood. Before you raid it you must pay the local gang 2 Resources of your choice. These resources are returned to the pouch.
Green House: This House is located on a Toxic Area. Before you raid it you get 1 Blacklist Point or 1 Adrenaline Point (depending if you are playing the base game rules or a specific scenario).
Orange House: This House is on fire. Before you raid it you must spend 1 Skill Point.
In all 3 cases if your raid is successful you get a bonus. You can craft 1 Item of your choice for free OR take the top Incident card from the IN deck.
4. The Rats Gang
In the suburbs you will find more than bad neighbourhoods, you will have to face some gangs. One of the most dangerous gangs is the Rats Gang that is made up of 15 members:
- The Commander x1
- The Rogues x3
- The Deformers x5
- The Scavengers x6
Each type of gang member has certain abilities that you will have to face during the base game and the scenarios. Regardless what scenario you play, their abilities do not change. The exact abilities of each type of gang member is detailed below.
Commander
The Commander stands on the roads and can see any Survivor in his line of sight, either horizontally or vertically, even if the survivor is being blocked by grass, height or barricade, but ONLY within the map tile he is standing. If you enter the same Map Tile as the Commander or if a Commander moves and finds one or more Survivors, then he immediately delivers 2 wounds to each Survivor. To attack a Commander you must be able to reach him along the roads of the current map tile without being blocked by any border, barricade or other obstacle. You then announce you want to attack.
To attack a Commander you don't need to spend action points and the attack is not considered an action. You just spend 1 gun resource and you roll your combat die. To destroy a Commander you must deliver 4 "pow" strikes or 2 "nuke" strikes during the same round. You can attack once per turn per gang member. If by the end of the round you have delivered fewer strikes than needed to defeat the Commander, the damage is ignored and is not transferred to the next round. Note: If you have a card that can be treated as a "pow" or "nuke" symbol during combat you may use it to damage or destroy the Commander.
Deformers
The Deformers stand on the road-paths of map tiles and can see any Survivor in their line of sight, either horizontally or vertically, except if the survivor is being blocked by grass, height, barricade or any other obstacle. If you enter the line of sight of a Deformer (even if you stand in different map tile) or if a Deformer moves and finds the Survivor, you have two options:
a) Defend by spending 1 gun resource and roll your combat die as normal (in this case you also don't have to spend action points and to defend or to attack a Deformer is not considered an action).
b) Take 1 wound (when you take wounds you reduce your life points by 1. You use the red-yellow disc as your life points). You set your disc at 0. The yellow side represents additional life points. The red side represents the negative points. If a survivor reaches 10 on the red side, then they are dead and eliminated from the game.
To attack a Deformer you must be able to reach him along the roads of your current map tile without being blocked by any border, barricade or other obstacle. You then announce you want to attack. If there are more than 1 Deformers and you can attack them all, you must first announce which one you want to attack and then follow the combat rules from the core game, with the following exception – to attack a Deformer you don't need to spend action points nor is it considered an action. You just spend 1 gun resource and you roll your combat die.
To destroy a Deformer you must roll 2 "pow" strikes (in the same round) or 1 "nuke" strike. You can attack once per turn per gang member. If by the end of the round you have delivered 1 "pow" strike to the Deformer, but you have not destroyed it by achieving a second "pow" strike, then the damage is ignored and not transferred to the next round. Note: If you have a card that can be treated as a "pow" or "nuke" symbol during combat you may use it to damage or destroy a Deformer.
Deformers move depending on the scenario you play.
Rogues
Rogues attack from the roofs of the Houses. When a player raids a House and a Rogue is on the roof of a House on the same map tile, then a combat is triggered:
-
The Survivor completes his raid action.
-
The Rogue attacks automatically without rolling any combat dice and delivers 2 wounds to the Survivor.
-
The Survivor may respond to the attack by spending 1 gun resource and rolling the combat die. The path to the Rogue must not be blocked by any barricade, border or other obstacle. The Survivor does not spend an Action Point for this combat, nor is it considered an Action. To destroy a Rogue you must roll 1 "nuke" strike. You can attack once per turn for each gang member. Note: If you have a card that can be treated as a "nuke" symbol during combat you may use it to destroy a Rogue.
Rogues are moved depending on the scenario you play.
Scavengers
When a player enters a tile with a Scavenger on it or when a Scavenger moves to a tile with a Survivor on it, they immediately attack using their Scav dice. There are 2 different Scav Dice. One has the numbers 1-2-3 and is called the Strike Die and the other has 6 colours that represent 6 out of the 8 resource colours and is called Resource Die. The only colours you will not find on that die are the food and the gun resources. The Scavenger rolls both dice and the Survivor loses as many resources of a specific colour as the die's number indicates. The Survivor must forfeit these resources (if he has them) from his collected resource pool and he places them next to the Scavenger miniature on that tile.
To attack a Scavenger you must be able to reach him along the roads of your current map tile without being blocked by any border or barricade or any kind of obstacles. You then announce you want to attack. If there are more than 1 Scavengers and you can attack them all you must first announce which one you want to attack and then follow the combat rules from the core game, with the following exception – to attack a Scavenger you do not need to spend Action Points nor is it considered an action. You spend 1 gun resource and you roll your combat die. If you roll a "pow" or a "nuke" the Scavenger is destroyed and you can take all the resources (if there are any) that the Scavenger had collected. Note: If you have a card that can be treated as a "pow" or "nuke" symbol during combat you may use it to destroy a Scavenger.
Scavengers movement depends on the scenario you play.
Exploring the Suburbs
Set-up
Set-up occurs as in the base game with a single difference. You will use the Suburb tiles instead of the basic game tiles. Place these tiles in a square formation (3x3) as you do in the base game.
You will also use the 6 Scavengers and the 2 Scav Dice.
Rules
Play with the rules from the base game with the following adjustments:
a) You can play with any of the Survivors from the base game as well as those from this expansion. Due to the fact that the Suburb tiles are more difficult and you also have to face the Rats Gang, we suggest using Survivors with better attacking power such as Carter or James.
b) Each time a Survivor moves from a map tile to another, spawn a Scavenger on the new map tile. At that time the Scavenger attacks the survivor rolling both Scav dice and the Survivor gets 1 Blacklist Point.
c) To destroy a Scavenger you must attack him and roll a "pow" symbol. Each time a Survivor destroys a Scavenger, he can choose: a) to take all the Resources the Scavenger has collected or b) to collect a Favour Point (single icon) or a Favour Point (stacked icon). If a Survivor chooses to collect a Favour Point, the resources are lost and must be returned to the pouch.
Editor's note: the printed text uses two different Favour Point icons (a single diamond and a stacked pair of diamonds) and the scan does not explain any difference between them; both are transcribed as printed.
d) Each time you step on a toxic area, or pass through a fire use the rules detailed earlier in this rulebook.
e) Each time a Survivor moves to a tile with a Scavenger on it, the Scavenger attacks automatically and the Survivor gets 1 Blacklist Point.
f) Each time a Survivor attacks a Scavenger and loses the battle, then the Scavenger counter-attacks.
g) When a Scavenger is destroyed, is removed from the board but not from the game. It can return back to the board. Remember the basic rule here (see (b)).
NOTE: You can also play with the Scavengers when using the tiles from the base game (either the Ruined City or the Wasteland).
Scenarios
The Black Market Is Under Attack!
Scenario 1: 3-5 Players
Co-op (three to five Survivor icons shown in the printed rulebook).
Mission: Protect the Black Market for 5 rounds from the Rats Gang. Don't let anyone get onto the Market tile. If you manage to protect the Black Market for 5 rounds or kill the Commander you win the game. (This scenario is co-operative with all players working together against the game.)
Set-up: Place the Map Tiles in the order shown in the image below. You can play this scenario with the tiles from the base game (on either side) or with the Suburb tiles. If you are playing the Wasteland tiles, the rules for diagonal lines apply normally in the scenario.
(The map layout diagrams and miniature placement diagrams for each player count are images in the printed rulebook and are not reproduced here.)
- After placing the Map Tiles place the House tiles following the rules of the base game.
- Remove from the game the Global Events, the Quest Cards and the Outpost tile and its miniature.
- The Survivors are placed together on the Black Market tile.
- Place the rest of the components of the game as you do in the base game but with the following changes:
- In a 3 player game you will play with 4 Scavengers, 3 Deformers, 1 Rogue and 1 Commander. See image below on how you place the miniatures.
- In a 4 player game you will play with 5 Scavengers, 3 Deformers, 2 Rogues and 1 Commander. See image below on how you place the miniatures.
- In a 5 player game you will play with all 19 members of the Rats Gang. See image below on how you place the miniatures.
(Set-up diagrams for 3, 4 and 5 players are images in the printed rulebook and are not reproduced here.)
Rules:
a) You treat your AP disk and SP disk the same as in the base game but in this scenario the Blacklist-Favor disk becomes your life points (LP). You set your life point disk at 0 and for each Wound you get you turn the disk to the Red side. When you reach 10 on the Red side, you die and you are eliminated from the game. Note that there are cards that can give you LP where you can turn your disk towards the yellow side. Note: the rules about the Red disk side from the core game DO NOT apply here. (It is recommended to use the Carter character in this scenario due to the fact that his items offer Nukes and Guns).
b) The Survivors begin with starting aid: Each Survivor starts with crafted Items equal to 4 Skill Points, they also get those 4 Skill Points and finally each Survivor gets 1 Gun token and 2 random Resources.
c) The Rats Gang miniatures move at the end of each round, after all the players have spent their AP as follows: 1) The Scavengers, the Deformers and the Commander moving 1 tile towards the market. Be careful how you place them on the tiles. It must be clear the road that each miniature is standing. 2) The Rogues jump to the roof of a House on the next tile. Only 1 Rogue is allowed on the roof of each House. You always place a Rogue on the roof of a Small House. If there is no such House then, you place it on a Medium House and so on. See the image beside to see how the Rats Gang moves through the map tiles:
(Movement diagrams are images in the printed rulebook: a 3-player set-up of the Rats Gang before their moves at the end of the round, and the positions after player movement, where the transparent view indicates the miniature's starting position.)
d) When a Survivor finds a Rats Gang miniature at the same map tile without being blocked by any barricade, border or obstacle combat is immediately triggered. Note that this is not considered as an action for the Survivor's turn.
e) If a Rats Gang miniature finds a Survivor miniature, either in the same tile or in their line of sight (depending on the Rats Gang miniature) then combat is immediately triggered. Again this is not considered as an action for the Survivor's turn.
f) If a Rogue cannot find a House on the next map tile because Survivors have raided them all then remove the Rogue from the board and place 2 Scavengers instead.
g) Survivors can use their crafted Item effects on other Survivors during their turn.
h) Survivors can spend Resources for other Survivors who want to craft a specific Item during their turn.
i) When a Survivor finds a Raid card with a Skull icon and decides not to raid that House, he gets 1 or 2 LP corresponding to the amount of Skull icons on the card. It's a good way to get LP during the game!
This scenario is recommended for 3-5 players but you may try to play this scenario with 2 players (using the rules and set-up for a 3-players game). It will be difficult to achieve victory and master the game.
Operation: Commander Edmund
Scenario 2: 3-5 Players
(Icons shown in the printed rulebook for this scenario.)
Mission: You must collect the 6 Source Tokens and by the 6th round move to the underground tunnel, reach the Outpost tile and destroy Commander Edmund. If by the end of the 6th round you have not completed this mission or if the Outpost Energy Die reaches number 20, you lose the game.
Set-up: Place the Map Tiles including the Outpost tile as shown in the image below. You can play this scenario with the tiles from the base game (on either side) or with the Suburb tiles. If you are playing the Wasteland tiles, the rules for diagonal lines apply normally in the scenario.
(The map layout diagram is an image in the printed rulebook and is not reproduced here.)
- After placing the Map Tiles place the House tiles following the rules of the base game.
- Remove the Global Events and the Quest Cards from the game.
- The Survivors are placed together on the Black Market tile.
- Place the Outpost Miniature on the Outpost tile along with the Commander Edmund and the D20 die.
- Incident cards work exactly like in the basic game.
- Place the Source tokens and the Guard tiles (from base game) as shown in the image below.
- The Rats Gang is placed in a specific formation next to the Suburbs as shown in the image below:
(The formation diagram is an image in the printed rulebook and is not reproduced here.)
- Place the rest components of the game as you do in the base game.
Rules:
a) You play with the rules of the base game with one difference in the Suburb tiles: the Underground Tunnel spaces are used only to enter the Outpost tile, the players as a team are trying to stop the rising threat of the savage Commander Edmund and his minions.
b) Each Survivor begins with 2 Guns and 2 resources of their choice.
c) Turn the D20 to 9. D20 represents the energy source of the Outpost. The Commander uses this source to bring more of his minions into the Suburbs. Remember: If the source reaches 20 you lose the game.
d) The Guards (from the base game) are hidden is certain Houses. When a Survivor is going to raid such a House he gets 1 Wound, then he raids the House and then the Guard attacks the Survivor using their own Combat die as in the base game.
e) A Survivor can trigger combat against the Guard if they are on the same map tile and if he has a Gun resource. In this scenario combat is not considered an Action and the Survivor does not have to spend Action Points. If the attack fails the Guard remains on the board and delivers 1 Wound each round to any Survivor on the same map tile.
f) When a Guard is destroyed in a 3-player game it is removed from the game. When a Guard is destroyed in a 4-player or a 5-player game it is reborn on the next round and placed on the same map tile it was on before in a location of your choice (but not in a House).
g) At the end of each round the Commander activates the source and brings his minions onto the board as in the diagram show in the set up image. Each round these minions increase by one from 2 minions, then 3 minions and so on. For each one of the miniatures that enter the board, you increase the Source die by 1.
h) When new minions enter the board, the previous minions move in circular formation as the images show below:
(Round 1 to Round 4 movement diagrams are images in the printed rulebook and are not reproduced here.)
i) Each time a Survivor destroys a Rats Gang member you decrease the Source die by 1.
j) The Survivors can collect only 1 Source token each Round. So during the 6th round they must have collected each Source token otherwise they cannot complete the mission.
k) When a Survivor destroys a Rats Gang member, the member is not removed from the game but he creates a new attack line as show in the images on the next page:
Round 1: The first two members are on the board. The Survivor attacks and kills one of them, the Scavenger (marked in red). The Scavenger begins a new attack line in formation. This attack line will include 6 members from the Rats Gang.
Round 2: The Deformer from the previous round is moving to the next map tile. The new members enter the board, and assuming that the Survivor destroys 2 more members in this round, they are added to the new attack line you created in round 1.
(Round 1 to Round 2 diagrams and the Round 3 and Round 4 diagrams on the following page are images in the printed rulebook and are not reproduced here.)
l) Use the rules detailed earlier on how the Rats Gang members act and how they are defeated. They move together as a pack in a circular formation.
m) To defeat the Commander you must deliver 4 "pow" strikes or 2 "nuke" strikes by the end of the 6th round. We recommend using Survivors who are better at combat.
n) Survivors can use their crafted Item effects on other Survivors during their turn.
o) Survivors can spend Resource for other Survivors who want to craft a specific Item during their turn.
p) When a Survivor finds a Raid card with a Skull icon and decides not to raid that House, he gets 1 or 2 LP equal to the number of Skull icons on the card. It's a good way to get LP during the game!
q) If a Survivor's LP reaches 10 on the Red side, they die and are eliminated from the game.
Operation Outpost: Last Stand
Scenario 3: 3-5 Players
Mission: Destroy the entire Rats Gang before the Outpost gets 10 strikes. If the Outpost gets 10 strikes it is destroyed and you lose the game.
Set-up: Place the Map Tiles including the Outpost tile as shown in the image below. You can play this scenario with the tiles from the base game (on either side) or with the Suburb tiles. If you are playing the Wasteland tiles, the rules for diagonal lines apply normally in the scenario.
(The map layout diagram is an image in the printed rulebook and is not reproduced here.)
- After placing the Map Tiles place the House tiles following the rules of the base game.
- Remove the Global Events and the Quest Cards from the game.
- The Survivors are placed together on the Outpost map tile along with the Outpost miniature.
- Incident cards work exactly like in the base game.
Rules:
a) Each Survivor begins with 1 Guns, 2 random Resources and Crafted Items equal to 3 Skill Points. The Survivors also get the Skill Point from these Items.
b) Use the rules detailed earlier on how the Rats Gang members act and how they are defeated.
c) The Rats Gang enters the Suburbs in triads at the beginning of each round and they move in an aggressive attacking line as in the images below:
(The attacking line diagrams are images in the printed rulebook and are not reproduced here.)
(Round 1 to Round 4 diagrams are images in the printed rulebook and are not reproduced here. Each round's diagram marks "STRIKE 1 TO THE OUTPOST" where a Rats Gang member reaches the Outpost.)
d) To defeat the Commander you must deliver 4 "pow" strikes or 2 "nuke". We recommend using Survivors who are better at combat.
e) Survivors can use their crafted Item effects on other Survivors during their turn.
f) Survivors can spend Resource for other Survivors who want to craft a specific Item during their turn.
g) When a Survivor finds a Raid card with a Skull icon and decides not to raid that House, he gets 1 or 2 LP equal to the number of Skull icons on the card. It's a good way to get LP during the game!
h) If a Survivor's LP reaches 10 on the Red side, they die and are eliminated from the game.
i) For each Rats Gang member that enters the Outpost map tile, count 1 strike on the Outpost. For each round a Rats Gang member stays in the Outpost map tile, count another 1 strike on the Outpost. Use the D20 die, to count the strikes.
The Characters
Casey, the Cook
As a former Special Forces operative trained in a dozen forms of martial arts, Casey undertook many extremely dangerous missions full of violence and bloodshed. When he tired of all the death he left the military and turned to his first passion - cooking. He spent years trying to forget his past, but when the bombs fell he found himself thrust back into a world of survival, where his old skills may just come in handy.
Angela, the Trainer
Angela was always the 'wild child' of the family, the black sheep who would never fit in or settle down. She spent most of her childhood and teenage years searching for a place to belong. She fronted a punk rock outfit, joined the local street gang and even dabbled in the occult for a while. The one constant was her ability to pick up any skill and excel at it. Wendy is a master of countless weapons and tactics come naturally to her. She hopes her skills will prove her worth to the masters of the Golden City.
Editor's note: the printed character text reads "Wendy" in Angela's entry; it is transcribed as printed.
Daphne, the Shooter
Before he died, Daphne's father gave her two things: the ability to strip, clean, assemble, load and fire almost any weapon and the burning will to survive. Although young, Daphne thrives in the wastelands. Quick-witted and a crack shot she can go toe-to-toe with survivors much larger and older than her. She has set her sights on the ultimate target - the Golden City.
James, the Driver
James lives for the sound of a high powered engine, the smell of petrol and the endless open road. Living on the fringes of society, James lived as a nomad moving from town to town when he grew restless. To him, the war has changed little except that fuel is becoming harder and harder to find. He hopes the Golden City will be able to provide him with the means to keep his motor humming and the highways running.