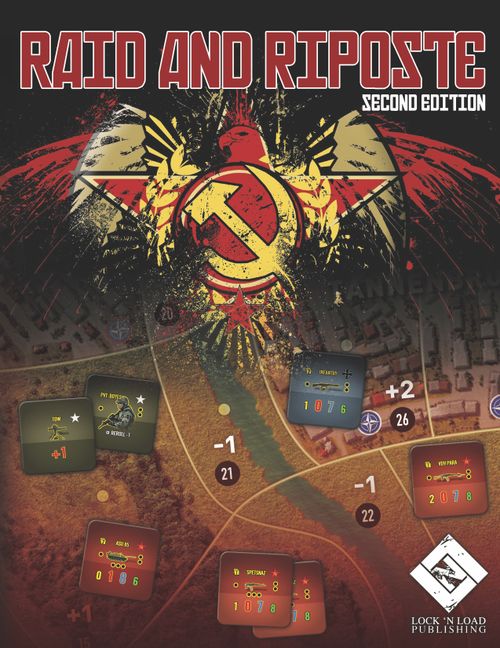
Raid & Riposte
Raid & Riposte Rulebook
Table of Contents
Table of Contents
1.0 Introduction
Raid and Riposte Second Edition takes places after the Warsaw Pact launches an invasion of Western Europe in the spring of 1985. In a surprise move NATO forces counterattack at city and bridge crossing of Tannenbruck. The Soviets did not plan on NATO counterattacking so quickly and called up the Soviet 1st Paratroop Regiment to hold the line.
2.0 Community and Support
If you have any game questions, or if you are just looking for other gamers with whom to chat, you can find quick replies on our Forums: http://forums.lnlpublishing.com.
If any parts of this game are damaged, or if you have any other support needs, please open a support ticket at our Support Desk: http://support.lnlpublishing.com.
You can also find additional game resources such as scenarios, counters, special rules and other community-design ideas in our Resource section: http://forums.lnlpublishing.com/resources.
3.0 Game Scale
Units represent companies, platoons, batteries, and leaders. An inch is approximately 750-1000 meters.
Turns equal a few hours of combat.
2.0 game Units
- Unit: Generic term for pieces that move and attack on the game map. Does not include the administrative markers.
- NATO: West German (gray) and American (green) units.
- Warsaw Pact: Soviet (red) units.
- Ranged Combat: Combat in which the attacker and target are not in the same area.
- Assault Combat: Combat in which the attacker and defender are in the same area.
- Ranged Combat Modifier: The number that is added or subtracted to 2d6 to determine the final Attack Value (AV) during ranged combat.
- Assault Combat Modifier: The number that is added or subtracted to 2d6 to determine the final Attack Value (AV) during assault combat.
- Defense Factor (DF): A unit's toughness and ability to withstand attacks. The factor is modified by the Terrain Modifier (TM).
- Morale: An abstraction of a unit's training, discipline, and overall coolness under fire.
- Action Points: Represented by dots on the edge of the counter, these represent the number of actions a unit can take in a turn.
- Administrative Markers: Includes Suppressed / Recovering, Airstrike, Turn / Initiative and Action Point markers.
5.0 Game Map
The game map is made up of areas representing different types of terrain and each area has an ID number.
Some areas will show Reinforcement Entrance Locations, Primary and Secondary Victory Locations, and any possible Terrain Modifiers.
5.1 Stacking
Up to six stacking points can occupy an area. German and American units cannot occupy the same area.
Stacking applies at all times. Stacking points are shown at the top left of the unit counter (Example: a VDV Para has two stacking points). Units which have no stacking points listed do not count against the stacking limit in the hex. Units from opposing sides (NATO and Soviet) may only occupy the same area during assault combat.
5.2 Terrain Modifiers
Terrain Modifiers represent the effect that terrain has on combat. Applicable Terrain Modifiers are added to the defender's DF (Exception: See Rule 7.3.5.3 Tanks in Assault Combat). The Terrain Modifiers are printed in the map area as a number from +2 to -1.
6.0 Sequence of Play
- Initiative Phase.
- Rally Phase.
- Operations Phase.
- Route Phase.
6.1 Initiative Phase
Both players roll 1d6. The player who rolls the higher number performs the first action in each phase. In the case of ties, the NATO player has the initiative.
6.2 Rally Phase
Perform the following actions in the listed order.
- Roll for cadre entry, if applicable (See Rule 7.3.6).
- Reset action points. Remove all Action Point Markers from all units, revealing that they are all at their maximum AP value. Suppressed / Recovering units are not reset.
- Remove all HIND helicopter counters from the map.
6.2.1 Suppressed and Recovering Units
Suppressed: Ranged and assault combat can suppress units. Place a Suppressed marker on the Suppressed unit. Suppressed units lose all action points, and their DF is reduced by two if targeted during assault combat. Suppressed units may attempt to rally in the Rally Phase.
Recovering: Suppressed units that fail to rally flip their Suppressed marker to the Recovering side. Recovering units receive a +1 to their morale and their DF is reduced by one if targeted during assault combat. A Recovering unit that receives a hit (see Ranged and Assault Combat) is Suppressed. Recovering units may attempt to rally in the Rally Phase. If a Recovering unit fails to rally, remove its Recovering marker, but do NOT reset its action points.
Example: A Morale 7 U.S. Infantry unit is Suppressed. In the following Rally Phase the unit's owner rolls 2d6. The dice read 3 and 5, for a total of 8. The unit fails to rally, and the Suppressed marker is flipped to the Recovering side. In the next Rally Phase (assuming the unit is not Suppressed during the Operations Phase), the U.S. infantry unit could attempt to rally by rolling 2d6 and comparing the results to its morale, modified by the Recovering marker (in other words 7 + one, or 8). If it fails, the Recovering marker is removed, but the action points are not reset in that Rally Phase.
Note: The Suppressed / Recovering / remove-but-don't-reset-action-points mechanic insures that a Suppressed unit will not be out of the fight for longer than three turns.
7.0 Operations Phase
Beginning with the initiative player, players alternate activating areas on the map containing their units to move or fire. Whenever both players sequentially pass, the turn ends.
Players must pass if they have no remaining actions to use. Players may pass at anytime and are not forced to use any or all of their actions.
7.1 Action Point System
Each unit is marked with a specific number of Action Points on its counter. Each time the unit is activated to move to an area or execute ranged combat, the unit must spend an action point. A unit may spend no more than one AP in an impulse (Exception: See Rule 7.3.5 Assault Combat). After a unit expends an Action Point, place the appropriate AP token on it to show how many AP it has left.
7.2 Movement
A unit spends one Action Point for each area entered. Units can only enter adjacent areas. Areas which share a side or a vertices are adjacent.
7.3 Combat
7.3.1 Ranged Combat
Units can attack as many times as they have action points available in a turn, but may only attack once per impulse (Exception: See Rule 9.5 AGS-17).
A target may be attacked as many times as the attacker has eligible units.
Conducting a ranged attack costs one action point. To attack a unit in ranged combat the target unit must be within range and the attacker and supporting units must have a clear Line of Sight to the target.
A unit's normal range is equal to its Range Combat Modifier (RCM). For example, a unit with a RCM of 2, could fire up to two areas away.
When computing range, don't count the attacker's area, but do count the target's area.
7.3.2 Line of Sight in Combat
Line of sight is blocked if the Line of Sight passes through an area containing buildings or trees.
Trace the LOS from the center dot of the attacker's area to the center dot of the target's area.
Note: All center dots are not in the precise center of their area. This is intentional.
7.3.3 How to conduct an Attack
To conduct an attack, the attacker rolls 2d6 and adds the attacker's RCM, along with an additional one point for any eligible in range supporting unit(s) from the same area. If the total is equal to or less than the target's Defense Factor (DF), plus the Terrain Modifier (TM), the attack is unsuccessful.
If the total is 1-2 greater, the target suffers one hit. If the total is 3-4 greater the target suffers two hits. If the total is 5 or greater the target suffers three hits.
Note: To be eligible, the supporting unit cannot be suppressed, nor have fully expended its AP for that turn. It does not cost the supporting unit an AP to provide support.
- The first hit suppresses a unit. Place a Suppressed marker on the unit. Suppressed units lose all action points, and their ASSAULT COMBAT DF is reduced by 2. Suppressed units may attempt to rally in the Rally Phase.
- The second hit reduces a unit. Flip the unit to its reduced side. If the unit is already reduced it is eliminated.
- The third hit eliminates a unit.
- The target may choose to retreat one area to negate the effects of one hit. Such retreats use all of the retreating unit's action points.
Note: Units can recover from suppression, and can subsequently be Suppressed again. For example, an un-suppressed, full strength unit, suffering two hits is Suppressed and reduced. In the subsequent Rally Phase the unit is rallied, removing the Suppressed marker, it remains reduced. In the following turn the unit suffers a hit. It is once again Suppressed.
7.3.4 Extended Range
Unless noted otherwise (Mortar is the exception), all units can fire one area further than their RCM. When doing so they have a penalty of -1 to the attack die roll.
7.3.5 Assault Combat
Assault combat occurs when units of the opposing sides occupy the same area. Assault combat costs one action point. The cost includes the cost of entering the area. The attacker/s add the Assault Combat Modifier (ACM) of the lead unit (nominated by the attacker), plus one for every supporting unit that moves into the area, and 2d6. This is the Attack Value (AV).
Note: To initiate or support Assault Combat a unit must have an ACM. Unit's with an asterisk in the ACM location cannot initiate or support Assault Combat.
The DF of the defending unit (as designated by the attacker), plus one for each supporting unit, plus the Terrain Modifier (TM), is called the Total Defense Factor (TDF).
7.3.5.1 Unsuccessful Attack
If the AV is equal to, or less than the target's TDF, the attack is unsuccessful and the attackers must return to the area from where they came. Set the attacker's action points to zero.
7.3.5.2 Successful Attack
If the AV is greater than the target's TDF, the area defenders suffer hits. If the total is 1-2 greater, the target suffers one hit. If the total is 3-4 greater the target suffers two hits. If the total is 5 or greater the target suffers three hits.
All hits must be assessed to the defending unit until it is eliminated (if necessary) or Suppressed, reduced, and retreated. After the lead defender has absorbed all the hits it can, the rest of the hits are spread among the defending units as the owner sees fit.
If after all hits are assessed, the number of remaining attacker stacking points is greater than the number of defending stacking points, the defender must retreat to an adjacent area. Otherwise the attackers must retreat to the area from which they entered. Set the retreating unit's action points to zero.
7.3.5.3 Tanks in Assault Combat
Tanks are large, difficult to hide, unable to take full advantage of cover during close fights. Accordingly, the TM of the area isn't added to tank units on either side.
7.3.5.4 Suppressed and Recovering Units in Assault Combat
Suppressed and Recovering units cannot support the defense of an area. If the defending unit itself is Suppressed, subtract two from its DF. If it is Recovering, subtract one.
7.3.5.5 Combat Results
- The first hit suppresses a unit. Place a Suppressed marker on the unit. Suppressed units lose all action points, and their DF is reduced by two during assault combat. Suppressed units may attempt to rally in the Rally Phase. The first hit on a Recovering unit still Suppresses the unit.
- The second hit reduces a unit. Flip the unit to its reduced side. If the unit is already reduced it is eliminated.
- The third hit eliminates a unit.
- The target may choose to retreat one area to negate the effects of one hit. Such retreats use all of the retreating unit's action points. Retreats must increase the range from the target to the attacker, and cannot decrease the range to another enemy unit. You cannot retreat into an area if it would violate stacking restrictions.
7.3.6 Cadres
If a Soviet VDV Para company is eliminated, roll 1d6 in the following Rally Phase. On a roll of 1-4 place the just eliminated unit, reduced side up, in Area 29. If the Area is controlled by NATO the Soviet player cannot roll for Cadre entry.
Roll only once for each eliminated VDV Para; the remnants either reform into a Cadre, or are lost forever. Subtract one from the die roll for the second or third VDV Para eliminated.
8.0 Route Phase
In the route phase the owning player can route any Suppressed or Recovering unit to an adjacent area. These units cannot violate stacking restrictions, nor can the route bring the unit closer to an enemy unit. The side with the initiative routes first.
9.0 Special Units
9.1 Mortar
Unlike other units, mortar batteries' RCM does not equal its range.
Mortars have a range of two areas. Mortar units attack all units in the area. Roll separately for each unit applying the rules for ranged combat.
Mortars cannot attack at extended range. A mortar unit need not have a LOS to the defender as long as any other friendly unit does.
9.2 Sniper
For his sole action of an impulse the NATO player may place the sniper on any unit located in Tannenbruck. He then rolls 1d6. On a roll of 1-4 the target unit is Suppressed. If already Suppressed, the unit suffers no further damage. On a roll of 5-6 the sniper counter is permanently removed from play.
Add two to the die roll on the second and subsequent use of the sniper.
The sniper can only be used once per turn. The sniper cannot attack the Hind. A unit may not retreat to ignore suppression by a sniper.
9.3 Sagger and TOW
These two units represent anti-tank guided missile (ATGM) teams. Each is assigned to one company of their respective side. They will always remain with that company, denoted by placement under the company. If the company is eliminated, the ATGM is removed. They increase the company's RCM by one.
9.4 Kastet
The 9K116 Kastet is an ATGM that is fired by the T-12 Anti-Tank Gun, and can only be fired one time and is then removed. Place the Kastet marker with the T-12 until it is fired and then remove it once fired. The Kastet increases the RCM by one.
9.5 AGS-17
The AGS-17 (Automatic Grenade Launcher) resolves its first attack normally, with one exception. If the Soviet player rolls doubles during the first attack only, they can attack a second time against either the same or a different target. Any supporting units cannot assist during the second attack.
The AGS-17's RCM cannot be used against units with a vehicle illustration on the counter.
9.6 T-12 Anti-tank Battery
The T-12 Anti-tank battery can only attack units with a vehicle illustration on the counter.
It cannot move from its initial placement area, even to retreat.
9.7 Col. Nikolas
Col. Nikolas must remain in an area with, and always move with, at least one other unit.
Col. Nikolas may use one action point to add one to any value of a unit in his area, including a mortar's range. Col. Nikolas may use this Action Point during the Rally Phase to increase the morale of one unit in his area.
Col. Nikolas cannot be attacked directly. If all units in Col. Nikolas's area are eliminated, Col. Nikolas is removed from play. Col. Nikolas may retreat with a unit from his area.
9.8 Pvt. Boyes
Pvt. Boyes must remain in an area with, and always move with, at least one other unit.
Pvt. Boyes may use one action point to allow a unit in his area to reroll one die, even during a rally attempt. Pvt. Boyes cannot be attacked directly. If all units in Pvt. Boyes' area are eliminated, Pvt. Boyes is removed from play. Pvt. Boyes may retreat with a unit in his area.
9.9 Commissar Col. Koval
Commissar Koval must remain in an area with, and always move with, at least one other unit.
Commissar Koval can't be attacked directly.
If all units in Commissar Koval's area are eliminated Commissar Koval is removed from play.
Commissar Koval may retreat with a unit from his area. Commissar Koval adds one to any assault in which he participates.
9.10 German HQ
Once per turn, the German HQ can spend an Action Point to give one Action Point to any unit in its area, or an adjacent area. All units in the HQ's area assume the HQ's morale.
9.11 Luchs Recon Unit
The Luchs unit decreases the defense factor of any enemy unit in an adjacent area during ranged combat only.
10.0 NATO and Soviet Air Capabilities
10.1 Airstrike
Beginning on turn one, both side's initiative die roll is compared to the turn number. If the NATO player rolls equal to or less than the turn number, the NATO Player receives an Airstrike. If the Soviet player rolls equal to or greater than the turn number, the Soviet player receives an Airstrike.
Airstrikes may be used once per turn.
Note: It is possible for both the NATO and Soviet player to earn airstrikes, since initiative roll ties go to the NATO player as per 6.1 Initiative Phase.
Place the counter in an area that is currently the target of ranged or assault combat. The attacker adds two to the appropriate modifier (ranged or assault) of the attacker. Remove the counter after the attack is resolved. If the attacker rolls doubles during an assault combat with an Airstrike the attacking unit receives one hit. The unit cannot retreat to negate this hit. If the owner wishes, Airstrikes may also be used separately to attack any area containing enemy units. Airstrikes can also support a mortar attack, but only add two to a single die roll.
10.2 Hind
Place the Hind in any non-enemy occupied area during a friendly impulse. It may only use its action points to conduct ranged combat. It is removed during the Rally Phase.
The Hind can be targeted normally in ranged combat. It is assumed the attacker is employing attached anti-air weaponry. Remove the Hind from the game map if it is Suppressed. It will return normally the following turn. Permanently remove the Hind from play if it is reduced. The Hind does not add the TM to its defense.
The Hind is not available on any turn when NATO has an Airstrike.
11.0 Game Setup
The NATO player sets up first followed by the Soviet player. The game lasts seven turns.
NATO: Setup
West Germany
Sets up first in any of the following areas: 1, 2, 3, or 4.
- 2 x M48 Companies
- 1 x Luchs Platoon
Warsaw Pact: Setup
Soviet: The Soviet player sets up second, but must first add units in the following areas: 7, 10, 14, 15, 16, and 28. The Soviets must have at least one stacking point in area 7, but otherwise may set up at their discretion within the named areas.
- 3 x VDV Para Companies
- 1 x Mortar Battery
- 1 x BMD Company
- 1 x T12 Battery
- 1 x AGS-17 Section
- Col. Nikolas
The following units must be set up in Area 19:
- 1 x ASU-85 Company
Reinforcements: Entrance areas are shown on the map as circles with West Germany in gray, United States in green and the Soviets in red. The number in the circle tells the turn that map area can receive reinforcements. Reinforcements not set to enter a set map area are shown on the Turn Record Track.
Turn 2 — West Germany
Enter area 1 or 2:
- 1 x M48 Company
- 3 x Infantry Companies
- 1 x HQ
Turn 3 — United States
Enter 4, 9, or 13:
- 3 x Infantry Companies
- 1 x TOW
- Pvt. Boyes
Turn 4 — United States
Enter area 3, 4, 9, or 13:
- 3 x M60 Companies
Turn 5 — United States
Place during the Rally Phase in any area solely occupied by a United States Unit:
- 1 x Mortar Battery
Turn 6 — West Germany
Any city area east of the river.
- 1 x Territorialhehr Platoon.
If the area is occupied by a Soviet unit, the Territorialhehr platoon immediately initiates assault combat.
Turn 6 — Soviets
Enter area 27, 29, or 30.
- Commisor Koval, 1 x Spetsnaz.
Note: Units designated to "enter" an area must pay an action point to do so. Units named to be "placed" in an area arrive without expenditure of an action point.
12.0 How to Win
To win, the NATO player must control the Primary and at least one Secondary Victory Objective. The Primary Victory Objective is map area 19 and all adjacent areas. The map below shows map area 19 and the adjacent areas necessary to meet the Primary Victory Conditions for NATO. These map areas have a NATO symbol with a red ring around it to denote them as the Primary Victory Objective.
The NATO player must also control at least one Secondary Victory Objective from the following map areas: 26, 28, 29, or 30 shown on the map below. These are the Secondary Victory Objectives and these corresponding map areas have a NATO symbol with a white ring around it to denote them as the Secondary Victory Objectives.
A map area is considered in control of the player who is the sole occupant of the map area, or the last player to have been the sole occupant of the map area.
Includes:
- 2x Map
- 2x Player Aid Cards
- 1x Manual
- 1x Counter Sheets