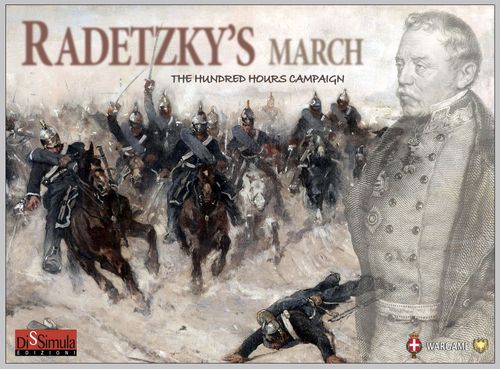
Radetzky's March: The Hundred Hours Campaign
Radetzky's March: The Hundred Hours Campaign Rulebook
Table of Contents
Table of Contents
Abbreviations List
Austrian: Chl: Chevaux-Leger; Drg: Dragoons; FJ: Feld Jäger; G: Grenadier; Grnz: Grenzer; Hus: Hussars; I.R.: Infanterie Regiment; L: Landwher; KJ: Kaiser Jäger; ST: Styrian Schützen; Uln: Ulhans; VV: Vienna Volunteers.
Piedmontese: Ao: Aosta; Bers: Bersaglieri; Ca: Casale; Co: Composta; Cn: Cuneo; Cvl L: Lombard Light Cav.; G: Guards; GN: Guardia Nazionale; L: Lombard; RN: Real Navi; Man: Manara; Nov: Novara; Form: Formation; Pi: Piemonte; Pn: Pinerolo; Re: Regina; Sa: Savoia; Sv: Savona.
Components
Game Map
The map represents the area in which the opposing armies maneuvered and fought. On top of the map there is an hexagonal grid that is used to regulate placements and movements of the units. The hexes contain different types of terrain, both artificial and natural, capable of influencing movements and combats in a different way. The map shows printed tables and tracks which are used to record and adjust some game functions. In particular:
Turn Record Track. The progression of the game is recorded on this table through the progress of turns. The amount of activation points available to each player during the various game turns is also shown. Austrian or Piedmontese symbols present in some turn boxes indicate the entry of reinforcements.
Combat Result Table - Cavalry Charge Table. These tables serve to resolve fights between units; their use is explained later.
Radetzky - Chranowsky holding box. In these two spaces are placed the Command Counters of the formations activated by Radetzky or Chranowsky.
Counters
Most of the counters in the game represent Piedmontese (on a light blue background) and Austrian (on a gray background) military units of different sizes: divisions (2 squadrons of cavalry) battalions and regiments whose size varies from 400 to 3000 men with their cannons. Some numerical coefficients are reported on them that represent the ability to move and combat with efficiency. If the combat value is greater than 1, on the back of the counter the units show smaller values that indicate a lower efficiency due to the losses suffered in combat. There are also symbols and colors that identify the type, historical designation and any combat bonuses.
The other counters in the game represent the commands of the upper formations (Divisions or Army Corps), the commanders in chief or are markers that are used to identify those units that, during the course of the game, are involved in particular situations.
Unit without command designation. Some Piedmontese units (3rd - 4th Bersaglieri, Guides, Art, Bridge Crew, National Guard) do not belong to any division; they can be activated indifferently by any Piedmontese command according to the methods described below.
Terrain effects charts
The table shows the various costs that units must pay to cross that particular hex and any benefits for the units that defend it.
Placement card
The card shows the deployment area of the units of both armies. Some units are not present in the first round but enter later, during the game.
Die
The die is used to resolve fights and other events.
Game Setup
Players choose which army to play and place the corresponding troops on the map according to the placements card. The first to deploy is the Piedmontese player; the bridge crew of the II Austrian corps (d'Aspre) can already start in bridge mode in its placement area. The turn marker is placed on Turn 1 of the Turn Record Track.
Game sequence
Each game turn involves a set of activities by both players, typically moving and fighting.
When for that turn all the planned activities have been performed, the turn ends; the turn marker is advanced by one box on the Turn Record Track and the players move to the next turn. When all the turns of a game are over, the game ends and the victory conditions are checked. The game can end first if certain special conditions are met (see: Game End).
In detail the operations that must be performed by the players in each turn are:
-
A - Choice of the formations to be activated for that turn (including the Independent units).
-
B - Supply and recovery phase (for the first turn of each day: turns 5, 10, 17 and 23). During this phase the "Stop Charge" and "Out of Supply" markers are removed. Players can also recover losses if certain conditions are met.
-
C - Operations phase:
- Extraction of command counters
- Movement and combat of activated formation
Steps 1 and 2 are repeated until there are command counters to be extracted by the container.
-
D - End of turn, the turn counter is advanced by one box on the Turn Record Track and the sequence is started over again from phase A.
Stacking
Friendly units and enemies can never occupy same hex at the same time except during a charge. Up to 3 friendly units can be stacked in the same hex; of these, at most, two may be of normal size. The smaller units are identified by an "s" ("small") on the upper left corner of the counter. Stacks can be formed or loosened at any time during the movement phase (or, in some cases, created as a result of fighting).
Units Activation
Activation points
They represent a theoretical estimate of the ability to move and fight of the two armies. As can be seen on the Turn Record Track the availability of points varies depending on the army and the game turn. These differences try to reflect the different operational attitudes of the two armies: while the Piedmontese are generally quite active at night, the Austrians tend to move little during the morning becoming very active in the second part of the day.
Procedure
At the beginning of the turn both players check the amount of command points available on the turn record track; each point allows to activate a corps (Austrian player) or a division (Piedmontese player).
Secretly and separately the players decide which corps or divisions to activate, by selecting the appropriate command counters, adding to them the "INDEPENDENT" counter and placing them all inside a convenient container where they can be mixed and extracted alternately during the turn.
Note that command counters can only activate military units belonging to their own formation or units that do not have a specific designation.
Example: D'aspre will be able to command only units of the second corps, distinct from the yellow box on the counter that indicates the corps to which it belongs; Ferdinando will be able to command units of the 4th division, green box, as well as all the Piedmontese units that do not have a specific designation and are within his own command radius.
Players alternate as they believe in extracting command counters. When a formation is drawn, the player it belongs to can activate it or pass it. If it pass, the formation can no longer be activated for current turn.
Example: turn 6, the Austrian player has 3 activation points; decides to activate the II, IV and the 1R Corps; takes the three command counters and places them in the container, together with the 'Independent' counter. The Piedmontese player has 4 activation points: he decides to activate the II - IV - V and the Reserve divisions, placing them in the container, he too together with his 'Independent' counter.
Activation of formations
The extracted counter is placed on the map; all units of his formation that fall within his command range can be activated, may move and fight. In addition, can be activated all units which do not have a specific designation (e.g. the 3rd and 4th Bersaglieri battalion, etc.) always within the command radius, provided that they are no longer activated for the current turn.
Important: the command radius can not pass through enemy units.
Command radius
- Chrzanowski - Radetzky: 10 hexes
- Austrian corps: 8 hexes
- Piedmontese division: 6 hexes
- Independent: 1 hex
Radetzky and Chrzanowski
In addition to the formations command counters, the players also have a counters that represents the commander in chief. This counter allows, once extracted, to activate and coordinate several formations simultaneously. Note that it has a wider command range than the counters representing the divisions/corps commanders. When a player decides to use the commander in chief, he selects the formations he wishes to activate at the same time, placing them in the appropriate holding box on the map. In their place, in the container, he places the commander in chief counter. When the commander is drawn all the previously selected formations are automatically activated and from that moment move and fight as if they were a single formation (it is advisable, once the commander has been taken out, also place the markers of the formations so activated, in order to facilitate the identification of retreat paths). Both commanders can activate a maximum of 3 formations per turn and can only be used on alternate turns.
Example: Turn 2, the Austrian player has 4 activation points; he select the counters of the I, II and IV corps by placing them in the holding box on the map; in their place in the draft container he places the Radetzky counter. Moreover, since it still has a command point, select the 1R corps and place the appropriate counter in the same container, together with its Independent counter. The Austrian player will be able to use Radetzky again from turn 4.
Reserve
During the turns in which the commander is activated, the player may designate a RESERVE formation among those that will be activated by the commander. This formation can be activated after the commander in chief has activated and moved the other formations under his command and resolved the relative fights.
Example: the Austrian player selects for the current turn the 1st, 2nd and 4th corps, arranges them in his holding box and places the Radetzky counter in the container; next to the counter of the IV corps he puts the RESERVE marker; when Radetzky is drawn, the Austrian player moves and fights simultaneously with the units of the first and second bodies; when he has finished, he moves and fights with the units of the IV corps, the one designated as RESERVE.
Independent
At each turn, including nights, players have the opportunity to activate some units regardless of the activations of the formations. Once the INDEPENDENT marker has been extracted according to the usual methods, it is placed on the map next to the units who he wants to activate, provided that they have not already been activated at that time. The command radius in this case is 1 hex. The units that can be activated in this way can be at most 3; they also do not need to belong to the same formation. These units can no longer be activated during the current turn. The INDEPENDENT marker does not cost activation points.
Austrian surprise
During the first game turn, the Austrian player may move the second corps first, without draw.
Movement
Once a formation has been activated, the units in command that are part of it can move individually or as a stack. Movement is voluntary, a player can move all, part or none of his units. Units that move are not required to spend the entire availability of movement points. The units or stack move must be completed before starting another one.
The number of hexes that a unit can cross is given by its movement factor; the unit pays movement points for each hex in which it enters; the number of movement points that it spends depends on the type of hex (or side) crossed; the Terrain Effects Table shows the costs for each type of hex. Units may not move voluntarily into an out-of-supply hex. If they are already out-of-supply, ignore this rule.
Movement in contact with enemy units
Crossing a hex adjacent to an enemy unit involves the expense of 1 additional movement point and the road movement cannot be used.
Strategic Movement
Units that start at least 3 hex from enemy units and remain in their movement always at 3 hexes away from enemy units double their movement factor.
Map exit
Some victory conditions allow to the players to earn points if units leave the map on some roads; when a player wants to make use of these conditions he simply puts the counters, once off the map, aside; their value will be calculated at the end of the game. It is not possible to bring units already off map back into play.
Visibility of enemy units
It is always possible inspect enemy units and stacks, any time.
Example of units movement
The Austrian player activates the first corps (Wratislaw) by placing the command counter so as to be able to reach all the units present in the example. Hussars move first through the forest, spending 2 movement points; then they move in the swamp, spending another 2 movement points to which 1 point is added for the adjacent Piedmontese unit, thus they stop. The IR 17 moves entirely along the road, spending the 3 available points and moving 6 hexes. Even the FJ 10 follows the same path and, thanks to its greater availability of movement, manages to arrive in the same hex as the IR 17. Then moves the Grenz 3, spending 3 movement points to get to the road and from here, with the last available point, he reach the hex together with the previous units.
The artillery moves along the road for two hexes, spending 1 movement point. Since it is far more than three hexes from the Piedmontese unit it can use the strategic movement, doubling its three points. Then it move for another 3 hexes, renouncing the last two points available. The deck crew moves closer to the river.
The last activation concerns the INDEPENDENT units, which the Austrian player places in this way, activating the cavalry of different corps. The Uln 3 move in strategic, with a total of 12 points available, reaching the woods. Chl 5 also doubles the availability of movement points, and even they manage to reach the woods with the previous unit.
Cavalry Charges
During the movement, cavalry unit (or stack), if they belong to an activated formation, can charge opposing units positioned in open terrain if they have enough movement points to enter the objective hex of the charge. For the resolution consult the Charge Table (note that the table differ depending on whether the target is made up of cavalry or infantry). Cavalry units that win a charge occupy the enemy hex and may, if they have enough points, continue the movement and / or charge. If the target of the charge is a cavalry unit it may attempt to evade the combat and withdraw 1 or 2 hexes at choice, if the die obtains 1 to 4. In this case, if the attacking unit still has points available, can chase and attempt a new charge toward the retreating unit. If the target of the charge is a stack made up of cavalry and infantry, for the resolution of the charge the cavalry table is used. Cavalry units after the charge, even if the result was unfavorable, can join the normal fighting.
Procedure
The active player adds the attack value of the units that are charging and compares them with the sum total of the units they are defending. If the objective of the charge consists only of cavalry, the table 'Vs cavalry' will be used; the 'Vs Infantry' table is used in all other cases.
The difference between the two coefficients makes it possible to identify the appropriate column. Differentials above +1 is resolved on column +1, differential lower than -3/4 is resolved on column -3/4.
Results
- AE - DE: Attacker or defender eliminated.
- A2-3-4 / D2-3-4: Attacker or defender must lose the indicated number of steps (alternatively it can absorb losses up to two steps by withdrawing up to two hexes according to the same combat modes shown below).
Failure of cavalry charge
Cavalry units that fail a charge (e.g. with a result 'A2', 'A3' etc.) can no longer attempt other charges until the next day. To remember this, a "STOP CHARGE" counter is placed on them, which will be removed the next day during the supply phase. Units may still move and participate in fights normally.
Example: The austrian player decides to activate the 2nd dragons regiment that moves 1 hex, forms a stack with the uhlans counter, moves a further hexagon and charge the piedmontese regiment. The combat total of the austrian stack is 3, while the defending force is 2; the combat differential is +1 in favour of the attacker; the austrian player rolls a 5. This roll, crossed on the VS infantry charge table, under the +1 column results in a D4, which involves the destruction of the piedmontese unit. At this point the stack separates: the dragons remain in the charged hex while the uhlans continue to move.
Bridges
To bridge, the player must bring an active bridge crew unit into the hex adjacent to the river and declare the construction of the bridge, turning the counter and showing the bridge side. At the end of the next turn the bridge is ready and on the following turns the units can go there by paying the foreseen costs (in other words, it takes 1 full turn to set up the bridge). In the case that an enemy unit is adjacent to the bridge under construction it is completed only if, by rolling a die, the result is 5 or 6. A bridge can be dismantled simply by declaring it; in the turn that happens, the counter is turned and from the next turn it can resume movement.
A bridge is destroyed if an enemy unit can cross it or win a combat with units that defend the bridge. A bridge crew is captured if enemy units enter its hex. A bridge crew always follows the fate of the units with which it is stacked: if they retire, the bridge crew retreats with them and if they are destroyed, the crew is destroyed. The elimination of a deck crew (or the destruction of a bridge) does not satisfy loss steps but allows you to gain 3 victory points.
Combat
After the movement and only during the day turns (during the night you do not fight!) active units can attack adjacent enemy units. Combat is voluntary, never obliged to attack; if a counter or a stack decides to fight must however engage all adjacent enemy units. A stack can divide its attacks by assigning a different combat to each unit. A unit (or stack) can be attacked (and attacked) simultaneously from all the surrounding hexes; simply, all units that attack a hex and all those that defend it add up the respective factors by solving the combat with a single die roll. The attacker decides the order of the various fights; a fight must be completely resolved before moving on to the next, applying losses, retreats and advances.
Procedure
The active player indicates which hex will be attacked and from which units; calculate, for each combat, the attack factor summing all the values of the attacking counters and dividing it by the sum of the factors of the defending units, thus obtaining a ratio of forces, rounding down if necessary.
Once the force ratio is obtained, the player locates the appropriate column on the Combat Result Table, applies any modifiers and rolls a die. The crossing of the result of the die with the ratio of forces allows to obtain the effect of the combat, which is applied immediately before moving on to another fight.
Ratios greater than 6:1 are however resolved on the 6:1 column, ratios below 1:5 are resolved on the 1:5 column.
Combat Modifiers
Encirclement. If a unit or stack is attacked by units in opposing hexes (example A) or units in three different hexes separated by empty hexes (example B) or units in more than three hexes (example C), the attacker benefits from a right column shift on the Combat Result Table. The encirclement is not possible against fortified cities or fortified hexes.
Ground. When the defender occupies certain types of terrain or the attacker must cross certain particular hex sides the defender benefits from one or more displacements to the left of the columns on the Combat Result Table. These effects are shown on the terrain effects table. This benefit only applies if all attacking units must cross that particular side of the hex.
Elite units. Some units have a number in a white circle in the upper right corner of the counter. This number represents the greater effectiveness of that units, and can be added to or subtracted from the die when the units are engaged in combat, both on offense and on defense (it can be applied to the maximum +1 or -1 for each combat).
Benedek. The Benedek counter is not counted within stacking limits; also in this case, its combat modifier can be added or subtracted to the result of the attacking or defending dice, as in the case of elite units. It is activated as any unit of the Austrian II Corps and can be used in fights where there is at least one unit of this corps. Benedek is eliminated of the game when stacked units with him are eliminated. You cannot combine this modifier with that of other units, you can apply a maximum of +1 (or -1) per combat to the die.
Combat Results
The numbers indicates the steps loss inflicted to the attacker (A) or the defender (D). This result can be absorbed in different ways:
- Turning the counter, showing its weaker side (if it has it): this satisfies 1 step lost (if the counter has only one step it is eliminated).
- Eliminating it; this operation satisfies two steps lost (as above, if the piece has only one step the elimination only satisfies the equivalent step lost.
Alternatively, the player can satisfy the steps losses by withdrawing the units by 1 or 2 hexes:
- 1 withdrawal hex satisfies 1 step lost
- 2 withdrawal hex satisfies 2 steps lost
For example: a stack receives a result D3; the defender satisfies the result by turning a unit and withdrawing the stack of 2 hexes. These methods can be combined with each other.
ENG (Engaged) result
Units remain in place facing each other until the end of the next turn, with no chance of disengaging. To highlight this condition the appropriate marker is placed on the units.
Retreat
The retreat following a fight must be conducted in a straight line, towards its own lines in the direction of the hypothetical position of the command counter of the formation or at least of its last known position, if possible privileging the empty hexes and avoiding passing next enemy units. If the retreating unit is likely to end up in over-stack (that is, in a hex already occupied by the maximum limit of allowed units), it is forced to retreat further hexes, until it is no longer in over-stack. It is not possible to withdraw from the game map.
Advance
The attacker can advance into the hex left free by the defender with the units that participated in the attack, respecting the normal stacking limits. If a result of D2 or higher was obtained on the Combat Result Table and this resulted in the elimination of the defender or a retreat exceeding 1 hex, the attacker may advance 2 hexes: the first hex is the one left free by the defender, the second can be any hex adjacent to this. The advancing forces can move into out-of-supply hexes.
Evade combat
Cavalry and horse-artillery can always avoid combat if attacked by forces composed solely of infantry and/or artillery. If they decide to do so, they can move 1 or 2 hexes following the normal retreat rules. If the cavalry is also present in the attacking force, the combat can be avoided with by rolling a die and getting from 1 to 4. The attacker can advance 1 or 2 hexagons; if he decides to do so he can occupy the hex left free and then move a further hex in any direction. This movement does not give rise to a new fight.
Combat example
From left to right: the cavalry and the Austrian artillery attack the Piedmontese cavalry that tries to retreat, roll the die and get a 5 failing the attempt and thus suffering the attack. The sum total of the two Austrian units is 5; it is divided by the combat factor of the Piedmont cavalry, 1, obtaining a ratio of 5:1 in favor of the attacker. The Austrian rolls the die, gets 3 to which the +1 artillery modifier must be added, total 4. Check the result on the Combat Result Table under the column 5:1, crossing it with the 4 of the result. The effect indicates D3 for the defender: the cavalry is destroyed because, even if it could withdraw of two hexes it has only 1 loss step. The Austrians units advance two hexes.
The IR 3 attacks the Piedmontese unit through the torrent: 2:1 but, since it attacks through the torrent the ratio slides 1 column on the left in favor of the defender, finishing on 1.5:1. Roll the die and get 1, which corresponds to a result of A2; IR 3 withdraws of 1 hex and loses one step.
The Manara Bersaglieri, combat factor 2, are attacked by 3 units for a total of 9 points: 9 divided by 2 allows to obtain a ratio of 4:1 (rounded down). The Bersaglieri however occupy a hex of the forest, the ratio slide a column to the left in their favor. The modifier given by the stream in this case does not apply because not all attacking units must pass through it. The Austrian rolls a die and gets 4 lowered to 3 because the Bersaglieri use their combat bonus by applying -1 to the die. The 3, crossed on the 3:1 column, gives D1: Bersaglieri retreat, 1 hex. All attacking Austrian units advance into the conquered hex.
The last fight sees 3 other Austrian units, with a total of 9 combat points, attack an enemy unit with a combat factor 2. The ratio in this case is 4:1 which, thanks to the encirclement given by the FJ 3 and IR 53 moves one column to the right in favour of the attacker. The Austrian rolls the die and gets 4 to which he adds the +1 bonus of the FJ 3 unit. The 5 thus obtained, crossed on the 5:1 column, results in a D4, causing the complete destruction of the Piedmontese unit. IR 53 advances into the combat hex, continues and reaches FJ 3. IR 38 limits itself to advancing in the conquered hex. FJ 3 remains stationary.
Supply
Supply is controlled on the first turn of each day: turns 5, 10, 17 and 23. The troops are supplied if they are within 5 hexes of a road connected to a supply hex and this path is not occupied by enemy units.
The supply hexes are for the Piedmontese player all the roads that go out to the north (west of Ticino), west, south. For the Austrian player all the roads that come out of the east side of the map. The supply terminals are marked with a special symbol. A supply hex can be occupied by enemy units. If this happens, that supply terminal is no longer valid for supply until it is occupied.
Prevent enemy supply
A friendly unit in order to interrupt enemy supplies must be supplied itself. Units cannot move voluntarily into an out-of-supply hex (this check is carried out at the same time as the movement). In other words, in order to cut off enemy supplies, it is necessary for a force arrive behind the enemy, keeping its supply line free, or that the enemy units are completely surrounded.
Alternative sources of supply
Units occupying city hexes (Novara, Vercelli, Casale, Pavia) or towns (Mortara, Vigevano, Abbiategrasso, Magenta) are considered supplied even if they are not able to draw a line towards a friendly supply hex.
Effects of being out of supply
Units out of supply lose 1 step, have reduced movement by 1 movement point and a negative shift is applied to them on the Combat Result Table in case of combat if they attack (if they defend there are no malus). A special counter (OoS: Out of Supply) is placed on them to remind players the effects of this condition. The marker is removed if, during the subsequent supply phase, the units can be supplied. Otherwise they are eliminated. Units in this condition (and only in this case) can move in out of supply hexes.
Recovery
During the supply and recovery phase the players can recover one step for each committed formation provided it is in supply. The recovery takes place by bringing a reduced unit (that has suffered losses) to full strength. The unit must be on map and not adjacent to enemy units. Units that are off-map or that have been eliminated can never be recovered.
Reinforcements
During the course of the game both players receive reinforcements; these units are placed on the entry point at the beginning of the arrival turn (see the reinforcements table). From now on they can be activated according to the normal rules. If the enemy occupies the arrival hex, reinforcements can be placed in the adjacent any hex.
Entry of the Ramorino division
The Piedmontese player can enter the 5th division by following this scheme:
- Turn 5: Roads from the south side of the map between the rivers Agogna and Terdobbio
- Turn 6: Roads from the south side of the map between the Sesia and Terdobbio rivers
- From turn 7: Any road that, from the south side of the map, are west of the Terdobbio stream
Game End
The game ends immediately when one of the two players recognizes his own defeat or:
- The Piedmontese occupies Pavia with supplied forces
- The Austrians occupy Casale, Vercelli and Novara with supplied forces
- A player loses the game, at any time, when the difference in step lost compared to his opponent is 24 or higher.
Victory at points
If an automatic victory does not take place, the game ends in any case at the end of turn 23 and the player who scored the most points wins the game. Both players check the points scored according to the following table:
| Player | Points |
|---|---|
| Both | 1 point for each step lost |
| Both | 3 points for the possession of each of the following cities: Mortara, Vigevano, Abbiategrasso, Magenta |
| Both | 6 points for the possession of each of the following cities: Casale, Vercelli, Novara |
| Austrian | 2 points for the Austrian player for each supplied* step that exit from west side of the map |
| Piedmontese | 2 points for the Piedmont player for each step supplied* step that exit from east side of the map |
* In this case the supply is checked at the beginning of the next turn (the communication lines of the off map formations must be free and remain such for at least one day).
Scenarios
(The Scenarios section of the English rulebook is empty; the setup and reinforcement information is on the placement card and map tables, which are not part of the rulebook text.)