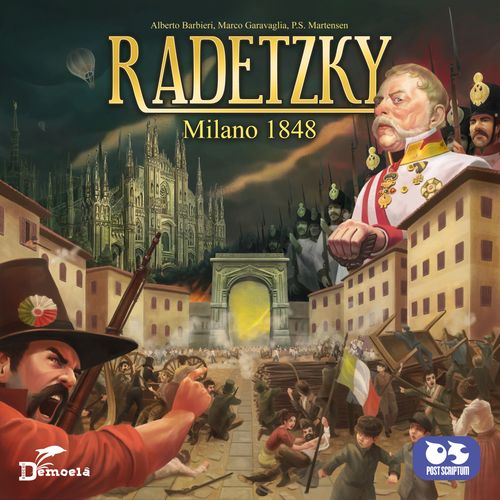
Radetzky: Milano 1848
Radetzky: Milano 1848 Rulebook
Table of Contents
Table of Contents
Components
- 1 Game Board, depicting the map of Milan bounded by the Spanish Walls, later demolished in the 19th century
- 1 Advanced Game board
- 110 cards, size 58x88, divided into:
- 16 Zone cards
- 33 Austria cards
- 60 Italy cards
- 1 First Player card (with a summary of the Austrian turn)
- 5 Patriot pawns, in 5 colors
- 1 Combat cube
- 50 Austrian Soldier cubes
- 1 cardboard standee depicting Radetzky
- 5 Help tiles (Base side / Heroic side)
- 5 Mobile Barricade tiles
- 11 Conquered Zone tiles
- These rules
Game Objective
Conquer at least 5 Zones without the Austrians conquering as many or more.
Basic Game Mode
The first part of this rulebook describes how the Basic game mode works. We recommend playing your first game with this version, which contains a reduced set of rules compared to the Advanced version. Winning still won't be easy!
The rules for the Solitaire game are at the end of the manual.
Setup
For a 2-player game, set up the game following the rules for 3 players, then read the dedicated chapter on page 17.
- Place the Game Board on the table, positioned so that it is easily reachable by all players.
- Place the Zone, Austria, and Italy card decks on the Board, in the spaces dedicated to them.
- Each player chooses a color and takes the corresponding Patriot pawn.
- Randomly determine the First Player, who receives the corresponding card.
- Prepare the Soldiers to be used during the game based on the number of players: 44 for 3 players, 47 for 4 players, and 50 for 5 players. Leave any unused Soldiers in the box.
- Reveal the top card of the Zone deck and place it next to the Game Board. This card is now defined as Available (meaning you will be able to Conquer the Zone associated with it — see page 6). Place Radetzky and 3 Soldiers on the corresponding Zone on the map.
- Place the other Austrian Soldiers as follows:
a. Reveal a number of cards from the Zone deck equal to the number of players and place 2 Soldier cubes on each of the indicated Zones.
b. Repeat the operation with an equal number of Zones, on which you place 1 Soldier.
c. Reshuffle the cards revealed in points 7.a and 7.b into the Zone deck, which is then placed back in its dedicated area, face down.
d. The card corresponding to the Zone where Radetzky is located stays next to the Game Board, face up.
- EXAMPLE 1: in a 4-player game, you draw 1 Zone on which to place Radetzky and 3 Soldiers, 4 Zones on which to place 2 Soldiers, and then 4 more on which to place 1 Soldier. In total there will be 15 Soldiers on the board.
- Starting with the First Player and proceeding clockwise, draw 4 cards each from the Italy deck.
- Starting with the First Player and proceeding clockwise, place your Patriots on the Board. Patriots can only be placed in Zones without Soldiers. It is possible to place more than one Patriot per Zone.
- The first Round of the game can begin.
Note: the Advanced Game board, the Help tiles, the Mobile Barricade tiles, and the Combat cube are not used in this mode and can be put back in the box.
How to Play
Each Round of the game consists of the following phases:
- Individual player turns
- Austrian turn, divided into: a. Check the Castle b. Conquer Austrian Zones c. Check victory conditions d. Arrival of new Soldiers
- New Round
Phase 1: Individual Player Turns
Starting with the First Player and proceeding clockwise, each player has a maximum of 3 ACTIONS available, chosen from among the following:
- Move
- Conquer a Zone
- Fight the Soldiers
- Fight Radetzky
- Refresh your hand
IMPORTANT: talking is allowed during the game! Coordinate with your teammates to decide what to do.
Move
You can move your Patriot into any Zone adjacent to the one it is in. Ignore the Barriers drawn on the map. Each move costs 1 Action. If you enter the Zone where Radetzky is located, or if you find yourself there following one of his movements, you cannot move until he leaves. You may still perform the Fight Radetzky or Refresh Your Hand actions. It is possible to move normally into Zones that contain Soldiers or that have already been Conquered by either Faction.
Conquer a Zone
If your Patriot is in an Available Zone (see point 6 of Setup), and if there are no Soldiers or Radetzky in that Zone, you may spend 1 Action to Conquer it. Place an Italian Zone token on it and put the corresponding card back in the box. Once Conquered, a Zone can never be lost again. Now victory is closer!
Available Zones. At the start of the game, the Austrians control most of the city. The Italians must wait for the right opportunity to Conquer a Zone. A Zone that can be Conquered is called Available and is represented in the game by the corresponding Zone card, placed face up next to the board. You cannot Conquer a Zone until its corresponding card is revealed. The Austrians, on the other hand, have no such restriction and can Conquer any Zone (see page 10).
Fight the Soldiers
If there is at least 1 Soldier present in the Zone where your Patriot is located, you may decide to fight it, as follows:
- Reveal a card from the Austria deck and look at the icon shown at the top.
- Play a card from your hand, following this table to determine which of the two wins the clash:
- Swords beat the Map.
- The Map beats the Cannonball.
- The Cannonball beats Swords.
- If two cards show the same icon, it's a tie.
Note: the icons were chosen specifically to recall Rock, Paper, Scissors, to make it easier to remember the winning combinations. Ignore the other icons shown on the Italy cards. They are not taken into account during the Fight action (nor during any other action available in the Basic game mode).
The following outcomes can occur:
a. If the Italian card beats the Austrian one, place 1 Soldier in the Lens area on the board. You must now decide whether to continue the Fight or stop:
- If you continue, start again from point 1.
- If you stop, return to the general reserve all defeated Soldiers present in the Lens area, thereby eliminating them from the board. b. If the Italian card loses against the Austrian one, the fight ends immediately. Leave all Soldiers in the Zone, returning to it any that were in the Lens area. c. If the Italian card ties with the Austrian one, you MUST start again from point 1, revealing a new Austrian card and playing a new Italian card. If you have no cards left in hand, the fight is lost. Proceed exactly as described in paragraph b.
- At the end of the fight, place all played cards into the discard pile of their respective decks, face up. When a deck runs out, reshuffle its discard pile to form a new deck.
IMPORTANT: you must always respond to an Austrian card by playing an Italian one from your hand, even if your card would lose. You cannot save it for later use.
EXAMPLE 2
2.1: Carlo's Patriot is in a Zone that contains 3 Soldiers. Carlo has the cards shown in the figure (Swords, Map, Map, and Cannonball) and decides to fight. He reveals an Austrian card: it's a Map.
2.2: He plays Swords and defeats it. He then places a Soldier in the Lens area. At this point he can decide whether to continue or not, and decides to continue.
2.3: He reveals a new Austrian card. It's a Map. Carlo has no Swords, so he plays a Map from his hand.
2.4: Since it's a tie, he must immediately reveal a new Austrian card. The card is Swords. Carlo defeats it by playing the Cannonball. He places a second Soldier on the Lens area. At this point, Carlo has only a Map card left in hand and decides to stop. He removes from the board the two Soldiers present in the Lens area, while one remains in the Zone. All played cards are discarded.
Strength in unity: if there is more than one Patriot in the Zone where the Fight takes place, Italian cards may be played from the hand of any player present, in any order. It is still up to the active player to decide whether to stop or continue.
EXAMPLE 3
3.1: Bartolomeo's Patriot is in a Zone that contains 3 Soldiers. Bartolomeo has the cards shown in the figure (Swords, Swords, Map, Map) and decides to fight. He reveals an Austrian card: it's a Map.
3.2: He plays Swords and defeats it. He then places a Soldier in the Lens area. At this point he can decide whether to continue or not, and decides to continue.
3.3: He reveals a new Austrian card. It's Swords. Bartolomeo plays Swords from his hand.
3.4: Since it's a tie, he must immediately reveal a new Austrian card. The card is Swords again. Bartolomeo loses, but must still play one of his two Map cards. The Soldier in the Lens area returns to the Zone where the Patriot is located, and all played cards are discarded.
Fight Radetzky
WARNING: If Radetzky is present in a Zone where your Patriot is located, you cannot move or fight the Soldiers until Radetzky leaves.
The fight against Radetzky is based on the same principle as the fight against the Soldiers, but in this case you must reveal 3 Austrian cards together and must defeat all three, playing 3 Italian cards, each of which beats one of the Austrian ones. If this does not happen, the fight is lost and the 3 played cards are discarded (you are still required to play 3 cards).
Also in this case, if more than one Patriot is present in the Zone, Italian cards can be played by any player present.
IT IS VERY DIFFICULT TO DEFEAT RADETZKY ALONE!
If Radetzky is defeated, the following effects occur:
- Remove 3 Soldiers from the Sforza Castle, returning them to the general reserve.
- Reveal the top Zone card from the deck. It is immediately added to the Available ones (see point 6 of Setup).
- Move Radetzky onto that Zone, without adding any Soldiers.
EXAMPLE 4
4: Luciano's Patriot is in the Zone where Radetzky is present. Luciano has the cards shown in the figure (Swords, Swords, Map, Cannonball) and decides to fight him. He draws 3 cards from the Austria deck, which are Swords, Swords, and Map. He defeats the first Swords card with the Cannonball, defeats the Map with Swords, but the second Swords card can at best be tied. The clash is lost. All cards are discarded.
EXAMPLE 5
5: Luciano and Gabrio's Patriots are in the Zone where Radetzky is present. Luciano has the cards shown in the figure (Swords, Swords, Map, Cannonball) and decides to fight him. He draws 3 cards from the Austria deck, which are Swords, Swords, and Map. He defeats the first Swords card with the Cannonball, defeats the Map with Swords. One Swords card remains to be defeated, so Gabrio plays a Cannonball from his hand. The fight is won. The players remove 3 Soldiers from the Sforza Castle, then draw card no. 4 from the Zone deck, placing it among the other Available cards, and position Radetzky on the map accordingly.
Refresh Your Hand
You can use an Action to draw cards from the Italy deck until you have 4 in hand.
Note: your hand will automatically return to 4 cards at the start of the next round, but sometimes it can be useful to perform this Action to follow particular game strategies.
Game tip: it is possible to Fight with the first Action, Refresh with the second, and Fight again with the third, or you can Refresh your hand as the third Action while waiting for another Patriot to arrive in your Zone, so that the cards you gain can be used in a Fight during their turn.
Actions are optional, can be performed in any order, and can be repeated.
Game tip: it can sometimes be worthwhile to carry out a Fight, decide to stop in order to remove the defeated Soldiers from the Lens area and return them to the reserve, and then immediately begin a new Fight against other Soldiers present in the same Zone, using the cards remaining in your hand: doing so costs an extra Action, but gives you a better chance of removing Soldiers from the map.
When the active player has used all 3 of their Actions, the turn passes to the player on their left. At the end of the last player's turn (the one to the right of the First Player), Phase 1 ends and play moves to the Austrian Turn.
Phase 2: Austrian Turn
The Austrian turn consists of the following phases:
2.A: Check the Castle
If the Sforza Castle contains 10 Soldiers or more, they pour out onto the map! Place 1 Soldier in each Zone that has not already been Conquered by Italy or Austria. Start from number 1 and proceed in order. If, upon reaching number 16, there are still Soldiers to place, start again from no. 1.
2.B: Conquer Austrian Zones
A Zone is conquered by Austria if, during this phase, it contains at least 4 more Soldiers than the number of Patriots present. In that case, return all the Soldiers to the reserve and place an Austria token on it. Remove the corresponding Zone card from the game, searching for it in the deck if necessary (in which case, reshuffle it).
Once Conquered by Austria, a Zone is lost forever.
IMPORTANT: Austria can never Conquer Zones outside of this Phase!
EXAMPLE 6
6: Zone no. 3 has 4 Soldiers and no Patriot, so it becomes Austrian. Zone no. 6 has 5 Soldiers, but also 2 Patriots, so it is not Conquered.
2.C: Check Victory Conditions
This check can have two outcomes:
- At least one Faction has conquered five or more Zones. In this case the game ends immediately and victory goes to the Faction that has conquered the greater number of Zones. In case of a tie, victory goes to Austria.
- No Faction has conquered at least five Zones. Proceed to phase 2.D and then to a new Round of the game.
2.D: Arrival of New Soldiers
-
The First Player takes the following quantities of Soldiers from the general reserve, to be used for the following steps: a. with 3 players: 11 Soldiers b. with 4 players: 13 Soldiers c. with 5 players: 15 Soldiers
For a 2-player game, consult the dedicated chapter on page 17.
IMPORTANT: if there are not enough Soldiers in the reserve, the game ends immediately with an Austrian victory!
-
Add 1 Soldier to every Zone that already has at least 1, following the numerical order of the Zones, from 1 to 16. The presence of Patriots or of Radetzky does not prevent the arrival of the new Soldier.
-
Draw a new Zone card and place it among the Available ones. Place Radetzky on it, then place a Soldier on that Zone.
-
Place a Soldier on each Zone not yet Conquered by anyone that is adjacent to the Zone where Radetzky is located.
IMPORTANT: in this case, the Barriers drawn on the board count! If there is a Barrier between the Zone where Radetzky is located and an adjacent Zone, the Soldier is not placed on that adjacent Zone.
If the Soldiers taken from the reserve during point 1 are not enough, start with the Zone that has the fewest Soldiers (i.e. empty ones first). In case of a tie, follow the numerical order.
-
If, during points 2, 3, and 4, you did not use all the Soldiers taken from the reserve during point 1, place the remaining ones in the Sforza Castle.
WARNING: ALL THE STEPS FROM 2.A TO 2.D ARE SUMMARIZED ON THE BACK OF THE FIRST PLAYER CARD. THE FIRST TWO STEPS ARE ALWAYS PERFORMED; THE OTHER 4 ONLY IF THE GAME DOES NOT END.
EXAMPLE 7
Phase 2.A: The Austrian turn begins. The Castle contains 10 Soldiers, which then pour out onto Zones no. 1, 2, 3, 5, 6, 7, 8, 9, 10, 11. No Soldiers are added to Zone no. 4, which has already been Conquered by Italy.
Phase 2.B: Zones 1 and 2 become Austrian, because they contain 4 more Soldiers than the number of Patriots present. Thanks to Gabrio's presence, Zone 5 is not conquered despite having 4 Soldiers.
Phase 2.D: Since this is a 4-player game, 13 Soldiers are put into play. The first 9 are added to Zones 3, 5, 6, 7, 8, 9, 10, 11, 13, where there were already Soldiers, after which a new Location card is drawn. It is number 16. Radetzky is placed there along with 1 Soldier. 1 Soldier is also placed on Zones 13 and 15, adjacent to Zone 16 shown on the card. No Soldier is placed on Zone 11 due to the Barrier, nor on zone 12 because it has already been Conquered by Italy. Finally, the last of the 13 Soldiers goes into the Castle.
Phase 3: New Round
- The First Player card moves clockwise.
- Starting with the new First Player and proceeding clockwise, everyone refreshes their hand to 4 cards.
- The new round starts again from phase 1.
Difficulty Levels
The game's difficulty level can be easily changed by modifying the number of Austrian Soldiers used in phase 2.D. Increase it if you want a game that is more difficult to win, or decrease it if you want it easier. We recommend changing the number by only one unit at a time, since the effects will be immediately noticeable.
You also have the option to decide how much information you give about the cards in your hand. Obviously, being able to describe them completely makes the game much easier, and not being able to say anything makes it much harder. We recommend adopting a middle ground, such as saying how many different icons you have in hand, but without saying which ones.
Advanced Game Mode
This game mode introduces new rules that strengthen both the Italian and the Austrian factions.
Setup
Perform setup as in the Basic mode, with the addition of the following steps:
- Place the Advanced Game board on the table, below the Main board, complete with the Help tiles, as shown in the figure for Example 8. The tiles must all show the Base side.
- Place the Combat cube in the space showing the number of players in the game. For a 2-player game, consult the dedicated chapter on page 17.
Also, in this version, the Zone card drawn in point 6 (the one related to Radetzky's position) is placed to the left of the Advanced Game board, among the not-Available ones.
The chapters GAME OBJECTIVE and HOW TO PLAY remain unchanged.
Phase 1: Individual Player Turns
You have up to 3 Actions available as in the Basic mode, but with the following changes or additions:
Modified Action: Move
The Barriers on the board also apply to Patriots. You cannot cross them.
Modified Action: Fight the Soldiers
At the end of a Fight, the Combat cube is moved based on its outcome:
- If the Italians win, it advances one space to the right for each Soldier defeated. The moment the cube passes the last space, return it to the starting space, immediately choose one of the not-Available cards and move it among the Available ones. In the rare case where there are no not-Available cards, draw the top card of the Zone deck and place it among the Available ones. Once this is done, carry out any remaining advances.
- If the Austrians win, the Combat cube moves back one space to the left, regardless of the number of Soldiers present. It cannot move back past the starting space.
EXAMPLE 8
8.1: The players won a fight, defeating 3 Soldiers. The Combat cube is on the second-to-last space. With the first movement it reaches the last space, with the second it returns to the start and a not-Available card becomes Available.
8.2: Then, with the third movement, the cube reaches the second space.
Available and Not-Available Zones. In the Advanced game, Zones can no longer be Conquered as easily as in the Basic game. You must first eliminate enough Soldiers to reduce Austrian strength in the city. This is represented in the game by the Combat cube and the track on the Advanced Game board.
Unlike what happens in the Basic game, when a new Zone card is revealed, it is not immediately Available to be Conquered by the Italians. Place it to the left of the Advanced Game board, as not-Available. The cards in this area represent Zones that are about to rebel, but are not yet ready for revolt against the enemy.
After defeating a sufficient number of Soldiers, one of the not-Available Zones will become Available and can be Conquered normally.
Clarification: Fight Radetzky
The Fight Radetzky action remains exactly the same as in the Basic version. This means that:
- The Combat cube is not moved either in case of victory or in case of defeat.
- If you defeat Radetzky, the new Zone that is revealed goes immediately among the Available cards.
New Action: Use a Help
Helps are the icons shown in the lower part of the Italy cards. They will let you carry out tactically richer turns and perform heroic feats for your faction. You may spend an Action to play a card, requesting the Help shown in the lower area.
Each Help icon has a Base effect, active from the start of the game, and a Heroic effect, which can be unlocked through the "Strengthen a Help" action described in the next chapter.
Put the played card into the discards after applying its effect.
Hot-Air Balloon
-
Base effect: move your Patriot into an adjacent Zone, ignoring the Barriers drawn on the map.
IMPORTANT: this Help cannot be used if Radetzky is present in the Zone where your Patriot is located.
-
Heroic effect: move your Patriot up to 2 times into an adjacent Zone, ignoring any Barriers drawn on the map.
IMPORTANT: this Help cannot be used if Radetzky is present in the Zone where your Patriot is located at the start of the movement. If the first movement reaches the Zone where Radetzky is located, the second movement cannot be carried out.
EXAMPLE 9
9.1: Carlo plays a Hot-Air Balloon with the Base effect. He can move from zone 9 to zone 14.
9.2: Carlo plays a Hot-Air Balloon with the Heroic effect. He can move from zone 9 to zone 6.
Martinitt
- Base effect: immediately draw 2 cards from the Italy deck and add them to your hand.
- Heroic effect: immediately draw 3 cards from the Italy deck and add them to your hand.
IMPORTANT: there is no limit to the number of cards you can have in your hand.
Rifle
- Base effect: as part of the Action, immediately start a Fight against the Soldiers. For the entire duration of this Fight, every time the Austrian faction must reveal 1 card, it reveals 2 instead, and it is enough for the Patriots to beat one of them to defeat 1 Soldier. In case of a tie, reveal 2 cards again.
- Heroic effect: identical to the Base effect, but reveal 3 cards instead of 2.
WARNING: the effect of this Help lasts for a single Action. If you stop to remove the Soldiers present in the Lens area and then Fight again by spending another Action, the effect will not be active.
IMPORTANT: this Help cannot be used if Radetzky is present in the Zone where your Patriot is located.
EXAMPLE 10
10.1: Carlo's Patriot is in a Zone with 2 Soldiers. Carlo has the cards shown in the figure (Map with rifle, Swords, Swords, Cannonball) and decides to play the Rifle Help. He reveals 2 cards from the Austria deck, which are Swords and Map. He plays one of his Swords to defeat the Map.
10.2: He then decides to continue and reveals 2 more cards, which are Swords and Cannonball. He uses his Cannonball to defeat the Swords. The fight is won. If the Rifle Help tile already shows the Heroic side, every time Carlo must reveal 2 cards, he reveals 3 instead, and still only needs to defeat one of them.
Barricade
- Base effect: place a Mobile Barricade tile on any Zone of your choice. During phases 2.A and 2.D, no Austrian Soldier will ever be placed on that Zone. Remove the tile at the end of phase 2.
- Heroic effect: after applying the Base effect, remove 1 Soldier (if present) from the Zone where the Barricade tile is located.
IMPORTANT: the maximum number of Mobile Barricade tiles in play can never exceed the number of players (with 1 or 2 players, up to 3 can be used).
Game tip: watch out! The Mobile Barricade can be useful to prevent Austria from conquering a Zone, but remember that every Soldier that doesn't go onto the Zones will probably go into the Sforza Castle instead!
Noblewoman
- Base effect: move a Soldier from one Zone to an adjacent one not yet Conquered by anyone. Radetzky's presence has no effect on this Help. The Barriers drawn on the map must be taken into account.
- Heroic effect: after applying the Base effect, remove 1 Soldier (if present) from the Sforza Castle.
New Action: Strengthen a Help
You may use an Action to play cards under one of the five Help tiles on the Advanced Game board, following these rules:
-
The first card played under a tile can be of any type. Subsequent cards played under the same tile must all show the same icon (Map, Swords, or Cannonball).
IMPORTANT: two cards are considered the same if they show the same icon at the top. The icon at the bottom is not considered for the purposes of this action.
-
With a single Action, you may play as many cards as you like, but only under a single Help tile. Consequently, all the cards must match each other and any others already placed there from earlier plays.
-
The Hot-Air Balloon, Rifle, and Martinitt Help tiles require as many cards as the number of players. The Barricade and Noblewoman Help tiles require one more than that. When there are as many cards under a tile as the required number, flip it to the Heroic Help side and place all the cards into the discard pile of the Italy deck. From this point on, the effect of the Help represented by the icon in that space will be stronger.
Game tip: a hand with 3 or 4 matching cards is not very good for fighting. The Strengthen a Help action is a great way to use them!
EXAMPLE 11
11: During the current turn, Gabrio has spent 2 Actions to move and fight. He has two Swords cards left in hand and decides to use them to strengthen the Rifle Help. Now it's Bartolomeo's turn, who, as his first action, decides to play 2 more Swords cards from his hand under the Rifle tile. There are 4 players in the game, so the strengthening is complete and the tile is turned to the Heroic side. With his second action, Bartolomeo refreshes his hand to 4 cards, and with the third he uses the strengthened rifle to fight in the Zone where he is located.
Phase 2: Austrian Turn
2.D: Arrival of New Soldiers
When you draw the Zone card on which to move Radetzky, place it in the not-Available zone, to the left of the Advanced Game board.
Phase 3: New Round
During the hand-refresh phase, if a player has more than 4 cards thanks to the Martinitt effect, they keep them.
The rest of the game remains the same as in the Basic mode.
2-Player Game
The 2-player game is played with 3 Patriots. During Setup, during Strengthening Helps, and during the Austrian turn, apply the rules provided for 3 players.
- At the start of the game, the players jointly decide where to place the third Patriot.
- The third Patriot's hand of cards is revealed: its cards are placed face up on the table.
- The third Patriot always plays last and is moved by the First Player of the current Round.
Solitaire Rules
- Set up the board as for a normal 3-player game. Arrange the 3 Patriots in the colors of your choice, following the normal rules. Start the game with 4 cards in your hand.
- Phase 1 of each Round consists of the individual turns of the 3 Patriots, each of which can carry out up to 3 actions, as in the multiplayer game, with the following differences: a. There is no predefined turn order: in each Round you can choose the order in which to move the 3 Patriots. Lay each Patriot down at the end of its 3 actions to indicate that its turn is finished. b. At the end of each Patriot's turn, bring your hand back to 4 cards. If you have more due to the Martinitt effect, keep them.
- Fights against the Soldiers and against Radetzky work as in the multiplayer game, with the following differences: a. If more than one Patriot is participating in the fight, reveal 3 cards from the Italy deck for each additional Patriot and place them on the table face up. You may use them during the fight, but they are not added to your hand (so it is not possible to use the Help icons on them). b. The 3 cards are revealed only once per turn for each additional Patriot and are discarded at the end of the active Patriot's turn. If the same Patriots fight together again on the following turn, draw 3 more. See Example 12 for clarification.
EXAMPLE 12
12.1: The player is in the situation shown in the figure. They first activate the blue Patriot, with which they fight the Soldiers. The green Patriot is in the same Zone, so the player reveals 3 cards.
12.2: The player defeats 2 of the 6 Soldiers present and decides to stop, removing them from the Lens area. Because of 2 ties, 4 cards had to be used.
12.3: As the blue Patriot's second Action, they decide to refresh their hand. No further cards are drawn because of the green Patriot's presence, only the remaining ones continue to be used (see Solitaire rule 3.b).
12.4: With the third Action, they attack again. The player defeats 2 more Soldiers and then decides to stop. The blue Patriot's turn is over and the player lays it down. The last card remaining on the table is discarded.
12.5: It's a new turn: the player refreshes their cards and decides to immediately activate the green Patriot. Since the blue Patriot is in the same Zone, they reveal 3 new cards and begin the fight.
Historical Note
This game retraces the events of a complex episode such as the Five Days of Milan, which we are aware we have broadly simplified, also taking some historical liberties, in order to favor the smoothness and cleanness of the rules. We do, however, want to spend a few words explaining some points. Enthusiasts will find far more complete and historiographically accurate references in the extensive literature written about the events of March 1848.
Game Map
The streets of Milan did not have Barriers like the ones drawn on the map, but rather barricades, fires, checkpoints, and any kind of obstacle that could be useful to prevent the passage of armed men and to provide shelter from enemy attacks. We still needed to limit the Patriots' movement, and we opted for a clear and unambiguous solution.
The division of the city into 16 Zones has no historical basis and is purely a functional game design choice.
Helps
Here are the historical references for the Help icon symbols:
- Hot-air balloons were actually used by the Milanese, not to travel but to transmit messages beyond the walls toward the countryside. The brilliant idea came from a French citizen, the perfumer Marie-Joseph Dunant, and Antonio Stoppani, the future priest-scientist, at the time a cleric at the Archbishop's Seminary of Milan. We needed an icon that would allow more convenient movement, and we chose to pay tribute to this ingenious system.
- The Martinitt were young boys (orphans and foundlings) who acted as messengers and couriers among the ranks of the insurgents.
- Firearms were scarce among the Milanese, so they resorted to rifles held in museums to improve their chances of victory in combat.
- Barricades were one of the main tools used to resist the more heavily armed and better organized Austrian forces; everyone took part in building them, even the students of the Seminary, who raised one at Porta Orientale, with the essential support of numerous women's groups as well.
- The main noblewoman figures we remember are Countess Suardi, who is said to have convinced a man to spill the first Austrian blood: "Go and wound the oppressor who outrages our beautiful Italy," and Cristina di Belgioioso, financier and later director of the "Gazzetta Italiana," who mobilized from Naples with 800 loyal followers to take part in the uprising.
Austrians
- For the sake of visual uniformity, we chose white uniforms for all the soldiers in the illustrations, even though historically the various units had specific colors.
- In 1833, Giuseppe Venceslao Radetzky, Count of Radetz, was appointed commander general; he was promoted to Field Marshal in 1834 and moved his residence to Milan in 1836.
In historical reality, Josef Radetzky gave orders to his troops without leaving the Sforza Castle. However, we felt that for a game of this kind it was essential to imagine him moving through the city, so that players could face him directly.
Italians
The figures who inspired the various Italian factions are:
- Carlo Cattaneo: always at the forefront on the barricades, he dreamed of a federal state with Milan as a European point of reference. Like Mazzini, he championed the idea of a free Italy, whose independence had to be achieved through the strength of the Italian people, without resorting to foreign aid or to the Italian princes. He observed that among those killed in battle there was not a single aristocrat, even though aristocrats had taken part in the fighting, and that "the price of victory was paid by the poor."
- Carlo Bartolomeo Romilli: bishop of the Milanese, he supported a state "liberally controlled" by the Church but free of Austrian rule. Radetzky already distrusted the Italian clergy, and on March 6, 1848 he sent a report to the viceroy "on the revolutionary spirit of the clergy and its influence on the youth of Milan"; on March 15, 1848 he issued an order forbidding soldiers to confess to Italian priests, since the Italian clergy was to be considered an enemy of the Crown.
- Luciano Manara: a follower of Mazzini and a Carbonaro, he fought for the idea of a united, republican Italy.
- Count Gabrio Casati: his political evolution took him from reformism to loyalty to the Habsburg imperial institutions, and then to rebellion against them in the name of Italian freedom, all while remaining loyal to the House of Savoy — moving from one form of legitimism to another, though the second was paired with the constitutional liberties of the Statuto Albertino. A constitutional monarchy respectful of citizens' fundamental freedoms appeared to Casati as the ideal political solution for Italy.
"The city of Milan is shaken to its foundations, and it is difficult to form an idea of it. Not hundreds but thousands of barricades close off the streets, (...). The character of this people seems to me changed as if by a magic wand; fanaticism has spread through every age, every class, every sex." (Radetzky)
Despite the divisions and at times political misunderstandings between Casati and Cattaneo themselves, a unique and patriotic spirit of collaboration ultimately prevailed. Milan was taken!
One of the first great steps toward Italian independence had been achieved... even though it would prove to be only a momentary stage.
Will you too, following their example, manage to free the city?
Have fun!