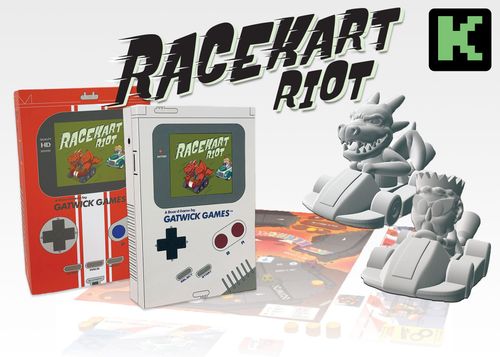
Racekart Riot
Racekart Riot Rulebook
Table of Contents
Table of Contents
Components
- Double-sided game board
- Miniature racers
- Racer boards
- Mystery items
- Movement cards
- Kart supplies
- Coins
- Dice (12-sided and 8-sided)
- 1st Player token
- Quick start rule cards
The rulebook uses "gold" and "coins" interchangeably for the same coin tokens.
Setup
1. Pick a Track
Pick which race track you want to play on and place that side face up.
- Redbane's Castle (beginner)
- Queen K's Cove (intermediate)
Redbane's Castle is recommended for your first play. Queen K's Cove is recommended once you have the basics down.
2. Coins
Give each player 10 coins: five 1-value coins and one 5-value coin each.
3. Board Set Up
Find the following icons on the game board and set up each as follows:
- Coin symbol: Place 3 coins on every space that has a coin symbol.
- Mystery Item symbol: Mystery Items aren't placed on the board. Instead, place all Mystery Items into the bag. These will randomly be picked throughout the game when you pass this icon. Find and leave 3 Banana Mystery Items out by the game board for later use.
Place the remaining coins and dice near the game board, in easy reach of players.
4. Supply Cards
Shuffle and place the kart supply deck face down near the game board. Flip over 5 cards and place them face up in a line next to the deck.
5. Pick a Racer
Pick a racer and take the matching miniature, racer board, movement cards, and 1 of each game quick start rule card.
Place your miniature on the start space behind the finish line.
Shuffle your movement cards and place them face down on your character board on the space labeled "movement draw pile". At the start of each round you draw 2 movement cards.
6. Roll to Start
Roll the 12-sided die to see who goes first. Give the player that rolled highest the 1st Player Token.
Gameplay
Each race is played until one player finishes two laps. The game is played in rounds in which each round consists of 4 phases:
- Pick Kart Supplies
- Play Mystery Attack Items
- Play Movement Cards
- Play Extra Movement Items
These are played in that order. Play is always done clockwise, starting with the player with the 1st Player Token.
Note: Some Items/Cards allow you to do some of these out of order; i.e. Jump Card, Mystery Items, Re-roll, Coins, etc.
Kart Supply Phase
In the first phase of each round every player picks up one kart supply card. The player that has the 1st Player Token goes first by picking the card they want. The card farthest from the deck is free, and every card closer to the deck costs one more coin than the card before it. These cards include: Movement, re-rolls, bonuses, and kart parts that can contribute to game end points.
The cost ladder, from the card farthest from the deck to the card nearest the deck, is:
- Free
- 1 coin
- 2 coins
- 3 coins
- 4 coins
- Deck (you cannot pick from the deck)
To pay for a card you will place one coin on each card before it, and you cannot pick from the deck itself. Once you place a coin on a card, it stays on that card until the card is selected.
Example: If you wanted the card that is 3 spaces in, you would place one coin on the free card space and one coin on the 1 coin card space.
When picking your card, take all coins on that card and add them to your stash, even if you had to pay coins on other cards. Place the chosen card face up on your racer board in the section it corresponds to. Your kart supplies will always be face up and visible to other players. When placing a kart supply card in a section of your board that already has cards on it, it does not matter how you stack them.
Note: There is no limit to the amount of Kart Supply cards you can hold at a time.
Immediately after picking a kart supply card, replenish the face up cards by sliding over all remaining face up cards one space over into the leftmost position, and flip over another card face up in the 4th space (closest to the deck). Each player will always have 5 face up cards to choose from.
Editor's note: the printed text says "the 4th space (closest to the deck)", but the set-up and phase diagrams show five face-up spaces. Transcribed as printed.
Once all players have picked a kart supply card and the face up selection is replenished, proceed to the attack items phase.
Note: You must always select a kart supply card. If you don't have coins or just don't want to spend them, select the free card.
For more detailed Kart Supply scenarios see "Detailed Rules/Glossary".
Attack Items Phase
You will collect Mystery Items throughout the game. The Banana, Egg, Homing Pigeon, Magnet, Steal Kart Part and Bomb are attack items. Starting with the player that has the 1st Player Token, each player will have a chance to use as many of their attack items as they would like.
You are not required to play your items. Once you are done using your attack items, the next player decides if they would like to use any items, until every player has played. Once you are done with your turn, you cannot use any more attack items until the next round.
To play an attack item, flip over your corresponding mystery item and resolve its actions (see each item's rules under the "Mystery Items" section). Once all players have had the chance to play their attack items, proceed to the movement phase.
Movement Phase
During the movement phase all players will draw 2 movement cards and then choose 1 to play. All players play their movement card at the same time. The card you choose to play will be discarded after use. The card you did not use will be placed face up at the bottom of your movement deck to be used in the future (placing it face up will help trigger when to shuffle your deck for re-use).
- Two Laps: When choosing a movement card, note that there are two movement sections. The top section only applies when the players are in their first lap of movement, and the bottom section only applies after the second lap is triggered.
- Movement Abilities: At times, beyond the movement speed in the corners, some cards will have Movement Abilities that take effect when you use that specific card. You will resolve these before you move your characters. The Movement Abilities include: Attacks, Unique Actions, and Extra Movement. Extra Movement occurs when you move your character. The other actions will be resolved in turn order.
For more detailed Movement Rules see "Detailed Rules/Glossary".
Once all movement abilities are resolved, players resolve the Movement Speed in turn order. Each player will move forward on the track according to the number on their movement card, starting with the player that has the 1st Player Token.
NO BACKWARDS MOVEMENT. When you carry out your movement, remember to take into account any attack items that hit you during the attack phase and may have reduced your movement. If you have reduced movement, you WILL NOT go backwards or less than 0.
Passing and Landing on Spaces
-
Mystery Items: For every mystery item space that you pass, take an item from the item bag, look at it, and place it face down on your character board on one of the spaces labeled "Mystery Items".
Note that you only have 3 spaces on your racer board for mystery items. You cannot ever have more than 3 mystery items at one time. If you were to pick up a mystery item and already have all 3 spaces filled, do not pick up and continue moving.
-
Game board Spaces/Events: When your movement from your card ends, check to see if there is a symbol and/or items on the space you stopped on. You will immediately resolve the action. If there are coins on the space, take all of them and put them into your stash. If there is any other item/symbol, refer to the "Board Rules" section to see how to resolve them.
Note: You activate a space's action every time you stop on a space and thus, may stack benefits on one turn. For example, if your initial movement ends on a space with coins, then you can pick up those coins, but after you may use an Extra Movement Item that gives you a 2 Space Turbo. You get to activate the action of the new space you end on as well.
End Movement: After all players have finished the movement phase, discard your used movement card onto the space on your character board labeled "discard pile". These cards will not be used again, except for in the unlikely event that you run out of cards in your draw pile. In that case you will reshuffle all of your movement cards and redraw.
Extra Movement Phase
After everyone has moved their miniature and resolved the items/symbols they landed on, each player (starting with the player with the 1st Player Token) has the option to use any Extra Movement Items to continue their movement. These items include mystery items/kart supplies that have the EXTRA MOVEMENT or double-arrow (▶▶) symbols that affect movement (explained in the "Board Rules" and "Detailed Rules/Glossary" sections).
After all players have done or had the chance to do all of these actions, the round ends.
End of Round
The player that had the 1st Player Token will pass it to the next player in a clockwise direction.
Each player will draw two new movement cards from the top of their movement draw pile.
Note: Once you see a face up card on the top of your draw pile, take the whole draw pile (NOT discarded ones), shuffle them, and place them back face down for future drawing.
2nd Lap
The 2nd Lap is triggered when at least one player passes the finish line after their first lap; at end of that round, carry out the following:
- Place 3 coins on every space with a coin symbol. It is possible that some spaces will now have more than 3 coins on them, making them a more desirable place to land.
- Now, all players only use the bottom half (2nd lap section) of their movement cards starting on the next turn, even if they aren't on their 2nd lap yet.
End of Game
The end of the game is triggered when at least one player completes their 2nd lap. Once this happens, the rest of the round is finished and then points are counted up.
Note: Crossing the finish line first does not necessarily mean that you will come in first place. First place points are awarded to the player that is farthest along the track after the final round ends.
Even if you pass the finish line to complete your 2nd lap, you continue the rest of your movement and any other movement items/abilities you have. If you land on or pass any items, coins, attack items, or board symbols, resolve them as normal.
In the unlikely event that someone passes the finish line and an event moves them backwards behind the finish line, the game continues until someone ends their movement past the finish line.
For more detailed information see "Detailed Rules/Glossary".
Points
Race Points
Once the game ends, race points are counted as follows. You receive these points regardless of whether you have crossed the finish line or not.
| Place | Points |
|---|---|
| 1st | 16 points |
| 2nd | 11 points |
| 3rd | 7 points |
| 4th | 5 points |
The person that has moved farthest past the finish line is in first place; 2nd, 3rd and 4th are determined by their distance behind first place. If your racers are on different paths and it is hard to determine what place you are in, count each space backwards from first place.
If two players tie for a specific place, they both get the allotted points, and then the next place is skipped.
Example: if Redbane and Goat Lorde tie for first place, they would both get 16 points. If Queen K is next in place, she would get 7 points for coming in 3rd place.
Item Combination Points
For every pair of Baking Soda/Vinegar and Health Potion/Luck Potion, points are counted as follows (this includes both unused AND used cards [in the used pile]):
| Pairs | Points |
|---|---|
| 1 | 2 points |
| 2 | 5 points |
| 3 | 9 points |
| 4 | 14 points |
| 5 | 20 points |
For each additional pair above 5 pairs add 6 points.
Baking Soda/Vinegar and Health/Luck Potions don't cross combine with each other for points. For example, a Baking Soda cannot mix with a Luck Potion to count as a pair.
Points are calculated based on the total amount of pairs that you have. For example, if you had 3 pairs of Health/Luck Potion and 1 pair of Baking Soda/Vinegar then you would get 14 points.
Editor's note: the printed example totals both pair types (3 + 1 = 4 pairs = 14 points), so the table is applied to the total number of pairs of both kinds, even though the two kinds never combine into a single pair.
You do not receive points for incomplete pairs. For example, a Love Potion without a Luck Potion is not worth points.
Kart Combination and Kart Part Points
You get points for every Completed Kart. A Complete Kart is 3 parts: Bumper, Chassis, and Caboose; aka the front, middle, and back. Kart points are counted as follows:
| Kart | Points |
|---|---|
| Not all same style | 3 points |
| All same style | 6 points |
You get more points for completed karts of the same style. In addition to the completed kart points, you get the points indicated on each of your individual kart parts (completed and not completed).
Points example: Kart Part - 7 points. Complete Kart Bonus - 3 points (not same style). Total - 10 points.
Points example: Kart Part - 2 points. Complete Kart Bonus - 0 points (not complete). Total - 2 points.
Lock a Kart: Kart Parts are open to be stolen until you lock a Complete Kart. When you lock a kart, you choose the three different parts and place them face down in the used card pile for scoring later. These Kart Parts cannot be stolen, but once locked, the parts cannot be changed/traded later to score more points. You choose to lock Kart Parts during the Kart Supply pick up phase.
You do not need to lock a Kart to score points.
Coin Points
Coins: You receive 1 point for every 3 coins you have, rounded down. For example, if you have 6 coins you receive 2 points but if you have 5 coins you only receive one point.
Winner
The winner is the player that has the most points once the game ends! As the winner of the grand Racekart Riot, you win the coveted Ruby Cup and are crowned the Racekart Riot Champion!
We know there may be times where something happens that aren't covered in the rules. If there is ever a time where something happens that isn't clear in the rules, do what seems right and what is most conclusive with what the rules say.
You made it! Well, sort of. Above is just the basic gameplay. The rest of the rulebook is dedicated to the specific rules of the board, cards, and items.
Basic Rules
Fundamentals
- Level: Some Items have been assigned a specific level (#) next to it. In order to block/dodge/surpass/beat, you must roll the 12-sided dice and roll HIGHER than the level number.
- 12-Sided Dice: Used to overcome anything with a level on it. Also used to determine who goes first at the beginning of the game.
- 8-Sided Dice: Used to determine the distance an item will go (forwards or backwards). It is used for events as well.
- Discard/Re-shuffle: After an item/card is used, it is discarded or placed into the "used pile." Keep all of your used Kart Supply cards for points. Once all Movement cards or Mystery Items are used, re-shuffle or place back in bag.
- Space Actions: Certain Board Rules happen only when you enter, land on, or exit a space with a specific symbol or item on it. Whenever the rules say enter a space, you will perform the action on that space regardless of stopping or moving through. Exiting a space happens when you move off a space to another space thus triggering an action (i.e. a Banana). Landing on a space is when you stop movement on a space.
- Reduced Movement: You are not limited to just -2 movement from getting hit by another player's attack. Each attack that gives you -2 movement adds together, decreasing your movement even more.
Board Rules
Mystery Item Space
Pick up one mystery item when you land on or pass this space. Only pick up one each time you enter the space.
Coin Space
You will place 3 coins on these spaces to start the game, and place another 3 coins at the start of the 2nd lap. If you stop your movement on a space with coins, you pick up all of the coins there. You cannot pick up coins by just passing through the space. Once the coins are picked up, they are only replenished on the 2nd Lap.
Event Space
If you land on a space with the event symbol, roll the 8-sided dice. After rolling, carry out the action shown on the event space legend on the game board that correlates to the number you rolled. All event rules follow standard rules. You may not play a Lucky Miss you dodge negative affects from the event space.
The event roll outcomes, shown on the game board, are:
| Roll | Outcome |
|---|---|
| 1 | Throw Banana |
| 2 | Advance 2 spaces |
| 3 | Pick up 3 gold |
| 4 | Move back 1 space |
| 5 | Kart supply pick up |
| 6 | Pay 1 gold |
| 7 | Mystery item pick up |
| 8 | Throw Homing Pigeon |
Kart Supply Space
If you land on this space, immediately pick up another Kart Supply Card (following the same rules as the Pick Kart Supply Cards rules).
Maps
Redbane's Castle
Difficulty: beginner (one crown).
- Lava (Level 4): When attempting to exit the space right before the lava, roll the 12-sided dice; if you roll a 1-4, then you stop your movement completely on your current space. If stopped, on your next turn you can move past the lava without rolling. Both of the two Lava crossing spots can stop you once per lap. If you have been stopped by the Lava, you may also use an extra movement item in phase 4 to move through without rolling the dice.
Note: The lava does not count as a space. If you successfully pass the lava, continue your movement as normal on to the space right after the lava.
-
Rainbow Bridge (Level 10): When exiting the space before the Rainbow Bridge you have the opportunity to roll the 12-sided dice to take the shortcut. If you roll an 11 or 12 you are successful and can continue your movement on to the shortcut path. If you roll a 1-10 you do not make it on to the shortcut and continue moving on the normal path.
-
Pay 2 or 3 Coins: If you land on this space, pay 2 or 3 coins. Do not place them on the space, but put them back in the main coin supply.
-
Pay 2 Coins to Pass: In order to enter this space, you need to pay 2 coins to the main coin supply.
Editor's note: the printed heading reads "Pay 2 Coins to Coin to Pass"; the map and body text make clear it is "Pay 2 Coins to Pass". Transcribed with the corrected heading.
Queen K's Cove
Difficulty: intermediate (two crowns).
-
Treasure Island: Upon entering Treasure Island you end movement (even if you had more movement left over) and collect 6 coins. No extra movement abilities or items can be played after stopping movement that turn. All players that go to the island receive 6 coins (i.e. there is no limit of players). You may only go once per lap.
-
Secret Waterfall (Level 10): Upon exiting the space with the waterfall roll the 12-sided dice to take the shortcut. If you roll an 11 or 12 you are successful and can continue your movement on to the shortcut path. If you roll a 1-10 you do not make it on to the shortcut and continue moving on the normal path.
-
High/Low Tide: If you decide to go through the leftmost path across the mini island spaces, then you roll the 12-sided dice to determine High or Low Tide. If you roll 1-5 then it is low tide and if you roll 6-12 then it is high tide. Low tide means that you have to move through each space shown on the board. High tide means you only have to move through the spaces that are shown above water. Once you roll the dice, you must move towards the island regardless of the status of the tide. Each player has their own tide roll. You only roll once per lap.
-
Crabs: Upon exiting the space with the crabs, rolling a 1-4 stops your movement on the crab space. Rolling a 5-10 allows you to continue movement on the normal path. Rolling a 11-12 allows you to continue on to the shortcut which counts as one space and allows you to perform a Kart Supply pick up for passing through. If you roll a 1-4 and have to stop movement, you can use an extra movement but must move on to the normal path (not the shortcut) since you do not need to roll again to pass.
-
Sharks: Pay 1 coin for a chance to cross. Upon exiting the space before the sharks, roll 8-12 to pass. If you roll 1-7 you don't pass and keep moving on the normal path but do not get your coin back. The sharks themselves don't count as a space. If successful in passing, continue movement on the next space after the sharks.
Detailed Rules/Glossary
Movement Rules
Every character has a deck of 12 movement cards. Each card has a section that refers to your first lap, and another section that refers to the second lap. If you ever have used all 12 cards and they are in your discard pile, shuffle and place them face down in your movement draw pile on your racer board.
All movement, whether it is in the normal movement phase or extra movement phase, starts with the person with the 1st Player Token, and continues clockwise.
Determining your Place for Movement Abilities: Some movement abilities determine what actions you take based on which place (1st-4th) you are in. You determine that before anyone moves, not after. This is because hypothetically all players race in real time even though turns are taken one at a time. Sometimes counting backwards from the finish line is necessary to determine your place.
Unique Scenario: If all players are on the same space at the beginning of a turn, they do their actions as if they are in 1st place, and not middle or last place.
Zero Movement: If you ever have a movement of 0 either because that is what your movement card states (Redbane), or you get hit and your movement is reduced to 0, you can re-use the symbol on the space that you used last turn (Event Space and Kart Supply Pick Up Space). You do not pick up another mystery item, nor do you have to pay coins again (if applicable).
Movement Attack Abilities: All Movement Attack Abilities are resolved before anyone moves, starting with the person with the 1st Player Token. Note: Lucky Miss cards are allowed to be used against these attacks.
- Bananas: Attack items on movement cards don't have physical tokens associated with them, except for the bananas, in which case you would find a banana that was set aside at the start of the game and place it following Banana Rules.
- "Throw Fireball" or "Throw Cat": These Movement Abilities act exactly like an Egg attack (see Egg Rules). Both are Level 5 Attacks.
- Attacks on 1st Place: Many Movement Attacks are targeted at 1st place. If you are in first place when you play this type of card, you disregard the attack. If two or more players are tied for first place, choose one of them to attack.
Coins: If you play a card that forces everyone to drop coins, you do not have to drop coins. If your card says you gain coins, you gather them from the reserve.
Limiting Opponent's Movement: If you limit an opponent's movement this turn, this only limits their initial movement speed. If they are hit by an attack item, they still go up to the limited number. Players may move freely in the Extra Movement phase.
Steal Actions: Some movements have a steal action, which includes stealing coins, movement speed, and kart parts. This is done before anyone moves, in turn order.
Movement that has a ▶▶ symbol:
- Replay a Used Movement Card: Queen K is able to look through her used movement pile and use one card as her new movement/ability. The card you choose still follows the current lap you are on, and you apply the effects of the Movement Abilities.
- Movement for 1st|Middle|Last: Some of Queen K's cards have "1st, Middle, and Last" on them. Depending on your current position as Queen K, your movement for that turn is decided by that card before any player has moved. For other Movement cards that refer to your place, see the previous page for determining place.
- Roll for Movement: Some Movement Speed is determined by rolling the 12-sided dice or the 8-sided dice (indicated on the card). In the case of Lightnin' n Thunda, you roll the 12-sided dice and then add 2 to the number rolled to determine movement speed. For Goat Lorde, roll the 8-sided dice, and your movement speed is determined by that number and you collect the same number of coins from the reserve for that specific roll.
- Extra Movement: Some movements have a turbo/extra movement. If applicable, add it to your total movement speed. For example, if you are in last place and your movement speed on the card is 3, and the Movement ability says +3 turbo if in last place, then your total movement would be 6 (not 3 movement first and then 3 in Extra movement phase).
- Copy Movement Speed: Copy the movement speed of a player of your choice. When you copy Movement, you decide after every player, including you, has laid down their cards. You will copy their movement abilities if they relate to your movement speed, but you do not copy their attack powers. In a two player game, if both Goat Lorde and Lightnin' n Thunda both use this ability on the same turn, both move 0 spaces.
- Pay for Movement: 1 Coin per 2 Spaces. The max movement is 10 spaces, the cost for 10 spaces would be 5 coins. You may pay 0 coins to not move.
Mystery Item Rules
Editor's note: each item's icon carries an "x" badge (for example, x6 for the Banana) and a tag showing when it may be used. The badge is transcribed as printed; the page does not otherwise explain it.
Banana (Level 5, x6, ATTACK)
When playing a banana, you have two options of where to place the banana. You can place the banana on the space you are on, or you can use the 8-sided dice to throw it ahead or behind you. Whatever number you get, you can place the banana on any space up to that number that you want.
You resolve a banana when you exit the space that the banana is on by rolling the 12-sided dice. If you place a banana on the space you are on, you do not need to roll for it by exiting at that time. At any other time, you must roll for each banana you pass, even if you were the one to throw it.
If you hit a banana by rolling 1-5, you lose 2 movement. You can never go negative spaces, so if, for example, you had 1 movement left and you hit a banana, then you would stop on the space that the banana was on. A banana stays on the board until someone hits it, at which point the banana is discarded. You are allowed to have multiple bananas on one space, and each must be resolved.
Note: You can throw a banana across a shortcut to place it in a strategic position. This also applies to other items that you can throw. Count the spaces normally on the shortcuts.
Egg (Level 5, x3, ATTACK)
Roll the 8-sided dice to determine how far ahead or behind to throw the egg. Choose one direction and also choose one path. Each player that is in that path and in range will roll the 12-sided dice to dodge the egg, starting with the person closest to you. If that player dodges the egg, then it keeps going on the same path and the next player in range will roll to dodge. The egg stops once someone gets hit (rolls 1-5) or the egg gets to its max range (the number rolled on the 8-sided dice) and doesn't hit anyone. Discard after use.
If the egg passes through a space with 2 or more players on it, it attacks the player whose turn it is next. If you are hit by the egg, you lose 2 movement this round.
Note: The player that is hit can take the egg item and place it face up next to them as a reminder, discarding it once their movement is finished.
Homing Pigeon (Level 9, x2, ATTACK)
The homing pigeon attacks any player on the board, that player must roll higher than a 9 to dodge it.
If you are hit by the homing pigeon, you lose 2 movement this round.
Bomb (Level 12, x2, ATTACK)
When playing a bomb, all other players (excluding yourself) are hit and have to drop 2 coins on the space they are on. Being a level 12 attack item, you cannot roll to defend the bomb UNLESS you have a Jump card that lowers the level by 4. Discard after use.
Coins (x4, ANYTIME)
When played, gain 3 coins immediately from the supply. You may play this any time during the game. Discard after use.
Magnet (x2, ATTACK)
Take one mystery item from any one player. The stolen item can be used immediately if you want/is possible. Discard after use.
Turbo Snail (x3, EXTRA MOVEMENT)
Gives you a turbo of +3 movement during the Extra Movement phase.
Pro Tip: By using the turbo snail, you could pass the lava if it stopped you or move to another space that has a symbol that you want (allowing you to possibly do 2 board actions on 1 turn). Discard after use.
Steal Kart Part (x2, ATTACK)
Take one face up kart part from an opponent and immediately place it on your racer board in the corresponding section. Any kart parts that a player has locked and placed into their used pile are safe and cannot be stolen. Discard after use.
Crown (x3)
Gives you an additional 2 points at the end of the game. Can be stolen with the Magnet. You cannot use this item, it simply gives you points at the end of the game.
Re-Roll (x3, ANYTIME)
May be used any time after you roll a dice. After re-rolling the dice you must use the new roll outcome. Discard after one re-roll.
Kart Supply Rules
Kart Parts
Bumper, Chassis and Caboose are the three kart part styles: the Bumper is the Basic Kart, the Chassis is the Dragon Kart, and the Caboose is the Hover Kart.
As mentioned previously, once you have at least one card of each kart part (bumper, chassis, caboose) you can lock all 3 cards by placing them face down in your used pile. You may do this during the Kart Supply pick up phase. You cannot lock 1 or 2 cards alone, and you need 1 of each part to lock a kart. You can lock multiple completed karts during the game. There is no limit to the amount of Kart Parts that you can have on your racer board.
Note: You do not have to flip over a complete set of kart parts the moment you get one of each part. You can leave them on your board in hopes of getting 3 of the same style, but beware of other players stealing one of your kart parts.
Level Up (MOVEMENT)
During the Movement Phase: This is used in place of a movement card to go 8 instead of whatever number is on the movement card you select. You still must select a movement card, but when everyone flips over their movement cards, you will flip yours over then immediately place your Level Up card on top of it. This card replaces your movement abilities as well. Discard after use.
Lightning (EXTRA MOVEMENT)
This card only affects you. If you are in first place you get a turbo of +1 movement. If you are in last place this card gives you a turbo of +4 movement. If you are anywhere in the middle, you get a turbo of +2 movement. Note: For this card, you determine what place you are in AFTER the Movement Phase ends; determine your place before players start moving in the Extra Movement Phase.
This card is used during the extra movement phase after everyone has done their normal movement, following turn order. Discard after use.
Speedway (EXTRA MOVEMENT)
Gives you a movement turbo of +2 in the extra movement phase. Discard after use.
Jump (ANYTIME)
Increases your roll on any one item/obstacle by 4 (includes shortcuts). Must choose to use BEFORE rolling. Discard after use.
Boosted Jump (Speedway + Jump)
When used together and instead of their normal abilities, you get an extra 4 turbo (during the extra movement phase) and increases your roll on all obstacles/shortcuts by 5 (only applies to movement during boosted jump). Discard both cards after use.
Baking Soda (no points on its own)
Does nothing on its own. It is not worth points on its own. Must be combined with Vinegar for a combination bonus.
Vinegar (no points on its own)
Does nothing on its own. It is not worth points on its own. Must be combined with Baking Soda for a combination bonus.
Combustion (Baking Soda + Vinegar, EXTRA MOVEMENT)
Together, this pair is used as a +1 movement turbo during the extra movement phase. After use, place both cards in your used pile on your racer board. This pair will be scored at the end of the game.
Lucky Miss (ATTACK, ANYTIME)
Can be used to dodge any Item or Movement Attack Ability. Must be used BEFORE rolling. When used, you do not need to roll for the attack. Discard after use.
Health Potion (no points on its own)
Does nothing on its own. Must be combined with Luck Potion for a combination bonus.
Luck Potion (no points on its own)
Does nothing on its own. Must be combined with Health Potion for a combination bonus.
Extra Life (Health Potion + Luck Potion, ANYTIME)
When used together, re-roll any dice roll one time. You must use the new roll as your final roll. After use, place both cards in your used pile on your racer board. This pair will be scored at the end of the game.
Wild Kart Part (Rainbow Kart)
This card can take the place of any 1 Kart Part. It has no point value on its own. It can also act as a specific type of Kart that will help the completion of a Kart. For example, if you have 2 parts of a Dragon Kart you can use the Wild Kart to finish the Dragon Kart to receive the 6 Bonus Points. It can be used to complete any Kart. You may use 2 Wild to complete a Kart, but not 3.
Tags when to use: MOVEMENT PHASE (orange); ATTACK PHASE (red); EXTRA MOVEMENT PHASE (double-arrow ▶▶); USE ANYTIME (clock).