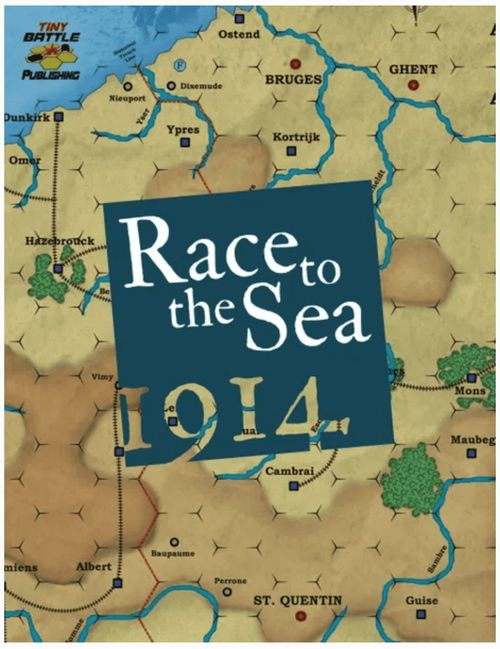
Race to the Sea 1914
Race to the Sea 1914 Rulebook
Table of Contents
Table of Contents
- 1.0 Introduction
- 2.0 The Map
- 3.0 Units and Ratings
- 4.0 Markers and Cups
- 5.0 Unit Casualties
- 6.0 Cards
- 7.0 Sequence of Play
- 8.0 Initiative
- 9.0 Actions
- 10.0 Movement
- 11.0 Firepower Combat
- 12.0 Assault Combat
- 13.0 Event Results
- 14.0 How to Win
- 15.0 Game Setup
- Editor's Notes on the Source
1.0 Introduction
1.1 Historical Background
A. After the Battle of the Marne was won by the Allied armies in early September 1914, the Germans withdrew to a formidable position north of the Aisne River and entrenched themselves on the high ground. Numerous French efforts failed to dislodge them, and the two great hosts stared at each other from their respective trenches. German General Erich von Falkenhayn and French Marshal Joseph Joffre realized that there was much open, exploitable territory to the north of these solidified lines and each prepared to maneuver around the flanks of his opponent. These mutual and simultaneous flanking moves resulted in a series of headlong battles that gradually shifted the forces north toward the French Channel coast. These manoeuvrings yielded a series of encounter battles at Picardy, Albert, Artois, La Bassée, and along the Yser River. But these engagements were ultimately indecisive, and the campaign's final stage was set for the dramatic clash at the end of the race at the ancient textile city of Ypres.
B. The Race to the Sea campaign was the last mobile campaign on the western front of the First World War – a last chance for victory. It was a final push to get "home before the leaves fall." But the resulting murderous battles – culminating in the infamous Nazi myth Kindermord van Ypern (the Massacre of the Innocents at Ypres) – were so bloody and indecisive, that their effects instead directly lead to the creation of the Western Front trench lines and to a continuation of a war that seemed would never end.
1.2 Abbreviations
| Abbr | Meaning |
|---|---|
| ART | Artillery (Rating) |
| RF | Rifles (Rating) |
| LOC | Line of Communications |
| SZ | Size (Rating) |
| MET | Morale/Experience/Training |
| TT | Turn Track |
| MG | Machine Gun (Rating) |
| VP | Victory Point |
| NML | No Man's Land |
2.0 The Map
2.1 Terrain
The game map is an 11" x 17" representation of that area of France and Belgium over which the "Race to the Sea" was fought. A grid of hexes is laid over the map to regulate movement and combat. Each hex is about nine miles across, and is classified as one of the following types of hexes, depending on its dominant terrain feature:
2.1.1 Clear
Contains no terrain features in the hex and no special game effects.
2.1.2 Forest
This hex is Difficult for movement and Light Cover for combat.
2.1.3 Railroad
A. This is a hex containing a railroad track graphic. Railroads are connected only if the graphics connect to one another.
B. Railroad Movement is a special type of movement available only to eligible Allied units.
C. Railroads can also affect the placement of German reinforcements.
D. These hexes have no effect on normal movement.
2.1.4 Rivers
A. Rivers run along the edges of hexes.
B. Units that must cross a hexside containing a river treat the entered hex as Difficult Terrain for movement purposes.
C. River hexsides can also affect Assault Combat, increasing the Cover Class of the attacked hex by one level.
Example: If a unit attacks a forest hex in Assault Combat by crossing a river hexside, the attacked hex is treated as having Medium Cover. If that attacking unit had conducted a Firepower Combat instead, the hex would be only Light Cover.
2.1.5 Town
This is a hex containing a grey circle. It has no additional effect on movement, and is Light Cover for combat.
2.1.6 City
This is a hex containing a blue box. It has no additional effect on movement, and is Medium Cover for combat.
2.1.7 Major City
This is a hex containing a red circle. It has no additional effect on movement, and is Heavy Cover for combat.
2.1.8 Water
A. The hexes in blue along the north side of the map represent the English Channel and are Prohibited Terrain.
B. A flooded hex is also treated as a water hex.
2.1.9 Entrenchments
The two hexes on the south map edge represent the north ends of the Allied (western hex) and German (eastern hex) trench lines along the Aisne River. These hexes are Prohibited Terrain to all units.
2.1.10 Siege of Antwerp Zone
These are the three hexes labeled with an A. When the Siege of Antwerp ends, retreating Allied units and advancing German units must enter the map via these clear hexes from Antwerp.
2.1.11 Elevations
A. Each hex has one of three height levels. A hex's elevation has no effect on any terrain feature within it and has no effect on movement. Elevation may only come into play in combat.
B. The three elevations are:
- Low (light tan): The lowest and most predominate elevation,
- Elevated (medium brown): Higher than Low hexes and lower than High hexes, and
- High (dark brown): The highest elevation hex.
2.2 Turn Track
A. Race to the Sea 1914 is played in ten turns, with each turn representing approximately one week.
B. The historical campaign lasted from about September 15th, 1914 to around November 23rd, the end of the Battle of Ypres. Place the Game Turn marker in the appropriate box as the turn changes.
3.0 Units and Ratings
A. There are two factions represented in the game: the Allies (consisting of the French, British, and Belgian units) and the Germans. Each player is assigned a faction to control in the game.
| Nationality | Colour |
|---|---|
| French | Blue |
| British | Khaki |
| Belgian | Orange |
| German | Grey |
B. Each unit represents a corps or grouping of special divisions, and has a Unit ID line at the top of the counter representing its identifier.
3.1 Unit Types
There are three types of units used in the game and each is handled slightly differently.
3.1.1 Infantry
These units are corps and divisions made up primarily of foot soldiers, including attached artillery batteries and cavalry.
3.1.2 Cavalry Corps
These units are made up of horse soldiers that travel mounted but fight dismounted. They also include attached horse artillery batteries.
3.1.3 False Report
A. These counters are not actual fighting forces but are dummy markers used by both players to fool the opponent (rumors, mistaken identity, refugees, enemy patrols, etc.).
B. While hidden, they act entirely as if they are normal infantry units, including controlling hexes, exerting an NML zone, etc. However, these units do not have a Size Rating, do not count for stacking, and never fight.
C. If attacked, their hex is treated as being empty.
D. Once revealed, they are removed from the map and returned to the available pool.
3.2 Unit Ratings
Each unit is rated in particular categories, which are read as follows:
3.2.1 Size
Size (SZ) is shown by the number of shaded boxes on the top of the counter and represents the total number of soldiers in the unit. Four boxes is a reinforced corps, down to one box, which is a large division. No boxes is a False Report unit.
3.2.2 Morale/Experience/Training
Morale/Experience/Training (MET) is the letter code to the left of the unit type and is the basic fighting skill and quality of the unit's soldiers. An A is an elite unit, while a D is basically militia or untrained men.
3.2.3 Special Artillery Rating
A. To the right of the unit type box there may be a symbol.
- A small gun icon with SQ means the trench unit is supported by batteries of 75mm quick-firing Soixante-Quinze guns.
- A larger gun icon means the unit is supported by Heavy Artillery (HA).
B. These ratings may be referenced with some combat results.
3.2.4 Rifles Rating
Rifles rating (RF), the first of the three numbers at the bottom of the counter, is the basic rifle skills of the unit's soldiers. A 4 represents marksmen quality, while a 1 is poorly-trained shooters.
3.2.5 Machine Gun Rating
Machine Gun Rating (MG), the counter's middle number, is the relative total number of machine guns deployed with the unit. A 4 is an abundant number deployed, while a 1 represents very few are deployed.
3.2.6 Artillery Rating
Artillery Rating (ART), the third number, represents the total number of field artillery tubes attached to a unit. A 4 means numerous batteries are supporting, while a 1 means a minimal number are present.
3.2.7 Modified Ratings
A. A unit's ratings can be modified by one or more casualties markers. The rating is reduced by one level (from larger to smaller or better to worse) in each designated category per -1 on the Casualties marker, and by two per -2. Modifications are cumulative.
Example: A unit with an MET of B has a Heavy Casualties marker on it with a -2 in the MET rating position of the marker has a modified MET Rating of D.
B. A unit's rating in each non-SZ category can never be lower than the lowest rating, meaning a unit always has at least a MET rating of D or a 1 for the other ratings, regardless of Casualties effects (5.0). This does not apply to a unit's SZ Rating which, when reduced to 0, means the unit is eliminated.
3.3 Unit Sides
All units have two sides, with different details by type.
3.3.1 Infantry
Infantry units have a Deployed side on the front of the counter, displaying all Unit Ratings, and a hidden side on the back with just a national flag. The Deployed side is displayed whenever the unit is revealed via cavalry scouting, combat, or an event. The hidden side is face up whenever the unit is hidden.
3.3.2 Cavalry
Cavalry units do not have a hidden side. Instead, they have a Scouting side (and thus is seeking the enemy), and a Deployed side (used when the unit acts essentially as an infantry unit).
3.3.3 False Report
False Report units have only a hidden side. While hidden, treat them as Infantry units for all purposes.
3.3.4 Example of Unit With Casualty Marker
This is the French 6th Reserve Corps unit. It has these ratings: SZ = 2; MET = B; RF = 1; MG = 3; ART = 2, with the 75mm gun bonus. If the unit took a hit in combat and the Light Casualties marker above were drawn, the unit's ratings would become SZ = 1; MET = B; RF = 2; MG = 2; ART = 1; and it would still have the 75mm gun bonus.
4.0 Markers and Cups
4.1 Markers
There are a number of markers used in the game to keep track of various gameplay and unit conditions.
4.1.1 Game Turn
A. This is used on the Turn Track (TT) to indicate the current game turn. Each side of the marker also indicates the player possessing the Strategic Momentum at the time.
B. The game begins with the Germans having the Strategic Momentum, which remains in place until Foch takes command of the northern wing of the Allied forces. At that point, Strategic Momentum changes in the Allies' favor.
C. The only time this can otherwise change for either side is due to an Event result.
4.1.2 Activated
A. These markers are two-sided – the grey side is used by the Germans and the green side by the Allies.
B. At the start of each Action Round, both players take the number of markers equal to their Bid Number. When a unit has completed its Action, place this marker on the unit to indicate that it cannot activate again this round.
C. When both players complete all Actions for the round, remove all Activated markers from the map.
4.1.3 Casualties
A. This marker is used as needed to indicate the number of hits on a unit, with the appropriate side face up, depending on the result.
B. These Casualty markers are not all the same and are kept under the affected unit.
4.1.4 Planned Operations
This marker can be awarded as part of an Event result (13.0). The marker is held until the player wants to deploy it in a Planned Operations Step.
4.1.5 Flooded
This is used to mark the flooded Dixemude hex (with the blue F), which is then treated as a Water hex.
4.1.6 Control
Both players use the relevant side of the marker to indicate a hex that is under their control but that is not obvious by the situation on the map.
4.2 Draw Cup
One cup or any equivalent opaque container is needed to hold the Casualties markers. These markers are all placed in the cup at the start, and are randomly drawn when needed.
5.0 Unit Casualties
5.1 General Rule
A. Units are subject to hits being inflicted on them due to combat or from an Event result.
B. If one or more hits are inflicted, players randomly draw and place Casualties markers equal to the number of hits inflicted (however, see Fallback From Fire, 11.3).
C. Each hit is applied against the affected unit and degrades the unit's various ratings by the amount indicated on the marker.
D. The markers are all different, but every hit inflicted automatically affects the SZ Rating of the unit by -1. If a unit is reduced to a zero SZ Rating, it is eliminated.
Example: A unit with a 2 SZ Rating that absorbs two hits is eliminated.
5.2 Unit Casualty Conditions
Unit Casualty conditions are:
5.2.1 Fresh
This is a unit with no hits. The unit has no Casualties markers.
5.2.2 Light Casualties
This is a unit with one hit. The unit receives a Light Casualties marker. The owner draws a random Casualties marker from the cup, placing it under the affected unit with the Light Casualties side showing. The marker indicates which of the unit's ratings are reduced by one level.
Examples: A -1 under the MG slot on the Casualties marker reduces a 3 MG rating to a 2. A -1 under the MET slot reduces a C MET rating to a D.
5.2.3 Heavy Casualties
This is a unit with two hits. A unit receives a Heavy Casualties marker. If it already has a Light Casualties marker, simply flip it over. If not, the player draws a random Casualties marker from the cup and places it under the counter with the Heavy Casualties side showing.
5.2.4 Cumulative Casualties
Hits are accumulated, so a unit with Light Casualties (one hit) that receives two more hits would have three hits. If the unit is not eliminated, this would be represented by using both a Light Casualties and a Heavy Casualties marker, adding the effects together. The marker with the unit is first flipped to its Heavy Casualties side and then a new Light Casualties marker is drawn.
5.2.5 Recovered Casualties
A. If Casualties are removed, do so in reverse order of the Casualty application procedure.
Example: A unit with Heavy Casualties that removes one Casualty level flips the Casualties marker over to its Light Casualties side.
B. Place any removed Casualties markers into the cup.
5.2.6 Eliminated Units
At the moment a unit absorbs a hit that equals or exceeds its SZ, the unit is eliminated. If eliminated, place the unit off map and return any of its Casualties marker(s) to the cup.
6.0 Cards
There are two types of cards: Initiative Cards and Combat Results Cards.
6.1 Initiative Cards
Each faction receives its six Initiative Cards. These cards are used by the players to bid for the initiative each turn and normally indicate the number of Actions that can be performed. The number on each card is the Bid Number.
6.2 Combat Results Cards
A. Each faction receives its twelve Combat Results Cards. Each faction randomly draws cards from its own deck to resolve various combat situations, both offensively and defensively.
B. Each card has a Card Number in the top right (1-12). The first six cards of each deck are also labeled EVENT! at the top (13.0).
C. The two decks are not exactly the same but have the same four general Combat sections:
- Firepower Attack,
- Firepower Defense,
- Assault Attack, and
- Assault Defense.
D. These cards are flipped over from the top of the deck as needed to resolve combats or to generate a random number. After being used, they are placed in the discard pile. When the deck runs out, shuffle the discard pile and start a new draw pile.
E. Hits scored by a German unit are indicated with a Maltese Cross symbol. Allied hits are indicated with French Roundel symbol. Reductions of hits scored have a minus sign before the appropriate symbol.
Design Note: There are no dice used in this game. Combat results and other game play factors requiring numeric results are all handled through the use of the game's cards. If players have access to card sleeves, it is advised that they utilize them.
7.0 Sequence of Play
Race to the Sea 1914 is played in a series of ten turns. Each Turn follows a distinct sequence of play, made up of seven phases. Each phase must be completed before proceeding to the next as follows:
7.1 Reinforcements Phase
A. Both sides receive new units during the game. These are called reinforcements. Such units are placed during this phase and the side with Strategic Momentum places after the opponent.
B. The scenario instructions list the units that enter and where. If a specific hex is listed, the units are placed in that hex if it is friendly-controlled and may overstack upon placement. If all eligible hexes are enemy-controlled, units may be placed on the closest friendly-controlled hex but must first apply one hit as a consequence.
C. If still overstacked at the end of the turn, the player must move enough units to cure the situation during the Fog of War Step.
7.2 Initiative Deck Setup Phase
A. Both players shuffle their respective deck of Initiative Cards (not looking at the Bid Number side), and then each discards the top card, placing it facedown on the table to establish the Discard Pile. This card is not available this turn.
B. Both players then take the remaining five cards into their hands, from which they will play during the turn.
7.3 Allied Railroad Movement Phase
A. Any number of Allied infantry and/or False Report units may use Railroad Movement this phase, but only up to a 4 SZ total limit.
B. Example: One 4 SZ unit could be moved by rail or two 2 SZ units, plus any number of False Report units.
C. Each eligible unit may move an unlimited distance of hexes as long as:
- It starts its move on any railroad hex,
- It moves only along connected railroad hexes, and
- It ends its move on a railroad hex that is also a major city, city, or town hex,
D. In all cases, the unit may not start, enter, or end in an enemy-controlled hex or in an enemy NML hex (even if occupied by a friendly unit).
E. Do not mark the moving unit as Activated.
F. Scouting cavalry units may not use Railroad Movement.
Play Note: Railroad Movement is a free move and has no effect on the unit's normal ability to activate during the turn.
7.4 Bid Initiative Card Phase
Players examine the cards in their hands and then each secretly selects a card to bid. The cards are then flipped over simultaneously. Based on each card's Bid Number, players determine the Initiative Player (8.0).
7.5 Action Round Phase
A. Both players (in most cases) will conduct Actions (9.0). The player winning the Initiative plays first and then the players alternate conducting their Actions.
B. After both players have completed all their Actions, the Action Round is over.
C. The Action Round is performed in two steps:
7.5.1 Initiative Advantage Actions Step
The Initiative player conducts a number of Actions equal to the difference between the two Bid Numbers.
Example: If the Germans bid the 4 card and the Allies bid the 2 card, the Germans immediately conduct two eligible Actions to start the Action Round.
7.5.2 Alternating Actions Step
A. When the Initiative player has completed their Advantage Actions, the non-Initiative player conducts one Action.
B. Players then alternate conducting one Action at a time until each has conducted a total number of Actions equal to their Bid Number.
Example: Continuing the example from 7.5.1, the Allies would then conduct their first eligible Action, then the Germans their third Action, the Allies their second (and last) Action, and then finally the Germans conduct their fourth (and last) Action.
7.6 Remove Activated Markers Phase
A. After both players have completed all their Actions, they remove all Activated markers from the map. They then begin another Bid Initiative Card Phase.
B. If there are no Initiative Cards left in their hand (i.e., after the fifth Initiative Card is bid and played), proceed to the End Turn Phase.
7.7 End Turn Phase
After the fifth Action Round is completed, both players conduct these five steps:
7.7.1 Siege of Antwerp Step
A. If the siege is still ongoing, the Germans draw the next Combat Results Card and check the Card Number, comparing it with the current turn's Siege of Antwerp entry (on the TT).
B. If the Card Number falls within the indicated range of numbers, the siege is over and Antwerp has fallen. Starting the next turn, the Allied Belgian Army unit is placed in any Siege of Antwerp Zone hex. The turn after this unit enters, the German Siege of Antwerp units may be placed as reinforcements in any of the same three Siege of Antwerp Zone hexes.
C. Skip this step if Antwerp has already fallen.
Historical Note: The siege of Antwerp started on September 28th, and the Belgian garrison finally surrendered on October 9th. A great portion of the Belgian army escaped along the coast, and was quickly pursued by German forces. The newly formed German 41th Army contained much of the very heavy artillery that bombarded Antwerp for days. This artillery contingent is reflected in the Heavy Artillery bonuses assigned to the German Reserve divisions that enter after the siege is concluded.
7.7.2 Foch Takes Command Step
A. If Foch has not yet taken command, the Allies draw the next Combat Results Card and check the Card Number, comparing it to the current turn's Foch Takes Command entry (on the TT).
B. If the Card Number falls within the indicated range of numbers, then Foch is appointed command of the northern French forces. Starting with the next turn, flip the Game Turn marker to indicate that the Allies have the Strategic Momentum for the remainder of the game (unless changed again by an Event result).
C. Skip this step if Foch has already taken command in a previous turn.
Historical Note: Lieutenant General Ferdinand Foch was a superior leader, proving himself during the Battle of the Marne. Marshal Joffre assigned him to command the northern wing of French forces on October 9th, 1914. He also oversaw coordination efforts with British formations. This change reinvigorated the French war effort, which was lackadaisical and disorganized. The positive effect is reflected in the changeover to permanent Allied Strategic Momentum (and can only be changed to German Strategic Momentum by an Event result).
7.7.3 Forced March Movement Step
Both players conduct Forced Marches. The player with the Strategic Momentum decides who will act first. After announcing the choice, the active player draws their next Combat Result Card and consults the Card Number. The players each cross-reference that number on the table below to determine how many units may force march.
| Number(s) | Germans | Allies |
|---|---|---|
| 1-3 | 1 | 0 |
| 4-7 | 2 | 1 |
| 8 | 2 | 2 |
| 9-10 | 3 | 2 |
| 11-12 | 3 | 3 |
7.7.3.1 Germans
While acting, the Germans may immediately move the indicated number of units one hex each. However, a unit may move two hexes if it does not enter a forest hex or cross a river hexside.
7.7.3.2 Allies
While acting, the Allies may immediately move the indicated number of units one hex each.
7.7.3.3 Restrictions
A. Normal movement rules apply, but the actual movement cost of entering the hex(s) is irrelevant.
B. No other Actions can be conducted.
C. After the first active player finishes Forced Marching units, then the other player does the same.
D. Do not mark these units as being Activated.
7.7.4 Fog of War Step
A. Both players simultaneously flip over any non-cavalry units currently on their Deployed side that are not adjacent to an enemy unit back to their hidden sides.
B. Both players may then gather up (from the map or pool) and redeploy their False Report units as they see fit, in the order determined by the Strategic Momentum player. These False Report units can be freely placed in any friendly-controlled hex on the map, as the player wishes. If a hex has units that are still overstacked during this step, the owner must move one or more units one hex in any direction, but not closer to an enemy unit. This is a free move – do not mark the units as being Activated.
7.7.5 Planned Operations Deployment Step
A. A player is holding the Planned Operations marker and wishing to use it during the upcoming turn must deploy it into any friendly-controlled hex (even if empty). Simply place the marker on the map in any friendly-controlled hex as desired. The marker then remains in that hex until used by the owner or until the enemy occupies the hex or steals the marker back (via an Event result).
B. If the hex is occupied by an enemy unit, the marker is returned to the available pool.
C. If the marker is still on the map at the time the opponent is awarded it, the opponent steals the marker away and takes possession.
D. There is no limit to how long the marker can remain in its deployed hex. It can only otherwise be removed from that hex if the owner is awarded it again. They can then pick it up and hold it again for a new deployment using normal procedures.
7.7.6 Advance Game Turn Marker Step
A. Move the Game Turn marker to the next box on the TT.
B. Players gather all six of their Initiative Cards and begin the next turn.
C. If this is the end of Turn 10, the game is over and players assess victory.
8.0 Initiative
In the Bid Initiative Card Phase, both players simultaneously reveal the Bid Numbers of the Initiative card they each played. Compare the two values, and play proceeds as follows:
8.1 Initiative Player
A. The player with the higher Bid Number card is the Initiative Player.
B. If both cards have the same Bid Number, the Initiative Player is the one with the Strategic Momentum.
8.2 Total Allowed Actions
A. The value of each player's Bid Number card normally represents the total Allowed Actions that may be used by for this Action Round. However, if both of the played Initiative cards are of the same value, this is called a Lull in the Action (8.3).
B. Each player takes a number of Activated markers equal to their Bid Number to help keep track of Allowed Actions.
8.3 A Lull in the Action
A. If players both play equal Bid Numbers, a Lull in the Action occurs. This reflects historical factors such as bad weather, fatigue, confusion, etc.
B. The Allowed Actions are automatically one, and earned only by the player with the current Strategic Momentum. The other player does not get any Actions this round.
Design Note: Yes, indeed – if you both bid your 5 Initiative Cards in the hopes of a big turn, only one of you will get an Action to perform. Just chalk this up to Von Clausewitz' "Friction of War."
8.4 Initiative Advantage Actions
The Initiative Player first conducts a number of Actions equal to the difference of the Bid Numbers, using normal procedures. They conduct one eligible Action after another until completing a number of Actions equal to the difference.
8.5 Alternating Actions
A. After the Initiative player finishes conducting their Advantage Action(s), the players then alternate completing the remaining Actions one at a time, starting with the non-initiative player.
B. The Action Round ends when both players have conducted all Actions.
Design Note: The winner of the initiative each Action Round gains a huge advantage. Not only do they move first, using the Initiative Advantage Actions, but they also move last in the Alternating Actions sequence.
9.0 Actions
A. Each player conducts Actions during the Action Round as dictated by the Initiative situation. When a player is eligible to conduct Actions, they may choose any available Action, up to the total Allowed Actions determined for this round.
B. Normally, the same Action may be used more than once, but each individual unit may participate in only one Action per Action Round. After conducting an Action, the owner should place an Activated marker on the unit that acted to indicate that it has acted that round.
C. These Actions can be used by any eligible unit:
9.1 Move
A. One selected unit may conduct normal movement (10.0).
B. Cavalry units use this Action to change from their Scouting side to their Deployed side or vice-versa, consuming all of their MA to do so.
C. This is the only Action a False Report unit can use, allowing it to mimic a real infantry unit moving.
9.2 Firepower Combat
One selected unit currently adjacent to an enemy-occupied hex may conduct a Firepower Combat (11.0).
9.3 Assault Combat
A. One selected unit adjacent to an enemy-occupied hex may move into that hex and conduct an Assault Combat (12.0).
B. A player with more than one Action available (due to the Initiative Advantage or Planned Operations) can move all eligible assaulting units into a hex before resolving the combat.
9.4 Planned Operations
A. If the active player has already deployed the Planned Operations marker and the marker is still in its deployed hex, it can be used with this Action. All units in that hex plus all units in one adjacent hex are now activated. All units in those two hexes may each conduct any eligible Action and in any order. They do not all need to pick the same Action.
B. Also, if any of these activated units conduct an Assault Combat, they receive a Big Push bonus. The assaulting player draws two Combat Result cards for each attacking unit, looks at them both and then chooses which to use. This is done after the defender has revealed its card. Discard the card that is not used.
C. After this Action is finished, the Planned Operations chit is placed back into the available pool.
D. Mark all participating units with an Activated marker (but remember that the use of the Planned Operations Action still only counts as one Action).
9.5 Regroup
One eligible unit with a Casualties marker may recover one or more hits. The unit must have a Line of Communications (LOC) to an eligible hex for its nationality. The LOC is a connected path of friendly-controlled hexes leading to an eligible hex, based on nationality:
9.5.1 German
Any friendly-controlled city or major city hex.
9.5.2 French
Any friendly-controlled city or major city hex, or the South Entry hex (15.0), if friendly-controlled.
9.5.3 British
A friendly-controlled Calais, Dunkirk, Nieuport, Ostend, or Zeebrugge hex.
9.5.4 Belgian
The friendly-controlled Ghent hex.
9.5.5 Hit Removal
A. If the eligible unit is adjacent to an enemy unit, it may only remove one hit.
B. If the unit is not adjacent to an enemy unit, it may remove two hits.
C. Adjust the Casualties marker accordingly after removing the hit(s).
9.6 Rebuild
One previously eliminated unit may be brought back into a SZ Rating of 1. Take the unit from the pile of eliminated units, placing it in any hex with an LOC (9.5) to an eligible hex for that unit's nationality. Place a Casualty marker with the unit to indicate a SZ of 1 and give the unit an Activated marker.
9.7 Cavalry Recon
One selected cavalry unit on its Scouting side may reveal any one adjacent hidden enemy unit. If more than one qualifying enemy unit is in the hex, the player may select only one of them to reveal.
9.8 Opening the Dykes
A. The Allies may place the Flooded marker in the Dixemude hex during any Action Round after the Siege of Antwerp ends. The hex must be Allied-controlled at the time.
B. The hex is now considered to be a water hex for all purposes. Any Allied unit currently there is displaced one hex for free, but not closer to an enemy unit (if possible).
C. A flooded hex may not be counted as a VP hex for either side.
10.0 Movement
10.1 Normal Movement Procedure
A. Units may conduct normal movement if allowed by the Action that they select. Units that conduct movement generally move from one hex to an adjacent hex, entering a number of hexes up to the amount allowed by the normal MA.
B. The normal MA is three hexes, except for scouting cavalry, which may move five hexes.
C. Some hexes have a terrain type that costs a unit more than one hex to enter or may prohibit entry (10.3).
10.1.1 No Man's Land
A. The six hexes adjacent to an enemy unit are termed No Man's Land (NML) hexes.
B. Units must stop moving immediately upon entering a NML hex, even if it is occupied by another friendly unit. They may not continue their move, ending their Action.
C. In addition, units may not move directly from one NML hex to another, except if screened (10.1.2). They must first move to any non-NML hex and then may then re-enter an NML if they have enough MA remaining.
Play Note: NML hexes are called zone of control hexes in other games.
10.1.2 Screening
A unit may only move from one NML hex directly into another adjacent NML hex if both hexes are occupied by a friendly unit. The unit may move only the one hex in this case, regardless of MA.
10.1.3 Cavalry
Cavalry may opt to flip to their opposite side (from scouting to deployed and vice-versa), consuming their entire MA.
10.2 Stacking With Friendly and Enemy Units
A. A hex may contain up to a total of six SZ Ratings at one time, regardless of the number of individual units.
B. Moving units may not stop in a hex if the total SZ Rating would exceed 6, though they may pass through such a hex.
C. False Report units stack for free.
D. During an Assault Combat Action, a unit may enter an enemy-occupied hex only if it begins adjacent to it. An Assault Combat must then be resolved. Any number of eligible assaulting units may enter the attacked hex (but see Occupying Captured Ground, 12.8).
10.3 Terrain Types
Most hexes do not have any additional effect on the movement abilities of units. However, some hexes have terrain types that slow down or prohibit movement.
10.3.1 Difficult Terrain
A. Forest hexes count as two hexes for movement purposes.
B. If a unit crosses a river hexside, the hex entered counts as two hexes.
C. Multiple Difficult Terrain types count only as one Difficult Terrain hex.
Example: Crossing a river into a forest counts as two hexes.
D. If a unit has insufficient MA remaining to enter a hex, it may not do so.
10.3.2 Prohibited Terrain
Units may never enter water or entrenchment hexes for any reason.
10.3.3 Railroad Terrain
A railroad hex allows Allied units to use railroad movement.
10.3.4 Movement Example
An Allied unit in Albert could move north into the adjacent hex, then to Arras, and finally to Lens for its third hex. It could also move southeast across the river (for two hexes of movement), then one hex toward Noyon. It could not have continued northeast into Perrone across the river.
10.4 The Fog of War
A. All non-cavalry units are placed on the map with their Hidden sides showing. This is to disguise the actual unit in a hex. Casualties markers are kept under the units to which they apply (so as to keep their effects secret) until a modified rating needs to be referenced.
B. False Report units follow the same procedures and are used by players to even further confuse the enemy. These units are treated as normal infantry units while hidden.
C. Units are only flipped over to their Deployed sides in these circumstances:
- A scouting cavalry unit reveals the unit with a Cavalry Recon Action. In this case, the non-cavalry unit is immediately flipped over to its Deployed side and its Casualties marker is available for inspection by the enemy. A revealed False Report unit is removed from the map and returned to the pool of units.
- The unit conducts a Firepower Combat.
- The unit is in the range of a Firepower Combat and receives any hits. It is not revealed if no hits are scored.
- The unit is engaged in Assault Combat as either the attacker or defender. Again, flip all involved units to their Deployed sides. Any involved False Report units are removed from the map and returned to the pool of units, along with any Casualties markers they were carrying.
D. Units remain on their Deployed side until the turn's Fog of War Step, at which time they may be flipped to their hidden sides if eligible. Cavalry units follow a different procedure (10.5).
10.5 Cavalry Scouting and Skirmishing
Cavalry units are unique in that they have a normal Deployed side and a special Scouting side.
10.5.1 Deployed Side
When on their Deployed side, cavalry units function in the exact same way as infantry units (except that they are never hidden).
10.5.2 Scouting Side
When on their Scouting side, cavalry units can perform the Cavalry Recon Action. They may not conduct any combat.
10.5.3 Skirmishing
A. If a scouting cavalry unit wishes to perform a Cavalry Recon Action on a hex that also contains an enemy scouting cavalry unit, it must first resolve a Skirmish Combat.
B. Both players simultaneously draw a Combat Results card and refer to the Card Number. Any cavalry unit with a 2 SZ Rating doubles that number.
C. The higher net Card Number wins the skirmish. The losing cavalry unit must retreat one hex.
D. If tied, the side with the Strategic Momentum wins.
E. If the active cavalry unit wins, it may then conduct a normal Cavalry Recon Action in that enemy hex.
F. No hits are inflicted.
10.5.4 Combat vs Scouting Cavalry
An infantry unit may conduct a normal Firepower or Assault Combat against a scouting cavalry unit using normal procedures, except:
10.5.4.1 Firepower Combat
The scouting cavalry may conduct a Fallback Move without suffering a hit possibility (11.3).
10.5.4.2 Assault Combat
Resolve as if the attacker were assaulting an NML hex (12.9). The cavalry must retreat one hex if the attacker wins the Assault Combat, but the cavalry never receives a hit itself; it ignores any normal hit application against it.
11.0 Firepower Combat
A. Firepower Combat represents a unit's engagement of the enemy using infantry rifle firefights, saturating machinegun fire, and artillery bombardments. The flow for Firepower Combat resolution is that the active unit attempts to inflict hits on the targeted unit and the target unit tries to reduce the number of hits scored on it. This is accomplished with the flipping of Combat Result Cards and referencing the two relevant Fire Combat sections of the cards.
B. The firing unit is termed the attacker and the target is the defender.
11.1 Firepower Combat Eligibility
A. Any unit conducting a Firepower Combat Action may resolve a Firepower Combat against any one enemy unit in an adjacent hex. If there is more than one enemy unit in the hex, the attacker chooses the unit as the target.
B. Cavalry units on their Scouting side may not conduct Firepower Combat.
C. The attacker must be immediately revealed when it announces the Fire Combat.
11.2 Firepower Combat Resolution
A. The attacker flips the top card from its Combat Results Card Deck.
B. The defender simultaneously flips the top card from its Combat Results Card Deck.
C. The attacker consults the Firepower Attack portion of the card and applies the result listed there.
D. The defender consults the Firepower Defense portion of his/her card and likewise applies the result listed there, even if the defender is a False Report unit.
Play Note: Most hits are conditional, based on the firing or targeted unit's ratings and/or the terrain involved. It is here that good ratings and/or tactics are important.
E. The two entries will be a combination of effects that may result in hits being inflicted and/or hits being taken away. Sum the two results to get a net number of hits inflicted on the defender.
F. Also, if both cards are Event cards, see 13.0 for procedures.
G. Apply the net hits (if any) against the target unit using normal Unit Casualties Procedures (5.1).
H. If there are no hits (or negative hits) scored, there is no effect on the defender.
I. If there are any hits scored, the defender unit must first be revealed. (This is effectively recon by fire.) Then apply the hit(s) normally. If a hidden unit's MET Rating needs to be referenced to apply its effect (per the owner's choice) the defender must then be revealed to show that rating.
J. If the MET Rating effect is not used, then the defender can remain hidden if it does not absorb a hit.
11.3 Fallback From Fire
A. The defender of a Firepower Combat may opt to make a Fallback Move when applying hits. This allows one hit (and only one) to be converted into a one-hex retreat result instead. This retreat move must follow all normal Retreat Procedures (12.7).
B. Scouting cavalry may opt to convert a Fallback Move before the combat is resolved; no hits are thus inflicted, but the cards are flipped anyway only to check for an Event.
Example: A unit receiving three hits from Firepower Combat may opt to apply just two hits and retreat one hex.
11.4 Higher Elevation Results
A. If a result refers to Higher Elevation, that unit applies that result if it is in a hex that is of a higher elevation hex than the opposing unit's hex.
B. The highest elevation hex is High, the next highest is Elevated, and the lowest is a Low hex.
Example: The German II Corps decides to issue Firepower Combat at an adjacent hidden full-strength French unit in Noyon. The Germans reveal the II Corps, and both players flip their top Combat Results Cards. The Germans draw their #5 card, referencing the Firepower Attack result, which reads: Hit if RF 4/3/2; Hit if MG 4; Hit if ART 4/3/2. Looking at the II Corps ratings, the unit meets the requirements in each case, so a temporary total of three hits is inflicted. The French hidden unit is the IV Corps. They draw card #6, referencing the Firepower Defense result, which reads: -1 Hit if MET A, -1 Hit if Heavy Cover; -1 Hit if Medium Cover. The unit is in a city hex, which is Medium Cover and it has a MET of A. Therefore, a defensive modifier of -2 hits applies and the net result is one hit inflicted on the French IV Corps. First, the French must reveal the unit to the Germans. Next, they apply either the hit (placing a randomly drawn Light Casualties marker under the unit) or they can opt to retreat one hex and not take a hit at all. They decide to retreat, moving the unit one hex southwest, and the attack ends. The Germans place an Activated marker on their II Corps.
12.0 Assault Combat
Assault Combat represents close combat attacks, wave assaults, and bayonet charges in an effort to take ground and intimidate the enemy from their positions. The flow for Assault Combat resolution is different than for Firepower Combat. Both the attacking and defending units attempt to inflict hits on each other. The side scoring the most hits wins the melee. This is again accomplished with the flipping of Combat Result Cards, but this time by consulting the two appropriate Assault Combat sections of the cards.
12.1 Assault Combat Eligibility
A. If an active unit enters an enemy-occupied hex (which can only happen normally if it starts adjacent to that same enemy hex and uses an Assault Combat Action or from an Event result), an Assault Combat between the two units must be resolved.
B. If the player has more than one active unit eligible to enter the same enemy hex at the same time, then all such units may move before resolving the Assault Combat.
Play Note: So yes, you can move multiple assaulting units into the same enemy hex so that a multi-unit combat is resolved. But this can only happen if the active player is the Initiative player, has won the Initiative by two or more Bid Numbers (and thus has the capability of moving more than one unit before resolving the Assault Combat), or uses a Planned Operations Action.
C. Cavalry units on their Scouting side may not conduct Assault Combat.
D. The active unit is the attacker and the inactive unit is the defender.
12.2 Assault Combat Matchups
A. Flip all units involved in the combat to their Deployed sides if not already on that side.
B. Remove revealed False Report units from the map, placing them back in the available pool, but the Assault Combat must still be resolved as an Empty NML Hex Attack (12.9).
C. Once an Assault Combat is announced, the attacking unit(s) cannot cancel it after the enemy units are revealed.
D. Then each attacking unit is matched against one defending unit as the attacker sees fit. Thus, a series of one-on-one combats are established.
E. After each unit is matched against an enemy, any remaining units (from either side) must be doubled up against an enemy unit that already has one unit matched with it (as the owner wishes).
F. After all units are doubled up and there are still units left that are not matched up, they can be tripled up, etc.
G. All units, attacking and defending, must be assigned to combat with an enemy unit.
12.3 Assault Combat Resolution
A. The attacker then resolves every matchup in any desired order.
B. The attacker announces the matchup and then flips the top card from the Combat Results Card Deck, consulting the Assault Combat Attack portion of the card.
C. The defender simultaneously flips the top card from the Combat Results Card Deck and consults the Assault Combat Defense portion of the card.
D. Both results (if any) are applied against the enemy unit simultaneously.
Play Note: Most hits are conditional.
E. The two results will be a combination of effects that may result in hits being inflicted on one or both sides.
F. If both cards are Event cards, see 13.0 for procedures.
Historical Note: Attacking German units will occasionally receive a benefit from machinegun fire as they often deployed them to fire indirectly in support of an attack, whereas the Allies were not as efficient using the tactic. By the same token, French units can get an offensive and defensive edge from their quick-firing 75mm guns (the famous Soixante-Quinze).
12.4 Multiple Unit Combats
A. Units that have more than one opponent matched up against them must fight all opposing units one by one. Resolve the initial matchup combat to conclusion first, using normal procedures.
B. Before resolving the next matchup, either side (starting with the attacker) may opt to voluntarily retreat one or more units involved in that matchup combat (using normal retreat rules).
C. If any units remain or no withdrawal option was chosen, the next matchup combat must be fought immediately.
D. A unit must conduct each such combat separately until it or the units it is fighting are eliminated or retreat.
E. If units are assigned to fight a unit but do not get a chance to do so (because the single enemy retreated or was eliminated) they must instead be rematched (attacker's choice) with surviving enemies later in the phase. This can only happen after all initial matchups are resolved to conclusion and there are still opposing units remaining in the hex.
F. If neither side chooses to withdraw, then another round of new matchups and combats occurs.
12.5 Flank Attacks
A. If the attacker has two or more units attack the same defending hex (which can only happen when two or more attacking units are active, 12.1) from any two hexes that are not adjacent to one another, then this is a Flank Attack.
B. The first attacker resolves normally.
C. The second and each subsequent attacker receives the Big Push Bonus (Planned Operations Action, 9.4).
12.6 Applying the Close Combat Result
A. First, both players apply the number of hits inflicted by the enemy on their units, using the normal Unit Casualties procedures (5.1).
B. Next, the players must assess who wins and loses the combat.
- If one unit is eliminated and the other survived, the surviving unit wins the combat, and is the winner of the combat, regardless of the number of hits inflicted by each side. The winning unit remains in its current hex.
- If both units are eliminated, there is no winner or loser.
- If neither unit is eliminated, the side that inflicts the greater number of hits on the enemy wins the combat. The opposing unit loses the combat and must retreat one hex (12.7) from the combat, and the winning unit remains in its current hex.
- If each side inflicts the same number of hits on the other, then the two units check their MET Ratings (after the hits are applied). The unit with the better MET Rating wins the combat. If the MET Ratings are equal, then neither unit wins and another Assault Combat must immediately be fought between the two units. Resolve normally. There is no limit to the number of consecutive combats that can be fought in this manner.
12.7 Retreats
A. The losing unit of an Assault Combat must conduct a retreat. The unit must move one hex from the hex in which the combat was fought.
B. If the attacker loses, it must return to the hex that it used to enter the combat.
C. A losing defender must retreat to any adjacent hex but may not retreat into the hex from which the attacker entered the combat, an enemy-occupied hex, an enemy NML hex (unless occupied by a friendly unit), a Prohibited Terrain hex, or an overstacked friendly hex.
D. If a unit has a choice, it must also try not to move closer to the enemy's side of the map.
E. If a unit cannot retreat one hex due to causing an overstacking situation, then it must retreat through that hex into a legal hex.
F. If a unit cannot retreat at all, it stays in the hex, suffers an additional hit, and (in the case of Assault Combat) a new combat must be fought.
12.8 Occupying Captured Ground
A. Attacking units that win their Assault Combat and eliminate or cause the defender(s) to retreat must remain in the battle hex. However, they may not exceed the normal stacking limit (10.2).
B. If more than a 6 SZ Rating of units is in the captured hex, then units exceeding that limit must return to the hexes from which they conducted their attacks (per the owner's choice).
12.9 Assaulting an Empty NML Hex
A. A unit may wish to occupy an empty NML hex that it could not normally enter with movement (i.e., moving from one NML hex directly into another without screening). The only way to do that is to conduct an Assault Combat against that empty hex.
B. The unit announces and conducts an Assault Combat against the empty hex normally. The defender (actually garrisons and patrols from the adjacent enemy units) draws a Combat Results Card normally, but the player only references any Empty Hex result on that card. If no result is listed, there is no effect on the attacker.
C. The defender is assumed to have a 0 SZ and a D MET Rating for comparison purposes. This may result in the attacker actually taking a hit, and can even cause the attacker to lose the combat if it does not score a hit.
D. In the case of ties, the attacker always wins.
E. This procedure is also used when attacking a scouting cavalry or False Report unit. (A False Report unit is always removed regardless.)
Example: The Allies play a 2 Initiative card while the Germans play a 4 card. This gives the Germans the Initiative and two Actions to use immediately. The Germans announce a flanking Assault Combat on the British IV Corps in Ypres with the III Reserve Corps from Dixmude and the XXIII Reserve from the elevated hex to the southeast of Ypres. The first resolution is with the XXIII Reserve combat and the Germans draw card #9, while the Allies draw #7. This results in no hits on the British unit and two hits on the German unit (remember that the British unit is in Heavy Cover, the city, plus the attacker is assaulting across a river hexside). The German unit is eliminated because it has an SZ Rating of 2. Next, the attack of the III Reserve is resolved and it has a Big Push bonus for the Flank Attack. First the Allies draw their card, #12, which scores just one hit on the German unit. (Note that the German unit is larger.) The Germans draw cards #3 and #11. They choose to play #3 and score three hits on the British unit. The German unit has a Light Casualties marker drawn and placed under it, and the British unit is eliminated. The German unit occupies Ypres and the bloody battle is over – for now.
13.0 Event Results
A. On the top of each set of Combat Result Cards numbered #1 through #6 is an Event indicator. When the players flip the top cards from their respective Combat Results card decks during any combat resolution, they must also check to see if the cards are Event cards. If both flipped cards are so labeled, an Event result occurs. If neither card says Event or only one of the two cards says Event, there is no additional effect.
B. If an Event result occurs, the players sum the two Event Card Numbers. Check the Event Card Results Table and find the sum. Apply the indicated special result immediately after resolving the combat normally.
Exception: If a multiple-unit Assault Combat is ongoing in a hex and all such combats have not yet been resolved, the Event result cannot be applied to any units in the assaulted hex.
C. All results are fully explained on the table.
D. There is no limit to the number of Event results that can be generated by any series of combats.
Example: An Assault Combat is being resolved with a French unit attacking a German unit. The German unit loses, retreating to an adjacent hex, and the French unit occupies the battle hex. The French drew their #4 card while the Germans drew their #5 card, which are both Event cards. Their Card Numbers sum to 9. The Event result of 9 is Counter-Attack/Wave-Attack. Because the German unit pulled the higher number, it gets the event. The Germans opt to move the just-defeated German back into the fought-over hex and launch a vicious counterattack on the French unit! This is immediately resolved as a new Assault Combat with the German unit attacking and the French unit now defending. If this counterattack had also created an Event result, that Event would be resolved after the counterattack.
14.0 How to Win
A. Race to the Sea 1914 is played through to the end of Turn 10. After the completion of that turn, players assess who won by summing the number of Victory Points (VPs) earned by each player. The player with the greater total wins the game and the victory level is determined by the difference in VP totals.
B. The goal of each side is essentially to create a better-positioned static Western Front for its side from which to fight for the duration of the war, measured by the players' final positions in relation to that Historic Trench Line.
C. Each player totals the number of VPs scored according to the following schedule:
14.1 The New Western Front
A. Award each side 1 VP per controlled hex on the opponent's side of the Historic Trench Line (marked with the red-dotted hexsides). The Germans earn 1 VP per controlled hex west of the Historic Trench Line and the Allies earn 1 VP per controlled hex east of the Historic Trench Line.
Exceptions: 14.2, 14.3, 14.4.
B. A hex is considered to be controlled if that side's infantry unit occupies the hex or was the last to occupy the hex. Use the Control markers to help keep track in confusing situations.
C. To qualify for a VP award, the hex in question must be able to trace a path of connected friendly-controlled hexes of any length back to any friendly-controlled map edge hex. The Germans must trace to the east map edge and the Allies to the west map edge. If this strategic LOC cannot be traced, that particular hex does not award a VP.
14.2 Key Channel Ports
The Germans receive 3 VPs each (instead of 1 VP) for controlling the Dunkirk and Calais hexes. No strategic LOC (as in 14.1.C) is needed to earn these VPs.
14.3 Turning the Tide
The Allies receive 3 VPs each (instead of 1 VP) for controlling the Ghent and Maubeuge hexes. No strategic LOC (as in 14.1.C) is needed to earn these VPs.
14.4 Behind Enemy Lines
Both players receive 2 VPs for each friendly-controlled hex located behind the enemy entrenchment hexes. There are ten qualified hexes for each side to capture, indicated with white outlined hexsides. Apply the same qualifications as in 14.1.B and 14.1.C.
14.5 Victory and Victory Levels
A. Total the VPs earned per 14.1-14.4. The player with the higher total is the winner.
B. Next, the players take the difference in their totals to determine the victory level per the schedule below:
| VP Difference | Result |
|---|---|
| 0 | Draw |
| 1-4 | Minor Victory |
| 5-8 | Major Victory |
| 9-12 | Crushing Victory |
| 13+ | War-Ending Victory |
15.0 Game Setup
15.1 In General
The game begins with only a few units deployed on the map. The German and Allied armies are staring at each other from their newly formed trench lines along the Aisne River, the northern extent of the lines represented by the two entrenchment hexes. Players will be entering most units as reinforcements.
15.2 Markers and Cards
A. Place the Game Turn marker on the Turn #1 space with its German Strategic Momentum side showing.
B. Place the Activated, Unit Casualties, Flooded, and Planned Operations markers near both players for easy access.
C. Both players shuffle their respective Initiative Cards together and place the draw pile near them.
D. They then do the same with their Combat Result Cards.
15.3 Initial Hex Control
At the start, all hexes to the east of the Historic Trench Line and behind German entrenchments are assumed to be German-controlled, all hexes to the west of the Historic Trench Line and behind Allied entrenchments are assumed to be Allied-controlled. Thereafter, mark any changes in hex control with the Control markers provided.
15.4 Cavalry
Cavalry units, when first deployed at setup or when arriving as reinforcements, may be placed on their Scouting or Deployed side as the owner chooses.
15.5 Allied Setup
A. The Allies set up first.
B. False Report units may be deployed as the owner wishes, with the units at start or Turn 1 reinforcements.
15.5.1 At Start
Only French units are on the map at start for the Allies.
| Units | Location |
|---|---|
| IV, XIII, VI Reserve | Any hexes south of the Somme River and west of the Historic Western Front Line |
| II Cavalry, 81/82 Terr, 84/88 Terr | Amiens |
15.5.2 Reinforcements
A. Place these units directly onto the TT for the relevant entry turn.
B. Enter the units per the Reinforcements Procedure (7.1) during the Reinforcement Phase on the entry turn.
C. Reinforcements enter the game as indicated below. The South Entry Hex is the railroad hex with the red arrow.
| Turn | Location | Nationality | Unit(s) |
|---|---|---|---|
| 1 | South Entry | French | XIV, XVI, XX |
| 2 | South Entry | French | XI, XXI, XXXII, I Cavalry |
| 2 | South Entry | British | Cavalry |
| 3 | South Entry | French | VIII, IX, X, II Reserve, 87/89 Terr. |
| 4 | Abbeville | British | II, III, False Report |
| 5 | Abbeville | British | I |
| 5 |
15.5.3 Siege of Antwerp Units
On the turn after the Siege of Antwerp ends (7.7.1), place the Belgian Army unit in any hex marked A as a reinforcement.
15.6 German Setup
A. The Germans set up second.
B. False Report units may be deployed as the owner wishes, with the units at start or Turn 1 reinforcements.
15.6.1 At Start
| Unit(s) | Location |
|---|---|
| II | Chauny |
| IX Reserve | Noyon |
| I Cavalry | Within two hexes of St Quentin |
15.6.2 Reinforcements
A. Place these units directly onto the TT for the relevant entry turn.
B. Enter the units per the Reinforcements Procedure (7.1) during the Reinforcement Phase on the entry turn.
15.6.2.1 German Rail Line Reinforcements
A. One unit may be placed in each of Cambrai and Valenciennes, but only if those hexes are not NML and a path of connected, friendly-controlled railroad hexes can be traced back to a friendly-controlled Mons hex. If not, that city cannot be used to place a reinforcement.
B. Any number of units can be placed in Mons.
| Turn | Location | Unit(s) |
|---|---|---|
| 1 | GRL | I Bavarian, II Bavarian, XIV Reserve, XXI |
| 2 | GRL | Guard, IV, I Bavarian Reserve |
| 2 | La Fere | XVIII, II Cavalry |
| 3 | GRL | XIV, IV Cavalry |
| 4 | GRL | VII, XIII, XV, XIX |
| 5 | Mons | XXIV Reserve |
GRL: German Rail Line
15.6.2.2 Siege of Antwerp Units
A. On any of the turns after the Allied Siege of Antwerp units enter (7.7.1), place the units below as reinforcements in any hex marked A.
B. The Germans can enter as many units as desired (observing stacking rules) in each eligible turn.
- III Reserve
- XXII Reserve
- XXIII Reserve
- XXVI Reserve
- XXVII Reserve
Editor's Notes on the Source
- This transcription follows the "revised and reformatted" Flying Pig rules file (2025 rules revisions credited to Jonathan Warshay), not the original 2016 printed layout.
- The designer's notes, credits, copyright lines, and page headers and footers have been omitted, as they are not rules.
- The Event Card Results Table (13.0) and the Turn Track, Historic Trench Line and Siege of Antwerp / Foch entries are on the separate charts, tables and tracks file and are not printed in this rulebook. Their contents are not transcribed here.
- Cross-references are transcribed as printed.
- Minor print-extraction artifacts were corrected to the printed words (for example "other" for "ocher", "Marne" for "Mame", "III" for "Ill").