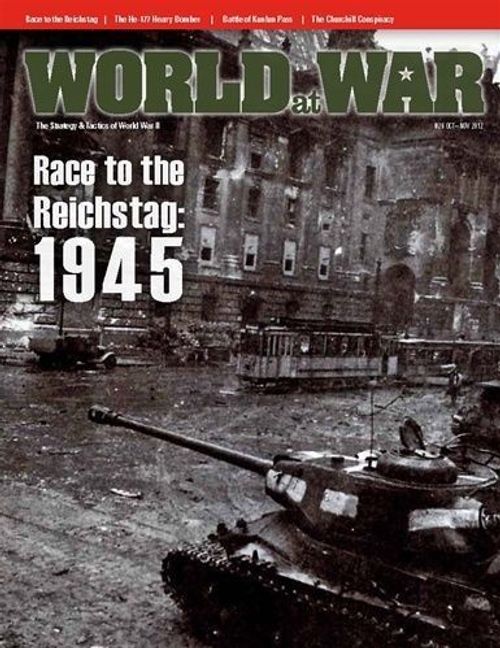
Race to the Reichstag: Berlin, 1945
Race to the Reichstag: Berlin, 1945 Rulebook
Table of Contents
Table of Contents
- 1.0 Introduction
- 2.0 Components
- 3.0 Set Up
- 3.1 Choosing Commands
- 3.2 German Flak Tower Allotment
- 3.3 German Static Units
- 3.4 Static Unit Pool
- 3.5 Drawing Static Units (BF Command)
- 3.6 Drawing Static Units (UF Command)
- 3.7 Berlin Garrison Deployment
- 3.8 Army Detachment Spree
- 3.9 56th Panzer Corps (1)
- 3.10 56th Panzer Corps (2)
- 3.11 BF Unit Placements
- 4.0 Sequence of Play
- 5.0 Map Sectors & the Reichstag Hex
- 6.0 Stavka Points (SP)
- 7.0 Reinforcements
- 8.0 Replacements
- 9.0 Movement
- 10.0 Stacking
- 11.0 Zones of Control (ZOC)
- 12.0 Combat
- 12.1 Attack Requirement
- 12.2 Attack Procedure
- 12.3 Attack Limitation
- 12.4 Resolving Attacks
- 12.5 Multi-Unit & Multi-Hex Combat
- 12.6 Diversionary Attacks
- 12.7 Attack Calculation
- 12.8 Soviet Barrage Support Limitation
- 12.9 Combat Strength Unity
- 12.10 Stacks Attacking
- 12.11 Stacks Defending
- 12.12 Parenthesized Combat Factors
- 13.0 Retreat After Combat
- 14.0 Advance After Combat
- 15.0 Barrage Markers
- 16.0 German Static Units
- 17.0 Fog of War
- 18.0 Demolishing Bridges
- 19.0 Engineering
- 20.0 Fatigue
- 21.0 How to Win
- 22.0 Optional Hitler Fantasy Scenario
- 23.0 Optional Better-Prepared Defense Scenario
- 24.0 Optional Rule: Soviet Lines of Communication
- 25.0 Optional Rule: Highly Mobile Units
- 26.0 Optional Rule: Escape to the West
- 27.0 Charts & Tables
1.0 Introduction
1.1 Premise
Race to the Reichstag: Berlin, 1945 (RttR) is a two-player low-to-intermediate complexity wargame of the battle for the capital of the Third Reich that was fought in April and May of that year. There are two players in the game, each commanding a Front (army group) of the Red Army as it fights its way into Berlin. One player commands 1st Byelorussian Front (historically led by Marshal Zhukov); the other player commands 1st Ukrainian Front (historically led by Marshal Koniev.) Each player also commands the German forces facing the other player. The map is divided into two sectors, one for each Front. Only units of one Front may operate in each sector. Additionally, each Front's Forces may enter the hexagon containing the Reichstag, which lies at the geo-strategic center of the map. The objective of both players is to be the first to reach the Reichstag hex while at the same time scoring the most victory points in terms of seizing other objective at the lowest possible cost. Meanwhile, both players will also be using the German forces facing the other player to delay that competing Front as long as possible. Thus, RttR is a race by the two Red Army Front commanders to gain glory by being the one to finally bring down the Third Reich.
1.2 Scale
Each hex on the map represents half a mile (.85 km) from side to opposite side. Each turn represents one day. Units of maneuver are battalion-to-division-sized battlegroups for the Germans and corps, divisions and regiments for the Soviets.
2.0 Components
2.1 The Map
The map shows Berlin and its environs as they were in 1945. A hexagonal ("hex") grid has been superimposed over the map in order to regularize the movement and positioning of the playing pieces. Every unit in play on the map is always in one or another hex.
2.2 Sectors
The map is divided into two sectors, First Byelorussian and First Ukrainian. Generally, both Soviet and German units are prohibited from crossing the sector boundary line; see section 5.0 for the exception.
2.3 The Playing Pieces
The die-cut cardboard pieces represent the actual military units that took part in the original campaign. These playing pieces are referred to as "units" (for military formations), and "markers" (for informational pieces).
Errata: The yellow units printed as "24 April East" on the reverse sides should actually be printed as "24 April South"; These units may only arrive via yellow star entry hexes.
2.4 Static & Mobile Units
There are two general classes of units: mobile and static. Mobile units, which occur in both Soviet and German forces, may move around on the map under the direction of one or another of the players. Static units, which only occur within the German force, may not move once placed on the map (except to go into the dead pile). German static units are printed black on a white background (and they also have an asterisk next to their combat factor), while their mobile units are printed white on a black background.
2.5 Sample Combat Unit
[Diagram of a sample combat unit in the printed rules; not reproduced.]
2.6 Parenthesized Combat Factors
Certain units have parenthesized combat factors. That means they may only defend; they never attack. Also note that movement allowances aren't printed on any units, static or mobile. See section 9.0 for details on that.
2.7 Unit Types
Mobile Unit Types
- Cavalry
Static Unit Types
- Emergency Airfield
2.8 Unit Organizational Sizes
Unit size codes printed on each unit in the game are defined as follows:
- XXX = Corps
- XX = Division
- X = Brigade
- III = Regiment
- II = Battalion
Note: If a unit's size symbol is beneath a bracket, that means it was an ad hoc formation, of was otherwise reconstituted into, a force of that approximate size.
2.9 Soviet Fronts
All Soviet forces in the game are divided between two high-level commands, called Fronts: First Byelorussian Front (1BF) and First Ukrainian Front (1UF). All 1BF units are printed with red as their background color; all 1UF units are printed with yellow as their background colors. Soviet units never switch their frontal allegiance during play.
2.10 Barrage Markers
Barrage Markers are of two types, artillery and airstrike, and are used to indicate fire from formations that aren't otherwise on the map or in the counter-mix.
2.11 Other Markers
Other Markers are used to indicate various functions.
2.12 Abbreviations
The following abbreviations are used on the units:
Soviet:
- G: Guards
- GC: Guards Cavalry
- GTA: Guards Tank Army
- Pol: Polish
- SA: Shock Army
German:
- AN: Anhalt
- AX: Axmann
- CD: Clausewitz Division
- CH: Charlemagne
- Ers: Ersatz
- FJgr: Fallschirmjaeger
- FKAH: Freikorps Adolf Hitler
- FKG: Freikorps Goebbels
- FKM: Freikorps Mohnke
- FLJ: Friedrich Ludwig Jahn Division
- FR: Friedrichain
- FvS: Ferdinand von Schill Division
- GD: Gross Deutschland
- HB: Himmler Begleit
- HJ: Hitlerjugend
- HJR: Hitlerjugend Regiment
- HT: Humboldthein
- JG: Jaeger
- KM: Kreigsmarine
- FG: Feldgendarmerie
- Lat: Latvian
- LVI Pk: 56th Panzer Corps HQ
- LW: Luftwaffe
- LAH: Leibstandarte Adolf Hitler
- MO: Mohnke
- MB: Muncheberg Panzer Division
- Ned: Nederland SS Panzergrenadier Division
- Nor: Nordland SS Panzergrenadier Division
- Ost: East
2.13 Game Contents
A complete game of RttR should include the following this rules set, the 34x22" map and 228 die-cut counters. Players will need to provide themselves with a six-sided die.
3.0 Set Up
3.1 Choosing Commands
Players should determine which Soviet Front each will command, place the map between them on a table, and set up the units in the sequence given below. Note that all stacking rules are in effect during set up. Also note German units within the same sector, but themselves belonging to different German upper-level command formations, may potentially be stacked together, at the discretion of the deploying player.
3.2 German Flak Tower Allotment
Either player places three 6-strength German Flak Tower units face up on the hexes with the corresponding name: Tiergarten (TG), Humboldthein (HT), Friedrichain (FR).
3.3 German Static Units
Place all remaining German Static units in a large-mouthed opaque container, such as a coffee mug or cereal bowl (which is henceforth referred to as the static unit "pool").
3.4 Static Unit Pool
The 1BF commander randomly (without examining their Front sides) picks three German static units from the pool and places them face down in the Reichstag hex.
3.5 Drawing Static Units (BF Command)
The 1BF player then randomly picks 15 other German static units from the pool. He examines their Front sides and, then, without showing them to the 1UF commander, he places them facedown in any hexes within the 1UF sector.
3.6 Drawing Static Units (UF Command)
The 1UF command then picks at random 25 German static units from the pool. He examines their Front sides and, then, without showing them to the 1BF commander, he places them face down in any hexes within the 1BF sector.
3.7 Berlin Garrison Deployment
Either player should then take the following German mobile units and mix them around, facedown off to the side of the map: AX, FKAH, GD, HJR, SSAN, SSCH, SSHB, SSLAH, SSLat, SSNed & 32SS. The 1BF then randomly draws four of those units and places them face-up in any hexes within the 1UF sector. The 1UF commander then places the remainder of those units face up in any hexes within the 1BF sector.
3.8 Army Detachment Spree
The 1BF commander next places the following German units, face-up, in or within two hexes of Potsdam and west of the Havel River in the 1UF sector: all FLJ Division units and all Potsdam Division units.
3.9 56th Panzer Corps (1)
The 1BF commander then places the following 56th Panzer Corps units, face up, in any hexes of the 1UF sector: all units belonging to the 18th and 20th Panzergrenadier Divisions.
3.10 56th Panzer Corps (2)
The 1UF commander then places the following German units, face-up, in any hexes within the 1BF sector: all 11th SS Panzergrenadier Division units, all Muncheberg Panzer Division units, all 9th FJgr Division units, the 920th Assault Gun Brigade and the 503rd SS Panzer Battalion.
3.11 BF Unit Placements
The 1BF commander places the following 1BF Soviet units within two hexes of the designated map edges of the 1BF sector.
North Edge: 1 Mechanized Corps, 9G & 12G Tank Corps, 6G Tank Brigade & 2GTA Tank Regiment.
South Edge: 35G, 39G, 47G, 57G, 74G, 77G, 79G, 82G & 88G Rifle Divisions; 7G & 8G Tank Brigades, 8G Assault Gun Brigade, 8G Mechanized Corps, 11 Tank Corps, 11G Tank Corps, 64G Tank Brigade, 19 Assault Gun Brigade, 1GTA Mechanized Brigade, and 1GTA Reconnaissance Regiment.
1BF Reinforcements: the 1BF commander then sets aside, within easy reach, all the remaining 1BF combat units in the counter-mix along with all 1BF air and artillery barrage markers.
3.12 UF Unit Placements
The 1UF commander places of the following 1UF Soviet units within the 1UF sector east of the Havel River and within two hexes of the south map edge: 5G, 6G and 9 Mechanized Corps, 6G, 7G and 10G Tank Corps, 3GTA and 68G Tank Brigades, 4GTA and 16 Assault Gun Brigade, 3GTA and 4GTA Reconnaissance Regiments.
1UF Reinforcements: the 1UF commander then sets aside, within easy reach, all the remaining 1UF combat units in the counter-mix along with all 1UF air and artillery barrage markers.
Note: In 3.11 and 3.12, "within two hexes" means in a map edge hex itself and/or in a hex adjacent to a map edge hex.
3.13 Non-Drawn Static Units
The remaining German static units remain in that pool, from where they may enter the game as reinforcements.
3.14 German 20th Corps & Army Detachment Steiner
The remaining German mobile units (20th Corps & Army Detachment Steiner), are set aside. They are used only in the optional Hitler Fantasy Scenario.
3.15 Fatigue Markers
Place both Soviet Fronts' Fatigue markers on the "Not Fatigued" side on the Turn Record Track, along with the Game Turn marker, in the 23 April box.
4.0 Sequence of Play
4.1 Game Turns
RttR is played in sequenced game turns, each composed of an interactive structure in which both players conduct operations with units of their own Soviet Front, and then also conducts operations with the German units facing their opponent's Soviet Front. All actions must be taken within the sequence given below.
4.2 Player Turns
Each game turn is divided into four player turns, and each player turn is further divided into segments called "phases." The player whose player turn is currently in progress is called the "phasing player"; the other player is the "non-phasing player."
4.3 Sequence of Play Outline
The player turns are conducted per the following sequence, strictly in the order listed.
I. 1BF Soviet Player Turn
- A. 1BF Reinforcement Phase: The 1BF commander determines if he receives any 1BF reinforcements or replacements. If so, he enters them into play as described in rules sections 6.0 and 7.0.
- B. 1BF Barrage Phase: The 1BF commander places any 1BF artillery and/or airstrike markers on the map that he wants to commit this player turn (see section 15.0).
- C. 1BF Movement Phase: The 1BF commander may move all, some, or none of his 1BF combat units (see section 9.0).
- D. 1BF Combat Phase: The 1BF commander uses his 1BF combat units to attack German units within the 1BF map sector and/or in the Reichstag hex (see section 12.0).
- E. 1BF Fatigue Phase: The 1BF commander must roll for fatigue (see section 20.0).
II. 1UF German Player Turn
- A. 1UF German Reinforcement Phase: The 1UF commander checks for any German reinforcements that are to be placed in the 1BF sector (see section 7.0).
- B. 1UF German Movement Phase: The 1UF commander may move all, some, or none of the mobile German units in the 1BF map sector (see section 9.0).
- C. 1UF German Combat Phase: The 1UF commander may use any, some, or all of the German units within the 1BF map sector to attack 1BF units.
- D. 1BF Barrage Marker Removal Phase: Remove all 1BF Barrage markers from the map.
III. 1UF Soviet Player Turn
- A. 1UF Reinforcement Phase: The 1UF commander determines if he receives any 1UF reinforcements or replacements. If so, he enters them into play as described in rules sections 6.0 and 7.0.
- B. 1UF Barrage Phase: The 1UF commander places any 1UF artillery and/or airstrike markers on the map that he wants to commit this player turn (see section 15.0).
- C. 1UF Movement Phase: The 1UF commander may move all, some, or none of his 1UF combat units (see section 9.0).
- D. 1UF Combat Phase: The 1UF commander uses his 1UF combat units to attack German units within the 1UF map sector and/or in the Reichstag hex (see section 12.0).
- E. 1UF Fatigue Phase: The 1UF must roll for fatigue (see section 20.0).
IV. 1BF German Player Turn
- A. 1BF German Reinforcement Phase: The 1BF commander checks for any German reinforcements that are to be placed in the 1UF sector (see section 7.0).
- B. 1BF German Movement Phase: The 1BF commander may move all, some, or none of the mobile German units in the 1UF map sector (see section 9.0).
- C. 1BF German Combat Phase: The 1BF commander may use any, some, or all of the German units within the 1UF map sector to attack 1UF units.
- D. 1UF Barrage Marker Removal Phase: Remove all 1UF Barrage markers from the map.
V. Game Turn Inter-Phase
- A. Sudden Death Victory Check Segment: If any Soviet units, of either Front, occupy the Reichstag hex, the game comes to an end and the winner is determined.
- B. End of Scenario Check Segment: If this is the last turn of the scenario, the game comes to an end and the winner is determined.
- C. Turn Advancement Segment: If neither A nor B have taken effect, move the Game Turn marker to the next turn's box within the track and start a new game turn.
5.0 Map Sectors & the Reichstag Hex
5.1 Front Boundary
Operations for both Soviet and German forces are restricted by the Front Boundary Line printed across the map. The map is divided into two sectors, each corresponding to the authorized area of operations of one of the two Soviet Fronts. The Reichstag hex in effect exists as a third mini-sub-sector that, in some respects, simultaneously exists within both Fronts' sectors, while in other respects it exists in neither Front's sector.
5.2 Front Stricture
Both German and Soviet units that are assigned to one Front sector may never move or attack across the Front boundary line for any reason, including and post-combat retreat or advance. Soviet units may only enter or attack into hexes of their own Front's sector and the Reichstag hex. German units may only enter or attack into hexes of the Soviet Front sector in which they were initially placed (or the Reichstag hex for those German units that begin play there).
5.3 Zones of Control (ZOCs)
ZOCs never extend across the Front boundary line.
5.4 Barrage Limits
Barrage markers of one Soviet Front may not be employed in the sector of the other Soviet Front. Additionally, barrage zones never extend across the Front boundary.
5.5 The Reichstag & Soviet Units & Markers
The Reichstag hex has unique rules that apply only to it. It's considered to exist simultaneously within both Soviet Front sectors for all purposes. If, however, combat units or barrage markers of one Soviet Front are in the Reichstag hex, units or barrage markers of the other Soviet Front may not enter or attack into it. If for some reason one Soviet Front commander's units enter but then exit the Reichstag hex, the other player's units and markers could then potentially deploy into it.
5.6 The Reichstag & German Units
The only German units that may ever be in the Reichstag hex are the static units placed there during set up. German units in the Reichstag hex may never attack. They defend there normally. The ZOC of German units never extend into or out of the Reichstag. German units may not attack into the Reichstag.
5.7 Special Abilities Prohibition
In general, the special abilities of the various types of German static units placed in the Reichstag may not be utilized. The exception is that any Strategic markers found to have been deployed in the Reichstag may be captured.
Historical Note: The Reichstag was the primary Soviet objective, and the goal for which both Fronts commanders were racing. The Soviets weren't initially aware of the Fuhrer Bunker's exact location, or even if Hitler was in the city or had departed.
6.0 Stavka Points (SP)
6.1 SP Usage
Stavka Points (SP) are a quantification of the logistical and administrative support available to enhance the operations of a Front. Only the units of the two Soviet Fronts may make use of SP; they can't be used to enhance German operations in any way. Each player should openly keep track of the Stavka points he uses during the game.
6.2 Expending SP
During the course of the game, a player may expend SP, which is registered by making a note on a piece paper. A player may potentially expend up to 100 SP over the course of a game. They may be expended on any turns, with no per turn limit as such, except that both players may together never expend a combined total of more than 100 SP.
6.3 Combined Front SP Total
The combined total of SP expended by both players may never exceed 100. Each player's expenditures count against that total expenditure of SP. For example, if one player expends 55 SP over the course of a game, the other wouldn't be able to expend more than 45. Conceivably, a player could expend all 100 SP on the first turn of the game, leaving the other player no SP. As will be seen, though, that's not likely and, given the structure of the victory conditions, such an expenditure strategy can be counter-productive (see section 21.0). You may expend SP for the functions described below.
6.4 Replacements
You may restore to play ("replace") eliminated Soviet units of your Front command. See section 8.0 and table 27.3 for more details.
6.5 Forced March
You may add three movement points to a Soviet unit's movement factor by expending one SP. No more than one forced march SP may be used for any given Soviet unit during each of its movement phases. Such SP are expended at the start of each forced marching unit's move. See section 9.0 and table 27.3 for more details.
6.6 Barrage Markers
To place an artillery or air barrage marker, you must pay one or two SP, respectively. That cost is paid each time a marker us used, and each marker may be used only once per game turn. See section 15.0 for more details.
6.7 Turn of Maximum Effort
At the start of any one of your Soviet Front Player Turns, you may declare that turn to be one of "maximum effort." That requires you to expend 10 SP. During the turn of maximum effort, the Soviet force under your command has no movement phase; however, that same force gets two combat phases in a row. Each player may declare only one turn of maximum effort per game. There is never any German turn of maximum effort.
7.0 Reinforcements
7.1 Soviet Combat Unit Reinforcements
Soviet Combat Unit Reinforcements are received according to the data printed on their reverse sides. Reinforcements are entered into play on the map by being placed in hexes adjacent to the indicated map edge within their own Front's sector. They may be placed in enemy zones of control but not in hexes containing enemy units, nor may they enter over-stacked. If all otherwise eligible entry hexes are blocked, such reinforcement units' entries are delayed until that same phase of the next game turn. In all other situations, reinforcements must be taken during the turn and phase indicated. Entry takes place in reinforcement phases, and it isn't considered movement. Note the arriving units are placed in map-edge hexes; they don't move onto the map from off of its outer edge. Reinforcements perform normally starting with the instant of their placement on the map.
7.2 Soviet Barrage Marker Reinforcements
Soviet Barrage Marker Reinforcements are simply kept within easy reach off to the side of them until committed to hexes on the map. All Barrage markers for both Fronts become available at the start of the April 24 Game Turn.
7.3 German Static Reinforcements
German Static Reinforcements potentially arrive during the reinforcement phases of each German Player Turn. The Soviet Front commander controlling the phasing German force rolls a die. On a result of one or two, he picks randomly picks one German static unit from the pool, examines it, then places it on the map face down in any eligible hex within his opposing Front commander's map sector.
Such units may only be placed in a hex already containing, or hex immediately adjacent to, one or more mobile or static German units in that same sector. They may not be placed in hexes containing Soviet units or zones of control (see 11.2). On a result of three through six, no reinforcement is received that turn for that German force.
7.4 Objective Hexes & German Reinforcements
If all objective hexes within a map sector are Soviet controlled, no German reinforcements may be picked for that sector. If the Germans retake one or more objective hexes within that sector, resume normal reinforcement picks at the regular times. Also remember, the Reichstag hex isn't part of either map sector; so, even if it's German controlled, it never gets a reinforcement pick.
7.5 German Replacements
German depot and emergency airfield units may be expended to replace certain eliminated units; see section 16.0. Such units are placed using the same strictures as for reinforcements.
7.6 German Optional Reinforcements
German Optional Reinforcements are explained in section 22.0.
8.0 Replacements
8.1 Reinforcement Phase
Certain units that are eliminated during play may be returned to play as "replacements." They're placed on the map during the appropriate reinforcement phase.
All Soviet combat units may potentially be replaced. Except as described in section 16.0 no German units may be replaced.
8.2 Soviet Replacements
When a Soviet unit is eliminated, place it within easy reach off to the side of the map. During each Front's Reinforcement Phase, the phasing Soviet commander may choose to replace one, some or all of his available units according to the provisions of rule 6.4 and 27.3. Units replaced into play in this manner are entered under the same strictures as those given in rule 7.1.
Note: Units from one Front may never be replaced into serving in the other Front.
9.0 Movement
9.1 Moving Units, Generally
During his movement phases, the phasing player may move as many or as few of his units as he desires. Units may be moved in any direction or combination of directions within the hex grid. Movement factors aren't printed on the units; rather, they're given in the rules below.
9.2 Soviet Movement
Every Soviet unit has a basic movement factor of six movement points (MP) in each of its Front's movement phases. That number may be increased to nine MP 50 via forced marching see 6.5.
9.3 German Movement
At the start of a German Movement Phase, the Soviet Front commander controlling that sector's German units rolls a die. This will be the number (1-6) of MP available to every mobile German unit in the sector under his command for that phase. If there are one or more face-up German command post counters within that sector, one is added to the die roll result for each such CP unit.
9.4 Movement Procedure
Units are moved one at a time, tracing a path of contiguous hexes through the hex grid. As each unit enters a hex, the unit pays one or more MP from its movement allowance. Consult the Terrain Effects Chart (27.5) for further details.
9.5 General Restrictions & Prohibitions
Units of a particular Soviet Front, or German units within a given map sector, may be moved only during the movement phase designated for them the sequence of play. Once a unit has been moved and the player's hand removed from, it may not be moved again. A unit may expend all, some or none of its movement points (MP) in any one game turn. Unused MP may not be accumulated from phase to phase turn to turn or transferred from unit to unit. Units may never move directly from one enemy zone of control (EZOC) to another, nor may they enter an enemy occupied hex, nor may they enter forbidden terrain or cross a sector boundary line. Units may not normally leave the map; but see the 13.3(5) rule for an exception for the Soviets.
9.6 No Minimum Movement Guarantee
A unit must have sufficient MP to enter a hex or cross a hexside. There is no minimum movement guarantee in this game.
9.7 EZOC
Units must stop moving for that phase when they first enter an EZOC. See section 11.0 for details.
9.8 Advancing / Retreating
Advances and retreats after combat aren't considered movement and, as such, they don't use MP.
9.9 Terrain Effects
A moving unit must expend one MP to enter a clear hex or to move along roads or rail lines. To enter other types of hexes, a unit must expend more than one movement point. When the TEC calls for an MP expenditure to cross a hexside, that cost is in addition to the cost for entering the hex itself. For example: to cross a river hexside into a clear hex would cost a total of four MP, three for the river hexside and one for the clear hex.
9.10 Road & Rail Movement
Units moving along the path of roads and/or railroads pay only one MP per hex entered no matter what terrain otherwise exists in the hexes entered. Note there's no railroad movement via train-transport in the game. Railroads, may simply be used as road beds (interchangeably with actual roads during the same move).
9.11 Bridges
Bridges negate the movement cost for crossing river/canal hexsides; however, also see section 18.0. At the start of play, all bridges on the map are intact.
10.0 Stacking
10.1 Stacking Defined
Having more than one friendly unit in the same hex at the same time is called "stacking." Units of the two different Soviet Fronts never stack together in the same hex, and German and Soviet units never stack together in the same hex.
10.2 Soviet Stacking Limits
Among the units of their own Front, both Soviet Front commanders may have maximum stacks as follows: 1) one corps plus one other non-corps/non-division sized unit, 2) one division plus one other non-division/non-corps sized unit, 3) two of any sized units smaller than a division.
10.3 German Stacking Limits
Up to three German units may stack in any given hex. There are no size, type or mobility-class strictures added to that simple three-count.
10.4 Stacking Perpetuity
Stacking limits apply at all times during the game turn. Friendly units may not move into or through hexes occupied by other friendly units if that would mean violating stacking rules.
10.5 Over-stacking Penalty
Whenever a hex is found to be over-stacked, enough units from it must be eliminated in order to bring it back into rules compliance (owning player's choice).
10.6 Free Stacking Units
None of the markers pictured in rules 2.10 and 2.11 in any way count for stacking. They may be added to any hex, in compliance with the rules for their particular uses, regardless of the presence of other units and/or markers, enemy or friendly.
10.7 Stacking Limit During Set-Up
Stacking limits must be observed for all forces during initial set up.
11.0 Zones of Control (ZOC)
11.1 ZOC Defined
The six hexes immediately surrounding a unit's hex constitute its "zone of control" (ZOC). Hexes in which a unit exerts a ZOC are called "controlled hexes." ZOC affect movement and combat.
11.2 ZOC Limitations
All combat units of both sides have a ZOC at all times, regardless of the phase or player turn. In general, ZOC aren't negated by the presence of other units, enemy or friendly, with the following exceptions: 1) ZOC don't extend across the Front boundary line; and 2) Soviet ZOC don't extend into objectives hexes. That's true even if an objective hex is unoccupied by German units. German ZOC extend normally into and out of and into objective hexes. Barrage markers don't exert ZOC.
11.3 Multiple ZOC
More than one friendly and/or enemy unit may simultaneously exert ZOC into the same hex; the two units are equal and mutually affected. There is no additional effect if more than one unit projects its ZOC into the same hex. If a given friendly unit is in an enemy controlled hex, that ZOC-projecting enemy unit is generally also in its controlled hex. The exception would come from rule 11.2(2) above.
11.4 Effects on Movement
Units must stop all their movement for that phase when they first enter an enemy ZOC (EZOC). They may move no farther that phase. Units may exit EZOC in one of two ways: 1) due to combat results that call for retreat or advance, or that cause all involved enemy units exerting ZOC to be eliminated; or 2) by disengagement.
11.5 Disengagement
Disengagement is the act of moving out of an EZOC. To do so, a unit must have begun its movement phase already in the EZOC that's to be exited, and it must move from there directly into an adjacent hex that contains no EZOC. Disengaged units may not enter any other EZOC during the same phase.
11.6 Combat
Attacking is mandatory for units that begin their combat phase in one or more EZOC. See section 12.0 for details.
11.7 Retreat After Combat
Units that must retreat into or through EZOC are eliminated. See section 13.0 for details.
11.8 Advance After Combat
Units may advance after combat into and/or through EZOC. See section 14.0 for details.
12.0 Combat
12.1 Attack Requirement
Attacking is generally mandatory for units that begin their force's combat phase in an EZOC (see 12.12 for the exception). The phasing player is termed the attacker and the non-phasing player is termed the defender, regardless of the overall strategic situation. There are two different combat results tables (CRT): Mobile (see 27.1) and Assault (see 27.2). Each reflects a different tactical approach to battle, and each therefore has different outcomes.
12.2 Attack Procedure
For each attack, go through the following procedure:
- The attacker declares which attacking units will be attacking which defending units and which CRT will be used to resolve that attack.
- Total the combat strength of all attacking units involved in this combat. Make any multiplications for artillery and/or airstrikes and/or flak towers.
- Total the defense strength of all defending units that are the target of this attack. Make any multiplications for defensive terrain and/or flak towers.
- Divide the attacker's strength by the defender's strength and multiply that number by 100. This gives an "attack percentage."
- Consult the appropriate CRT under the appropriate percentage column heading and roll a die. Cross-index that result beneath the column heading to get a particular combat result.
- Apply all the particular outcomes for that combat result in the order listed within its explanation.
12.3 Attack Limitation
No given unit may attack or be attacked more than once per combat phase
12.4 Resolving Attacks
The attacker may resolve all his attacks in any order he desires. All attacking units in EZOC must attack, and all enemy units in friendly ZOC must be attacked. The attacking player may choose which of his units will attack which defending units, as long as the previous stricture is observed. A defending hex may be attacked from as many as six adjacent hexes. Units in a single attacking hex may potentially attack simultaneously into one, some or all of the six surrounding hexes.
The attacker need not declare all his attacks beforehand; they should be declared and resolved one at a time. Always keep in mind: Soviet ZOC never project into objective hexes, so German units in such hexes don't have to attack, though you may choose to have them do so. The converse is not true. That is, Soviet units adjacent to German occupied objective hexes must attack them. Similarly, Soviet units occupying objective hexes project their ZOC out of them.
12.5 Multi-Unit & Multi-Hex Combat
If an attacking unit is in the ZOC of more than one enemy unit, that attacking must attack all those enemy units that aren't engaged by other attacking units. Units in two or more hexes may combine their combat strengths and attack a single hex provided only that all the involved attacking units are adjacent to all the involved defending units. Attacks may potentially involve any number of attacking or defending units. For an attack to be resolved as a single combat, however, all the attacking units must be adjacent to all the defending units.
12.6 Diversionary Attacks
When making a series of attacks, you may allocate your attacking units so some attacks are made at low percentages in order to allow other attacking units to concentrate their strengths to obtain more advantageous percentages against selected objective hexes. Such deliberately structured low-percentage attacks are called "diversionary attacks."
12.7 Attack Calculation
The attacking player may never choose to reduce the attack percentage of any given attack.
12.8 Soviet Barrage Support Limitation
Soviet barrage markers may not be used to make attacks by themselves, they are used to support regular Soviet combat units in their attacks.
12.9 Combat Strength Unity
A given unit's attack and defense strengths are always unitary. No single unit's strength may not be divided among different combats, neither on attack nor on defense.
12.10 Stacks Attacking
Attacking units in the same hex must be combined into a single attacking force; they may not be split up to participate in separate attacks.
12.11 Stacks Defending
Units defending the same hex must be attacked as a single combined defensive force; they may not be attacked separately.
12.12 Parenthesized Combat Factors
Units with a parenthesized combat strength may only defend; they never attack, even if in an EZOC.
12.13 Zero Combat Factors
Units with a combat strength of zero ("0") are eliminated at the start of any combat phase that when one or more enemy units has placed them in their ZOC. They are eliminated even if stacked with units that have a combat strength of one or more. This doesn't count as combat and, when eliminated in this fashion, adjacent enemy units may not advance into the newly eliminated zero-units hexes. Until eliminated, such units project ZOC and otherwise function normally as units.
12.14 Barrage Markers & Soviet Attacks
If one or more defending units are in the barrage zone of a barrage marker belonging to the attacking player, all involved attacking units have their attack strength doubled. This bonus doesn't apply to the defense. See section 15.0 for more details.
12.15 Flak Towers & German Combat
Any German mobile units within two hexes of a revealed flak tower have their combat strength doubled for both attack and defense. That's true regardless of intervening enemy units and/or EZOC. This bonus is also applied in the hex in which the flak tower itself is located. Note, though, that static units never receive this bonus.
12.16 Bonus Singularity
The bonuses for barrage markers and flak towers apply only once per combat; if a given force is within the radius of more than one such bonus, there is no further multiplication. At the same time, though, every Barrage marker and flak tower can provide its multiple to any number of separate combats within its radius.
12.17 Terrain
Defending units may benefit from the terrain in the hex they occupy and/or along that hex's perimeter hexsides. Terrain in hexes occupied by the attacker has no effect on combat. The effect of terrain on combat is reflected by multiplying the defender's printed strength. The Terrain Effects Chart gives the defensive multiples (see 27.5).
12.18 Hexsides
A force receives the benefit for defending behind a hexside only if all attacking units are attacking across such hexsides.
12.19 Terrain Multiples Limitation
Terrain multiples aren't cumulative: if there's more than one type of multiplying terrain involved, the hex and/or hexside, a defending force receives only the best single multiple.
12.20 Combat Value Limitation
If a defending force can take advantage of both a combat bonus (12.14 & 12.15) and a terrain bonus, its combat value is tripled, not quadrupled. Regardless of all other factors, units may never be more than tripled in combat.
Example: A German unit defending in an objective hex behind a river within two hexes of a flak tower would be tripled, not sextupled.
12.21 Choice of CRT
The attacking player is generally free to choose which CRT will be used in each attack he directs, both Soviet and German; however, if Soviet units are attacking, and one or more of the involved defending German units are in objective and/or urban and/or S-Bahn hex, that attack must be resolved on the Assault CRT.
12.22 Combat Resolution
Attack percentages are determined by dividing the attacker's strength by the defender's strength and then dividing that result by 100.
Example 1: The attacker has 20 combat factors and the defender 12. 20/13 x 100 = 153%; so that combat is resolved using the 100-199% column.
[Editor's note: the printed example reads "20/13 x 100 = 153%", but the defender has 12 factors. 20/12 x 100 = 167%, which falls in the same 100-199% column; the figure is transcribed as printed.]
Example 2: The attacker has 10 combat factors and the defender 12. 10/12 x 100 = 83%; so the combat is resolved use the 50-99% column.
12.23 Combat Results Explanations
Combat results are defined as follows.
AA (Attacker Attrition)
- Eliminate the single strongest attacking unit.
- No retreat or advance.
AD (Attacker Defeated)
- Eliminate attacking units with printed combat strengths equal to at least half the attacking force's total printed combat factors.
- Retreat all surviving attacking units one hex.
- Defending mobile units may advance one hex
AP (Attacker Panics)
- Eliminate the single strongest attacking unit.
- Attacker rolls another 6-sided die: All involved units must retreat that number of hexes.
- Defending mobile units may advance one hex.
AR (Attacker Retreats)
- Retreat all surviving defending units one hex.
- Defending mobile units may advance one hex.
BB (Bloodbath)
- Eliminate defending units with printed combat strengths equal to at least half the defending force's total printed combat factors.
- Eliminate attacking units with printed combat strengths equal to at least half the attacking force's total printed combat factors.
- No retreat or advance.
DA (Defender Attrition)
- Eliminate the single strongest defending unit.
- No retreat or advance.
DD (Defender Defeated)
- Eliminate defending units with printed combat strengths equal to at least half the defending force's total printed combat factors.
- Retreat all surviving defending units one hex.
- Attacking mobile units may advance one hex.
DE (Defender Annihilated)
- Eliminate all defending units.
- Attacking mobile units may advance one hex.
DP (Defender Panics)
- Eliminate the single strongest defending unit.
- Defender rolls another 6-sided die; retreat all surviving defending units that number of hexes.
- Attacking mobile units may advance up to two hexes.
DR (Defender Retreats)
- Retreat all defending units one hex.
- Attacking mobile units may advance one hex.
MD (Mobile Defense)
- Eliminate the single strongest attacking unit.
- Retreat all defending units one hex.
- Attacking mobile units may advance one hex.
OR (Overrun)
- Eliminate all defending units.
- Attacking mobile units may advance up to three hexes.
12.24 Unit Eliminations
The choice of units to be eliminated is up to the owning player, unless the result calls for the elimination of "strongest unit." In cases where "at least half" the strength of a force is to be eliminated, the owning player may have to eliminate excess factors to fully satisfy that requirement. A player may always choose to eliminate a larger number of factors than called for by the combat result. (Sometimes that's useful if you want to preserve certain units.)
12.25 Barrage Marker Immunity
Barrage Markers are never affected by combat results, and they may never be eliminated in order to satisfy any combat result. Flak towers aren't affected by combat results for attacks or defenses they support unless the tower itself is adjacent to the enemy units and is in the hex that's the objective of that combat.
13.0 Retreat After Combat
13.1 Retreating
When a combat result requires a player's involved units be retreated, the player designated by that result must immediately move those units the indicated number of hexes away from their combat position(s). Retreat isn't normal movement; it's counted in terms of hexes rather than MP, and mobile units may always retreat the number of hexes indicated regardless of their printed movement allowances.
13.2 Types of Retreat
There are two general types of retreat result:
- normal retreat, which is one hex; and
- panic retreat, in which the player rolls a die and must retreat all designated units that number of hexes.
13.3 Retreat Strictures
Retreat is subject to the following strictures, and if a unit is unable to retreat while obeying all of them, it's eliminated.
- Units may never retreat into hexes containing enemy units or EZOC.
- Units may not retreat into hexes or across hexsides it wouldn't be allowed to enter during normal movement. For example, units may not retreat across a lake unless there is an intact bridge crossing it.
- Units may not retreat across the sector boundary.
- Units may retreat into and through hexes containing friendly units as long as stacking restrictions are met at all times.
- German units may not retreat off the map. Soviet units may retreat off the map. Such units would reenter play as reinforcements during the following game turn.
- A retreating unit must terminate the retreat the indicated number of hexes away from its former combat position. If it can not, and can retreat only a portion of the number of the obligated hexes, it is eliminated in the last hex in which it was able to retreat. The Retreat Path terminates in the hex in which a unit as eliminated.
- Units retreating from the same hex may be retreated together or separately, at the owning player's discretion.
- In no case may a unit be retreated into a hex that would cause it to be eliminated, or go off the map, if another non-fatal, or no-exit, path is available.
13.4 Static Units Retreat Prohibition
Static units called on to retreat are instead eliminated in place. Note, however, that German static units defending in or attacking out of objective hexes ignore retreat results.
13.5 Fighting Retreat
Units that retreat into a hex, and if their new locale is attacked later that same phase, defend normally and contribute their defense strength to the new hex.
Note: This would happen only when a German unit retreated into an objective hex, since Soviet ZOC don't extend into them.
13.6 Objective Hexes & Retreats
German units in objective hexes that receive retreat results (attacking or defending) may be retreated, but they aren't required to do so. That's determined by the owning player on a unit-by-unit basis. Similarly, if German units panic-retreat into an objective hex, they may cease their retreat in that hex and thus escape having to retreat the full panic distance. This rule applies to both defending and attacking German units; however, if units both inside and outside an objective are involved in the same combat, and a retreat is called for, those units outside of the objective hex would have to retreat. Note that since Soviet ZOC don't extend into objective hexes, German units may always retreat into them regardless of the adjacency of Soviet units.
14.0 Advance After Combat
14.1 Advance After Combat Defined
Advance after combat is a special form of movement that may occur as part of a combat result. If a combat result allows a player to conduct an advance, he may immediately move one, some or all of his involved mobile units (only) the number of hexes indicated. Generally, that will be one hex; however, certain results will allow units to advance two or three hexes. Static units can never advance after combat.
14.2 Advancing
Advancing doesn't expend MP. It may be made only into hexes into which the advancing units could normally enter during movement phase movement. Advancing units ignore EZOC, but they may not enter hexes containing enemy units nor may they over-stack.
14.3 Advance Maneuver
If an advance is more than one hex, some units may stop in the first hex and others in the second hex, etc. Always advance units one at a time.
14.4 Target Hex Advance Requirement
In single-hex advances, the hex moved into must always be the one that was just vacated by the defeated defending force. In multi-hex advances, that just-vacated hex must be the first one advanced into by the victorious attackers.
14.5 Unbridged Rivers & Canals
No matter how many hexes a unit is authorized to advance, it must stop as soon as it crosses an unbridged river or canal hexside. That's not true if an intact bridge is used to facilitate such crossings.
15.0 Barrage Markers
15.1 Artillery & Airstrikes
There are two types of Barrage Markers: artillery and airstrike. They both function in much the same way, with exceptions noted below.
15.2 Barrage Zones
Each barrage marker has a radius of hexes around it that it affects, which is called its "barrage zone" (BZ).
Artillery: Artillery barrage markers have a BZ made up of its placement hex and all the hexes immediately adjacent to that hex.
Airstrike: Artillery markers have a BZ made up of its placement hex and all the surrounding hexes within two hexes of that hex.
[Editor's note: the printed Airstrike entry reads "Artillery markers"; the sense is clearly airstrike markers, transcribed as printed.]
Note: BZ never does extend across the sector boundary line. For this purpose, the Reichstag hex is considered to exist in both sectors.
15.3 Barrage SP Cost
Every use of a barrage marker requires the expenditure of SP, one for each artillery marker used and two for each airstrike marker used. Within that stricture, a particular barrage marker may be used an unlimited number of times in the game, though never more than once per game turn. Also note that barrage markers may not be used on the first game turn; they come into play starting with game turn two.
15.4 BZ Effects
The effects in each barrage zone (BZ) hex is defined as follows:
Supporting Soviet Attacks: Soviet units making attacks against German units defending in a barrage zone have their attack strength doubled. Only one hex of a multi-hex German defending force need be in a BZ for this effect to take place.
Interdicting German Movement: German mobile units that enter a BZ must pay an extra MP for every BZ hex entered. German retreats and advances after combat are unaffected by BZ.
15.5 Multiple Effect
A single barrage marker may both support Soviet attacks and interdict German movement within its BZ.
15.6 Soviet Immunity
A BZ has no affect on Soviet units.
15.7 Multiple BZ Irrelevancy
Having more than one BZ in a hex provides no additional effects or multiples.
15.8 Barrage Marker Removal
Once place, a barrage marker remain on the map until the appropriate Barrage Marker Removal Phase, either turn sequence step II.D for 1BF markers or turn sequence step IV.D for 1 UF markers.
16.0 German Static Units
16.1 Static Units Defined
Certain German static units have special properties, as described below.
16.2 Command Posts
For each face-up command post in a Sector, all German mobile units in that sector add one to their rolled movement factor. For example, if there were two face-up CP in a sector, all German mobile units in that sector would increase their rolled movement factor by two.
16.3 Emergency Airfield
This unit may be placed only in road or airfield hex. During any German Reinforcement Phase, the owning player may deliberately pick any two static infantry units from the other player's dead pile and place them in any hex(es) on or immediately adjacent to the emergency airfield. The emergency airfield unit is then permanently eliminated.
16.4 Flak Towers
All German mobile units within two hexes of a face-up tower in the same sector have their combat values doubled for attack and defense. This is regardless of intervening enemy units, EZOC and terrain, etc. Flak towers themselves aren't doubled.
16.5 Snipers
When picked, you may deploy snipers immediately or hold them off the map and place them during any subsequent German Reinforcement Phase. Place them anywhere on the map within four hexes of any non-sniper German unit you control. Note that, within that stricture, they may be placed "behind" Soviet lines.
16.6 Strategic Markers (Fuhrer Bunker, Chemical Weapons, Atomic Research)
These count for victory points at the end of the game for the Soviet Front that captures them. See section 21.0 and 27.4.
16.7 Supply Depot
During any German Reinforcement Phase, you may take any one eliminated German mobile unit from the other player's dead pile and place it in or adjacent to the hex in which the depot is located, ignoring EZOC. The depot is then permanently eliminated.
16.8 Hidden Status
Static units may initially be placed facedown. The player who placed a given static unit may always examine its face-up side. Static units are flipped face-up under the following circumstances: 1) you may always choose to turn face-up any of the static units you're deploying, or that you deployed earlier; and 2) a static unit must be turned face-up at the start of any combat phase in which one or more Soviet units are adjacent to them, regardless of EZOC nullification. Also see 16.12 below.
16.9 Static Unit Revelation Permanence
Once face up, a static unit remains that way for the remainder of its time in play.
16.10 Reichstag Units
Three static units are initially placed facedown in the Reichstag. Neither player may examine their face-up side until the start of a Soviet Combat Phase in which one or more Soviet units are adjacent to that hex, at which time the whole Reichstag garrison is permanently flipped face-up. Those units are never controlled by either player. They never attack, but they may be attacked by either player's Soviet units. If attacked, the other player controls them temporarily for that combat (for purposes of extracting combat losses, etc.). They always ignore retreat results. If one or more strategic markers turn out to be in the Reichstag, the player who advances after combat into the hex is considered to have captured it.
17.0 Fog of War
17.1 Examining German Units
German static units may initially be deployed face down. German mobile units are always deployed face up. Generally, a player may examine a German stack only under the following conditions: 1) if you control it; or 2) at the start of a combat resolution procedure in which that German stack is involved; or 3) by conducting reconnaissance.
17.2 Examining Soviet Units
Both players may always examine all Soviet stacks of both Fronts.
17.3 Reconnaissance Units
At the start of every Soviet Player Turn, the phasing player may examine any one hex within two hexes of each Soviet reconnaissance unit he controls (including the Reichstag hex.) The hex to be examined must be in the same sector as the enabling reconnaissance unit. Beyond that restriction, the examination may take place regardless of intervening units, terrain, EZOC, etc. Reconnaissance allows you to examine all units in the selected German stack. If any facedown static units are in the stack, flip them face up. The unit conducting the reconnaissance may not move in that player turn's movement phase.
Note: A player that successfully reconnoiters an enemy hex is not required to share the information his reconnaissance unit acquired.
17.4 Aerial Reconnaissance
Whenever you place an airstrike marker in a hex, you may immediately choose to examine all German stacks within its BZ as given above. The enabling air marker is then immediately considered used up for that game turn and is removed from the map.
18.0 Demolishing Bridges
18.1 Demolition Check
The instant that any Soviet unit moves into a hex that has a hexside containing a bridge, the moving player must check to see if the bridge is demolished. This may occur during movement, retreat or advance after combat.
18.2 Demolition Procedure
Roll a 6-sided die: On a 1-3, the bridge is demolished. Place a Bridge Demolished marker on it. On a 4-6, the bridge remains intact for the remainder of the game.
18.3 Intact Permanence
Bridge demolition for each bridge on the map is checked only the first time a Soviet unit moves adjacent to its hexside. If that one attempt fails, no further checks are made.
18.4 Demolition Permanence
You may not rebuild demolished bridges. Keep an open record on a piece of paper of intact bridges against which demolition attempts have failed.
18.5 Demolition Effects
A demolished bridge ceases to exist for all purposes for the remainder of the game.
19.0 Engineering
19.1 River/Canal Crossing
Engineer units negate the river/canal crossing movement cost. They also negate the defensive bonus for defending behind rivers. Finally, units advancing after combat two or three hexes may cross an otherwise unbridged river/canal hexside that's adjacent to, or within the hex of, an engineer unit (belonging to their Front) as if it were a bridged hexside.
19.2 Procedure
To gain advantage from an engineer unit, you must have it in place at the start of the phase in which the river/canal hexside is to be negated. It may not move in that phase. All hexsides in its hex and those adjacent to it are effected as long as the engineer unit is in place.
19.3 Combat
An engineer unit may attack normally during a combat phase it provides support, but if the instant it's eliminated, retreats or advances, the support effect ceases.
20.0 Fatigue
20.1 Fatigue Defined
This rule represents the cumulative effects of attrition and cohesion loss, especially given the fact no one wanted to be the last man to die in World War II.
20.2 Procedure
During each Soviet Fatigue Phase, the phasing player must check for fatigue for his Front. That's done as follows: roll two dice and total the results. If that total is less than the number of Soviet corps and divisions of that Front currently in the dead pile, fatigue has set in for that Front. (Units smaller than divisions don't count.)
Example: If there were four 1UF corps in the dead pile, that Front would become fatigued on a dice roll of three or less. Also note that, since you may remove units from the dead pile via replacement, that can work as a way to reduce the chance of fatigue setting in at an inopportune time.
20.3 Effects
If a Front is fatigued, its commander must expend twice the normal number of SP for every SP function (see section 6.0 and 27.3).
20.4 Duration
Once fatigued, a Front remains fatigued for the remainder of the game. Don't roll for it again (there's no such thing as "double fatigue").
20.5 German Irrelevance
The Germans are never affected by, or checked for, fatigue.
21.0 How to Win
21.1 Checking Victory
Players check for victory at the following times: 1) During a Sudden Death Victory Check Segment if a Soviet unit occupies the Reichstag; or 2) at the end of the 2 May Game Turn.
21.2 Victory Points (VP)
The VP Table (27.4) lists the number of VP gained for accomplishing various goals. Players gain VP for the following.
- Control of Strategic Markers: A player gains control of a strategic marker if he makes an attack into a hex containing one and then advances after combat into it. Instead of being eliminated, the marker is placed in the player's control off to the side of the map.
- Capture of Objective Hexes: A player gains control of an objective hex by having one of his Soviet units occupy it. Place an appropriate Front Control marker in such hexes. Once under your control, you don't have to garrison an objective hex in order to keep control of it. If a German unit moves back into such a hex, however, your control of the hex is lost. ZOC don't affect objective hex control.
- German Mobile Units Eliminated: You gain a VP for every German mobile unit eliminated by your Front that's in the dead pile at the end of play.
21.3 Losing VPs (SP Expenditure)
Players lose VP for expending SP during play. That is, when victory is being reckoned, you subtract the number of SP you expended during play from the total of the VP you earned above. That subtraction gives your final VP tally.
21.4 VP Tally
The player with the higher VP is the winner of the game. In the event of a tie, victory goes to the 1UF Commander.
21.5 German Victory
The game is a German victory if one or both of the following conditions apply at the end of 2 May: 1) neither Front controls the Reichstag; or 2) If both players have a final VP total of zero or less. In such a case, both players are considered to have lost the game.
22.0 Optional Hitler Fantasy Scenario
Historical Note: This scenario presumes German forces moving to relieve Berlin did so more vigorously and thereby threatened the Soviet flanks. It adds into play the 20th Corps and Army Detachment Steiner units.
22.1 Procedure
At the start of each German Player Turn starting on the second game turn, the Soviet player controlling the phasing Germans rolls a die. If that result is less than the current turn number, those German units appear as reinforcements (see below). Otherwise, roll again the next game turn. Regardless of the turn, a "6" always means no reinforcements appear. Once a reinforcement group has been received, do not roll any more on that sector.
22.2 Army Detachment Steiner
These units are controlled by the 1UF commander. They appear on north map edge hexes. The group includes all units of the 4th SS, 5th Jaeger, 25th Panzergrenadier, and HG Divisions.
22.3 20th Corps
These units are controlled by the 1BF commander. They appear on west or south map edge hexes in the 1UF sector. They include all units of the Clausewitz, Ferdinand von Schill and Ulrich von Hutten Divisions.
22.4 Placement
Arriving units are placed on the designated map edge hexes in the same manner as Soviet reinforcements.
22.5 Me-262s
When a reinforcement group arrives, the controlling player also receives one German Me 262 airstrike unit. They're are used in the same manner as a Soviet airstrike, except: 1) they cost no SP to use; 2) they're placed at the start of the German Combat Phase and remain on the map until the end of that phase; 3) they double the attack strength of all German units in their BZ; 4) they may not be used for interdiction; and 5) each Me 262 marker may only be used only once per game.
23.0 Optional Better-Prepared Defense Scenario
Historical Note: This scenario assumes the Germans pulled back their forces sooner to defend Berlin, and set up a better-coordinated defense. The Germans receive additional forces, but that also frees up the Soviet effort that historically went elsewhere. Use the Army Detachment Steiner and 20th Corps units. This option may not be combined with the Hitler Fantasy Scenario.
23.1 Initial Deployment
- The 1BF commander adds the German 20th Corps units to the units initially placed in the sector facing the 1UF.
- The 1UF commander adds the German Army Detachment Steiner units to those initially placed in the sector facing the 1BF.
- During initial deployment step 1, the 1BF commander places the XVI Panzerkorps and Westen command posts in the 1UF sector, while the 1UF commander places the Zitadelle and Ost command posts in the 1BF sector. Those units don't count against the 15 and 25 static units initially placed in step 4 of the initial deployment procedure.
23.2 Main Defensive Perimeter
Soviet ZOC don't extend into S-Bahn hexes. German units occupying S-Bahn hexes, in addition to its normal effects, also ignore retreat combat results on attack and defense
23.3 Stavka Points
Halve the normal SP cost for replacements (use normal values if a Front is fatigued).
24.0 Optional Rule: Soviet Lines of Communication
24.1 LOC
For a Soviet commander to use SP for certain functions, the units taking advantage of those SP must be able to trace a line of communication (LOC). A LOC is a path of hexes traced from the unit being supported back to a "friendly map edge," which are defined as follows.
- First Byelorussian Front: any north, east or south map edge hexes within the 1BF sector.
- First Ukrainian Front: any south map edge hexes within the 1UF sector.
24.2 Tracing an LOC
A LOC may be traced through any number and any kinds of hexes, with the following exceptions: 1) hexes containing German units; 2) across the Front boundary.; 3) across a river or lake hexside, unless there's either an intact bridge over it or you have an engineer unit adjacent to it.
24.3 No EZOC
A LOC also terminates in a hex containing an EZOC, even if that hex is also occupied by a friendly unit. For example, a LOC could be traced to a Soviet unit that was in a German ZOC, but not any further through that hex.
24.4 Airfields
A Soviet unit occupying an airfield doesn't need to trace a LOC; however, units outside an airfield may not trace a LOC to it.
24.5 Functions Requiring LOC
- Entering a Replacement Unit: In addition to the strictures for placement given in 7.1, a Soviet replacement unit may be placed on or adjacent to any unit of its Front. The placement hex must be able to trace a LOC. The placement hex may not contain enemy units or EZOC.
- Forced March: The SP are expended at the start of the move and the unit's starting hex must have a LOC. The unit may move to a position that has no LOC.
- Barrage Combat Bonus: In addition to normal requirements, Soviet units must be able to trace a LOC in order to double their combat strength when attacking. Some units in an attack might be doubled and others not. This does not affect barrage Interdiction.
24.6 German Irrelevancy
German units never need to trace a LOC.
25.0 Optional Rule: Highly Mobile Units
25.1 Highly Mobile Units
Highly Mobile Units are defined as Soviet and German tank, panzer, assault gun, mechanized, panzer grenadier, reconnaissance and cavalry units.
25.2 Forced March
When using forced march, highly mobile Soviet units have a movement factor of 12 instead of nine.
25.3 Advance After Combat
If a combat result allows for units to advance two or three hexes, only highly mobile units may make a two or three hex advance. Other mobile units may advance only one hex.
26.0 Optional Rule: Escape to the West
26.1 Escape Effects
Using this rule, German mobile units may, once the Fuhrer Bunker has been captured, be moved and retreated after combat off the west map edge (cost is one MP). Place such units in a separate pile. They may never return to play, but neither Soviet player gains VP for them: they've surrendered to the Americans off the west map edge.
27.0 Charts & Tables
27.1 Mobile Combat Results Table
| Die Roll | ≤ 49% | 50-99% | 100-199% | 200-299% | 300-399% | 400-499% | 500-599% | ≥ 600% |
|---|---|---|---|---|---|---|---|---|
| 1 | AP | AP | AP | AR | MD | MD | MD | MD |
| 2 | AP | AP | AR | MD | MD | DR | DR | DP |
| 3 | AP | AR | MD | MD |
27.2 Assault Combat Results Table
| Die Roll | ≤ 49% | 50-99% | 100-199% | 200-299% | 300-399% | 400-499% | 500-599% | ≥ 600% |
|---|---|---|---|---|---|---|---|---|
| 1 | AD | AD | AD | AA | BB | BB | BB | BB |
| 2 | AD | AD | AA | AA | BB | BB | BB | BB |
| 3 | AD | AA | AA | BB |
27.3 Stavka Points (SP) Table
| When Expended | Function & Cost |
|---|---|
| Reinforcement Phase | Replace Tank or Mechanized Corps = 4 |
| Reinforcement Phase | Replace Infantry or Cavalry Division = 2 |
| Reinforcement Phase | Replace Brigade, Regiment or Group = 2 |
| Barrage Phase | Place Artillery Marker = 1 |
| Barrage Phase | Place Airstrike Marker = 2 |
| Movement Phase | Force March One Unit = 3 |
| Turn of Maximum Effort | Replace Movement Phase with Second Combat Phase Once per Game = 10 |
Note: All listed SP costs are doubled for fatigued Fronts.
27.4 Victory Points (VP) Table
| Condition | VP Awarded |
|---|---|
| Control a Strategic Marker | +10 each |
| Control the Reichstag Hex | +30 |
| Control the Potsdam Hex | +10 |
| Control Other Objective Hexes | +5 each |
| Number of Mobile German Units Your Front Eliminates | +1 each |
| Number of SP Your Front Expends | -1 each |
27.5 Terrain Effects Chart
| Terrain Type | Movement Cost | Defense Multiple | Notes |
|---|---|---|---|
| Clear Hex | 1 | X1 | - |
| Suburban Hex | 2 | X1 | - |
| Urban Hex | 2 | X1 | Soviets Use Assault CRT |
| Objective Hex | 2 | X2 Germans, X1 Soviets | Soviets Use Assault CRT, Soviet ZOC Don't Extend In, Germans Ignore Retreats |
| Woods Hex | 2 | X1 | - |
| River/Canal Hexside | +3 | X2 | No LOC (24.1) Unless Bridged |
Notes:
- Defense Multiple: x1 = use printed defense strength; x2 = double printed defense strength.
- Other Terrain: use the other terrain in the hex to determine movement cost or defense multiple.