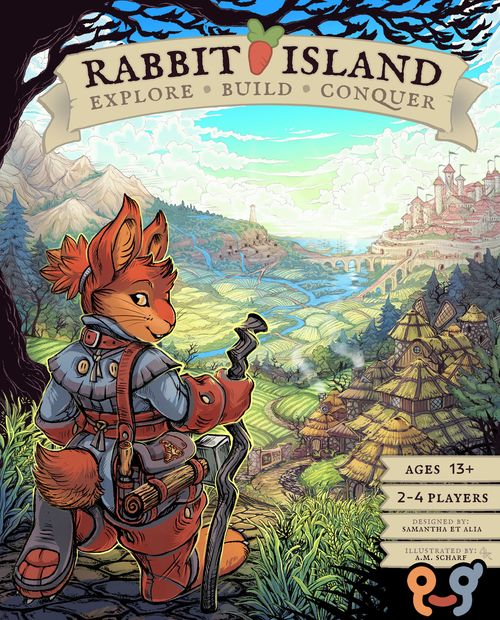
Rabbit Island: Explore, Build, Conquer
Rabbit Island: Explore, Build, Conquer Rulebook
Table of Contents
Table of Contents
Components
- 4× Rabbit Standees (with base)
- 4× Rabbit Meeples
- 100× Building Tokens (25 per color)
- 4× Emblem Tokens
- 54× Movement Cards:
- 5× Move 1 Space
- 9× Move 2 Spaces
- 13× Move 3 Spaces
- 13× Move 4 Spaces
- 9× Move 5 Spaces
- 5× Move 6 Spaces
- 27× Action Cards (see Action Cards List, page 19)
- 42× Map Tiles, including:
- 24× Territory Tiles:
- 6× Cave
- 6× Forest
- 6× Meadow
- 3× Lake
- 3× Valley
- 18× Event Tiles:
- 1× Founder's Hill
- 1× Founder's Hill Short Game
- 4× Carrot Patch
- 12× Rabbit Hole
- 24× Territory Tiles:
- 84× Carrot Tokens:
- 18× 100-Carrot Tokens
- 24× 50-Carrot Tokens
Setup
Decide to play either a Standard Game (45–90 minutes) or a Short Game (30–45 minutes). For a Standard Game, continue to Step 1 below; for a Short Game, turn to page 18 for more information.
-
Place the Founder's Hill Event Tile in the center of the table. Founder's Hill will serve as "home base" for each rabbit leader as they set out to explore.
-
Place the following nearby:
- Rabbit Hole Tiles
- Collapse Counters
- Year Tracker Board
- VP Scoreboards – Place the 4× Emblem Tokens at the start of the board. Victory Points can either be tracked during the course of play, or tallied at the end of the game.
-
Shuffle the Territory and remaining Event Tiles together and place them in a face down pile. Shuffle the Movement Cards and Action Cards separately and place into two facedown piles.
-
Each player chooses a color and receives:
- 1× Rabbit Pawn (of chosen color and type; either meeple or standee – your choice!)
- 25× Building Tokens (of corresponding color)
- 1× Quick Reference Guide
- 100 Carrot Tokens
-
Place every player's Rabbit Pawn on the Founder's Hill Tile.
-
Set aside the remaining Carrot Tokens to create the Community Carrot Bank. Whenever you gain or spend Carrot Tokens, you'll take them from or return them to the Community Carrot Bank.
-
Deal to each player the following number of face down Map Tiles:
- 2 Players – 11 Map Tiles
Game Summary
The game takes place in two main phases – the Explore Phase and Build Phase – and ends with the Conquer Phase.
In the Explore Phase, players will take turns exploring the island, laying down Map Tiles to create the Island. The Year Tracker Token on the Year Tracker board will not move from the "Explore Phase" space until the beginning of the Build Phase.
When every player is finished placing and discarding tiles, the Explore Phase ends permanently.
During the Build Phase, the players will take turns building up the Territories on the island.
After each player has taken one turn during the Build Phase, move forward one year on the Year Tracker board.
At the end of Year 20, the game immediately ends and the Conquer Phase begins (see How to Win, below).
How to Win
At the end of Year 20 (see page 15 for more on tracking years), it's time to see which tribe has conquered the island!
Victory Points (VP) can be tracked on the VP Scoreboard either during the course of play, or tallied at the end of the game. The player with the most VP wins. Each player gains VP as follows:
- By placing Building Tokens to build Camps, Villages, and Towns (variable VP)
- If the player has the most Carrot Tokens (+1 VP)
- If the player has the largest Harvest Group; a chain of connected Territory Tiles controlled by the same Territory Owner (+1 VP)
See page 16 for more information on ending the game.
Territory Tiles and Building Tokens
Much play in Rabbit Island centers on placing and building on Territory Tiles.
There are five types of Territories: Cave, Forest, Meadow, Lake, and Valley.
Throughout play, you will have opportunities to place your Building Tokens onto Territory Tiles.
Each Building Token represents one of three Territory Levels: Camp, Village, and Town.
- Camp – Every Territory starts with a Camp. Costs 10 Carrots to build; worth 1 Victory Point; Harvest Value 10 Carrots.
- Village – Upgrade from a Camp to a Village. Costs 30 Carrots to build; worth 2 Victory Points; Harvest Value 20 Carrots.
- Town – Upgrade from a Village to a Town. Costs 70 Carrots to build; worth 3 Victory Points; Harvest Value 30 Carrots.
Territory Tile diagram notes (printed on the sample Forest tile): place your Building Token here when building; follow the paths to navigate the island; the Territory Tile title is shown at the bottom of the tile.
- Building Cost – To place your Building Token, you must pay this many Carrots to the Community Carrot Bank. If any Building Tokens are already here, your Building Token goes on top.
- Victory Points – At the end of the game, you will earn Victory Points for every Building Token you've placed.
- Harvest Value – This is how many carrots you will gain from the Community Carrot Bank if you are the Territory Owner and either you or an opponent lands on this tile. See page 9 for more info.
Territory Tiles and Building Tokens (continued)
When on a Territory Tile with no Building Tokens, you may build a Camp.
To do so, pay the Camp's Building Cost in Carrot Tokens (shown on the Territory Tile) to the Community Carrot Bank, and place one of your Building Tokens in the center of the Territory Tile.
When on a Territory with a Camp, you may upgrade it to a Village. When on a Territory with a Village, you may upgrade it to a Town.
To do so, pay the Village or Town's Building Cost (shown on the Territory Tile), and stack one of your Building Tokens on top of the other token(s) on the Territory Tile.
When upgrading, do not remove any Building Tokens already on the Territory Tile.
You are the Territory Owner when you own the highest stacked Building Token on a Territory Tile (this includes owning the only Building Token).
A Territory can only hold one Camp, one Village, and one Town.
You may only build or upgrade once per turn.
Never change the order of stacked Building Tokens. It matters at the end of the game!
If tracking Victory Points during the course of the game, move the player's Emblem Token the same number of spaces as Victory Points indicated on the Territory Tile for the Camp, Village, or Town you build.
Example (Forest tile): 1st Token – Camp (Yellow player in example); 2nd Token – Village (Blue player in example); 3rd Token – Town (Red player in example).
Harvesting and Harvest Groups
Throughout play, you'll have opportunities to harvest Carrots from Territory Tiles that you own.
When you harvest from a Territory Tile, you gain Carrots equal to the tile's Harvest Value shown for its highest-stacked Building Token.
Example 1: Yellow has the highest stacked Building Token, making them the Territory Owner. This is the 1st Building Token on the Territory, indicating this is a Camp. Yellow harvests 10 Carrots, as indicated by the Camp Harvest Value.
Example 2: Blue has the highest stacked Building Token, making them the Territory Owner. This is the 2nd Building Token on the Territory, indicating this is a Village. Blue harvests 20 Carrots, as indicated by the Village Harvest Value.
Example 3: Red has the highest stacked Building Token, making them the Territory Owner. This is the 3rd Building Token on the Territory, indicating this is a Town. Red harvests 30 Carrots, as indicated by the Town Harvest Value.
Some Territory tiles may form a Harvest Group.
A Harvest Group contains two or more Territories owned by one player that are adjacent to one another (up, down, left, or right), or connected to each other by adjacent Territories.
A player may own multiple Harvest Groups.
When you land on any of the Territories within your Harvest Group, you harvest from all of the Territory Tiles in your Harvest Group.
Group Example: Red's Harvest Group is shown outlined, consisting of adjacent Territory Tiles owned by Red. Empty Tiles, Tiles owned by other players, and Event Tiles are not included in the group.
You may also harvest Carrots from an opponent's Territory Tile, or when an opponent lands on Territory that you own (see page 14 for details).
Explore Phase
It's time to explore the island! During this phase, players will take turns laying down Map Tiles, moving their Rabbits, and building the first Camps that will make up the foundation of their tribe; or harvesting Carrots and receiving an Action Card from the first Carrot Patches!
Explore Phase Cycle: Place Tiles → Move Pawn → Resolve Tile → Check for End
Step 1 – Place Tiles
Place 2 Map Tiles on the table, following the placement rules (on the next page).
- If you cannot legally place any of your Map Tiles, discard them and draw an equal number of Map Tiles from the box, then continue your turn as usual.
- If you ever have only one Map Tile in your hand, discard it immediately.
- If you have no Map Tiles, skip this step and move to Step 4.
Step 2 – Move Pawn
You must move your Rabbit Pawn to one of the 2 Map Tiles you just placed.
Step 3 – Resolve Tile
If you move your Rabbit Pawn to a Territory Tile, you may pay the Building Cost for a Camp and place your Building Token (as explained at the top of page 8).
If tracking Victory Points during the course of the game, move the player's Emblem Token the same number of spaces as Victory Points indicated on the Territory Tile for the Camp.
If you move your Rabbit Pawn to a Carrot Patch, you may resolve its text.
Carrot Patch: Harvest 50 Carrot Tokens and draw 1 Action Card. Action Cards can only be played during the Build Phase (page 13).
Step 4 – Check for End
Begin another Explore Phase unless each player has one Map Tile remaining in their hand. If they do, move to the Explore Phase End (page 11).
Map Tile Placement Rules
- You Must Follow Pathway Arrows – You can only place a new tile where an existing Pathway Arrow leads to an empty space on the table.
- Switchbacks Are Legal – Two indented sides are allowed to border one another.
- Arrows Cannot Touch – Pathway Arrows on Map Tiles cannot point towards one another.
- Tiles Cannot Leave the Table – Your playing surface serves as an outside boundary for the game board.
- Tiles Cannot Be Rotated – All Map Tiles must be oriented in the same direction as Founder's Hill.
Explore Phase End
If any player has only one Map Tile in their hand, discard this final Map Tile.
Place Rabbit Hole Tiles on all open spaces led to by Pathway Arrows, except Pathway Arrows on Founder's Hill – these paths are considered incomplete and cannot be traveled through.
The island is now fully explored! The Explore Phase ends permanently after this step.
For the remainder of the game, play the Build Phase instead of the Explore Phase. Start the Build Phase with the same player who started the Explore Phase.
Build Phase
It's time to start building! Players now take turns moving forward along the paths formed by the Pathway Arrows, building on Territories, upgrading buildings, harvesting Carrots, and collecting Action Cards.
At the beginning of the Build Phase, deal 2 Movement Cards face down to each player. Move the Year Tracker Token onto Year 1 on the Year Tracker Board.
Build Phase Cycle: Play a Movement Card → Move Pawn → Play Action Cards → Resolve Tile → Draw a Movement Card
Step 1 – Play a Movement Card
As the active player, you must play a Movement Card from your hand.
This card is then put into the Movement Card discard pile. If the Movement Card deck has no cards, shuffle the deck's discard pile into a new draw pile.
Step 2 – Move Pawn
Move your Rabbit Pawn the number of spaces shown on the card. You must move the exact number of spaces printed on the card.
You must move your Rabbit Pawn forward along the path formed by the Pathway Arrows. If you reach a fork in the path, you may choose which direction to move.
- Rabbit Holes: When your Rabbit Pawn reaches a Rabbit Hole Tile, you must use one movement space to return your Rabbit to Founder's Hill. If you land on a Rabbit Hole Tile as a result of your final movement space, you resolve the effect there (Harvest 20 Carrots or Draw 1 Action Card). On your next turn, you must spend your first movement space to move your Rabbit to Founder's Hill.
- Founder's Hill: When your Rabbit Pawn lands on Founder's Hill as a result of your final movement space, or as the result of an Action Card, you can resolve the effect there: Harvest 50 Carrots & Draw 1 Action Card.
Step 3 – Play Action Cards
Starting with the active player, each player in clockwise order may play an Action Card or choose to pass. After playing an Action Card, discard it (the sole exception here is for Collapse!; in which the card is discarded after its final action is resolved, as explained on page 22).
If every player, starting with the active player, passes, then this step ends. If any player plays an Action Card, then the opportunity to play an Action Card continues to every player again until all players pass.
Action Cards can only be played during this step.
You may have more than 5 Action Cards during your turn. At the end of your turn, if you have more than 5 Action Cards, you must discard down to 5.
Interrupt Action Cards
Some Action Cards are Interrupt Action Cards, which may cancel or physically move the effect of one or more Action Cards.
An Interrupt Action Card can be played as normal, or immediately after another Action Card is played. Interrupt Action Cards are resolved immediately, before the effect of the regular Action Card can take place.
An Interrupt Action can move or cancel the effect of another Interrupt Action.
Example – Advance in Action: Red has moved 4 spaces to a Lake tile, which has a Camp owned by Blue. Blue can play the Action Card Advance to move Red forward one Map Tile, before they can choose to upgrade Blue's Territory.
Example – How Advance Moves the Other Actions: Red plays Free Labor in order to build a Camp on an empty Territory Tile without paying its Building Cost. Blue then plays Advance, which moves Red forward onto a Carrot Patch Event Tile. Free Labor can no longer go into effect, since Event Tiles cannot be built on. Both Free Labor and Advance are discarded.
Example – Turn Order, and How Thwarted Can Cancel Another Thwarted!: Blue is the active player, so she has first opportunity to play an Action Card. She passes to Red, who plays Advance. Next to act is Yellow, who plays Thwarted to interrupt Red's Advance. Play returns to Blue, who plays Thwarted to interrupt Yellow's Thwarted, which means the original Advance takes effect. Play returns to Red, who chooses to pass. Yellow also passes, so Blue resolves the Action Card, and then resolves the effect of the Map Tile.
Step 4 – Resolve Map Tile
Carrot Patch: When your Rabbit Pawn reaches a Carrot Patch Event Tile as a result of your final movement space, or as the result of an Action Card, you can resolve the effect there: "Draw 50 Carrots & Draw 1 Action Card."
Transcriber note: the printed text on this page reads "Draw 50 Carrots & Draw 1 Action Card." (the Carrot Patch entry on page 12 reads "Harvest 50 Carrots"). Transcribed as printed.
Territory Tile Owned by No One: You may build a Camp on the Territory Tile (page 8).
Territory Tile Owned by You: You must harvest from the Territory Tile. If the Territory is in a Harvest Group (page 9), you must harvest from every Territory in the Harvest Group. You may then upgrade the Territory once (page 8) if you have enough Carrots.
Territory Tile Owned by an Opponent: When landing on an opponent's Territory, the opponent will harvest Carrots according to the Building Level (Camp, Village, or Town) they own.
You must choose to either:
- Upgrade the Territory (see page 8 on how to upgrade a Building Level)
- or, Share the Harvest – You and the player who owns the Territory both receive Carrot Tokens equal to the Harvest Value on the Territory Tile. If the Territory is part of a Harvest Group, you both gain the Harvest from every Territory in the Harvest Group.
You cannot choose to do neither (though circumstances may prevent you from doing either). If you cannot afford to upgrade the Territory, then you will automatically share the Harvest with the Territory Owner.
Example – Landing on an Opponent's Territory: Red lands on a Cave with a Camp owned by Blue. Red chooses to share the Harvest with Blue. The Cave shows that the Harvest with a Camp produces 10 Carrot Tokens, so sharing this Harvest gives Red and Blue 10 Carrot Tokens each.
However, if the opponent's Territory has a Town, you cannot share the Harvest. If the Territory does not have a Town, but is in a Harvest Group that has a Territory with a Town, you may still share the Harvest, which will still include the Town's Harvest in the Carrots given to you and the player who owns the Territory.
Example – Landing on an Opponent's Town: Red lands on a Valley with a Town owned by Green. This Territory Tile is part of a Harvest Group owned by Green. Red cannot upgrade the Town and cannot share the Harvest. Green receives the combined Harvest from the full Harvest Group, and Red ends their turn.
Example – Landing on an Opponent's Harvest Group: Red lands on a Lake with a Village owned by Blue. This Territory Tile is part of a Harvest Group owned by Blue that also includes a Cave with a Camp and a Forest with a Town. Red chooses to share the Harvest with Blue. Adding up all of the Territory Tiles in this Harvest Group, this Harvest produces 70 Carrot Tokens. Sharing this Harvest gives Red and Blue 70 Carrot Tokens each.
Step 5 – Draw Movement Card
To finish your turn, you must draw a new Movement Card from the Movement Deck. You should have two Movement Cards in your hand between turns.
If the Movement Deck or Action Deck has no cards, shuffle the deck's discard pile into a new draw pile.
After resolving these steps, the next clockwise player becomes the active player.
After all players have taken a turn, move the token on the Year Tracker forward by one Year Space and begin the Build Phase again.
When Year 20 is reached, the game ends! (End on Year 10 in a short game; see page 18.)
End of Game
When Year 20 is reached, the game ends. It's time to retire your Rabbit Leaders and reflect on the amazing civilizations you've all developed!
Calculate each player's score by moving the corresponding Emblem Token forward on the VP Scoreboard. The player with the most Victory Points wins! (If there is a tie for any place, all tied players win for that place!)
- Most Carrots: Award a Victory Point to the player with the Most Carrots. Place a Building Token from that player on the Most Carrots spot on the VP Scoreboard for reference. (If there is a tie, no player wins the point.)
- Largest Harvest Group: Award a Victory Point to the player with the Largest Harvest Group. Place a Building Token from that player on the Largest Harvest Group spot on the VP Scoreboard for reference. (If there is a tie, no player wins the point.)
These extra Victory Points for the "Most Carrots" and "Largest Harvest Group" can only be officially rewarded at the end of game.
It is up to the group as to whether or not Victory Points (VP) will be tracked throughout the game with the VP Scoreboard, or if scores will be tallied at the end of the game. All points are awarded by moving the relevant Emblem Tokens forward on the VP Scoreboard. If your group has been tracking Victory Points throughout the course of the game, you may verify your scores by doing the following:
You receive Victory Points for all of your Camps, Villages, and Towns, including those on Territories owned by other players.
- Towns: On each Territory with a Town, award the Victory Points shown on the Territory for the Town to the player owning the Town. Do this for all Territories with a Town.
You may then either remove all Town Building Tokens from the game map, or place the Town Building Tokens over the "Town" indicator on the Territory Tile itself. However you decide to handle this step, repeat it for the following:
- Villages: On each Territory with a Village, award the Victory Points shown on the Territory for the Village to the player owning the Village. Do this for all Territories with a Village.
- Camps: On each Territory with a Camp, award the Victory Points shown on the Territory for the Camp to the player owning the Camp. Do this for all Territories with a Camp.
Victory Example
First, the players counted up their total Carrot Tokens, and then the Territories in their Harvest Groups, and assigned the extra Victory Points as necessary. Towns were tallied for each player and removed from the board, then Villages, and then Camps.
The final totals show that Acorn and Cobalt have tied for 1st place!
Doing very well in one category (Towns, for example) may not be an indicator that a player has done well in every category.
Final Scoring Example
| Tribe | Carrots | Largest Harvest Group | Towns | Villages | Camps | Total |
|---|---|---|---|---|---|---|
| Russet (Ignis Tribe) | 2,000 | 4 tiles (+1 VP) | 6 VP | 10 VP | 5 VP | 22 VP |
| Saffron (Memor Tribe) | 1,800 | 3 tiles | 14 VP | 7 VP | 2 VP | 23 VP |
| Acorn (Herba Tribe) | 5,500 (+1 VP) | 2 tiles | 16 VP | 3 VP | 4 VP | 24 VP |
| Cobalt (Cursus Tribe) | 900 |
Acorn and Cobalt are tied for 1st place! There are no tie-breakers. There may be multiple players in 1st/2nd/3rd place.
Short Game Rules
Don't have enough time for a full game? You can play a short game in 30–45 minutes by exploring a smaller island and playing through fewer years. In a short game, you will play with slightly different rules, as listed below. All other rules remain the same.
Setup Changes
- Replace the Founder's Hill Tile with the Founder's Hill (Short Game) Tile, which has 1 starting path instead of 3.
- Remove all Lake and Valley Territory Tiles from the game.
- Deal 5 Map Tiles to each player, regardless of the number of players.
Play Changes
- At the beginning of the first Build Phase round, give 2 Action Cards to each player in addition to the usual 2 Movement Cards. This only happens once, and at no further point will more Action Cards be freely given out to players.
- The game ends immediately when Year 10 ends. Follow the End of Game directions found on page 16.
Movement Cards
Movement Cards allow players to move across the map by the number of spaces shown on the top of the Movement Card.
The Story of Rabbit Island: Each Movement Card has a unique picture, and is labeled in the bottom-right corner with a number from 1 to 54. Lay out the cards in numerical order to see the story of the First Landing, from the moment Cobalt first sighted the Island, to Russet discovering Founder's Hill!
Action Cards List
The two yellow stars featured at the top of an Action Card mean that it is an Interrupt Action Card. See page 13 for more information on how to play Action Cards.
- Advance (×5) (Interrupt Action Card) – Move the active player forward 1 space. If there are multiple directions available for moving, the player who played this card gets to choose the direction.
Collapse! – To find the Collapse! card rules and examples, see pages 22 & 23.
- Drought (×1) – The active player harvests 0 Carrots. Other Action Cards cannot increase this.
- Epic Discovery (×1) – If the active player draws any Action Card, they draw 2 extra.
- Every Bunny Wins (×1) – Each player gets 100 Carrots.
- Extreme Advance (×1) (Interrupt Action Card) – Move the active player forward 2 spaces. If there are multiple directions available for moving, the player who played this card gets to choose the direction.
- Free Labor (×1) – If Building, 0 Carrots are required. Other Action Cards cannot increase this.
(The Action Cards List continues on the following pages.)
-
Full Harvest (×2) – The active player harvests double the amount of Carrots. Two Full Harvests played on the same turn will quadruple the Carrots harvested. If you're both the active player and the Territory Owner, you may also use Hometown Advantage to affect your harvest total.
Example – Two Full Harvests: Red lands on a Cave on which they own a Village. The Harvest for the Village is 10 Carrots. Red plays two Full Harvests, which allow them to harvest 40 Carrots. They then use these Carrots to pay the Town's Building Cost.
-
Go Home! (×1) (Interrupt Action Card) – Move the active player to Founder's Hill. Other Action Cards can move the active player after this.
-
Hometown Advantage (×2) – The Territory Owner harvests double the amount of Carrots. Two Hometown Advantages played on the same turn will quadruple the Carrots harvested. If you're both the active player and Territory Owner, you may also use Full Harvest to affect your harvest total.
Example – Hometown Advantage: Red lands on a Forest on which Blue owns a Camp. The Harvest for the Camp is 10 Carrots. Blue plays a Hometown Advantage, which allows her to harvest 20 Carrots. Red must choose whether or not to share the Harvest (they would receive only 10 Carrots), or upgrade the Territory to a Village.
-
Hungry Workers (×1) – If Building, double the Carrots are required.
-
Peace & Quiet (×1) (Interrupt Action Card) – Cancel the effects of all other Action Cards. Discard them. No other Action Cards can be played for the remainder of this turn.
-
Poor Harvest (×2) – The Territory Owner harvests 0 Carrots. Other Action Cards cannot increase this.
Collapse! (×3)
In three turns, the player who played this card will cause a disaster that will wipe out a Camp, resulting in a lost or downgraded Building Level! Other players may be able to move the destruction, and landing on an Event Tile will cancel it out entirely – but there are three in the deck, so beware!
When you draw this card, immediately play it. If there are two or fewer years left on the Year Tracker, discard this Collapse! and draw another Action Card. Otherwise, continue with the following:
Countdown Timer: Put a Collapse Counter on the first space of the countdown timer featured on the card. After you play a Movement Card during your Move Pawn step, move the counter down once (from 3 to 2; then 2 to 1).
Short Game Exception: If this Action Card is drawn at the beginning of the Build Phase during a Short Game, the player will play it face-up, but will wait to place the Collapse Counter on the first position of the countdown timer until after their first Movement Card resolves. It continues to move down the timer as stated above. In this case, a player cannot draw a new Action Card.
Interaction with Action Cards: Collapse! cannot be affected by other Action Cards until it has been officially triggered by the counter being placed on the final position (on the "1" space) on the countdown timer (see next section).
After the action has been triggered, it cannot be canceled (by cards such as Thwarted! and Peace & Quiet), but it can otherwise be affected by other Interrupt Actions (such as Advance and Go Home!).
Collapse! Trigger and Effect: When the counter hits the final space on the countdown timer, you will remove the bottom Building Token from the Territory Tile your Rabbit is on.
If there is only a single Building Token on the Territory Tile, then it is removed. This includes Building Tokens owned by the player who plays Collapse!
If the Collapse! is triggered on a Territory Tile that has no Building Tokens on it, or an Event Tile, then nothing happens and the action is discarded.
Example – Collapse!: Red plays "Move 3 Spaces" at the beginning of their turn and moves onto Blue's Town. Red moves the counter on their Collapse! Action Card to the final countdown timer space.
Every player has the chance to move this action by playing an Interrupt Action Card (an Advance or other movement card would redirect the Collapse! to another Map Tile). Note that Collapse! cannot be cancelled (by cards such as Thwart! or Peace & Quiet).
If no one interrupts Red's Collapse!, Red removes the bottom Building Token from Blue's Territory Tile, which turns the Blue's Village into a Camp, and their Town into a Village.
Every player may play any other Action Card that they may like at this point. Once players are done playing Action Cards, Red has the option to upgrade Blue's Village, stacking a Red Town on it and gaining ownership of the Territory Tile!
Collapse! countdown example: Start by placing a Collapse Token onto the "3" space of the countdown timer. On your next turn, after resolving a Movement Card during the Move Pawn step, move the Collapse Token from "3" to "2". On your third turn, after resolving a Movement Card, move the Collapse Token from "2" to "1", and follow the rules above! Collapse is triggered!
Transcriber note: the Action Cards are transcribed in full above (Advance ×5, Collapse! ×3, and the remaining cards by quantity), totalling the 27 Action Cards stated in the Components list on page 4.