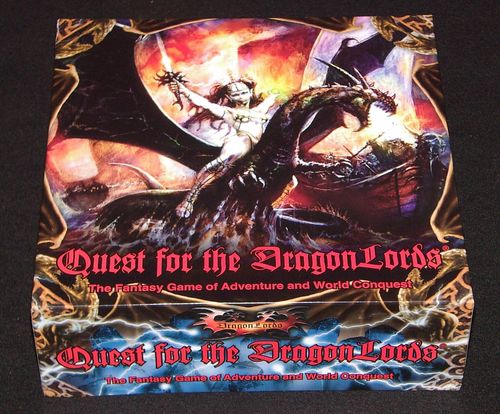
Quest for the DragonLords (Second Edition)
Quest for the DragonLords (Second Edition) Rulebook
Table of Contents
Table of Contents
- Game Overview
- Game Setup
- The Gameboard
- Placement of Game Pieces
- It's My Turn, What Do I Do?
- Action Sequence
- How Do I Move the Men Around the Board?
- Combat Movement
- Combat Sequence
- Other Types of Movement
- Naval Combat
- Commanders
- Teleportation
- Wizard's Spells
- Scroll Cards
- Ending the Game
- Almanac
- About Commanders
- Combat
- Naval Movement
- Teleportation
- Retreating
- Elf Sneak Attack
- Wizard's Spells
- About Scroll Cards
- Player Elimination
- Overthrown Kingdom
- Re-Instating a King
- Two Player Game
- Optional Rules of Play
- A Quest in Vigrond
- Quest Activity Phase
- The Wastelands
- Preparing Your First Quest Party
- Quest Party Movement Allowance
- Quest Party Movement Restrictions
- Companion Cards
- Prophecy Cards
- Treasures
- Tools
- Quest Cards
- Quest Combat
- Wizard's Spell Book
- Scroll Card Library
- Strategy and Hints
- Frequently Asked Questions
- Glossary
- List of Game Components
- Epic Battle
Game Overview
Each player is the leader of a unique civilization: Elves, Dwarves, Orcs, or Barbarians. The ultimate goal is to conquer all other Kingdoms and/or eliminate all other Kings. A wise ruler will strengthen his or her fledgling civilization by conquering and controlling key territories, while steadfastly defending his or her Kingdom. A ruler must strategically command armies and fleets, optimize his or her civilization's distinctive traits, and judiciously call on the powers of magic.
The greatest rewards will come from sending brave adventurers into the wastelands. Though fraught with peril, quest parties may find valuable treasures, fantastic spells, magic items, and perhaps even a legendary DragonLord! These discoveries will immediately benefit the forces on the mainland in their quest for victory.
Object of the Game
- Standard Victory Conditions: The first player to gain control of 4 Kingdoms is declared the winner.
- Optional Rule 1: Players may agree to change the victory conditions to require 3 Kingdoms for a shorter game, or 5 to 6 Kingdoms for a longer game.
- Optional Rule 2 (Bloodlust): Find and defeat all other kings, thus eliminating all other players from the game.
Game Setup
Cardboard Counters
There are two sheets of cardboard counters. One sheet of coins is to be used as currency and the second sheet is used to represent various tools, treasures, mana markers and commanders. Carefully punch out the counters from the cardboard sheets. Give each player the following cardboard counters to start the game: King, Wizard, 2 Decoys, Pickaxe.
Gold Currency
There are three types of gold coin cardboard counters. The copper colored coins are worth 1 gold, the silver colored coins are worth 5 gold and the gold colored coins are worth 10 gold. Each player starts with 30 gold (2 gold colored, 1 silver colored and 5 copper). Set the remainder aside and appoint one player to be the "banker".
Game Dice
The game has various multi-sided dice and a special clear die. The clear die is rolled when a player has to "consult the gods". The player is blessed if he rolls yellow, ignored if he rolls blue and cursed if he rolls red. The black multi-sided dice are used in all combat situations. For example, if a player had to roll a four-sided die, it would be referred to as "1d4".
Plastic Chips
Plastic chips are used to substitute for units to save space in overcrowded zones (territories, sea zones or Wasteland spaces). The white chips represent 1 unit, the red chips represent 5 units and the blue chips represent 10 units.
Reference Cards
Each player randomly chooses a civilization: Elves (green), Dwarves (yellow), Orcs (red) or Barbarians (blue). Each player takes the reference card for his or her civilization. Place 2 pegs in spell numbers 1 and 2 of the first row of the Wizard's Spell box (Wizard 1) and place a mana marker on "2" on the mana scale of your reference card.
Game Cards
Shuffle and place the game cards face down into five decks around the gameboard as table space allows as shown. The five decks are: Quest Cards, Scroll Cards, Treasure Cards, Prophecy Cards and Companion Cards.
The Gameboard
The game board features a map of Midgaard - the known world. There are six realms with two realms on each continent. Each realm consists of seven territories. Territories are separated by solid black and dotted black lines. The dotted black lines are mountain ranges that may not be crossed. Two territories that separated by dotted lines are not considered adjacent.
At the center of the gameboard is Vigrond - the Wastelands. Surrounding the continents are blue hexagon shaped sea zones with four island gold territories. The left edge of the gameboard does NOT connect to the right edge of the gameboard. However, the top edge of the gameboard connects to the bottom edge of the gameboard, so a player may move his ships or armies from one side of the gameboard to the other.
Notes printed on the board diagram: "The top sea zones are adjacent to the bottom sea zones." "Ships may pass over the land bridge." "All mountain ranges are impassable." "The top territories are adjacent to the bottom territories."
Placement of Game Pieces
- Each player counts out his or her starting units: 4 players = 25 units, 3 players = 30 units, 2 players = 35 units. Set the rest of the units aside for now.
- Beginning with the oldest player, roll the crystal die. The first player to roll yellow is blessed as the 'Chosen One'. Starting with the Chosen One and continuing clockwise, place 5 units in any Kingdom until all players have claimed one Kingdom. For all unoccupied Kingdoms remaining, place 5 white chips representing neutral units (3 Attack / 6 Defence). These units must be defeated to gain the Kingdom.
- Starting with the Chosen One and continuing clockwise, place one unit in any unoccupied gold territory (Exception: no units may be placed on islands).
- 2 players: Each player claims 3 gold territories.
- 3 players: Each player claims 2 gold territories.
- 4 players: Each player claims 1 gold territory. Place 5 white chips representing neutral units on the two remaining gold territories. This will ensure that all players start the game with the same income.
- Strategy: Choose gold territories next to your Realm.
- Starting with the Chosen One and continuing clockwise, place 1 unit in any unoccupied territory until all territories are selected. No units may be placed in the Wastelands, sea zones, or any of the 4 islands.
- Strategy: Choose a territory with a Wasteland entrance and at least one territory with a harbor.
- Once all territories have been selected, continue with the next player and place 1 unit in any friendly territory. A friendly territory is a territory that the player has already claimed. Continue until all players have placed all of their starting units onto the gameboard.
- Strategy: Place extra units in your Kingdom, gold territories, territories with a wasteland entrance, and at least one territory with a harbor.
- Each player places 1 ship with the appropriately colored sail in any harbor he or she controls. The ship is lost if the player does not control a harbor. Strategy: It would be wise to dock your ship in a friendly harbor in your realm.
It's My Turn, What Do I Do?
Study the board. Look for opportunities to conquer territories to gain extra income. Try to understand what your opponents are up to. Do any of your opponents have a large force on a coastal territory poised to strike?
When it is your turn, you may spend your gold to buy new armies or ships. You place these units on the gameboard at the end of your turn. Dispatch a ship to capture islands for extra income. Now you may move your men into an enemy held territory and combat any adjacent enemy territories you wish to conquor. You may also go on adventures in the Wastelands on a Quest for the DragonLords. Here's how.
Action Sequence
The action sequence consists of seven steps or phases that are briefly described below. Each player performs all seven phases during his or her turn before play passes to the next player to his left. The seven phases must be completed in order starting with the purchase units phase and ending with the place reinforcements phase. Note: The player conducting these 7 phases is called the phasing player or the attacker.
Step 1) Purchase Units Phase
You start by spending your gold in your Kingdom on new units or reinforcements. Refer to your reference card for the cost of your units. A ship costs 10 gold for all civilizations. Purchased units are placed on the gameboard at the end of your turn during the place reinforcement phase of your turn. Strategy: It would be wise to save at least 5 gold, so that your quest party may purchase items in the Wastelands during the quest activity phase.
Step 2) Naval Movement Phase
This step allows you to use your ship(s) to pick up units from a territory with a harbor and move them to any other territory with a harbor, including islands and enemy occupied territories. Commanders may teleport during the naval movement phase. (See TELEPORTATION)
Step 3) Quest Activity Phase
Adventures abound for those brave enough to face the perils that await! This step allows you to move your quest party of up to 6 units around in the Wastelands. (See Quest Activity Phase)
Step 4) Combat Phase
This step allows you to move your units into enemy occupied territories to do battle. If you successfully conquer the enemy forces, you gain control of the territory and gain extra income during the collect income phase (See Combat Movement).
- Naval battles are also resolved during the combat phase.
- Forced Marches may be made during this phase to move your forces up to 4 adjacent friendly territories.
Step 5) Transfer Phase
This step allows a player to re-organize his forces.
- Each unit may move to one adjacent friendly territory.
- You may move units from a territory (with a harbor) into a ship to create a naval blockade.
- You may transfer units to a territory with a harbor from a naval blockade in an adjacent sea zone.
Commanders may teleport during the transfer phase.
Step 6) Collect Income Phase
Gain gold for each territory occupied by friendly forces as noted. You do NOT gain any gold for Wasteland spaces or sea zones. Place the gold gained in your Kingdom. You may divide your gold between Kingdoms, if you occupy more than one. You may ONLY collect income if you occupy a kingdom.
- Gain 1 gold for each friendly territory.
- Gain 3 gold for each gold territory.
- Gain 5 gold for each Kingdom.
Step 7) Place Reinforcement Phase
- Reinforcements must be placed into the realm of a Kingdom(s) you occupy.
- If you occupy more than one Kingdom, you may reinforce the realms of the other Kingdoms.
- You may NOT place reinforcements into the Wastelands, gold territories or ships.
- You may NOT reinforce a territory in another player's realm even if you occupy a territory in it.
- You may redeem 3 mana for a scroll card.
Once you have finished placing your reinforcements, play passes to the player to your left. That player must now complete all seven phases in order starting with the purchase units phase.
How Do I Move the Men Around the Board?
You may move your units or men to an adjacent (touching) enemy occupied territory during the combat phase. If you successfully defeat the enemy forces, you may continue to the next adjacent territory. You may also use your ship to move your units to islands and enemy occupied territories that have a harbor. The methods of movement are detailed below.
Combat Movement
The basic form of movement is to simply move your units from a territory into an adjacent (touching) territory that is occupied by enemy forces. This movement is considered an attack and you must follow the combat sequence.
The sample illustrates: the Orc player moves 4 units from his army of 5 units into the Barbarian territory. Neither player wants to cast a scroll card and there are no commanders in the battle, so the missile attack steps of the combat sequence are ignored. The TAS of the Orcs is 3 (Orc Attack number) and the TAS of the Barbarians is 4 (Barbarian Attack number).
- Step 1: Orc TAS = 3 / Barbarian TAS = 4. The Orc player moves his army and attacks the Barbarian occupied territory. Note: One Orc unit must remain to occupy its own territory.
- Steps 2 to 4 are ignored with no missile attacks.
- Step 5: Orc player rolls 5, 5, 6, 3 and scores 1 hit.
- Step 6: Barbarian player rolls 3, 4 and scores 2 hits.
- Step 7: The Orc player removes 2 units and the Barbarian player removes 1 unit.
- The Orc player continues to attack. He rolls 2, 1 and scores 2 hits. The Barbarian player rolls a 2 and scores 1 hit.
- Each player removes 1 unit each.
- Victory! Orcs have conquered the territory!
Combat Sequence
All land, naval, and quest combat is resolved using the same combat sequence. Each time you go through the combat sequence, it is considered a round of combat. Note: It is recommended that players keep track of the hits points scored during battles on a spare die. The phasing player is the attacker.
The combat sequence consists of the following 7 steps:
Step 1) Determine Total Attack Strength
The attacking and defending player determines the T.A.S. (Total Attack Strength) of his units.
TAS = Attack number + (Effects due to treasures, spells, Kingdoms and commanders)
Missile Attack Phase
Step 2) Defender Missile Attack
- The defending player may cast 1 inflict damage scroll card on the attacking enemy units.
- Each defending commander may cast 1 inflict damage spell.
- The attacking player may use a scroll card to counter the defender missile attack.
Step 3) Attacker Missile Attack
- The attacking player may cast 1 inflict damage scroll card on the defending enemy units.
- Each attacking commander may cast 1 inflict damage spell.
- The defending player may use a scroll card to counter the attacker missile attack.
Step 4) Remove Missile Attack Casualties
- The attacking player must remove a unit for each hit point the defending player scored.
- The defending player must remove a unit for each hit point the attacking player scored.
Melee Attack Phase
Step 5) Attacker Melee Attack
- Each attacking unit that remains in the combat zone must roll less than or equal to its TAS to score a hit point using the die represented by the defense number of the defender. Note: All civilizations have a defense number of 6, so all naval and land combat is resolved by the attacker and the defender using six-sided dice.
Step 6) Defender Melee Attack
- Each defending unit that remains in the combat zone must roll less than or equal to its TAS to score a hit point using the die represented by the defense number of the attacker.
Step 7) Remove Melee Attack Casualties
- The attacking player must remove a unit for each hit point the defending player scored.
- The defending player must remove a unit for each hit point the attacking player scored.
- Wizards may use the Heal spell.
We Have Completed a Round of Combat, Now What Do We Do?
If the defending player still has a unit(s) remaining in the combat zone, the attacking player may attack again by repeating the combat sequence, until only one player's unit(s) remains.
- OR -
The attacking player may choose to retreat back to an adjacent friendly territory. (See RETREATING)
If the attacking player was successful and no enemy units remain in the combat zone, he may move and attack an adjacent enemy occupied territory. (See Capturing Territories) The phasing player may attack as many enemy occupied territories as he or she desires.
Other Types of Movement
Forced March
You may move each unit up to 4 adjacent friendly territories during the combat phase of your turn. The forced march is great method of reinforcing the gold territories.
The sample illustrates a forced march in which the Elf player could reinforce any of the 4 territories with the second Elf in the Kingdom. Note: The land bridge connects the top edge of the gameboard to the bottom edge of the gameboard. Territories 2 and 3 are adjacent to each other.
Naval Movement
The sample illustrates naval movement: the Elf player picks up 3 units from the harbor (anchor) and moves his ship 2 sea zones. The Elf player drops 1 unit off to occupy the island gold territory and continues to move the other 2 units 2 more sea zones. He unloads the 2 units to attack the Dwarven occupied territory. This attack would be conducted during the combat phase.
Some territories on the coast of a realm will have an anchor in the sea zone. The anchor is a harbor and these are the only territories where units may be picked up or dropped off using a ship.
A ship may be used to transport 8 units up to 6 sea zones during the naval movement phase. You may pick-up units, move up to 6 sea zones and deploy these units all in the same movement phase. (See naval movement illustration)
Naval Combat
Naval combat is a battle between opposing naval blockades. A player moves his ship(s) into the enemy occupied sea zone during the naval movement phase and carries out the attack during the combat phase of his turn. (See Combat Sequence)
The sample illustrates: the Elf player attacks the Dwarf naval blockade by moving his ship into the same sea zone as the Dwarf ship during the naval movement phase.
- Step 1: Elf TAS = 3 / Dwarf TAS = 3.
- Steps 2 to 4 are ignored with no missile attacks.
- Step 5: Elf player rolls 1, 2, 4 and scores 2 hits.
- Step 6: Dwarf player rolls 3, 4 and scores 1 hit.
- Step 7: The Elf player removes 1 unit and the Dwarf player removes 2 units.
- Victory! The Elf player boards the Dwarf ship and replaces the yellow sail with a green sail.
Commanders
There are 3 types of commanders and they are Kings, Wizards and DragonLords. These units have a great effect on the outcome of battles. Each player starts with a King and a Wizard. The gold counters depicting a crown and a staff are placed under a miniature to represent these commanders. The decoy gold counters are useless but are also placed under miniatures to confuse your opponents. The DragonLord must be earned from a quest in the Wastelands. Use the DragonLord miniature to represent this commander.
Teleportation
You may use a teleportal to move units to any one of the other teleportal territories during the combat phase or transfer phase. DragonLords and Wizards with the Teleportal spell may teleport once during the naval movement phase and once again during the transfer phase.
Wizard's Spells
Wizard's spells are magic that may be used in combat or increase the power of your civilization. Each civilization has a unique set of spells. The Wizard's Spell box of your reference card is used to keep track of the spells that each of your Wizards knows. Your first Wizard starts with spells 1 and 2. Consult your reference card for a brief description of how to use these spells. For a full description of all spells, see WIZARD'S SPELL BOOK.
Scroll Cards
As the King of your realm, you possess and have the power to cast the scroll cards. Each player starts the game with 3 scroll cards. The shrine space in the Wastelands is a good place to gain a scroll card. For a full description of each scroll card available, see SCROLL CARD LIBRARY.
Ending the Game
Once the victory conditions that were determined at the start of the game have been met, the game is over. (See Object of the Game)
Almanac
History of the Civilizations
It is rumored that many other civilizations survived the Dragon Wars, but their identity and location eludes our people. This is a compellation of what we know of the civilizations that survived the devastation.
The Dwarves
Dwarves are an ancient people, coming from the industrious Svartalfheim. It is said that before the darkness fell, it was the Dwarves who constructed great weapons for the gods and treasures too beautiful to look upon with the naked eye. Today, Dwarves are still gifted in manufacturing weapons of war, but much of their skill of old has been lost. The Dwarves are experts in mining and never venture too far from the stone they love dearly. In happier times, the Dwarves would spend many days and nights in merriment, drinking ales and roasting meats. The Dwarves are a hard working people, and the ringing of hammers on stone forever echoes in their halls.
Many civilizations believe that it was greed that destroyed Midgaard. Did the Dwarves dig too deep in their quest for riches? It is whispered that the Dwarves found some ancient evil, which long ago was exiled by the gods to the foundations of the earth.
Special Abilities: The Dwarf player gains 5 gold as opposed to 3 gold when Dwarves occupy gold mine territories. (See About the Gameboard) The Dwarves add 1 to the T.A.S. of all friendly units during combat in the mines.
The Barbarians
It is said that the Barbarians were once a proud people. The speed of their swords was terrible to look upon when the fire leapt from their hearts and glistened in their eyes.
Now, their numbers are few. Forever they search the seas for clues of their past, looking for the answer to a riddle that has haunted their people. Were they responsible for the destruction of the Crystal of Power? It is said by some that it was Lord Boldrur, the mightiest of Kings, who held the crystal in the final moments. Was his vanity the cause of the despair that has endured? Nonetheless, the Barbarians knowledge of navigation is unequalled. The Barbarians are masters of the seas have the strength to reach distant shores.
Special Abilities: The Barbarians may move their ships up to 10 sea zones as opposed to 6 sea zones.
The Orcs
Their kind first appeared in strength just before the destruction of the great crystal. Not much is known of their civilization. Maybe they come from across the boundaries of the Ginnungagap! The Orcs lived in lands that none dared enter in the early years. A tough people, the Orcs can survive in places where no other people could. Scorned by all people for their drive to pillage the land of its resources, they are constantly on the move, looking for new lands to feed their insatiable appetites. Are they made of maggots as all other civilizations choose to believe or are they destitute, just trying to survive? Nonetheless, the Orcs' strength lies in the shear weight of their numbers.
Special Abilities: The cost to purchase a single Orc unit is 3 gold, but the Orc player may also purchase 4 units for 10 gold.
The Elves
The Elves are the most ancient of the four known civilizations to survive the destruction of the great crystal. Not much is known about these people anymore. All the Elves that we know of in this world come from their home of light, the Ljusalfheim. Before the dark times, the Elves were a social people, quick to laughter, and were renowned singers of song. A very strong bond was said to exist between the Elves and the Barbarians. Now they are mortal enemies. The borders of the Elven lands are now closed to all, and none return that venture too close. Their warriors are very skilled in battle and possess exceptional skill with the bow. The Elves have many years of experience with the Arts, and are reputed to be very powerful Wizards. Was it the Elves' quest for knowledge that upset the balance of power? Was it the arrogance of the Elves' ability to harness the forces of nature that was the cause of the apocalypse?
Special Abilities: The Elves has a special form of attack called the sneak attack. (See ELF SNEAK ATTACK)
About the Gameboard
Kingdoms and Realms
It is important to note the distinction between a Kingdom and a realm. In each realm, there is one Kingdom. There are 6 Kingdoms, one in each of the 6 Realms. A realm has 7 like colored territories including a Kingdom. The like-colored territories surrounding an occupied Kingdom are considered part of the occupying player's realm for purposes of reinforcements and special abilities (such as the Elf sneak attack). It is vital that a player keeps control of his or her Kingdom. Each player stores all of his gold in his Kingdom(s). You may NOT collect income without a Kingdom. Keep this in mind when selecting territories to place units during the set up of the game.
- The Kingdom reduces the T.A.S. of units attacking by 1. (See Combat Sequence)
- The Kingdom is worth 5 gold during the collect income phase.
- Each territory occupied by friendly forces is worth 1 gold during the collect income phase, including territories occupied by friendly forces in another player's realm.
Sea Zones and Harbors
The blue hexagon shaped spaces are called sea zones. You may not place units in a sea zone when placing units during the set up of the game. Units are not allowed in sea zones unless accompanied by a ship. Some territories adjacent to sea zones have a harbor, which are represented with anchor symbols. You may only pick-up or drop-off units in a coastal territory with harbor. Sea Zones do not belong to any realm and cannot be reinforced during the place reinforcements phase.
Wastelands
The Wastelands are barren paths at the center of the game board. (See Quests Activity Phase) You may not place units in the Wastelands during the set up of the game. Each player may dispatch units into the Wastelands during the quest activity phase. Wasteland spaces do not belong to any realm and cannot be reinforced during the place reinforcements phase.
Gold Territories
The gold territories are yellow colored and are worth 3 gold during the collect income phase. There are 3 types of gold territories: mines, teleportal and islands. Gold territories do not belong to any realm and may not be reinforced during the place reinforcements phase. Keep this mind when placing units during the set up of the game.
- Mines: The 3 gold territories with a mine symbol give the Dwarf player a special advantage. The Dwarf player gains 5 gold as opposed to 3 gold during the collect income phase for each mine in his possession. Dwarven units add 1 to their TAS while combating in the mine territories. (See Combat Sequence)
- Islands: You may not place a unit(s) in an island territory during the set up of the game. You must use a ship to transport a unit(s) to occupy an island territory.
- Teleportals: There are 3 territories that contain a teleportal. Teleportals connect territories as though these territories are adjacent to each other. (See TELEPORTATION)
About Commanders
Kings
You are the commander and King or Queen of your realm. You control and cast the scroll cards. Keep this commander safe and hidden until you have sufficient strength to unfurl his banner and lead an army into battle.
- The King adds 1 to the T.A.S number of every friendly unit in the combat zone.
- The King has one melee attack per round of combat.
- A King may NOT enter the Wastelands.
If you eliminate another player's King, you gain all of that player's scroll cards and that player is considered vanquished. (See PLAYER ELIMINATION and RE-INSTATING KINGS)
Wizards
Wizards may cast spells. Each player starts with one Wizard, which has two spells. Consult your reference card for a brief description of the spells your Wizard may cast. (See Wizard's Spell Book for a full explanation)
- The Wizard has one attack per round of combat. It has a choice to combat as a regular unit during the melee attack phase or to cast an inflict damage spell during the missile attack phase. Strategy - A player may not want to reveal that the unit is a Wizard, so it may combat as a regular unit.
- A player must reveal to the other player that the unit is a Wizard by turning the gold counter face up to cast any spells that it possesses. If a Wizard is lost, any spells it knew do not go to the victor but are also lost.
- A Wizard is the only commander that may go to the Wastelands.
- Each player may possess up to 3 Wizards.
- A Wizard must redeem 1 mana for each spell that it casts, except where noted. (See reference card or WIZARD'S SPELL BOOK)
DragonLords
You have to send units on a quest in the Wastelands to gain a DragonLord. A DragonLord uses a missile attack called Dragon fire during combat. If a unit becomes a DragonLord during your quest activity phase, replace a unit with a DragonLord miniature. Dragonlords do NOT require mana to teleport or use Dragon fire.
- DragonLords reduce the TAS of enemy units in the combat zone by 1.
- The DragonLord may teleport up to 10 units once to ANY sea zone or territory during the naval movement phase and once again to a friendly territory during the transfer phase. (See DragonLords / Wizard with Teleport spell)
- DragonLords may move as a regular unit during the combat phase. (See Combat Movement Restrictions)
- The DragonLord may use dragon fire during land combat. Dragon fire SCORES 1 hp of damage during the missile attack step of the combat sequence.
- DragonLords may NOT combat during the melee phase of the combat sequence.
- DragonLords may NOT use Dragon fire during naval combat. (See Commander restrictions during naval combat)
- DragonLords may NOT occupy a ship or a sea zone. After naval combat, the DragonLord must teleport to a friendly territory during the transfer phase.
- You may NOT place a King or Wizard counter under the DragonLord unit to make either of them a DragonLord, but you may use the DragonLord to teleport them.
- As opposed to a dragon, DragonLords have a 6 Defense number. Opposing players would still use a d6 die during combat with a DragonLord.
- Each player may only have one DragonLord in his possession. (See Optional Rules of Play)
Combat
Land Combat Movement
- You may only move your units from a friendly territory into an enemy occupied territory that is adjacent to it or touching it. You may not move your units over mountain ranges that completely separate two territories.
- You may never voluntarily leave a territory unoccupied by moving all of the units into an enemy occupied territory. You must leave at least one unit to occupy each territory.
- The units you move into the enemy occupied territory may come from more than one friendly territory. You may combine several small armies into one large army to attack an enemy occupied territory.
- You do NOT have to declare all of your attacks at the start of the combat phase. (See Reduced Combat Movement - Optional Rules of Play)
- There is no restriction on how many territories a player may conquer on a single turn.
- All land and naval combat takes place during the combat phase of the action sequence except quest combat, which takes place during the quest activity phase.
Determine TAS (Total Attack Strength)
T.A.S. = Attack number + (Effects due to spells, treasures, commanders and Kingdoms)
Note: This step is only used if a player has any effects that affect the T.A.S. (Total Attack Strength) of the units involved in the battle otherwise, simply use the Attack number of the civilization.
The attack number of a unit is always used in combat, whether the unit is attacking or defending a territory. Your defense number is only used in combat with monsters and simply dictates the type of dice your opponent must use.
Note: All civilizations have 6 Defense, so all naval combat and land combat is resolved using d6 dice. The multi-sided dice (4d, 8d, 10d, and 12d) are only used during quest combat with monsters in the Wastelands. (See Quest Combat)
Capturing Territories
If you successfully defeat the last unit in an enemy occupied territory, you must claim the territory. If you decide to move your victorious army to another adjacent enemy occupied territory, you must leave one unit to occupy the newly acquired territory.
Vacant Territories
It is possible for a territory to become vacant due to mutual losses in combat. You may conquer a vacant territory by force marching a unit to it during the combat phase or transferring a unit to claim it from an adjacent friendly territory during the transfer phase.
Capturing a Kingdom
If you successfully defeat the last unit in an enemy Kingdom, you gain all the gold that the Kingdom contains. You may reinforce friendly territories in the realm of the newly acquired Kingdom during the place reinforcements phase of your turn.
Forced March Restrictions
You may move units up to 4 adjacent friendly territories during the combat phase. Strategy: This is a great method of reinforcing gold territories.
- The units to be forced marched may NOT engage in any combat before or after the forced march. The units must end their forced march on a friendly territory.
- You may not leave any territories you crossed vacant and all the territories crossed must be adjacent to each other.
- You may not cross over territories occupied by enemy units.
Naval Movement
- A ship may transport 8 units up to 6 sea zones during the naval movement phase.
- A ship must have at least one unit with it to move.
- To pick-up or drop-off units does not count against the movement allowance.
- You may continue to move your ship after dropping off a unit(s).
- To move a ship from the harbor into the sea zone does not count against the movement allowance.
- Units that are transported or dropped off in enemy occupied territories combat the enemy units during the combat phase of your turn.
- Units that are dropped off may join forces with other friendly units moved into the enemy occupied territory in a combined attack.
- To move a ship from one side of the gameboard to the other costs 1 naval movement allowance.
Naval Blockades
A sea zone occupied by a ship with a unit aboard is referred to as a naval blockade.
- You may hold up to 8 units per ship in a naval blockade. Since you can't, physically, place your army unit into the ship, signify a naval blockade by placing the ship and the units aboard directly onto the sea zone.
- You may NOT move your ship through an enemy blockade. If there is an enemy blockade in any sea zone you pass through or wish to occupy, you must stop and combat the enemy blockade.
- After naval combat is resolved during the combat phase, no further movement is permitted. You may not continue to combat an adjacent enemy blockade or land units on an enemy occupied territory with a harbor even if you were victorious! Strategy - A naval blockade is a good way of protecting a territory or island from an invasion by sea.
Docked Ships
A ship in a harbor, with no units aboard is considered docked. Place the ship on the anchor symbol to identify to the other players that it is docked.
- A docked ship is under the protection of that territory with the harbor.
- A docked ship does NOT control the sea zone. An opposing ship may pass through and occupy the sea zone of a docked ship.
- A docked ship does NOT control the harbor. An apposing ship may also land units in a harbor of a docked ship.
- If a territory with a docked ship comes under attack, the ship goes to the victor!
- If units are deployed in an enemy territory with a ship, the battle is considered land combat and is NOT considered naval combat.
Naval Combat (Continued)
- The victor of the battle may claim the enemy ship(s) if he has enough units left to do so. You must have at least one unit to board an enemy ship, so any ship remaining without a unit on board is sunk and removed from play. For example, if there are 4 ships involved in naval combat, and only 3 units survived the battle, a ship would be removed from play.
- Unlike land combat, you may NOT continue to attack another naval blockade, even if the enemy blockade is adjacent to the sea zone you now occupy. You must wait for your next turn and move during the naval movement phase.
Commander Restrictions during Naval Combat
- Only the units a DragonLord teleports may combat a naval blockade.
- A Commander may not use Dragon fire, Lightning bolts or Fireballs during naval combat for fear of setting the fleet aflame.
- DragonLords may NOT occupy a sea zone or a ship.
Teleportation
Teleportals
- You may only use a teleportal during the combat phase of your turn to teleport units to an enemy occupied teleportal.
- You may use a teleportal to transfer units to a friendly teleportal territory.
- The teleported units must fight until one unit type remains to occupy the territory, as you may NOT retreat back through the teleportal or to an adjacent territory even if friendly units occupy it.
- To use a teleportal, you must have a commander (King, Wizard or DragonLord) in the territory you are teleporting from. The commander does not need to teleport with the units moving through the teleportal. The commander only needs to occupy the point of origin, in order for the units to pass through the teleportal.
- Commanders do not need mana to teleport units through a teleportal.
DragonLords / Wizards with Teleport Spell
- DragonLords and Wizards with the Teleport spell may teleport once during the naval movement phase and once again during the transfer phase. Since a commander may only teleport once during the naval movement phase, if it teleports to an enemy naval blockade, it may not take part in any land combat for the duration of your turn.
- Wizards may teleport 5 units and DragonLords may teleport 10 units. The units to be teleported must originate from the same territory as the commander.
- The Teleport spell allows commanders to teleport units to ANY zone, including an enemy occupied zone during the naval movement phase. Beware DragonLords: A bearer of a dark crystal (treasure) may be waiting to send you back to Valhalla!
- If the commander successfully conquers the enemy occupied territory, it may continue to attack adjacent enemy occupied territories as per combat movement restrictions.
- It costs a player 1 mana each time his Wizard casts a Teleport spell.
- Newly acquired DragonLords from a successful quest must teleport to a friendly TERRITORY during the transfer phase.
- DragonLords must occupy a friendly territory at the end of the phasing player's turn.
Retreating
- ATTACKING land forces may retreat to one adjacent territory after the defending land forces have finished their melee attack and removed casualties. If the attacking units moved into the enemy occupied territory from more than one territory, they may only retreat back to one adjacent friendly territory.
- Defending units may never retreat. EXCEPTION: See Retreating with Teleport spell.
- Units that teleported (with a Teleport spell or a teleportal territory) to an enemy occupied territory or naval blockade may NOT retreat and must combat until one unit type remains to occupy the territory.
Strategy - If your objective were to attack an enemy occupied Kingdom with a DragonLord, it would be wise to conquer an adjacent territory to the Kingdom first. Then you can retreat back to the territory adjacent to the Kingdom, if the battle for the Kingdom goes poorly. These units can then be teleported to safety during the transfer phase of your turn.
Naval Retreating
- Attacking or defending naval blockades may NOT retreat from naval combat.
- You may retreat from a battle in a coastal territory with a harbor back to your ship if it is docked in the harbor. These units and ship would then become a naval blockade occupying the sea zone.
Retreating with the Teleport Spell
Contrary to the rules regarding retreating, if a commander with the Teleport spell is under attack during another player's turn, it may use the Teleport spell to retreat to a friendly territory during the defender missile attack step of the combat sequence. The retreating commander may NOT cast any inflict damage spells, attack or teleport any other units.
Elf Sneak Attack
Only Elves may use this form of attack. During the combat phase, the Elf player may move units into an enemy occupied territory that is within the Elf player's realm. Each unit rolls a d6 die. Each unit must roll equal or less than its TAS to score a hit. The opposing player must remove a unit for each hit point suffered and may NOT counter-attack. The Elf player must retreat back to an adjacent friendly territory if any enemy units remain. In order for the Elf units to sneak attack, the following conditions must be met:
- The enemy unit(s) must be within the realm of an Elf Kingdom.
- The attacking Elf unit(s) must originate from a territory adjacent to the enemy occupied territory to be sneak attacked at the start of the Elf player's turn.
- The attacking Elf unit(s) must NOT have engaged in any combat or movement, prior to the sneak attack.
- An enemy occupied territory may only be sneak attacked once per turn.
- The Elf player may never sneak attack with more than 5 units.
- Elf units may move into an enemy occupied territory from more than one adjacent friendly territory to sneak attack.
- Elf units may NOT leave a territory unoccupied to sneak attack.
Wizard's Spells
- All spells that a Wizard has may be used repeatedly. The Wizard does NOT lose the spell that it casts.
- A Wizard's spell must be cast in the same zone as the Wizard.
- A player may have up to 3 Wizards. A quest card that directs a player to gain a Wizard is ignored if the player already has 3 Wizards.
- All Wizard spells require mana to cast. Reduce your mana scale the appropriate amount before casting the spell. (See Reference Card)
How to Gain a Wizard or a Spell
There are a various ways of gaining spells for your Wizard, but the process is the same for each.
- If you do NOT have a Wizard in your quest party, place a 'Wizard 2' or 'Wizard 3' counter under a unit. Note: Ignore this step if you have a Wizard in your quest party.
- Roll 1d6 die to determine what spell you gain. You may re-roll the die if your Wizard has knowledge of the spell already. If your Wizard has 6 spells, you may create a new Wizard.
- Place a peg in the corresponding numbered hole in the same row as the Wizard that has gained the spell.
How to Gain Mana
Anytime a player gains or spends mana, the player must adjust the mana scale on his reference card.
- Gain 1 mana by successfully conquering one or more enemy occupied territories during the combat phase. However, you may only gain 1 mana per turn by territory conquest.
- A player gains 1 mana each time the quest party visits the shrine.
- You may also gain or lose mana during adventures in the quest cards. The quest card determines the mana gained or lost.
- You may NOT claim another player's mana as a result of defeat in combat.
- At no time may a player have less than 0 mana or more than 5 mana.
How to Spend Mana
- It cost 1 mana for a Wizard to cast a spell, unless otherwise noted. (See Reference card)
- Mana may be spent to increase or decrease the movement allowance in the Wastelands. (See Quest Party Movement Allowance) Each mana a player spends may increase or decrease the movement allowance by one space.
- Mana may be spent at the Oracle to gain a spell for a Wizard in your quest party or you may use it to create a Wizard. (See How to Gain a Wizard or a Spell)
- 3 mana may be spent to gain a scroll card.
About Scroll Cards
- You may redeem 3 mana for a scroll card at the end of your turn during the place reinforcements phase.
- If you gain a scroll card, draw a scroll card and keep it face down.
- A scroll card may only be used once and then it is returned to the bottom of the scroll card deck.
- A scroll card may only be cast on your turn or IF any of your units are being attacked during another player's turn. You may use a scroll card against the player attacking you. You may NOT cast a scroll card against a player that is not involved with the conflict.
- Scroll cards may be cast anywhere, however, scroll cards with the missile or melee attack symbol must be cast on enemy units in a combat zone. (See Spell and Scroll Card Symbols)
- A player does NOT have to reveal the location of his King to cast a scroll card.
- There is no restriction to the number of scroll cards a player may have in his possession.
- If you successfully defeat another player's King, you gain all of the defeated player's scroll cards.
Wizard's Spells and Scroll Card Symbols
Some Wizard's spells and scroll cards have symbols in the description. Each symbol represents the type of spell, various restrictions or the cost in mana the spell takes to cast. The printed symbols are described as follows:
- Inflict damage symbol: this symbol indicates that this spell is an inflict damage spell.
- Missile attack symbol: this spell is a missile attack spell that may only be cast on enemy units in the combat zone.
- Phasing player symbol: the phasing player may NOT use this spell. In other words, a player may only cast this spell during another player's turn.
- Melee attack symbol: this spell is a melee attack spell and it may only be used on enemy units in the combat zone.
- Naval movement symbol: this spell may only be cast during the naval movement phase.
- Heal symbol: this spell may be cured by a Heal spell during the remove melee attack casualties step in a combat zone OR nullified by a Wizard with a heal spell if cast outside of a combat zone.
- Mana cost symbol: the player must reduce his mana scale on his reference card the amount dictated on this symbol to cast this spell.
Player Elimination
- If a player loses his King, he is considered vanquished. He may continue to play, but all the scroll cards that he possessed go to the victor. A player may not win the game without a King, but may play to extract revenge.
- If a player decides to leave the game, return the player's quest party, companion cards, prophecy cards and scroll cards to the game inventory. All of his units on territories or sea zones remain on the gameboard and are considered vanquished. Vanquished units must be defeated to gain control of any territories or sea zones they occupy.
Overthrown Kingdom
If a player loses their Kingdom, and has no income as a result, he or she may gain 3 units and place them on ANY friendly territory during the place reinforcements phase of his or her turn. Any gold acquired during the quest activity phase may also be converted to units during the place reinforcements phase.
Re-Instating a King
If the victory conditions set at the start of the game was Kingdom acquisition; you may re-instate a King by acquiring your civilization's prince or princess with your quest party. Fangluk is the Orc prince, Lady Aurvandila is the Elf princess, Odenin is the Dwarf prince and Prince Agnar is the Barbarian prince. Remove the card from the game and place a King gold counter under a unit in a Kingdom you occupy. You must occupy a Kingdom to re-instate a King.
Two Player Game
Each player may take two unit types. Play continues as if there were four players. The two unit types are considered allies but each territory may only be occupied by one unit type.
- OR -
Consider the gold territories, the 2 realms and the Kingdoms on the right side of the board as being tundra that is uninhabitable. You now have 4 realms to conquer. Each player chooses a Kingdom at the start and places 5 units in it. Place 5 white chips or 5 units from each of the unused civilizations and place these in the 2 unclaimed Kingdoms. The first player to conquer 3 Kingdoms wins the game.
Optional Rules of Play
Each of these rules can be added separately or together, as the players see fit.
DragonLord Power Reduction
Reduce the amount of units that a DragonLord may teleport to just 5 units. The DragonLord may NOT teleport directly to a Kingdom.
DragonLord Power Increase
Allow the DragonLord to teleport unlimited quantities of units.
Unlimited DragonLords
Allow players to have more than 1 DragonLord.
Wizard Power Increase
Allow Wizards to cast an inflict damage spell or Heal spell at no cost in mana during the first round of combat.
Reduced Combat Movement
With this rule option, it would increase the realism of the battles. It would reduce the time between turns for each player, but it would increase the time necessary to finish the game. The phasing player must declare all attacks at the start of the combat phase by moving his units into the enemy zones before any battles are resolved. In other words, all units under your command may only be used once per turn to attack an adjacent enemy territory.
Bid for Initiative
To determine which player starts first in the game, each player must hold a bid in gold concealed in their hand. The player with the highest bid gets to go first. All bids are returned to the 'banker'. The player to the left of the highest bidder goes second and play continues clockwise.
A Quest in Vigrond
(Flavour narrative omitted. The rules for quests in the Wastelands follow in the Quest Activity Phase section.)
Quest Activity Phase
The goal of your quest party is to obtain a DragonOrb so that you can charm a dragon to gain a DragonLord. To gain a DragonOrb, you may redeem 3 mana for a DragonOrb at the Witch Den or gain a DragonOrb through valor with the quest card adventures.
The Quest Party
- The quest party may consist of up to 6 units. If at any time during the quest activity phase, you have more than 6 units in your quest party, you must remove the extra units and place them on your Kingdom during the place reinforcements phase of your turn.
- Each civilization may only have 1 quest party in the Wastelands at any time. If your quest party is lost or captured, you may form another quest party the following turn.
- You may only move your quest party once during the quest activity phase.
- Along with the 6 units, you may also have up to 3 companions as members of your quest party. If at any time during the quest activity phase, you have more than 3 companions, you may choose which companions to keep and return the extra companion cards to the companion card deck.
The Wastelands
There are seven different places that are referred to as Wasteland spaces. (For a brief description of each Wasteland space, refer to your reference card) Here is a list of the actions you take, if your quest party lands on one of the following Wasteland spaces:
Village
Villages in Vigrond are gathering places where adventurers gain supplies and rest. Taverns located in the village are good places to meet strangers who may help you on your quest.
- Draw a companion card.
- May purchase a pickaxe or torch for 1 gold.
- You may purchase a unit(s) at regular cost.
Witch Den
Witches pay no allegiance to any civilization and practice the arts of the Wicca. Gatherers of herbs and roots, they make potions and trinkets that may be used to aid adventurers. The Witch Den is a good place to purchase Potion, Elixir, and a Talisman. You may also trade mana for a DragonOrb.
- May purchase 1 potion for 1 gold.
- May purchase 1 elixir and/or 1 talisman for 3 gold.
- May trade 3 mana for 1 DragonOrb.
Shrine
Shrines are sanctuaries respected by all civilizations, so no combat may take place on these grounds. Monks that dwell there pay homage to the gods alone and spend their time preparing scrolls. When you visit the shrine, you pay respect to the gods and gain their favor.
- Gain 1 mana.
- Gain a scroll card if your quest party has a talisman.
Oracle
Prophets gather at these alters and help adventurers with messages from the gods concerning their quests. If you are in favor of the gods, they will also enlighten you with magic.
- Draw a prophecy card.
- May trade 1 mana for 1 spell. (See How to Gain a Spell)
Teleportal
The teleportal in the Wastelands may be used to enter or exit the Wastelands provided that you have a commander at the point of origin. To enter the Wastelands with a teleportal, the units to be used as a quest party must occupy a teleportal territory at the start of the quest activity phase. Simply follow the quest activity movement instructions but start from the teleportal in the Wastelands.
Dragon Lair
The Dragon Lair is a good place to gain a treasure. If your quest party has a DragonOrb, you may attempt to charm the dragon that resides there to gain a DragonLord.
When a quest party enters the Dragon Lair, a red dragon will attack! The red dragon is printed as 6 Attack / 12 Defense, 2HP, using Dragonfire.
- The dragon will use Dragonfire to score 1 hit point of damage during the attacker missile attack step and will use its 6 Attack strength during the attacker melee attack step of the combat sequence.
- If your quest party possesses a DragonOrb, you may attempt to charm the dragon during the defender missile attack step of the combat sequence. (See How to Charm a Dragon)
- If you manage to score 2 hit points of damage to the dragon, it will disappear. If you have any units remaining, your quest party gains a treasure. (See How to Gain a Treasure)
Draw Quest Card
When your quest party lands on the draw quest card space, the player to your right draws a quest card and reads the introduction. The phasing player must then consult the gods and roll the crystal die to determine if the gods have blessed, ignored or cursed the quest party. The player reading the card must then continue to read the appropriate column and combat on behalf of the monsters.
Preparing Your First Quest Party
When you set out on your first quest:
- State how many units you intend to send in your quest party. (6 units maximum)
- The units to be formed into a quest party must come from a territory adjacent to a village in the Wastelands or units dropped off at the village harbor during the naval movement phase.
- Replace each unit in the quest party with a white chip, except for one. This unit will be used to identify your quest party in the Wastelands.
- Your first quest party starts with 2 tools. Place the pickaxe and torch counter you start with, along with the white chips into a stack and place the miniature on top.
- Roll 1d4 die to determine your quest party movement allowance. You start from the path before the village space or the sea zone if landed by ship.
Quest Party Movement Allowance
Roll 1d4 die to determine your movement allowance. You must move your quest party the full amount of spaces dictated by the roll of the die in any direction, with the following exceptions:
- You may voluntarily stop short on a village.
- You may stop short on a space occupied by an enemy quest party and attack.
- You may increase or decrease your movement allowance at the cost of 1 mana per space.
The printed example reads: Dwarf player rolls a 1d4 die to determine quest movement allowance. He rolls a 3 and moves three spaces to land on the Witch Den.
Quest Party Movement Restrictions
- You must move your quest party at least 1 space. You may NOT guard a space.
- While moving your quest party, you must continue in the same direction. You may NOT move a quest party back and forth between 2 spaces.
- The Shrines are the only Wasteland spaces where 2 opposing quest parties may occupy the same space with no combat.
- A quest party may pass over a space occupied by an enemy quest party, but if you land on the same space, you must attack.
Companion Cards
Companion cards are strangers your quest party may meet. The companions you meet may have various powers to aid or hinder your quest party. Be careful some companions may betray you at the worst possible moment.
- A player draws a companion card each time his quest party visits the village.
- Place the companion card face up beside your reference card to reveal the companion to the other players.
- Companions move and combat with your quest party and may be used to absorb losses during quest activity. A companion may be removed from game play to absorb 1 hit point of damage.
- If all units in your quest party are lost, any companion cards in your possession are removed from game play and are NOT returned to the bottom of the companion card deck. The victor in quest combat may NOT claim any companion cards of the opposing player.
- If your quest party visits the village and there are no companion cards remaining, you do not gain a companion card.
- You may have up to 3 companions in your quest party. If at any time you gain 1 or more companion cards, which results in your quest party exceeding the 3 companion card limit, you must return one or more cards to the companion card deck to return the number of cards in your possession to 3.
- Prince Agnar (Barbarian); Prince Fangluk (Orc); Lady Aurvandila (Elf); Prince Odenin (Dwarf) are nobility and will flee with the quest party of their civilization, if the opposing quest parties occupy the same Wasteland space. Note: They will grant safe passage (no combat), if asked, to the quest party they depart from.
Prophecy Cards
Prophecy cards are messages from the gods to aid your quest party with clues to help you on your quest and hinder enemy quest parties.
- A player draws a prophecy card each time his quest party visits the Oracle.
- Prophecy cards are kept face down and may be played during a player's quest activity phase.
- Prophecy cards depicting a companion may be played at any time during another player's quest activity phase, if the prophecy card affects a companion in his quest party. If the prophecy card results in a companion betraying his or her quest party, the companion card is returned to the bottom of the companion card deck. Strategy: If you a have a prophecy that will result in a companion betraying his or her quest party, play it when the quest party is the most vulnerable.
- A prophecy card may only be used ONCE and then it is returned to the bottom of the prophecy card deck.
- You may NOT claim another player's prophecy cards as a result of victory in combat.
Treasures
Treasures are artifacts that have special powers that affect the strength of your armies or fleets.
How to Gain a Treasure
If a player gains a treasure, he draws a treasure card and places it face down in front of him. The treasure card describes the power of the treasure. Obtain the corresponding treasure counter (gold counter) from the game inventory and place the gold counter face down under a unit in the quest party or place it under any unit in your Kingdom. The treasure is now assigned to that unit. A player may NOT transfer a gold counter or a treasure from a unit to another unit, even if it is in the same territory. The treasure is assigned to a single unit and may be moved along with the unit.
Treasure Cards and Combat
Treasures are very useful in combat. Many of the treasures affect the T.A.S. of units in the combat zone. The unit with the treasure must be in the combat zone to use it in battle.
- A player must reveal the treasure to the other players when he wants to use it.
- If a unit possessing a treasure is lost (while combating enemy units), any friendly unit that remains in the battle may claim it. If no friendly unit remains, the treasure may be claimed by an enemy unit.
- If at any time, a unit with a treasure is lost and no other unit remains in the combat zone to claim it, the treasure counter is returned to the game inventory and the treasure card is returned to the bottom of the deck.
Tools
Tools may NOT be used outside of the Wastelands. All tools may only be used once, except for the pickaxe, torch and talisman, which may be used repeatedly. If a tool is used or lost, it is returned to the game inventory.
Gaining or Purchasing Tools
- Any tools gained or purchased by the quest party remain with the quest party.
- There is a limited supply of tools. A quest party may not receive the tool, if there are no more tools left in the game inventory.
- A quest party may only purchase 1 of each tool available at a Wasteland space.
Stored Tools
- When a unit(s) enters the Wastelands from an adjacent territory to become a quest party, place any tools stored in your Kingdom with the quest party.
- If a quest party occupies the village space adjacent to your realm, it may store or take tools from the Kingdom.
- A Wizard with a Teleport spell may teleport to and from a Wasteland space with tool(s) in his possession.
- If your quest party moves out of the Wastelands, store their tools in your Kingdom, so the tools may be used again.
Tools and Quest Combat
All tools in the possession of both quest parties go to the victors at the conclusion of quest combat. If no other quest party is in the same Wasteland space to claim a tool(s) of a lost quest party, it is returned to the game inventory.
Various Tools
- Pickaxe: You may need it to dig for treasure. For example, you will only be able to make your claim in the mine (Quest card) if you have a pickaxe. Pickaxe may be purchased in the Village space for 1 gold.
- Torch: You may need it to light up your quest. Some quests require that you have a torch to enter, such as the cave. If your quest party does not have a torch, the quest card is discarded. The torch may be purchased in the Village space for 1 gold.
- Talisman: The talisman is a symbol of your allegiance to the gods. If a quest party that lands on the Shrine space possesses a Talisman, the player gains a Scroll card. A talisman may be purchased at the Witch den for 3 gold.
The torch, pickaxe and talisman are re-usable. You do not have to return these tools to the game inventory if they have been used. Potion, Elixir, and the DragonOrb are returned to the game inventory once they have been used.
- Potion: It may be used to heal all poisoned units in the quest party during the remove melee attack casualties step of the combat sequence. Potion may also be used to nullify spells or scroll cards that depict the heal symbol. Potion may be purchased in Witch Den for 1 gold.
- Elixir: Allows a unit to become invincible. All hit points the quest party suffers are nullified for one round of combat. Elixir may be used during combat with an enemy quest party in the wastelands. Elixir may be purchased at the Witch Den for 3 gold.
- DragonOrb: May be used to charm a dragon. (See How to Charm a Dragon) You may trade 3 mana for a DragonOrb at the Witch Den. The DragonOrb is only returned to the game inventory, if you successfully charm a dragon to gain a DragonLord.
Quest Cards
Some quest cards have symbols to give a clue to the player of which tools you must or should possess to successfully complete the quest. For example, this quest card recommends that you bring a Wizard along for this quest. The quest card symbols shown on the sample card are labelled "Clue", "Multiple Monster Attack" and "Booty symbol".
The sample quest card is titled with the teleportal in the Wastelands. Its introduction reads: "Energy sizzles in the air about you as you approach a teleportal carved out of stone. Runes are carved in the arch that glow red hot as you approach. Only one wizened in the arts will have the knowledge to unlock the secrets the runes foretell. You must have a Wizard to proceed with this quest."
The sample card's three columns read:
- Blessed: Your Wizard whispers the ancient text carved in the stone of the teleportal. It is the Bifrost Bridge. A rainbow shows your quest party a sacred place where pillars of gold and skies of blue fill your hearts with glee. The gods await you when you have fulfilled your quest. Gain 3 mana or 1 treasure.
- Ignored: Your Wizard has the knowledge to use the teleportal. Do you wish to enter? Roll the crystal die. Blessed – move your quest party to any Wasteland space or territory. Ignored – Draw another quest card. Cursed – Visions of Hell fill the void of the teleportal just before your Wizard pulls you back. Lose 1 mana.
- Cursed: As your Wizard recites incantations, the doorway comes to life. Out of the doorway steps another quest party. It is a band of Orcs gone berserk! (1d8) Orcs Attack! 4 Attack 6 Defense. As you search through their baggage, you find tools and a book of spells. Gain 2 spells, a torch and a pickaxe.
Rules for quest cards:
- Each quest card has three different scenarios. The phasing player must consult the gods and roll the crystal die. You have been blessed by the gods if you roll yellow, ignored if you roll blue and cursed if you roll red.
- The player to the right of the phasing player reads the appropriate column. The player reading the card stops reading the column at the booty symbol.
- If the quest party overcomes the obstacle such as a monster, he gains any booty below this symbol.
- At the conclusion of the quest, the quest card is returned to the bottom of the quest card deck.
Rescuing a Captured Quest Party
If a quest party has been captured, set the quest party aside with the companion cards. Return Lord Mortizen companion card to the bottom of the companion card deck, if he was a member of your quest party. You must dispatch another quest party and try to obtain a prophecy card that allows you to rescue the lost quest party or by capturing and obtaining the Lord Mortizen companion card. If you are successful, the extra units above quest party size restrictions, are returned to your kingdom and extra companions are returned to the bottom of the companion card deck.
Quest Combat
The player reading the quest card will roll and act on behalf of the monsters that are attacking the questing player. If more than a single monster is attacking, Roll the appropriate multi-sided die to determine the quantity of monsters attacking. Some monsters may require more than 1 hit point to defeat it. You may use white chips to represent the multiple monsters or multiple hit points during the battle.
Combat Sequence (Quest Combat)
The monster assumes the role of the attacker and the quest party assumes the role of the defender.
Step 1) Determine Total Attack Strength
- The phasing player determines TAS of his quest party.
Step 2) Defender Missile Attack (Quest party)
- The quest party may use a Wizard to cast a spell or companions with missile attack ability.
Step 3) Attacker Missile Attack (Monster)
- If the monster has spells or a special ability such as Dragonfire, it must use them during the monster missile attack phase.
Step 4) Remove Missile Attack Casualties
- Each player removes a unit or white chip from play for each hit point suffered.
Step 5) Attacker Melee Attack (Monster)
- Each monster attacking must roll less or equal to its Attack number using a d6 die. The monsters use a d6 die because that is the defense number of Elves, Orcs, Dwarves and Barbarians. Note: Some monsters such as a rat only poison when it hits the quest party. (See Poisoned Units)
Step 6) Defender Melee Attack (Quest party)
- Roll a die for each member of the quest party (not including those units or companions that used a missile attack.) using the same type of dice as the defense number of the monster. For example, a dragon has a defense number of 12, so a Barbarian attacking a dragon would have to roll 4 or less on a d12 to hit the dragon.
Step 7) Remove Melee Attack Casualties
- Remove 1 unit, 1 monster or 1 hit point for each hit point suffered.
- Potion or a Wizard with a Heal spell may be used to heal ALL units that have been poisoned.
- Repeat the combat sequence until all monsters or the quest party is lost.
If the quest party is successful in defeating a monster, it may claim any booty the monster may have been protecting.
Poisoned Units
Some monsters only poison units if they successfully hit or roll less than its attack number. These units may be healed ...here's how.
- If a unit is poisoned, it may NOT roll during the melee attack phase.
- A poisoned unit(s) may be healed during the remove melee attack casualties step. The poisoned unit(s) is removed, if the quest party has no potion or a Wizard with a Heal spell.
- A Wizard that has been poisoned will be unable to cast a spell.
- If the quest party has potion, it may be spent to heal ALL units in the quest party and is returned to the game inventory.
How to Charm a Dragon
If your quest party has a DragonOrb, you may attempt to charm any dragon you encounter. Here's how:
- Declare to the other players that you have a DragonOrb and you intend to charm the dragon.
- Roll the crystal die during the defender missile attack step of the combat sequence. Replace a unit with a DragonLord if you roll yellow (blessed) and return the DragonOrb to the game inventory.
- If you roll blue or red (ignored or cursed), the dragon will attack during the attacker melee attack step. The dragon will NOT use Dragon fire for fear of destroying the DragonOrb.
- You may block or nullify the dragon's melee attack by rolling equal to or less than your TAS during the defender melee attack step. If unsuccessful, you lose 1 unit.
- If any units survive, you may repeat the sequence. You may continue in your attempts to charm the dragon until you have no units left.
DragonLords are not permitted in the Wastelands, so a newly acquired DragonLord must leave the wastelands during the transfer phase and teleport to a friendly territory.
Combat between Quest Parties
- Combat between quest parties may only take place if you occupy the SAME Wasteland space, with the exception of the shrine. You may NOT combat an enemy quest party occupying an adjacent space.
- Combat continues until only a single quest party remains to occupy the space. Retreating is NOT permitted.
- Your quest activity phase ends after the battle and you may NOT encounter the Wasteland space, even if you were victorious.
Retreating during Quest Combat
- Quest parties may NOT retreat from combat.
- A quest party attacking an adjacent enemy occupied territory from the Wastelands may NOT retreat and must combat until a single unit type remains to occupy the territory.
To Exit the Wastelands
If the quest activity movement allowance takes your quest party to the village, you may exit the Wastelands.
- Place the units on the adjacent territory.
- Combat will take place during the combat phase, if enemy forces occupy the territory.
- Any companion cards your quest party has must be returned to the companion card deck.
- You may keep your prophecy cards for future quests.
To Teleport from the Wastelands
- A commander (DragonLord or Wizard with a Teleport spell) may teleport your quest party to a friendly territory during the transfer phase of your turn.
- To exit the Wastelands using the teleportal, your quest party must have a Wizard present. You may move the quest party to a teleportal territory or a friendly Kingdom during the combat phase of your turn. These units may then move and attack during the combat phase.
Exiting or Entering the Wastelands with a Ship
- You may use the village harbor to drop-off units to be used as a quest party to enter the Wastelands.
- If you start your turn with your quest party in the village, you may move your ship to the harbor during the naval movement phase, pick up the quest party and transport them elsewhere.
- If your quest party moved to the village during your quest activity phase and you have a naval blockade in the sea zone adjacent to the village, you may transfer your quest party on to the ship during the transfer phase of your turn.
Wizard's Spell Book
All spells cost a player 1 mana to cast, unless noted otherwise.
Inflict Damage Spells
A Wizard may only cast the following Inflict damage spells in a combat zone.
Fireball: This missile attack spell allows the Wizard to hurl a fireball and score 1 hit point of damage to the enemy in the combat zone. The Fireball spell may NOT be used during naval combat for fear of setting your own fleet on fire. Fireballs have no effect on dragons that use dragon fire.
Lightning Bolt: This missile attack spell allows the Wizard to hurl a lightning bolt and score 1 hit point of damage to the enemy in the combat zone. The Lightning bolt spell may NOT be used during naval combat for fear of setting your own fleet on fire.
Cone of Cold: This missile attack spell allows the Wizard to blast a cone of cold and score 1 hit point of damage to the enemy in the combat zone. This spell has no effect on an enemy that also uses a Cone of cold spell.
Arrows of Skadi: This missile attack spell allows the Wizard to score 1 hit point of damage to the enemy in the combat zone.
Poison: This missile attack spell allows the Wizard to poison an enemy unit in the combat zone. An enemy unit is immobilized immediately and may not roll during the melee attack phase. A Heal spell may be used during the remove melee attack casualties phase of the combat sequence to revive the unit. If the unit cannot be healed it is removed from play. The Poison spell has no effect on monsters that attack with poison or monsters that require more than 1 hit point to defeat it.
Jotunheim (Cost 2 mana to cast): This missile attack spell allows the Wizard to poison enemy units in an adjacent territory. The player must roll 1d4 to determine the number of hit points scored. A Heal spell may be used to nullify this attack. If the units cannot be healed, they are removed from play.
Wrath of Aegir (Cost 2 mana to cast): This missile attack spell allows the Wizard to attack enemy units in a combat zone located in a sea zone or a coastal territory. The player must roll 1d4 to determine the number of hit points scored.
Scorn of Freyja (Cost 2 mana to cast): This missile attack spell allows the Wizard to initiate an earthquake in a combat zone located in a territory with mountains. The player must roll 1d4 to determine the number of hit points scored.
Fjorgyn Awaken (Cost 2 mana to cast): This missile attack spell allows the Wizard to awaken forests and attack enemy units in a combat zone located in a territory with forests. The player must roll 1d4 to determine the number of hit points scored.
Whirlwind Attack (Cost 2 mana to cast): This inflict damage spell allows the Wizard to roll 3 dice once during the MELEE attack phase. The defense number of the enemy determines the type of dice rolled. For each roll less than or equal to the TAS of the Wizard causes 1 hit point of damage.
Other Spells
Utgard Brood (Cost 3 mana to cast spell): Place 2 units in a friendly Kingdom or the same zone as the Wizard casting the spell. May be used at any time during the phasing player's turn or if the Wizard is being attacked on another player's turn.
Hreidmar Forge (Cost 4 mana to cast spell): The Wizard must cast this spell during the naval movement phase. Draw a treasure card and place the appropriate treasure counter in a friendly Kingdom during the place reinforcements phase. Vor Clarity: May be used to see another player's scroll cards. For each mana spent the opposing player must reveal a different scroll card in his hand. A Wizard in a quest party may cast this spell to move to any Wasteland space rather than using the roll for quest movement allowance.
Teleport Spell: This spell allows the Wizard and up to 5 units to move to ANY zone during the naval movement phase. The Teleport spell may also be used to teleport once again during the transfer phase. (See TELEPORTATION)
Alchemist: Place 2 gold in the Kingdom during the collect income phase for each mana spent.
Haste: A Wizard with this spell at the point of origin allows a player to march through 3 adjacent friendly territories with up to 5 units and attack an adjacent enemy occupied territory.
Heal Spell: This spell allows the Wizard to heal all units in the combat zone of poison and other ailments. The Heal spell does NOT resurrect units lost during melee combat, it only heals units of ailments. The Heal spell protects friendly units and nullifies the effects of scroll cards that have the heal symbol.
Scroll Card Library
Berserk: This inflict damage scroll must be cast during the missile attack step in a combat zone. The inflicted player must roll a 1d6 die for each unit (10 units maximum). The inflicted player removes a unit with each roll that is less than or equal to the unit's attack number (not the T.A.S.). A Heal spell may be used to nullify this scroll card.
Black Death: This inflict damage scroll may only be cast on an adjacent enemy occupied territory. Roll a 1d4 die to determine the number of hit points scored. A Heal spell may be used to nullify this scroll card.
Breath of Aegir: Allows a defending player to destroy an enemy ship moving into his naval blockade or attempting to drop off units in his coastal territory. This inflict damage spell must be cast during the naval movement phase of another player's turn. An enemy ship is destroyed along with all units aboard.
Dispel Magic: The dispel magic scroll card may be used to nullify and protect friendly units from the effects of an inflict damage spell or scroll. It may also be used to protect your quest party from magical monsters such as zombies, skeletons, sirens, will-o-wisps, mummies, and elementals.
Einherjar: Place up to 5 units on the same zone as friendly units. This scroll card may be used in a combat zone but it may NOT be used on a zone only occupied by enemy units. This spell may NOT be used to violate 8 units maximum per ship on a naval blockade or 6 units maximum in a quest party.
Eyes of Vor: This scroll card allows a player to take a look at all the other player's scroll cards.
Infernal / Tempest: These missile attack spells may only be cast in a combat zone. Roll a 1d4 die to determine the number of hit points scored. The Infernal scroll is used to create fireballs and the Tempest scroll is used to create lightning bolts. An infernal spell would have no effect on an army that had a unit with the Nidhogg Shield treasure.
Long Boat: This scroll card may be used to create a ship in a harbor or a naval blockade occupied by friendly units. This scroll may be used to save the units lost to the Kraken or the Breath of Aegir.
Muspelheim: The missile attack spell may be cast to allow a defending player and his army to retreat from a combat zone. The player must retreat his entire army to an adjacent friendly territory leaving the attacking army to occupy the territory. If the attacking player wants to pursue the retreating army and cross the border separating the 2 territories, he must roll a d6 die to determine how many casualties are removed from play. The wall of fire will only endure for the duration of the attacking player's turn.
Nifleheim: The missile attack spell may be cast to allow a defending player to re-deploy up to 10 units in a combat zone to a friendly Kingdom or to an adjacent friendly territory.
Odronir: This scroll card allows a player to create a Wizard or gain a spell for an existing Wizard. Roll 1d6 to determine the spell gained. If the Wizard already knows the spell, the player may re-roll the die until he gains another spell.
Portal Collapse Spell: This scroll card allows the player to close a teleportal. The teleportal may NOT be used by anyone for the duration of the game. Place this card on the teleportal to be closed.
Reflect: The Reflect scroll card may be used to reflect or turn the effects of a missile attack spell cast in the same combat zone. A Reflect spell may be used to reflect an inflict damage spell that was reflected back to your units.
Summon Sirens: This inflict damage spell may only be used against enemy units on coastal territories or naval blockades. Roll a 1d4 to determine the number of hit points scored. Summon sirens may only be used during the naval movement phase. A Heal spell may be used to nullify this scroll.
Summon Kraken: This inflict damage spell may only be cast during the naval movement phase on enemy naval blockades. The enemy ship is destroyed along with all units aboard.
Strategy and Hints
- You should not reveal the location of your King at the beginning of the game, by using it in battle. Keep it safe, with as large an army as you can afford.
- It is vital that you maintain control of at least one Kingdom. You may not collect any income if you do not have a Kingdom.
- Send forth a well-equipped quest party into the Wastelands, with a torch and a pickaxe and as many units as you can afford. The Wastelands are dangerous and chances are grim, but this is where you can get a DragonLord, Wizards, gold, scrolls, spells and treasure.
- Save some gold for your quest party to spend on tools in the Wastelands.
- Try to gain control of as many Kingdoms as you can because you can only reinforce the realms of the Kingdoms you occupy.
- Try to gain control of the gold territories to gain extra income.
- Do not be overly concerned with protecting your borders, as DragonLords, and marauding ships may attack from anywhere.
Frequently Asked Questions
Can you place your units on an island at the beginning? No, you must use your ship to transport the unit to the island gold territory during the naval movement phase.
Can you put a unit on the teleportal territory at the start of the game? Yes, all 3 teleportal territories may be claimed at the start of the game along with the 3 mine territories.
Can I place a unit on the Wastelands during set-up? No, you must move a unit(s) into the Wastelands during the quest activity phase.
Does each player complete all 7 phases in the action sequence before the next player starts his or her turn or do all players complete phase 1 before going to phase 2? A player must complete all 7 phases of the action sequence before the next player's turn.
Can you move units from one edge of the game board to the other? Yes, the territories on the top edge of the gameboard are adjacent to the territories on the bottom edge. The land bridge connects the two territories in the center continent. The sea zones at the top edge are adjacent to the bottom edge. It cost 1 naval movement allowance to move ships from one side of the gameboard to the other.
Can I leave a territory empty? No, you may never voluntarily leave a territory unoccupied. However, vacant territories may result due to mutual losses in battle.
What happens when you have mutual losses resulting in an unoccupied territory? Nothing, that territory may be left unoccupied but you can transfer or force-march a unit to claim the unoccupied territory.
Does the Kingdom have any effect in battle? Yes, the army attacking a Kingdom must reduce its TAS by 1.
Can a unit move more than 1 ship? No, there must be 1 unit per ship to move during the naval movement phase. However, there is no restriction on how many ships a single unit may guard if the ships are docked.
Can a Wizard teleport in the Wastelands? Yes, it may only transfer to a Wasteland space occupied by friendly quest party during the naval movement phase or transfer phase. A Wizard may also teleport itself and 5 units from a Wasteland space to a friendly zone during the transfer phase or to an enemy occupied territory during the naval movement phase.
Can I transfer or force-march a treasure from one unit to the next? No, if you gain a treasure in the Wastelands, you can place it under a unit in the quest party or place it under a unit in the Kingdom. The treasure is now assigned to that unit and may be forced marched during the combat phase or transferred to an adjacent territory during the transfer phase along with the unit that the treasure has been assigned to.
When can I teleport from a teleportal territory? If you have a commander in the teleportal territory, you may move your army through the teleportal to another teleportal territory during the combat phase (if occupied by enemy forces) or the transfer phase (if occupied by friendly forces). Think of the teleportal territories as a gateway or tunnel connecting the continents. The teleportal territories are not to be confused with casting a teleportal spell, which must be used during the naval movement phase or the transfer phase.
When can I use the Teleport spell? A commander may only use the Teleport spell during the naval movement phase or the transfer phase of the attacking player's turn. However, if a commander with the Teleport spell is under attack during another player's turn, it may use the Teleport spell to retreat to a friendly territory during the remove melee attack casualties step of the combat sequence. The retreating commander may not attack or teleport any other units.
Can you move more than one quest party into the Wastelands? No, you may only have 1 quest party at any one time. If it is lost or captured you may form another quest party and re-enter the Wastelands.
What happens to a captured quest party? Set the quest party aside with the companion cards. You must dispatch another quest party and try to obtain a prophecy card that allows you to rescue the lost quest party. If you are successful, the extra units above quest party size restrictions, are returned to your kingdom and extra companions are returned to the bottom of the companion card deck.
Does a unit in the Wastelands count as 1 gold during the collect income phase of your turn? No, you receive 1 gold for each territory you occupy, 3 gold for each gold territory and 5 gold for each Kingdom you occupy.
Where do I have to place the pickaxe and torch? Your first quest party starts with a torch and a pickaxe. Simply place the torch and pickaxe along with the units in a stack and roll the d4 die. You now move the corresponding number of Wasteland spaces with the village space counting as 1.
Can I buy items from the village before I go on a quest? Yes, you must always move to the full extent of the 1d4 roll (See Quest Party Movement Allowance) with two exceptions; you may voluntarily stop short on a village or stop short on an enemy quest party.
Who owns a ship docked at the village harbor? No one owns the ship, if there are no units aboard. You can drop some units off in the harbor, but you should leave at least 1 unit in the ship to bring the ship to safety during naval movement. The units dropped off may then roll for quest activity movement allowance during the quest activity phase and move to the corresponding Wasteland space.
What happens to lost items, do they vanish? Yes, if a monster for example defeats a quest party during a quest, all treasures and tools in the quest party's possession including companion cards are removed and returned to the game inventory.
Glossary
- Adjacent Territory: A territory that shares a border or touches another territory.
- Attack Dice: Dice that are rolled during the melee attack step of the combat sequence.
- Attack Number: A number that represents the combat ability of a unit, companion or monster.
- Bearer: The unit that has been assigned a treasure.
- Booty: The reward for a successful quest, such as gold or treasure.
- Combat Zone: A territory, sea zone or Wasteland space occupied by both friendly and enemy forces.
- Combat Sequence: The seven steps used to combat opposing forces.
- Crystal Die: The clear d6 die that depicts yellow, red and blue dragon skulls. Used to consult the gods to determine if a quest party has been blessed, ignored or cursed.
- Defense Number: The number that represents the ability of a unit, companion, or monster to avoid damage during combat. The defense number is used to determine the type of die to be used by the opponent during combat.
- Friendly Zone: A Wasteland space, sea zone or territory occupied by friendly forces.
- Friendly Territory: A territory occupied by friendly units.
- Friendly Forces: The units of the phasing player.
List of Game Components
1 Game board, 4 Reference cards, 1 set of Barbarian units, Orc units, Elf units, Dwarf units, 4 DragonLords, 8 Ships, 12 Sails, 20 Quest cards, 24 Scroll cards, 18 Prophecy cards, 18 Companion cards, 18 Treasure cards, 7 Multi-sided dice (d4, 3d6, d8, d10, d12), 1 Crystal die, 1 set of Pegs, 1 Tray, Bag of blue, white and red chips, Sheet of gold coins, Sheet of gold and silver counters.
Epic Battle
Breath of Aegir: Destroy invading ship. This defensive scroll may be used in a coastal territory or naval blockade that is under attack by an enemy ship. An enemy ship is destroyed along with all units aboard.
The printed example is a sequence of illustrated steps:
- During the naval movement phase, the Elf player moves his naval blockade to the Dwarf harbor and moves his DragonLord along with 6 units to enemy occupied territory adjacent to the Dwarf kingdom. The Dwarf player plays the 'Breath of Aegir' scroll card and destroys the Elf ship along with all units on board. The Elf player does not have a scroll card to counter the Dwarf player's attack, such as the 'Dispel Magic' or 'Long Boat' scroll cards and removes his units.
- During the combat phase, the Elf player declares that the DragonLord army will now attack the lone Dwarf unit. The Dwarf unit has no defensive missile attack ability, and the DragonLord uses 'Dragon fire' to score a hit on the Dwarf unit. The Dwarf player removes his unit.
- The Dwarf player reveals that the gold counter under a unit is indeed his king, which adds 1 to his TAS, which cancels the DragonLord effect. The Elf player leaves 1 unit behind to hold the newly acquired territory and moves his DragonLord and 5 units into the Kingdom. ELF TAS = 2 (3 Att. - 1 for Kingdom attack). Dwarf TAS = 3 (3 Att. - 1 for DragonLord + 1 for King).
- Step 2: The Dwarf player has no scroll cards or spells. Step 3: Dragon fire scores 1 hit. Step 4: Dwarf player removes 1 unit. (This unit may not roll during the melee attack phase.) Step 5: Elf player rolls 2, 2, 4, 5, 6 and scores 2 hits. Step 6: Dwarf player rolls 2, 3, 3, 6, 6 and scores 3 hits.
- Step 7: The Dwarf player removes 2 units and the Elf player removes 3 units. So ends one round of combat. The Elf player may retreat his 3 units remaining back to the adjacent friendly territory or continue to attack the Dwarf player's king and 2 units.
What would you do?