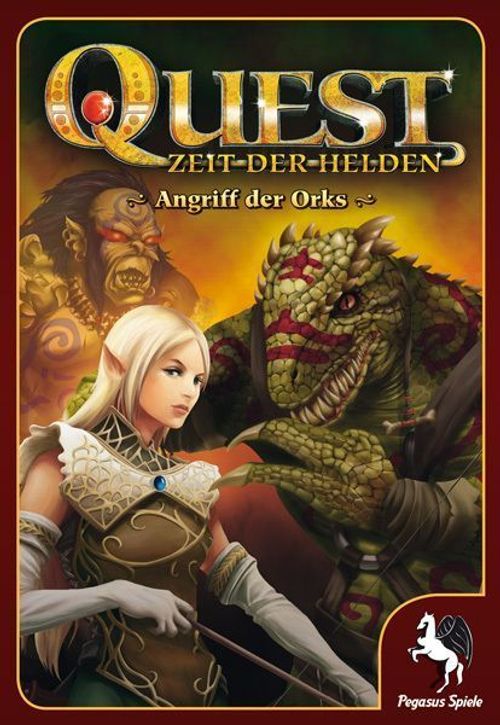
Quest: A Time of Heroes
Quest: A Time of Heroes Rulebook
Table of Contents
Table of Contents
Survey of the Game
How do I read these rules?
If you are playing Quest – A Time of Heroes for the first time, you need not read all the rules at once. You need only read as far until we recommend you play adventure 1. The first adventure has been written specifically to allow learning the rules while playing.
The rest of the rules have been optimized for looking things up. They explain the individual elements of the game by means of example. And should you really be stumped as to the meaning of one particular term, you can easily find the explanation via the index.
You should only take a look at the expert rules (Advanced Rules) once you have played through two or three adventures. And once you have played through all adventures, you can learn how you can create your own adventures.
Game Components
- 1 Rules booklet
- 1 Adventure booklet
- 3 Quest Master sheets
- 4 Hero sheets
- 1 Overland map
- 120 Game cards:
- 20 Equipment cards
- 16 Gift cards (Gift: Combat and Gift: Magic)
- 25 Location cards
- 4 Hero cards
- 4 Innate Gift cards
- 10 Event cards
- 3 Adventure cards
- 8 Dark Gift cards
- 6 Bad guy cards
- 13 Quest item cards
- 11 Ruler cards (this ruler helps you in setting up the terrain elements and the miniatures on the battlefield; the longer side of this card equals 1 length unit)
- 18 Cardboard miniatures: 10 Minions, 4 Arch villains, and 4 Heroes
- 18 Miniature bases
- 2 10-sided dice
- 1 Signaling horn
- 1 non-permanent pen
- 25 coins
- 12 terrain elements: 2x lake/tents, 1x cottage/tree, 3x tree/brazier, 2x tree/rock, 1x barrels/tree, 1x barrels/rock, 1x altar/campfire, 1x prone woman
Preparing to Play
Set up the game like this:
- Unfold the overland map.
- Pile up the coins.
- Sort the cards according to their backs.
- Shuffle the piles "Equipment" and "Events" as well as "Gifts: Combat" and "Gifts: Magic." The remaining card piles are meant for the Quest Master (see 6).
- Have the pen at hand.
- Choose a Quest Master. If you can't agree, just roll a die each. The player with the highest result gets to be the Quest Master. There always has to be a Quest Master.
- The other players choose 1 hero sheet each. If you can't agree, the player to the Quest Master's left chooses first (then go clockwise). 1 to 4 heroes may play.
Keep the space beneath the overland map free. This is where you will later be setting up the battlefield. When doing so, use the ruler cards to accurately place the terrain elements and the miniatures.
Your hero's starting equipment
- The hero sheet.
- Hero Card and Innate Gift, each showing the hero's portrait on the back.
- 1 Gift from his Gift Group.
- The cardboard hero miniature.
- 2 gold.
- Tick the 5 starting values that have been marked in red on your hero sheet.
- The hero with the highest Charisma gets to be the leader and takes the signaling horn.
A hero may only draw Gifts from his own Gift Group. The big symbol on your hero sheet (Combat or Magic) tells you which group this is.
The Quest Master's starting equipment
(as exemplified by the first adventure)
- Quest Master sheet for the first adventure.
- Equipment: "Potion of Refreshment," 3x "Potion of Healing," 2x "Shield," "Veteran's Sword".
- Locations: "Merchant," "Harbor," "Forest Clearing," "Tavern".
- Quest Items: "Ax of the Dwarven King," "Treasure Map".
- Bad Guys: The bad guy card with the portrait of the Orc Warrior, as depicted on the Quest Master sheet.
- Terrain elements: all the trees.
- The Toughness Bonus (p. 27) of the first adventure is 0.
The Quest Master now opens the adventure booklet to the first adventure: "The King's Treasure." Right at the beginning, there is a list with the game components needed. These he takes. He should keep the adventure text as well as the cards hidden from the players.
As Quest Master, you keep the adventure and the cards hidden. The players trust your statements. You are the dark commander and judge at the same time. While your minions will use whatever tricks they can, as judge you will always have to abide by the rules and the guidelines in the adventure text.
Playing the Game
The game always begins with paragraph (1) of any adventure (if this is your first game, you'll be playing Adventure 1: The King's Treasure). The Quest Master reads out the italicized text and also goes through the various tasks mentioned in that paragraph until some action on the part of the players is required. Once the heroes have completed their actions, the Quest Master checks the effects of these actions. These effects determine the next task that will be set to the players. This, in turn, leads to new actions. In this way, tasks and actions alternate with one another until the adventure is over.
The adventure is over as soon as the Quest Master arrives at a paragraph that announces the end of the adventure. The heroes may end an adventure either successfully or unsuccessfully.
Reading an adventure paragraph (as numbered in the example):
- Each adventure has been subdivided into clearly identifiable paragraphs. Each paragraph is introduced by a highlighted paragraph number.
- Text marked with "Read out:" is read aloud by the Quest Master. Everything else is tasks for the Quest Master which is not read out.
- Your Rank (p. 17) in your first game is "Dungeon Master." You draw 1 event.
- This task means that the Quest Master places the locations "Harbor" and "Forest Clearing" onto the overland map. The heroes place their character miniatures onto the "Harbor".
- This task means that the heroes' leader (p. 15) receives the Quest Item "Treasure Map".
- This task means that the Quest Master places the locations "Tavern" and "Merchant" next to the overland map.
- This task means that the heroes have to choose from among several options. The cards on the table show what these options are.
- The heroes' actions now determine the reference. It tells the Quest Master which new paragraph is going to continue the adventure. Simply move to the paragraph introduced by the corresponding paragraph number.
- In the sidebar, Quest symbols summarize the tasks described in the paragraphs in the main text. This means that you get to see what happens at one glance. There is a complete list of all Quest symbols on the last page of the adventure booklet.
Now you can get right down to playing! Advice boxes in the first adventure will explain the rules to you as you go along. If there is only 1 hero to play in the adventure, this hero had better take a "Potion of Healing" from the equipment pile (see "Lone Heroes," p. 28).
Heroes
Most players in this game are going to play heroes trying to stem the tide of evil. By braving dangers and succeeding in adventures, heroes will grow more experienced and more powerful, allowing them to stand up to ever greater danger.
Ever so often, heroes will have to perform actions. Depending on the effects of such an action, the Quest Master sets the next task in the course of the adventure.
These actions are available:
- Change attributes (see Hero Sheet, p. 11)
- Draw Gift (see Gifts, p. 18)
- Refresh / Exhaust Gift (see Gifts, p. 18)
- Buy items (see Equipment, Quest Items, and Gold, p. 16)
- Find items (see Equipment, Quest Items, and Gold, p. 16)
- Choose option (see Options, p. 15)
- Roll checks (see Checks, p. 19)
- Enter combat (see Combat, p. 21)
In addition, heroes may at any time:
- Use Gifts (see Gifts, p. 18)
- Sell items (see Equipment, Quest Items, and Gold, p. 17)
- Swap items (see Equipment, Quest Items, and Gold, p. 17)
- Use items (see Equipment, Quest Items, and Gold, p. 17)
Serious Injury
If your hero is down to 1 Vitality Point and then takes additional damage (and is not immediately saved by a Potion of Healing or a Healing spell), his Vitality Points do not fall any lower. Instead, he takes a serious injury.
Now you have to:
- Lower 1 attribute by 1 permanently
- Discard 1 equipment item that says "discard after use" (if present)
- Exhaust all your Gifts, but you still take part in the game fully, unless you are in the middle of combat (see Combat, p. 21). In this case, you need to wait until the end of combat – and hope that your companions will win this fight even without your help!
An attribute may never fall below its starting value – or increase beyond the maximum value as indicated by its bar. Your Vitality Points may never be higher than your Strength +1 (see the Vitality Points box right next to your Strength value).
Heroic Death
Sometimes, adventures end tragically since all the heroes succumb to their injuries: They have died heroic deaths. Just like at the beginning of the game, you now choose new heroes. However, the "new guys" follow in the footsteps of the "old guard": Each hero receives all the Quest Items his predecessor had at the beginning of his last adventure. The game then begins anew with that very adventure.
Gold
Heroes may use gold to buy new equipment during adventures in situations where this is possible. However, there are also other situations where gold might come in handy. Whenever a hero spends gold, he needs to put the appropriate amount of coins back onto the gold pile. Equipment is described on p. 16 in more detail.
Your Innate Gift
This card shows your hero's Innate Gift – a special ability unique to him. Gifts are described in more detail on p. 18.
Your Hero Card
This card shows the hero's combat values and also tells you which weapon he is using, and how much damage this weapon does. Colored bars to the side of the card show movement range [green] and maximum ranged combat distance [blue]. A hero without a ranged combat bar cannot use ranged attacks at the beginning of the game. P. 22 has more information on how to use your hero card in combat.
Advanced rules when playing with 1 or 4 heroes: Lone Heroes (p. 28), Powerful Hero Groups (p. 28).
Your Hero Sheet
- Name and Class.
- Portrait.
- Symbol of your Gift Group (Combat or Magic; see Gifts, p. 18).
- Your hero has 4 attributes: Charisma, Talent, Deftness, Strength.
- Equipment and Quest items (see p. 16) provide you with bonuses on your Deftness rolls in combat (see p. 24). You may fill in your modified Deftness values here, for Melee Combat, Ranged Combat, and Armor.
- Your Hero's Vitality Points.
Starting cards: Hero Card, Innate Gift, additional Gift card.
Example: Alondis takes 1 damage. If she still has 3 Vitality Points, she lowers that value to 2. If she only has 1 Vitality Point left, she takes a serious injury.
The Quest Master
The Quest Master leads the heroes through an adventure and tests their abilities. He does not play any heroes, but instead guides their enemies: bloodthirsty Orcs and their dark captains. The Quest Master has to fulfill these tasks:
- Place locations on the map and remove them again (see Setting Out/Removing Locations, p. 14)
- Tick off markers (see Ticking Off Markers, p. 14)
- Resolve queries (see Resolving Queries, p. 14)
- Draw events (see Events, p. 17)
In addition, the Quest Master may play an event at any time (p. 17).
The Quest Master Sheet
Each adventure has its own Quest Master sheet. It shows the respective markers as well as the game statistics of the bad guys.
- Title of the adventure.
- Cover picture of the adventure.
- Marker section (see Ticking Off Markers, p. 14, and Resolving Queries, p. 14).
- Toughness Bonus (see Toughness Bonus, p. 27).
- Bad guys have 4 attributes, too: Charisma, Talent, Deftness, Strength.
- Minions have 1 Vitality Point. They are vanquished once they take 1 damage.
- Arch villains have more Vitality Points. Just how many they have depends on the number of heroes. If an arch villain loses Vitality Points, they are ticked off from right to left.
Example: With 4 heroes, Garthelm starts play with 8 Vitality Points. After taking 3 damage, he is left with 5.
- Arch villains also have Gifts they may use, just like heroes can (see Gifts, p. 18). The number of heroes determines how many Gifts an arch villain has. The small number below each Gift determines the minimum number of heroes in play to receive it. Sometimes the villain receives no Gift but an extra refresh (depicted as "1x extra") which allows him to refresh a single Gift once, freely (tick the box off afterward). Note: a roll of 9 still allows the refreshing of a Gift.
Example: With 4 heroes, Garthelm has the Dark Gifts "Riposte" and "Cloud of Blades" and may also refresh them 2x out of sequence. With 3 heroes, he could only refresh 1x out of sequence. With 2 heroes, he only has the 2 Gifts, and with 1 hero only the "Riposte" Gift.
Bad Guy Cards and Dark Gifts
Just like heroes have a Hero Card, the bad guys have Bad Guy Cards (see Combat, p. 22). Some bad guys even have their own Dark Gifts (see Gifts, p. 18).
Locations
Locations are placed onto the overland map, and are removed during the course of the game. Some options open to the heroes depend on whether a certain location is in play (see Options, p. 15).
Quest Items
Quest Items are special things the heroes may find in an adventure. The adventure tells you when to hand out a Quest Item (see Equipment, Quest Items, and Gold, p. 16).
Events
Events stand for unpleasant surprises for the heroes. Most of them are usable in combat. The adventure tells you when to draw Events (see Events, p. 17).
Event cards shown as examples:
- REINFORCEMENTS: May only be played at the beginning of the Quest Master's turn in combat. Immediately distribute up to (number of heroes) minion characters freely over the minion starting zones.
- PRAYER TO THE DARK GODS: May only be played at the beginning of the Quest Master's turn in combat. Until the beginning of the Quest Master's next turn, the heroes may not use any Gifts.
- BLESSING OF THE DARK GODS: May be played at any time during combat. Choose one arch villain and refresh all his Gifts. If there is no arch villain in play, discard this card and draw again.
Dark Gift cards shown as examples (Garthelm the Knight):
- RIPOSTE: May only be played if user has taken damage from a melee attack. He may make an immediate melee attack against his opponent.
- CLOUD OF BLADES: User may make a ranged attack against all character miniatures within range.
Adventures
The adventures in Quest – A Time of Heroes are like some kind of movie script with read-aloud text and tasks for the Quest Master. They all begin with a list of game components needed for that particular adventure.
Each adventure begins at paragraph 1. During the course of the adventure, you will be going from paragraph to paragraph. However, paragraph 1 does not automatically lead to paragraph 2. Instead, the decisions and actions of the players (and on occasion, random luck) determine which paragraph will be used to continue the adventure. References to the next paragraph have been clearly marked ("Go to (X)").
There are two game elements in Quest that are important for the progression from one paragraph to the next: locations and markers.
Setting Out / Removing Locations
Some locations are placed onto the overland map, some are put next to it. If the heroes decide to visit a location on the overland map – such as the "Forest Clearing" – put the cardboard characters onto that card.
Should you be asked to remove a card that isn't in play at all, just ignore this request.
Ticking Off Markers
Tick off the respective marker on the Quest Master sheet for the adventure.
Later paragraphs will require you to check whether a location has been placed, or whether a marker has been ticked off: Thus, the heroes may learn about the effects of their decisions quite a few paragraphs after the actual action has taken place.
Resolve Queries
You will always be able to answer a query with "yes" or "no". Depending on the answer, the adventure continues at "Yes" or "No".
Example: "Query: Has marker 9 been ticked off? Yes: Go to (44). No: Go to (48)."
Some queries work like an insertion. If "yes," you do the task listed under "yes," but then go on with "In both cases." If "no," you directly jump to "In both cases."
Example: "Query: Are there 8 coins on the pool? Yes: Tick off marker 5. In both cases, continue the fight."
Most queries require you to look up whether a certain marker has been ticked off, or whether a location is in play. In some cases, however, you will need to check several markers at once or ask the players something, waiting for their answer before you can go on.
Options
This is where the heroes decide how they want the adventure to continue. All options are listed in a table. However, only some options may be available once specified conditions have been fulfilled.
Example table:
| Option | Conditions |
|---|---|
| Shop at the merchant's (2) | "Merchant" in play |
| Visit the tavern (3) | "Tavern" in play |
| Follow the treasure map (12) | "Forest Clearing" in play |
Whenever you reach an option table, only read to the players those options the conditions of which have been fulfilled (usually, the appropriate location needs to be in play).
When using the signaling horn, the leader may choose an option by single decision (see Signaling Horn and Leader, below).
Example (from another adventure): If marker 2 has been ticked off, the "Wise Woman" location will come into play. After this, the heroes get to choose from the options. Should there be no option left, draw 1 Event.
Checks
To conduct a Check, roll 1 or 2 of the 10-sided dice. There are 2 types of Checks: Tests and Conflicts. The success (or failure) of a Check determines the further progression of the adventure.
Combat and Combat Maps
Once combat is joined, you and the heroes act in order. Part of each combat is a combat map that shows you what the battlefield is supposed to look like. Place the terrain elements and characters on the table as indicated in the illustration (see Combat, p. 21). The success (or failure) of the heroes in combat determines the further progression of the adventure.
Scripted Pause
In longer adventures, we have marked one or two paragraphs as "Scripted Pause." These are good points for a break in play until the next time the players meet. Make notes of your values and cards – just like you would do with Epic Heroes (see p. 27). Also write down the adventure name and the number of the pause paragraph, and you're all set to continue play in another playtime.
Signaling Horn and Leader
The hero with the signaling horn is the leader of the company. He may use the signaling horn to make a decision on a task all on his own (for instance, if the other players can't agree on what to do):
- Distribute equipment/Quest Items/gold (see Equipment, Quest Items, and Gold, p. 16)
- Choose options (see Options, p. 15)
- Choose participants in Checks (see Checks, p. 19)
After this one decision, he passes the signaling horn to the hero on his left.
Example: The heroes have found a treasure chest containing 5 gold and are now arguing how to distribute the coins. Kr'Zzzt uses the signaling horn and decides: 3 gold for him, 1 gold each for his companions. Then he passes the horn on to Alondis.
Equipment, Quest Items, and Gold
Equipment and Quest Items grant advantages to heroes, such as bonuses on die rolls. Such items may either be found or bought during the game. Unless text on a particular card says otherwise, heroes may use equipment or Quest Items at any time. Some pieces of equipment (such as Potions of Healing) may only be used once and have to be discarded after use (see the text on the card in question).
Finding Items
Found equipment, Quest Items, and gold may be distributed among the heroes in any manner desired. By using the signaling horn, the leader may decide on the distribution of found stuff all on his own (see Signaling Horn and Leader, p. 15).
Should a found item be no longer obtainable, the heroes instead find its monetary value in coins.
Buying Items
The game offers you the chance of buying equipment and, sometimes, even Quest Items. To buy one of the cards offered, you discard a number of coins equal to the gold value of the item.
If your hero has a high Charisma value, he will get a discount!
Equipment Cards can never cost less than 1 gold.
Example: The Veteran's Sword costs 3 gold. The Potion of Healing costs 1 gold. Karomin has to pay the full price. Cessair pays 1 gold less, i.e., she gets the Veteran's Sword for 2 gold. She still has to pay 1 gold for the Potion of Healing, though – the merchant doesn't make presents!
Equipment Limit
The number of Equipment Cards a hero may carry cannot exceed the number listed next to his Strength value. Surplus equipment must be done away with immediately, by using either of these actions: Use Items, Swap Items, or Sell Items.
Quest Items do not count against the equipment limit!
Example: With a Strength of 4, Karomin may carry three Equipment Cards. Increasing his Strength to 5 would increase this number to four! He may also carry as many Quest Items as he likes.
Using Items
You may use your hero's equipment and Quest Items at any time. State clearly which item you are using, and follow the instructions on the card. Most items may be used as long as you have them in your possession. Some, however, can be used only once (for instance, Potions of Healing) and need to be discarded after use.
Example: Some items have their own bars or their own damage values. Use the information on these cards instead of the data on your Hero Card in such circumstances.
Some items have been marked as "Weapons." You may not use more than one weapon with a single die roll.
The position of the damage symbol tells you if the damage is dealt by either melee (left, next to movement bar) or ranged attacks (right, next to range bar).
Using up one-shot items does not count as selling them.
Advanced rules for equipment: Shopping Between Adventures (p. 28).
Swapping Items
You may give another hero one of your pieces of equipment, your Quest Items, or some of your gold at any time. The only exception is when you are in combat (see page 21).
Selling Items
You may sell your hero's equipment or Quest Items at any time: Discard the card you want to sell and take the item's worth in money reduced by 2 (but you will always get 1 gold).
Example: If Kr'Zzzt were to sell the Chain Shirt, he would get 2 gold for it. The Potion of Healing is worth 1 gold.
Example cards:
- VETERAN'S SWORD: Weapon. +1 to any melee attack.
- POTION OF HEALING: Any one hero may regain 3 Vitality Points, even if he is currently taking damage. In combat, may only be used on the user or heroes touched by the user. Discard after use.
- CHAIN SHIRT: +1 to any melee attack. +2 to any Armor Roll.
- CROSSBOW: Weapon. +1 to any ranged attack.
- AX OF THE DWARVEN KING (Quest Item): Weapon. +1 to any melee attack. If user is a Dwarf: Causes 2 damage if opponent rolls 0.
- SPEAR OF THUNDERSTORMS (Quest Item): Weapon. +1 to any melee attack. If user is a Shaman: Causes 2 damage if opponent rolls 0.
- BOOTS OF STRIDING: User may use the movement bar of this card when moving, instead of the bar on his combat card.
Events
At the beginning of each adventure, the Quest Master draws a number of Events equal to his Rank. Whenever you have played 5 adventures as Quest Master, your Rank goes up by 1 and you may draw more cards before play begins. Thus you should make a note of all the adventures you have run so far.
| Quest Master Rank | Adventures Played | Event Cards |
|---|---|---|
| Dungeon Master | 0-4 | 1 |
| Black Knight | 5-9 | 2 |
| Dark Captain | 10+ | 3 |
Drawing / Discarding Events
Draw as many Events, or discard as many Events, as indicated by the text. Draw one card at a time. If the draw pile is exhausted, ignore all requests to draw cards. Follow the same procedures when discarding. Unused Events are discarded at the end of the adventure.
Playing Events
You may play an Event at any time by putting the Event card onto the table, face-up, and following the instructions on the card. The Event is then discarded.
Advanced rules for Event Cards: Powerful Hero Groups (p. 28).
Gifts
Gifts enable the heroes to perform supernatural and superhuman deeds – the stuff of legends!
Drawing / Discarding Gifts
- Each hero may only draw and use Gifts from his Gift Group.
- Each hero has an Innate Gift from the beginning of play onwards. It can never be discarded.
- In addition to his Innate Gift, a hero may not have more Gifts than indicated by the number next to his Talent value. Should he pass this limit, he needs to discard one Gift of his choice.
Example: Karomin only draws Combat Gifts. He is the "Chosen of the Gods" from the very beginning (and gets the card). Talent 2 means he may hold 2 more Combat Gifts. If he draws a fourth Gift, he will need to discard one – but not his Innate Gift.
Refreshing / Exhausting Gifts
Once a Gift has been exhausted, the card is turned face-down. Once a Gift is refreshed, the card is turned face-up again.
If a hero or an arch villain ever rolls a 9 during the game, he may immediately refresh 1 Gift.
Using Gifts
You may use your hero's Gifts at any time. State clearly which Gift you are using, follow the instructions on the card, and then exhaust the Gift.
Example: Magistra Cessair uses the "Healing" Gift. She may now heal her companions for a total of 5 Vitality Points. She has herself regain 2 Vitality Points and gives 3 to Alondis. Then she exhausts the Gift, i.e., she turns it face-down.
Gifts that modify a die roll may be used even after the die has been cast. If several players want to use Gifts at the same time, the Leader begins and play then proceeds in a clockwise direction.
A Gift with the exclamation point symbol may be used during combat only in the owning player's turn (see Combat, p. 21). Outside of combat, it may be played at any time.
Advanced rules for Gifts: Creative Use of Gifts (p. 28).
Example Gift cards:
- CHOSEN OF THE GODS (Innate Gift): User wins his Check automatically.
- HEALING (Gift: Magic): One or more than one hero(es) regain(s) up to a total of 5 Vitality Points, even if they are currently taking damage.
- WIND RIDER (Innate Gift): User may make 1 melee attack, 2 ranged attacks, and (despite the ranged attacks) take 1 move in any order.
- CHARGE (Gift: Combat): User may take up to 3 moves and then make a melee attack with +3.
- FIREBALL (Gift: Magic): Area attack. Each character in the area of effect takes 1 damage.
Checks
You resolve Checks by rolling 1 or 2 of the 10-sided dice. There are two types of Checks: Tests and Conflicts. In a Test, either the hero or the Quest Master rolls 1 die. In a Conflict, hero and Quest Master each roll 1 die, comparing results.
Tests
Determine who is taking part in the Test: Gifts and combat rules tell you who this is. For tests in the adventure booklet either 1 hero rolls, or all of them do. If only 1 hero rolls for the Test, the Leader may determine which hero this is going to be by making use of the signaling horn (see Signaling Horn and Leader, p. 15).
All who are taking part in the Test now roll. Any die showing 0 indicates automatic failure. Any die showing 9 indicates automatic success.
Example: Alondis (Deftness 4) can only fail in a Deftness Test against 3 if she rolls 0. On the other hand, Karomin (Deftness 3) can only succeed in a Deftness Test against 13 if he rolls 9.
If the Test hasn't failed or succeeded automatically, the participants now add their respective attribute. If the final results equals or exceeds the target number of the Test, the participant succeeds. If it is lower, he has failed.
Example: Alondis and Karomin each roll a Deftness Test against 11. Alondis rolls 7, adds her Deftness of 4, and hits the target number of 11 spot on. Made it! Karomin also rolls 7, but adding his Deftness of 3 only results in 10 – he fails his Test. If he has Equipment or Gifts that can modify his roll, now's the time to use them!
Should you have Equipment that can give you a bonus to your tested attribute, now's the time to use it (see Using Items, p. 17). You may also use Gifts (see Using Gifts, p. 18).
Tests in the adventure book branch depending on the success of the heroes. If the heroes succeed, the Quest Master follows the green "Success"-keyword, if the heroes fail, he follows the red "Failure"-keyword.
Conflicts
Determine who is taking part in the Conflict: Gifts and combat rules tell you who this is. For conflicts in the adventure booklet either 1 hero rolls, or all of them do. If only 1 hero rolls for the Conflict, the Leader may determine which hero this is going to be by making use of the signaling horn (see Signaling Horn and Leader, p. 15).
Now determine the antagonist. If no specific antagonist has been named, the Quest Master rolls.
Now, the participants taking part in the Conflict roll at the same time. If either the initiator or the antagonist rolls a 9 he succeeds automatically. If either one rolls a 0 it is an automatic failure. If both sides roll 0 or 9, always decide in favor of the heroes.
Example: Alondis has to face a Strength Conflict against 8. She rolls 1, but the Quest Master rolls 0. She succeeds. Even a 0 on her part would not have changed that since in case of a draw the decision would have been in her favor.
If the Conflict hasn't failed or succeeded automatically, the participants now add their respective attribute. Whoever's final result is higher succeeds. In case of a draw, decide in favor of the hero.
Example: Karomin has to face a Strength Conflict against a Conflict value of 5. He rolls 2; adding his Strength of 4, he gets a total of 6. The Quest Master rolls 3, which, after adding the Conflict value of 5, results in 8. This means Karomin would have lost. However, he exhausts his "Chosen of the Gods" Gift that allows him to automatically succeed in a Check. Thus, he succeeds in the Strength Conflict after all.
Should you have Equipment that can give you a bonus to your tested attribute, now's the time to use it (see Using Equipment, p. 17). You may also use Gifts (see Using Gifts, p. 18).
Conflicts in the adventure book branch depending on the success of the heroes. If the heroes succeed, the Quest Master follows the green "Success"-keyword, if the heroes fail, he follows the red "Failure"-keyword.
Advanced rules for Checks: Creative Use of Gifts (p. 28), Uncertain Checks (p. 29).
Combat
Setting Up the Battlefield
- Place the terrain elements as shown in the illustration.
- The ruler shows you how large the battlefield is (in sideward card borders). You may use the ruler cards to help you set up.
- Place the bad guy character miniatures into their starting zone and take the corresponding Bad Guy Cards. If there are several starting zones, each of them – if possible – should hold at least one character.
- Remove the hero characters from their current location card and put them into the hero starting zone. Once combat is finished, they are returned to the location they came from.
One player goes first in combat. This is either the leader or the Quest Master. Once the heroes have fulfilled the victory conditions, combat ends and play continues with the entry for "Victory." Should the heroes lose, play continues with the entry for "Defeat." Tell the heroes these conditions.
Some combats show an exclamation point symbol on the battlefield map. This means that special rules apply to this combat. You should read these rules carefully before you start the fight. Always read the entire combat description before you start the battle.
The Combat Sequence
During combat, each hero (beginning with the leader and then going around the table) takes 1 combat turn. After this, it's the Quest Master's turn to move all his characters. Then it's the heroes' turn again, starting with the leader. Sometimes it is the Quest Master who goes first in combat. The adventure text always tells you who goes first.
Example: As leader, Karomin goes first and moves as far as he can. Cessair moves next, while Alondis remains stationary. Neither hero can take any combat action. Now it's the Quest Master's turn. First, he plays the "Reinforcements" Event and places another 3 Orcs into the starting zone. Then he moves all his Orcs, one after the other. The first 3 forego their combat actions. Only the last of them actually gets to the Dwarf and then uses his combat action to attack.
Players and Quest Master may do these things during their combat turns:
- take 1 move and
- take 1 combat action
Movement may take place before or after the combat action. A player may forego his combat action and/or his move. When making a ranged attack, the character has to forego his move.
- One end of the movement bar must touch some part of the edge of the miniature's base. Adjust the end of the bar to the center. That miniature may then move to any point along the length of the movement bar, but not past the other end of the bar: the character's miniature must be touching some point of the movement bar at the end of its move.
- Your character may not move through terrain elements or enemy characters. Friendly characters do not hinder movement.
- Some cards allow you to take multiple moves by using them more than once. Such a card's movement bar tells you how often you may use it.
- Once it's the Quest Master's turn, he takes one turn each for all his characters. For each character, he uses the appropriate Bad Guy Card.
Cards and Game Statistics in Play
All of the heroes' combat values can be read off their Hero Cards and Hero Sheets. The Quest Master uses the Bad Guy Cards and the Quest Master Sheets instead. Minions are the multitude of faceless lackeys at the Quest Master's disposal. Arch villains, on the other hand, are his most important characters – "dark heroes," you might say. They have more than 1 Vitality Point, are able to use their own Dark Gifts, and refresh their Gifts on rolling 9 (see Refreshing Gifts, p. 18).
Combat Actions
During your turn, you may choose to perform 1 of these actions:
- Melee attack
- Ranged attack
- Use Gift
- Swap items
Combat Action: Melee Attack
You are the attacker. Choose 1 enemy character that is touching your character. This is your antagonist. Your attack creates a Deftness Conflict. As the attacker, you are taking part in the check and your opponent is your antagonist (see Conflicts, p. 19). The two rolls constitute the melee attack.
If you possess items that grant you bonuses to melee attacks, now is the time to use them (see Using Items, p. 17). You might also want to use Gifts (see Using Gifts, p. 18). Your antagonist may also make use of bonuses to melee attacks, and of Gifts.
The damage as shown on the Hero Card or the Bad Guy Card informs you how many Vitality Points the defeated party loses.
The defeated party in any combat loses Vitality Points (see Your Hero Sheet, p. 11, or The Quest Master Sheet, p. 12). This means that you may get wounded in your own melee attack!
A character miniature that has only 1 Vitality Point left and is forced to take even more damage is considered vanquished and is removed from the battlefield. Heroes are considered seriously injured (see Serious Injury, p. 10).
You may only use 1 weapon per roll of the die. If you do so, use the damage shown on the Weapon Card, not the one on the Hero or Bad Guy Card.
Example: The Orc is the attacker and Karomin is the antagonist. Karomin rolls 3, adds his Deftness of 3 and the +1 of his Veteran's Sword for a total of 7. The Orc rolls 7 and adds his Deftness of 4 for a total of 11. The Orc wins the Deftness Conflict, although Karomin gets to use his Veteran's Sword. Karomin loses 1 Vitality Point, as shown on the Bad Guy Card "Orc Warrior."
Example: During his turn, Karomin chooses a melee attack as his combat action. He rolls 7, adds his Deftness of 3 and the +1 of his Veteran's Sword for a total of 11; the Orc rolls 7 and adds 4 for 11. In case of a draw the hero wins: Karomin hits and causes 1 damage with his Veteran's Sword. The Orc, having only 1 Vitality Point, is removed from the battlefield.
Combat Action: Ranged Attack
When you make a ranged attack, you may not move during that turn. You are the attacker. The blue bar represents your ranged attack range. It is used like a ruler to measure distance. Distance is counted from edge of base to edge of base.
You may measure (and thus shoot) across intervening terrain elements – as long as they don't show the cover symbol! Other characters also block the line of sight necessary for a ranged attack. Some cards may be used several times for measuring distance: all of this has to be in one straight line. Choose 1 character within range that you are not touching: this is your target.
A character without a blue bar on the Hero Card or the Bad Guy Card may not make a ranged attack. He needs to employ a weapon to do so.
Your attack creates a Deftness Conflict. As the attacker, you are taking part in the check and your opponent is your antagonist (see Conflicts, p. 19). Your roll is a ranged attack, while the target makes an Armor Roll.
If you possess items that grant you bonuses to ranged attacks, now is the time to use them (see Using Items, p. 17). You might also want to use Gifts (see Using Gifts, p. 18). The same also applies to your target, except that he can make use of bonuses to Armor Rolls instead.
If the attacker wins, the target loses Vitality Points (see Your Hero Sheet, p. 11, or The Quest Master Sheet, p. 12). The damage as shown on the Hero Card or the Bad Guy Card informs you how much damage the attacker inflicts. If the target wins, nothing happens – the attacker has not inflicted any damage. This means that you may not get wounded in your own ranged attack.
If you have a weapon with a ranged attack bar, you may use it instead of the information on your Hero Card or the Bad Guy Card. But take note that you may only use 1 weapon per roll of the die.
Example: Alondis chooses a ranged attack as her combat action and thus has to remain stationary. She picks the only Orc without cover as her target. The dice for both the ranged attack and the Armor Roll come up 11. In case of a draw, the hero wins and thus the Orc takes 1 damage – he is vanquished.
Combat Action: Use Gift
During combat, heroes as well as bad guys may use their Gifts at any time – unless a Gift displays the exclamation point symbol. This means it may only be used as a combat action in the owning player's turn.
Some Gifts are marked as "Area Attacks". This means that you need to place the entire card across the battlefield, making it touch your cardboard miniature. All characters underneath the card are affected by the Gift.
A Gift that has a blue bar may only be used against characters in range (see Combat Action: Ranged Attack, p. 25).
Example: After moving, Cessair chooses Use Gift as her combat action since her Fireball is marked with an exclamation point symbol. She places the Fireball across the battlefield in a way that the card touches her base and covers two Orcs. Each Orc suffers 1 damage and is vanquished.
Combat Action: Swap Items
Outside of combat, heroes may swap items at any time (see Swapping Items, p. 17). During combat, the characters of the heroes involved need to be touching one another and one of the characters needs to use up 1 action for this.
Advanced rules for combat: Charge of the Hordes (p. 28), Uncertain Circumstances (p. 28).
Epic Heroes
Once you have successfully braved one or more adventures with your hero, you may write down his statistics on a piece of paper after play has ended. Take down the values of the 4 attributes, your hero's current Vitality Points, and the cards in his possession. When you sit down to play again, do not take your hero's starting cards but instead the cards you wrote down on that piece of paper and also adjust his attributes accordingly.
If several heroes have written down the name of the same card, they need to decide among themselves who gets to have that card. All disputed cards are placed at the center of the table and each player involved takes 1 of them in sequence. Players who don't get one of the disputed cards get replacements: In case of missing equipment, players get the item's worth in gold. In case of missing Gifts, players redraw from the respective Gift pile.
Toughness Bonus
Epic heroes increase their attributes during the course of their adventures, always in search of bigger challenges. To make the adventures in Quest – A Time of Heroes playable both for new heroes and veterans, we introduce the Toughness Bonus: It adjusts an adventure's difficulty level to the abilities of your heroes.
You should not mix new heroes with epic veterans because the resulting Toughness Bonus would fit neither the new heroes nor the experienced ones. You should either allow the new hero to increase his values as often as the others have done, or you all start with new heroes.
Determine the Toughness Bonus
The Toughness Bonus is determined at the beginning of each adventure. Ask your players by how many points they have increased their attributes in total. Total all the results and then divide by the number of heroes (round down fractions). Based on this final result, the table below tells you how large the Toughness Bonus is, and how many Events the Quest Master gets to draw (in addition to his Rank).
| Average Amount of Improvements | 0-3 | 4-7 | 8-11 | 12-15 | 16-19 | 20-23 | 24-27 | 28-31 | 32 |
|---|---|---|---|---|---|---|---|---|---|
| Toughness Bonus | 0 | 0 | 1 | 1 | 2 | 2 | 3 | 3 | 4 |
| Events | 0 | 1 | 1 | 2 | 2 | 3 | 3 | 4 | 4 |
Example: The Quest Master wants to determine the Toughness Bonus of an adventure with 2 heroes and asks the players for the number of improvements. Karomin has increased his attributes by a total amount of 7, Cessair by an amount of 12. Adding the two numbers, the Quest Master gets 7+12 = 19. This is now divided by the number of heroes, yielding 9.5. The Quest Master rounds down to 9. He notes a Toughness Bonus of 1 and draws 1 additional Event.
If your Quest Master feels up to it, he may also calculate two different Toughness Bonuses and apply them during the game: one for the veterans and one for the new players.
Use the Toughness Bonus
The Toughness Bonus tells the Quest Master which bonus he has to apply to all target numbers and all attributes during Checks.
Example: A Toughness Bonus of 3 means that the target numbers of Tests and Conflicts all go up by 3 points, and that the 4 attributes of all his bad guys are increased by 3, too.
Advanced Rules
This section gives you rules you may use during adventures with experienced players and heroes to make the game even more interesting.
Charge of the Hordes
Before each combat, the Quest Master takes 1 "Reinforcements" Event into his hand and lowers the minions' Deftness values by 1 each. Alternatively, he may take 2 "Reinforcements" Events every time and lower the minions' Deftness values by 2 each. This makes combat more epic, but it will also take longer.
Shopping Between Adventures
The heroes may buy items from the Equipment pile between adventures. This makes the game easier for the heroes.
Lone Heroes
Should there only be one hero, or two, and the adventure may look too difficult for you, then have each hero take 1 "Potion of Healing" Equipment before play starts.
Creative Use of Gifts
In addition to the text printed on the respective card, each Gift has an additional way of using it: By exhausting it, the hero automatically succeeds in one Check fitting the Gift in question. This may even be invoked after rolling the die. The player needs to explain to the Quest Master and his fellow players how his Gift helps him succeed in the task at hand. It is important that the Quest Master and the other players will be able to imagine how the Gift may be used meaningfully within the situation as described by the adventure text. Then it is up to the Quest Master to decide whether the use of the Gift will be plausible as well as entertaining.
Should he reject the use of the Gift, the player may not use his Gift in that way and it is not exhausted, either. If a Gift is used in this way, the effect printed on the card does not come into effect!
Example: Approved creative use of Gifts. A hero needs to roll a Talent Conflict to heal a wounded soldier. The Conflict fails and the player states: "I exhaust my Healing Gift to cure the soldier's wounds." The Quest Master agrees because using this Gift is appropriate for the situation at hand. Since the player is using the Gift to succeed in a Check, he may not distribute 5 Vitality Points among himself and the rest of the group, as printed on the card.
Example: Rejected creative use of Gifts. A hero needs to succeed in a Deftness Test to catch up with a fleeing thief in the market. The player states: "I use my Bladestorm Gift to whirl up a lot of knives from one of the stalls and throw them after him!" The Quest Master rejects this idea because the Gift is intended to be used against more than one opponent in melee combat. He also rejects the use of the Fireball Gift: This would only kill the thief, but not capture him.
This advanced rule requires the Quest Master to not act as the players' opponent, but as a judge. Should playing with this rule lead to too many discussions during game play, simply dispense with it!
Powerful Hero Groups
If there are three or four heroes and the adventure may look too easy to you, you may want to have the Quest Master draw 1 additional Event per hero.
Uncertain Circumstances
This rule increases the difficulty level of fights. Once the heroes have entered combat, the Quest Master does not mention the conditions for victory and defeat and only reveals them as soon as one of these conditions have been achieved and combat is thus over.
Uncertain Checks
This rule increases the difficulty of Checks. Whenever the heroes need to roll a Check during their turn, the Quest Master does not reveal the necessary attribute until the heroes have decided who among them is going to attempt the task. This means that the heroes will have to judge solely from the adventure text which of them might be best for the task at hand.
Creating Your Own Adventures
You have played through the adventures in this box, but your players are yearning for more? You can download additional adventures at www.pegasus.de/quest. Then again, why don't you invent new adventures of your own to have your heroes battle the forces of evil? This is actually a lot less difficult than it may seem at first glance. Follow us along the next few pages, as we are going to give you tips and advice on how to create your own adventures and challenges for your players' bold heroes in next to no time.
Before you go on to designing your own adventures, you should be thoroughly familiar with the rules and game mechanisms of Quest – A Time of Heroes. Then take a piece of paper to jot down your ideas.
Your Adventure Idea
Before you start writing down individual scenes and Checks, you should give some general thoughts to the overall course of your adventure. The more precise your understanding of what you want to happen, the easier it will be for you to make design choices and select game elements later on.
The Villain
At the center of each adventure is always some kind of villain whose plans the heroes will have to foil. Sometimes the heroes will not initially know who they are going to fight, but you as the Quest Master already do. Box 1 provides you with 4 arch villains: the Orc Chieftain, the Orc Shaman, Garthelm, and the Pale King. Choose one of them as your main bad guy and write this information down. Of course, you do not need to call these characters Garthelm or the Pale King – you are free to give them entirely new names.
Example: Our baddie for this adventure is the Orc Shaman.
Goal, Method, and Prevention
You should now think about answers to these 3 questions:
- What does the villain want to achieve?
- By which means does he want to fulfill his plans?
- How will the heroes be able to prevent it?
Do not choose too broad a goal. The heroes should be able to prevent it within the course of a single adventure. Once you are done, try to put the villain, his goal, and his means into a single sentence, and write it down. Then add a second sentence, describing how the heroes may prevent all this. Should you need more than one sentence each, then your idea is probably too complicated for one adventure.
Example: The Orc Shaman wants to steal a warship out of Krokk harbor by putting all the inhabitants of the city into a magical sleep. The heroes need to defeat the Orc Shaman to prevent this.
While you proceed along the next few steps, you may want to rework and refine these two sentences whenever you have a new idea.
The Structure of Your Adventure
An adventure is composed of several scenes. A scene consists of various paragraphs that all take place at the same spot. You should take a look at the Location Cards to plan your adventure. The more scenes an adventure has, the longer it will take to play through it. As a first rule of thumb, plan on each scene taking 10 minutes. This means that a Quest adventure intended for play in one night should have between 6 and 10 scenes.
A thrilling adventure requires the right mixture of challenges, fights, and breaks in the action. For this reason, we have broken down the scenes into several categories. A good adventure contains scenes from every category.
- Intro (*)
- Challenge
- Decision
- Hint
- Rest
- Relief
- Finale (*)
The scenes Intro and Finale have been marked with "(*)" since they only appear once in each adventure. Each adventure begins with the Intro. Then you have the other types of scenes, in any number and order, until the adventure ends in the Finale. You should think about Intro and Finale first – and then you can add the remaining scenes as waypoints between Intro and Finale.
If you are strapped for ideas where to set a scene, just draw a Location Card from the draw pile.
Intro
Choose a location where the players begin the adventure and put the respective Location Card next to your sheet of paper, or maybe already onto the overland map. The first scene of the adventure takes place in this location: this is where the heroes will be drawn into the adventure. Now it's time to determine how this happens, and how this fits your adventure idea. These are some typical examples of an adventure Intro:
- The heroes learn of some threat.
- The heroes learn of some treasure.
- The heroes are given a task.
- The heroes discover something by chance.
Example: A priest from Meadowground asks the heroes to find out what may have happened to a nearby monastery. Its inhabitants used to come to the city on a regular basis, but haven't done so for several weeks now. The priest has already sent one of his novices, but he has not returned either. The idea is that the Orc Shaman has taken over the monastery to use it as a base of operations for his mass sleep spell.
Finale
Choose a location where the Finale is going to take place and put the respective Location Card right next to the starting location. This is where the adventure is going to end – in a big battle with the villain (as to how to set up the battlefield, see Setting Up Battlefields). Determine what happens if the heroes win – and what happens if they lose. Don't forget to figure in some means of survival for the heroes in case they do lose!
Example: The heroes get onto the ship in the very moment the Orcs are casting off. Now they need to fight the Orcs on the narrow deck of the ship. If the heroes win, they return the ship. If they lose, the Orcs throw them over board so that they might swim to shore. The Orcs, however, escape and now have a means of raiding ships bound for Krokk.
Decision
Determine a location where the Decision is to take place. Here, the heroes get to choose between several options. The most simple of all Decisions is the one as to where the heroes should go next. In this way, they determine the next scene of the adventure. However, heroes may need to decide on more than just a change in scenery. Most interesting of all are Decisions that force them to weigh certain things against one another, like whether to help the serving wench or follow the forger in the first adventure. Another example can be seen in the second adventure: Do the heroes spare the Orcs, or don't they?
Each Decision should have some kind of effect in the game. This need not be a world-shaking one, though. Typical effects are:
- The heroes choose between two (or more) scenes.
- The heroes arrive at the same scene – but they may get a reward or a penalty.
Example: After the Intro, the heroes need to choose whether they want to set out for the monastery directly, or whether they want to shop at the merchant's first. In each case, the next scene takes place at the monastery, but if the heroes go shopping first, the Orcs will have more time to advance their plans – meaning that the Quest Master draws 1 Event.
Challenge
Challenges are either Checks or fights. In both case, you should determine how the adventure is going to continue if the heroes win and if they lose.
With each Challenge, make sure that the adventure will go on in a way that still makes sense regardless of whether the heroes win or lose. If this isn't the case, you will need to work on the results of the Challenge a bit more, or replace it with a different scene. A Challenge always ends in one of two ways: in a Check or in combat.
Checks: Checks are rolled against an attribute. Such a roll has one of 3 difficulty levels: Easy, Medium, or Hard. Most Checks in an adventure will be at Medium level. You may use Easy or Hard Checks for especially big rewards/penalties, or as long-term rewards/penalties (see Long-term Effects).
Levels of Difficulty Table
| Difficulty | Easy | Medium | Hard |
|---|---|---|---|
| Test | 6 | 9 | 11 |
| Conflict | 1 | 5 | 8 |
Rewards / Penalties: In many scenes, the heroes are either given rewards or penalties, depending on how things are going for them. These are the possible rewards/penalties:
- Exhaust / refresh a Gift
- Regain / lose Vitality Points
- Find / discard(*) equipment
- Find / lose gold
- Discard / draw an Event
- Find / Discard(*) a Quest Item
- Draw() / discard() a Gift
Rewards/penalties marked with "(*)" are very powerful and should be used sparingly.
Example: The heroes are approaching the monastery. One of them gets to roll a Talent Test to determine whether he notices signs of the Orcs in the monastery. If this roll succeeds, another Challenge follows. If the roll fails, the adventure goes directly into combat mode since the heroes didn't notice the Orcs.
Long-term Effects: To make sure that effects such as rewards or penalties do not enter play directly but at a later time, you can use markers. Tick off a marker at the time the players attain the reward and check the markers (resolve a query) at the time you want to effect to come into play. This works the same way with penalties.
Example: The second Challenge has all heroes roll whether they will be able to silently climb the wall of the monastery to surprise the Orcs. If all succeed, you tick off marker 1. At the beginning of combat, you check whether marker 1 has been ticked off. If it has, then the "Surprise Attack" card is put in play.
Combat: Combat is a special form of Challenge since fights take longer to play through and are more taxing on the heroes' Gifts and Vitality Points. As with Checks, there are Easy, Medium, and Hard fights.
Combat Level Table
| Easy | Medium | Hard | |
|---|---|---|---|
| Combat Value | 3 | 6 | 10 |
Combat value depends on the characters taking part in the fight.
Combat Value of Characters Table
| Character | Value |
|---|---|
| Number of heroes x1 minions | 1 |
| Number of heroes x2 minions | 2 |
| Veteran minions | +1 |
| Arch villain | Number of Vitality Points per hero (usually, 2 or 3) |
| Able to use Gifts | +1 |
A combat value of 12 to 16 is sufficient for one adventure. In most cases, the final battle is a Hard fight, which means there are usually 1 or 2 Easy fights left for the rest of the adventure.
Example: There are still (number of heroes x2) Orc minions in the monastery, serving as guards (2 points). They are led by a Dark Sorcerer (2 Vitality Points per hero, 2 points) who has access to Gifts (+1 point). The resulting combat is worth 5 points – almost a Medium one. If the heroes win, the adventure continues with a Hint. If the heroes lose, the Orcs capture them and the adventure is over. Leave them the option of escaping from their prison, but they will be too late to save the ship.
Hint
Choose a location where the heroes may get some kind of Hint. A Hint is an important piece of information that is indispensable for the adventure. Hints often lead to the unveiling of new locations, allowing the players to decide what they want to do afterwards.
Example: The heroes have won the combat in the monastery and saved the monks imprisoned there. The monks now tell the heroes of the Shaman's plan and the spell he has wrought in the monastery. Then the Quest Master places the Harbor onto the overland map.
Rest
After combat or any other Challenge, the heroes will occasionally need to rest. This means they get some reward.
Example: The monks treat the heroes with healing herbs from the monastery's garden. Each hero regains 1 Vitality Point.
Relief
In longer adventures, you also need to provide for the occasional comic relief. A good example of this is the Conflict in the third adventure where the heroes may lock the mayor up in the cupboard.
The Storyboard
While you are thinking up the individual scenes, you might already start making notes on how to link these scenes. For each scene, draw a box onto the sheet of paper and write some information into it: (1) the scene type; (2) the scene's title; and (3) the location where the scene will take place.
If you already know that you want to use specific game elements, you may write that down, too. If a scene is to follow another one, draw an arrow leading from this scene to the next one. If you want to write down the circumstances needed to advance to a scene, put some keyword next to the arrow.
Example: This is the storyboard for the adventure created with the example scenes. While it may be somewhat short, it does contain all important scene types. You may use it as a guideline for your own adventures – or even try to play it!
- (1) Intro, Monks missing, Meadowground, +Monastery, +Merchant. Option A go to (2). Option B go to (3).
- (2) Rest, shopping, merchant, +Event. Go to (3).
- (3) Challenge, approach monastery, Monastery, Talent (Medium). Success go to (4). Failure go to (5).
- (4) Challenge, sneaking up, Monastery, Talent (Medium). All succeed: Tick off marker 1. In any case go to (5).
- (5) Challenge, fight Orcs, Monastery, check marker 1 for surprise. Defeat go to (6). Victory go to (7).
- (6) The end. Dungeon, Monastery, end without success.
- (7) Hint, Orc plan, Monastery. Go to (8).
- (8) Rest, healing herbs, Monastery, +1 Vitality Point. Go to (9).
- (9) Challenge, hurry to the ship, Harbor, Strength (Medium). Failed: exhaust Gift. In any case go to (10).
- (10) Finale, combat on ship, Harbor, own battlefield with ship. Victory go to (11). Defeat go to (12).
- (11) The end, Orcs vanquished, Harbor, successful ending.
- (12) The end, heroes in water, Harbor, unsuccessful ending.
Playing Your Own Adventures
What you have done so far is all you need to play your adventure as a Quest Master with other players – although you have neither created read-out text nor battlefields yet. This is because you don't need that – not unless you want to give your adventure to another Quest Master to run.
Storytelling
Instead of reading out a text, you can simply tell your players something about the current situation. Try to picture the scene in your mind and then give your players all the information that is important for advancing the action of the game. Use these rules of thumb:
- Always describe a location in some detail when the players see it for the first time (e.g., the monastery when the players approach it for the first time).
- End your narration with a question or a prompt before you hand over to the players (e.g., "Who wants to scout ahead?").
- Your narration is not a reading passage. This hardly matters, though, if you allow your players to ask questions.
If you are not sure whether you will be able to give all the necessary information during the adventure, you may think of three keywords for each scene and put them into the boxes on the storyboard.
Placing / taking away locations
Place locations as soon as the heroes have learned that they may travel there. On the other hand, once players no longer have any need, or are no longer able, to visit a particular location, you will want to take it off the overland map.
Setting Up Battlefields
As long as you aren't using any special combat rules (such as the battle at the fountain in adventure 3), you may determine what the battlefield looks like when placing the terrain elements. We suggest the following scales:
| Combat size | Length |
|---|---|
| Small combat | 3 card lengths |
| Medium combat | 4 card lengths |
| Large combat | 5 card lengths |
You may want to draw your own terrain elements for special combats.
Example: The Quest Master has thought up something special for the final combat: Since there is no terrain element featuring a ship, he improvises and draws the outline of a ship onto a sheet of paper. During combat, the heroes may only move inside the confines of this outline.
A good adventure gives the heroes the feeling that they have managed a difficult task. It can't be too easy because that would take away from the feeling of success: Bah, anybody could have done this! However, the adventure may not become too difficult, either. If the heroes fail, they should understand that this was because of bad luck – not because you have stacked the odds against them so that the obstacles became insurmountable.
Writing Down Your Adventures
If you want other Quest Masters to play through your adventure, you will need to write down a bit more than just the storyboard. You need read-aloud passages as well as sketches of the combat plans. Look to the adventures in the adventure booklet for inspiration here.
You should also have run your adventures at least once yourself. If you have made changes while doing so, you should also incorporate these changes into your descriptions accordingly.
Sending In Adventures
Pegasus and Z-Man Games offers you the chance to make your adventure available for download on the website for Quest – A Time of Heroes. In this way, you may distribute your adventures among other players, and get to play their adventures in return! Send your adventures as PDFs to: [email protected].
Change During Gameplay
When you play your adventure for the first time, you will often notice that you can improve some things. Sometimes, you notice you have put too many opponents into one combat, sometimes the rest you have scheduled will not allow the heroes to regain enough Vitality Points. Since your players don't know the adventure, you may simply make the necessary changes without telling anyone.
Rules Summary
Equipment
- Your hero may not have more items than he has points of Strength.
- Quest Items do not count here.
- You may sell your hero's equipment or Quest Items for their gold value reduced by 2 (but at least 1 gold) at any time.
Gifts
- Your hero may not have more Gifts (not including his Innate Gift) than he has points of Talent.
- In combat, a Gift with an exclamation point symbol may only be used during your turn. Outside of combat, it may be played at any time.
- Whenever a hero rolls a 9 in the game, he may immediately refresh 1 Gift. (The booklet's English text of this line is printed in German in this summary; the rule is the same as on p. 18.)
Signaling Horn
When you possess the signaling horn, you become the leader of the heroes. You may pass the horn to the hero to your left to make a decision on your own (e.g., if the heroes cannot come to a decision):
- how to distribute equipment/Quest Items/gold.
- which option to choose.
- which hero takes part in a Check.
Tests
- In a Test, you roll the die and add one of your attributes to the result.
- If the result is equal to or higher than the Target Number of the Test, you have succeeded. If the result is lower, you have failed.
- A result of 0 on the die indicates an automatic failure.
- A result of 9 on the die indicates an automatic success.
Conflicts
- You roll the die and add your attribute. At the same time, your antagonist rolls and adds his attribute (or the Conflict Value).
- If your result is higher than that of your antagonist, you have succeeded in the Conflict. If it is lower, you have failed.
- In case of a draw, the decision is made in favor of the hero.
- A result of 0 on the die indicates an automatic failure.
- A result of 9 on the die indicates an automatic success.
- Conflicts in the adventure book branch depending on the heroes' result.
The Most Important Die-rolling Rules
- In case of a draw, the decision is made in favor of your hero.
- Whenever a hero rolls 9 during the game, he may immediately refresh 1 Gift.
- A result of 0 on the die indicates an automatic failure in a Check. A result of 9 on the die indicates an automatic success (if you are the participant).
Combat
Each character may take 1 move and 1 combat action during his turn. Combat actions are:
- Melee attack (Deftness Conflict between two touching characters):
- Both rolls form a melee attack.
- The loser of the Conflict takes damage.
- Ranged Attack (remain stationary, Deftness Conflict between attacker and target):
- Attacker's roll is the ranged attack.
- Target number is Armor Roll.
- If target fails roll, it takes damage, otherwise nothing happens (attacker misses).
- Use Gift with exclamation point symbol (other Gifts may be used at any time):
- An Area Attack affects all characters covered by the card. The card needs to touch the user's character.
- Swap Items (characters need to be touching).
Toughness Bonus Table
| Average Amount of Improvements | 0-3 | 4-7 | 8-11 | 12-15 | 16-19 | 20-23 | 24-27 | 28-31 | 32 |
|---|---|---|---|---|---|---|---|---|---|
| Toughness Bonus | 0 | 0 | 1 | 1 | 2 | 2 | 3 | 3 | 4 |
| Events | 0 | 1 | 1 | 2 | 2 | 3 | 3 | 4 | 4 |
Quest Master Rank
| Quest Master Rank | Adventures Played | Event Cards |
|---|---|---|
| Dungeon Master | 0-4 | 1 |
| Black Knight | 5-9 | 2 |
| Dark Captain | 10+ | 3 |