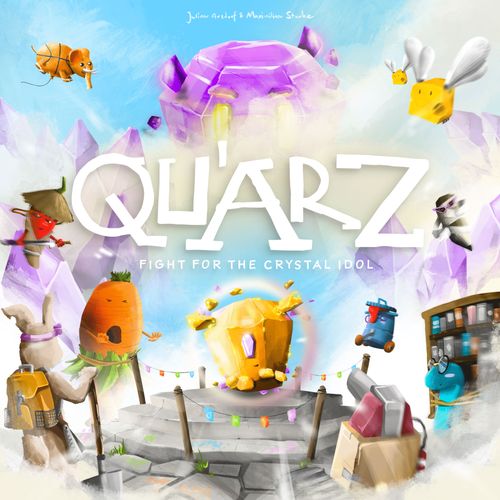
Qu'arz
Qu'arz Rulebook
Table of Contents
Table of Contents
- What Is Qu'arz All About?
- Before the Game Begins
- Game Board
- Setting Up for a Four-Player Game
- Setting Up for a Three-Player Game
- Setting Up for a Two-Player Game
- Core Concepts
- The Time Tracker
- The Game Board
- The Monsters
- Favor Cards
- Game Flow
- Your Turn
- 1) Movement
- 2) Attack (Strike and Shoot)
- 3) Mob March
- 4) Drawing Cards
- 5) Munching a Card
- Special Mechanics
- Activate a Shrine
- Regeneration
- End of Turn
- End of the Game
- Icons and Glossary
What Is Qu'arz All About?
Objective
The goal of the game is to outmaneuver rival mobs using the monsters in your own mob and bring the Crystal Idol from the altar at the center of the board back to your base.
Your Tools
Each monster has actions and unique abilities granted by cards, which you'll need to use strategically to achieve victory.
Paths to Victory
Winning via the Crystal Idol: The first mob to successfully transport the Crystal Idol to their base immediately wins the game.
Winning by Time Limit: If the time marker on the time track runs out before any mob has secured the Crystal Idol, the game ends, and the winner is determined by the highest total Victory Points (VP).
How to Earn Victory Points:
- Activate Shrines: Each activated shrine tile at the edge of the game board scores 1 point per activation.
- Control the Crystal Idol: At the end of the game, a mob earns 2.5 points if one of their monsters is placed on the Crystal Idol.
Components
2 Large Shrine Tiles; 2 Small Shrine Tiles; Altar; Time Tracker; 4 Monster Camps; 4 Impassable Obstacle Hex Tiles; 18 Empty Hex Tiles; 12 Water Hex Tiles; 6 Crystal Wall Hex Tiles; 200 Acrylic Energy Gems; 8 Stun Tokens; Crystal Idol; 16 Monster Tableaus; 16 Monster Miniatures; 4 Shrine Miniatures; Time Snail; 16 Mob Tokens; 4 Shrine Cards; 8 Reaction Tokens; 13 Time Tiles; 20 Favor Cards; 208 Monster Ability Cards; 6 Swap and Special Ability Cards (1 Cake Slice, 1 Running Carrot, 1 Turbo Worm, 1 Sugar Mountain, 2 Portals, 2 Rabbit Holes, 1 Critical Damage Die); 3 Dice (1 Chili Ninja, 1 Lab Rat, 1 Calcu Bot); 3 Poison Tokens (Lab Rat); 3 Rabbit Trap Tokens (Skater Bunny); 3 Mummy Shield Tokens (Mummified Pencil); 2 Shelf Shield Tokens (Bookworm); 6 Frosting Tokens (Cake Monster).
Before the Game Begins
Take turns giving your most inspiring and creative motivational speech to rally your monster mob. The player with the best speech becomes the starting player. Turn order for the remaining players is assigned clockwise.
In reverse turn order (counterclockwise), each player chooses a monster mob. Each monster comes with a miniature, a monster board, and a deck of cards. Some monsters have additional tokens, dice, or miniatures - these are listed in the bottom-right corner of their monster board (details on page XY).
In turn order (clockwise), players select their starting positions on the game board. Place your monster base on the board according to the setup rules outlined in the "Setup" section (page 4, subsection g).
Take the tokens associated with your mob and place them in front of you. The number of tokens each player receives matches the total number of players. (For example: In a four-player game, each player receives 4 tokens.)
Example: The Horror Mob consists of all 4 miniatures, their corresponding monster boards, card decks, and 4 mob tokens.
Selecting Monsters
Each monster mob consists of 4 monsters. Each monster comes with its own miniature, monster board, and deck of cards.
Choose 3 of your 4 monsters.
Place their miniatures on the table and set their corresponding monster boards in front of you (c).
Some monsters also come with special tokens, dice, or additional miniatures. You can find a detailed list of these items in the bottom-right corner of the monster tableaus (more details on page XY).
Example: For the Horror Mob, you might choose the Pencil, Watering Can, and Trash Bin. The mummified Pencil brings along unlimited Stun Tokens and 3 Toilet Paper Tokens.
Preparing Decks
Take the decks for the monsters you selected.
Find the Ultimate Ability Card in each deck (identified by the banner in the top-left corner). Slide this card face down beneath the third feeding slot from the left on the corresponding monster board (see page 7).
Shuffle the remaining cards and place them as a draw pile to the left of each monster board (d).
Example: The Ultimate Ability of the Watering Can is marked by the banner under its energy cost in the top-left corner and the golden border around the ability name in the center of the card.
Distributing Energy
On each monster tableau, you'll see a large yellow circle - this is the Energy Pool for that monster. The energy stored here is used to perform actions.
Place a number of Energy Gems into the circle equal to the number shown below it.
Example: 10 Energy Gems are placed into the Energy Pool (the large yellow circle on the monster board of the mummified Pencil).
Drawing Starting Cards
Draw 2 cards from the draw pile of each of your monsters and add them to your hand.
Additional Materials
Take 2 Reaction Tokens and a set of Initiative Cards (values 4, 3, 2, 1, 0).
Build an Initiative Deck using one card of each value and place it nearby.
Now, prepare the game board.
Game Board
Qu'arz - Fight for the Crystal Idol can be played with 2, 3, or 4 players. Each player count has a specially tailored game board. The board consists of modifiable and non-modifiable hex tiles (referred to as "tiles" below).
Modifiable tiles are marked with a modifiable-tile symbol. These tiles are laid out by players at the start of the game: Use them to create obstacles for your opponents or to open pathways for yourself.
Modifiable tiles can also be affected during gameplay through the power of the shrines. Use shrines to, for example, destroy, rotate, or swap tiles.
All non-modifiable tiles lack the symbol and include:
- The Altar: Place the Crystal Idol on this tile at the start of the game.
- Shrine Tiles: Place a shrine miniature on these tiles.
- Monster Camps: These are where each mob's selected three monsters start.
- 4 Impassable Obstacle Tiles: These tiles are an exception to the general rule - they can be melted during the game (see "Melting Impassable Obstacles" on page 21).
Setting Up for a Four-Player Game
Step 1: Start with Non-Modifiable Game Board Elements
Altar and Crystal Idol: Place the altar in the center of the table and position the Crystal Idol on the tile marked with the altar symbol.
Shrines and Shrine Cards: The number of shrines matches the number of players. For a four-player game, place 4 shrines at the edges of the game board as shown in the diagram. Shuffle the shrine cards and place one randomly next to each shrine. Position shrine miniatures on tiles marked with the corresponding symbol.
Monster Camps: Place each mob's monster base in the corners of the game board.
Impassable Obstacles: Place the 4 tiles with impassable obstacles on the designated spots on the game board.
Step 2: Laying Out Modifiable Tiles
Prepare the Tiles: Shuffle the following modifiable hex tiles:
- 16 empty tiles (no water or crystal walls)
- 5 tiles with crystal walls
- 11 tiles with water
Distribute Tiles: Divide the tiles into stacks so each player gets 8 tiles.
Placing Hex Tiles: Fill the red-marked areas of the game board by taking turns (counterclockwise) placing one tile from your stack.
Rules for Placement:
- Do not look through your stack.
- The player who was last in turn order begins.
- The orientation of the tile is determined by the player placing it.
Step 3: Finalizing Setup
Once the last hex tile has been placed, the game board is ready.
Place your 3 monster miniatures in your monster base without a fixed arrangement.
Place any leftover Energy Stones and Stun Tokens in a shared supply next to the game board.
Setting Up for a Three-Player Game
Shuffle the following hex tiles:
- 4 Crystal Wall tiles
- 6 Water tiles
- 8 Empty tiles
Distributing Hex Tiles: Divide the shuffled tiles evenly among the players.
Take turns placing the tiles counterclockwise on the gray-marked areas of the game board as shown in the diagram.
The player who was last in turn order begins.
Setting Up for a Two-Player Game
Shuffle the following hex tiles:
- 2 Crystal Wall tiles
- 4 Water tiles
- 5 Empty tiles
Distributing Hex Tiles: The player with the Starting Token receives 5 tiles, and the other player receives 6 tiles. Take turns placing the tiles on the gray-marked areas of the game board as shown in the diagram. The player who was last in turn order begins.
(The printed text reads "ake turns" with the first letter cut off.)
Core Concepts
Objective of the Game
1) Victory by Crystal Idol: As soon as a monster mob successfully brings the Crystal Idol to its camp, it immediately wins the game.
2) Victory by Victory Points: If the time on the time tracker runs out before any mob can deliver the Crystal Idol to its camp, the player with the most victory points wins the game.
How to Earn Victory Points
Activating Shrines: Each shrine tile activated along the edge of the game board grants 1 point per activation.
Controlling the Crystal Idol: At the end of the game, a mob earns 2.5 points if one of its monsters is standing on the Crystal Idol.
The Time Tracker
The time available to deliver the Crystal Idol to your camp is limited. This limitation is represented by the time tracker.
The time tracker comes two-sided: one side for a Two- or Three-Player Game, the other for a Four-Player Game.
Preparing the Time Tracker
Place the Time Tracker: Position it next to the game board, matching the number of players.
Place the Time Snail: Place the Time Snail on the starting position of the tracker.
Select Time Tiles: There are three levels of time tiles, marked with snails according to their level 1, 2, and 3 on their backs.
Select and stack tiles face-down based on the desired game length:
- Short Game: 1 Level 3 tile, 2 Level 2 tiles, 1 Level 1 tile.
- Medium Game: 1 Level 3 tile, 3 Level 2 tiles, 1 Level 1 tile.
- Long Game: 1 Level 3 tile, 3 Level 2 tiles, 2 Level 1 tiles.
Stack tiles face-down with Level 1 on the bottom and Level 3 on top.
Flip the stack face-up and place it in the center of the time tracker, revealing the effect of the top tile.
Gameplay on the Time Tracker
Move the Time Snail: At the end of each turn, move the Time Snail forward by one space on the tracker.
Activate and Remove Tiles: When the Time Snail crosses the 12 o'clock position (tip of the red tongue), remove the top time tile.
The effect of a time tile remains active as long as it is visible.
Game End Due to Time: When only one time tile remains, the game ends as soon as the Time Snail crosses the 6 o'clock position.
Recommendations for Initial Games
- Four Players: Play a medium-length game.
- Three Players: Choose a short or medium-length game.
- Two Players: Start with a short game.
- Long Game Recommendation: Only for experienced players familiar with Qu'arz.
Adjust the game length as desired once you gain experience. A complete overview of all time tiles is provided at the end of the rulebook.
Monster Deployment
Arrange your four [words partly hidden by overlaid arrows in the source] on the player turn order track below the time tracker based on the order determined by your motivational speech.
The Game Board
The game board in Qu'arz consists of the following elements: Altar; Monster Camps; Shrines; Open Fields and Obstacles.
The Altar
Located at the center of the game board. At the start of the game, place the Crystal Idol on the Altar.
Monster Camps
Each mob has its own camp, which serves as the starting point for its monsters.
Place the three selected monsters of your mob in the camp at the start of the game.
The camp is the only field where multiple monsters from the same mob can occupy simultaneously.
Moving through your own camp counts as 1 hex field and requires only one movement point.
Monsters from other mobs cannot enter or move through your camp.
The mob that successfully brings the Crystal Idol to its camp wins the game instantly.
Shrines
The number of shrines on the board equals the number of players: 2 shrines for 2 players, 3 shrines for 3 players, 4 shrines for 4 players.
At the start of the game, place one shrine card face-up next to each shrine on the board. These cards describe the power of each shrine.
Shrine hex fields are marked with a special symbol. Movement rules for shrine fields follow the standard movement rules: only one monster may occupy a shrine field at a time.
A monster standing on a shrine field can spend 2 energy to activate the shrine, triggering its unique power.
Each shrine can be activated by your monsters up to 2 times, provided the activating monster has the monster power to activate a shrine a second time (see page 20).
Victory Points for Shrine Activation: Activating a shrine not only triggers its power but also grants 1 victory point per activation.
Place one of your mob tokens on a transparent circle on the shrine card to mark the activation.
Detailed shrine rules can be found in the chapter on shrines on page 20.
Obstacles
Some fields on the game board feature one or more obstacles. There are two types of obstacles:
Simple Obstacles (Water and Crystal Walls): Found along the sides of hex fields. These act as movement barriers between fields. Monsters can overcome these obstacles only through specific card actions or abilities.
Impassable Obstacles: These obstacles fill an entire hex field and cannot be entered or crossed by monsters. They are permanent and cannot be replaced, destroyed, or rotated, except as part of a specific monster power of melting them (see melting Impassable Obstacles on page 21).
When Are Fields Considered Adjacent Fields?
For melee attacks or abilities marked with a symbol, hexes are considered adjacent if they are not separated by any obstacles.
For ranged attacks or abilities marked with a symbol, water is ignored, but crystal walls and monsters block line of sight.
The Monsters
Each monster consists of a miniature, a monster tableau, a deck of cards, and, if applicable, tokens and dice. The specific tokens and dice associated with each monster are listed on its monster tableau.
In the top-left corner of the monster tableau, you can see the symbol indicating which mob the monster belongs to. Next to it, you'll find the name of the monster.
In the top-right corner (1), the tableau specifies whether the monster can perform a melee or ranged attack and how much damage it deals. Next to this, the monster's movement value is displayed, indicating how many hexes it can move when performing a movement action.
Energy Pool
The large yellow circle (2) represents the monster's energy pool. At the start of the game, place as many energy gems here as the number shown below the energy pool. Over the course of the game, abilities and munching effects can add or remove energy stones from a monster's pool.
You can spend these energy gems on your turn to perform actions with the monster. These actions include moving, mob marching, attacking, munching cards, playing abilities from cards, and activating shrines. Each action has specific energy costs.
Energy gems can also be lost if your monster becomes the target of opponent abilities or attacks from other monsters that it cannot fully block.
Spent or lost energy gems are moved to the large black circle for expended energy. But don't worry - monsters can regenerate. "Regeneration" is an action that allows a monster to recover energy, and it doesn't cost any energy itself.
Munching Slots
Each monster tableau has three munching slots (3). As an action, a monster can "munch" on one of its cards, gaining a permanent munching effect in return. The card must already be in your hand to be munched.
A munched card with a permanent munching effect is slid underneath one of the three munching slots on the tableau, with only the "Munching Effect" section visible. Fill munching slots from left to right.
You can replace a munched card in a filled munching slot by munching a new card, removing the old card from the game. Cards with a lock symbol cannot be removed once munched.
Before the game begins, one munching slot (the rightmost, third slot) is already occupied. Each monster starts with a hidden card in this slot representing its ultimate ability.
Once a monster has munched on two additional cards and filled the left and middle munching slots, you can take the ultimate ability card into your hand and treat it as a normal card.
In addition to the munching effects of munched cards, monsters gain passive monster abilities when they fill their second and third munching slots. A summary of these effects can be found at the end of this rulebook.
Monster Decks
Each monster has its own deck of cards, consisting of 10 unique cards specific to that monster and 3 "Push/Swap" cards that are the same in every deck.
These cards represent the monster's abilities and may only be played by the monster they belong to unless the card text states otherwise.
At the start of the game, shuffle the cards for each monster and place them face down to the left of their respective monster tableau (4), forming the monster's draw pile. Draw two cards from each monster's draw pile to form your starting hand.
Cards can be used for two actions:
- Playing the ability described in the card text.
- Munching the card to gain its munching effect.
In the top-left corner, you'll find the energy cost (5) for playing the card's ability. To play the ability, you must immediately pay this cost from the monster's energy pool. Then resolve the ability by following the card text word for word. Place the card face-up next to the monster's draw pile, forming its discard pile.
The discard pile may only be reshuffled into the draw pile by performing the Regeneration action (see page 21).
The top-right corner shows the munching cost (6): the energy cost required to munch the card. Munching a card provides either:
- A one-time munching effect, resolved immediately (the card is then removed from the game).
- A permanent munching effect, which occupies one of the monster's munching slots (7) and provides a continuous bonus.
Munching effects are displayed in the colorful box at the bottom of the card.
Monster Abilities
When a monster fills its second or third munching slot (8), it gains the monster ability shown above that slot on its tableau.
Examples of abilities:
- Simple Bonuses: Increase stats or actions (e.g., +2 damage, +2 energy, draw 1 card).
- Boost: Allows an adjacent monster in your mob to ignore an adjacent crystal wall during movement.
- Piggyback: Allows an adjacent monster in your mob to ignore crystal walls during ranged attacks.
- Living Shield: If this monster is adjacent to another mob monster taking damage, it can take the damage instead.
- Push = Crystal Throw: If this monster controls the Crystal Idol, it can use the "Push" card to move the Crystal 1 hex instead of pushing it.
General Rule
Card texts and munching effects override rulebook rules. If there is a conflict, the card text or munching effect takes precedence, but only for the specific situation described on the card.
This does not replace the general rule as a whole.
Favor Cards
Each player has their own deck of Favor Cards, which determine the new player turn order at the beginning of each round.
Each Favor Card has a Favor Value ranging from 0 to 4. Additionally, each card specifies a Favor Action that you must perform when it's your turn.
Determining Player Order
Playing Favor Cards: At the beginning of each round, secretly select and place a Favor Card from your hand face-down.
Revealing Cards: Once all players have placed their cards, reveal them simultaneously. The player who played the card with the highest Favor Value takes the first turn in the new round. The player with the lowest Favor Value takes the last turn.
Tiebreakers: If two or more players play cards with the same Favor Value, the turn order between these players remains as it was in the previous round.
Example: Sarika and Marc both play a Favor Card with a value of 3. Since Sarika was ahead of Marc in the previous round, she remains ahead in the new round.
Starting the Round: The new round begins following the newly established player order.
Taking Your Turn:
- Flip your Reaction Tokens to their active side.
- Start your turn by performing the action written on the Favor Card you played.
- Keep the Favor Card in front of you, forming your personal discard pile of Favor Cards.
Managing Your Favor Cards: Played Favor Cards are placed in your discard pile and remain there, covered by newly played Favor Cards in subsequent rounds.
When you play a Favor Card with a value of 0, you may take all previously played Favor Cards back into your hand.
(The 0 card shown in the illustration reads: "You are the last player to take your turn. Take all your Favor Cards back into your hand. Regenerate one of your monsters. This monster can be activated in the following round and does not need to skip a turn." Only part of the text is legible in the source.)
Game Flow
Players take turns in the order determined by the Favor Cards, each completing one turn per round. A turn consists of the following three phases:
- Flip all your Reaction Tokens to their active side.
- Perform the Favor Action specified on your Favor Card.
- Perform two actions of your choice.
Your Turn
When it is your turn:
Reactivate Reaction Tokens: Flip all previously used Reaction Tokens to their active yellow side.
Reaction Tokens are consumed during opponents' turns to trigger instant effects for your monsters.
Favor Action: Execute the Favor Action listed on your Favor Card. Most Favor Cards offer a choice of actions. If none of the listed Favor Actions can be performed, the Favor Action is forfeited.
Performing Actions: After resolving the Favor Action, you may perform exactly two actions using any of your monsters in any order. Once a monster performs an action, it is considered activated.
Action Rules
Energy Costs: To execute actions, energy must be spent from the monster's Energy Pool. A monster may only perform actions if it has sufficient energy. You may repeat the same action within a turn (e.g., moving the same monster twice or playing two cards).
Multi-Monster Activations: Certain cards allow activating multiple monsters within a single action, enabling more than two actions in one turn.
Energy Depletion: When a monster runs out of energy, it cannot perform any more actions, even if the action itself requires no energy - except for the Regeneration action. Monsters must first regenerate before resuming actions.
Instant Effects: These do not count toward your action limit. Depending on the card text, they may also be played during an opponent's turn. Some instant effects may use one of the two reaction tokens available. Therefore flip the token from yellow to black side (also see Instant Effects on page 19).
Available Actions
Movement: Pay 1 energy to move a monster up to its movement points as indicated on its tableau across hex fields.
Attack (Strike and Shoot): Pay energy equal to the monster's base damage to attack an opposing monster according to ranged or melee combat rules. The targeted monster may attempt to block the attack.
Mob March: Pay 4 energy to distribute 4 movement points freely among your monsters. All monsters must be moved.
Draw Cards: Pay 1, 3, or 5 energy to draw 1, 2, or 3 cards for a specific monster.
Play an ability from a hand card: Pay the energy listed in the top left corner of a hand card to activate the ability described in the center of the card.
Munch a Card: Pay the energy listed in the top right corner of a card to trigger the munch effect detailed at the bottom of the card. Slide the card into an available munch slot on the respective monster's tableau.
Activate a Shrine: If one of your monsters stands on a shrine hex, pay 2 energy to activate the shrine's power.
Regeneration: Costs no energy. Instantly refill the monster's Energy Pool and shuffle its discard pile back into its draw pile. The monster's turn ends immediately.
1) Movement
To move a monster, you must spend 1 energy. The monster may then be moved across a number of adjacent, unoccupied hexes up to its movement value as shown on its Monster Tableau.
Movement Rules
You may move monsters through friendly monsters but not:
- Through enemy monsters,
- Through simple obstacles like water or crystal walls unless allowed by specific abilities or munch effects,
- Through impassable obstacles.
Monsters can never move onto or through impassable obstacles unless they are melted (see melting impassable obstacles).
Adjacent hexes are considered connected if no obstacles separate them.
A monster's movement must always end on an unoccupied hex. No more than one monster can occupy a single hex at any time.
Exception: The only exception to this rule is the base camp of your Monster Mob, where multiple monsters from the same mob may occupy the same hex. The base camp counts as a single hex for movement purposes.
Movement with the Crystal Idol
Taking Control of the Crystal Idol: A monster that moves onto the hex containing the unclaimed Crystal Idol immediately gains control, regardless of whether the movement was due to a monster action, a mob ability, or triggered by an attack or ability from an opposing mob.
Upon taking control, the monster's current movement immediately ends, and any remaining movement points are lost.
If movement was triggered by an ability or attack, the action is interrupted.
Bonus Movement: The controlling monster gains an immediate bonus movement of 1 hex. This movement takes priority over all other effects, including instant effects.
The direction of the bonus movement is chosen by the player controlling the mob to which the monster belongs.
After this bonus movement, any pending ability effects continue as applicable.
Each time a monster takes control of the Crystal Idol, it receives this bonus movement.
Example: The Cheese Fly moves three hexes as part of its action. On the first step, it enters the hex with the unclaimed Crystal Idol and gains control. The movement action ends immediately. However, due to gaining control, the Cheese Fly can immediately move one additional hex as a bonus movement.
Restricted Movement with the Crystal Idol: The Crystal Idol moves together with the controlling monster, following it wherever it moves.
While controlling the Crystal Idol, a monster's movement range is reduced to 1 hex per movement action.
This restriction applies even if the monster gains additional movement points from actions, mob marches, or munch effects, unless a card text explicitly permits otherwise.
Special Movement Rules After Attacks: Unique movement rules apply when controlling monsters:
- After taking melee damage - See "Movement with Crystal after Melee Rules."
- After taking ranged damage - See "Movement with Crystal after Ranged Rules."
- After taking ability damage or being influenced by abilities - See "Movement with Crystal through Ability Effects."
2) Attack (Strike and Shoot)
You can use any monster to attack either opposing monsters or your own. The energy cost for this action equals the base damage of the attacking monster, indicated on the attacker's Monster Tableau.
Increases in damage from abilities or munch effects (e.g., through "munch effects") do not affect the energy cost.
The type of attack a monster can perform is indicated on its Monster Tableau.
There are two types of attacks: Strike and Shoot.
Attack Types
Strike - Range: 1 hex. To strike in melee combat, your monster must be on an adjacent hex to the target.
Shoot - Monsters capable of shooting can attack targets up to 2 hexes away, regardless of whether these hexes are aligned in a straight or diagonal line.
- Line of Sight: The target must be visible. Line of sight is obstructed if crystal walls or other monsters are positioned between the shooter and the target along either the straight or diagonal shooting path.
- Crystal Walls: They block visibility if they lie directly on the straight or diagonal shooting path. However, when a crystal wall would block a straight shot, it is still possible to shoot past it to a target on a diagonal hex.
- Water: Water never obstructs line of sight.
- Monsters: Monsters always block straight shooting paths. However, it is possible to shoot past them to a diagonally positioned hex.
Inflicting Damage
A monster inflicts damage through either a strike or a shot unless the attack is negated by an instant effect.
The damage dealt equals the base damage indicated on the attacker's Monster Tableau.
Damage can be increased through abilities and munch effects.
Blocking Damage
The attacked monster may block damage by discarding its hand cards.
Each discarded card blocks 1 damage. Damage may be reduced to 0 this way.
Any unblocked damage results in a successful attack.
Important: An attack is considered successful if it inflicts at least 1 point of damage.
Move the corresponding number of energy stones from the attacked monster's energy pool to its used energy space.
Blocking Limitations: You may discard a maximum number of cards equal to the total damage the monster can inflict, calculated by its base damage plus munch effect or passive ability bonuses.
Example: Tim's Cheese Fly is attacked by the Bookworm, dealing 3 damage. The Cheese Fly has a base damage of 1 and a munch effect granting +2 damage. It can block up to 3 damage by discarding up to 3 hand cards. Tim has only 2 Cheese Fly cards in hand and chooses to block 2 damage. Both cards are discarded.
Important Note: Cards from other monsters cannot be used to block. The Cheese Fly takes the remaining 1 point of damage.
Combat with the Crystal Idol
All strike and shoot rules apply to monsters controlling the Crystal Idol.
Movement after Melee Combat: When a monster controlling the Crystal Idol takes damage from a strike, it immediately loses control and is displaced.
- The attacking monster moves the targeted monster 1 hex following standard movement rules.
- The Crystal Idol remains on the current hex without moving.
- Immediately after, the attacking monster moves onto the Crystal Idol's hex and receives its bonus movement.
Special Case: If the attacked monster cannot be displaced, move the Crystal Idol to the attacking monster's hex instead, leaving the attacked monster in its original position.
Movement after Ranged Combat: When a monster controlling the Crystal Idol takes damage from a shot, it immediately loses control.
The Crystal Idol, not the attacked monster, is displaced by 1 hex.
The attacking monster moves the Crystal Idol to a neighboring hex, ignoring simple obstacles like water or crystal walls.
Special Case: If the Crystal Idol lands on a hex already occupied by another monster, that monster immediately gains control and receives a bonus movement.
Movement after Ability Effects: If abilities marked with strike or shoot symbols inflict damage, follow the respective melee or ranged movement rules as described by the card text and rules.
Knock Out (K.O.)
If a monster's energy pool reaches "0" due to your monsters' attacks or abilities, you may displace the knocked-out monster by 1 hex.
Displacement Rules: Movement must follow standard rules:
- The monster may only move through hexes occupied by friendly monsters.
- It cannot end its movement on a hex already occupied by another monster.
- Obstacles must be respected during movement.
Additional Rules:
- Munch effects and abilities of the affected monster apply: monsters with swimming abilities may move over water obstacles.
- Other relevant abilities and effects also remain valid.
- If a monster cannot be moved according to movement rules, it remains on its current hex.
3) Mob March
Select one of your monsters to pay for this action by spending 4 energy. You receive 4 movement points that can be distributed freely among your three monsters, even if this exceeds the movement points shown on their tableaux.
All three monsters must move: If a monster cannot participate (e.g., due to insufficient energy or blocked movement by obstacles or enemy monsters), you cannot perform the Mob March action.
No Movement Without Energy: A monster without active energy cannot move, even during a Mob March.
Stunned Monsters: If a monster you wish to move has a stun token, the energy cost for Mob March increases accordingly. The monster paying for the Mob March action must cover these additional costs. Remove the stun token after the movement.
4) Drawing Cards
You may draw 1, 2, or 3 cards from the activated monster's deck by spending 1, 3, or 5 energy from its energy pool.
Munch effects or other bonuses may increase the number of cards you can draw.
Playing Cards to Use Abilities
To play a card, spend the energy cost shown in the upper left corner of the card from the energy pool of the monster it belongs to.
Follow the card text word for word. Place the card on that monster's discard pile after resolving its effects.
What Are Abilities? Each monster has four special abilities in its deck:
- Ultimate Ability: One unique card placed face-down under the tableau at the start of the game.
- Three Other Special Abilities: Each appearing three times in the deck with varying munch effects.
Ability Damage
Abilities may cause damage. Although categorized as Strike or Shoot, they are not considered attacks and cannot be blocked.
The specific damage type is indicated by the corresponding symbol (strike or shoot) on the card.
Instant Effects
Instant effects are special abilities you can use in response to other monsters' actions or abilities - at any time, even during an opponent's turn.
- Conditions: An instant effect can only be played if its conditions are met.
- Reaction Tokens: Most instant effects require a reaction token to be used. This is indicated in the card text with 1 (reaction symbol). Flip the token to mark it as used.
- Exceptions: If an instant effect requires no token, it is indicated with 0 (reaction symbol).
- Token Refresh: You regain all used reaction tokens at the start of your turn.
Special Ability: Push / Swap
Each monster has this card three times in its deck. Choose one of the two effects:
Push: Spend 1 energy from the activated monster's energy pool. Move an adjacent monster 1 hex, including friendly monsters.
- Special Interaction: If the pushed monster is on the Crystal Idol, push it off to an adjacent hex following melee movement rules.
- Movement Rules: The pushed monster must adhere to standard movement rules and cannot end its movement on an occupied hex.
- Simple obstacles must be respected.
- Munch Effects & Abilities: Effects such as swimming abilities remain valid, allowing movement over water obstacles if applicable.
- If the monster cannot be moved according to the rules, it remains on its current hex.
Swap: Spend 2 energy from the activated monster's energy pool. Swap the positions of the activated monster and an adjacent monster.
- Crystal Idol Interaction: If the adjacent monster controls the Crystal Idol, it retains control, and the Idol moves with it to the new hex.
5) Munching a Card
Your monsters can munch their own hand cards as an action, gaining one-time or permanent effects.
Monsters can only munch their own cards.
Example: The Bookworm can only munch Bookworm cards, and the Chili Ninja can only munch Chili Ninja cards.
Energy Cost: Pay the energy cost shown in the upper right corner of the munched card from the energy pool of the munching monster.
Types of Munch Effects
- One-Time Munch Effects: Trigger immediately upon munching. The card is then removed from the game.
- Permanent Munch Effects: Place the card in an available munch slot on the monster tableau, filling slots from left to right while keeping the effect visible.
Special Mechanics
Ultimate Ability
When a monster fills its second munch slot, immediately place its ultimate ability card from the third slot into your hand.
Swapping Munched Cards: If all munch slots are filled, you can swap an existing card for a new one. Remove the replaced card from the game unless it has a lock symbol.
Locked Cards: Cards with this symbol cannot be swapped.
Miniature Swaps: Some cards allow your monster to swap its miniature, transforming into a new form.
Important Note: If a munched card is removed, shift all cards to the left to ensure empty slots remain on the right.
Monster Powers
When a monster fills the second or third munch slot, it gains additional powers listed above the slots on its tableau:
- Simple Bonuses: Increase values or actions, e.g., +2 damage, +2 energy, or +1 card when cards are drawn.
- Piggyback: Allows an adjacent monster in your mob to ignore a crystal wall when moving.
- Boost: Allows an adjacent monster in your mob to ignore crystal walls for ranged attacks.
- Living Shield: When an adjacent mob monster takes damage, this monster can take the damage instead.
- Crystal Throw: If controlling the Crystal Idol, use the "Push" card to move the Crystal 1 hex instead of pushing a monster.
- Multiple Shrine Activation: Unlocking a monster's third munch slot grants the power to activate a shrine twice.
Activate a Shrine
When one of your monsters is standing on a shrine hex, you can activate the shrine as one of your two actions by paying 2 energy from the monster's energy pool.
Shrine Powers
After activating a shrine, use its ability as described on the corresponding shrine card:
- Shrine of Change: Rotate 2 free hexes of your choice and reorient them on the game board.
- Shrine of Trade: Swap 2 free hexes of your choice on the game board.
- Shrine of Friend Swapping: Swap the positions of 2 monsters in your mob. If one controls the Crystal Idol, the Idol remains in place and the monster on the Idol swaps positions.
- Shrine of Movement: Move any monster 2 hexes, ignoring obstacles. If the Crystal Idol is moved, limit the movement to 1 hex.
Multiple Shrine Activations
Initially, each shrine can only be activated once per mob.
But as said above, unlocking a monster's third munch slot grants the power to activate a shrine twice.
If a monster with this power stands on a shrine already activated by your mob, it may activate the shrine a second time.
Maximum Limit: Each mob can activate any given shrine up to two times.
Victory Points from Shrine Activation
Each shrine activation grants 1 victory point. Place a mob token on an available shrine card space, symbol "1x" face-up.
When activating the shrine a second time with the special monster power, earn another point and flip the mob token to show the "2x" symbol.
Melting Impassable Obstacles
A monster with the power to activate shrines twice can choose to sacrifice this ability to melt any impassable obstacle on the board.
Permanent Sacrifice: Once sacrificed, the monster cannot regain this power.
Flip the chosen impassable obstacle to its reverse side to mark it as melted. Melted obstacles become ice floes.
Monsters moving onto an ice floe slide in a straight line to the next hex unless blocked by another monster, a crystal wall, or similar obstacles.
Movement Rules: Movements must end on a free hex.
Monsters controlling the Crystal Idol slide similarly over ice floes.
Any water adjacent to an ice floe becomes frozen and is no longer considered an obstacle, allowing adjacent hexes to be treated as connected for movement and attack purposes.
Shrine Miniatures and Obstacles
A shrine miniature does not count as an obstacle.
Regeneration
Regeneration is the only action available when a monster has exhausted its energy.
Return spent energy to the monster's energy pool.
You may choose to reshuffle the monster's discard pile into a new draw pile.
Important Note: After a monster performs the Regeneration action, it cannot take any further actions during that turn.
End of Turn
- Check Hand Limit: The total hand limit is 10 cards. Discard any excess cards to the respective monster discard piles.
- Move the Time Snail: Advance the Time Snail one hex clockwise on the time track. If the 12-o'clock mark is crossed, remove the top time tile and read the new effect aloud.
- Next Player: The next player takes their turn.
End of the Game
The game ends in one of two ways:
Crystal Idol Victory: A mob wins instantly by successfully bringing the Crystal Idol to its base.
Victory by Points: If time runs out before the Crystal Idol reaches a base, the mob with the most victory points wins.
Point Scoring
- Shrine Activations: 1 point per activated shrine tile at the board's edge.
- Crystal Idol Control: At the end of the game, a mob earns 2.5 points if one of its monsters controls the Crystal Idol.
- Tie Resolution: The mob whose monsters have munched the most cards wins. If still tied, a rematch is required.
Icons and Glossary
- Energy: used to perform any kind of action.
- Movement Range of your monster.
- Damage dealt by a monster or an ability.
- Draw a Card.
- Strike: a monster on an adjacent field in melee combat.
- Shoot: a monster in 2 hex field distance in range combat.
- Push: an adjacent monster by one hex field.
- Swap: your monster's position with an adjacent monster.
- Munch a Card from your hand.
- Ultimate Ability of your monster.
- Shrine field, indicating a shrine to activate for 2 energy.
- Altar field, starting position of the Crystal Idol.
- Locked card symbol, indicating that this munched card cannot be swapped.
- Instant effect, may cost a flip of a reaction token.