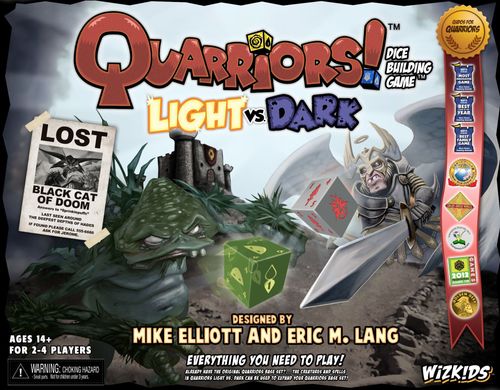
Quarriors! Light vs. Dark
Quarriors! Light vs. Dark Rulebook
Table of Contents
Table of Contents
Game Components
Your copy of Quarriors: Light vs. Dark includes:
- 8 large Quiddity dice
- 16 Assistant dice
- 43 varied Quarry dice, 5 each in eight different color combinations (64 assorted dice in total)
- 43 power cards
- 1 Glory tracker
- 4 dice bags
- 4 matching markers to track your glory
This box contains a quantity of dice, as well as a lot of cards. Each card matches one specific type of die. The Assistant dice have three different cards that match them, while the other dice each have five different cards that match them. The Quiddity dice do not have a matching card.
Each card details all the powers of one set of dice. Each set of dice has a unique custom symbol, as well as a unique color combination to identify it.
Cards and their associated dice come in two types: creatures and spells. Creature dice have numbers around their custom symbol. Spell dice have no numbers around their custom symbol, only the occasional burst icon.
In addition, you get dice bags, matching score markers, these rules, and a whole boxful of awesome!
What's New in This Edition
Here's an overview of the major changes from the last version of the rulebook:
New Quiddity Dice! Quiddity Dice are no longer part of the players' individual collections. Instead, each player keeps two large Quiddity Dice off to the side and rolls them along with the dice from his or her dice bag. These Quiddity Dice never enter the player's bag and are immune to all effects except for "re-roll." The Quiddity Dice grant more Quiddity per die than in the original game, and the new Quiddity Dice even generate special forms of Quiddity, specifically...
Light and Dark Quiddity! Now, in addition to plain old normal Quiddity, your dice can generate Light and Dark Quiddity as well. Light and Dark Quiddity can be used for any purpose that requires normal Quiddity, but using Light or Dark Quiddity might allow a player to capture a Quarry from the Wilds at a reduced cost. Light and Dark Quiddity are also needed to activate...
Anchored Spells! Sometimes Creatures are so powerful that just being in the Wilds allows them to open up new sources of quantum energy! Players now have the ability to spend a specific amount of Light or Dark Quiddity in order to activate Anchored Spells that appear on Creature Cards in the Wilds. Players can activate one Anchored Spell per turn regardless of whether or not they actually own the Creature that is providing the Spell.
New Setup! The new dice and a different arrangement for the Wilds are cool, but definitely look at the...
New Assistants! Each player's collection of dice now starts with only 4 Assistant dice. Better yet, there are three different Assistant cards, and players choose one of these randomly at the start of the game.
No Culling! Well, sort of. Players no longer have the automatic ability to cull dice when their Creatures score. However, players can still cull dice by activating special powers that appear on Creatures and Spells in the game.
New Rulebook! Because it has quintessential quality.
Power Cards
Each card details the capabilities of one set of dice (your Quarry). They also provide a convenient place to store the Quarry dice that can be captured during the game.
At the upper left is the die's cost. You must spend this amount of Quiddity to capture one matching Quarry die from this card.
Immediately below that is the die's energy type. Dice of a given type provide that type of energy, and you get a purchase discount (noted by the smaller cost) if you use at least one of that sort of energy to purchase the die.
Below that is the card's title. Most cards have several versions.
The top right number is the amount of glory you gain when that creature scores. We'll explain what that means later.
The gray text box details the die's abilities. These include the basic abilities that the die always has, as well as the additional abilities, if any, the creature gets when you roll a side with a burst. If the die face does not show a burst, you cannot use that burst ability. To use a Creature ability, you must roll the Creature Icon and summon it to your Ready Area. To use a Spell effect, you must roll the Spell Icon and spend the die.
The colored box at the bottom (yellow or dark grey) is the card's Anchored Spell. Not all cards have Anchored spells, but if any do, these anchored spells are additional abilities that you, the mighty Quarrior, get just because the card is in the Wilds!
An Anchored Spell has a specific cost in Light or Dark Quiddity. Once per turn, a player can pay that cost to activate an Anchored Spell on one card in the Wilds. The player does not even need to own the die to use the Anchored Spell!
Finally, at the bottom, the card shows the various faces of the die. Generally, the ones on the left are Quiddity faces, and the ones on the right are Creature or Spell faces.
Anatomy of a Card
A Power Card shows, from top to bottom and left to right: the Base Cost, the Discounted Cost & Energy Type, the Card Name, the Burst Effect, the Glory Value, the card art, the Text Box, the Anchored Spell, and the Die Face Reference (Energy Faces on the left, Creature Faces on the right).
Dice
The dice have a variety of symbols on the different faces. When you roll a die, the symbols on the top face of the die tell you what you can use or "spend" that die to do:
- Quiddity: When you roll this symbol, you can spend this die to gain the amount of Quiddity shown. Sometimes there will only be 1 Quiddity, but often you will get 2 or more from a single die!
- Light Quiddity: When you roll this symbol, you can spend this die to gain the amount of Light Quiddity shown. Light Quiddity can be used for anything normal Quiddity can be used for, but Light Quiddity also has special properties that will be explained later.
- Dark Quiddity: When you roll this symbol, you can spend this die to gain the amount of Dark Quiddity shown. Dark Quiddity can be used for anything normal Quiddity can be used for, but (you guessed it!) Dark Quiddity can also do unique stuff that you'll find out about later.
- Immediate Effect: When you roll this symbol, check the Power Card associated with that die. It will tell you what to do! This is an Immediate Effect, and you can only use it immediately after rolling.
- Creature Icon: Creature Dice show a unique symbol on one or more faces, called the Icon. The Icon is different on each type of die! Creature dice have numbers around the Icon that tell you the Creature's level, its attack (the amount of damage it adds to your attack total), and its defense (the amount of damage it can take before being destroyed). When you roll the Icon, you may spend Quiddity to move that die to your Ready Area, converting it into a Creature (see "Ready Spells and Summon Creatures").
- Spell Icon: Spell Dice also show a unique Icon on one or more faces. Unlike Creatures, Spell dice have no numbers around the Icon, although they may have bursts. When you roll the Icon, you may move that die to your Ready Area, converting it into a Spell (see "Ready Spells and Summon Creatures").
- Burst: Some dice have special effects that only occur when certain faces are rolled. These special faces show a Burst symbol in the lower left corner. The Power Card lists the effects that occur when the matching Burst symbol is rolled. Any effect created by a Burst is in addition to the normal effects of the die roll.
Example: One face of the Black Cat die shows a burst. If you roll this face, your Black Cat can use the special power listed next to the burst symbol on its corresponding Creature card.
Quiddity Dice
Unlike the other dice, Quiddity Dice are never added to your collection. Instead, at the start of each of your turns, add the 2 Quiddity Dice to your Active Pool. As you spend Quiddity from these dice, the dice go to your Spent Pile. At the end of your turn, instead of placing them in your Used Pile, place the Quiddity Dice to the side until your next turn. Quiddity Dice are never added to your bag and cannot be targeted by any effects except for "re-roll."
We made the Quiddity dice larger as a physical reminder that they are not treated like ordinary dice.
Other Accessories
The game also comes with four dice bags, four markers (one to match each dice bag), and a score card on which you track each player's glory.
Setup
First, find the three cards named "Assistant of [Something]". Select one of these at random and place it face up in the center of the table. This is the first card in an area we call the "Wilds." Put the other 2 Assistant cards back into the box.
Note: If you want to include cards from previous sets with this game, that's okay, but don't include any Basic Quiddity, Assistant, and/or Portal cards from the original game when you're playing with these rules. If you do, you'll tear a rift in the very space-time Quontinuum! Also, the game won't work.
Divide the rest of the cards into two stacks: Creature Cards and Spell Cards.
Shuffle the 30 Creature Cards that come with this set. Turn over the first card and place it face up in the Wilds next to the Assistant Card. Continue to turn over cards, one at a time. Each card has a "class" (such as "Black Cat") and may have a "type" (such as "Strong"). For each card, check to see if it matches the same class as any of the cards already in the Wilds. If it does not, then add that card to the Wilds. If it does match a card already in the Wilds, put it back in the box and turn over the next card.
Example: If the first card turned over was the Lesser Archangel, and a Mighty Archangel card is turned over later, put the Mighty Archangel card back in the box, since it is the same class as the Lesser Archangel already in the Wilds.
Keep turning over cards until you have 6 different classes of Creature Cards in the Wilds. Then, shuffle the 10 Spell Cards and repeat the process until you have 2 different classes of Spell Cards in the Wilds. You may find it helpful to arrange the 2 groups (spells and creatures) in ascending order of cost (i.e., if you have spells that cost 3 and 2, place the 2 spell on the left and the 3 on the right). This helps when deciding which die to capture (see "Phase 4: Capture One Quarry Die From the Wilds").
Find the 5 Quarry dice that match the color of each Creature Card and Spell Card in the Wilds. Place those dice on their matching card.
Each player chooses a bag and Glory marker of the same color. Place your Glory marker on the "0" space of the Glory Track.
Give each player 4 Assistant Dice. Each player puts all 4 Assistant Dice in his or her bag. Next, give each player 2 Quiddity Dice. Each player places these dice off to the side for now; Quiddity Dice are never added to a player's bag. Return any leftover Quiddity and Assistant Dice to the box.
Finally, choose which player will begin the first turn. Your quest is ready to begin!
Note: If you want to include Creatures and Spells from other sets, you should set things up a little differently. First of all, shuffle the Creature Cards and Spell Cards from this game with the Creature Cards and Spell Cards you want to include from the other sets. Next, keep dealing Creatures and Spells until you have 7 different classes of Creature Cards and 3 different classes of Spell Cards. Other than that, the rest of the game plays the same!
Dice Locations
Quarriors: Light vs. Dark has several game locations that help regulate the flow of the game.
Note: The back page of the rulebook has a play mat. You can use that or print out your own at www.wizkidsgames.com.
The Wilds: Any dice in the middle of the table are said to be "in the Wilds." No one controls any of these dice, and you cannot use them until you capture them. You may, however, activate any Anchored Spells that are listed on Creature Cards in the Wilds.
We call all of the dice you currently control your "collection." Only you can use the dice in your collection (and you can't use dice in other players' collections!). Each die in your collection will normally be in one of five places:
Your Bag: Dice that are not currently "in play" are kept in your bag. These dice can't be used for any purpose, and they cannot be the target of any Creature ability or Spell effect. Each turn you will draw dice out of your bag to bring them into play, adding them to your Active Pool.
Your Active Pool: These are the dice you will roll or have rolled during your turn, but have not done anything with yet. You can use these dice to ready Spells, summon Creatures, gain Quiddity, or create Immediate Effects. Any effect or ability that allows you to re-roll dice can only be used to re-roll dice in your Active Pool (unless that ability or effect says otherwise, of course!). Unless an effect or ability says otherwise, any time you roll dice for any reason, they are always added to your Active Pool.
Your Ready Area: This is where you put readied Spells and Creatures that you have summoned. You can use these dice to attack your opponents or cast spells. Creatures in your Ready Area can earn Glory if they survive until your next turn.
Your Spent Pile: Any time you "spend" dice during your turn, they go to your Spent Pile—where they will languish until the end of your turn. Dice in your Spent Pile cannot be drawn or rolled unless an effect or ability specifically allows it.
Your Used Pile: At the end of your turn, all of the dice in your Spent Pile, along with any unused dice from your Active Pool, go to your Used Pile. Also, any dice in your Ready Area that score or are "destroyed" go to your Used Pile immediately, as do any new Quarry dice you capture from the Wilds. If you need to draw dice and your bag is empty, put all the dice in your Used Pile into your bag, mix them, and draw the dice you need.
Dice in your Spent Pile and Used Pile are still "in play," so they can be targeted by abilities and effects, but you cannot spend them for any purpose.
The Basics
Quarriors is played in turns, starting with the first player and continuing clockwise around the table. Keep taking turns until one player earns enough Glory to win the game, or until there are 4 empty Creature Cards in the Wilds (see "Winning the Game").
This is pretty important: Your turn is divided into 5 phases, which you must complete in this order:
- Score Creatures
- Draw, Roll, and Ready Dice
- Attack Your Rivals
- Capture One Quarry Die From the Wilds (optional)
- Move Dice to Your Used Pile
Phase 4 is optional. You may skip this phase if you don't want to take that action. The other phases are required: you cannot skip them even if you want to!
Important Concept: Spending Dice
Most of the time, if you want to get the benefit of a die (such as gaining Quiddity or casting a spell), you must "spend" that die. When you spend dice, they are immediately moved to your Spent Pile. You can only spend dice that are in your Active Pool.
Quiddity
Quiddity (Quid for short) is the source of all magic in Quarriors. You gain Quiddity by spending dice with the Quiddity symbol during your turn. You can also gain Quiddity from some Spell effects or Creature abilities. Dice with the Quiddity symbol give you 1 or more Quiddity when you spend them. The number inside the Quiddity symbol is the amount of Quiddity that the die provides when you spend it.
Quiddity is used to summon Creatures from your Active Pool to your Ready Area. You also use Quiddity to capture new Quarry dice from the Wilds.
Some dice also provide Light or Dark Quiddity. Light Quiddity and Dark Quiddity can be used to pay for anything that requires normal Quiddity, but they can also be used for special things like paying Discounted Costs to capture Quarry dice or activating Anchored Spells.
You cannot save Quiddity from turn to turn. Any Quiddity that you do not spend is lost at the end of your turn!
On Your Turn
Phase 1: Score Creatures
If you have any Creatures in your Ready Area, you must score them now.
To score your creatures, find the matching Power Card for each Creature in your Ready Area. The number in the top right corner tells you how much Glory you earn for scoring that Creature. Move your token on the Glory Track up that many spaces. If you now have enough Glory to win the game, the game immediately ends and you win!
Next, you must move all Creature Dice from your Ready Area to your Used Pile (not your Spent Pile).
Some Creatures have a special ability that you can use when it scores. You may choose to use these abilities at this time.
Phase 2: Draw, Roll, and Ready Dice
Shake your bag to mix the dice inside. Then (without looking!) draw out 2 dice and add them to your Active Pool—after your first two turns, draw 3 dice out of your bag each turn. Take the 2 Quiddity Dice and add those to your Active Pool as well—for a total of 4 dice in your Active Pool for turns 1 & 2 and a total of 5 dice in your Active Pool for each turn thereafter.
Next, roll all of the dice in your Active Pool.
If there aren't enough dice left in your bag for you to draw, draw all of the dice that are there and add them to your Active Pool. Then take all of the dice in your Used Pile and return them to your bag, mix them thoroughly, and continue drawing until you have drawn the correct number of dice or until you have no more dice left to draw. If you have no more dice in your Used Pile to replenish your bag, then you do not get to draw any more dice.
Immediate Effects
Some dice, and all Assistants, have an "Immediate Effect" face that may turn up when you roll them. These effects might allow you to draw and roll more dice, or re-roll dice, or some other benefit. Usually, you must spend the dice to get the effect.
Immediate Effects are optional. You choose which Immediate Effects to use and which to ignore. You can use Immediate Effects in any order you choose, but they can only be used immediately after rolling your dice. Dice with Immediate Effects showing are never placed in your Ready Area.
Example: Quinn has rolled the question mark symbol on his Assistant Die, which generates an Immediate Effect. This Assistant's Immediate Effect allows him to draw and roll 2 additional dice, and then place the Assistant Die in his Spent Pile. Remember that a player can choose which order to resolve any Immediate Effects he rolled. If Quinn had rolled any other Immediate Effects, he could have chosen to activate them before or after using the Immediate Effect on his Assistant Die. The Immediate Effects do not occur simultaneously!
Some abilities and effects allow you to add dice to your Active Pool during an opponent's turn. If this happens, leave those dice in your Active Pool until your next turn, at which point you'll get to roll them in addition to all the other dice you drew from your bag to roll for that turn.
Example: Since it's his third turn, Quade draws 3 dice out of his bag and adds them to the Herald Die that is already sitting in his Active Pool. He then adds his 2 Quiddity Dice. Finally, he rolls all 6 dice.
Ready Spells and Summon Creatures
Once you are finished resolving your Immediate Effects, take a moment to look at the dice still in your Active Pool. You may move any Spell Dice showing the Spell Icon to your Ready Area. These dice become "Spells" that you can later cast (see "Spells"). You do not have to spend any Quiddity to ready your spells.
Creature Dice that show a Creature Icon can be "summoned." You must spend Quiddity equal to the Creature's level (in the upper left corner of the die face) to summon it. Spend dice from your Active Pool to get the Quiddity you need. After spending the required Quiddity, move the Creature Die to your Ready Area. It is now a ferocious warrior, ready to attack your foes and earn Glory!
Some Creatures have abilities that can be used at the moment you summon them. Once you summon such a Creature, the ability has to be used right away: you cannot wait to use these abilities later.
If you summon multiple Creatures together, you can resolve their abilities in any order you choose. If one of these abilities allows you to draw and roll more dice, you may use any Immediate Effects, ready spells, and summon Creatures as normal.
You can summon all the Creatures you want to summon during your turn, as long as you can pay the Quiddity costs. You can even summon some Creatures, resolve any special abilities, and then summon some more.
Unspent Quiddity can be saved to capture a new die.
Example: Looking at his dice, Quinn sees that he has one Spell: a Light Cantrip. He moves the die to his Ready Area so it is available to cast later. Quinn also has two Creature Icons on his dice: the Mighty Herald and the Quartz Golem. The Mighty Herald is level 1, so he can summon it by spending 1 Quiddity. The Quartz Golem is level 2, so he'll need 2 Quiddity for that one. Even though Quinn has plenty of Quiddity available on his Active Pool dice, he wants to capture an expensive Quarry die later. So he only spends 1 Quiddity to summon the Mighty Herald.
Phase 3: Attack Your Rivals
Now is the time to send your Creatures to attack your foes! All of the Creatures in your Ready Area must attack all of your opponents. To resolve your attack, follow the steps below.
1. Count Damage: Add the attack values of all the Creatures in your Ready Area together (including any spells you are using). This is your "attack total." If you want to cast spells or use Creature abilities to increase your Creatures' attack value for this turn, you may use them now.
2. Attack: Each of your opponents who have at least one Creature in their Ready Area must defend against your attack total. Each opponent receives the same attack total. Your opponents defend simultaneously and individually. Each opponent follows these steps to resolve your attack:
2a. Apply Protection: The defending player may use abilities or effects that reduce your Creatures' attack (such as casting a spell that lowers your Creature's attack) or increase the defense values of his Creatures.
Unless the ability or effect says otherwise, such game effects only reduce your attack values and attack total for that player, and have no effect on your attacks against your other opponents.
However, spells that destroy one of your creatures remove that creature for all defenders (and thus reduce your attack total against all of them).
2b. Choose Defender: Each defending player must now choose one Creature to defend against the attack total.
2c. Defender Takes Damage: The defending Creature takes damage from the attack. If your attack total is less than the Creature's defense value, the defender is not affected, and that player is done defending against your attack. If your attack total is equal to or higher than the Creature's defense value, your opponent's Creature is destroyed! Move the Creature to that player's Used Pile (not his Spent Pile), and subtract the Creature's defense from your attack total against that player's remaining Creatures.
2d. Next Defender: If your attack total is still higher than zero, that opponent must choose another Creature to defend (if he has any). If your opponent has run out of Creatures to defend with, he is done defending against your attack, even if his Creatures did not absorb the entire attack total. Any leftover attack value is lost.
Repeat steps 2c and 2d as needed until all players have either defended against your entire attack total, or run out of Creatures to defend with.
Important: When you defend against an attack, you must choose your defending Creatures one at a time. You cannot choose to divide the attack total among your Creatures to keep them from being destroyed!
Example: Monique is ready to attack her rivals. She has two Creatures in her Ready Area: a level-2 Strong Boogieman and a level-3 Greater Qeelzebub.
Step 1: Count Damage: The Strong Boogieman has an attack of 6 and the Greater Qeelzebub has an attack of 8. She adds these numbers together for an attack total of 14.
Step 2: Defend: Quinn must defend against Monique's attack. He has three Creatures: a level-1 Herald (no burst), a level-2 Lesser Quartz Golem, and a level-3 Strong Archangel. Quinn decides to defend with the Herald first. It only has a defense of 2, so it is destroyed (it goes to Quinn's Used Pile). Monique still has an attack total of 12, so Quinn must choose another defender. He selects the Lesser Quartz Golem, which has a defense of 6. Like the Herald, the Lesser Quartz Golem is destroyed (it also goes to Quinn's Used Pile). But now the attack total is reduced to 6. That's not enough to kill the Strong Archangel, which has a defense of 8, so Quinn keeps it in his Ready Area. While Quinn is defending, Jacques and Quentin must each also defend against the full attack total of 14.
Additional Attack Rules
Some Creatures have abilities that can be used when they are destroyed, or when an opponent's Creature is destroyed. Remember to resolve these abilities immediately when their conditions are met. Each Creature in your Ready Area can only be damaged once per attack: If an effect or ability prevents a Creature's destruction or returns a destroyed Creature to your Ready Area, you may not assign any more damage to that Creature this turn. After all defending Creatures have been damaged once, any leftover damage is lost.
In rare cases, the order in which Creatures attack multiple players matters. In these situations, the players resolve the destruction of their Creatures in turn, clockwise around the table, starting with the player to the left of the attacker.
Phase 4: Capture One Quarry Die From the Wilds
After your attack phase is complete, you may spend any Quiddity you have left to capture one Quarry die from the Wilds. You are never required to capture dice, nor can you capture more than one.
Note: Some Creature abilities or Spell effects allow you to capture more than one die on your turn.
The cost (in Quiddity) of each die is shown in the upper left corner of the matching Power Card. Spend dice from your Active Pool to pay the required Cost. In addition, you may have gained Quiddity from your Immediate Effects, Creatures, or Spells. You may also spend this Quiddity now. Place Quarry dice you capture in your Used Pile (not your Spent Pile).
Below their base cost, the Creatures in this set also have a Discounted Quiddity Cost. This allows a player to pay the amount of Quiddity shown in the Discounted Quiddity Cost section if the player pays at least one Quiddity of a special type (Light or Dark), as indicated on the Creature's Power Card.
If there are 4 (or more) empty Creature Power Cards in the Wilds after you capture a Quarry die, the game ends (see "Winning the Game")!
Example: Quinn has a total of 5 unspent Quiddity: 2 Light Quiddity and 3 normal Quiddity. He'd like to capture a Greater Quartz Golem from the Wilds, but this normally costs 6 Quiddity to capture. Fortunately for Quinn, the Greater Quartz Golem has a Discounted Quiddity Cost of 5 Quiddity if at least 1 Light Quiddity is spent. Since Quinn has Light Quiddity to spend, he can capture the Greater Quartz Golem at the Discounted Cost of 5. Since Quinn can only capture one die each turn, if he had any Quiddity left over it would be lost.
Phase 5: Move Dice to Your Used Pile
At the end of your turn, you must move all the dice from your Spent Pile and any dice left in your Active Pool to your Used Pile. You may also choose to move any spells from your Ready Area to your Used Pile, or you can leave them where they are. It can be very useful to keep spells around for future turns, so choose carefully.
After you move the dice to your Used Pile, your turn is over, and any unspent Quiddity is lost. The player to your left can now begin his turn!
Winning the Game
The goal of the game is to earn Glory. The primary way to gain Glory is by summoning and protecting your Creatures until the scoring phase of your next turn. All Glory you gain is recorded on the Glory Track.
There are two ways that the game can end:
- If any player earns enough Glory to reach the goal shown in the Glory Goals chart, the game immediately ends and that player wins!
- If there are four or more empty Creature Cards (cards with no Quarry dice on them) in the Wilds after a player captures a Quarry die, the game immediately ends. Only Power Cards that match Creature Dice are counted: empty Spell Power Cards or Assistant Cards are not counted to determine if the game ends.
If the game ends because of empty Power Cards, the player with the highest Glory wins the game! If there is a tie, the tied player with the most dice in his Ready Area wins. If they are still tied, they share the victory!
Glory Goals
| Players | Glory |
|---|---|
| 2 | 20 |
| 3 | 15 |
| 4 | 12 |
Additional Rules
Now that you have all the basics, we can talk about some details and special cases.
Creatures
A "Creature" is a die showing the Creature Icon that has been summoned into a player's Ready Area. Dice in your Active Pool or any other location are not Creatures, regardless of the symbol showing on the die.
Note: An Assistant can be a Creature.
When you roll a Creature Icon on a die, you may summon that Creature to your Ready Area by paying Quiddity equal to the Creature's Level (in the top left corner of the die). Once you move the die to your Ready Area, it becomes a Creature and you can use the abilities shown on the die and the matching Power Card.
Most Creatures have a special ability. Some abilities are always in effect while the Creature is in play. Other abilities are only available if you roll a face that has one or more Burst symbols. Burst abilities are listed next to the matching Burst symbols on the Power Card.
Some abilities can only be used under special circumstances. You can only use the ability if those conditions are met.
Example: The Strong Herald has an ability that gives it +2 defense when it's alone. If there are any other Creatures in your Ready Area, the Strong Herald does not receive this bonus.
If your Creature survives until the first phase of your next turn, you earn Glory as shown on the matching Power Card. If the Creature scores Glory or if it is destroyed, move the die to your Used Pile (not your Spent Pile).
Spells
A "Spell" is a die showing the Spell Icon in a player's Ready Area. You have to spend the die to cast the spell.
When you roll the Spell Icon on a die, you may ready that spell by moving it into your Ready Area. You do not have to pay any Quiddity to ready a spell. Once you move the die to your Ready Area, it becomes a spell and you may cast it to use the Spell effect on the matching Power Card.
Spells in your Ready Area can be cast immediately, or you can save them for use on a later turn. Most Spells can only be cast during your own turn in any Phase except Phase 1: Score Creatures. You can even spend Spells from your Ready Area when your Creatures attack. However, many "Reaction" Spells can only be cast during opposing players' turns (see "Reaction Spells").
Example: Quinn rolls his Light Spell die and gets the Spell Icon, so he moves it to his Ready Area. Unfortunately, he has no Creatures in his Ready Area to take advantage of the spell, so he leaves the Light Spell in his Ready Area. On a future turn, after he summons a Creature, he can cast the Light Spell (spending the die and moving it to his Spent Pile) to rotate that Creature to a higher level.
Some Spell die faces show a Burst symbol in addition to the Spell Icon. These Spells have a special effect that is listed on the matching Power Card next to the Burst symbol.
Example: The Light Charm spell can be cast to allow you to draw and roll 1 additional die from your bag this turn. If you rolled the Burst symbol, you'd be able to draw and roll 2 additional dice instead!
When you cast a spell, you always choose the target of the spell. Spells can target your dice or dice in your opponents' collections.
Reaction Spells
Normally, you can only cast spells from your Ready Area on your own turn. But a small number of spells can be cast during your opponents' turns. These dice have the word "Reaction" in the Spell effect. You may cast a Reaction Spell at any time during your opponent's turn. On the other hand, only a few of these spells can be cast when it is your turn.
Reaction Spells are often most useful if you cast them when another player's Creatures attack you.
Anchored Spells
Anchored Spells are different from spells you cast from your Ready Area. Several Creature Cards have Anchored Spells listed in a gold box in their card's text area. Once during your turn, you can choose to spend the required Light or Dark Quiddity to activate an Anchored Spell listed on one Creature Card in the Wilds. It doesn't matter whether or not you actually own a Creature Die associated with that card.
You can activate one Anchored Spell per turn, during any phase of your turn except for Phase 1. You can't activate Anchored Spells during your opponents' turns.
Culling Dice
Some special powers allow you to "cull" dice from your collection. When you cull a die, return it to the matching Power Card in the Wilds. That die is again available for any player to capture. Culling dice allows you to modify your collection by removing dice you don't want anymore. You can never cull the oversized Quiddity Dice, but you can cull your hapless Assistant!
Card Text
Power Cards use a variety of very specialized text. This section discusses specific cases.
"And Then"
If a Power Card's text includes the words "and then," you must first accomplish whatever is specified before the words "and then" in order to do whatever comes after.
Example: Greater Archangel's Anchored Spell allows you to spend 2 Light Quiddity in order to "Destroy 1 Dark Creature in any Ready Area, and then gain 1 Glory." You cannot gain 1 Glory unless a player had a Dark Creature in his or her Ready Area for you to destroy!
References to "Cost"
If a Power Card's text refers to the "Cost" of a Quarry, then it is referring to the normal Cost, not the Discounted Quiddity Cost.
Rotating Dice
If a Power Card's text allows you to "rotate" a Creature die to a higher level, then you should rotate that die to the next face immediately to the right of the current face as shown on the die's Power Card; if this face is not a higher level, then go to the next face that is a higher level. If a Creature is at the highest level possible, then do not rotate it.
If a Power Card's text allows you to "rotate" a Creature die to a lower level, then you should rotate that die to the next face immediately to the left of the current face as shown on the Power Card; if this face is not a lower level, then go to the next face that is a lower level. If the Creature is at the lowest level possible, then do not rotate it. A Creature cannot be rotated to a non-Creature in this way.
Avoiding Destruction
Some spells and Creature abilities allow a destroyed Creature to "return" to your Ready Area. Unless the effect or ability says otherwise, the Creature always returns to your Ready Area with the same face up as when it was destroyed. Do not rotate the die to show a different face.
If an ability or effect occurs when a Creature is destroyed, it still takes place, even if the Creature is saved from destruction.
Dice Etiquette
Truly awesome Quarriors avoid quibbles by observing these simple guidelines at all times:
- Keep Your Dice in Their Place: Make sure that it is clear which dice are in your Active Pool, Ready Area, Spent Pile, and Used Pile. Keep these Areas separate on the table in front of you.
- No U-Turns: Don't try to change the face up side of any dice—yours or your opponents'. If you do so accidentally, carefully return the dice to show the proper face.
- Hands Off My Dice!: You can only use the dice in your own collection. You cannot use, roll, or spend other players' dice.
- No Peeking: While you can look inside your bag to count how many dice you have left, you MUST ensure that the dice are completely randomized (mixed well) before you draw any dice from your bag.
- That's Too Much: If you ever pull too many dice out of your Bag, return all the dice you drew to the Bag, shake it, and draw again until you have the correct amount.
- On the Table Please: If any dice fall off the table when you are rolling them, pick them up and roll them again, on the table.
- Looks Cocked to Me: If you roll a die and it lands on top of something so that it is crooked (or "cocked"), roll the die again.
- Roll Over: When you roll a die, it must roll at least once all the way around. You are not allowed to drop dice off the edge of your hand so that it only rolls one or two sides.
Advanced and/or Optional Rule
Quantity Capture Rule
During Phase 4 of your turn, you may capture up to two dice (instead of only one). More dice to roll = more fun!