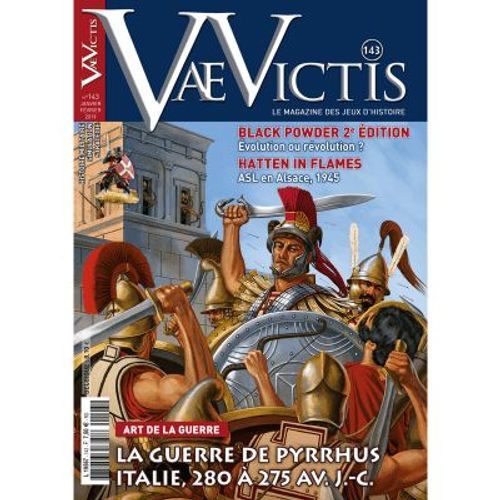
Pyrrhus Imperator
Pyrrhus Imperator Rulebook
Table of Contents
Table of Contents
- 0 - Materiel
- 1 - Sequence of Play
- 2 - Actions
- 3 - Land Combat
- 4 - Combat vs Samnites & Etruscans
- 5 - Siege
- 6 - Special Units
- 7 - Naval Combat
- 8 - Special Rules
- 9 - Scenarios
- 10 - Designer's Notes
0 - Materiel
0.1 - The Game Board
The game board represents a point in Africa but especially in Magna Graecia, which is the southern part of Italy and Sicily. The small islands are decorative elements.
The zones may be rural zones (plains are green, mountains are brown), sea zones (blue), or urban or city zones (squares). The anchors symbolise the ports. The rural and sea zones are separated by borders. The cities have a garrison value of 4 to 10 (black circle), a revenue value of 1 to 10 (yellow circle) and a defence value of 1 to 3 (tower).
0.2 - Counters
There are three types of counters: commanders, combat units and markers.
0.2.1 - Commanders
A commander counter represents an officer without troops. A commander with no combat unit (CU) who encounters an enemy CU is eliminated (taken hostage if Roman).
An army is composed of one or more combat units (CU) and a commander.
A commander may only command the CU of his camp and mercenary CU.
- Tactical Value (TV) illustrated by a die: it indicates whether the commander may re-roll 0, 1 or 2 dice for each battle.
- Strategic Value (SV): it indicates the maximum number of combat units (4 to 10) that may be commanded by this commander. This is a roman numeral for the Romans and an Arabic numeral for the others.
- Verso: the commander has been activated this season.
- Consuls A and B: the consuls are called A and B to differentiate them in the game help. They have no activated verso.
Note: A Roman commander cannot command a mercenary CU.
0.2.2 - The Combat Units (CU)
A combat unit (CU) represents a unit of 500 to 2,000 men or 500 to 1,000 cavaliers or 10 war elephants or 10 siege weapons. A CU has a melee value of 0 to 3 and a fire value of 0 to 4.
The Roman CU have a symbol: T for Triari, H for Hastati and V for Velite. The Greek allies also have a symbol.
Most CU have a coloured sword next to their melee value. This indicates that during a pitched battle, the unit moves to the front line if the player uses the "Dissuasion" tactic (blue sword and value) or the "Frontal Attack" tactic (yellow sword and value) (see 3.3).
- The Step losses: a CU has 1 Step loss. If a CU suffers one loss, it is Eliminated.
- Verso: the CU have a purchase value of 1 to 3 on their verso. The place of recruitment is also indicated.
0.2.3 - The Samnite and Etruscan Tribe Counters
The Samnites revolt against Rome constantly and engage in guerrilla warfare in their mountains. The Etruscans are a declining people who are practically at constant war with Rome.
The tribes have several Step losses symbolised by their Strength.
Each turn, a tribe counter may increase its Step Loss value by 1 (turn the counter over). They are allied to Pyrrhus.
0.2.4 - The Classis or Flotilla Counter
Carthage and Pyrrhus have a flotilla.
A flotilla has a die value of 1 or 2. It has a melee value and a fire value.
- Verso: the flotilla has been activated.
A flotilla has a value in Naval Points (NP). 1 x NP represents ten war ships.
0.2.5 - The Markers
Markers correspond to all the counters aside from commanders and units.
- Alea (Iacta Est): represents a die that a camp may re-roll. It is turned over to its verso (Iacta Est side) once it is used.
- Turn: indicates the current turn and season. It is placed on the corresponding space on the game board.
- Ravage: indicates a zone ravaged by an army (take a coin).
- Classis: keeps track of the number of Naval Points intact.
- Fortuna: this counter is attributed to the camp whose army won the last battle. The goddess provides a bonus to the camp she favours. At the beginning of the game, la Fortuna is neutral (she belongs to no player). The player that possesses her determines the order of the turn and the purchase of mercenary CU. If a minor camp (Greeks before they are allied with Pyrrhus, Campanians and Mamertines) wins a battle, la Fortuna is awarded to it. The camp with la Fortuna wins a re-roll for any die roll. If the camp uses it, la Fortuna becomes neutral again.
- Tactikos: these 8 counters allow the eastern player to choose his tactic in land or naval combat.
0.3 - Game Help
The game help includes the Battle zone where the two armies are facing off (see 3) and the positions for the army to place units assigned to a commander and their plunder.
The space with the laurel represents Rome's treasure; the space with the sign of Tanit represents Carthage's treasure.
0.4 - Dice
The game requires 6-sided dice. When 4+ is written, this indicates that the result of the die (plus bonuses) must be 4 or more. When 1d6 is written, this indicates that you must roll a die.
It is also recommended to have 20-sided dice or paper and pencil to tally plunder.
1 - Sequence of Play
Pyrrhus Imperator is played in a succession of game turns. A turn equals one year. A year is composed of two seasons and each season contains several sequences.
1.1 - Hot Season
Sequence 0: Nature reasserts itself. Remove the Ravage counters. The CU in the Elysian Fields (Elysii Campi) may be recruited again. Place them in the reinforcement zone (Supplementum).
Sequence 1: Initiative. If la Fortuna is neutral, the eastern camp decides the order of the turn. Otherwise, la Fortuna's owning player chooses.
Sequence 2: Preparation. The commanders are returned to their active side. The eastern camp and the Punic camp may play an event, respecting the order of the initiative. The Samnite tribe, if still in play, increases its strength by 1.
Sequence 3: Activation phase by alternating actions. Each player activates an available commander or a flotilla that will carry out a single action per turn. After an available commander has carried out his action, turn him to his verso; he becomes unavailable.
The players alternate the commander activations until exhaustion. If one player still has commanders and the other does not, he plays them all one after another. The action phase ends once both players have exhausted their available commanders and flotillas.
Exception: The two Roman commanders are played one after the other and are not turned over but are considered activated. Place them head down.
There is a special rule for each camp:
- In the eastern camp, Pyrrhus may play 2 actions in a row per season.
- In the western camp, a commander or a flotilla may play 2 actions in a row in one season but only once per turn. In a year, he will have two western counters that will have been able to carry out 2 actions in a season while for the east, it's always Pyrrhus.
Each commander or flotilla that has two actions to play must do so one after another.
Sequence 4: Collection by major camps. Each major camp collects its revenues according to its national cities and the cities it occupies. The minor independent cities collect nothing for themselves.
Make a distinction between the revenues of each camp: Rome, Carthage, Pyrrhus.
- Rome loses BP (Booty Points) for each tribe that is still active.
- Pyrrhus has the revenues of Epirus (3 BP).
The collected monies are distributed among the commanders, flotillas and capitals with no restrictions. Update the d20 on the game help.
Note: Pyrrhus does not collect taxes in Sicily and in Italy; he collects taxes only via events that cost him Hubris.
Sequence 5: End of the hot season. Turn the season counter over to its cold season side.
1.2 - Cold Season
Sequences 1 to 3 are identical to the hot season, except:
- The Etruscan tribe increases its strength by 1 if it is still in the game.
- The eastern camp and the Roman camp may play an event.
Sequence 4: Going home (free movement).
- Each CU and each commander that is not in a city returns to a city of its camp in the same geographical zone (Italy, Sicily or Africa), otherwise it is destroyed.
- Each flotilla must return immediately to an adjacent, non-blockaded port; if it is unable, it loses 1d6 of NP with no re-roll possible and remains in place.
- Now that everyone is in a friendly city, each player can distribute his commanders, his CU and his Booty Points (BP) as he wishes in the same geographical zone. The flotillas do not move.
Sequence 5: Recruitment.
- The Roman player must elect consuls. A consul taken hostage returns to Rome. The Roman player discards the two consuls of the year then takes two new ones, either by historical order or at random, but never two of the same in the game. The two commanders arrive where the other commanders were and take their treasure. If they were hostages, they arrive at Rome.
- The dead Carthaginian commanders are placed alive at Carthage. Note: a male member of the family replaces them.
- Mercenary CU: the player who has la Fortuna may buy first a maximum of 2 mercenary CU; the other player may buy 1 CU. Only the camp of Pyrrhus and Carthage may buy mercenary CU. A mercenary CU placed in Africa or Carthage costs twice as much.
- Each camp may recruit its national and allied troops.
- The CU in the Elysian Fields cannot be recruited.
| Units | Place the recruits in | Colour |
|---|---|---|
| Roman (V-H-T) | Rome or Latium | Red |
| Roman Allies | Rome or Latium or Campania or Bruttium | Red |
| Carthage | Carthage or Africa or Lilybaeum | Beige |
| Greeks from Italy | Home city or Italy, with Pyrrhus if in Italy | Light blue |
| Greeks from Sicilia | Syracuse or Agrigente or Henna, with Pyrrhus if in Sicilia | Light blue |
| Mercenary from Epire, Thessalia | With a commander | Grey |
| Creta, Rhodos | A port of Mare Ionium | Light blue |
| Naval unit | Carthage or Tarente or Syracuse |
Limitations
- It is impossible to recruit units of a city occupied by the enemy or a completely ravaged rural zone (for example the Bruttium is composed of two zones).
- To increase the size of the flotilla, it must be in Carthage, Taranto or Syracuse. This costs 5 x BP for 1 x NP.
- Each minor city that is still independent tries to buy back its available troops in the reinforcement zone according to the value in revenue of its city and puts them in its city. A city directed by Pyrrhus is not independent.
- A Roman army must respect certain quotas. As much as possible, it must maintain the proportion 1 x Triari + 1 x Hastati + 1 x Velite + 1 x Ally when it is created or moves.
Note: If you cannot recruit during this sequence, the commanders may spend an action to do so during their activation.
Sequence 6: End of the cold season. The Turn marker is advanced one space and turned over to its hot season side.
2 - Actions
2.1 - Commanders and Units That Act
- A commander acts with the CU he commands thanks to his SV.
- A CU that is commanded or not may only be activated once per season.
A. Commanded units. The SV of the commander indicates the maximum number of CU he commands. These CU form an army. They move with their commander. They can go to the first line of combat. They are placed on the player's army card, next to their commander.
If the army commander is eliminated:
- If there are other commanders in the army, the commander with the highest SV takes the command (if there are two or more with the same SV, the army is divided into two or more). If the size of the army is greater than the SV of its new commander, certain CU fall out of command.
- If there is no other commander in the army, all his CU become out of command.
B. Out of command units. They only move one by one, each at the cost of an activation. They participate in battles but cannot be in the first line. Without a commander, they are left on the map.
C. Other counters assigned to a commander. These counters do not count in the commander's SV. A commander may have commanders with a strategic value less than his own in his army. These commanders are placed on his army card, but they may not use their strategic value. They do not spend their action for the actions taken by the army to which they belong.
2.2 - Common Actions
2.2.1 - Action: None
The commander passes his turn and becomes unavailable.
2.2.2 - Action: Moving an Army
2.2.2.1 - Limits
- Historical
- No Carthaginians or Mamertines in Italy.
- No Romans or Campanians in Sicily.
- No more than one elephant and four Greek infantries (Epirus, Rhodes, Crete) in Sicily.
- The Greeks from Italy do not go to Sicily or Africa and those from Sicily do not go to Italy. The mercenaries go everywhere.
- Physical
- There can be no more than 10 CU from one camp in a region. A tribe does not impact this limit. The number of CU in a city is limited by the size of its garrison.
2.2.2.2 - Normal Movement
A commander may move his army one zone. The movement occurs from one zone to another adjacent zone. The terrain has no effect on movement.
When an army leaves a city, it may go to a rural zone that encompasses the city or to an adjacent rural zone. If an enemy army is in the rural zone that encompasses its city, it may only move to this same rural zone.
Example: When leaving Taranto, an army may go to Salento or Apulia. If an enemy army is in Solento, the army that leaves the city may only go to Solento and provokes a battle.
An army that goes into a rural zone, provokes a siege and wins it may freely enter the conquered city. This is a movement plus a free attack plus a free movement.
At the beginning or end of his movement, a commander can exchange the units of his army with those of another army present in his zone and commanded by a commander with a lower SV or with the out of command units in his zone. He may also add to his army units that are out of command or commanded by a commander of lesser SV, as SV limits allow (if the entire army of a commander with inferior SV moves to his command, this commander and his plunder are integrated into his army).
At the beginning or end of its movement, if a principal army contains subordinate commanders, they may be transformed into an autonomous army by attributing to them one or more CU and BP of the principal army.
The exchange of units and the abandoning of CU are the only cases in which a commanded CU may become voluntarily out of command.
An army that enters a zone occupied by an enemy army provokes a battle.
2.2.2.3 - Forced March
A forced march is a movement of a distance of two adjacent zones similar to a normal movement.
If the army that carries it out crosses an enemy or launches a siege, its adversary (city, army or tribe) wins an Alea counter for this engagement.
This movement costs its commander 1 x BP.
2.2.3 - Action: Moving an Isolated CU
When a player activates a commander, he may move an isolated CU (of his nationality) instead of having the commander act.
2.2.4 - Free Action: Ravage
A commander who moves and who has at least one CU may choose to ravage the rural zone he arrives in. Place a coin in the ravaged rural region. The camp wins 1 x BP.
One may neither recruit in nor ravage a region that has already been ravaged.
2.2.5 - Free Action: Attack
If an enemy army is in the arrival zone, combat automatically ensues.
If an enemy city is in the arrival zone, the arriving party may declare a siege combat.
If there are several enemies, the arriving army must first attack the army of its choice, then the tribe of its choice, then the city of its choice. It may not attack more than one city at a time, but it must attack all the enemy armies present as long as it is victorious.
2.2.6 - Action: Naval Movement
A flotilla is symbolised by Naval Points (NP). The Carthaginian and the Epirote may move by sea as many CU as they have NP and as many commanders as they wish. If the number of NP decreases whilst there are CU at sea, certain CU may be destroyed.
A flotilla moves one sea zone per action. Once it is in the sea, after potential interception of the enemy flotilla, it can immediately enter a port or create a blockade there.
Limitation: The Punic flotilla may not go into the Ionian Sea or the Adriatic Sea because of a treaty with Rome.
2.2.6.1 - Embarking and Disembarking
A CU may only embark in a port (city with an anchor). Once the flotilla moves, it may embark and disembark CU in the same action. A CU may disembark in a rural zone containing a city with a port. When it arrives, it can immediately launch a siege.
Exception Strait of Messina: if a flotilla is in the Strait of Messina, an army of its camp may pass from one end of the strait to the other during its movement by paying 1 x BP, regardless of its number of NP.
Note: the dotted line surrounding Africa on the map is purely symbolic and illustrates the zoom on the map.
2.2.7 - Action: Naval Blockade
A flotilla in a city is considered to be in the port. It is untouchable. If the city is taken, the flotilla is captured, its NP are taken by the enemy on a 5+, otherwise they are destroyed.
An enemy flotilla touching an anchor is considered to be maintaining a blockade, and the city:
- has no more revenue;
- has defence value reduced by 1;
- can no longer receive reinforcements from Thessalia, Crete or Epirus if it is a port city of the Ionian Sea or from Africa or Carthage if it is Lilybaeum.
2.2.8 - Action: Naval Interception
If two flotillas are on the same sea, one flotilla may intercept the other for an action (it's a free action if it just arrived in the sea).
The interception is successful on 5+. The flotilla may use a re-roll, but if so, it cannot use it in combat. If it is successful, a combat ensues. Otherwise, nothing happens.
If the two flotillas want to meet, a combat occurs immediately.
If a flotilla forms a blockade and an enemy flotilla breaks through it by coming out of the port or arriving from the sea, there is a combat.
2.2.9 - Action: Recruiting One More Unit
2.2.9.1 - Limitations
The commander may not recruit if he is:
- in a zone with a Ravage marker;
- in a region that does not belong to his camp.
It is prohibited to recruit mercenaries in this manner.
2.2.9.2 - Recruiting
A commander spends his Action to recruit in the zone he occupies. He pays the price on the verso of the CU(s) within the limits of his available CU.
A recruited CU is placed on the army card next to the commander who just enrolled it.
A recruited CU may move during the year.
Pyrrhus' camp may recruit Samnite CU when he is in Samnium and as long as the Samnite tribe is active.
2.2.10 - Action: Harassment of the Sons of Mars
The Mamertine or Campanian commander who sees an enemy army adjacent to his army may harass them. Each shooter has a fire action. The player takes his losses. Then, the army in the targeted region may return fire with all its units with fire capacity and the Mamertine or Campanian commander distributes his losses among the shooters that participated in the harassment. Finally, the surviving shooters return to their region before the harassment.
There is no plunder possible for the two camps during harassment.
2.2.11 - Action: Ambush
If an army ravages Rhegium or the Nebrodes Mons, the adjacent army of a Mamertine or Campanian commander may attack immediately if its commander hasn't yet used his action for the turn.
Roll the die, on 5+, it's an ambush. Otherwise, it's a normal attack.
In the case of an ambush, the Mamertines or Campanians fire first, the enemy takes its losses, then the two armies carry out their fire, and the battle continues normally.
2.3 - Required Actions (Free)
2.3.1 - Action: Orgy
In the absence of a commander, a CU cannot have any BP. A commander with no CU or NP cannot transport plunder.
If all the commanders of an army are eliminated or if the commander abandons his army, the plunder of this army is lost (the soldiers waste it as they see fit).
2.3.2 - Action: Retreat or Disengage
Retreat movement is an obligatory movement and therefore a free action (see 3.5.3).
3 - Land Combat
As soon as enemy CU (with or without commander) are in the same zone, they must affront each other.
If two armies of the same camp are in the same zone and are attacked, they are done so separately (the exchange of units between commanders at the moment of attack is impossible) and the attacked player chooses which army is attacked first. Any out of command CU defend themselves with either commander, as the defender chooses.
3.1 - The Battle Sequence
A battle is composed of several segments.
Segment 0: Deployment. Use the game help "Battlefield" and place on it:
- The CU of each camp in the second line [Secunda Acies].
Segment 1 (simultaneous and hidden): Land tactic choice. Each player secretly chooses a land tactic (EXCEPT in the case of a skirmish, see 3.2.1, or an army with no commander, see 3.2.2). The eastern player places his tactical counter face down, the western player announces his tactic and then the eastern player turns his tactical counter over.
The player who chose the "General Attack" tactic [Signa Inferre] receives an additional Alea Iacta Est marker valid only for this battle.
Segment 2: Pitched battle. In phases 1 to 2, announce, before rolling each die, to which unit this corresponds. The players roll their dice simultaneously to manage their re-rolls.
Tip: If possible, place a die on the counter that just attacked successfully. One die per counter.
- Phase 1 (simultaneous): Fire. All CU with a fire factor may fire (see 3.4). At the end of this phase, a Retreat in good order may be attempted by the commander who chose the "Dissuasion" tactic [Infestis Pilis] (see 3.4.6).
- Phase 2 (simultaneous): Melee. All the commanded CU concerned by the tactic chosen by the player move to the front line [Prima Acies]. Move the corresponding units on the battlefield. If the attacked commander cannot command all the CU, leave the out of command CU in the second line [Secunda Acies]. All CU with a melee factor may engage in melee (see 3.4). The CU in the front line may carry out Critical Hits (see 3.4.1). At the end of this phase, a Retreat in good order may be attempted by the commander who chose the "Dissuasion" tactic (see 3.4.6).
Segment 3: Determination of victory. To determine who wins a battle, the players compare their losses since the beginning of the battle (see 3.5). Then, there are different consequences for the victor (see 3.5.2) and the defeated (see 3.5.3). Finally, the counters are returned to the game board or the army cards (see 3.5.5).
3.2 - Special Cases for Battles
3.2.1 - Skirmish
If one of the two armies has 3 x CU or fewer, the battle is a skirmish. There is no tactical choice (ignore segment 1) so no Critical Hits and no Retreat in good order.
3.2.2 - Army Without a Commander
One or more out of command CU may combat normally. If they are attacked they are treated like a single army.
The defender without a commander may not choose a tactic and so cannot engage in Critical Hits or a Retreat in good order.
On the other hand, the attacking commander chooses his tactic (if the two armies have more than 3 x CU) and takes advantage of the bonus but cannot annihilate his adversary by his tactical choice (see 3.5.1).
3.2.3 - Crushing
If an army has six times as many CU as the enemy army, it crushes it. All the CU of the crushed army are destroyed and the plunder is automatically seized.
A CU in a city cannot be crushed.
3.3 - Tactical Choices
Each camp secretly chooses a Tactic, which sometimes allows for moving certain CU to the front line. The CU in the front line may also carry out Critical Hits, in melee only, but must suffer the first two losses received during each melee phase.
Only commanded CU may move to the front line and therefore inflict Critical Hits.
To choose a tactic, the camp must have at least one commanded CU that can go to the front line except for the General Attack which is always possible.
- Wings [Ala]. The cavalry CU go to the front line (attacking at the flanks). Precision: elephants are not cavalry.
- General Attack [Signa Inferre]. The player has an additional re-roll. Take an Alea Iacta Est combat marker. He has no CU in the front line.
- Dissuasion [Infestis Pilis]. The CU with a blue sword move to the front line. The player may attempt a Retreat in good order at the end of each fire phase and each melee phase.
- Frontal Attack [Ad Gladios]. The CU with a yellow sword that points up go to the front line.
3.4 - Fire and Melee
During the fire and melee phases, players must respect the following steps:
- The players roll a die for each CU that has a fire or melee factor, following the case.
- The CU in the front line may carry out Critical Hits (see 3.4.1) (melee phase only).
- The losses are calculated (see 3.4.1).
- Any re-rolls occur (see 3.4.2).
- The losses are then distributed (see 3.4.4) and recorded (see 3.4.5).
3.4.1 - Calculation of Losses
General case. If the die roll result is less than or equal to the unit's fire value (phase 1) or melee value (phase 2), a loss is inflicted on the enemy. The player then places the die on this counter. There is no effect if the die is greater than the value.
Examples: A rebel from the Balearic Islands inflicts a loss during the fire phase on a d6 of 1, 2 or 3. He cannot do so in melee. A cavalryman from Campania inflicts a loss during the fire phase on a die roll result of 1 and on 1 or 2 in the melee phase.
Critical Hits. During a melee only (phase 2), a CU in the front line inflicts 2 losses on a result equal to its melee value. It inflicts 1 loss on results less than its value.
Example: A Triari (3 in melee) inflicts a loss during the melee phases on a die roll of 1, 2 or 3. Note, if its commander chose the "Frontal Attack" tactic, he inflicts a loss on 1 or 2 on the d6 and two losses if he rolls a 3.
3.4.2 - Re-rolls
During the battle, each commander or flotilla may use his re-rolls from his TV, the defence of the city, from la Fortuna or a forced march. Only one commander uses his TV in battle; during a naval battle, the flotilla, rather than a commander, takes its TV.
During the fire or melee phases, the player may re-roll the dice before calculating the losses for his own CU or his opponent's.
3.4.3 - Effects of the Losses
A CU that suffers a loss is eliminated. An eliminated CU is placed in the Skeleton space on the "Battlefield" game help.
3.4.4 - Distribution of Losses
The losses are distributed as the player who suffers them wishes, respecting the following:
- First, the CU in the front line must suffer the first two losses received during each melee phase.
- Then, the Roman blood must be spared. For this reason, the stand-ins must be destroyed first, then the Velites, Hastati and finally Triari. You must respect the minimum losses imposed by the tactical choices.
Idem for the Punics: they must first sacrifice the mercenaries, the Libyans and the Numidians before the Punics.
The losses during a combat are simultaneous and take effect at the end of each phase in progress (fire, melee).
Example: The player chose the "Frontal Attack" tactic. He suffers 1 loss during the fire phase which he decides to attribute to a Cretan rebel (a wise choice since the latter has no melee value). During the melee phase, he suffers 3 losses. He must attribute 2 losses to 2 CU in the front line. For the third loss, he may attribute it to the CU of his choice.
3.4.5 - The Calculation of Losses
For each fire phase and each melee phase, the losses inflicted by each camp are counted.
3.4.6 - Retreat in Good Order
At the end of phases 1 and 2, the player that chose the "Dissuasion" tactic may attempt to carry out a Retreat in good order.
To do so, he rolls a die. The retreat is successful on a 6 if the battle took place in a plain and 4, 5 or 6 in the mountains. He is declared defeated, but there is no destruction possible; the commander retains his units. He loses 1 x BP per enemy cavalry.
The units are returned to the army card. The commander retreats to an adjacent zone according to the rules (see 3.5.3).
If the Retreat in good order fails, the battle continues its course.
Note: Since this option is free, the player may attempt another Retreat in good order during the following phase.
3.5 - The Final Effects
3.5.1 - The End of the Battle
A battle ends when:
- One army successfully Retreats in good order (see 3.4.6).
- One of the armies is annihilated (all its CU are in the Skeleton space).
- The two phases have been played.
If the two armies still have non-eliminated CU after the last combat phase, the army that suffered more losses is declared defeated. If the losses are a tie, it's a Status Quo (see 3.5.4).
Except in the case of a Status Quo or a skirmish or a successful Retreat in good order, consult the Pursuit Table below by crossing the tactical choices of the two camps to determine what happens to the defeated army.
Results:
- AD: The defeated Army is completely Destroyed.
- R: The defeated Army Retreats.
- SQ: Status Quo (see 3.5.4).
Precision: If the victorious army has an AD result and it has no cavalry, the enemy army is defeated and not destroyed.
Pursuit Table (rows: tactic of the victor; columns: tactic of the defeated)
| Victor \ Defeated | Frontal | General | Dissuasion | Wings |
|---|---|---|---|---|
| Frontal | R | AD | R | R |
| General | R | R | AD | R |
| Dissuasion | R | R | SQ | AD |
| Wings | AD | R | R | R |
3.5.2 - The Effects for the Victor
The victor takes (or keeps) la Fortuna marker. It is placed on the capital of the victor or its tribe or Pyrrhus or the neutral city.
If an army is defeated, the defeated army gives the BP it had with it. All the Roman commanders taken hostage are liberated and discarded.
A commander wins 1 BP for each enemy CU eliminated during the battle that has a yellow gladiator sword. He may not stock up more than 20 BP.
3.5.3 - The Effects for the Defeated
If all his CU are destroyed, the commander is taken hostage if he is Roman, otherwise he is killed. The defeated player does not win BP.
If the defeated commander still has CU, he retreats to an adjacent zone.
It is impossible to retreat to a zone occupied by the enemy or that was occupied by the enemy just before the battle. If the attacker is defeated, he returns to the zone he occupied before the attack.
If the defeated cannot retreat, all his CU are eliminated and these new losses are added to the calculation of plunder, in addition to the CU eliminated during the battle.
3.5.4 - Status Quo
The attacker returns to his starting zone. There is no plunder.
La Fortuna becomes or remains neutral and is placed on its space.
3.5.5 - Repositioning of Counters
At the end of the battle, reposition the counters.
- The eliminated CU go on the Elysii Campi space on the game board.
- The other CU return to the army card.
- If a CU has no commander, place it on the map. The CU are turned face down (optional).
4 - Combat vs Samnites & Etruscans
It proceeds like a land battle with the following characteristics:
- There is no tactical choice.
- With each loss, the tribe loses 1 strength level; at 0 it is destroyed.
Phase 1 (simultaneous): Fire. The Roman units fire. The tribe inflicts 1d6 - 3 losses on the Roman army (minimum of 0).
Phase 2 (simultaneous): Melee. The Roman units engage in melee. The tribe inflicts 1d6 + 1 losses on the Roman army.
Advice: the Roman commander's re-roll die may allow the tribe to re-roll a die.
Segment 3: Determination of victory. The Roman player wins if he gets the tribe to a strength of 0; otherwise he loses and must retreat. The Tribe takes la Fortuna.
If the Roman player wins, the tribe counter is removed from the game and he takes la Fortuna.
There is never any plunder.
5 - Siege
If a city has at least one CU, there is always a siege. If there are no CU present, the city is taken automatically. An empty city returns to its original camp. The Greek cities occupied once militarily by Pyrrhus' camp or seized by an event are always in Pyrrhus' camp.
On the other hand, a city that has at least one CU and that has never been taken by Pyrrhus defends itself if Pyrrhus attacks.
Example: Syracuse at the beginning of the game.
The siege proceeds like a land battle with the following defining characteristics:
- The defender takes one Alea Iacta Est marker per defence level of the city. If an enemy flotilla blockades the port, the city loses a defence level.
- The play out of the battle is a little different.
- There is no tactical choice.
- The besieged CU are considered commanded, even if they have no commander at their head.
Phase 1: Fire by the besieged, then the besieger. The besieged units fire, then the besiegers.
Phase 2 (simultaneous): Melee on the walls. All the CU with a yellow sword move to the front line [Prima Acies] and may carry out Critical Hits.
Phase 3 (simultaneous): General melee. Idem Phase 2. The besieger is not required to set off this second melee phase. He can stop there.
Segment 3: Determination of victory. The besieger wins if he has destroyed all the enemy CU or if the surviving besieged CU have no melee value. Otherwise he loses and returns to the rural region adjacent to the city. If the besieger does not destroy the besieged, la Fortuna goes to the besieged.
Plunder is only calculated if one of the two combatants is annihilated.
If the besieger wins, he distributes his CU and commanders as he wishes between the conquered city and the surrounding rural region.
6 - Special Units
- Elephant CU. An elephant CU has a value of 5+ in the first pitched battle against the Romans. It has 4+ in the second. For a siege, it remains at 3. A destroyed elephant CU can never return to the game. Note: Asia is far away.
- Artillery CU. An artillery CU may only combat during a siege. During a land melee, it may suffer a loss and be destroyed. The ballista of Syracuse can only be bought by Pyrrhus.
- Mercenary CU. A mercenary CU that is alone is played in the recruitment zone. It must always be surrounded by a general and a non-mercenary CU, otherwise it returns to the Supplementum space.
7 - Naval Combat
It proceeds like a land battle with the following defining characteristics.
The flotillas confront each other in the Sea and not in a port.
There are naval tactical decisions to be made.
A flotilla has a melee value and a fire value. Each NP has this value. Take one die per NP.
- Diekplous. This flotilla does not fire and can carry out Critical Hits in melee. It attacks first in a melee.
- Kuklos. The flotilla fires first and attacks second in melee.
- Periplous. This flotilla does not fire; it attacks second in melee and carries out Critical Hits on 1 and 2. The player has an additional re-roll. Take an Alea Iacta Est combat marker.
- Abordage. The flotilla fires and combats in melee normally.
The phases are played this way unless the tactical choices modify them. If the two flotillas must both fire or engage in melee first, they do so simultaneously.
Phase 1: Simultaneous fire. The two naval units fire simultaneously.
Phase 2 (simultaneous): Abordage. The two naval units engage in melee simultaneously.
Segment 3: Determination of victory. The victor is the player with fewer losses. In the case of a tie, it's a Status Quo.
The defeated may go to an adjacent port or remain in the same sea.
Remove the land CU that are no longer on a ship. Then, for each loss of the defeated, the attacker rolls 1d6; on a 5+, he captures the NP, otherwise it is destroyed.
8 - Special Rules
8.1 - Destiny
Once per battle, each commander or flotilla can decide to re-roll 0 to 2 dice depending on its tactical value.
The defence of a city increases the number of re-rolls.
8.2 - Revenue
Each camp collects revenues, allowing for the reinforcement of the armies and the play of certain actions.
The revenues are symbolised by 20 dice or d20 (or any other means at the players' disposal). A revenue die cannot exceed 20. A commander or capital or a flotilla has a single d20 of BP.
Rome's revenues are placed in Rome and Carthage's in Carthage (use the game help).
When a commander plunders, the BP are placed with the commander. A Roman commander or a Punic commander or flotilla in its capital can deposit or take BP from there.
When Pyrrhus collects taxes, he can distribute the BP to his commanders and his flotilla, respecting the geographic zone of collection.
The annual revenues (3 x BP) of Epirus are distributed among the commanders and the flotilla as the player wishes.
If a d20 already has a high value and the player adds BP, the result may not exceed 20; if it does, the BP are lost (well, not for everyone).
9 - Scenarios
This conflict is very complex and takes into account one camp per Greek city plus the Etruscans, Samnites, Romans, Punics, Mamertines and the king of Epirus. There is a great deal of politics and struggles for influence that are swayed according to the military events, a bit like with the kings of France during the Italian wars.
9.1 - Shared by the Scenarios
9.1.1 - The Positioning of the Forces
General conditions
- Hubris: begins at 15.
- La Fortuna is neutral: place it in her space.
- Place the hot season marker on the year 279.
Rome
- Sabinia or Campania or Capua or Picenum: 1 x consul A and 2 x T + 2 x H + 2 x V + 1 x ala.
- Latium or Rome: 1 x consul B and 2 x T + 2 x H + 2 x V + 1 x ala.
- Capua: 2 x Campanians.
- Locri: 1 x Bruttian ally.
- BP: one per commander.
Pyrrhus
- Taranto and Salento: all the units from Taranto, Epirus, Thessalia, Crete, Rhodes and Asia to be distributed. Epirote commanders to be distributed.
- The flotilla is at Taranto.
- NP: 4.
- BP: 3 to be distributed.
- Pyrrhus may only collect taxes in Italy.
Carthage
- All the Punic CU. To be distributed among: Carthage (2 x CU min), Lilybaeum, Agrigente (1 x CU max), Henna (1 x CU max), Mount Eryx (1 x CU max).
- One commander at Carthage and another at Lilybaeum.
- NP: 10 placed at Carthage.
- BP: one per commander and one for the flotilla.
Greeks
- Syracuse: all its units and its commander except the ballista.
- The Greek cities are either neutral or occupied by Rome or Carthage.
- The Greek cities go to Pyrrhus' camp only by event. If he takes them by force, he cannot recruit their troops.
Mamertines
- Rhegium: all the Campanian counters.
- Messina: all the Mamertine counters.
Tribes
- The Samnites begin at a strength of 5; the eastern player chooses in which region of Samnium he positions himself.
- The Etruscans begin at a strength of 5.
Supplementum Area
- All mercenaries: 5 CU.
- All Samnites: 2 CU.
- Ballista of Syracuse: 1 CU.
- Paestum, Heraclea, Locri and Crotone: 4 CU.
9.1.2 - The Hubris of Pyrrhus
The king of Epirus is impulsive and combative. He uses expedients to arrive at his ends and considers his backers like vassals. His excessiveness provokes the ire of the Greeks. Pyrrhus' hubris waxes and wanes according to his actions and the events. It can exceed neither 0 nor 20.
Subtract 1
- Levy taxes in Italy or in Sicily.
- Ravage a region other than Campania, Latium, Picenum, Sabinia, Africa.
- Defeat in skirmish.
- Carthage's offer of peace is refused.
Subtract 2
- Defeat in pitched battle.
- Ravage Locri.
- Levy taxes in Italy and in Sicily.
- Pyrrhus wants to land in Africa.
Subtract 3
- Syracuse is Punic.
- Taranto is Roman.
Add 1
- Victory in a pitched battle, siege or naval battle.
- Capture of Capua, Lilybaeum, Mount Eryx, Messina or Rhegium.
- Liberate a hostage.
- Offer of peace at Rome.
9.1.1 - The Events
In each season, each camp may play an event. Certain events cost BP and require a certain minimum level of Hubris to be played.
An event may only be played once per game unless it is marked by an *.
9.1.1.1 - Pyrrhus' Events
When Pyrrhus is in Italy
- Paestum and Heraclea rally around Pyrrhus; Hubris > 10+. The cities go over to Pyrrhus. Place his unit in each city. The Romans or their allies that are present return to Rome.
- Locri and Crotone rally around Pyrrhus; Hubris > 10+. The cities go to Pyrrhus' side. Place his unit in each city. The Romans or their allies that are present return to Rome.
- Offer of peace at Rome*; Hubris > 10+. It is refused. Pyrrhus loses 1d6 of plunder.
- Pyrrhus ravages Locri. He must be in the city with his army. He wins 1d6 + 6 of BP. The city is ravaged for the whole game and does not generate any more revenue.
- Samnite Revolt (275 BCE). The Samnite counter wins 2 in strength.
- Sicily calls Pyrrhus; Hubris > 10+ and after 279.
- Pyrrhus is placed in Syracuse with a maximum of 1 x elephant CU and 4 x infantry CU, his flotilla and one of his sons (Alexander or Helenus).
- Pyrrhus can collect the revenues from Sicily and direct the troops and command the Greeks of Sicily (not the Mamertines).
- The Carthaginian CU in Sicily are placed at Lilybaeum and/or at Mount Eryx, idem for their commanders. The flotilla is positioned at Carthage.
- Pyrrhus' flotilla gains 3 x NP.
- This event may be played even if Syracuse is Punic.
When Pyrrhus is in Sicily
- Agrigente and Henna rejoin Pyrrhus in Sicily; Hubris > 10+.
- Pyrrhus now directs these two cities.
- The CU of these cities are positioned at these cities.
- The Carthaginian CU at Agrigente and Henna go to another Punic city.
- Pyrrhus' flotilla gains 1 x NP.
- Pyrrhus wants to land in Africa. Pyrrhus' flotilla gains 4 x NP.
- Influx of mercenaries. The number of mercenaries that Pyrrhus can recruit this season is multiplied by two.
- Liquidation sale. The mercenaries are worth 1 x BP this year for Pyrrhus.
- Pyrrhus is first on the wall. During a siege this season, Pyrrhus removes one level of defence from the besieged city during an attack. If he loses the battle, he dies on 6+.
Anywhere
- Pyrrhus requests subsidies from the Diadochi. He gains 1d6 - 2 of BP.
- Storm (cold season). The flotillas that sail in the sea (not toward a port) suffer 1d6 of losses.
- Nephew of Alexander the Great. This season, no enemy army may attack the city where Pyrrhus is located.
- Levy taxes in Italy and in Sicily*. The commanders present in these geographic zones distribute the BP generated by the occupied or rallied cities. The BP arrive in their geographic zone of removal.
- Levy taxes in Italy or in Sicily*. The commanders present in these geographic zones distribute the BP generated by the occupied or rallied cities.
9.1.1.2 - Events of Carthage
- Henna secedes if Hubris < 7. Pyrrhus' troops must abandon Henna and are placed in the adjacent rural region. Henna's CU is placed in Henna (even if it was at the Elysian Fields or with Pyrrhus).
- Agrigente secedes if Hubris < 6. Pyrrhus' troops must abandon Agrigente and are placed in the adjacent rural region. Agrigente's two CU are placed in Agrigente (even if they were in the Elysian Fields or with Pyrrhus).
- Defection of Syracuse: if Hubris < 5. The Syracuse commander Hiero is killed. The Syracuse troops can no longer be recruited by Pyrrhus but remain with him. If the city has no more CU from Epirus or from Thessalia, it becomes free and the CU from Crete, Rhodes or Asia are automatically placed in a city under Pyrrhus' control. Pyrrhus' flotilla can no longer be reinforced at Syracuse.
- Holocausts to Baal. La Fortuna becomes Punic for 1d6 + 3 of BP.
- Aggressive Campanians. Rome can play the Campanians of Rhegium this year to lead one aggressive action per season against an eastern or Roman army but not against a city.
- Strong proposition. The number of mercenaries that Carthage can recruit this season is multiplied by two and they are worth 3 x BP each instead of 2 x BP.
- Flotilla lying in ambush. The Carthaginian flotilla automatically succeeds its interception one time if it is in the Strait of Messina or in the sea bordering Africa. This event may be stocked until it is played.
- Naval alliance between Rome and Carthage. The Punic flotilla may sail to all the seas for the entire game.
9.1.1.3 - Events of Rome
- Offer of peace of Carthage refused. Carthage loses 1d6 x BP.
- Material alliance between Rome and Carthage. At each revenue phase, Rome or Carthage may give 3 x BP of its treasure to the other side.
- We are legions. Take four Roman counters in the Elysian Fields and place them in Rome.
- Sacrifices to the gods. La Fortuna becomes neutral for 1d6 of BP.
- Aggressive Mamertines. Rome may play the Mamertines of Messina this year to lead an aggressive action per season against an eastern or Punic army but not against a city.
- Decius practices Devotio. This season, Decius sacrifices himself during a pitched battle, the Roman player wins a re-roll and the Roman commander is killed at the end of the battle.
- Pyrrhus punishes the Tarentines for treason; if Hubris < 8. One CU from Taranto is destroyed and removed from play.
- Gold for the Etruscans. The Etruscans' revolt level decreases by 2 for 1d6 x plunder. It cannot reach 0.
9.1.2 - Victory Conditions
- "Pyrrhus-style" Victory or historical result. Pyrrhus controls only Taranto and Syracuse at the end of the last turn. The Etruscans and Samnites are pacified.
- Automatic defeat of Pyrrhus at the end of a year. Taranto and Syracuse are taken or Pyrrhus is killed or the Hubris of Pyrrhus is at 0.
- Automatic victory of Pyrrhus at the end of a year. There are several cases possible:
- Rome or Carthage is taken and Pyrrhus controls Taranto and Syracuse;
- Pyrrhus controls all the cities of Sicily and Taranto;
- Pyrrhus controls Syracuse and all the cities of Italy except Rome;
- Pyrrhus controls all the Greek cities, Messina, Rhegium plus a Roman city or a Punic city.
If there is no victory, it's the one of the three camps with the most revenue that wins. With two players, Rome and Carthage are not cumulative.
9.2 - Two Player Scenario
The position was to divide into two big camps: the king of Epirus against the Romano-Punics and the small independent camps.
The Greeks are with Pyrrhus but not all of them at the beginning because they are occupied by the Romano-Punics. They may even end up leaving him and becoming independent again.
The Mamertines and the Campanians are two autonomous very close cities that lean more toward the Romano-Punics. Anyone can attack them to increase their revenues.
9.3 - Three Player Scenario
Everything is identical except:
- The Roman and the Carthaginian are separate players.
- To win, the Carthaginian must control all of Sicily and the Roman player all of Italy.
- When Pyrrhus is in Sicily, the Roman player has two actions. If he is in Italy, it's the Punic player. This simulates Pyrrhus' swiftness and the fact that when the watchdog wasn't there, his enemies regained their strength.
- If Pyrrhus dies, the game continues and the Hubris doesn't move again. Any events concerning Pyrrhus are no longer playable.
- The alliance events no longer exist unless both concerned players agree and in this case only this event is played during the year for both players.
9.4 - Adjustments
It is possible to adjust the game to help a beginner player or if you find one camp to be too strong. The choices are:
- Syracuse has the ballista at deployment or a mercenary drawn at random.
- Hubris: begins at 12 to penalise Pyrrhus.
- The less experienced player begins the game with la Fortuna.
10 - Designer's Notes
10.1 - Hidden Play
It is possible to play with one's CU placed on their verso on the game help. During the combats, turn your CU to their visible side only after you have revealed your tactical choice.
You may also reveal only the shooters at the fire phase, then all the CU at the melee phase.
10.2 - Advice
Pyrrhus was an impulsive general who could lead his men into daring and perilous plans. For this reason, the games can be very quick because Pyrrhus might fall into an ambush or quickly demolish an enemy.
They can also be longer if the Romans and the Carthaginians require Pyrrhus to go from one field of operation to another.
Never forget that revenues arrive one season before the winter recruitment, except if you recruit with a commander's action. Attention, the "dead" only return at the beginning of the hot season!
There are many strategic choices and it is up to you to surprise the enemy.
May la Fortuna be with you!
10.3 - Historical Details
Pyrrhus began his campaign in 280 BCE. The game begins in 279 BCE to better manage the political complexity with the revolt of Rhegium, the Greek rallying and the siege of Syracuse.
The term Velite for the light Roman troops appears during the Second Punic War. Leves or accensi would have been more pertinent but Velite is better known by players. Rest assured that it is the same type of troops: tactical, equipment, social milieu for recruitment. Only the Velite's characteristic wolf's skin is different!
The names of the cities are sometimes in Greek and sometimes in Latin or even in French. At the time, cities might change camps several times a year. For players' comprehension, the most popular names were chosen.