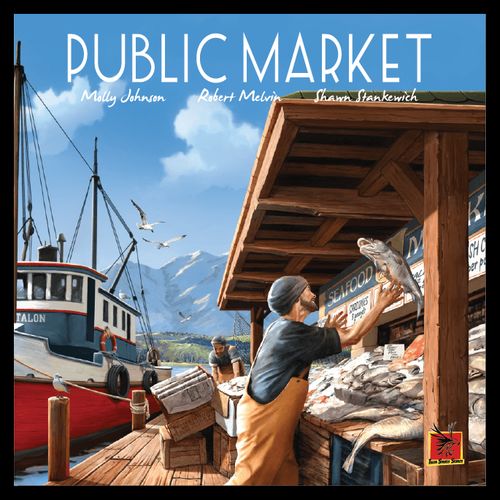
Public Market
Public Market Rulebook
Table of Contents
Table of Contents
Components
1 x Market Board, 4 x Player Mats, 10 x Ice Chests, 1 x Ocean Bag, 4 x Scoring Locations, 2 x Collection Locations, 45 x Fish Tiles, 72 x Money Tokens, 24 x Crab Meeples (6 per player), 12 x Red Today's Catch Cards, 16 x Blue Today's Catch Cards, 18 x Public Contracts Cards, 30 x Scrap Fish Tiles, 1 x Boat Token, 4 x Player Tokens (1 per color), 32 x Cubes (8 per color), 1 x Final Rounds Counter, 16 x Gear Tokens (4 per player), 16 x Fish Tokens (4 per player).
Game Set Up
- Place the market board on the table.
- Place the scrap tiles of the 4 fish types above the market board: sardine, herring, cod, and salmon.
- Place the money near the market board. This is the bank.
- Shuffle the ice chest cards and place them in a stack near the scraps.
- Separate the Public Contract Cards by column number, 1 through 4. Shuffle each column stack, draw 2 cards, then place them face up below Scoring Location Tile with the matching column number. The rest of the Public Contracts will be returned to the box, they will not be used this game.
- To start setting up the Public Market, place the Scoring Location Tiles under the Market Board starting with sardines, then herring, cod, and finally salmon.
- Take the victory point location tiles with the set collection icons and place them on the left hand side of the public contract cards area.
- Shuffle the red "Today's Catch" cards (12 cards). Under the public contracts as shown in the set up diagram, deal out 4 stacks of 3 cards each face down.
- Shuffle the blue "Today's Catch" cards. For a 2- or 3-player game, deal 3 cards evenly on top of the red "Today's Catch" cards face down. For a 4-player game, deal 4 cards evenly on top of the red "Today's Catch" cards face down. The remaining "Today's Catch" cards are not used and can be returned to the game box. Now flip the top card face up on each of the 4 stacks.
- Place the boat token under the leftmost "Today's Catch" stack.
- Place 12 tiles per player in the ocean bag provided. 36 tiles for 2-players, 36 for 3-players and 48 for 4-players. Shake the bag up and draw out 16 tiles. Place these tiles into 4 columns each with four tiles.
Player Set Up
- Each player will take a player board.
- Each player will choose a color and take the meeple and 8 cubes of the matching color. Seven of the cubes will be placed next to your board for scoring and one cube will be placed on the shrimp icon.
- Each player will take 4 white fish tokens and place them on the left side the "0" box in each Catch Tracker column.
- Each player will take 4 purple gear tokens and place them on the left side of the "0" box in each Catch Tracker column.
- Each player will take 6 of the crab meeples and place them next to their player board.
- Each player will take an ice chest.
- Each player will take $12 dollars from the bank.
Playing the Game
The game is now set up and you are ready to play. We recommend reading through the rules completely before playing. The player that most recently bought fish will be the first player. In the first round of play the established first player will bid first and bidding will continue in clock wise order for just the first round. In subsequent rounds of the game turn order is set each round by bidding.
Market Board
The market board has several locations that are used through out game play. The market board shows two sides the "Dock" side and the "Market" side.
No Scrap / $0 Dollars - Players will not gain a scrap and the player does not need to pay any money to bid at this location.
Sardine / $2 Dollars - At this location a player must pay $2 dollars to the bank. The player will also receive a sardine scrap if there are sardines tiles available.
Herring / $4 Dollars - At this location a player must pay $4 dollars to the bank. The player will receive a herring scrap if there are herring tiles available.
Cod / $6 Dollars - At this location a player must pay $6 dollars to the bank. The player will receive a cod scrap if there are tiles available.
Salmon / $8 Dollars - At this location a player must pay $8 dollars to the bank. The player will receive a salmon scrap if there are tiles available.
Final Rounds Counter - Use in the final rounds of the game.
Dock Side - The bottom left side of the market board is where meeples are placed when the player is taking the "Fishing" action. Meeples are placed here in turn order.
Market Side - The bottom right side of the market board is where meeples are placed when the player is taking the "Market" action. Meeples are placed here in turn order starting on the number 5.
Bidding Phase
Each players turn will begin where the players bid for turn order. This is performed by each player in the current turn order by placing their colored meeple on one of the bid locations on the market board. At the beginning of the game, the first player is established and this player begins the bidding at the start of the game. Bidding continues in a clockwise order in the first round of game play. In subsequent turns, the players will bid in the turn order established from the previous round. Players may choose from one of five locations when they bid:
- No Scrap 0 cost
- Sardine Scrap $2 dollars
- Herring Scrap $4 dollars
- Cod Scrap $6 dollars
- Salmon Scrap $8
Important: Players may always take a scrap from one location lower from where they bid if they wish. Example: Sally bids on the Cod location and pays $6. Sally decides that she will take a Sardine scrap instead of a Cod scrap.
Once the player places the meeple on the location of their choosing, they will pay the amount of money associated with the location they choose and take the associated scrap of fish (if available). Players may take the scrap of the current bid location or any scrap from a lower bid location (to the left of the location they selected). Once all players have placed their meeple, paid the money for the location, and selected a scrap, the game will advance to the "Action Phase".
Bidding at the Same Location - There are no lock outs in the bidding. If the previous player (yellow) bid in the sardine location and you (red) also want to bid in the sardine location you may. However, you must decide if you want to take your action before or after the player that bid there prior to you. If you want to go after the player that bid to the same location, you will place your meeple to the left and behind to the rival player. If you wish to take your action before the rival player you will place your meeple to the right of the rival player and you must give the rival player a single dollar ($1).
Two or More at a Location - If a location has two or more players already you must choose where in the turn order you wish to go. You may always go behind all the current players by placing your meeple to the left of all rivals. However you may choose to go in front of both rivals that are already there. You would pay a single dollar to the rival that is farthest to the right.
The Zero Dollar Location - When a player goes to the zero dollar location they must always go behind any rival players that were there prior to their bid. Players may not pay to move ahead of a rival player in the bid order like they could at the other 4 locations on the market board.
End of Bidding Phase - Once bidding is completed, in turn order starting with the highest bider players will either go Fishing or go to Market. If you go fishing you will take the lowest number at the bottom of the Market board on the "DOCK" side of the market board numbers 1-4. If you go to market you will take the lowest number on the "MARKET" side of the board numbers 5-8. When a player moves the meeple down to the chosen side and number the player will take that action at that time, BEFORE the next player in turn order moves down.
Action Phase: Fishing
When a player moves their meeple to the "DOCK" they will go fishing, This action is taken when the player moves their meeple to the lowest number available on the "DOCK" side of the market board. The player will fish tiles from the ocean directly underneath the boat. Once the player has completed the fishing action the next player in turn order will decide which action they will take.
Important: When you fish you must fish in the column directly below the boat. There is one exception, if you have the "Shrimp Bonus" fish anywhere, this lets you fish anywhere in the ocean. This is the only time you can break the rule of fishing below the boat.
Placing the Tiles - The scrap (taken earlier) and the fish tile must be placed into the players ice chest based on placement rules (see below). All tiles must be placed before the game advances to the next phase. A player is allowed to pick up the fish tile and access if the tile shape will fit into their board. The player may return the fish tile and chose a different fish tile. Once the choice has been made for the tile the player would like, the next player in turn order will fish their tile and so on until all players have fished their tiles from the ocean.
Example: Molly chooses to go fishing and moves her meeple to the number "1" spot on the fishing side of the market board. Molly will choose one of the fish tile directly below the boat. Molly will take the tile she chose and along with the scrap she took in the bidding phase, she will place both the scrap and the fish tile onto her ice chest board based on the placement rules located below. Once Molly has picked up her fishing tile play will move to the next player in turn order and they will chose their action.
Placing Fish Tiles in the Ice Chest
Each player must always have an Ice Chest on which to place fish tiles. There are three symbols on the ice Chest tile that will direct a player on how they may place there fish tiles and scrap tiles.
Ice Block - Players may not place tiles over or cover the two Ice Blocks on their Ice Chest board.
Crab - Players may cover the crab for no effect. However, if a player can surround the crab icon, meaning that every area adjacent to the crab in all directions has either a fish tile on it or has an ice block on it the crab would be surrounded. When the player goes to market if the crab is surrounded then the player may take a crab meeple and place it on their player board in the carb meeple collection location. These crabs will be counted and based on the number of crabs gained during play Victory Points will be awarded.
Shrimp - Players may cover the shrimp. When all three shrimp icons on your Ice Chest have been covered you may choose a Shrimp Bonus.
Players earn VPs for number of crabs completed at the end of the game. You may earn one crab per Ice Chest. To gain all six crabs you would need to completely surround the crab on at least six Ice Chest boards during play.
All tiles and scraps must fit into the Ice Chest. if a tile does not fit then you may sell it to the boat captain for $3 dollars or you may use the shrimp bonus to place the tile in your personal cooler.
Note: Players do not have to wait until their Ice Chest is full to choose to take a Market Action instead of Fishing. You may choose to take a Market Action whenever you're ready to make money!
Selling a Tile to the Boat Captain - If a player acquires a fish tile they can not use or do not want, they have the option of selling the fish tile to the boat captain for $3 dollars. When this transaction is completed the fish tile sold will be removed from the game and the player would take $3 dollars from the general bank.
Adjusting the "Catch Tracker" - Players will adjust their "Catch Trackers" based on the fish tiles they fish from the ocean. When a fish tile is removed from the ocean by a player they will adjust the white fish marker for the type of fish they have caught. This is done so that a player can easily look at the player board and see how many fish and what types are in the Ice Chest.
Adding fish tiles to your Ice Chest will increase the fish levels on your Catch Tracker. This is an easy way at a glance to see what your current levels of fish are.
Example: Shawn fished a tile with 1 Sardine, 1 Herring and 1 Salmon from the ocean and bid at the Herring location in the bidding phase and has a scrap of Herring. Shawn will adjust his "Catch Tracker" by adding 4 fish to it based on the tile and his scraps. Shawn will add 2 herring to his "Catch Tracker" by moving the white fish token upward two spaces once for the Herring scrap and once for the Herring on the Fish Tile. Further more Shawn will move the white fish tracker in the Sardine column up one for the single Sardine on the Fish Tile and Shawn will also move the Salmon tracker up one as well based on the Fish Tile.
Shrimp Bonus Powers
The shrimp bonus is triggered when player covers all three shrimp icons on their Ice Chest. These powers will grant the player a small boost when used and they will aid the players during game play.
There are 4 different bonuses to choose from. When you choose a shrimp bonus you will move your cube next to the icon representing the power that you want. Place your cube over the red square so that you can see the green square. When you spend the power you will slide your cube to the right and cover the green square and now the red square should be visible. This represents that the power has been used.
You will leave the cube there until you gain the shrimp bonus again. When you trigger the right to claim another shrimp bonus you must choose a different bonus and you may not take the same bonus back to back.
This also means that if you earn the right to a shrimp bonus and you have not used the previous one you will lose the one you did not use. You may not keep the one you have you must chose a new one if you did not use it prior to gaining the new one.
Place Fish in your Personal Cooler - You may take a Fish Tile you just fished and keep it off to the side of your Player Board instead of placing it in your Ice Chest. Players will still gain the benefits of having the Fish Tile and adjust their Catch Tracker appropriately.
Fish Anywhere - On your turn, when you would fish a Fish Tile from under the boat, you may fish from anywhere in the Ocean instead. You still only gain one Fish Tile.
Take any Scrap - At anytime on your turn you may take one of any scrap from above the market board and immediately add it to your Ice Chest. Placement rules still apply.
Take 5 dollars - You may take 5 dollars from the general bank and add it to your personal bank at anytime during your turn.
Action Phase: Market
When a player goes to market there are a number steps that will take place.
- Crab Bonus - If the crab icon is completely surrounded the player will take a crab meeple if one is available from their personal supply and add it to the crab bonus location on their player board. Each player will only have 6 crab meeples they may earn total.
- Catch Tracker - Ensure that the catch tracker reflects the correct number of fish in the ice chest.
- Complete Contracts - Complete public contracts and "Today's Catch" cards based on the number of fish you have to spend. Fish on the catch tracker may only be counted once. As fish are spent on contract cards or today's catch cards they should be deducted in real time and your catch tracker should reflect this by moving the white fish markers down one for each fish spent on a contract.
Public Contracts - Have the column listed at the top and show the 4 types of fish. To fulfill the contract you need to meet the required number of fish shown on the card by type. This card requires 2 herring, 1 cod and 1 salmon.
When you complete a public contract you will score it by placing a cube on a single reward location.
Scoring Locations - If you choose the Scoring Location from the column you completed the contract in, each spot offers victory points, a small bonus, or both. The VPs are written underneath the cubes spots, the bonuses are shown inside.
Collection Locations - If you choose one of the 2 Collection Locations, you will gain a Cannery Logo of your choice towards your end game collections. These locations count the same as having the "Today's Catch" cards.
Today's Catch - Have a set number of fish needed to complete the card. This card requires 1 Herring and 1 Salmon.
When you complete a Today's Catch card you will remove it from the board and place it next to your player board. There are two types of Today's Catch cards. Blue backed and Red backed. The difference is in the rewards gained.
Blue Today's Catch - You will gain Gears and Cannery logos when you complete a Blue backed Today's Catch. When Gears are gained, adjust the purple gear on your player board up one spot for each type of gear. Sardines, Herring, Cod, and Salmon. When Cannery logos are gained they become part of a collection. There are four collection logos. The collections are worth VPs at the end of the game 1/3/6/10.
Red Today's Catch - You will gain Cannery logos when you complete a Red backed Today's Catch. When Cannery logos are gained they become part of a collection. There are four collection logos. The collections are worth VPs at the end of the game 1/3/6/10.
Important: When Today's Catch cards are purchased they are removed from the board area and the player will keep them for the rest of the game. At the END of the Market Phase players will flip the next card in the stack face-up, so players will always have 4 Today's Catch cards to choose from.
Gears Earned - When gears are earned they become permanent fish in subsequent rounds of the game. If you purchased the two cards shown, you would earn 1 Cod and 1 Herring for the rest of the game. You would also add 1 Anchor and 1 Boat to you collection efforts. After these cards have been added to your totals your gears would move up on your Catch Tracker and you would start the next round with 1 Herring and 1 Cod.
-
Selling Remaining Fish - After the player has completed all the Public Contracts or Today's Catch cards they choose to, players MUST sell all remaining fish for market value which is listed on the player board.
-
Payout - Players are paid out by columns or rows. A player must evaluate their Ice Chest and determine the best way to calculate the payout based on columns (up and down) OR Rows (side to side). Each completed row or column will gain the player 3 dollars. So a completely full board would give the player 15 dollars.
Important: Crabs and Ice Blocks count as a completed space. Even though they do not have a fish tile on them, they count as completed.
-
Return Scraps - Players will return their Fish Scraps to the Scrap area above the Market Board, and all Fish Tiles from their Ice Chests should be set aside into a common discard pile. DO NOT PUT THEM BACK IN THE OCEAN BAG! These discarded Fish Tiles will be used at the end of the game.
-
Ice Chest Exchange - Players will put their used Ice Chest at the bottom of the supply pile and draw a new clean one from the top of the supply pile. Players will adjust the white fish tokens on their Catch Tracker to match their gear levels.
Example - In the start of the next round Rob would begin the round with 3 Sardines, 1 Herring, 2 Cod and 1 Salmon. Then any fish tiles and scraps that are placed in his Ice Chest would be added to the levels the Catch Tracker shows.
Repopulation
Before the next round can begin the ocean must be restocked with fish. Take the Ocean Bag and draw the number of needed tiles to fill any empty spots in the Ocean Grid. There should always be 16 Fish Tiles to choose from.
What if the Bag is NOT Empty? - place the bag aside and move on to the next phase.
What if the Bag is Empty? - If the ocean bag is empty or you do not have enough tiles in the bag to fill empty spots then the end of the game has been triggered. Place the final rounds counter marker on the number three in a 2 player game and on the number four in a 3 - 4 player game. See "Ending the Game" below.
Navigation
Once the Ocean has been repopulated, the last player in turn order gets to set the boat for the next round.
The boat can be moved to any Column for the next round. Once the boat is set, this is the column of Fish Tiles that will be available for players to fish from in the next round's Action Phase.
Ending the Game
If the Ocean Bag is empty, or you do not have enough Fish Tiles in the bag to fill empty spots in the Ocean Grid, then end of the game has been triggered! The game will continue for FOUR more rounds. At the end of those four rounds the game is over.
Once the last round has been completed players will add up their Victory Points as follows:
- Count all Victory Point locations with your color cube: Red 15, Yellow 18, Blue 15 and Green 12.
- For every 3 dollars in your personal bank you get 1 Victory Point.
- Score your set collections of Cannery logos from Today's Catch cards and Collection Locations - 1 icon 1VP / 2 icons 3VP / 3 Icons 6VP / 4 Icons 10VP.
Example - Sara has 11 icons all together from Today's Catch cards and Collection Locations broken down as follows: Boat (card) / Wheel (card) / Anchor (collection location) / Fish (card) = 10 victory points (4 icons) Boat (card) / Wheel (card) / Anchor (card) / Fish (card) = 10 victory points (4 icons) Anchor (card) / Wheel (card) = 3 victory points (2 icons) Anchor (collection location) = 1 victory point (1 icon)
- Crab Bonus - 1 Crab 1VP / 2 Crabs 3VP / 3 Crabs 5VP / 4 Crabs 7VP / 5 Crabs 9VP / 6 Crabs 12VP.
Card Anatomy
Let's discuss the different types of cards that you will play with during the game. Each card has a distinct purpose within the game and this section should help you understand the make up of each card. Through out the game you will see the four types of fish represented by Colors and Symbols as well as art work: Sardine (blue triangle), Herring (green square), Cod (yellow circle), Salmon (pink star).
Public Contract Cards - Public Contract cards are placed out into the playing area during set up in Step 5.
- Public Market Logo.
- Column Number - column number the card goes in.
- Ticket Number - (Art Only, however, the numbers may have general pop culture significance).
- Check Box - If there is a white check mark then this fish is needed in some amount to complete the contract.
- Sardine - denotes how many Sardines are needed to fulfill the contract.
- Herring - denotes how many Herring are needed to fulfill the contract.
- Cod - denotes how many Cod are needed to fulfill the contract.
- Salmon - denotes how many Salmon are needed to fulfill the contract.
Public Contract Card information: Once Public Contract Cards have been set up at the beginning of the game in Step 5 they do not change for the entire game. The purpose of the cards not changing is so that players can plan accordingly through out game play. More fish are required to complete the cards the higher the Column Number. For example a column 1 card make take 7 or 8 fish where a column 4 card may take 11 - 13 fish to complete.
Today's Catch Blue - Today's Catch Blue cards are placed out into the playing area during set up in Step 7.
- Today's Catch.
- Fish Gear - You gain a permanent fish, in this example it is a Sardine.
- Fish Gear - You gain a permanent fish, in this example it is a Salmon.
- Advancement Arrow - move your matching gear up one rank on the Catch Tracker.
- Sardine - denotes how many Sardines are needed to fulfill the contract.
- Herring - denotes how many Herring are needed to fulfill the contract.
- Cod - denotes how many Cod are needed to fulfill the contract.
- Salmon - denotes how many Salmon are needed to fulfill the contract.
You will also see Cannery Symbols in the bottom right corner of the BLUE cards. This symbol will become part of your collection if you purchase and own the card. A Blue card is denoted by the blue table cloth art on the back of the card.
Today's Catch Red - Today's Catch Red cards are placed out into the playing area during set up in Step 6.
- Today's Catch.
- Cannery Logo - You gain a Cannery Logo towards set collection.
- Cannery Logo - You gain a Cannery Logo towards set collection.
- Herring - denotes how many Herring are needed to fulfill the contract.
- Cod - denotes how many Cod are needed to fulfill the contract.
- Salmon - denotes how many Salmon are needed to fulfill the contract.
A Red card is denoted by the red table cloth art on the back of the card.
Two Player Variant
In the two player variant each player will control two meeples. Each player will take all the components for one of the colors and then a second meeple of a different color.
The last person to eat fish will go first and the first player will take both of their bidding actions. Bidding will then pass to the other player and now turn order as been set.
The game will flow the same as a three or four player game taking actions in the order set during the bidding phase.
Two Player Set Up Reminders
- Deal three Blue Today's Catch cards onto each of the four stacks.
- Place 16 Fish Tiles into the Ocean Grid and place 20 random Fish Tiles into the Ocean Bag.
Scoring Location Set-up - When playing a two player game, you must use the Scoring Location tiles with the side that has the dividing line in the center of the tile.
Scoring Locations - When scoring in a two player game the scoring locations are restricted to either side of the line which divides the Scoring Location tiles. You may only place one scoring cube on either side of the center line. Each Scoring location tile has no more that two scoring cubes.