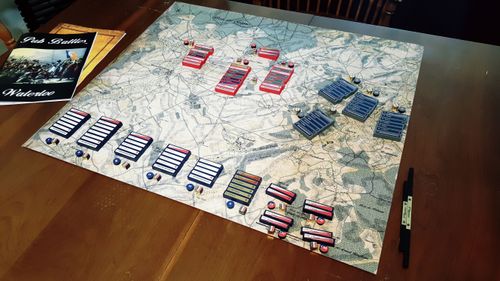
Pub Battles: Waterloo
Pub Battles: Waterloo Rulebook
Table of Contents
Table of Contents
- Introduction
- The Pieces
- Status
- How the Turns Work
- How the Pieces Move
- How to Resolve Combat
- How to Alter Turn Order
- Optional Hidden Reserves
- Optional Baggage Trains
- Optional Multi Player Rules
- Optional HQ Alter
- Optional Written Orders
- Terrain Effects
- Waterloo Scenario: Special Rules
- Waterloo Scenario: Setup
- Waterloo Scenario: Order of Battle
- Waterloo Scenario: Reinforcements
Introduction
These rules explain the basics of how to play turns, movement and combat. The Scenario will provide details on Order of Battle (sticker placement), Map, Setup, Reinforcements, Victory Conditions and any special rules for that battle. You will find details on Order of Battle (stickering blocks), Setup and Victory Conditions and any special rules for a battle in the Scenario.
The Pieces
See the Order of Battle (OB) in the Scenario for pictures of the different piece types.
| Piece | Purpose |
|---|---|
| HQs | Command pieces to Move / Attack and Alter the move order. |
| Cavalry | Move fast and can screen / delay the enemy's advance. |
| Artillery | Bombard from a distance or bolster your defense. |
| Infantry | Do all your basic fighting in the battle. |
Status
Pieces begin the game Fresh. Taking Hits in combat or retreating can flip them to Spent. They can Rally to Fresh later by not moving.
(The printed rulebook illustrates a Fresh piece and a Spent piece, each with its Front Facing marked.)
How the Turns Work
Usually, several Commands (Corps or Wings) make up an Army (see OB). Each Command has a corresponding Command Chit. As you randomly pull these Chits, the Commands move on the field.
You resolve combat at the end of the turn after all Chits are gone.
Resolve each turn as follows:
| Step | Action |
|---|---|
| 1 | Place all Command Chits in a cup. |
| 2 | Pull a Command Chit randomly from the cup. |
| 3 | Move pieces from that Command. |
| 4 | Repeat Steps 2 and 3 until cup is empty. |
| 5 | Resolve Combat between all enemy pieces in contact. |
| 6 | Start a new Turn. |
How the Pieces Move
Moving
Pieces simply move on the map up to their max range (see Terrain Effects chart).
Pieces can:
- Move where the majority of the piece can fit.
- Be in only 1 type of terrain: the type under the majority of the piece.
- Not stack on top of each other.
- Move through friendly pieces but not enemy.
Oblique Move
- Must move in the direction they are Facing and maintain their Facing while moving.
- Change their facing once at any time during their move (rotate from the center point). Each additional facing change uses up 1/3 of their movement.
- Move obliquely up to a 45 degree angle.
HQs
Command Range: HQs cannot attack, be attacked or overrun and do not block movement. Simply push them back towards their lines as you move.
Army HQs with no chit can move once per turn with any friendly command.
To attack, a piece must begin its move within 1/3 cavalry move of its HQ. Move HQs first, THEN determine command range.
Army HQs can also Command Attacks, with any friendly pieces.
Road Column
Pieces in Road Column can move faster (x2) but become stretched out and vulnerable to attack. Pay 1/3 move to change into or out of Road Column.
Turn piece lengthwise along the road. While moving in Road Column:
- Ignore terrain and facing changes while moving along same road.
- You cannot move through friendly pieces while moving along the same road.
- You cannot move into an enemy Field of Fire (FoF).
Field of Fire
Infantry, Dragoons and Artillery project a Field of Fire (FoF) out to their front, within a 45 degree arc, to a range of 1/3 Foot move, limited by Line of Sight.
How to Attack
- Fire Fight: Advance to put the enemy in your FoF.
- Melee: Move so that the majority of the pieces are in contact as shown.
Moving Intent
In general, a Combat is between 2 opposing pieces. Players should move in such a way as to make this intent clear. You should not purposely move to obscure or confuse the game. For example, moving so that you are:
- equally in two types of terrain at once.
- equally attacking 2 pieces at once.
- half in Fire range, half out.
If the opponent moves in this manner, you may relocate his piece within 1/3 foot move to the terrain of your choice.
(The printed rulebook gives illustrated examples of moves that are not allowed and moves that are preferred.)
Bombardment
Instead of moving, Fresh artillery can change facing and fire once at a target in its FoF. Bombardment cannot destroy pieces.
Line of Sight
To Bombard, artillery must be able to "see" their target. Woods, Buildings, Hills and pieces block line of sight. You can see into Woods and Buildings up to the thickness of a piece: 3/8". You can see onto a Hill up to the center crest line.
While on a Hill, you can see over Woods, Buildings or a lower Hill IF you are closer to those blocking objects than the target.
The max range you can see is 1 Foot move.
ID Type
If you can spot a piece, the enemy must reveal the type upon request: Inf, Cav, Art.
Rally
Instead of moving, a piece may Rally: rotate to Fresh and change facing. A piece cannot Rally while in contact with the enemy or in enemy FoF.
Ineffective
A Command that has suffered 50% losses (killed pieces) is Ineffective. Result: The pieces from this Command can no longer Rally.
Move Examples
The printed rulebook illustrates these move examples:
- The center Red piece is in clear terrain. It can attack the center Blue piece because the majority of the piece can fit past the right Blue piece. It cannot flank attack the right Blue piece because the majority of the piece cannot fit there. The right 2 Red pieces could attack the right Blue piece in support. The left 2 Red pieces could attack the center Blue piece in support.
- Can the Red attack across the river? Yes! Simply move them forward as shown.
- Can the Blue flank the Red? No. There is not enough room. Majority of piece is in or past river.
How to Resolve Combat
Definition
A Combat is two opposing pieces in Melee (contact) or a Fire Fight (in FoF).
The Attacker is the piece that moved creating the Combat.
Resolve Combats one at a time in Rounds with opposing pieces firing at each other simultaneously. As lead pieces retreat or are destroyed, follow-on pieces behind them may become involved in the next Round. Continue Rounds until the Combat is broken: there are no opposing pieces remaining in contact or FoF. Then resolve the next Combat until there are none left.
Order
The side with the better Command Ratings chooses the order.
Process
Resolve Combat in Rounds as follows:
| Step | Action |
|---|---|
| 1 | Defender and Attacker roll dice and apply hits simultaneously. Pieces only roll IF they had a target at the beginning of the Round. |
| 2 | Defender may Retreat or stay for another round. |
| 3 | Attacker may Retreat or stay for another round. |
| 4 | Repeat until Combat is broken. |
Rolling Results
Each piece rolls dice as follows:
| Piece | Melee Dice | Fire Dice |
|---|---|---|
| Infantry | 3 | 2 |
| Artillery | 3 | 3 |
| Cavalry | 3 | 0 |
| Dragoons | 2 | 1 |
(For this campaign the Mounted Cavalry rule in the Waterloo Scenario sets the Dragoon dice at 3 regular dice; see that section.)
Applying Hits
Results of 4 or higher inflict hits. Terrain Effects may modify results (see chart).
Artillery
Artillery Fires First: Apply their hits first, then other pieces return fire. Artillery forced to retreat (as a result of hits) in Melee, is destroyed.
Apply each hit to the target enemy piece as follows:
| Piece | Result |
|---|---|
| Fresh piece | is flipped to Spent |
| Spent piece | must retreat |
| Already Retreated piece | is destroyed |
Hits are cumulative. So 2 hits on a Fresh piece, flip it and force it to Retreat. 3 hits on a Fresh piece (or 2 hits on a Spent piece) Destroy it.
Excess hits are wasted. Do not apply them to other pieces.
Combat Example
- Round 1: A and C roll 3 dice in Melee. C is destroyed with 3 hits. B and D cannot fire.
- Round 2: A and D roll 2 dice in Fire. If D is destroyed or retreats, the combat is over. If A is destroyed or retreats, B and D will Fire at each other for a 3rd round.
Unit Quality
- Elite pieces absorb the first hit in a combat with no effect.
- Militia pieces count their first hit in a combat as 2 hits.
The first absorbed hit from a bombardment does not carry over to combat.
Retreat
The Piece must turn about and make a 1/3 move, ignoring terrain costs, back and away from the combat, enemy positions and out of enemy FoF.
- If unable to do this because of enemy pieces or impassible terrain, it is destroyed.
- If friendly pieces are in the way it can simply retreat further.
- A voluntary retreat also flips Fresh pieces to Spent.
Cavalry Withdrawal
Defending Cavalry may retreat before combat IF in contact with Infantry. Cavalry in Road Column cannot Withdrawal.
Flanking Attacks
Attacking an enemy's flank gives you die roll modifiers. Flanking often puts 2 or more pieces in your FoF and results in multi-piece combats. This is allowed for flanking attacks.
You Flank the enemy IF they are in your FoF but the majority of your piece is not in the enemy's FoF.
Pieces do not normally fire outside their FoF. IF you are Flanked, you may fire at a piece on your flank with a -1 modifier.
Combine nearby Flanking attacks into a combined Combat as applicable.
Multiple Piece Combat
You can only fire at one target per round. If you have multiple targets, you must select and declare before you roll. Treat all pieces as firing simultaneously. Any excess hits are wasted.
Example:
- Round 1: A and D fire at each other. C and E Melee. B cannot fire. C is destroyed.
- Round 2: D can only fire at A. E can fire into the flank of A or B. A can fire at D or at E with a -1 modifier. B can fire at E with a -1 modifier.
How to Alter Turn Order
Definition
Once per turn, each HQ may attempt to alter their move sequence by rolling their rating or less: Find the HQ ratings in the Scenario.
Types
- Delay: Move Return your just pulled chit to the cup AFTER you draw a new one.
- Move Now: Jump ahead in sequence and move before the pulled Chit. Other HQs may then attempt to move before this.
Flip the HQ, name side up to show it has already rolled this turn: Spent.
Note: The Army Commander can also roll for one of his Commands if he is within Command Range of that HQ (1/3 Cav move).
Optional Hidden Reserves
Purpose
After your first game, we strongly recommend this rule. It adds true Kriegsspiel style Fog-of-War, without the need of an umpire.
Cut out and fold the Reserve Cards (1 for each HQ). The Reserve Cards remain off board and act as a screen to hide your pieces from the enemy. Your pieces on the board and even other entire Corps can move onto Reserve Cards by moving "into" the matching HQ. They move out of Reserve by placing them on the board by the HQ and conducting a regular move.
The HQ marks the location of pieces that are closest to the enemy. Consider all pieces in Reserve to be within 1/3 Cav move at or behind the HQ (away from the enemy).
HQs can only move at the speed of the slowest piece they have on their card. Pieces can begin the game in Reserve.
Army HQs can also hold pieces in Reserve.
Pieces can remain hidden in Reserve, as long as the HQ cannot be Spotted by the enemy. If the HQ is Spotted, all of its Reserve pieces must be placed on the board AFTER the move is complete.
If an HQ is moving along a road at column speed, treat all pieces in reserve as in Road Column. If that HQ stops for a turn or only moves 1/3 of a Foot move, then treat all pieces as in combat formation.
Pieces moving in Reserve must still comply with all normal movement rules. You cannot use the Hidden Reserve as a way to move pieces further than they could normally.
Reassignment
Before the game starts, you can reassign pieces to other commands. Simply note which units are attached to which commands. Treat them as a regular part of that command for the entire game.
Command Size Limits
- Min: 2 pieces
- Max: Largest historical Command of that army (see OB), +1 piece
Optional Baggage Trains
Purpose
Baggage Trains introduce logistical conundrums. They are vulnerable, necessary for sustaining attacks and clog the roads.
- Cavalry does not normally require Baggage to Rally.
- Inf and Art must be within 1/3 Mounted move of a Baggage Train to Rally.
- Baggage Trains in contact with the enemy at the beginning of Combat are automatically destroyed.
- Each Baggage Train can only Rally 1 piece per turn.
- Destroyed Baggage Trains count double for victory.
Optional Multi Player Rules
Purpose
These simple rules recreate most of the command communication problems of Kriegsspiel, without Umpires and tracking written dispatches.
Each player controls 1 or more HQs.
Limited Communications
Players can talk freely before the game. During the game players can only "Communicate About the Game" IF their HQs are touching.
"Communicate"
This includes any and all forms, both verbal and non-verbal. Such as: groans, sighs, eye rolling, nodding, smiling, frowning, staring, etc.
"About the Game"
This means anything to do with the game strategy or situation. Unrelated social small talk is allowed, as long as it is not used as secret communication.
- You can ask questions about the rules and mechanics of game play. Players can answer for clarification.
- You cannot "ask questions" as a way of communicating with a player, so as to prompt him to avoid a threat.
Penalty
Immediately announce when you catch a player in violation of this rule and record. For each violation you catch, you get 1 die, Re-Roll to use at anytime during the game.
Optional HQ Alter
Purpose
In real command, the clock is ticking. Do you want to get the jump on the enemy? Then you better assess and decide quick. This rule is tense, fun and trains you to think like a real commander.
Rather than the usual die roll for Altering, use these rules:
- Every HQ can attempt to Alter the sequence EVERY chit pull, as long as that HQ hasn't moved yet this turn.
- There is no die roll. There can only be 1 Alter per Chit Pull (excepting ties).
- The first HQ that announces its Alter is successful. All others fail.
- You must announce the Command and the type of Alter. For example: "First Corps, Delay" or "Eleventh Corps, Jump". You must say it clearly and discernibly. No mumbling.
- Whatever you say, you MUST do. You can't blurt something random out and then decide what you really want to do later.
- In a tie, BOTH HQs Alter. Roll a die to determine which goes first.
- You can Jump if your Chit was pulled. This prevents another Command from Jumping ahead of you, IF you say it first.
(The printed rulebook notes that this works really well for Multi-Player games.)
Optional Written Orders
Purpose
Many have the impression that written orders are a tedious hassle. If done right, they can add a lot of realism and fun to the game. The goal here is not so much to "win" but to Role Play the key officer's positions while learning about history, teamwork, leadership and command.
Location
A Location is simply an area on the map, with the diameter of 1 full Foot move. Specify the Location by a name on the map. Examples: "Birmingham Hill", "Sunken Road", "Chadd's Ford".
SOP
Each Command is in a Location. They can deploy, move and attack within their Location to control and defend it from the enemy. If forced out of their Location, they will fall back and hold until they can recapture it. None of this requires orders. All Commands will do this normally.
Orders
Moving to a new Location or attacking to take an enemy Location requires Orders. Orders do not specify exactly how to move and face each piece. Instead, they order a Command to attack or move to a new Location.
Examples
- "Attack Culp's Hill."
- "Move SE along Old Post Road to Miller farm."
Move Vs Attack
A "Moving" Command will halt upon meeting the enemy and will NOT try to take their Location.
When
At the beginning of each turn, Army Commanders have 3 minutes to write new orders.
Delay
Orders become effective 1 turn later IF the distance to that HQ is within 1 Mounted move. Delay the order 1 turn for each extra Mounted move.
Initial Orders
It is usually best to have only the attacking side start with initial orders. The defending side can start writing orders as the game begins.
2 Player Kriegsspiel
This works best if a different person has to interpret and implement the orders. If you only have 2 players, you can randomly assign Commands to each player. So the Blue Army Commander will control half of the Red Commands. The Red Commander will control half of the Blue Commands.
Solitaire
Written Orders make for a great Solitaire game. Write out 3 different sets of initial orders for the attacking side. Randomly pick which set to use AFTER you setup the defender and start playing.
(Tip from the printed rulebook: try to run each Command by their orders, knowing only what they would know.)
Terrain Effects
| Terrain | Movement | Combat |
|---|---|---|
| Woods | Reduced. | Cover for Defender. |
| Buildings | Pieces in Buildings become Spent and cannot Rally. | Cover for Defender. Defenders cannot be Flanked. |
| Hills | Reduced to cross a slope. | Cover for Defender if Attacker moved from lower ground. |
| Streams | Reduced to cross. | No effect. |
| Rivers | Reduced. Cross only at bridges or fords. | Treat pieces attacking across a River as flanked for 1st round only. |
| Marsh | Reduced. No Artillery or Cavalry. | No effect. |
| Road Column | Pay 1/3 move to change. 2x. | Treat as Flanked for combat. |
| Flanking |
Reduced
Moving through any or all of the difficult terrain types, reduce movement by 1/3. This is in addition to any Formation and Road Column change costs.
Cover
-1 to Attacker's die rolls if the Defender has Cover. Woods on a Hill is still -1, not -2.
Rates of March
The printed rulebook shows a graphic scale bar for Foot and for Mounted movement. The bar lengths are a graphic and are not reproduced in this text.
Transcriber note: the printed Marsh entry reads "Cavarly"; it is transcribed above as "Cavalry" (spelling correction only).
Waterloo Scenario: Special Rules
The following is the Waterloo 3.3 scenario text. Sections keep the headings printed in the scenario.
Charge
A Charge is a special attack that allows some units to resolve combat immediately after moving, instead of at the end of the turn.
Pieces That Can Charge
- Guard Infantry (gold stickers)
- Cuirassiers
- Lancers
- Elite Cavalry
Conduct Charges 1 piece at a time. You cannot Charge with support or in conjunction with a flank attack.
Cuirassiers and Lancers gain a +1 drm for their 1st round of combat IF Charging.
Cavalry Weight
Lighter Cavalry firing at Heavier Cavalry, suffers a -1 drm.
-See the OB for Cavalry types.
| Weight | Type |
|---|---|
| Light | Hussar |
| Light | Lancer |
| Medium | Dragoon |
| Heavy | Cuirassier |
Mounted Cavalry
Cavalry in this campaign did not fight dismounted as skirmishers. As such:
- Dragoons roll 3 regular dice for combat.
- Cavalry does not get a bonus for defending in Hills, Buildings or Châteaus.
- Cavalry cannot attack defenders in Buildings or Châteaus.
Infantry Squares
Fresh infantry is able to form and hold a square. Spent infantry cannot:
| Cavalry firing at.... | Get a ... drm |
|---|---|
| Fresh Infantry | -1 |
| Spent Infantry | +1 |
Châteaus
Treat Châteaus like Buildings for combat, except that pieces do NOT become Spent by entering and can Rally normally.
Weather & Ground
Clear & Wet.
Streams
Treat streams with marshy banks the same as Rivers, on all 4 campaign maps.
Woods
Treat all woods as thick, on all 4 campaign maps: Artillery and cavalry cannot enter. Infantry becomes spent in them.
Reverse Slope
The French did bombard the British on the reverse slope but the indirect fire and soft ground greatly reduced it's effectiveness.
You can bombard targets out of LoS at a -2 mod: hitting only on 6.
Guard Artillery
Guard artillery fires with a +1 drm.
Grande Batterie
Instead of moving the Guard, Napoleon can command all Artillery in his Command Range to move and / or Bombard at once.
HQ Ratings
| Army | HQ Rating |
|---|---|
| French | 2 |
| Prussians | 3 |
| British | 4 |
Road Columns
While marching in Road Column, Infantry & Baggage Trains become strung out. Place 1 blank piece behind them as extended Road Columns: (the printed rulebook shows a diagram of three Road Columns, one each for the Grey, Blue and Red forces, each with a blank piece behind its Infantry.)
This applies to Minor Roads. Major Roads have double the capacity. So there is no trailing column on them.
Starting Time
The Waterloo battle begins on June 18th, Turn 2.
Objective
The French must defeat both Allied armies to win. Count Infantry, Artillery & Cavalry for Rout. For convenience, these are the totals for the historical Waterloo battle.
| Force | French | Prussian | British |
|---|---|---|---|
| Total | 25 | 16 | 19 |
| 50% | 13 | 8 | 10 |
If neither side has won, the battle can go into a second day. -See the Reinforcements, page 11-12. Add Reinforcements arriving on the 19th to the totals above.
Optional Reinforcements
Upon hearing Napoleon's opening bombardment, Soult and Gérard urged Grouchy to "march to the cannon!" Grouchy refused but what if he did try this? Would it have made a difference at Waterloo?
The Optional Reinforcements on page 13, assume that Grouchy's column immediately marches to the battle upon hearing cannon fire. There is no battle at Wavre.
Combined Campaign
These rules link all 4 battles (Quatre Bras, Ligny, Waterloo & Wavre) together into 1, continuous campaign.
Campaign Setup
The campaign starts on the 16th. Use the Setups for Quatre Bras and Ligny for a historical game.
Alternatively, allow the French to organize their forces any way they like. They enter on the same roads at the same time but with the order of march and force division of their choosing. The Allies will operate with the historical reinforcements.
After a night turn on the 16th, continue normally for the next several days. Essentially, this is an ongoing, multi-day battle that spans over the 4 maps.
Battles
A Battle starts when 2 opposing sides, both unpack a Baggage Train. If this never happens, the encounter is just a Skirmish, not a Battle.
Which forces are in the battle?
All friendly forces, within 3 Foot Moves (FMs) of a friendly unpacked Baggage Train (as the crow flies).
You win the battle when the other side is Routed, Broken or voluntarily decides to re-pack an unpacked Baggage Train. The losing side must then withdraw. For 50% Rout losses, only count the forces that are 'in the battle'.
The Allies operate independently here. So if the Prussians rout in the same battle, the British can still keep fighting.
Withdraw
When you Withdraw, you must re-pack all your Baggage Trains and evacuate all forces in the Battle, at least 3 FMs away (as the crow flies). Allied forces must withdraw north. French forces must withdraw south.
Withdrawing troops cannot Attack or Rally.
After you have withdrawn the minimum distance away, you are free to again unpack a Baggage Train and fight a new battle as you choose.
Treat any forces that withdraw or retreat off the map as destroyed. They cannot re-enter the game later. (-see Gembloux exception)
If a Baggage Train is destroyed, all elements of that Command must withdraw off the map, away from the enemy.
Road Columns (Combined Campaign)
Your blocks cannot run around on the map individually, moving in different directions.
All the units in a Command will march out together in 1 continuous road column.
Historical Weather
| Day | Weather | Ground |
|---|---|---|
| 16th | Clear | Wet |
| 17th | Rain | Wet, then Mud from turn 5 on. |
| 18th | Clear | Mud, then Wet from turn 2 on. |
| 19th | Clear | Wet |
| 20th | Clear | Dry |
Mud Effects
Cavalry, artillery and baggage trains can only move along roads. They cannot fight or unpack. No Charges. All units fire at bad effect. Artillery cannot fire at all.
Campaign Victory
Winning or losing a battle does not mean you have won or lost the campaign.
To win the campaign, the Allies must ultimately defeat the French army. If both sides suffer defeat in the same turn, the Allies win.
The French can win in the following ways:
- Defeat both Allied armies.
- March a majority of the starting French army off the northern map edge. They do NOT need to maintain a supply line south while doing this.
-Brussels was a critical Allied supply base to the north. Though not technically correct, this rule does give the Allies proper motivation for the larger campaign. The Allies cannot win by running away and hiding in a corner of the map, or quickly concentrating in 1 spot and then sitting there. They must disperse to intercept the French advance and then concentrate quickly to defeat them in battle.
How to Defeat an Army
To defeat an enemy army at the campaign level, you must inflict 50% losses on their total forces for the campaign: counting Infantry, Artillery and Cavalry, including all their reinforcements off map, that have not yet entered the map. These are the totals for Campaign Victory:
| Force | French | Prussian | British |
|---|---|---|---|
| Total | 35 | 20 | 24 |
| 50% | 18 | 10 | 12 |
Supply Sources (LoCs)
The French must trace supply off the South map edge. The Prussians draw supply from Liege (major road NE out of Wavre). The British draw supply from Brussels to the N or Ghent to the NW, (as marked in Waterloo reinforcements).
Gembloux
After Ligny, Thielmann withdrew the Prussian III Corps north east to Gembloux. This is just off the map, north east of Ligny. Napoleon thought the entire Prussian Army was going there. This would make sense, since that route led back to their supply source at Liege. He ordered Grouchy to march to Gembloux to pursue the Prussians.
The problem was, Zieten I and Pirch II withdrew north to Wavre. What should Grouchy do? When the greatest military mind of the era orders you to march to Gembloux, you march to Gembloux! Besides, what was the alternative? Ignore Thielmann and march north straight to Wavre? That would have left his right and supply line unsecured.
Why march to Gembloux? Assuming there is a battle near Ligny, for the Prussians, it is a quick and efficient way to evacuate. There aren't many good routes north. If the Prussians march there, the French need to send at least a Corps to clear / secure their right flank. Otherwise the Prussians could come back onto the map behind them, cutting their supplies.
For the game, treat Gembloux as an off map box. You can march there and still march back onto the map. Your forces are not out of the game. See the diagram below for the distances to and from Gembloux at different locations, given in Foot Moves (FMs).
(Diagram: four arrows point to Gembloux from four points on the map, labelled 3 2/3 FMs, 2 2/3 FMs, 2 FMs and 2 1/3 FMs, from the longest to the shortest. The map locations are not named in the text.)
If a Prussian Corps marches there, they can stay and re-enter when they want. If a French Corps pursues them there, the Prussians MUST continue their march north to Wavre. You CANNOT fight a battle in Gembloux.
IV Corps
Bulow's Prussian IV Corps was marching in from Liege. They arrive at Gembloux on the 16th, during the night turn. If other Prussian Corps don't withdraw to Gembloux, Bulow is free to march in wherever he wants.
If a Prussian Corps does withdraw to Gembloux, Bulow MUST redirect his march to the NE, as he did historically. In this case, Bulow will enter along the major road leading NE out of Wavre on the Night turn, at the end of the 17th.
Orders
As troops march on dry roads, they kick up big dust clouds. You can see these from miles away. In the field, this makes it easy to keep tabs on the enemy. The defender can see enemy columns approaching.
A huge problem for the French here was the rain. Wet ground means no dust clouds. After the battles at Quatre Bras and Ligny, where did the Allies go? Sure, the cavalry could keep tabs on the tail of the Prussian columns but where was the head? The French had to grope along in the dark. The best way to model this is to plot your marches between battles on Order Sheets.
Order Sheets
The Order Sheets are simply small, paper maps that you can draw your 'orders' on visually. They are scaled to exactly 1/3 the size of the maps. This means you can use the regular measuring devices to plot your moves. The chains work best for this. 1/3 of a move on the chain equals 1 full move on the Order Sheets.
You can download pdfs of these off our website for FREE. It is best to print off several copies for each player.
Keep your location and movement hidden from the enemy by drawing your orders and marches on these sheets. You can draw them in pencil. It also works well to put a clear transparency over them and draw your orders with a fine tipped, dry erase pen.
Road March
In general, you will mark the closest part of your column to the enemy with your HQ on the map. Keep your blocks hidden off map on the Reserve Card in their order of march. So the HQ will mark the head of the column for the French in pursuit, and the tail of the column for the withdrawing Allies.
All columns must 'issue orders' before each turn by simply drawing their route on an order sheet like this:
(The printed rulebook shows an example order sheet with a red route drawn on it.)
If you are withdrawing, it is important to track the head and tail of your column. Measure and record the total length of your column (in FMs) when all stretched out with road column extensions.
Knowledge of the Enemy
No Meta Gaming! You cannot take any action that involves something that HQ would not know about in the field. This is much easier and clear than it sounds.
There are only 2 ways you can 'know' where enemy troops are:
- Hearing
You can hear all combat on the map. (This includes all 4 of the maps.) If there is a fight going on, then the enemy is there! You can discern the general location, volume and direction of the fire.
- Seeing
Your troops can spot the enemy if they have a clear line of sight. You can also see units marching on dry roads. If the ground is dry, put all road marching blocks on the map. See Scenario notes for weather and ground conditions.
You can also use the Order Sheets to restrict your movement with realistic Command limitations and delays. You can find details for this on our website.
(Sidebar text on this page, with no printed heading:)
At first, the 17th might seem boring. It's just a bunch of marching around, with no fighting. Don't be fooled. This is arguably the most important part of the campaign! There is a lot more going on here than at first appears. Every move you make here determines when, where and how the next critical battles will take place. Often the outcome of a battle had already been determined before the shooting even started.
Many historians say that Napoleon's greatest skill and genius was his ability to time and orchestrate road marches at the campaign level like this. Instead of boring or tedious, think of this as an exciting new dimension of gaming. Like a complex, moving puzzle to solve. It is a critical part of war we don't usually see in games.
You will need to think strategically in terms of timing 4-8 moves ahead. A collision between long sprawling columns can easily result in massive traffic jams and delays. One wrong move here could quickly spell disaster. As you start to consider the impact of the road network, timing, dispersion, speed of concentration and possible enemy moves, the decisions quickly become mind boggling.
These are the kinds of issues real officers have to struggle with even today. It is hard and confusing at first but it can be a lot of fun too. You are learning new, real world skills that the great generals of the past used. They still apply today in war and in business. Embrace the struggle!
Waterloo Scenario: Setup
Initially deploy ONLY British and French forces shown on: Historical Forces at Waterloo (see Order of Battle below).
- British setup 1st on this line or within 1 move North of it.
- French setup 2nd on this line or within 1 move South of it.
Start with these chits in the cup:
- French (navy chits): G, I, II, VI, CIII, CIV
- British (red chits): I, II, R, C
- Prussian (grey chits): I, II, IV
Include these IF using optional French Reinforcements: French chits III, IV, CI, CII.
(The printed Historical Setup map (page 10) shows where the historical forces are placed on the map. Those positions are graphic and are not reproduced in this text.)
Waterloo Scenario: Order of Battle
Historical Forces at Waterloo
These are the historical forces that fought at Waterloo. Prussian units on this sheet are not deployed at the start; they enter as reinforcements (see Reinforcements below).
Armée du Nord (French)
- G Command (chit G; Napoleon, marked N on the sheet):
- G Light
- G Heavy
- G Grenadier
- G Young Guard
- G Old Guard
- G Artillery
- I Command (chit I; d'Erlon):
- I Jacquinot
- I Donzelot
- I Marcognet
- I Durutte
- I Artillery
- II Command (chit II; Reille):
- II Piré
- II Bachelu
- II Jérôme L
- II Jérôme R
- II Foy
- II Artillery
- VI Command (chit VI; Lobau):
- VI Jeannin
- VI Simmer
- VI Artillery
- CI Subervie (printed in the VI column of the sheet)
- CIII Command (chit CIII; Kellrmn):
- CIII l'Héritier
- CIII d'Hurbal
Anglo-Dutch Army (British)
- I Command (chit I; Orange):
- I Cooke (gold sticker, Guard infantry)
- I Alten 3
- I Kielmansegg 3
- I Perponcher 2
- I Chasse 3 (M)
- I d'Aubremé 3
- I Ne (M)
- I Artillery
- II Command (chit II; Hill):
- II Clinton 2
- II Halkett 2 (M)
- II Artillery
- R Command (chit R; Picton):
- R Picton 5
- R Vincke 5 (M)
- R Kruse 6 (M)
- R Brunswick
- R Artillery
- C Command (chit C; Uxbridge):
- C Left
- C Right
- C Heavy
Prussian Army of the Rhine (enter as reinforcements)
- I Command (chit I; Zieten):
- I Roder
- I Pirch
- I Steinmetz
- I Jagow
- I Artillery
- II Command (chit II; Pirch):
- II Langen (M)
- II Artillery
- II Tippelskirch
- II Brause (M)
- II Jurgass
- IV Command (chit IV; Bulow):
- IV William
- IV Ryssel (M)
- IV Hiller
- IV Losthin
- IV Hacke (M)
- IV Artillery
(The sheet's sticker legend marks Militia pieces with M. Gold stickers are Guard infantry. Star, dot and other icons are printed on the stickers themselves and are not described in the text. The sheet's trailing numerals are printed on the stickers; the scenario text does not define them.)
Full Campaign Order of Battle
The three campaign sheets below list every unit of each army. Units that appear in the Historical Forces list or the Reinforcements tables are the same pieces; units that appear only here enter through the Reinforcements tables or are kept off map as detachments.
Armée du Nord campaign sheet
- Army HQ: Napoleon (N)
- HQs: d'Erlon (I), Reille (II), Vndme (III), Gérard (IV), Lobau (VI), Pajol (CI), Exlmn (CII), Kellrmn (CIII), Mhaud (CIV)
- G: G Light, G Heavy, G Grenadier, G Young Guard, G Old Guard, G Artillerie
- I: I Jacquinot, I Quiot, I Donzelot, I Marcognet, I Durutte, I Artillerie
- II: II Piré, II Bachelu, II Jérôme L, II Jérôme R, II Foy, II Girard, II Artillerie
- III: III Domon, III Lefol, III Habert, III Berthézène, III Artillerie
- IV: IV Maurin, IV Pécheux, IV Vichery, IV Bourmont, IV Artillerie
- VI: VI Jeannin, VI Simmer, VI Teste, VI Artillerie
- CI: CI Soult, CI Subervie
- CII: CII Strolz, CII Chastel
- CIII: CIII l'Heritier, CIII d'Hurbal
- CIV: CIV Watier, CIV Delort
- Detachments: x4
Anglo-Dutch Army campaign sheet
- Army HQ: Wellgtn (no chit)
- HQs: Orange (I), Hill (II), Picton (R), Uxbridge (C)
- I: I Cooke, I Alten 3, I Kielmansegg 3, I Perponcher 2, I Goedeck, I Chasse 3 (M), I d'Aubremé 3, I Ne (M), I Artillery
- II: II Colville, II Lyon, II Clinton 2, II Halkett 2 (M), II Stedman (M), II Anthing In, II Artillery
- R: R Picton 5, R Vincke 5 (M), R Lambert 6, R Kruse 6 (M), R Brunswick, R Decken (M), R Bulow (M), R Artillery
- C: C Left, C Right, C Heavy
- Detachments
Prussian Army of the Rhine campaign sheet
- Army HQ: Blücher
- HQs: Zieten (I), Pirch (II), Thlmn (III), Bulow (IV)
- I: I Roder, I Steinmetz, I Pirch, I Jagow, I Schuetter (M), I Artillery
- II: II Jurgass, II Tippelskirch, II Krafft, II Brause (M), II Langen (M), II Artillery
- III: III Hobe, III Borcke, III Kampfen, III Luck (M), III Stulpnagel (M), III Artillery
- IV: IV William, IV Ryssel (M), IV Hiller, IV Losthin, IV Hacke (M), IV Artillery
- Detachments: x3
Waterloo Scenario: Reinforcements
Reinforcements enter in Road Column in the shown march order.
Prussian reinforcements (historical)
- Enter 18th, Turn 3 with 1 full move: Zieten (chit I) and Blücher; I Roder, I Pirch, I Steinmetz, I Jagow, I Artillery.
- Enter 18th, Turn 4 with 1/2 of a move: Pirch (chit II); II Tippelskirch, II Langen, II Artillery, II Brause, II Jurgass.
- Enter 18th, Turn 2 with 1/3 of a move: Bulow (chit IV); IV William, IV Ryssel, IV Hiller, IV Losthin, IV Hacke, IV Artillery.
French reinforcements (historical)
- Enter 19th, Turn 1 with 1 full move: Pajol (chit CI); CI Soult, IV Maurin.
- Enter 19th, Turn 2 with 1 full move: Gérard (chit IV); IV Vichery, IV Bourmont, IV Artillerie. Exlmn (chit CII); CII Strolz, CII Chastel.
- Enter 19th, Turn 3 with 1 full move: Vndme (chit III); III Domon, III Lefol, III Habert, III Artillerie.
British reinforcements (historical)
- Enter 19th, Turn 1 with 1 full move, at 1 of these roads: R Lambert 6, R Bulow H (M), R Decken H (M). (Picton's chit R.)
- Enter 19th, Turn 1 with 1 full move, at 1 of these roads: I Goedeck, II Anthing In, II Stedman 1 (M), II Lyon 4 (M), II Colville 4.
Optional Reinforcements
The optional schedule on page 13 assumes Grouchy's column marches to the battle upon hearing cannon fire. There is no battle at Wavre. Use it with the optional French chits (see Setup).
- Enter 18th, Turn 2 with 1/3 move: Bulow (chit IV); IV William, IV Ryssel, IV Hiller, IV Losthin, IV Hacke, IV Artillery.
- Enter 18th, Turn 3 with 1 full move: Zieten (chit I) and Blücher; I Roder, I Pirch, I Steinmetz, I Jagow, I Artillery.
- Enter 18th, Turn 3 with 1/2 move: Pajol (chit CI); CI Soult, IV Maurin.
- Enter 18th, Turn 4 with 1/2 move: Pirch (chit II); II Tippelskirch, II Langen, II Artillery, II Brause, II Jurgass.
- Enter 18th, Turn 4 with 1 full move: Gérard (chit IV); IV Bourmont, IV Vichery, IV Artillerie. Exlmn (chit CII); CII Chastel, CII Strolz.
- Enter 18th, Turn 6 with 1 full move: Vndme (chit III); III Artillerie, III Domon, III Lefol, III Habert.
- Enter 19th, Turn 1 with 1 full move, any Grey road: Thlmn (chit III); III Stulpnagel, III Kampfen, III Luck, III Artillery, III Hobe.