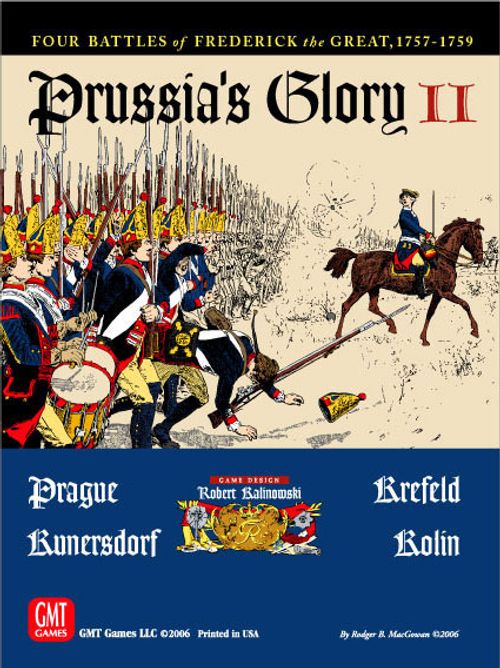
Prussia's Glory II: Four Battles of the Seven Years War, 1757-1759
Prussia's Glory II: Four Battles of the Seven Years War, 1757-1759 Rulebook
Table of Contents
Table of Contents
- 1. General Information
- 2. How to Read the Game Pieces
- 3. Sequence of Play
- 4. Army Activation and Command Determination
- 5. Stacking
- 6. Zones of Control and Engaged Units
- 7. Movement Phase (3)
- 8. Bombardment (Offensive and Defensive) (4, 6)
- 9. Rally Phase (5) and Unit Morale
- 10. Close Combat Phase (7)
- 10.1 Step 1—Attack Designation
- 10.2 Withdrawal Before Combat
- 10.3 Determine Odds
- 10.4 Select Lead Units
- 10.5 Determine DRM
- 10.6 Resolve the Close Combat
- 10.7 Check For Leader Casualties
- 10.8 Combat (and Bombardment) Results
- 10.9 Retreats
- 10.10 Advance After Combat
- 10.11 Momentum Advances and Momentum Attacks
- 11. Remove Locked Markers Segment (8)
- 12. Army Morale
- 13. Joint Army Morale Adjustment Segment (C)
- 14. End of Turn Phase (D)
- 15. More On Leaders
- 16. PG I and II Optional/Advanced Rules
- 17. Advanced Rule 1—Limited Intelligence
- 18. Advanced Rule 2—Advanced Command Determination Results
- 19. Scenario Basic Introduction
- 20. Glossary of Terms
1. General Information
1.1 Components
A full game of Prussia's Glory II includes:
- Two 22" x 34" back-printed maps
- One rulebook
- One playbook
- Two 17" x 11" Player Aid Cards
- Four and a half counter sheets
- One six-sided die
MAPS: Each side of the maps depicts the terrain on which the battles were fought. A hexagonal grid has been superimposed on the terrain to regulate placement and movement of Units. When counting distances between hexes, count the final hex but not the starting hex (adjacent hexes are 1 hex apart, for example).
COUNTERS: The counter sheets contain counters that represent combat Units, their leaders, and a variety of information markers. The counters should be carefully removed from their frames and sorted by battle and side before play. About half the Units for each battle will not begin play on the map; these are replacements which enter play when casualties are removed.
1.2 Glossary
See back of rules booklet.
1.3 Game Scale
Each hex on the map represents 500 yards. Each Game Turn represents one hour of real time. Every Strength Point (SP) of infantry represents about 400 men, while every SP of cavalry represents about 200 men. 3- and 4-Step Units are brigades or equivalents, 2-Step Units are regiments (or Russian Cossack or Prussian Freikorps Units), and 1-Step Units are battalions. Artillery Units represent 10 to 20 cannons and crew.
1.4 Nationalities
The different nationalities in the game are represented on the counters by the following colors:
- Prussian—blue background
- Austrian—white background
- Austrian auxiliaries (Prague scenario)—gray background, designated Main (Mainz)
- Saxon—medium gray
- Russian—green background
- French—white background with blue print
- Hanoverian—red
Hanoverian Allies:
- Brunswickers, Hessians—medium blue
2. How to Read the Game Pieces
PG II contains two different types of pieces: Unit/Leader counters, and Markers. Units and Leaders represent the infantry, cavalry, artillery, and leaders who fought the historical battles. Markers are purely informational, and are used to track information such as Morale State and Engaged status.
2.1 Infantry and Cavalry Counters
Infantry and cavalry counters represent units composed of up to 4 "steps," with varying combat, morale, and movement values on each side of the counter. 3- and 4-Step Units are represented by two counters, although only one will be on the map at any time. Units that have a dot instead of a set up hex reference are replacement counters.
Each infantry/cavalry counter shows: the Historical Designation, Wing Affiliation Color Bar, Strength Points, Morale Rating, Movement Allowance, Shock Points, Step Number (the number of remaining steps), and the Setup Hex for Battle Scenarios (letter indicates scenario).
2.2 Artillery Counters
Artillery Units also have up to 4 steps, but use three Bombardment Strength values instead of a combat strength. Artillery does not have any Wing affiliation.
Each artillery counter shows: the Historical Designation, Bombardment Strength (for 1 hex/2 hexes/3 hexes), Morale Rating, Movement Allowance, Step Number (the number of remaining steps), and the Setup Hex for Battle Scenarios (letter indicates scenario).
2.3 Leader Counters
Wing Leaders and Army Commanders do not have Morale or Strength Points and are NOT Units. Leaders will have a Morale Modifier, and some will have an Initiative rating.
Each Leader counter shows the Leader Name, whether he is an Army Commander or Wing Commander, a Scenario Code, an Initiative rating (C=Cavalry, I=Infantry), a Morale Modifier, whether a star indicates a special leader, his Wing Affiliation, and his Movement Allowance.
3. Sequence of Play
The game is divided into a number of Turns, specified by the scenario. Each Turn is divided into Prussian and Coalition Player Turns, each of which has several phases. Once a player finishes a phase, he may not go back to perform a forgotten action unless his opponent permits it. The Player executing his Player Turn is the Active player. The other player is the Inactive Player. After each Turn is finished, go back to the beginning of the Sequence of Play and start a new Turn, until all the scheduled Turns are completed. Note—parenthesized numbers after segments in the Sequence of Play refer to rules sections covering that segment. Parenthesized numbers after the actual rules segments refer back to their order in this Sequence of Play.
DESIGN IMPROVEMENT NOTE: For more clarity, the "Engaged" markers used in PG are now called "Locked" markers, i.e. the indicated units are 'locked in combat'. The term 'Locked' is synonymous with 'Engaged' throughout these series rules.
A. Prussian Player Turn
- Army Activation Phase (Main scenarios only) (4.1)
- Command Determination Phase (4.2)
- A. Deploy from Column Segment (4.4)
- B. Group Command Roll Segment (4.5)
- Movement Phase (7)
- A. Routed Movement Segment (7.1)
- B. Place "Locked" Markers Segment (7.2)
- C. Normal Movement Segment (7.3)
- Offensive Bombardment Phase (8)
- Rally Phase (9.4)
- Defensive Bombardment Phase (8.5)
- Close Combat Phase (10)
- Remove Locked Markers Phase (11)
B. Coalition Player Turn
The Coalition player performs his player turn in the same way.
C. Joint Army Morale Adjustment Phase (13)
Both players adjust their Current Morale Markers, then check for and apply Army Demoralization/Broken procedures, if required.
D. End of Turn Phase (14)
Move the Turn marker to the next box on the Turn Record track and begin the next Turn.
4. Army Activation and Command Determination
Command includes two concepts: Army Activation and Command States. Once an Army has been Activated, every Group and Wing will have a Command State determined for it every turn.
4.1 Army Activation Phase (1)
An Army must be Activated before it may perform any movement or combat. Army Activation only occurs once per side. Both sides' armies start the Main Scenarios Inactive. Generally, the Prussian player will have to decide when to Activate so that he can move his Army. The Coalition player may also attempt to Activate (at higher cost and risk), or await Activation due to Prussian actions. In Battle Scenarios, both Armies are already Activated.
There are three types of Activation: Normal Activation, Automatic Activation, and Coup d'Oeil (CdOA) Activation.
DESIGN NOTE: It is possible for both Armies to stay inactive. The Prussian player must balance the Turn he intends to start on with the potential drawbacks of early activation, such as increased opportunity for Coalition counter-moves or greater exposure to battle losses and fatigue. The Coalition player may attempt activation to disrupt Prussian efforts with a countermarch, at the cost of crucial Army Morale.
4.1.1 Normal Activation: During the Army Activation phase, a player may attempt Normal Activation of his Army if it is not Activated. Players can attempt Normal Activation once per turn until the Army is Activated. To attempt Activation, the player pays the Activation cost specified in the Scenario instructions by placing spare counters in boxes on his AM Track equal to his Army's Activation Cost (see 12.2). He then rolls one die (pay cost, then roll) and adds his Army Commander's Initiative rating. If the result is 7 or more, the Army is Activated and may begin normal Command/Movement. If the result is less than 7, the Army does not Activate and the cost and Army Morale spent is wasted. A player whose Army is not Activated does not perform any of the remaining phases of his Player Turn. [See 12.2 on how to mark spent Army Morale.]
4.1.2 Automatic Activation: As soon as an enemy counter moves within three hexes and clear Line Of Sight (LOS) (8.2) of an Inactive counter, the Inactive Army is Activated in the next Player Turn, at no cost in Army Morale. [Exception: Detachments do not cause Automatic Activation. (4.3)]
4.1.3 Coup d'Oeil Activation: The first time any counter of an Inactive Army or Detachment (4.3) gets a clear LOS of 7 hexes or less to an enemy Unit (not Leader), the Inactive player may make a Coup d'Oeil Activation (CdOA) attempt. A CdOA attempt may be attempted only once per Army. Each Detachment may also make one CdOA attempt (4.32). A player attempting a CdOA attempt rolls the die and adds his Army Commander's Initiative rating. If the result is 8 or higher, the player may choose to Activate his Army by paying the Activation cost specified in the scenario (roll, then pay if desired for CdOA). CdOA attempts occur during an enemy Movement Phase, not the friendly Army Activation Phase.
HISTORICAL NOTE: "Coup d'oeil: a brief survey; glance." In the Frederickian era, a key quality by which Leaders were measured—the ability to take in a situation 'at a glance' and respond correctly. Due to the erratic nature of scouting in this era, and the relatively slow reaction and reorientation capabilities of linear-based battle lines, CdOA was a highly prized but uncommon asset. During the approach march phase of a battle, fleeting opportunities, acted on or overlooked, often meant the difference between victory and defeat.
4.2 Command Determination Phase (2)
4.2.1 Wings and Groups:
Historical regiments and brigades were combined into Wings under a single leader. For command determination in the game, several historical Wings are often assigned to a Basic or Specific command Group.
a. Wings. Unless assigned to a Specific Group, Wings are assigned as follows:
- Wings containing one or more infantry Units are known as Infantry Wings, and are assigned to the Basic Infantry/Artillery Group (even if cavalry Units are in the Wing)
- Wings containing only cavalry Units are known as Cavalry Wings, and are assigned to the Basic Cavalry Group
- Artillery Units are always assigned to the Basic Infantry/Artillery Group.
b. Groups.
- Specific Groups are composed of any infantry Wings, cavalry Wings and artillery Units assigned by scenario instructions.
- The Infantry Basic Group contains all Infantry Wings and artillery Units not assigned to any Specific Groups.
- The Cavalry Basic Group contains all Cavalry Wings not assigned to any Specific Groups.
4.2.2 Command Ratings: Once an Army has been Activated, players determine each Group's Command State every turn. A Group is either Effective or Degraded. Every Group has a Command Rating, which is the die roll result (or less) needed for the Group to be Effective. Command Ratings and die roll ranges are shown in each scenario's Army Information charts, and on the Groups' respective Command Effectiveness Markers, which are placed on or near the map each turn to reflect each Group's Command state.
4.2.3 Command State: The Group's Command State applies to every Wing of the group, along with any artillery currently in it.
- Effective Wings get full Movement Allowance.
- Degraded Wings get half Movement Allowance (round up).
- Wings that are In Column have different Degraded MAs (7.6.1).
- Leaders always get their full Movement Allowance.
4.2.4 Special Leaders: Special Leaders are marked with a star, and allow one Degraded Wing (and possibly some artillery) to attempt to recover to an Effective state. This attempt occurs after all Groups have rolled for Command State that turn (see 4.5).
- Special Leaders marked with an "I" may only affect Wings that have infantry.
- Special Leaders marked with a "C" may only affect Cavalry Wings.
- A Special Leader without an "I" or "C" may affect any Wing.
- All Special Leaders may affect artillery.
- Both Wing Leaders and Army Commanders may be Special Leaders if so designated by scenario instructions.
4.2.5 Out of Command Units: Any Unit starting the turn more than 5 hexes away from its Wing Leader is Out of Command (OOC). When counting, count the Leader's hex but not the Unit's.
- Units that are OOC may only use half their normal movement allowance (round fractions up) regardless of their Command State, and cannot enter an EZOC.
- Artillery Units can trace command to any friendly Leader.
- Enemy Units, terrain and EZOCs do not impede tracing command.
- Also, each turn, any two infantry or cavalry Units may trace command directly to the Army Commander.
- Mark any Units that cannot trace command with Out of Command markers.
4.3 Detachments
Detachments (Dets) are temporary Specific Groups and are not considered part of the main Army. They may be Activated independently, and movement and combat by the Det counters will not normally cause Army Activation, either of its own Army or the enemy's Army [Exception:, see 4.3.2 below]. Whenever a Det counter can trace a 3 hex or less LOS (8.2) to an enemy counter, or an already Activated friendly Det counter, the Det is considered immediately Activated. The player then begins determining Command State for the Detachment.
4.3.1 Detachments and Main Army Activation: When the main Army is Activated, no matter how it is Activated, all Dets are dissolved. The Det counters are reassigned to their appropriate Basic Groups.
4.3.2 Detachments and CdOA Activation: Each Det gets one attempt at CdOA Activation in addition to the attempt allowed for the main Army. If a Det succeeds at its CdOA Activation, the entire Army is Activated.
4.3.3 Det Command Effectiveness chits/Det Command rolls are not used in the Battle scenarios, as the Dets have already been assigned per 4.3.1.
4.4 Deploy From Column Segment (2A)
Players decide whether to Deploy their In Column (IC) Wings (7.6). This decision is made prior to determining Command State. Players declare which of their Wings will Deploy. Artillery Units may Deploy with any deploying Wing if they are within 5 hexes of its Wing leader. Flip IC leaders to their deployed sides, and rotate IC unit counters back to normal facing.
4.5 Group Command Roll Segment (2B)
a. For each Group, roll a die and compare to its Command rating.
- If equal to or less than the Command Rating (4.2.2), place the Group's Effectiveness Marker on or next to the map with the Effective side up.
- If greater than the Command Rating (4.2.2), place the Marker with the Degraded side up.
b. If all Groups are Effective, Special Leaders (i.e., those with a star, 4.2.4) are not needed.
c. If one or more Groups are Degraded, each Special Leader may attempt to return one Degraded Wing to an Effective state.
- To re-roll the Command State for a Wing, the Special Leader must either be that Wing's Leader, or be stacked with that Wing's Leader.
- The Special Leader must be eligible to re-roll for that type of Wing (4.2.4).
- A Special Wing Leader may affect only one Wing in a turn (which may be the leader's own Wing, but does not have to be). The Special Leader also may affect any artillery with which he is stacked.
- Roll a die and compare the result to the Special Leader's Initiative. If the roll is equal or less, the affected Wing plus artillery (if any) are Effective that turn. If not, the Wing/artillery remain Degraded.
- It is suggested that Wings that have regained Effective Command due to a Special Leader have all their Units moved in sequence to avoid confusion as to which Units have full MA or half MA.
EXAMPLE 1: In Prague, the Austrian player has three Groups; the Basic Infantry/Artillery Group with a Command Rating of 1, the Basic Cavalry Group (CR 4), and the Browne Flank Infantry Specific Group (CR 3). The Austrian player will roll and place Markers for all 3 Groups. The player rolls a 4 for infantry, a 5 for cavalry, and a 3 for Browne. This means all Austrian infantry, artillery and cavalry are Degraded, except for the infantry assigned to the Browne Specific Group, which are Effective.
EXAMPLE 2: In Prague, the Prussians have Basic Group Ratings of 5 for both Infantry/Artillery and Cavalry, and 2 for the Right Flank Cavalry Specific Group. Schwerin (4I) and Zieten (4C) are special leaders (Schwerin may only affect Infantry Wings, Zieten only Cavalry wings)). On Turn 1, the Prussian player rolls three 2's, so all Groups/units are Effective and Special Leader attempts are not needed. On Turn 2, the Prussian rolls a 6 for the Infantry/Artillery Group (making it Degraded), a 5 for the Cavalry Group, and a 1 for the Right Flank Cavalry Specific Group. Schwerin is eligible to reroll for Winterfelt because he is stacked with Wing Leader Winterfelt and two artillery units. Schwerin rolls a 4. Winterfelt's Wing and those two artillery units (only) are now Effective. Since both Cavalry groups are already Effective, Zieten again has no need to roll.
5. Stacking
Counters are placed on the map in individual hexes. All Units in a single hex are referred to as a Stack. Units' order in a Stack is important, and the number of Units allowed in a Stack is limited.
5.1 General Limits
Up to 12 steps of infantry and/or cavalry plus up to 8 artillery Steps may stack in a hex. Alternatively, up to 12 artillery Steps may stack alone. Leaders and Markers do not count against Stacking limits.
5.2 In Column Limits
No more than 4 Steps of infantry and/or cavalry plus 8 artillery Steps may stack when In Column (7.6).
5.3 Cossack and Freikorps units
Russian Cossack and Prussian Freikorps units (in Zorndorf, Torgau, and Kunersdorf) count double for stacking and Engaged purposes (Example—a two step Cossack unit counts as four steps). These units have their step values in a red box as a reminder.
5.4 When Do Limits Apply?
a. Stacking limits apply throughout the Movement Phase, and a hex may not be entered by a Unit if such entry would violate stacking limits.
Important: Each player's first priority during his respective Movement Phases, after moving Routed Units, is to bring any overstacked hex within the stacking limit by moving as many supporting Units from the hex as necessary (see also 7.3).
b. Stacking limits also apply during each advance and retreat as a result of combat.
- Advancing Units cannot enter any hex in violation of stacking limits.
- Retreating Units can enter a hex, and even remain in that hex, in violation of stacking limits, but cause severe penalties for stationary Units already occupying the hex (10.9.2A).
5.5 Stacking Order
Only the Engaged (6.2) units at the top of a Stack will participate in combat first. Only artillery that is above all infantry and cavalry in a stack may Bombard. Leader placement in a Stack is not important. In general, players are free to stack Units as they choose, with the following exceptions:
- Units that start the turn under a Locked (Engaged) marker (7.2) have restrictions on changing stacking order.
- A Retreating Unit is always placed on top of a Stack whose hex it enters.
- COALITION ARTILLERY STACKING ORDER: Coalition artillery that enters an EZOC (6.1) must be placed on the bottom of the Stack. Prussian Units do not suffer this restriction.
DESIGN NOTE: The Prussians were markedly more aggressive and adept in moving their 12 pound guns "up front" in an infantry close support role. Coalition artillery use tended to be more positional. This rule allows the Prussians to move into an EZOC after infantry or cavalry and provide support in the next Defensive Bombardment Phase. Coalition guns moving into EZOC will have to wait a full turn (next friendly movement phase) until they can be shifted to the top of the Stack and Bombard.
6. Zones of Control and Engaged Units
6.1 What Is A Zone Of Control?
All non-Routed Units exert a Zone of Control (ZOC) over all six adjacent hexes, except any hexes the unit is prohibited from entering (7.4.3). Leaders and routed units have no ZOC. A ZOC represents the area of the battlefield that is contested by the Unit. ZOCs are used to determine which Units are Engaged (6.2), will participate in Close Combat (10), and affect enemy Unit movement (7.5). A ZOC exerted by an opposing Unit is an Enemy Zone of Control, or EZOC.
6.2 Definition of Engaged and Supporting
a. When the first infantry or cavalry Unit (and any subsequent units) enters a vacant hex in an EZOC, that Unit may become Engaged and be required to cease movement (7.5.1 and 7.5.3).
b. When a Stack containing infantry and/or cavalry (inf/cav) starts the Movement Phase in an EZOC, the inf/cav counters totaling 4 Steps or fewer are considered Engaged, counting Steps in turn from the top of the Stack. All remaining inf/cav are considered Supporting.
EXAMPLES: Steps in a stack from the top down, and order in which they are engaged:
- 2-Step, 2-Step—both Engaged
- 2-Step, 3-Step—only the 2-Step Unit
- 1, 1, 2-Step—all Engaged
- 1, 1, 4-Step—both 1-Step Units only
DESIGN NOTE: Players may better grasp Stacking and Engaged Unit concepts by envisioning 4-Step Units as spanning the entire 500 yard hex. Successive Supporting Units would be ranged 200-220 yards behind those in front. Unless firing at enemy on a flank, only the first line (first 4 Steps and artillery) in a hex is capable of forward fire.
c. Artillery Units do not become Engaged or Supporting. All Engaged inf/cav must participate in Close Combat if they are adjacent to any opposing inf/cav.
6.3 Engaged Units and Stacking Order
All Stacks that begin the Turn with Engaged infantry/cavalry are already Locked In Combat, and have restrictions on changing Stacking order and moving.
- All such Stacks will be marked with "Locked" Markers. Any hexes so marked may not be vacated completely during the turn [Exception — 6.4].
- During the turn, the inf/cav that are Engaged in that Stack can change, either by Supporting inf/cav moving to the top of the stack or new inf/cav entering the hex and being placed on top of the Stack. In both cases, flip the "Locked" marker over to its penalty ("–2 DRM") side. That Stack will have a negative modifier in the upcoming Close Combat.
- An Inf/cav unit may enter a hex with a Locked marker and become a Supporting Unit without penalty, or it may continue movement if it has sufficient movement points available to pay the hex exit cost and the entry cost of any adjacent hex it is allowed to enter.
CHANGING STACKING ORDER WITHOUT PENALTY: Units in hexes (even EZOC hexes) that are not marked with a Locked marker (i.e, the Units in the hex didn't begin the movement phase in an EZOC) may change their stacking order freely during the active movement phase, with the exception of Coalition artillery units per 5.5.
EXAMPLE: The Austrian player has an Effective Wing, and 4 step inf units A and B did not start the player turn in EZOC; therefore, they had no Locked marker on them. He moves inf A into a Prussian cav ZOC; inf A is considered Engaged at that instant (per 7.5.1). As it's currently the top (and only) 4 steps in an EZOC, it must stop moving. The Austrian then moves inf B from the hex behind into the same hex. He now has a choice—he can say it moved in as a Supporting Unit; if so, he can leave it in that hex, or, since he has only expended 1 MP, he can leave the hex for +1 MP (7.5.1) and enter the next hex, for a total of 3 MP. Alternatively, he could decide that he wants inf B to lead the attack against the Prussian cav (because inf B has a better morale rating, for example). So he says inf B is moving in ON TOP of A. Inf B is now the Engaged unit, and inf A has become the Supporting unit (although A cannot resume movement). This stacking shift incurs no penalty because there is no Locked Marker in this hex.
ADDITIONAL ENGAGED UNITS: If fewer than 4 steps are Engaged in a hex, players may make more units Engaged up to the 4 step Engaged limit without incurring the penalty, as long as this does not change the Engaged status of the original Engaged unit(s). (In this case, you are not changing the status of the already Engaged unit(s), but bringing other troops alongside into vacant frontage, which would not cause the confusion of having units actually advance or withdraw through each other's lines.)
EXAMPLE: The player has a 2 step cav unit, a 4 step inf, and another 2 step cav unit beneath the inf, in that stacking order, in an EZOC. Per 6.2, only the top 2 step cav is Engaged, and he must place a Locked marker on the hex. During his movement phase, he could move up the 2 step cav from the bottom of the stack to become Engaged along with the top 2 step cav. This would NOT cause a Locked marker flip, as that original Engaged cav did not change its status. However, if the player wanted to move up the 4 step inf, he'd have to place it atop the original Engaged 2 step cav (4 step Engaged limit). This would change that cav from Engaged into Supporting status. As this does change the original Engaged unit, the Locked marker is flipped to –2.
6.4 Locked Markers and Engaged Fast Units
Engaged Fast Units (any Unit with a Movement Allowance of 4 or greater) may legally leave a hex marked with a Locked Marker if they are not adjacent to one or more Engaged, Formed enemy cavalry units. Fast Units that leave a hex do not cause the Marker to flip to its penalty side, but still pay additional movement costs (see 7.5.3). If the marked hex is now empty, discard the Marker.
7. Movement Phase (3)
In this phase, players move all of their eligible counters.
- All Routed infantry and cavalry must move first (7.1).
- Routed artillery never moves.
- All hexes with infantry and cavalry in an EZOC are marked with a Locked Marker (7.2) and have restricted movement (6.3).
- The player then moves all non-Routed counters (7.3) with priority given to moving enough supporting Units out of overstacked hexes to bring them back within stacking limits (5.4).
- Players may place Wings In Column before or after completing movement (7.6).
- As long as no other rules are broken, a counter may always move one hex during its turn, regardless of MP costs.
- Artillery Units that move may not Bombard in the same Player Turn, and should be marked with an Artillery Moved Marker.
7.1 Routed Movement Segment (3A)
a. Routed infantry and cavalry must move during this segment, following the retreat rules (10.9). Routed infantry moves 2 hexes per turn, and Routed cavalry moves 3 hexes per turn, ignoring all MP costs for terrain or leaving an EZOC. A Routed Unit that reaches the edge of the map with movement remaining is removed, counting as eliminated. Otherwise, Routed movement follows the rules for all other Retreats (including Capture, if unable to make the full move required).
b. Routed artillery cannot move.
7.2 Place Locked Markers Segment (3B)
All Stacks that begin the Turn with Engaged infantry/cavalry are marked with Locked Markers.
7.3 Normal Movement (3C)
Normal Movement involves spending Movement Points (MPs) to cross hex-sides and enter adjacent hexes. Only non-Routed Units may perform Normal Movement.
PROCEDURE:
- Counters are moved one at a time, and each counter must complete its movement before the next one may be moved.
- The Phasing player must first move enough supporting units out of any overstacked hexes to bring such hexes back within stacking limits. NOTE: If an overstacked hex is totally surrounded by enemy units or impassible terrain and movement is not possible, the owning player removes or reduces as many supporting units as is necessary to bring the hex back within stacking limits. The counters removed are placed on the Army Morale Track as eliminated surrendered units.
- The Phasing player may now move his remaining unmoved eligible counters in any order.
- MPs may never be saved for later use or transferred, and unused MPs are lost.
- A counter may not spend more MPs than its Movement Allowance (MA).
- The cost in MP to enter each type of hex and to cross certain types of hex-side is shown on the Terrain Effects Chart (TEC). Each type of counter has its own cost column. For hexes with multiple terrain types, use only the highest hex cost.
- Counters always pay all applicable hex-side costs.
- As long as no other rules are broken, a counter may always move one hex during its turn, regardless of MP costs.
EXAMPLE: To enter hex 1726 on the Prague map from hex 1725 costs 2 MPs, 1 MP for the clear hex and +1 MP for moving up the slope hex-side. Also on the Prague map, the marsh/pond hexes cost 3 MP for cavalry to enter, not 5 MP.
7.4 Movement Restrictions
7.4.1 Non-Leader Units. Non-leader Units' MAs are halved (round up fractions) if any of the following conditions apply, but are not further reduced if more than one applies:
- Command State is Degraded (4.2.3)
- Unit is Out of Command (4.2.2)
- Unit is Disordered (9.1)
EXAMPLE: Most infantry have an MA of 3, and will have an MA of 2 when Disordered.
7.4.2 Leader Units. Leaders always get their full MA.
7.4.3 Prohibited Terrain.
- Counters may never enter prohibited terrain (see TEC).
- Counters may never enter a hex occupied by an enemy counter, unless attempting an Artillery Capture.
- Non-Routed Units may never exit the map unless their Army is Demoralized or Broken (see 12.0).
7.5 Movement and ZOCs
- There is no additional cost in MPs to enter an EZOC.
- Exiting an EZOC, if possible, always incurs a movement point penalty, and the exiting Unit must always have enough MPs to pay both the penalty and normal terrain costs to enter an allowed adjacent hex.
- Different types of Units interact with EZOCs in different ways (see 7.5.1 - 7.5.3).
7.5.1 Infantry Movement and EZOCs: There are two classes of infantry: normal infantry (MA 3) and fast infantry (MA 4). This section covers normal infantry. (Fast infantry is covered in section 7.5.3.)
- When an infantry Unit enters an EZOC and becomes Engaged (6.2) with any enemy unit, it must stop moving.
- A Supporting infantry Unit that either begins movement in an EZOC or enters an EZOC may leave that EZOC at a cost of +1 MP in addition to normal terrain costs.
- If an Engaged infantry Unit started the Turn under a Locked Marker, the only way it can leave the hex is to have another Unit enter and make it a Supporting Unit, or have a Supporting Unit in the hex become Engaged. In this case, flip the Locked Marker in the hex to its penalty side. The formerly Engaged infantry Unit (now a Supporting Unit) may leave the EZOC at a cost of +1 MP, in addition to normal terrain costs.
7.5.2 Artillery Movement and EZOCs: Artillery has the same restrictions as normal infantry in 7.5.1 (and is also restricted by 5.4). In addition, artillery may never enter an EZOC unless the hex already contains friendly infantry/cavalry. Artillery units anywhere in a stack, or alone in a hex, may leave EZOCs at a +1 MP cost, as if they were Supporting Units.
7.5.3 Fast Units and EZOCs: All cavalry and infantry Units with an MA of 4 or more MPs are considered Fast Units.
- When a Fast Unit enters an EZOC and becomes Engaged with a Formed enemy cavalry Unit, it must stop moving.
- When a Fast Unit enters an EZOC and becomes Engaged with any enemy units except Formed cavalry Units, it may leave the EZOC at a cost of +1 MP for Prussian cavalry, or +2 MP for all other fast Units, in addition to normal terrain costs.
- Engaged Fast Units that start movement adjacent to only Engaged Disordered enemy cavalry and/or any enemy infantry may also leave those EZOCs at a cost of +1 MP for Prussian cavalry, and +2 MP for all other fast Units, in addition to normal terrain costs. Note that this movement will not flip a Locked Marker to its penalty side per 6.4. This is the only way to change which Units are Engaged under a Locked Marker without flipping the Marker to the penalty side.
- Supporting Fast Units which either start in, or enter, a hex in an EZOC may also leave an EZOC at a cost of +1 MP, in addition to all normal terrain costs.
- In Column Fast Units may also leave EZOCs, by decreasing the number of hexes moved in column by 1 for Prussian cavalry, or 2 for all other units (7.61).
7.5.4 Leaders and EZOCs: Leaders may not enter an EZOC unless a friendly Unit is in that hex. If friendly Units are present, Leaders may enter and leave EZOCs freely at no additional cost and do not have to stop.
7.5.5 Units with Parenthesized Strength Points: Some Units have parenthesized Strength Points on their replacement steps. These Units are not permitted to enter EZOCs (these exhausted units are too shaken to attack).
7.6 In Column Movement
DESIGN NOTE: 'In Column' movement (IC) is faster than regular movement, but incurs penalties if IC units become involved in combat. During the early turns, the Prussians will usually want to move IC to be able to reach and attack the enemy without running out of time.
Both players may move troops In Column (IC). Units are placed IC as part of an entire Wing, not individually. For a Wing to be put IC, the Wing must be Effective, all of the Wing's surviving Units must be Formed and In Command, and no Unit may be in EZOCs. Up to 3 Effective artillery Units within 5 hexes of a Wing Leader going IC may also be placed IC. To mark a Wing that is IC, flip the Wing Leader to its IC side, and rotate all IC Leaders and IC Units 90 degrees from Units that are not IC. Wings are usually placed IC at the start of the movement segment. However, provided all other conditions are met, Wings can also perform normal movement, then go IC at the end of movement. Army Commanders can be placed IC and Deploy during the appropriate segments without regard to EZOCs. IC Units stay IC until they are Deployed.
DESIGN NOTE: You must put ALL of a Wing's Units IC, and you take ALL of them out. This rigidity is to discourage players from viewing IC moves as a 'bonus rate' to be selectively and flexibly employed. Consider IC as deliberate operational Wing/Army movement. Commanders of the era intended to move and deploy their Wings as unified bodies—'attack from the march' was viewed as a nightmare, not a deployment scheme.
7.6.1 Effects of In Column Movement: Units that are IC gain +4 MA, and ignore all terrain costs, paying 1 MP per hex entered. Exception: Marsh and Heavy Woods hexes cost 2 IC mp each. Fast IC units may exit EZOCs at a cost of 1 MA for Prussian Cavalry and 2 MA for all other fast units. Note—Units in IC may still not enter prohibited terrain. If an IC Wing is Degraded, do not halve the Units' MAs or add 4. Instead, Degraded IC MAs are as follows:
| Unit type | Degraded IC MA |
|---|---|
| Artillery | 4 MA |
| Infantry | 5 MA |
| Cavalry | 7 MA |
IC Units have penalties in Close Combat, listed on the Player Aid Cards. There may be occasions when attacking may be necessary while In Column (overwhelming attacks against isolated units, or occupying critical terrain), but the combat DRM penalties are severe. IC Artillery may not Bombard offensively or defensively.
7.6.2 Voluntary Deployment: During the Deploy From Column Segment (4.4), a player may announce that a Wing is Deploying from column. Flip the Wing Leader back to the normal side and rotate all of the Units back to normal. Any artillery unit within 5 hexes of the Wing Leader may Deploy at the same time. Normal movement rules immediately apply to this Wing.
7.6.3 Forced Deployment: If an enemy Unit moves or starts any movement phase within 3 hexes of any IC Unit, the associated Wing may attempt to Deploy (along with any IC artillery within 5 hexes of that Unit). First, determine the Command Rating for the moving and stationary Units. Normally, this is the Command Rating for each Units' Group. However, if a Leader with Initiative is stacked with either Units' Wing Leader, that Leader's Initiative may be used instead. Each player rolls one die and adds each side's Command Rating or Initiative. Non-moving Prussian cavalry then add +4 to their die roll.
HISTORICAL NOTE: Prussian cavalry was better conditioned, superbly drilled, capable of quickly deploying from march column to charge, and led by men who lived under Frederick's famous standing order that any cavalry commander who allowed the enemy to charge first would be cashiered. Catching Prussian cavalry IC would be a rare feat.
If the IC side's total is higher, they may immediately Deploy as described above. Otherwise, the IC Units have been caught IC and may not Deploy during the current Player Turn. Each Wing gets only one attempt at Forced Deployment per turn.
8. Bombardment (Offensive and Defensive) (4, 6)
The Active Player may Bombard with artillery that fulfills the following conditions:
- It is Stacked above all infantry and cavalry in its hex
- It is not In Column or Routed
- It did not move this Player Turn.
Each artillery Unit may only fire at one hex per Turn. In addition, each hex may only be Bombarded once per Turn. If multiple Units fire at one target hex, their Bombardment Strengths are summed. Resolve each Bombardment one at a time.
8.1 Selecting the Target
Artillery may Bombard any hex up to three hexes away. The Bombarding artillery must have LOS to the target hex (8.2). Artillery adjacent to enemy Units may fire at those Units only. Artillery may not Bombard targets at 2 or 3 hex range if the targets have any friendly Units adjacent to them. Artillery bombarding at 1 hex range (i.e into an adjacent hex) may fire at any enemy-occupied hex freely, regardless of friendly Units' locations.
EXAMPLE: On the Leuthen map, an enemy Unit is in hex 3106 and a friendly Unit is in hex 3107. An artillery Unit in hex 3207 may fire at the enemy Unit, but an artillery Unit in hex 3305 may not.
HISTORICAL NOTE: "Close overhead" supporting fire was rarely used due to the desire to avoid losing costly troops from friendly fire, not to mention the effect on morale.
8.2 Line of Sight
Line of Sight (LOS) is the method used to determine if two counters can "see" each other. LOS must be checked to determine if Armies can spot each other, and to determine which hexes an artillery Unit may Bombard. LOS is checked by tracing an imaginary line from the center of the source hex to the center of the target hex to see if anything blocks LOS. LOS is never blocked by terrain in the sighting hex or target hex. LOS is always clear to adjacent hexes. If the trace passes through an intervening hex containing woods, town or a Unit (with some exceptions noted below), LOS is blocked. If the trace passes through the hexside between two hexes, the tracing player gets to choose which hex to use (ignore a slope along that hexside, if present).
DESIGN NOTE: Every effort has been made to make the LOS rules precise and to cover every situation. If a dispute arises, it is the Designer's adamant intent that players do not agonize or bicker over LOS. In such a case, defer to rule 8.2a or 8.2b below:
8.2a (recommended): Adopt a suitably sporting 18th century battle captain's attitude. Allow the other player their shot. With a spirited hand flourish, say, "But of course, mon frère, fire away! I'm sure my rascals deserve a rousting anyway!" Vary pithy phrase as desired.
8.2b: For those who cannot accord such grace, each player rolls a die, high roll calls it.
8.2.1 Slopes: The hex that is on the high side of the slope must be adjacent to the slope for there to be LOS. If it is not, the hex is hidden behind the crest. That is, when sighting DOWNHILL, the source must be adjacent to the slope. When sighting UPHILL, the target must be adjacent to the slope.
EXAMPLE: On the Zorndorf map, hex 2104 can see hex 2102, because the high Unit is adjacent to the slope. 2105 cannot see 2103, because the high Unit is not adjacent to the slope.
8.2.1.1 Two Slopes: LOS is blocked when sighting across two slope hex-sides, except in two cases. Sighting over low ground occurs when the two slopes are in opposite directions, indicating low ground between the two hexes. Ignore the slopes for all purposes in that case. The other case is sighting up or down a long slope. If both slopes are part of the same intervening hex, and the hex on the high side is adjacent to the slope (which is the same rule as for one slope), LOS is clear. Again, this represents one Unit being at the top of a rise.
EXAMPLE: On the Zorndorf map, Hex 2105 has LOS to 2107, 2108, and 2207, and vice versa. Also on the Zorndorf map, hex 1724 has LOS to 1923 and 2023 and vice versa. However, hex 1724 does NOT have LOS to 1922 or 1423.
8.2.1.2 More than Two Slopes: In general, the unit at the highest elevation must be adjacent to the highest slope edge. Any further changes in elevation down must occur in successive hexsides. Low ground, defined in 8.2.1.1 above, can be ignored.
8.2.2 Sighting Over Units: Intervening Units block LOS except in two cases. First, a Unit on low ground (see 8.2.1.1) between the source and target does not block LOS. Second, if the source or target hex is on the high side of a slope, a Stack immediately adjacent and down slope from the high side may be ignored for tracing LOS.
EXAMPLE: On the Leuthen map, hex 3617 can trace LOS to hex 3512, even if a Unit is in 3615 because the Unit is on low ground. Also, 3512 can trace LOS to 3614 over Units in 3513 and 3613, because the Units would be directly downhill.
8.3 Resolving the Bombardment
a. Total the Bombardment Strengths (BS) of all firing Units. The BS varies depending on the range to the target. BS at one hex is listed first, followed by two hexes and three hexes.
b. Find the column corresponding to this total on the Bombardment Table on the Player Aid Cards. Note that 1 BS cannot cause any damage.
c. Determine the net DRM from the Bombardment Table (the DRMs are cumulative):
- +? Use the TEC to determine if any Artillery Bombardment DRMs apply. The attacker selects one attacking hex. Add in the least favorable terrain DRM from that hex and from the target hex, including all applicable hex-side terrain from both hexes.
- –3 if the target hex contains only Routed units
- –3 if any firer is Disordered
- –1 if firer is in a Demoralized army (does not apply if the firer is in a Broken army)
- –2 if firer is in a Broken army
- –2 if any bombarding artillery is currently under an MA-2 marker
- +2 if all bombarding artillery is at one hex range to the target.
[Note Optional Rule 16.1.a: Cavalry (but not fast infantry) in a target hex may withdraw before the bombardment die roll, using the procedures outlined in rule 10.2]
d. Roll one die, apply the net DRM and look up the result from the Bombardment Table.
e. The result is applied to the Units in the target hex (see combat results, 10.8). Results must be applied to Units that are or would be Engaged in that hex (the top 4 Steps of inf/cav). The owning player may spread the results among those Units as desired.
8.4 Remove Moved Markers Segment
After all Offensive Bombardment is complete, remove all the 'Artillery Moved' Markers from the map.
8.5 Defensive Bombardment Phase (6)
The Inactive Player may Bombard with their artillery per the conditions in 8.0. Defensive Bombardment is only permitted against adjacent Units.
9. Rally Phase (5) and Unit Morale
During the Rally Phase, the Active player may attempt to rally Disordered and Routed Units. The morale of Units is expressed by their Morale Rating and their Morale State. A Unit's Morale Rating is used in Close Combat, and is also occasionally checked in other circumstances. All Units start out with a Morale State of Formed, which may be degraded to Disordered and finally to Routed. Units may recover Morale States through Rallying. Disorder and Rout can result from Close Combat, Bombardment, failing Morale Checks, and having to Retreat through friendly Units. When a Unit becomes Disordered or Routed, place the appropriate Dis/Rt Marker on top of the Unit (use the blue for Prussian troops and gold for Coalition troops, if available).
9.1 Disorder
When Units become Disordered, they must immediately Retreat one hex, unless otherwise noted (10.9 and 10.13.3). Disordered Units may only use half of their MA (round up) until they Rally. Disordered Units also incur penalties in Close Combat and Bombardment, which are listed on the Player Aid Cards with the other DRMs for those activities. A Disordered Unit that suffers an additional Disordered result suffers a Rout result instead.
9.2 Rout
ROUTED EFFECTS:
- When non-Artillery Units become Routed, they immediately Retreat 2 hexes (if infantry) or 3 hexes (if cavalry), ignoring all MP costs.
- Routed artillery never moves or retreats (the gunners are saving their own skins, leaving their guns behind).
- If a Routed Unit suffers a Disorder or Rout result, treat it as another Rout (with another Retreat).
- Routed Units lose their ZOC and are not fully controlled by the player until they Rally.
ROUTED UNITS IN COMBAT:
- Routed Units that are attacked in Close Combat or by Bombardment incur negative DRMs, as listed on the Player Aid Cards.
- If the attacker is attacking only Routed Units, the attacker ignores all combat results against his Units.
- If a Routed Unit is forced to enter an EZOC, it is immediately Captured. However, Routed Units may leave an EZOC without any penalty.
ROUTED UNIT SURRENDER: If Routed Units of Demoralized or Broken armies are attacked in Close Combat, they surrender immediately, before any combat die roll is made.
9.3 Morale Checks
Units make Morale Checks when:
- their Army becomes Demoralized (12.4)
- their Army becomes Broken (12.5)
- other Units Retreat through them (10.9).
To make a Morale Check, take the Unit's Morale Rating (MR) and add the Morale Modifier of any one Leader in the hex. Subtract one for Demoralized Armies and two for Broken Armies. Roll the die and compare the result to the modified MR.
- If the die roll is 1 or 2 points higher, the Unit is Disordered.
- If the die roll is 3 or more points higher, the Unit is Routed.
- Otherwise, the Unit suffers no effect.
9.4 Rally
A Rally is an attempt to improve a Unit's Morale State from Routed to Disordered, or from Disordered to Formed. It is impossible to Rally directly from Routed to Formed. To Rally a Unit, modify its current MR using the DRMs from the Rally Modifiers table (see the Player Aid Cards). Then roll a die and compare the result to the modified MR. If the die roll is less than or equal to the modified MR, the Unit recovers one level of Morale (from Routed to Disordered, or from Disordered to Formed). Otherwise there is no effect. Units may Rally while in EZOCs.
10. Close Combat Phase (7)
PROCEDURE:
- The Active player is always the attacker, and the inactive player is the defender.
- Every Engaged (6.2) infantry and cavalry unit on both sides must participate in Close Combat in this phase. Note—this means that if an attacking friendly engaged Unit/Stack is adjacent to two or more engaged enemy Units/Stacks, it must attack them all unless additional friendly Units/Stacks can move up to assist in the Close Combat.
- Close Combats are resolved in the order chosen by the Active player.
- For every Close Combat, follow the entire Close Combat Sequence before moving on to the next Close Combat. Exception: Optional Rule 16.2—Alternate Combat Method, Croat Sniping Attacks.
EXAMPLE: The Prussian unit on the left is Engaged and cannot move. During the Close Combat Phase it must attack all three adjacent Austrian units unless the Prussian unit on the right moves up to help out.
- In general, no Unit may participate in more than one Close Combat per Turn; however, attacking cavalry that performs a Sweeping Charge may participate in two combats, and defending units may be subject to more than one combat result due to Sweeping Charges.
CLOSE COMBAT SEQUENCE
- Attack Designation (10.1) Note 1
- Withdrawal Before Combat (10.2)
- Determine Odds (10.3)
- Select Lead Units (10.4)
- Determine DRM (10.5)
- Resolve Close Combat (10.6)
- Check for Leader Casualties (10.7)
- Apply Results (10.8 and 10.9)
- Advance After Combat (10.10)
- Momentum Advance/Attack (10.11)
- Earn Combat Success Markers (10.12)
- Cavalry Action (10.13)—repeat Step 11, if necessary, after Cavalry Action
Note 1: Perform Croat Sniping attacks (Optional Rule 16.2).
10.1 Step 1—Attack Designation
- The Active player states which hexes are attacking and which are being attacked.
- All Engaged infantry/cavalry in each combat's hexes will be involved in the Close Combat.
- All attacking hexes must be adjacent to all hexes being attacked.
The attacker may arrange attacks against multiple hexes containing Engaged defending units, but must organize these attacks so that all Engaged attacker hexes in each combat are adjacent to all Engaged defender hexes in each combat.
- Resolve Croat Sniping Attacks (Optional Rule 16.2)
10.1.1 Flank Attacks, Supported Defenses: If there is a single defending hex and it is completely surrounded by attacking Units or the attacking Units' ZOCs, either a Flank Attack or a Supported Defense will occur.
- Do not count the presence or ZOC of Units not participating in the current Close Combat.
- Attacker ZOC is not negated by the presence of adjacent defender Units.
a. FLANK ATTACKS: If no Supporting Units are in the defending hex, a Flank attack applies. The attacker receives a +3 DRM if the defending hex is not a town (as noted on the Player Aid Cards).
b. SUPPORTED DEFENSE: If Supporting Units are in the defending hex, a Supported Defense applies. In this case, the defender (only) may add up to 4 Steps of Supporting inf/cav Strength Points to his total. Also, a Supported Defense results in +1 Loss Point to both sides during resolution.
DESIGN NOTE: The defender's Supporting Units are engaging attacking Units on the defender's flank and/or rear. The larger number of troops simultaneously engaged will result in higher losses.
10.2 Withdrawal Before Combat
All Defending Fast Units may Withdraw one hex before Close Combat if there are no Formed Cavalry Units Engaged in the attacking hexes. To Withdraw, all eligible Units must Withdraw from a hex, and they must all move one hex to the same location. They may Withdraw into an EZOC, and are always placed on top of any Stack they move onto. When Units Withdraw, new inf/cav may become Engaged in the defending hex, and Close Combat proceeds against those Units. If the intended defending hex is now completely vacated, intended attackers/support units may advance into that hex, but may not add their strength to any other Close Combat that player turn.
10.3 Determine Odds
10.3.1 The Attacker totals the Strength Points of all attacking Engaged inf/cav, and the Defender totals the Strength Points of all defending Engaged inf/cav. There is a limit to the number of SPs that may be counted per hex.
10.3.2 A maximum of 8 infantry SPs or 6 cavalry SPs may take part from the same attacking or defending hex in one Close Combat.
LIMIT EXAMPLE: Two Prussian 2-Step 5-5-3s are Stacked together. They may only use 8 SPs in Close Combat.
DESIGN NOTE: Shot up 2- and 1-Step Units actually retain more than 50% or 25% of their men. Thus, two 2-Step Units would require more than a one hex frontage. This rule therefore prevents several shot-up Units from fielding an artificially greater strength than an equal frontage full-strength Unit. Write off the ignored SPs to the difficulties entailed in trying to meld two or more battered Units into a unified force, and to shaken troops migrating to the rear, as in the 40-man-deep parts of the Austrian "line" at Leuthen.
10.3.3 During a Supported Defense (10.1.1), the Defender also adds the Strength Points of up to 4 Steps of Supporting inf/cav. In a Supported Defense, apply this limit separately to the Engaged Units and the Supporting Units.
10.3.4 After totaling the SPs on each side, compare the attacker's SPs to the defender's to get a ratio. Round that ratio in the defender's favor to one of the listed ratios on the Combat Results Table (CRT).
RATIO EXAMPLES: 5 SPs attacking 4 SPs is 1-1. 4 SPs attacking 5 SPs is 1-2. 7 SPs attacking 4 SPs is 3-2.
10.4 Select Lead Units
Each player must choose one Engaged infantry or cavalry from any of their participating hexes to be their Lead Unit. The Lead Unit's morale is used for comparison as a Close Combat DRM, and the Unit will also take the first loss points. The selected Unit does not have to be on top of the Stack, it only needs to be Engaged.
10.5 Determine DRM
The Active player sums all applicable DRMs from the charts to arrive at a total DRM (See Combat Result Table DRM section on the Player Aid Card). Two DRMs require computation.
10.5.1 Terrain DRM: The attacker selects one attacking hex and one defending hex.
- In cases where Combats contain only one attacking and one defending hex, those hexes are automatically chosen.
- In cases where Combats contain two or more defender and/or attacker hexes, the attacker selects one attacking hex and one defending hex. The attacker may freely choose those hexes offering the least negative terrain DRMs to him.
- In all cases, apply the least favorable hex terrain to the attacker from those two selected hexes, including all applicable hex-side terrain between the two selected hexes.
- Hexes selected for terrain DRMs do not need to contain the Lead Units for each side.
EXAMPLES:
- An attack from clear into a town is at –1.
- A cavalry attack from woods into clear is at –4.
- An attack by infantry from clear and cavalry from woods into a town is at –1. If there were an entrenchment between the clear and town hexes, the modifier would be –3.
10.5.2 Cavalry Shock DRM: Cavalry Shock occurs in Combat when all attacking Units contributing SPs are cavalry, and all defending units contributing SPs are either cavalry, or are In Column, Disordered, or Routed infantry.
a. Find the average shock value for each side by adding the shock values of each involved friendly cavalry unit and dividing by the number of units involved in that combat.
- Heavy Cavalry units (MA 5) have a shock value of 2.
- Medium Cavalry units (MA 6) have a shock value of 1.
- Light Cavalry units (MA 7) have a shock value of 0.
- Disordered cavalry units have a shock value of 0, but are included in the number of units involved.
b. Round this value to the nearest whole number (halves round up).
EXAMPLE: One formed Prussian Cuirassier (heavy) cavalry unit and one formed Prussian Dragoon (medium) cavalry unit in separate hexes attack one formed Austrian Dragoon (medium) cavalry unit and two Disordered Austrian Cuirassier (heavy) cavalry units (also in separate hexes, with the Austrian Cuirassiers stacked together). The Prussian cavalry possesses three Shock Points (two for the heavy unit, and one for the medium unit). Dividing three by two (the number of units) yields 1.5, which rounds up to two shock points. The Austrian cavalry possess one Shock Point for the medium unit, and zero Shock Points for the two Disordered heavy units. Dividing one by three yields .333, which rounds down to 0 Shock Points. The Prussian cavalry will have a +2 DRM in the upcoming battle.
c. The shock DRM is determined by subtracting the average shock value for the defender from the average shock value for the attacker.
d. Cavalry Shock is never used when the selected defender's terrain is woods, town or marsh; when the selected attacker's terrain is woods; or when an entrenchment was counted in the terrain DRM.
10.6 Resolve the Close Combat
The Active player rolls one die, modifies it by the total DRM, and cross-references the modified die roll with the correct odds column to determine the result of the Close Combat.
10.7 Check For Leader Casualties
All Leaders in any of the hexes of the Close Combat must now perform a Leader Loss Check as described in 15.2.
10.8 Combat (and Bombardment) Results
Though resolved on separate tables, Close Combat and Bombardment both share the same Combat Results.
a. Bombardment results are expressed as Loss Points (a number); and r or * additional effects.
- Bombarding artillery takes no losses.
- The results shown apply only to the target hex.
b. Combat results are expressed as No Effect (-); Loss Points (a number); Exchanges (Ex and Ex + 1); and *, R, r, ( ) or S additional effects.
- Two results are listed: results on the left of the slash are for the attacker, those on the right are for the defender.
- The defender applies his result before the attacker, but both results are considered simultaneous. Therefore, the attacker's result is not affected by any Unit reduction or Retreats the defender sustains.
- In particular, any Units that Rout as a result of Close Combat lose their ZOC immediately and cannot perform any Captures as a result of that Close Combat.
- If the attacker is attacking only Routed Units, the attacker ignores all combat results against his Units (and no leader loss check is performed).
10.8.1 Loss Points: Players must attempt to satisfy all Loss Points (LPs) incurred by their side from each combat. A side cannot inflict a Loss Point result in a single Close Combat greater than the number of steps that contributed SP. The Lead Unit on each side must be the first to take a Loss Point. Each LP may be satisfied by an Engaged infantry or cavalry (and only by Engaged infantry or cavalry) in one of two ways: a Step Loss or a Retreat. It is possible, through all Units being forced to Retreat, that not all Loss Points will be satisfied. Artillery may never satisfy LP. Note that as inf/cav Retreat, new inf or cav may become Engaged and may start satisfying LPs. As long as all other requirements are satisfied, players are free to assign LP to Engaged inf/cav freely.
NOTE 1: Add one LP to both sides if a battle involves Supported Defense
NOTE 2: PGII Optional Rule 16.1.b Attacking or defending hexes containing solely cavalry subtract –1 LP from all 3, 4, and 5 LP results.
10.8.1.1 Step Losses: A single Step Loss satisfies one LP. A 3-Step Unit is removed from the map and its substitute placed instead, 2-Step side up. A 2-Step unit is flipped to its 1-Step side. A 1-Step Unit is removed from the map.
10.8.1.2 Assigning Step Losses: During any Close Combat, a Unit must take one Step Loss (regardless of MR) before it is allowed to Retreat. During Bombardment from one hex range (canister fire), two step losses must be assigned before any unit can retreat (all other assignment is as normal).
DESIGN NOTE: Musket fire had a 20-80 yard effective range, but artillery canister fire reached up to 400 yards; Units facing canister were in deadly range for far longer, whether advancing or retreating.
10.8.1.3 Forced Retreats: Units may take additional Step Losses until their MR drops below 5. If an LP is assigned to a Unit with MR below 5 that has already taken its required Step Losses, that Unit will suffer a loss of Morale State (and therefore retreat) rather than take another Step Loss. This will satisfy one LP.
- If the Unit has an MR of 4, it suffers a Disordered result (9.1).
- If the Unit has an MR of 3 or less, it suffers a Rout result (9.2).
EXAMPLE: A lone Formed Prussian 7-5-3 Unit gets hit with 2 LPs. It must take one Step Loss to 5-4-3. With its morale now reduced to 4, and with no other friendly Units in the combat to satisfy the remaining LP, it must Retreat one hex and suffer a Disordered result. This retreat satisfies the second LP, and completely fulfills the result.
10.8.1.4 Voluntary Retreats: A Unit with an MR of 5 or higher that has taken the required minimum number of Step Losses (10.8.1.1) may voluntarily suffer a Disordered result (9.1). Such a voluntary Retreat may never be into EZOCs. Since players must satisfy as many LPs as possible, a Unit may not voluntarily Retreat unless it is the last LP, or there are other Units available to satisfy all of the remaining LPs.
EXAMPLE 1: A Prussian 7-5-3 three Step Unit is stacked on top of a four Step 8-6-3 Unit, and the stack gets a 4 LP result in Close Combat. The first Unit, which is Engaged, must take a Step Loss to 5-4-3. Since its MR is now less than 5, it must Retreat and suffers a Disordered result for the second LP. The 8-6-3 Unit is now Engaged. It takes a Step Loss to 7-5-3 for the third LP. The player now has a choice, since the Unit's MR is still 5. It can take a second Step Loss for the fourth LP, dropping to 5-4-3 and remaining Formed and in the hex. Alternatively, the Unit can voluntarily take a Retreat and suffer a Disordered result for the fourth LP, and remain at 7-5-3.
EXAMPLE 2: A lone Prussian 7-5-3 Unit gets hit with 3 LP. It must take one step loss to 5-4-3. With its MR now 4, and no other friendly Units in the Close Combat to satisfy the remaining LP, it must retreat one hex and suffer a Disordered result. Since is the defender has not satisfied all of the LPs, the attacker gets to make a Momentum Advance or Attack (10.11).
10.8.2 Exchanges: Exchanges are Loss Point results where the exact number of LPs depends on the size of the forces involved. Separately total the number of Steps contributing SPs on each side and divide by 4, rounding to the nearest whole number; .5 is rounded up. The result is the total number of LPs applied to the enemy. For an "Ex + 1" result, perform the same calculation and then add 1 to the final number of LPs. For an "Exr" result, perform the same calculation and then add an "r" result after all LPs are satisfied.
EXAMPLE: 3-Step and 2-Step Prussian Units attack 4-Step and 2-Step Austrians, and the result is EX/EX. 5 Prussian steps / 4 = 1.25, for 1 Austrian LP. 6 Austrian steps / 4 = 1.5, rounded to 2, for 2 Prussian LPs.
10.8.3 "*", "R", "r", "( )", and "S" Results: There are several results that can occur in an addition to the Loss Points in a combat result.
10.8.3.1 Artillery Step Loss ("*"): If a "*" appears in a result, one artillery Unit present in an affected hex must lose one Step, as per 10.8.1.1. This is the only way artillery can be reduced other than Capture. If no artillery is present, ignore this result. Note that this is in addition to any LPs listed.
10.8.3.2 Rout ("R"): An "R" after the LP number means that any Retreats taken in satisfying the LP must be taken as Routs, regardless of current Unit MR.
10.8.3.3 Additional Retreat ("r"): After all LPs are satisfied, all remaining Engaged inf/cav that have MR less than 5 suffer a Disordered result (9.1). Units with 5 or higher MR are unaffected. This result never directly causes the Rout of a Formed Unit, regardless of current MR. Supporting Units that become engaged as a result of these Retreats are not affected by the "r" result. Bombardment may give an "r" result at range when no target Units are Engaged. In this case, the units that would be Engaged (the top four steps) are affected.
10.8.3.4 Reduced LP for Supporting Units ("( )"): Any LPs enclosed in parenthesis are reduced by one if any Supporting Units are present in any of the affected hexes, prior to satisfying LPs.
10.8.3.5 Surrender ("S"): An "S" means that Engaged inf/cav with MR of 3 or less surrender and are Captured, satisfying 1 LP (only!) each, regardless of the number of Steps left in the Unit. Inf/cav with higher MR which fall to 3 or less due to taking LPs in this combat are also subject to Capture.
EXAMPLE: An Austrian 2-Step 3-3-5 Unit and 2-Step 4-3-3 Unit are stacked together (and are both Engaged) on top of an Austrian 2-Step 4-4-3. The Stack is hit with a 4RS• result. Since both Engaged Units have MR 3, they both surrender immediately, satisfying 2 LPs. The 4-4-3 takes a Step Loss to 2-2-2 and then surrenders, satisfying the full four LPs.
10.9 Retreats
PROCEDURE: A Unit which is Retreating should always move away from the enemy, avoiding EZOCs, and should attempt to retreat towards the closest friendly map edge when possible. Friendly map edges are defined by the scenario rules. Units should always attempt to Retreat in one direction only, may never enter prohibited terrain, and should attempt to end their Retreat further away from the enemy than where they started. When these goals are in conflict, a Unit's priority is first avoiding EZOC, then avoiding nearby friendly Units, and finally seeking the friendly map edge. If a Unit must Retreat and it cannot (for example, due to impassable terrain, enemy Units or Units with Parenthesized SPs forced into EZOCs), the Unit is Captured.
LEADERS AND RETREATS: A Leader which is Stacked with a Retreating Unit may accompany the Unit without cost.
STACKING AND RETREATS: Retreating Units must be placed at the top of any Stack they end their Retreat on.
10.9.1 Retreats and EZOCs: If a Disordered Unit must Retreat into EZOC, it continues Retreating one hex at a time until it is no longer in an EZOC. For each hex over the required number that it enters, it is reduced by one Step. These Step Losses do not fulfill any other Step Loss requirements. A Routed Unit forced into an EZOC is Captured.
10.9.2 Retreating into or through Friendly Units:
A. If a Unit Retreats into a hex, causing it to exceed the Stacking limit, all stationary Units are automatically Disordered, and receive Disordered markers unless already Disordered or Routed. Units receiving Disordered markers are not automatically retreated (an exception to 9.1). Units that were already Disordered or Routed suffer no further effects from this Disordered result (also an exception to 9.1). After this automatic Disorder, each stationary unit must immediately make a morale check once the retreating unit finishes its Retreat.
OR,
B. In all other cases, each time a retreating unit enters a hex with stationary units, each stationary unit must immediately make a morale check once the retreating unit finishes its Retreat.
In Either case A or B above, if the hex contains both infantry and cavalry, add +1 DRM to each Morale Check, in addition to any other modifiers.
Retreating through hexes with stationary Units may cause additional Retreats if stationary units fail their Morale Checks. Finish each Retreat before resolving any subsequent Morale Check. It is entirely possible for stationary Units in a hex to make multiple Morale Checks if friendly Units in front of the hex are forced to retreat through the hex. This means that massing Units several hexes deep can be a dangerous practice if the Units in front have to retreat through the stationary Units, possibly starting a chain reaction of retreats.
C. Since retreating units must be placed on the top of any stack, if an artillery Unit had been the top unit, it is now covered. Stacking order must be changed for it to become the top unit again during the next Movement Phase.
10.10 Advance After Combat
10.10.1 Vacated Defender Hexes: If any defender hex is vacated, the attacker may Advance any infantry or cavalry (including Supporting Units) from attacking hexes into any vacated hex.
- The stacking order may be changed freely, and any Leaders may advance with any infantry/cavalry.
- Artillery may never Advance.
10.10.2 Vacated Attacker Hexes: Defending Units may never advance into vacant attacker hexes if the attacker has retreated.
- The only case in which the defender may Advance is if an attacking hex now contains only artillery (10.10.3).
- In this case, any infantry/cavalry from defending hexes may advance in the same way as attacking Units (10.10.1).
10.10.3 Attacker or defender hexes containing only artillery: Advance after combat into artillery-only hexes is the only case when opposing Units may occupy the same hex.
- If any defender hex now contains only artillery, the attacker may Advance any infantry or cavalry (including Supporting Units) from attacking hexes into any artillery-only defender hex.
- The stacking order may be changed freely, and any Leaders may advance with any infantry/cavalry.
- Artillery may never Advance.
- The only case in which the defender may Advance is if an adjacent attacker player hex now contains only artillery. In this case, any infantry/cavalry from defending hexes may advance in the same way as attacking Units.
10.10.4 Artillery Capture Attempt Procedure: After advancing, a Capture attempt is made on the artillery.
- If the artillery bears a Routed marker, the attempt automatically succeeds and the artillery is Captured.
- Otherwise, roll a die for every artillery Unit in that hex. Modify it by the DRMs listed on the Player Aid Cards and look up the result on the Artillery Capture Table.
- Remember, when placing Captured artillery on the AM track, it is important to note how many Steps were Captured (see 12.2).
EXAMPLE: A 3-Step artillery Unit suffers an "on-map counter captured" result. The 3/2 Step counter is placed upside down on the AM track with the 2-Step side showing, representing 2 Steps of Captured artillery. The 1-Step replacement counter is put in its hex on the map, and then becomes Disordered and Retreats one hex.
10.11 Momentum Advances and Momentum Attacks
If the entire Loss Point result was not satisfied and the attacker Advanced, the attacker gets a bonus. The attacker may do one of the following:
Momentum Advance: This is an additional advance of one hex in any direction. A Momentum Advance can be performed only by infantry/cavalry that have advanced as a result of Close Combat, and now occupy a hex that is not adjacent to enemy infantry/cavalry.
Momentum Attack: If a Momentum Advance is not possible, or not desired, the Attacker may place a Momentum Attack Marker on any adjacent hex containing enemy infantry/cavalry. This provides a DRM in the next combat involving that hex. If the hex is attacked in the current Player Turn (either by a Declared Close Combat or Sweeping Charge), the attacker gains a +2 DRM. If the hex is forced to attack in the next Player Turn, the Marker is applied as a –2 DRM. Momentum Attack markers are cumulative and are removed after providing their DRM. If the marked hex is vacated before an attack involves the hex, discard the marker. Artillery counters under an MA marker also incur a –2 DRM on all bombardments until the marker is removed.
10.12 Earn Combat Success Markers Segment
You earn Combat Success Markers for Capturing, Routing or eliminating enemy Units. Every time A Rout marker is placed on an enemy unit (or a Dis marker on an enemy unit gets flipped to its Rout side), for whatever reason, and every time an enemy Unit counter is removed from the map due to complete elimination, substitute counter placement, or Routing off map, you earn one CS Point.
PLAY NOTE: Thus, already Routed units that are routed again but remain on map do not earn the enemy any further CS points. When a 3- or 4-Step enemy Unit is eliminated or captured, you will receive a total of 2 CS Points. CS Markers in denominations of 1 through 4 are provided, and players should make change freely. PG II maps have Combat Success Tracks as well. Players may accumulate CS markers, or use any CS marker on these tracks instead at their option.
10.13 Cavalry Action Segment
Cavalry may be able to perform a Sweeping Charge, which allows a cavalry Unit to participate in one additional Close Combat in the same Turn.
DESIGN NOTE: Well-executed cavalry charges could sweep through two or three enemy lines.
10.13.1 Attacker and Defender Participation:
a. After any Advancing, including a Momentum Advance, any attacking Engaged Formed cavalry may attempt a Sweeping Charge.
b. This may include Units that started the Close Combat as Supporting Units, since stacking order can change as a result of an Advance.
c. A Sweeping Charge may not be attempted if the original attack was made into a hex containing woods, a town or marsh, or across an entrenchment (or if the target hex for the Sweeping Charge contains such terrain).
d. It is not necessary to Advance prior to attempting a Sweeping Charge (for example, if the original defending hex was not vacated).
e. Cavalry, whether in an Engaged or Supporting role, can only participate in one Sweeping Charge attempt per turn.
10.13.2 Performing the Sweeping Charge: The Active Player selects which cavalry will attempt the Charge, designates which hexes will be involved in the Sweeping Charge combat (see 10.1), and rolls one die for all Units. If a cavalry Wing Leader is present in any hex attempting the Sweeping Charge, that leader's MM may be added to the total of the die roll. Add the modified die roll to each Unit's MR. If the total is 11 or more, the Unit must participate in the next Close Combat. If it is 10 or less, the Unit may not participate in the next Close Combat. The Close Combat involving any Sweeping cavalry must be resolved next, and only Sweeping cavalry may be attackers. If the initial Close Combat resulted in a Momentum Attack being applied to a hex, that hex must be designated as a defending hex for the Sweeping Charge. Otherwise, the attacker may designate the defender hexes within the parameters of rule 10.1.
10.13.3 Cavalry Disorder: All cavalry that engages in combat becomes Disordered, but timing for placement of Disordered markers varies.
a. At the conclusion of any close combat, all Formed, Engaged cavalry Units of both sides receive Disordered markers. This includes Supporting Units that became Engaged before all Loss Points were resolved, but not any that became Engaged upon fulfilling the last LP.
Exception: Formed, Engaged, attacking cavalry Units designated to perform a Sweeping Charge do not receive Disordered markers at this time (see paras b. and c. below).
b. If a Sweeping Charge is declared, those Formed, Engaged cavalry Units designated to participate that fail the die roll (see 10.13.2 above) immediately receive Disordered markers.
c. Those Formed, Engaged, cavalry Units that successfully participate in a Sweeping Charge do not receive Disordered markers until the conclusion of the Sweeping Charge Close Combat.
d. Note that these Disorder markers are placed after all LPs are applied. Cavalry that become Disordered due to paras a, b, or c, above do NOT Retreat (in an exception to 9.1). Note also that only Formed cavalry become Disordered, so no Routs are caused by applying this rule.
EXAMPLE 1: A 6'-7-6 Prussian cavalry Unit stacked on top of a 4-7-7 cavalry Unit attacks a lone 2-3-6 Russian cavalry Unit. The Prussian stack is hit with 1 LP and captures the Russian. The 6'-7-6 Unit takes a Step Loss which drops it to 5'-6-6. The Prussian player elects not to attempt a Sweeping Charge, and the 5'-6-6 Unit is Disordered but the 4-7-7 remains Formed.
EXAMPLE 2: Assume the same situation as the previous example, but the Prussian player Advances the Units, places the 4-7-7 on top of the Stack, and attempts a Sweeping Charge. A 3 is rolled, which fails. The 5'-6-6 becomes Disordered since it was Engaged during a combat. The 4-7-7 becomes Disordered because it was Engaged when a Sweeping Charge was attempted. If the Sweeping Charge had succeeded, the 4-7-7 would still have suffered a Disordered result after the Sweep. However, if a Sweeping Charge had not been attempted, the 4-7-7 would have stayed Formed, since it was not Engaged while combat was resolved and a Sweep was not attempted.
EXAMPLE 3: Assume the previous stack is attacking a much tougher target and takes 3 LPs. The first two LPs are resolved by a Step Loss and Retreat by the top Unit, with one LP applied as a Step Loss to the 4-7-7, dropping it to 3-6-7. Whether or not the Prussian player attempts a Sweeping Charge, the 3-6-7 will suffer a Disordered result, since it became Engaged while LPs were applied (the only question is when the Disorder marker will be applied—see para 10.13.3). If only 2 LPs were applied, causing the top Unit to Retreat but no further effects, the 4-7-7 would stay Formed, unless the Prussian player attempted a Sweeping Charge, because it was not Engaged while the combat was resolved.
11. Remove Locked Markers Segment (8)
After all Close Combats are resolved, remove all Locked Markers that remain on the map.
12. Army Morale
12.1 Army Morale Tracks
The collective ability of the Armies to continue fighting despite losses and fatigue is reflected in the Army Morale (AM) tracks. Each Army's Morale starts at a level specified in the scenario instructions, also shown on the tracks. Start each Army's Current Morale Marker at this level. The upper limit for Army Morale is the top of each track.
12.2 Army Morale Adjustments
The Army Morale track boxes will be gradually filled in, primarily by eliminated Units, but also with other Markers, reducing Army Morale. At any given time, the Current Morale Marker indicates each Army's AM. As each Unit counter (except Leaders) is eliminated, Captured or Routed off map, it is placed on their Army's AM track following the procedure below. Any time a cost in AM is paid, place spare Markers on the AM track the same way.
- Place the Marker or Unit on the AM track in the next empty box (below all filled boxes). If there are no Markers or Units on the track, place in the box with the Current Morale Marker.
- Always ignore the Current Morale Marker when placing pieces. The Current Morale Marker never fills a box on its own-it merely serves as a reminder of current AM.
- AM can drop not only due to combat losses, but also Army Activation (4.1) or Fatigue (12.3).
- Place Captured Units on the track the same way, but rotated 180 degrees to distinguish them from the other Units. It is important for Victory Points purposes to know which Units were Captured, and which were eliminated by combat results.
- If a Routed Unit moves off of the map, treat it as an eliminated Unit.
- If a 3- or 4-Step Unit is Captured or eliminated, place the replacement Unit on the AM track as well, filling another, separate box.
The pieces placed on the AM track will be used to move the Current Morale Marker during the Joint Army Morale Adjustment Phase (13).
CAPTURED ARTILLERY: It is important to know how many artillery Steps were Captured. Each artillery counter placed on the AM track can represent 1 or 2 Steps Captured; place the counter on its 2- or 4-Step side if it represents 2 Steps of Captured artillery. Place it on its 1- or 3-Step side if it represents only 1 Step.
EXAMPLE: In Kolin, the Austrians attempt an Activation, having lost no AM to this point. The player places a Rout Marker (or any other spare) in the 40 box (under the Current Morale Marker) and the 39 box on the Army Morale Track, and rolls the die. The markers are placed because the activation attempt costs two morale points.
EXAMPLE (PG I): In Leuthen, the Austrians attempt an Activation, having lost no AM up to this point. The player places Rout Markers (or any other spare) in the 24 box (under the Current Morale Marker) and the 23 box on the Army Morale Track, and rolls the die. If the Austrian player had lost two counters prior to attempting Activation, due to a Prussian attack on the Detachment, the Rout Markers would be placed in the 22 and 21 boxes.
ARTILLERY CAPTURE EXAMPLE: A 3 Step artillery Unit is Captured. Both its counters are placed in separate boxes on the AM track, rotated 180 degrees, 3-Step (and 2-Step), and 1-Step/blank sides up.
PLAY NOTE: Yes, the first piece placed on the AM track is "free" in that it does not actually lower AM. The first piece placed merely starts the process.
12.3 Fatigue
HISTORICAL NOTE: As at the battle of Zorndorf (in PG I), heat played a critical part in the battles of Kolin, and again especially at Kunersdorf.
To reflect the severe heat in the battles of Kolin and Kunersdorf, every turn that an Activated Army engages in movement or combat, it takes an AM penalty. For this rule, combat includes any Close Combat, or being bombarded at 3 BS or higher. During the Joint Army Morale Adjustment Phase, if an Army engaged in non-Routed movement or combat during the turn, it takes a 2 point Army Morale penalty. Place two unused markers (use a different marker than markers used to pay for Army Activation) on the Army Morale Track in the highest numbered unfilled boxes, just like any other counters placed on the track. After an Army is activated, if it spends a turn resting and does not engage in non-Routed movement or combat, it can regain lost AM. In this case, remove two fatigue markers from the AM track and move the other counters up to fill the gap, if necessary. If no fatigue markers are available, no fatigue can be regained.
EXAMPLE: The Prussian player finishes their turn with AM box 31 filled. They adjust for Fatigue by placing markers in boxes 30 and 29. They then count two Routed Units and place the Current Morale marker in box 27. The next turn, the Prussian player gains a respite and rests for a turn. They remove the markers from boxes 29 and 30, regaining two fatigue. If they still have two Routed Units, their Current Morale marker is placed in 29.
12.4 Army Demoralization
An army may become Demoralized when its Current Morale Marker enters 6 or below on the AM track. During the Joint Morale Adjustment Phase, roll a die for each Army in danger of Demoralization. Compare the die roll with the Demoralization range printed in the box under the Current Morale marker. If the roll is within that range, the army is Demoralized. An Army automatically becomes Demoralized when its Current Morale Marker is placed in the zero box or lower. Once Demoralized, an Army may never recover.
EXAMPLE: The Prussian player adjusts his Army's morale for CS and Routed Units, and finds the Current Morale Marker at 4. Demoralization range in that box is 1-2, and the die roll comes up a 3. The Prussians just avoid Demoralization. If the roll had been a 1 or 2, the Prussians would have been immediately Demoralized.
MORALE CHECKS: When an Army becomes Demoralized, any of its Units that is within 3 hexes of enemy Units must take a Morale Check (9.3). All Units have –1 MR for this and all future Morale Checks. Army Demoralization happens after CS are counted for the turn, meaning any CS earned through an enemy Army Demoralization will not be turned in until next turn. Demoralization/Broken checks are simultaneous, and both Armies will take any Morale Checks at the same time. If it becomes important which Units Retreat first for EZOC purposes, players should alternate Retreating one Unit at a time (determine first player randomly) until all Units have Retreated. Note that any Routed Units lose their ZOC immediately, even if they have not performed their Retreat yet.
The continuing effects of Army Demoralization are:
- +1 to all Command State rolls
- –1 MR for all Morale Checks and Rallies
- –1 DRM if Attacking in Close Combat or Bombarding
- +1or +2 DRM if Defending in Close Combat (depends on the type of attacking unit—see the CRT)
- A Routed Unit of a Demoralized Army that is attacked is immediately Captured.
- Unrouted Units of Demoralized Armies may pay 1 MP to voluntarily leave the map through a friendly map edge (as defined by the scenario). These Units do NOT count as eliminated.
DESIGN NOTE: Unrouted defeated forces are withdrawing to "fight another day".
12.5 Army Broken
An army is automatically Broken when its Current Morale Marker is placed in the –10 box or lower. Once Broken, an Army may never recover. At the instant an Army becomes Broken, all of its Disordered Units become Routed (9.2). All of its Formed Units within 3 hexes of enemy Units must perform a Morale Check (9.3), but are now –2 MR. The Army Broken procedure happens after CS are counted for the turn, meaning any CS earned through an enemy Army Demoralization will not be turned in until next turn. Demoralization/Broken checks are simultaneous. Resolve EZOC conflicts in the same way as for Demoralization.
The continuing effects of Army Broken are:
- +2 to all Command State rolls
- –2 MR for all Morale Checks and Rallies
- –2 DRM if Attacking in Close Combat or Bombarding
- +2 DRM if Defending in Close Combat
- Unrouted Units of Broken Armies may pay 1 MP to voluntarily leave the map through a friendly map edge (as defined by the scenario). These Units do NOT count as eliminated.
- A Routed Unit of a Broken Army that is attacked is immediately Captured.
13. Joint Army Morale Adjustment Segment (C)
The following Joint Army Morale Adjustment steps are performed by both players simultaneously:
STEP ONE: On every turn, each marker or group of CS Markers totaling three CS points (10.12) earned by a player provides a one AM bonus for his morale track. Excess CS points over and above any multiples of three CS points are wasted. Also, if a player has only earned two or fewer CS points, they are wasted. For every AM bonus earned, take all the pieces from the lowest number box on the AM track and move them up one level (but not beyond the top of the track), thus gaining back AM. Move the Current Morale marker back up to the lowest filled AM box. If there are no pieces on the track other than the Current Morale Marker, move it up the correct number of boxes. Return all CS chits to the pile.
STEP TWO: Each player then counts the number of friendly Routed Units on-map, and places their Current Morale Marker that many spaces down from the lowest numbered filled box on the AM track. If there are no friendly Routed Units on-map, the Current Morale Marker remains in the box it occupies. This is their Army's Current Morale. Remember, the Current Morale Marker never fills an empty box on its own—if occupying an empty box, that box is eligible to hold the first friendly unit removed from the map.
STEP THREE: If the Army's Current Morale is 6 or less, roll for possible Army Demoralization (12.4). If either army is Demoralized, perform Demoralized procedures. If either army becomes Demoralized, flip its Current Morale Marker to its Demoralized side.
STEP FOUR: If either Army's Current Morale is –10 or less, immediately apply Broken Army procedures (12.5).
EXAMPLE: The Prussian player starts with the Prussian Army's AM boxes filled down to 34 and the Current Morale Marker at 34. During the turn, it loses 2 counters, which are placed in the 33 and 32 boxes. During the Joint Army Morale Adjustment Phase, he finds he has earned only 2 CS chits, and so makes no CS adjustments. There are 2 Routed Units on-map, so the Current Morale Marker is placed in the 30 box. Next turn, 2 more counters are lost and are placed in the 31 and 30 boxes (in 30, beneath the Current Morale Marker); then one of the Routed Units moves off-map and is placed in the 29 box. But, during the Adjustment Phase, he turns in 6 CS Markers. So the Prussian player takes the Units from the 29 and 30 boxes and moves them up to box 31. Army Morale has thus been boosted two points. There are no Routed Units, so the Current Morale Marker is placed in the lowest filled box, in 31.
14. End of Turn Phase (D)
Move the Turn marker to the next box on the Turn Record track and begin the next Turn.
15. More On Leaders
Leaders have no Strength Points, Morale Rating, Steps or ZOC, and they cannot attack, defend or hinder enemy movement. Leaders are primarily the focal points of their Wings, and must remain within five hexes of all their Units to keep them in Command. Leaders have no Command State or Morale State and always get their full MA. Leaders may add their Morale Modifier (MM) to the current Morale Rating of all Units in their hex (including members of other Wings), increasing their MR for Morale Checks and Rallies.
Wing Leaders of cavalry Wings may use their MM for cavalry Units in their hex attempting a Sweeping Cavalry Charge (10.13.2). Leaders do NOT affect MR for any other purpose, including Lead Unit MR comparisons.
EXAMPLE: A 5-4-5 Unit Stacked with Seydlitz (MM 2) is treated as having a MR of 6 for Morale Checks and Rally Attempts, or for performing a Sweeping Charge.
15.1 Replacement Leaders
Leaders can be killed or wounded due to Close Combat or enemy movement.
WING LEADERS: When a Wing Leader is removed, put a replacement Leader (with a matching movement allowance if possible) in the same hex. If that hex is unavailable, the replacement Leader is Stacked with the nearest friendly Unit.
ARMY COMMANDERS: If an Army Commander is killed or wounded, flip the Leader over to the second-in-command. Again, if the hex is unavailable, move to the nearest friendly Unit. If the second-in-command was a Wing Leader, place the flipped Army Commander in the Wing Leader's hex, and replace that Wing Leader with a replacement Leader—the Wing Leader has been promoted. If the second-in-command is killed or wounded, the Army must operate without a Commander.
15.2 Leader Casualty Checks
CLOSE COMBAT: After every Close Combat that occurs in a hex with a Leader, perform a Leader Loss Check by rolling a die. On a 6, the Leader has been injured: roll again. On a 1, it was a flesh wound (no effect). On a 2-5, the Leader is wounded and is removed from the map. On a 6, the Leader is killed and is removed from the map.
PLAY NOTE: Why have wounded and killed results? It matters for Army Commanders and Victory Points purposes.
CAUGHT ALONE: When a Leader is in an EZOC without being stacked with a friendly Unit, roll a die. If the result is a 6, the Leader is killed. Otherwise, the Leader is immediately moved to the nearest friendly Unit.
16. PG I and II Optional/Advanced Rules
16.1 Cavalry (all armies)
16.1a. Cavalry Withdrawal before Bombardment: Cavalry Units may withdraw before Bombardment as well as Close Combat.
16.1b. Reduced Cavalry losses: Stacks consisting solely of cavalry, or only cav/arty (no inf), reduce all 3, 4, and 5 LP results by 1 LP.
16.1c. Russian Cossacks (Zorndorf, Kunersdorf)
COSSACK RELIABILITY: Roll a die each time the Coalition player attempts to have Cossack Units enter EZOC during movement; on a DR of 6, the Cossack unit refuses to enter EZOC, and stops one hex short; it may continue using its remaining MPs, but may not again attempt to enter EZOC. [Exception—the MR 6 114 Tsugachev Cossack unit in Kunersdorf may enter EZOC normally, without the above checks.]
COSSACK WITHDRAWAL: Cossack cavalry may withdraw from ANY enemy Units, including Formed Prussian cavalry.
16.2 Austrian Croat Sniping Attacks
Hexes containing only Austrian Croats that are Engaged against enemy non-cavalry units may use a special combat procedure called sniping. The Austrian player designates one enemy hex for each sniping attack, and adds up the Croat SPs (only) for each attack. Roll the die, and add this to the attacking SPs. If the result is higher than the Engaged enemy Unit's morale rating, the enemy Unit becomes Disordered, but does not retreat. If the result is equal or less, there is no effect. Either way, this satisfies the attack requirement for the Croat Units. This in no way affects Croat units in defense.
16.3 Artillery Facets (All Armies)
(These rules contributed by PG player and Wilderness War designer Volko Ruhnke.)
16.3.1 Extended Artillery Range: Artillery units may bombard targets at lower elevations at 4 hexes distance, using their 3 hex range BS.
16.3.2 Howitzer Fire: If the attacker has any Howitzer artillery (Hw abbreviation on counter) involved in a bombardment at 2-3 hex distance, any negative DRMs for slopes, entrenchments, or walls are ignored.
DESIGN NOTE: the howitzers are lobbing shells in at a high trajectory, nullifying the upslope, entrenchment or wall hexside advantage.
16.4 Advanced Woods Effects
Each deployed non-Croat Unit moving into or through a woods hex must make a Woods Disorder check for each such hex, and apply normal Disorder/Rout results if applicable (IC Units are not affected).
Each deployed non-Croat Unit retreating into or out of a woods hex, must also make the Woods Disorder check, and apply normal Disorder/Rout results if applicable (IC Units are not affected).
Woods Disorder check:
- Roll one die.
- Units with current morale of 6 or higher become Disordered on a die roll of 5 or 6.
- Units with current morale of 5 or lower become Disordered on a die roll of 4-6.
- Units that are already Disordered become Routed.
17. Advanced Rule 1—Limited Intelligence
PLAY NOTE: Warning: this rule is intended to produce player shock (usually for the Coalition player). It accounts for the enemy confusion/unbalancing that occurred in the face of successfully veiled army movements and superior coup d'oeil on deployments, which we as gamers largely avoid due to our God's Eye View. It may produce drastic outcomes. Players may either love or hate this rule; use only upon strong agreement, and be prepared for the worst.
DESIGN NOTE: These rules increase the impact of attacker axis and defender position choices, and underline the use of cavalry and detachments as advanced guard and defensive tripwires. Most important, they give players some taste of the operational anxiety Commanders may have felt as they closed on or waited for an enemy force only vaguely located.
17.1 Dummy Counters (Replacement/False Leaders)
In Main scenarios, each side may be allocated Dummy Wing Leader and Detachment counters. These are drawn either from the appropriate nationality Replacement Leader counters, or (for the Austrians in Leuthen and Torgau) "false" Leader counters from the Rossbach game. Dummy counters are treated exactly as real Leaders/Dets, and may be used to deceive the enemy as players devise, until they are spotted, at which time they are removed from the map.
17.1.1 Real Units' Off-Map Set Up: Before placing Wing Leaders on map (see below), all Wings, and up to 3 artillery Units per Wing, are arranged near the map for fast access. Once grouped, Units may not be moved between Wings. Army Commanders are placed with any Wing, and will be deployed with that Wing when spotted. Units may be covered with a tissue, small box cover, or otherwise masked from view.
Army Commander's Detached Units: Any 2 inf/cav Units and 2 artillery Units may be detached to each Army Commander. The detached Units are considered part of the Wing the Commander is in, may trace command to that Wing Leader, and assume that Wing's Command status. If the Commander successfully rerolls Effectiveness for that Wing, all detached Units are also Effective. Players may want to note detached Units' identities on a sheet of paper for reference. Detached Units may resume their status under their parent Wings at any time, but cannot then revert back to their detached command chain.
17.1.2 On-Map Set Up: To set up, players place on-map only real Wing Leaders and Dummy Leader counters, on their Inf, Cav, Inf/Cav +4 sides [Exception: Torgau Austrians set up slightly differently; see below]. Each counter then has two appropriate color Dis counters placed near it.
- For a normal Wing/Dummy, the Dis counters are placed within one or two hexes of it, in any direction.
- For a Wing or Detachment with less than 4 Units, the Dis counters are placed within one hex in any direction.
These represent generalized deployment areas for that Wing or Dummy. Wing/Dis Counters then move or stay in place, representing all their Units, until they are spotted by the enemy.
DESIGN NOTE: For Stationary Wings, the Dis counters ensure a large Wing cannot hide behind a single woods or hill hex. But this also helps a stationary Wing spot the enemy from more than the single hex its Leader/Dummy counter occupies.
17.1.3 Command Rolls: Effectiveness rolls are made as normal for unspotted Wings. Special Leaders may make their re-rolls as normal for a Wing they accompany. It is not necessary to reveal the location of Special Leaders to use their re-roll. (As always, mes frères, let honor prevail!)
17.1.4 Moving Wings
Unspotted Wings move normally, in either deployed or IC status. The MA for an unspotted Wing (and its Dis counters) is the MA of its slowest Unit, either at Deployed MA or IC MA. For Dummies, players may choose any movement rate, up to the maximum that would be possible if the Dummy were a real Wing.
EXAMPLE 1: An unspotted, deployed but Degraded command status Aus Cav Wing Leader and his Dis counters can move, to a max of 3 MPs a turn; Dis counters get the same MA as the slowest real Unit in their wings.
EXAMPLE 2: An unspotted IC Prus cav Wing of all 3 cav types will have an IC MA of 9 hexes (Cuirassiers 5 + 4 IC).
Unspotted deployed IC Wings and their Dis counters move as if they were deployed Units. The Dis counters must always remain within 2 hexes of their respective Wing counter.
Each Wing Leader's IC side has an arrow on it. When a Wing Leader/Dummy counter moves IC, the Leader's arrow should be faced behind it, i.e. to the last hex moved from. Moving IC Wings trail their two Dis counters behind them, in the direction of the arrowhead, like a tail. (Orientation of the Wing counter's arrow is important for IC movement only; it may be ignored for unspotted deployed Wings.)
17.1.5 Stationary Wings: Stationary Wing Leaders and their units of un-Activated armies are always considered to be already on-map, unspotted but deployed (not IC).
17.1.6 Spotting Modifications: When any opposing Wing/Dis counters (unrevealed or Deployed Units) come within 7 hexes of an enemy Wing/Dis counter, and LOS is clear, the MOVING side is considered spotted first and flips over its Leader (if not already revealed). If the moving Leader is real, the enemy Wing Leader is also revealed (if not already). If the moving Leader is a Dummy, it and its Dis counters are removed. If the stationary Leader is a Dummy, it and its Dis counters are removed, and the moving Wing Leader is re-inverted and may keep moving. If the enemy Leader is real, perform Wing Deployment per 17.2.
DESIGN NOTE: Given that it is impossible to game marching 'blind' into enemy-occupied territory without hidden Units, and the historical effectiveness of Dets as tripwires, we've taken some design license. Consider non-moving Dummies to be small enemy patrols that spot your moving Wing, then scamper away to report it.
PLAY NOTE: Players who move same-type Dummies in the vicinity can work a little "same-hex crossing shell-game" during the next movement phase, and may succeed in hiding their actual forces again.
17.2 Wing Deployment
17.2.1 Deployment Roll: Upon spotting, each player rolls a die and adds their Wing's Command rating. If the Army Commander or a Special Leader is present with the Wing, the player may add that Leader's rating to their die roll instead (select highest Initiative if more than one Leader is eligible). A Wing containing solely currently non-moving Prussian cavalry and Leaders also adds +4 to the die roll. The side that rolls highest wins the Deployment roll, with ties going to the stationary player.
17.2.2 Victorious Moving Wing Adjustment: If the moving Wing won the Deployment roll, the moving player may adjust the Wing Leader's position a number of hexes equal to the difference in the Deployment rolls, to a maximum of 3 hexes in any direction.
EXAMPLE: In Torgau, the Prussian player has a moving cav Wing spotted by an Austrian inf Wing; the Prussian rolls a 5 (+4 cav command rating) for a 9; the Austrian rolls a 2 (+3 basic inf command rating) for a 5; the Prussian wins the roll, with a difference of 4. The Prussian player may now move his Wing Leader up to 3 hexes closer to the Austrian Wing Leader, if he wishes. The stationary Austrian Wing is then placed on map as below.
EXAMPLE: Same as above, but the Prussian rolls a 2; with a difference of 6 to 5, the Prussian may only adjust his Wing Leader 1 hex, not up to 3.
17.2.3 Stationary Wing Formation: If it was not already on the map, the stationary Wing is now placed on-map (17.3). If the stationary player won the roll, and that Army was already Activated, stationary Units may be placed deployed or IC. If the stationary player lost the roll, and moved last turn, Units are placed in that Wing's last formation status (deployed or IC; formation may not be switched during on-map placement). If the stationary Army is not Activated, it is always placed deployed.
17.2.4 Moving Wing Formation: The moving Wing is now placed on-map (see 17.3). If the moving player won the roll, and was IC, the Wing may be placed on-map deployed or IC. If the moving Wing was deployed, it is placed on map deployed. If the moving player lost the roll, the units are placed in that wing's last formation status (deployed or IC; formation may not be switched during on-map placement).
17.3 Placing Units on Map
17.3.1 Placing Deployed Wings on Map: Before actual Unit placement, formerly IC Wings that are placed on map Deployed may take their trailing Dis counters and place these on any adjacent hex to their Wing Leader.
Place the first actual Unit under the Wing Leader. The next two units are placed in Dis counter hexes, and the Dis counters are removed. Remaining Wing Units can be stacked with or placed adjacent to these Units. No Unit may be placed more than 3 hexes away from the Wing Leader. Leaders and Units may deploy adjacent to the enemy, but cannot be placed beyond them, or in such a way that the deploying Units themselves surround the enemy. After Units are placed on map, their movement is ended for the turn.
17.3.2 Placing IC Wings on Map: The first Unit(s) within IC stacking limits (5.2) may be placed under the Leader. The rest must be placed in a line corresponding to the Leader's prior march path (arrow and Dis counters), up to six hexes behind. All IC stacking limits apply (5.2). Any remaining Wing Units can be placed parallel to this initial 6 hex long IC string, on one or both sides.
IC Units may not be placed adjacent to or beyond enemy Units. After Units are placed on map, their movement is ended for the turn.
17.4 Voluntary Deployment
Active unspotted Wings may voluntarily deploy as per 17.3.1. Such Wings may move up to half their IC movement allowance (round remainders up), then deploy.
17.5 Multiple Spottings
If a Moving Leader comes within 7 hexes of several enemy Wings, only the closest is revealed, and if real, deployed. If the enemy Units block LOS to the Wings beyond, the other Wings are not revealed. If not, all enemy Wings that can be spotted are deployed as in 17.2 and 17.3, and all Wings use the same deployment die roll.
17.6 Scenario Instructions
When using Limited Intelligence rules, the number of dummy counters allowed for each side is listed in the scenario information below. Limited intelligence rules are only used with Main scenarios.
PG I SCENARIOS
17.6.1 Rossbach: The Prussian player gets 2 Inf and 2 Cav dummies. Place these dummies with all the other Leaders. The FrE player gets no dummies.
17.6.2 Leuthen: The Prussian player gets 3 Inf and 3 Cav dummies.
The Austrian player uses the Von Loudon Inf/Cav "false" Leader dummy counter from the Rossbach game, which can be placed as a Detachment, within 5 hexes of 2114, like Nostitz, the real Detachment Leader.
17.6.3 Zorndorf: The Prussian player gets 3 Inf and 3 Cav dummies. The dummies must be placed on the three start lines in the Broad Historical set up. If using the Free set up, a dummy counter may replace the Wing within 3 hexes of 3215, and all other dummies are placed north of the Mietzel river, along with all other Wing Leaders.
The Russian player gets 1 Inf and 2 Cav dummies. The dummies may be placed within 2 hexes of any of the setup hexes using the Broad Historical set up. If using the Free set up, dummies are placed as with any other Wing Leader.
17.6.4 Torgau: The Prussian player gets 2 Inf and 2 Cav dummies. The Austrian player gets 1 Inf and 2 Cav Replacement Leader dummies, and may also end up using the Von Loudon and St. Germain Inf/Cav "false" Leader dummies from the Rossbach game. Dummies may be interspersed with the Dets, or placed with the main body Wing Leaders.
17.6.4.1 Austrian Dummy Set Up and Stacking: Because the Austrian Dets may consist of combat units without accompanying Leaders, dummy set up is different, as follows:
17.6.4.2 Off-Map Det stacks: The Austrian decides if he's going to use any Dets. If so, he divides his Det units into 1-3 piles off map. Designate each pile as Dets 1-3 and cover it with its respective Det Command Effectiveness Marker. Routed markers may be mixed with the real Units to make all these stacks the same height to mask true Det composition.
17.6.4.3 Creating On-Map Dummy/Real Det Stacks: If the Austrian uses only one Det, he does NOT get use of either the Von Loudon or St. Germain counters as false leader dummies. If he uses 2 Dets, he adds in the Von Loudon counter for use below; if he uses 3 Dets, he also adds in the St. Germain counter.
The real Det stacks will be represented on-map by one of the 3 Det counters. If the Austrian chooses to use fewer Dets, use only the Det counters that match the real designated Dets off map. Set the other Det counters aside.
To create a real Det stack, place Ried or any of the Replacement/False leaders, IC side up, on top of a real Det counter, to mask it. Both are placed on-map, along with Dis counters per 17.1.2. When revealed, remove the replacement/false leader counter, and deploy the real Det units from their off-map stack onto the map. If Reid is used as the masking counter, when revealed, Reid is deployed with that Det.
Masking Leader counters do not have to match real Det unit types.
EXAMPLE: A real Det consisting of one Croat infantry Unit may be masked by a replacement Cav Leader, and Drg 31 can be masked by the Repl Inf leader, etc.
To create a dummy Det stack, place a Replacement/False Leader counter, IC side up, on top of any spare counter. Both are placed on map. When revealed, remove both counters.
17.6.4.4 Placing Real/Dummy stacks on map:
Similar to the Torgau Set Up info in 26.3, there must be 3 spaces between Det/dummy Stacks (and their Dis counters) when placed on map. Note, when these Stacks are revealed, their Units are deployed per 17.3, using the original Stack space as starting point.
17.6.4.5 Creating Dummy Main Army Wings:
Per 17.1.3, place only the Replacement/False Leader counter, IC side up, on-map, the same as placing a real Wing Leader.
PLAY NOTE: From the above mix, the Austrian may create up to 3 real Det Stacks, with 3 additional Det dummy Stacks. Alternatively, the Austrian could create less Det dummy Stacks, and place dummy main army Wings, etc. If no Dets are made, up to 3 false main army Wings can be placed.
PG II SCENARIOS
17.6.5 Prague: The Prussian player gets 2 Inf and 2 Cav dummies. Place these dummies with all the other Leaders. The Austrian player gets no dummies.
17.6.6 Kolin: The Austrian player gets 2 Inf and 2 Cav dummies. Place these dummies with all the other Leaders. The Prussian player gets no dummies.
17.6.7 Krefeld: The Hanoverian player gets 2 inf and 2 Cav dummies. Place these dummies with all the other Leaders. The French player gets no dummies.
17.6.8 Kunersdorf: The Russian and Prussian players both get 2 inf and 2 cav dummies. Place these with all other Leaders.
18. Advanced Rule 2—Advanced Command Determination Results
Fortunes of War Table:
Every time a player rolls a "6" for basic inf/arty, cav, and special group command rolls, roll two more dice, and apply the results from the Fortunes of War table below.
Fortunes of War Command Effects:
Two dice roll result after the first "6" result:
| Dr | Effect if PRUSSIAN | Effect if COALITION |
|---|---|---|
| 1 | NE | NE |
| 2 | NE | Dragging Guns |
| 3 | Confused Wing Leader | March Debacle |
| 4 | Dragging Guns | Dragging Guns |
| 5 | NE | NE |
| 6 | Dragging Guns | Confused Wing Leader |
| 7 | Dragging Guns | Dragging Guns |
| 8 | NE | Confused Wing Leader |
| 9 |
DRMs:
- Army Commander Rating 3 or less: –1
- Army Commander Rating 4 or more: +1
EXPLANATION OF RESULTS
NE: No Effect.
Confused Wing Leader: the enemy player picks any ONE friendly Wing; this Wing's Units are reduced to 1 MP if deployed, or 2 hexes if IC. Cannot pick a Short Leash Wing.
Dragging Guns: ALL friendly artillery not stacked with the Army Commander is reduced to 1 MP if deployed, or 2 hexes if IC. Result cannot be changed by any special Leader rolls.
March Debacle: the enemy player picks any TWO friendly IC Wings; these Wings' IC MA is reduced to 2 hexes this turn. Includes any artillery that starts the turn stacked with these Wings. Applies to IC Wings only; otherwise ignore result. Cannot pick a Short Leash Wing.
Rash Attack: the enemy player picks any ONE friendly Deployed Wing; friendly player must move as many of this Wing's Units using their FULL MAs (as if Effective) to get adjacent to enemy Units, or as close as possible. Applies to Deployed Wings only; otherwise ignore result. Cannot pick a Short Leash Wing.
"Short Leash" Wings
At the start of each Command phase, the friendly player can name ONE friendly Wing Leader stacked with the Army Commander as a Leader on a "short leash" (i.e. under close supervision by the Commander). This Wing Leader's Wing is immune from above results so listed.
19. Scenario Basic Introduction
Each player is trying to destroy or Rout his opponent's forces, and in some cases advance into or defend key terrain, while minimizing losses. Victory is determined by Victory Points earned according to the Common Victory Point Schedule and scenario-specific objectives. The levels required for victory are defined in each scenario.
19.1 Common Victory Point (VP) Schedule
At the end of the scenario, each side scores Victory Points (VPs) as follows:
- 1 VP for every Unit counter destroyed or routed off map
- 2 VPs for every inf/cav counter captured
- 2 VPs for every step of artillery captured
PLAY NOTE: All destroyed Unit counters, whether they are infantry, cavalry or artillery, are worth the same amount. Captured artillery is worth more than captured infantry and cavalry, however.
Coalition Only:
- 4 VPs for Wounding Ferdinand
- 10 VPs for Killing Ferdinand
- 10 VPs for Wounding Frederick
- 30 VPs for Killing Frederick
Prussia Only:
- 4 VPs for Wounding Daun
- 10 VPs for Killing Daun
- 2 VPs for Wounding or killing any other Coalition Army Commander
19.2 Scenario Specific Victory Points
Each scenario may also have an additional specific Victory Point schedule.
PROCEDURE: At the end of the game, each player totals his Victory Points gained from eliminated or captured enemy Units placed on their opponent's AM track, and adds any Victory Points gained from meeting scenario specific objectives. The Coalition total is subtracted from the Prussian total, resulting in a positive or negative differential. Players use this differential and the scenario victory conditions to determine the winning side, if any, and the degree of victory.
20. Glossary of Terms
Active Player: The player who is currently taking his Player Turn.
Activate: An attempt by a player to get his Army to begin normal command, movement and combat procedures.
Advance: Infantry and cavalry may Advance after Close Combat if they have cleared opposing hexes.
Army: An Army comprises all infantry, cavalry, artillery and Leaders controlled by one player.
Army Commander: The Army Commander is the overall commander of the Army. The Army Commander's values are used to determine the Activation of their Army.
Army Morale (AM): A number on the Army Morale Track representing the staying power of the Army. Combat losses will decrease Army Morale, while Combat Success can raise it.
Automatic Activation: Free Army Activation that occurs as soon as opposing forces close within three hexes.
Basic Group: Every Army has two Basic Groups: the Basic Infantry/Artillery Group and the Basic Cavalry Group.
Battle Scenario: The Battle Scenarios feature the historical deployments from the original battle after the approach march was complete.
Bombardment: Bombardment is the only form of combat in which artillery directly participates.
Bombardment Strength (BS): Bombardment Strength is the relative destructive capacity of artillery at varying hex ranges.
Broken: An Army becomes Broken when its Army Morale drops to a point where the Army is in danger of destruction. See specific scenarios for Broken levels.
Capture: A Unit is Captured when it must Retreat and cannot; when it Routs into an Enemy Zone of Control; as a result of a Surrender Close Combat result; or through an artillery Capture attempt. Captured Units are worth more Victory Points than eliminated Units.
Close Combat: Close Combat occurs between adjacent enemy infantry and cavalry.
Combat Results Table (CRT): The Combat Results Table is used to resolve all Close Combats, and is printed on the Player Aid Cards.
Combat Success (CS): Combat Success, recorded with CS markers, represents the positive effect of winning an engagement on the Army's overall morale.
Command Rating: A rating that determines how likely a Group is to be Effective or Degraded.
Command State: Every Game Turn, each Wing of an Activated Army will be in one of two Command States: Effective or Degraded. Command State also applies to artillery, which is not part of any Wing.
Coup d'Oeil Activation (CdOA): A special form of Army Activation that may occur when an Army first spots the opposing Army.
Degraded: The Command State that only permits half movement (rounded up).
Demoralized: When Army Morale drops to a point too low to continue fighting effectively, it is Demoralized. A Demoralized Army has many penalties imposed on it. See specific scenarios for Demoralization levels.
Deploy: Taking a Wing out of In Column movement and returning it to normal movement.
Detachment: A Detachment is a separate Specific Group that can be Activated independently of the main Army.
Die Roll Modifier (DRM): A Die Roll Modifier affects a resolution roll, either positively or negatively.
Disorder: A Morale State for Units. Disordered Units have a reduced Movement Allowance and are less effective in Close Combat.
Effective: The Command State that permits full movement.
Enemy Zone of Control (EZOC): An EZOC is a Zone of Control exerted by a Unit controlled by the opposing player.
Engaged: The infantry/cavalry totaling 4 Steps or less on top of a Stack in an EZOC are Engaged. Only inf/cav may be Engaged.
Fast Units: All cavalry, and all infantry with a printed Movement Allowance of 4 (or greater) are Fast Units.
Flank Attack: A combat situation wherein a single defending Unit is surrounded by attacking Units or their Zones of Control.
Formed: A Morale State for Units. A Unit is Formed when it is not Disordered or Routed.
Friendly Map Edge: The direction towards which Routed Units must move. Defined in each battle's specific rules.
Game Turn: Each Game Turn has two Player Turns, followed by a joint Morale Adjustment Phase.
Group: One or more Wing Leaders and their Units.
In Column (IC): A movement formation permitting increased movement, but with combat penalties.
Inactive Player: The player who is not currently taking his Player Turn.
Initiative: The Initiative rating for a Leader represents his ability to take decisive action on his own judgment. All Army Commanders have an Initiative rating as do some Special Wing Leaders. Initiative ranges from 2 to 5.
Leader: There are two types of Leaders: Wing Leaders represent the commander of a single Wing, and are used to control just that Wing. The Army Commander is primarily used for Army Activation.
Locked: Stacks that begin the Turn with Engaged infantry/cavalry (friendly infantry/cavalry units adjacent to one or more hexes containing enemy infantry/cavalry units) are considered Locked and have Locked markers placed on them.
Loss Points (LP): Loss Points are results caused by Close Combat and Bombardment.
Main Scenario: The Main Scenarios allow players control over their deployments and allow them to perform the approach march.
Marker: A Marker is an informational piece that is not an infantry, cavalry, artillery or leader piece. Markers are usually used to indicate the state of Units, and are also used to track information such as current Game Turn.
Morale Check: A Morale Check is when a Unit must check to see if it remains Formed, or becomes Disordered or Routed.
Morale Modifier (MM): A positive DRM some Leaders impart during Morale Checks, Sweeping Cavalry charges, and Rally attempts.
Morale Rating (MR): The Morale Rating of Units represents the relative effectiveness of a Unit. A higher number represents better morale (due to physical conditioning, tactical training, or mid-ranking/junior officer quality).
Morale State: A Unit's Morale State is Formed, Disordered, or Routed. Only infantry, cavalry and artillery have a Morale State.
Movement Allowance (MA): A counter's Movement Allowance is the maximum number of Movement Points that it may spend in each movement phase.
Movement Points (MP): Movement Points are expended to enter hexes, cross hex sides, and leave an EZOC.
Normal Activation: A voluntary Army Activation, where a player pays a cost in Army Morale and then makes a die roll to attempt to Activate his Army.
Out of Command (OOC): A Unit is Out of Command when it is not within 5 hexes of its Wing Leader.
Player Turn: During each Player Turn, the Active player determines his Wings' Command State, then moves and fights with all of his pieces.
Player Aid Card: A card containing numerous charts used during play.
Rally: An attempt to recover Morale State for a Unit.
Retreat: A forced move that is a result of combat.
Sequence of Play: The Sequence of Play defines the order of events in the game.
Special Leader: A Special Leader permits a player to re-roll when determining the Command State for a Wing.
Specific Group: A Specific Group is a Group that is defined by the scenario. Detachments are one type of Specific Group. Any Wing that belongs to a Specific Group does not belong to a Basic Group.
Stack: All of the Units in a single hex of the map.
Step: A Step is a measurement of the number of men in a Unit. Steps are considered when determining how many Units may Stack together, and which Units are Engaged in combat.
Step Loss: As a result of combat, Units will suffer Step Losses.
Strength Points (SP): Strength Points represent the relative combat strength of infantry/cavalry. Only inf/cav have Strength Points.
Supported Defense: A combat situation wherein a surrounded defending Unit stack is allowed to use supporting Units in calculating combat odds.
Surrender: A Surrender result occurs in Close Combat, and causes low Morale Units to be Captured.
Sweeping Charge: The ability of well led cavalry to make an additional attack during a turn.
Terrain Effects Chart (TEC): The Terrain Effects Chart details what effects terrain has on movement, Close Combat and Bombardment. It is printed on the Player Aid Cards.
Turn: Each completion of the Sequence of Play is one Turn.
Unit: Unit is the umbrella term for all infantry, cavalry and artillery. Leaders are NOT Units.
Wing: A Wing is a collection of infantry/cavalry assigned to one Leader. The colored bands on Units indicate which inf/cav units are assigned to which Wing Leader. Note that artillery is never directly part of a Wing.
Zone of Control (ZOC): A Zone of Control is the area of the map that a Formed or Disordered Unit exerts influence over. A ZOC encompasses the six hexes around a Unit.