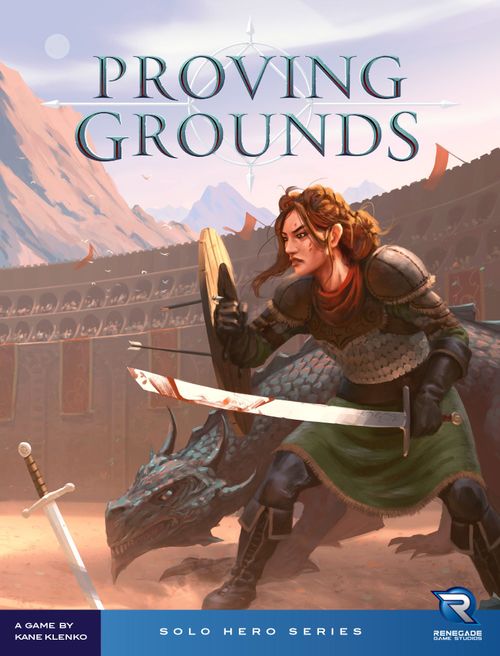
Proving Grounds
Proving Grounds Rulebook
Table of Contents
Table of Contents
Components
- 1 Dragonling Die
- 14 Attack Dice (8 white, 2 blue, 2 green, 2 yellow)
- 1 Health Marker
- 1 Dragonling Token
- 1 Encounter Board
- 6 Battle Markers
- 1 Reference Card
- 6 Conspirator Cards
- 1 Sun and Moon Dial (with plastic rivet)
- 6 Shield Tokens
- 15 Inspiration Cards
- 19 Chariot Cards
- 30 Enemy Cards
The game requires use of a one-minute timer. Be sure to download the Renegade Games Companion app, where you will find the official Proving Grounds timer.
Victory And Defeat
Your goal, as Maia Strongheart, is to survive the Proving Grounds by defeating eight enemy combatants in the arena before your health is reduced to zero.
Winning the Game
If you defeat eight enemies and are still alive at the end of the round, you win!
Losing the Game
If the health marker ever reaches the last space on your health track, you immediately lose!
Enemy Card Anatomy
- Card Name: The name of this enemy.
- Battle Track: Used to track your progress against this enemy in battle.
- Start Space: When the enemy card is drawn, the battle marker is placed on this space.
- Bottom Space: If the battle marker reaches this space, you suffer a wound.
- Top Space: If the battle marker reaches this space, you defeat the enemy.
- Dice Requirements: The number (and possibly color) of dice required to move the battle marker into this space of the battle track.
- Enemy Ability: Some enemies have abilities that affect how your attacks are resolved.
- Dragonling Icon: This icon represents a weakness to a specific result from the dragonling die. (For details, see Module 1: The Dragonling.)
Game Setup
- Place the encounter board on the table in front of you.
- Shuffle the enemy deck and place it nearby, face down.
- Draw six enemy cards, one at a time, from the deck. As each card is drawn, place it in an empty slot around the encounter board, face up.
- Place a battle marker on the start space of each enemy card in play.
- Place the health marker on the top left space of the health track.
- Place three white attack dice on the exhaustion track, one on each space.
- Stack three attack dice (one green, one yellow, one blue) and place them on the space with three colored rings on the health track.
- Place eight attack dice (one green, one yellow, one blue, five white) in your play area. This is known as your dice pool.
Note: The rest of the components are only used with the optional modules. If you are playing the "training game," return these other components to the game box. For setup specific to each module, see the corresponding sections below.
How To Play
The game is played over a series of rounds, until you trigger a win or loss condition. The main part of each round takes exactly 60 seconds and occurs in real time! There are three steps to each round, which must be performed in order:
- Step 1: Roll Dice
- Step 2: Resolve Attacks
- Step 3: Recover
Note: Proving Grounds is made up of a core game (the "training game") and six modules that can be added, in any combination, to increase the game's difficulty and variability. These rules will describe the core game, and then each module will be described separately.
Step 1: Roll Dice
At the beginning of this step, start the timer in the app. (If you don't have access to the app, any one-minute timer will work.) You now have 60 seconds!
Pick up all of the dice in your dice pool and roll them once. After this initial roll, separate the dice according to their rolled results. You may reroll your dice, following the rules below, until you are satisfied with the results or until the timer goes off — whichever happens first. (If you decide to stop early, hit "Battle End" in the app.)
What Is a Set?
If you have two or more dice showing the same number (e.g., 1,1,1), those dice are known as a set. Sets can always be rerolled. It is possible to have multiple sets at the same time (e.g., 1,1,1 and 3,3). However, you can only ever reroll one set at a time. After rerolling a set, separate the dice again, according to the results of the new roll.
What Is a Single?
If you have only one die showing a given number (e.g., a single 4), that die is known as a single. Singles can never be rerolled. However, when you reroll a set, if one or more dice from that rerolled set now match a different single, that single becomes part of its own set, and can now be rerolled.
Example: After Carter's initial roll, his dice look like this: 1,1,3,3,4,5,6,6. He has singles of 4 and 5, which cannot be rerolled. He also has sets of 1s, 3s, and 6s. He decides to reroll his two 1s, and they come up as 4 and 6. His dice now look like this: 3,3,4,4,5,6,6,6. He now has a single of 5 and sets of 3s, 4s, and 6s. He could still reroll any of his sets, but he is happy with these results, so he ends early, stopping the timer.
Step 2: Resolve Attacks
After you have finished rolling your dice, separate them by number, then assign them next to the matching numbered slots of the encounter board. The dice represent your attacks against those enemies. Now you must resolve your attacks.
First, move battle markers, in numerical order (i.e., starting with enemy #1, ending with enemy #6). Then check to see if you defeated any of the enemies, or if you suffer any wounds from those enemies.
A) Move Battle Markers
The battle marker on an enemy card will move up, down, or not at all — based on what dice you have assigned to that enemy.
- Single: If you attack with a single, move the battle marker down one space on the enemy card's battle track. The enemy has scored a hit on you!
- Set: If you attack with a set containing a number of dice equal to or more than the number indicated in the space directly above the battle marker, move the battle marker up one space on the enemy card's battle track. You have scored a hit on this enemy!
- Multiple Spaces: If there are enough dice in the set to move up multiple spaces, you may do so, but each space requires separate dice.
- Color Requirements: Some spaces require that you have dice of specific colors in the set in order to move the battle marker up by one space.
- Incorrect Combination: If your set does not contain the required number or color of dice, nothing happens. Do not move the battle marker up or down.
- No Dice: If you did not assign any dice to the enemy, you did not attack them; nothing happens. Do not move the battle marker up or down.
Example: After finishing his die rolls, Carter has the following dice: 1,1,2,4,4,6,6,6. He moves the battle marker up one space on enemy #1 since he has at least two 1s. He moves the battle marker down one space on enemy #2 since he has a single 2. He assigned no dice to enemy #3, so nothing happens. Enemy #4 requires two dice, and one of them must be green. Carter has two 4s, but neither of them are green, so nothing happens. He assigned no dice to enemy #5, so nothing happens. He moves the battle marker up one space on enemy #6 since he has at least three 6s and one of them is blue.
B) Check for Defeat or Wounds
If the battle marker on an enemy card has now reached the top space or bottom space of the enemy's battle track, you must resolve the consequences.
Defeating an Enemy
If the battle marker reaches the top space of the battle track, you have defeated the enemy! Remove the enemy card from the encounter board and place it in a face-up discard pile.
Suffering Wounds
If the battle marker reaches the bottom space of the battle track, you have suffered a wound!
Whenever you suffer a wound, there are three things that happen:
- Add one of your dice to the exhaustion track, placing it on the top space. If there are any dice already on this space, stack them.
- Move the health marker down one space on your health track.
- Reset the enemy's battle marker to the start space.
Example: On enemy #1 and enemy #6, the battle marker has reached the top space of the battle track. Carter has defeated them, so he removes those cards from the encounter board and puts them in the discard pile. On enemy #2, the battle marker has reached the bottom space of the battle track, so Carter suffers one wound! He must add one of his dice to the exhaustion track — he chooses a white one. Then he moves his health marker down one space and resets the enemy's battle marker to the start space.
Replacing Dice
If suffering a wound causes the health marker to move into the space on your health track with the stack of colored dice, you get to replace one of the white dice in your dice pool with one of the colored dice from the stack. Discard the replaced white die to the game box.
Any remaining colored dice in the stack are then moved down one space on the health track. The next time you suffer a wound and your health marker moves down another space, you will get to replace a die again. Remember, if the health marker reaches the last space of the health track, you lose!
Example: Carter has suffered another wound, and this time the health marker moves into the space on his health track with the stack of colored dice, so he gets to replace a die. He sees that he will be needing yellow dice for some of the enemies currently in play, so he takes the yellow die and discards one of his white dice.
Step 3: Recover
Retrieve all dice assigned to enemies this round, returning them to your dice pool. On the exhaustion track, move all dice down one space. Any dice that were on the bottom space now move off the exhaustion track and return to your dice pool.
For each empty slot around the encounter board, draw the top card of the enemy deck and place it in the empty slot, face up. Then place the battle marker on the start space of that card.
You are now ready for the next round! Remember, the round sequence continues until you trigger a win or loss condition (see Victory and Defeat).
The Modules
The training game is only the beginning of Maia Strongheart's difficult trials in the Proving Grounds. Once you have become comfortable with the introductory gameplay, these modules expand the choices and challenges significantly.
Feel free to add a single module or mix and match to your tastes. If you're feeling truly adventurous, put them all together for a true test of your gladiatorial combat skills!
Module 1: The Dragonling
"Maia's heart pounded. If she was wrong, the dragonling or its blood could kill her. If she was right, she had a fearsome ally in this impossible fight."
In this module, the dragonling appears! Perhaps it will aid Maia Strongheart in the arena. But the dragonling is an untamed beast that can create chaos if not kept under control…
Setup
Add the dragonling die to your dice pool, giving you nine dice instead of eight. Put the dragonling token into play. (There is a reference guide on the back.)
Gameplay
Every round, roll the dragonling die along with all the other dice in your initial roll. You may reroll the dragonling die each time you reroll a set. However, the dragonling die cannot be combined with a single and rerolled (as this is not a "set").
After the timer has ended, you then determine how you will use the dragonling die result, based on the other dice you have rolled.
- The talon, tail, or teeth result may be added to any set or single to attack an enemy card with the matching icon. However, the dragonling die does not count as a colored die. For purposes of color requirements, it counts as a white die.
- The wing result may be used to prevent the battle marker from moving down for any one single. However, the wing result does not prevent a situation that would cause an enemy to raise their shield (see the Shield Module for more details).
- The chaos result must be used to immediately reroll all colored dice, before resolving any attacks. This is mandatory.
Example: Enemy #3 requires two 3s, but Carter has only rolled a single 3. However, the enemy card has the tail icon, and Carter rolled the tail result on the dragonling die. Therefore, he can add the dragonling die to his single 3, making it a set of two 3s instead.
Module 2: Chariots
"The horse-drawn chariots encircled the combatants, hooves pounding the earth and stirring up clouds of dust across the arena."
In this module, chariots represent a new threat that Maia Strongheart must fend off — even as she deals with the normal six enemies assailing her from all sides.
Setup
Shuffle the deck of chariot cards. Reveal the top card of the deck and place it beside the encounter board, face up. Place the rest of the deck next to the revealed card, face down.
Gameplay
While you are rolling your dice, you can place dice on any chariot cards in play. Each chariot card has a specific die requirement: either a single die of a specific number or any two dice of equal number. Remember, you must do this while the timer is running!
After the timer is stopped, but before you resolve your attacks, resolve any chariot cards in play. If there are multiple chariot cards in play, resolve them in the order that they were drawn.
- If you placed the required dice on the chariot card, you have prevented it from activating. Move those dice to the reserve (next to the exhaustion track) and discard the chariot card.
- If you did not place the required dice on the chariot card, then its effect activates (if possible). After resolving the effect, discard the chariot card.
Example: The revealed chariot card has this effect: "For every single, move that enemy's battle marker down one extra space this round." Preventing this effect requires placing two dice with the same number. Carter is too engaged in trying to make sets, and forgets to place dice on the chariot card. He has a single 3. When resolving his attack on enemy #3, he is forced to move the battle marker down two spaces, instead of one.
After advancing the dice on the exhaustion track, retrieve any dice from the reserve, adding them back into your dice pool. Then, reveal the top card of the chariot deck and place it face up next to the encounter board.
If there are now no dice on the exhaustion track, reveal another card from the chariot deck, placing it face up next to the previous card.
Module 3: Inspiration Powers
"Maia Strongheart's centuries-old ceremonial armor, said to have been crafted from the Wizened's iridescent green scales, was a pledge of support for the rising and setting Sun Queens: for her mother, the first matriarch of the Strongheart clan, and for her grandmother, Eva, who'd recently passed."
In this module, Maia Strongheart draws inspiration from her friends, as well as relics and legends of her people, as she battles her way through the Proving Grounds.
Setup
Take all 15 inspiration cards. After deciding which modules to use, remove any inspiration cards that require modules that are not in play. Shuffle the remaining cards and draw one, placing it face up. Return the rest of the inspiration cards to the box.
Note: On each inspiration card, there is an icon denoting which module must be in play for that inspiration card to be used.
Gameplay
Your inspiration card provides you with an ongoing power. Each inspiration card has text indicating what the power is and when it is triggered.
A module icon on a card denotes the module required for this card to be used. For example, a card marked with the dragonling icon can only be used when the dragonling module is included.
Example: Carter has decided to play with the dragonling module. The inspiration card he draws is Dragonscale Armor. This card's power allows him to use the tail result of the dragonling die against any enemy — not just against those with the tail icon.
Module 4: Shields
"The queen's soldier lifted a gleaming metal shield, deflecting Maia's strike. Momentarily sent off balance, she spun to her knee as the soldier's weapon narrowly missed her shoulder."
In this module, Maia Strongheart's enemies will raise their shield any time that you resolve an attack that is unsuccessful. Shielded enemies become that much harder to defeat!
Setup
Place the six shield tokens within reach nearby.
Gameplay
When you attack an unshielded enemy with a set, but the dice are not the correct combination, the enemy raises their shield. Place a shield token on that enemy card. The enemy is now shielded against your future attacks, until you break their shield.
Example: Carter rolled four 3s, but unfortunately none of them are blue, which is required for an attack on enemy #3. Since he rolled a set, but it is not the correct combination to attack, he instead places a shield token on the enemy card.
- When an enemy card is shielded, if you attack them with a single, you break their shield. Remove the shield token, but do not move the battle marker.
- When an enemy card is shielded, if you attack them with a set, whether it would normally score a hit or not, move the battle marker down one space on the battle track.
Example: Enemy #3 is shielded. Carter has rolled a single 3. When he resolves this attack, he removes the shield token, but does not move the battle marker.
Example: Enemy #3 is shielded. Carter has rolled three 3s and one is blue. Instead of scoring a hit, he must move the battle marker down one space.
Module 5: Conspirators
"The legend's many mysteries, both real and imagined, have ensnared the minds of conspirators, politicians, and wise counselors alike."
In this module, every time that Maia Strongheart defeats an enemy, another one of the conspirators reveals their identity and attempts to exert influence over the arena.
Setup
Shuffle the six conspirator cards into a single deck and place it above the encounter board, face down. Then reveal the top card of this conspirator deck, placing it face up.
Gameplay
Each time you defeat an enemy, reveal the top card of the conspirator deck at the start of the following round, placing it next to the other conspirators in play, face up. (If you defeat multiple enemies in a round, reveal multiple conspirators in the following round.) Once all conspirators have been revealed, ignore this rule.
At the beginning of each round, before you start the timer, roll one attack die. If the die result matches the number of a revealed conspirator, then that conspirator is active for this round. If the die result does not match the number of a revealed conspirator, nothing happens.
Sometimes a conspirator's ability is an immediate effect, and sometimes it will activate when you resolve your attacks.
Example: At the start of the round, there are two conspirators in play: Queen Brianna (6) and Fern Greenbush (4). Carter rolls one die, with a result of 4. This activates Fern Greenbush, who has this effect: "Choose an enemy and move their battle marker down one space."
Module 6: Sun and Moon
"We have gathered at this irregular hour to bear witness. Let us all hope these insidious rumors and secrets are exposed by moon's silver glow or sun's first light."
In this module, you must pay attention to where Maia Strongheart is facing. By attacking the enemy directly in front of Maia (in the sun position), you can gain bonus dice. But failing to attack the enemy directly behind Maia (in the moon position) can result in more wounds.
Setup
Attach the sun and moon dial to the encounter board, using the included rivet. Place three colored dice (blue, green, yellow) on the indicated spaces of the sun and moon dial, instead of on the usual space of the health track.
Gameplay
At the beginning of each round, rotate the sun and moon dial so that Maia is facing an enemy card of your choice. You must rotate the dial each round. In other words, Maia may not face the same enemy card slot two rounds in a row.
After resolving attacks, return to the sun and moon dial any colored dice you gained in the previous round. Then, check to see which sun and moon effects take place.
Sun Effects
- If you scored a hit on the enemy in the sun position, choose one of the colored dice from the sun and moon dial, adding it to your dice pool for next round.
- If you did not score a hit on the enemy in the sun position, nothing happens.
Moon Effects
- If you scored a hit on the enemy in the moon position, nothing happens.
- If you did not score a hit on the enemy in the moon position, move the battle marker down one space on that enemy card.
Example: Carter decides to rotate the sun and moon dial to face enemy #2 this round. After resolving his attacks, he checks for sun and moon effects. He scored a hit on enemy #2, so he chooses the green die from the sun and moon dial for use next round. But he rolled no 5s, so he moves the battle marker down one space on enemy #5.
Common Clarifications
Q1: Can I ever reroll a single?
No. Certain enemies have effects that say a die of a certain color "counts as two dice." This means that a single of that color would be treated as a set when resolving attacks. However, this does not let you reroll a single, because it does not become a set until attacks are resolved.
Q2: How do I handle timing conflicts?
The timing can get more complicated when you have multiple modules in play. If there are any conflicts as to when something should occur, follow this sequence:
- Reveal conspirators
- Set the sun and moon dial
- Roll dice
- Activate chariot effects
- Assign dragonling die
- Resolve attacks
- Resolve sun and moon effects
- Recover
- Retrieve dice from the reserve
- Draw enemy cards
- Draw chariot cards
Q3: The timer is still going but I have no sets left to reroll. What do I do?
In that case, you are forced to stop the timer early. This can only happen if you have six or fewer dice in your dice pool. Since your dice pool starts with eight dice, this would mean that you currently have a lot of dice on the exhaustion track.