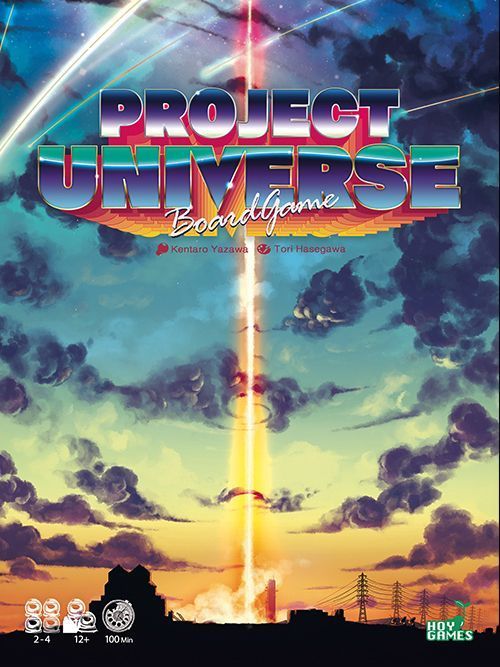
Project Universe
Project Universe Rulebook
Table of Contents
Table of Contents
- Components
- Individual Player Setup
- Sample Layout for a 4-Player Game
- Game Setup
- Order of Play
- Being "In Space" and Available Actions
- Being "Home" and Available Actions
- Final Scoring
- Facility Effect Tile List
- Capital Investment Bonus List
- Space Station Facility List
- Additional Action Card Effects
- Rocket Board Effects and Descriptions
Components
- 4 Rocket boards
- 8 Workforce markers (front and back, back showing 10)
- 8 Money markers (front and back, back showing 10)
- 80 player tokens (4 sets [colors] of 20 tokens)
- 4 Rocket pieces (4 sets [colors] of 1 piece)
- 8 Score markers (4 sets [colors] of 2 markers)
- 1 Start Player card
- 1 Head Office board
- 1 Universe board
- 4 Initial Order cards (front and back)
- 40 Order cards (front and back)
- 36 Additional Action cards (front and back)
- 2 Round cards (front and back)
- 6 Conference cards (front and back)
- 12 Facility Effect tiles (front and back)
- 16 Initial Action cards (4 sets [colors] of 4 cards; front and back)
- 50 Bean cubes (green)
- 50 Water cubes (blue)
- 1 Time marker
- 9 Space Station tokens (3 sets [colors] of 3 tokens)
- This rulebook
Individual Player Setup
The players each receive the following components:
- 1 Rocket board
- 1 Workforce marker
- 1 Money marker
- 1 Initial Order card
Then the players each choose their color and receive the components of their color:
- 20 player tokens
- 1 Rocket piece
- 2 score markers
- 4 Initial Action cards
The Initial Action cards have their colors indicated as shown (the color is indicated by the colored circle with a number in it on each card).
Place your Workforce marker, Money marker, and 3 player tokens on your Rocket board. Keep your remaining player tokens next to your Rocket board.
- Workforce marker: placed on the Workforce track at "0".
- Money marker: placed on the Money track at "0".
- Player tokens: place one player token on each of the spaces marked ①, ② and ③ on the Rocket board (three player tokens in total). (The rulebook marks these spaces only by the numbered callouts; the exact spaces are as shown in the illustration.)
The players each shuffle their Initial Action cards, form the Action card deck and place it on their Rocket board. Keep a space for discarding used Action cards just above the deck.
Shuffle the Initial Order cards and randomly deal 1 card to each player. The players each place their Initial Order card face up in the Received Order Card area next to their Rocket board. Put the remaining Initial Order cards back into the box.
Replenish your Workforce up to the Workforce Number indicated on your Initial Order card. Indicate your current Workforce by moving the Workforce marker on the Workforce track.
If your Workforce or Money reaches "10", flip the Workforce/Money marker to the side with "10" face up. This indicates you have 10 Workforce/Money.
Example: Player A has 12 Workforce. The player flips their Workforce marker to the side with "10" face up and places it on "2" on the Workforce track.
Check the number in a corner of the Initial Order card.
The player with the lowest number in the corner of their Initial Order card is the start player and receives the Start Player card. Next, in clockwise order from the start player, the players receive the Money to have at the start of the game. In the same manner as with the Workforce, move your Money marker on your Money track to indicate how much you have. Each cell on the Money track indicates 1 trillion dollars ($1T).
The start player receives $2T, the 2nd player $3T, the 3rd player $4T, and the 4th player $5T. Thus, you receive $1T more than your prior player.
Sample Layout for a 4-Player Game
The rulebook shows a sample layout for a 4-player game: the Universe board in the centre, the Head Office board with the Round cards, Facility Effect tiles, Order cards and Conference area, each player's Rocket board and Warehouse, and the Bank of Bean, Water, Workforce and Money markers.
Game Setup
- Place the Universe board on the table and place the Head Office board next to it.
- Place the 2 Round cards next to the Head Office board. Place the Round 1 card face up on top of the Round 2/3 card.
- Place the Time marker on the Round 1 spot on the Time track.
- Place the Facility Effect tiles in the "Export Water", "Export Beans", "Water Purification" (Water Purification Facility), and "Field" (Bean Field) areas on the Head Office board. In the "Export Water" area, place the "Export Water" Facility Effect tiles face up. Stack the tiles with "LV1" at the top, "LV2" below it, and "LV3" at the bottom.
- Likewise, stack the "Export Beans", "Water Purification" and "Field" Facility Effect tiles face up in the corresponding areas.
- Note: the printed text says "LV3" at the bottom, but the illustrations of this step label the bottom tile of each stack "LV4". The text is transcribed as printed.
- Place the remaining Bean, Water, Workforce and Money markers within the reach of all the players as the Bank. The Bank is considered to have infinite Bean, Water, Workforce and Money markers. If the markers run out, substitute them with other articles.
- Divide the Order cards into stacks according to the destinations indicated on the back.
- Shuffle each stack of Order cards divided by Destination and place the top card of each stack face up next to the stack. The area where the Order cards are placed face up in a row is the Order Card area.
- The Additional Action cards have letters "a" through "f" on their front. Divide the Additional Action cards into stacks of cards with the same letters and shuffle each stack face down.
- Stack "Stack a" on "Stack b" as the Additional Action card deck for Round 1.
Now, the game setup is complete.
How to Gain/Use Materials and Their Upper Limits
Indicate the current amount of your Workforce and Money by moving Workforce/Money markers on your Rocket board.
When you get Materials, such as Beans and Water, keep them near your Rocket board. This is your Warehouse.
There is no upper limit to the amount of Workforce, Money, Beans or Water you can keep. If the amount of your Workforce or Money exceeds 19, receive the spare Workforce/Money marker from the stock for counting.
Example: Player A has 20 Workforce and $24T and indicates them on their Workforce and Money tracks as follows: Workforce: 20; Money: $24T.
Order of Play
This game ends after 3 rounds. Each round is comprised of 3 phases.
The phases proceed in the following order:
- Preparation Phase
- Action Phase
- Ending Phase
When Round 3 is over, end the game and proceed to the final scoring.
1. Preparation Phase
All the players undergo this phase at the same time.
If you have less than 3 Action cards, draw cards from your Action card deck and add them to your hand until you have 3 cards.
If you have 3 or more cards, do not replenish your hand.
If the deck runs out while replenishing your hand, shuffle the cards in the Discard area to form a new deck. Then draw cards from the new deck until you have 3 cards.
When all the players have replenished their hands, proceed to 2. Action Phase.
2. Action Phase
Take turns clockwise from the start player.
In your turn, choose and take 1 action and then pass to the next player.
The actions you can choose vary depending on your state in your turn. There are 3 states: "On Earth", "In Space" and "Home".
Continue the Action Phase until all the players are "Home".
Being "On Earth" and Available Actions
If your Rocket is in the Rocket Garage on the Universe board, you are "on Earth".
When you are on Earth, you can choose one of the following actions:
- Card Play
- Branch Manager Action
Card Play
Play an Action card from your hand and use the card's effect. After that, choose and use one of the available effects indicated on the Head Office board according to the Action card you have played. You may also choose not to use the effects of the Action card and/or Head Office board.
Stack the used Action cards face up in the Discard area near your Rocket board.
Types of Action cards: there are roughly 3 types of Action cards: "Ordinary Employee", "Manager" and "Executive". The type of Action card you play from your hand determines the available effects on the Head Office board.
- "Ordinary Employee" allows you to choose from the effects in the Ordinary Employee area on the Head Office board.
- "Manager" allows you to choose from the effects in the Ordinary Employee and Manager areas on the Head Office board.
- "Executive" allows you to choose from the effects in the Ordinary Employee, Manager, and Executive areas on the Head Office board.
Branch Manager Action
Instead of using an Action card, choose and use one of the effects indicated as Branch Manager Actions on your Rocket board. (See P.8 to P.9.)
Effects in the Ordinary Employee area
- Water Purification Facility: Pay Workforce and get Water. On each turn, you can pay the designated Workforce once. The effect varies depending on the level (LV) of the Water Purification Facility Effect tile currently visible.
- Illustration: LV1 Water Purification tile shows "Workforce to pay: 3" and "What you get: 1 Water".
- Bean Field: Pay Workforce and get Beans. On each turn, you can pay the designated Workforce once. The effect varies depending on the level (LV) of the Bean Field Effect tile currently visible.
- Illustration: LV1 Field tile shows "Workforce to pay: 3" and "What you get: 2 Beans".
- Bank: Get $1T.
Receive an Order
Take any one of the face-up Order cards placed near the Head Office board. Place the Order card you have taken face up in the Received Order Card area next to your Rocket board.
Then draw an Order card face up from the deck with the same destination and replenish the Order Card area with it. After the Order card deck runs out, continue the game without replenishing the Order Card area.
Check the amount of Workforce stated on the Order card you have gained. If your current Workforce is less than the amount stated on the Order card you have just taken, replenish your Workforce up to the amount stated on the Order card.
Example: On the Order card gained, the Workforce is "7". If your Workforce is less than 7, replenish it up to 7. (The printed example reads "is have less than 7"; it is transcribed here as "less than 7".)
If your Workforce is 7 or more, your Workforce remains the same.
If you take an Order card with the same destination as that of an Order card in the Received Order Card area, the prior Received Order card fails.
Place both failed and achieved Order cards in the Resolved Order Card area on your Rocket board. Place failed Order cards face down and achieved Order cards face up.
Effects in the Manager area
- Export Water: You can pay Water to get Workforce and Money. You can pay the designated Water once per turn. The effect varies depending on the level of the currently visible Export Water Facility Effect tile.
- Illustration: LV1 Export Water tile shows "Water to pay: 1" and "What you get: 3 Workforce and 1 Money".
- Export Beans: You can pay Beans to get Money. You can pay the designated Beans once per turn. The effect varies depending on the level of the currently visible Export Beans Facility Effect tile.
- Illustration: LV1 Export Beans tile shows "Beans to pay: 2" and "What you get: 3 Money".
- Improve the Rocket: You can pay Money to improve your Rocket board. In the action to Improve the Rocket, choose 1 Facility and improve it once.
- Rocket board Facilities that can be improved: Launch Engine, Propulsion Engine, Transport Container.
- Pay the Money stated in the space between the cell where your player token is located and its right adjacent cell, and move the player token to the right adjacent cell.
- Workforce, Beans, Water, and/or VPs may be indicated on the cell where you move your player token. If so, receive what is indicated there immediately. (See P.16 to P.15.)
- Illustration: a player token on a Launch Engine cell moves past a Money cost of "4" to the right adjacent cell.
- Capital Investment: You can pay Money and invest in the Facilities on the Head Office board. In the Capital Investment action, choose and invest in 1 Facility once.
- Head Office Facilities available for investment: Export Water, Export Beans, Water Purification Facility, Bean Field.
Effects in the Executive area
- Employment: Pay 2 Workforce. After that, take one of the face-up Additional Action cards in the Employment area and add it to your hand. If the number of face-up Additional Action cards in the Employment area is 4 or less, immediately replenish them to 5 cards. When you replenish the cards, draw cards from the current round's Additional Action card deck.
- The Additional Action cards will not be replenished after the current round's deck runs out.
Branch Manager Action
You can choose one of the 3 types of Branch Manager actions: "Conference", "Launch", and "Return Home".
-
Conference
Hold the Conference in the following order:
-
Discard (any number of) Action cards from your hand
-
Replenish your hand until you have 3 cards
-
Reveal a Conference card
-
Discard (any number of) Action cards from your hand. You can discard any number of cards from your hand to the Discard area. You may also choose not to discard any card.
-
Replenish your hand until you have 3 cards. Draw cards from your Action card deck until you have 3 cards in your hand. Do not replenish your hand if you have 3 or more cards.
If the deck runs out while replenishing your hand, shuffle the cards in the Discard area to form a new deck. Draw cards from the new deck until you have 3 cards in your hand.
-
Reveal a Conference card. Draw a Conference card and place it face up. Advance the Time marker on the Time track in the direction of the arrow according to the number stated on the revealed Conference card. The number of steps to advance varies depending on the number of players.
Conference step table (shown on the Conference card):
- 2 Players: astronaut ×2 with 2 hourglass icons (advance 2 steps). The rulebook states: "In a 2-player game, advance the Time marker 2 steps."
- 3 Players: astronaut ×3 with 2 hourglass icons.
- 4 Players: astronaut ×4 with 1 hourglass icon.
After you have revealed all Conference cards, shuffle them to form a new deck of Conference cards.
-
Additional Orders
Each Order card has 1 or 2 additional orders on it.
- Additional Order 1: Materials for achievement; Additional Order 1 Achievement Reward.
- Additional Order 2: Materials for achievement; Additional Order 2 Achievement Reward.
Order card example: the card shows Additional Order 1 (materials: 1 Bean, shown with a green cube; reward: 2 VPs) and Additional Order 2 (materials: 2 Water, shown with a blue cube; reward: 9 VPs).
After receiving the On-Arrival Reward, you can also meet the additional order(s) stated on the achieved Order card. You can gain the reward(s) for achieving the additional order(s) by paying from your Rocket's Transport Container the Materials required for meeting the additional order(s).
If you can pay the materials, you can meet all the additional orders stated on the Order card. You can also achieve only Additional Order 1 or Additional Order 2. You cannot gain extra points by paying more Materials than you need to achieve the additional orders.
The following icons indicate what you can gain as a reward:
- Take an Employment action without paying any Workforce.
- Receive the specified amount of Money and Workforce.
- Receive the specified amount of VPs.
B. Use a Space Station Facility
At each Space Station with a Facility, you can use the Facility Effect once. (See P.14.)
Return Home
Move your Rocket to a Home and now you are "Home". Place your Rocket on a cell not occupied by another Rocket and gain the income indicated on that cell.
Home cells (income):
- First Home cell: Get 2 Beans and 1 Water.
- Second Home cell: Get $3T.
- Third Home cell: Get 4 Workforce.
- Last Returner's Home (Start Player) cell: receive the Start Player card and be the next round's start player.
If you return home when all the other players are already "Home", place your Rocket piece in the following Home cell. You cannot choose this Home cell on other occasions.
Free Actions
When you are "On Earth", you can load the Beans and Water you have gained into the available Transport Containers on your Rocket board or return them to your Warehouse at any time. You can do this even during another player's turn.
When you are "In Space", you cannot load Beans or Water or return them to your Warehouse.
Being "In Space" and Available Actions
If you have taken the Launch action and your Rocket is on a cell other than the Rocket Garage at Home, you are "In Space".
When you are in space, choose one of the following actions:
- Move Action
- Return Home
Move Action
Pay the cost to move your Rocket to an adjacent cell. To move, check the cell where your player token is placed in the Propulsion Engine on your Rocket board. You can move your Rocket by paying the Workforce indicated below the cell where the player token is placed.
You can move to an adjacent cell linked by a line from the cell where your Rocket is located (even if another player's Rocket is also located there).
After moving your Rocket, you can take an Arrival action. The Arrival action varies depending on the destination.
Arrival Action
Space Station: Take the same actions as those taken in the Launch action. Take each of the following actions once in any order you like:
- A. Achieve an Order card
- B. Use a Space Station Facility
Space Station construction sites
The cells with face-down Space Station tokens are Space Station construction sites. You can gain VPs by paying the Beans and Water indicated on each token. After you make the payment and gain the VPs, immediately flip the Space Station token face up.
After that, take another Arrival action, which is the Arrival action for the revealed Space Station. If you flip a Space Station token face up, either a "Space Station Branch" or "Wormhole" is revealed.
(The illustrations show the face-down construction site tokens, the Space Station Branch marking "A", and the Wormhole icon.)
Space Station Branch: The Space Station Branch is not equipped with any Facility, but if you have a Received Order card with this Station specified as the destination, you can achieve that Order.
Wormhole: If you arrive at a Wormhole, you must take an additional Move to an adjacent cell. This additional Move does not require any Workforce as the cost. Then take an action according to the cell where you move to. You cannot move back to the cell where you were located in the same turn.
Time Elapse cell
When you enter the cell with this icon, advance the Time marker one step on the Time track.
Return Home
This action is the same as the Branch Manager Action "Return Home". Return home and you will be "Home". For details, see P.9 "Return Home".
Being "Home" and Available Actions
If your Rocket is on a Home cell, you are "Home".
If the turn of play moves to a player who is already "Home", advance the Time marker on the Time track one step and end the turn without taking any action.
Overtime Work
After the Time marker on the Time track reaches the cell marked 残業 / Overtime, it is overtime.
You must pay Money as a penalty for each turn you take while working overtime. The amount of Money to pay varies between each round:
- Round 1: $3T
- Round 2: $4T
- Round 3: $5T
You do not need to pay the penalty if you "Return Home" or if you are already "Home" in your turn. If you cannot pay the penalty, take the "Return Home" action.
The Time marker will not advance while working overtime. The Time marker will not advance even if a Rocket enters the Time Lapse cell or if the turn of play moves to a player who is "Home".
Do not draw a Conference card even if you hold a Conference while working overtime.
3. Ending Phase
When all the players are "Home", proceed to the Ending Phase. The Ending Phase proceeds in the following order:
- Income
- Check the Investment Contribution
- Proceed to the Next Round
- Reset the Time Track
- Remove and Reveal Action Cards
- Reset Conference Cards
- Store Rockets
After the Ending Phase, proceed to the next round. In the Round 3 Ending Phase, skip 3 and later steps and proceed to Final Scoring.
1. Income
The players each count their player tokens on the Investment cells on the Head Office board and gain their income accordingly.
- Get 1 Bean per your player token on the Investment cells in the Manager area.
- Get $1T per your player token on the Investment cells in the Ordinary Employee area.
Example (Manager area): Player A, who has placed 1 player token, gets 1 Bean. Player B, who has placed 3 player tokens, gets 3 Beans. Player C, who has not placed any player token, cannot get any Bean. Player B, who has placed 2 player tokens, gets 2 Beans. (The last sentence of this example is printed as shown; it appears to refer to the Ordinary Employee area.)
Example (Ordinary Employee area): Player A, who has placed 2 player tokens, gets $2T. Player B, who has placed 1 player token, gets $1T. Player C, who has placed 1 player token, gets $1T. Player D, who has placed 2 player tokens, gets $2T.
2. Check the Investment Contribution
The players each count their player tokens on the Investment cells on the Head Office board and gain VPs according to the area.
Compare the number of the players' tokens placed in the Manager area and Ordinary Employee area.
(Make sure to count the player tokens in each area, not on each Facility.)
The following players will gain VPs from the Investment cells in the Manager area:
- The player who placed the most tokens
- The player who placed the 2nd most tokens
- The player who placed the 3rd most tokens
There is a round in which the 3rd player cannot gain VPs.
| Round | 1st | 2nd | 3rd |
|---|---|---|---|
| Round 1 | 2 VPs | 1 VP | — |
| Round 2 | 5 VPs | 2 VPs | 1 VP |
| Round 3 | 8 VPs | 3 VPs | 2 VPs |
Next, the following players gain VPs from the Investment cells in the Ordinary Employee area:
- The player who placed the most tokens
- The player who placed the 2nd most tokens
- The player who placed the 3rd most tokens
There is a round in which the 2nd and 3rd players cannot gain VPs.
| Round | 1st | 2nd | 3rd |
|---|---|---|---|
| Round 1 | 1 VP | — | — |
| Round 2 | 3 VPs | 1 VP | — |
| Round 3 | 5 VPs | 2 VPs | 1 VP |
What to Do in Case of a Tie: In case of a tie in the number of player tokens placed on the Investment cells, the player who placed their player token in an upper Investment cell in that area will be ranked higher.
Example: Both Players A and D placed 2 player tokens on the Investment cells in the Ordinary Employee area. Player A, who placed a player token in an upper Investment cell in the Ordinary Employee area, is ranked higher and comes 1st. Player D comes 2nd.
3. Proceed to the Next Round
- In the Round 1 Ending Phase, put the Round 1 card back into the box and reveal the new Round card with its "Round 2" side face up.
- In the Round 2 Ending Phase, flip the Round card to have its "Round 3" side face up.
- In the Round 3 Ending Phase, skip the following steps and proceed to Final Scoring.
4. Reset the Time Track
Move the Time marker on the Time track to the cell with the number matching that on the Round card revealed in Step 3.
5. Remove and Reveal Action Cards
Put the Additional Action cards currently placed face up in the Employment area back into the box.
Return to the box the Additional Action card deck for the round before the Round card revealed in Step 3.
Then draw 5 cards from the Additional Action card deck for the Round card revealed in Step 3 and place them face up in a row in the Employment area.
6. Reset Conference Cards
Collect all the Conference cards and shuffle them to form a deck. Then place the Conference card deck in the Conference card area.
7. Store Rockets
The players each return their Rocket from the Home cell in the Universe board to the Rocket Garage. Then they each return the Beans and Water remaining in their Rocket's Transport Container to their Warehouse.
Final Scoring
After the Round 3 Ending Phase, calculate your final score. There are gains and losses of VPs according to the following factors:
- VPs from Materials
- Destination Bonus
- Special Action Card Bonus
- Penalties for Failed Orders
VPs from Materials
- Workforce: Get 1 VP for every 5 Workforce left on your Rocket board.
- Beans: Get 1 VP for every 4 Beans left in your Warehouse and Transport Container.
- Money: Get 1 point for every $3T left on your Rocket board.
- Water: Get 1 point for every 2 Water left in your Warehouse and Transport Container.
- Action card: Get 1 point for each Action card (including the Initial Action cards) you have.
Destination Bonus
Form sets according to the types of achieved Order cards and gain VPs.
- Get 4 VPs for each set of 3 types (destinations) of achieved Order cards.
- Get 8 VPs for each set of 4 types (destinations) of achieved Order cards.
- Get 16 VPs for each set of 5 types (destinations) of achieved Order cards.
The Order cards included in a set cannot be included in another set.
Example: Player A has achieved the Order cards with the following destinations: 3 Arbiter (A), 1 Brown & McFly (B), 2 Solaris (C), 1 Discovery (D), and 3 Enterprise (E). Player A has 1 card of "A", "B", "C", "D", and "E", so they can form a set of 5 types of cards and gain 16 points. The player still has more Order cards not included in any set. A set of 3 types of Order cards can be formed by "A", "C" and "E" to gain 4 more VPs. The remaining Order cards that have not been included in any set are 1 "A" and 1 "E". You cannot gain VPs by 2 types of Order cards. Thus, Player A has gained a total of 20 points as the destination bonus.
Special Action Card Bonus
If you have gained any Additional Action card with an effect that is applied at the end of the game, you gain VPs with it.
Penalties for Failed Orders
If you have any Order card that you could not achieve up to the Round 3 Ending Phase, it counts as a failed Order card. Add up the loss points indicated on your failed Order cards and reduce your VPs according to the total loss points.
Determine the Winner
After the final scoring, the player with the most VPs wins.
In case of a tie, the player who has achieved more Order cards wins. If that is also a tie, the player who has more Money wins. If that is also a tie, the tied players shall share the victory.
Facility Effect Tile List
Water Purification Facility
- LV1: Pay 3 Workforce and get 1 Water.
- LV2: Pay 2 Workforce and get 1 Water.
- LV3: Pay 2 Workforce and get 2 Water.
- LV4: Pay 1 Workforce and get 2 Water.
Bean Field
- LV1: Pay 3 Workforce and get 2 Beans.
- LV2: Pay 2 Workforce and get 2 Beans.
- LV3: Pay 2 Workforce and get 3 Beans.
- LV4: Pay 2 Workforce and get 4 Beans.
Export Water
- LV1: Pay 1 Water and get 3 Workforce and $1T.
- LV2: Pay 1 Water and get 3 Workforce and $2T.
- LV3: Pay 1 Water and get 4 Workforce and $1T.
- LV4: Pay 1 Water and get 4 Workforce and $2T.
Export Beans
- LV1: Pay 2 Beans and get $3T.
- LV2: Pay 2 Beans and get $4T.
- LV3: Pay 1 Bean and get $4T.
- LV4: Pay 1 Bean and get $6T.
Capital Investment Bonus List
Water Purification Facility (bonus list)
- $3T: Get 1 card from the Employment area and raise the Water Purification level to LV2.
- $4T: Get 2 Water cubes and 1 VP.
- $4T: Get 1 card from the Employment area and 1 VP. Then raise the Water Purification level to LV3.
- $5T: Get 3 VPs.
- $7T: Get 6 VPs and raise the Water Purification level to LV4.
Bean Field (bonus list)
- $2T: Get 1 card from the Employment area and raise the Field level to LV2.
- $3T: Get 2 Beans.
- $4T: Get 1 card from the Employment area and 1 VP. Then raise the Bean Field level to LV3.
- $5T: Get 3 VPs.
- $6T: Get 4 VPs and raise the Bean Field level to LV4.
Export Water (bonus list)
- $3T: Get 2 Water and raise the Export Water level to LV2.
- $4T: Get 2 Water and 1 VP.
- $5T: Get 1 card from the Employment area and 2 VPs. Then raise the Export Water level to LV3.
- $6T: Get 4 VPs.
- $8T: Get 7 VPs and raise the Export Water level to LV4.
Export Beans (bonus list)
- $3T: Get 1 card from the Employment area and raise the Export Beans level to LV2.
- $4T: Get 3 Beans and 1 VP.
- $4T: Get 1 card from the Employment area and 1 VP. Then raise the Export Beans level to LV3.
- $5T: Get 3 VPs.
- $7T: Get 6 VPs and raise the Export Beans level to LV4.
Space Station Facility List
- Arbiter Station (A): Pay $1T and get 1 Water. Since this Water was produced in space, you can immediately load it onto your Transport Container. You can also choose not to load it. If not loading the Water, store it in your Warehouse.
- Brown & McFly Station (B): Get 1 Workforce.
- Solaris Station (C): Pay 1 Workforce and get 2 Beans. Since these Beans were produced in space, you can immediately load them onto your Transport Container. You can also choose not to load one or both Beans. If not loading some Beans, store them in your Warehouse.
- Discovery Station (D): Pay 1 Bean in your Transport Container and get $5T.
- Enterprise Station (E): Pay 1 Water in your Transport Container and get 6 Workforce.
Additional Action Card Effects
These effects can be applied by playing the cards.
- Get $1T.
- Get 1 Workforce.
- Get 1 Bean.
- Get 1 Water.
- Choose and get 2 Beans or 1 Water.
- Pay 1 Workforce and get $1T. You can apply this effect up to twice when you play the card.
- Pay 1 Workforce and apply the Head Office board effect(s) that you choose following this card effect twice instead of once. You can apply the same effect on the Head Office board twice or apply each of the 2 effects once. The Head Office effects that you can apply are limited to those available for the type of card you use (Executive, Manager, or Ordinary Employee).
- Pay $1T and get 2 Beans. You can apply this effect once when you play the card.
- Pay $1T and get 1 Water. You can apply this effect once when you play the card.
- If you use this card for "Improve the Rocket" on the Head Office board, the cost is discounted by $1T. The cost can be discounted down to $0 and cannot be less than $0.
- If you use this card for "Capital Investment" on the Head Office board, the cost is discounted by $1T. The cost can be discounted down to $0 and cannot be less than $0.
- If you use this card for "Capital Investment" or "Improve the Rocket" on the Head Office board, the cost is discounted by $1T. The cost can be discounted down to $0 and cannot be less than $0.
- If you use this card for "Capital Investment" or "Improve the Rocket" on the Head Office board, count the number of your player tokens on the Investment cells. The cost is discounted by "the number of your placed player tokens × $1T". The cost can be discounted down to $0 and cannot be less than $0.
Additional Action Card Effects (continued)
- If you use this card for "Receive an Order" on the Head Office board, your Workforce is replenished to 3 Workforce more than the number indicated on the Order card.
- If you use this card for "Receive an Order" on the Head Office board, your Workforce is replenished to double the number indicated on the Order card.
- Count all of your player tokens placed on the Investment cells and get $1T per such token.
Effects at the end of the game
- Investment chips (end of game): This effect will not be applied when you play the card. Instead, count all of your player tokens placed on the Investment cells and get 1 VP per 2 such tokens at the end of the game.
- Action card count (end of game): This effect will not be applied when you play the card. Instead, count the number of the Action cards you have gained (including this card). You will get 1 VP for 8 or fewer cards, 3 VPs for 9 to 10 cards, 5 VPs for 11 to 12 cards, and 7 VPs for 13 or more cards.
- Type split (end of game): This effect will not be applied when you play the card. Instead, divide the Action cards you have gained to "Executive", "Manager" and "Ordinary Employee" at the end of the game. Among these 3 types of cards, you will gain 1 VP for each of the least cards you have.
Rocket Board Effects and Descriptions
The Rocket board indicates the strengths of your Rocket's 3 parts: "Launch Engine", "Propulsion Engine" and "Transport Container".
Use your player token to indicate each part's level of improvement. The leftmost cell indicates LV1, and the level goes up to LV2, LV3, and LV4 as you move the player token to the right.
Launch Engine
This engine is used to launch the Rocket. The Launch Engine is a dream engine mainly fueled by beans.
To launch the Rocket, pay the Bean and Water indicated below the cell where the player token is placed.
- LV1: Pay 4 Beans for the launch.
- LV2: Pay 3 Beans for the launch. When you improve your Launch Engine to LV2, immediately get 1 Bean and 1 VP.
- LV3: Pay 2 Beans for the launch. When you improve your Launch Engine to LV3, immediately get 3 VPs.
- LV4: Pay 1 Bean or 1 Water for the launch. When you improve your Launch Engine to LV4, immediately get 6 VPs.
Propulsion Engine
This engine is used when you are in space. The Propulsion Engine mainly works with the support from the people on board and people on earth.
To take the Move action in space, pay the material indicated below the cell where the player token is placed.
- LV1: Pay 5 Workforce for the Move action.
- LV2: Pay 4 Workforce for the Move action.
- LV3: Pay 3 Workforce for the Move action. When you improve your Propulsion Engine to LV3, immediately get 1 Water.
- LV4: Pay 2 Workforce for the Move action. When you improve your Propulsion Engine to LV4, immediately get 1 VP.
Transport Container
This container is used for taking what is produced and gained on earth into space. You can freely load and unload materials when you are on earth, but you can only use the materials in the container when you are in space.
You can use the loading space up to the cell where the player token is placed.
- LV1: Can load up to 3 cubes (Bean and/or Water).
- LV2: Can load up to 6 cubes (Bean and/or Water). When you improve your Transport Container to LV2, immediately get 1 Bean and 2 Workforce.
- LV3: Can load up to 9 cubes (Bean and/or Water). When you improve your Transport Container to LV3, immediately get 1 Water, 2 Workforce and 2 VPs.
- LV4: Can load up to 12 cubes (Bean and/or Water). When you improve your Transport Container to LV4, immediately get 1 Bean, 1 Water and 4 VPs.