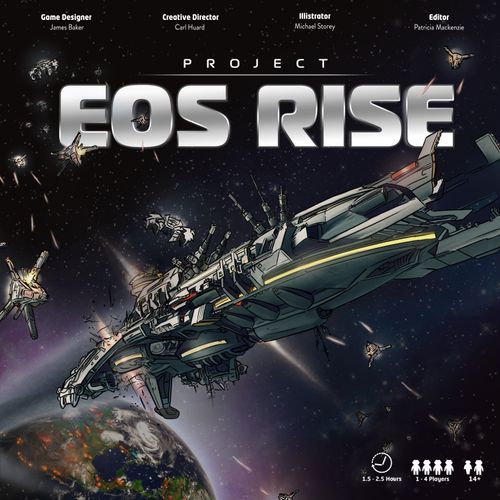
Project EOS Rise
Project EOS Rise Rulebook
Table of Contents
Table of Contents
- Components
- How to Use This Rule Book
- Mission Objective
- How to Win
- Key Game Concepts Part 1
- Roll for Location
- Game Facilitator
- Game Setup
- Key Game Concepts Part 2
- Skill Dice
- Advanced Rooms
- Mission Card
- The Starship EOS
- Alien Ship Cards
- Gameplay Overview
- Phase 1: Event
- Phase 2: Crew Actions
- Phase 3: Starship EOS Warp and EOS Attack
- EOS Attack Sequence
- Phase 4: Alien Pursuit and Engagement
- Phase 5: Clean-up
- The Last Dash
- Common Questions
- Additional Rules
- Game Phase Summary
- Last Dash Summary
- EOS Attack Sequence Summary
- Phase 4 - Alien Pursuit and Engagement Summary
Components
Wooden Components
- 8 Star Markers
- 8 Hull Markers
- 4 Stress Markers
- 4 Yellow Cubes
- 4 Blue Cubes
- 6 Green Cubes
- 6 Pink Cubes
- 4 White Cubes
- 4 Skill Level Markers (Yellow, Green, Blue, Pink)
- 4 Character pawns (Yellow, Green, Blue, Pink)
- 4 Assistants (Yellow, Green, Blue, Pink)
- 4 Alien Space Stations, matching one in each color
- 20 Dexer
- 12 Galagat
- 8 Vorde
- 1 Starship EOS
Dice
- 2 Green Skill Dice
- 2 Yellow Skill Dice
- 3 Blue Skill Dice
- 3 Pink Skill Dice
- 8 White Basic Skill Dice
- 1 D6 (6 sided die)
- 1 D20 (20 sided die)
Game Cards
- 12 Dexer
- 12 Galagat
- 7 Vorde
- 31 Damage
- 21 Contracts
- 21 Technology
- 20 Mission Cards (5 per character)
- 16 Advanced Room Cards (4 per character)
- 60 Event Cards (15 for each region)
- 4 Alien Space Station Cards
Game Tokens
- 15 Shield Tokens
- 15 Skill Tokens
- 10 FRB Tokens
- 1 EOS Start Token
- 15 1-Credit Tokens
- 15 3-Credit Tokens
- 5 Mining Stations Tokens
- 4 Cargo Delivery Tokens (Yellow, Blue, Green, Pink)
- 1 Paradise Planet Token
- 15 Asteroid Tokens
- 5 Locked Room Tokens
Game Boards
- 4 Player Boards
- 1 Game Board
Other
- 1 Red Alien Ship Bag
- 1 Rule Book
How to Use This Rule Book
This rulebook is structured to guide you step by step, ensuring a smooth and engaging experience.
Start with Key Game Concepts: Part 1 to learn about the game board and token placement, then complete the Game Setup. Next, read Key Game Concepts: Part 2 to understand cards, player boards, and their functions. Once familiar, dive into the Game Phases to master movement, exploration, and combat. Follow this sequence, and you'll be ready to lead the Starship EOS on humanity's greatest mission!
Mission Objective
The fate of humanity is in your hands. As a crew member of the Starship EOS, your mission is clear: navigate the unknown, gather Fast Radio Bursts, and survive the perilous journey to find the Paradise Planet.
In this cooperative space adventure, you'll engage in worker placement, push-your-luck mechanics, and dice-driven combat to complete critical objectives. Every decision matters—will you take the safest route or risk it all for greater rewards?
How to Win
Your mission is to explore the universe, collecting Fast Radio Bursts (FRBs) to advance the Progress Track. Each time the Starship EOS reaches a galaxy with an FRB Token, the crew collects it, moving the Progress Marker one step forward. After collecting the ninth FRB, the crew identifies the Paradise Planet, triggering The Last Dash—a final, high-stakes push to reach the planet before time runs out.
The Intel Track: An Alternate Path
The Intel Track advances when the crew completes Contracts or defeats Alien Ships. If the Intel Marker reaches an FRB icon, the Progress Marker advances just like collecting an actual FRB. The Intel Track then resets, allowing multiple cycles per game, providing an alternative way to reach the Paradise Planet.
Key Game Concepts Part 1
The game board is divided into two main sections:
- Starship EOS: Positioned on the left side, representing the crew's base of operations.
- Universe: Located on the right side, where all major events and encounters occur.
The Universe is divided into regions, sectors, galaxies, and interconnected by Warp Lanes:
Regions
There are four distinct regions in the Universe: Hawkins (yellow), Chandra (pink), Borealis (green) and, Perseus (blue).
Each region is associated with a unique deck of Event Cards that influence gameplay during a game round.
Sectors
The Universe board is composed of large hexagons, each representing a sector. These sectors are numbered 1–19, starting from the center and spiraling outward.
Galaxies
Within each sector, small hexagons representing individual galaxies serve as the main locations for encounters and crew actions. Galaxies may span across 1–3 sectors, with each galaxy identified by a unique number that aids in token placement.
Warp Lanes
Gray lines represent Warp Lanes that connect each galaxy to its closest neighbors, enabling movement throughout the Universe. The Pilot uses these lanes to navigate the Starship EOS in Phase 3.
Roll for Location
The Roll for Location system is essential for placing tokens and determining the sites of encounters. This system utilizes two dice:
- D20: Determines the sector where the token will be placed.
- D6: Identifies the specific galaxy within that sector.
Example: If you roll a D20 = 13 and D6 = 6, locate Sector 13 on the Universe Board and place the token in Galaxy 6 within that sector.
At any time after setup, when Rolling for Location to place a token, rolling a 20 will trigger a Mass Invasion (see page 21).
Card-Based Placement
Some cards display a Roll for Location icon. Roll for Location to place the indicated token as shown on the card.
Note: During setup, if a 20 is rolled, simply reroll it.
Game Facilitator
Since Project EOS Rise is a cooperative game, one player should be assigned as the Game Facilitator to keep the game moving smoothly. This role best fits the player controlling the Commander or with the most experience playing the game.
The Game Facilitator's tasks include:
- Keeping the game progressing
- Tracking game phases using the reference
- Reading and executing event cards
- Ensuring players make independent decisions without excessive influence from others
Game Setup
- Place the board in the center of the table.
- Separate the cards into decks. Shuffle each deck and place it face down near the board.
- Sort the tokens and place each set near the board.
- Place all Skill Dice in a dice pool near the board.
- Place a star marker on the first hex of each of these on the game board: Funding track, Intel Track, Progress Track, Extinction Track.
- Place the Paradise Planet Token on the planet at the end of the Progress Track.
- Place a Hull Marker on the stars in the Command and Engine rooms.
- Match the Locked Room Tokens to each of the 5 rooms on the EOS. These rooms are inaccessible now but may be unlocked (built) during the game.
- Place all the Alien Ships into the provided bag. Alien Ships in the bag are always drawn randomly.
- Place the 4 space station cards next to the board within reach of all players.
- Add Shield Tokens to each charge level in the Shield Control room according to the number on the SHIELD icon of each charge level.
- Setup the Redeploy Track
- a. Draw 4 Alien Ships randomly from the Alien Ship Bag. Place each on hexagons 01, 02, 03, and 04 of the Redeploy Track.
- b. Place the following tokens next to the designated hexagons:
- Hex 01: FRB Token
- Hex 02: Skill token
- Hex 03: 1 Credit token
- Setup The Character Boards
The game must be played with all four characters. If you are playing with fewer than 4 people, assign multiple characters as needed.
- a. Place the wooden Skill Marker matching each character color on the first hex of the basic Skill Track.
- b. Give each Character 1 Basic Skill Die.
- c. The crew begins the game with 8 credits. All credits in the game are community property.
- d. Place a Stress Marker on the Stress Track icon with 3 lightning bolts. This is the starting point for each character's stress tolerance.
- e. Place a cube on each colored Skill Cube square.
- f. Place the Cargo Delivery Token on the matching lower-left icon above the contract card slot.
- g. Sort the Mission Cards according to character color and deal one to each character from their matching deck.
- h. On the Engineer Board, place the 4 white Cubes, one on each white Calibration Cube square and place the remaining 6 Hull Markers next to the Engineer.
- i. Near the Commander, place the four colored Assistants.
Note: The Advanced Room decks should be off to the side for now. They will be used midway through the game.
- Setup The Universe
Complete the Universe setup by Rolling for Location for each token type and placing it in the resulting galaxy. Multiple tokens (including Alien Ships) can occupy the same galaxy.
- Asteroid Fields: Place five, one at a time.
- Alien Ships: Draw two ships from the bag and place them one by one.
- Skill Tokens: Place three, one at a time.
- FRBs: Place one at a time. The number depends on difficulty: Very Easy 5 FRBs, Easy 4 FRBs, Normal: 3 FRB's
- Place the Starship EOS
Roll for Location and place the Starship EOS. If the location you roll has any other token, re-Roll for Location until the result is an empty galaxy.
- Setup the Alien Space Stations
For each region, roll a D6 to place a space station in the following sectors: Hawkins Sector 9, Chandra Sector 12, Borealis Sector 15, and Perseus Sector 18.
Key Game Concepts Part 2
The Character Boards
Four individuals head up Humanity's toughest challenge: the Commander, the Pilot, the Combat Specialist, and the Engineer. Each character has a unique set of skills that will allow them to contribute to the mission in a variety of ways.
Basic and Advanced Skill Tracks / Skill Marker
Each has a Basic [A] and Advanced Skill Track [B]. Use the colored Skill Marker [C] to track progress as you gain Skill Levels through training or claiming rewards by moving the marker to the right. When you reach the Advanced Track, you will need to select one of the three skill paths to advance your marker. A character also can only ever have 1 Contract and two Technology Item's equipted to their boards [F].
Unique Character Icons
Each Character Board includes icons that unlock special abilities as the character advances:
- Commander – Assistant Icon: Unlocks Assistants for each crew member, allowing them to take two crew actions.
- Commander – Stress Start Icon: Unlocks higher stress tolerance for all characters.
- Pilot – Warp Icon: Increases EOS movement by one Warp Lane per icon.
- Combat Specialist – Damage Icon: During EOS Attack, draw one additional Damage Card per icon.
- Engineer – Tool Icon: Unlocks the ability to build one additional room per icon.
Note: Rooms are not destroyed if the Engineer loses a Skill Level that reduces the number of rooms that may be built. However, no new rooms may be constructed until the Engineer has again gained enough Skill Levels.
Stress Track and Stress Management
During the game, each character will take actions and face obstacles like attacking enemy ships, which can cause them stress. This negative effect is tracked on their Stress Track [D] using the Stress Marker [E]. Anytime a character rolls a Lightning Icon(s), their stress will increase by the number of lightning bolts rolled unless a special action is used to block this effect (To learn more about Skill Dice see page 7).
Stress Tolerance
The highest level of stress the crew can endure is marked by the 3 different Stress tolerance Icons. At the beginning of the game, all characters start at the Stress Tolerance Icon with 3 lightning bolts. Their stress cannot be reduced past this point until the Commander unlocks a new Stress Start Tolerance Icon on their Skill Track.
- When the Commander advances their Skill Level and unlocks a new Stress Tolerance Icon, it increases the stress tolerance for the entire crew. All characters instantly benefit and move their Stress Marker to the new Stress tolerance icon.
- If the Commander goes down a Skill Level and loses a Stress tolerance Icon, all crew members suffer and instantly move their Stress Markers to the new Stress tolerance Icon unless their stress is already within the new limit.
Stressed Out
If a character's Stress Marker reaches the -3 Skill position, they become Stressed Out. When this occurs:
- Reset the character's Stress Marker to the current Stress Tolerance Icon unlocked by the Commander.
- Reduce the character's Skill Level by 3 levels on their Skill Track.
- If the character's Skill Level is on or reduced to the Basic Skill Track, draw a Damage Card, and apply the damage to the EOS.
Skill Cubes
Each character has special cubes that can be used to trigger actions.
- Commander: Stress Relief Cubes (Pink)
- Pilot: Afterburner Cubes (Yellow)
- Engineer: Quick Fix Cubes (Green)
- Combat Specialist: Missile Barrage Cubes (Blue)
Any number of cubes can be used in a single action. Once a cube is used, it is removed from the Character Board. Cubes can only be replenished during the Crew Actions phase. Refer to each character's board for when and how they can be used and the credit cost to replace them.
Calibration Cubes (Engineer)
The Engineer begins the game with 4 powerful Calibration Cubes (White). These cubes are unique and cannot be replenished with credits. During a game, only 1 Calibration Cube can be restored, and only if the Engineer unlocks an advanced skill.
At any time, the Engineer may spend 1 Calibration Cube to change the result of any rolled die to a result of their choice. Use them wisely—these cubes can turn the tide of combat or secure a critical success.
2.0 Rules Revision Note
If you're playing with the original version of Project EOS Rise, note that some of the Character Boards still contain text referencing phases from the original rules. The way the cubes are used remains the same; however, the following phase numbers have changed:
Combat Specialist – Missile Barrage Cubes: Printed as Phase 4 (EOS Attack). These cubes can still be used during EOS Attack; however, this action is now combined with Phase 3 – Starship EOS Warp.
Skill Dice
The game includes two types of Skill Dice: Basic Skill Dice (white) and Advanced Skill Dice (character colors), each playing a crucial role in combat and various game actions. Each character begins the game with one Basic Skill Die. Characters can unlock dice by advancing their Skill Tracks (see page 12 Training).
Basic Skill Dice
The 8 Basic Skill Dice are identical and feature the following faces:
- 1 Gear
- 1 Warp
- 1 Pill
- 1 Damage (Wild)
- Single Stress (Lightning)
- Double Stress (Lightning)
These icons are essential for gameplay, as crew members must roll and match specific icons to deal damage to Alien Ships during combat.
Advanced Skill Dice
Each character has a unique Advanced Skill Die, which is unlocked as they progress along their Advanced Skill Track. These dice differ from Basic Skill Dice in two key ways:
- They feature an extra icon unique to their role and personality.
- No stress icons. Instead, the extra face is blank, which produces no result.
Unique Icons by Role
- Pilot: Additional Warp
- Engineer: Additional Gear
- Commander: Additional Pill
- Combat Specialist: Additional Wild
Dice Count
This refers to the total number of dice a character has unlocked, based on their Skill Track progress. Count the DICE icons from the first hex of the Basic Skill Track to the current position of the Skill Marker.
Example: If the Combat Specialist's Skill Marker is on the second hex of the middle Advanced Skill Track, they have passed three DICE icons, giving them 2 Basic (white) and 1 Advanced (blue) Skill Dice.
Note: When rolling, always use the character's total Dice Count.
Advanced Rooms
When a character's Skill Marker reaches the first hex of an Advanced Skill Track, they immediately gain access to an Advanced Room. Review and select one of the 4 Advanced Room Cards from the character's deck. Place this card next to the top of the Character Board. This room will now be available for the Character or their Assistant to use during the Crew Actions Phase. The character's other unselected rooms can be returned to the box.
- Using Advanced Rooms: Advanced Rooms can be used during Phase Two: Crew Actions. To use an Advanced Room, place your Character or Assistant on your unlocked Advanced Room and gain the special action or ability described on the room card. Characters can only use their own Advanced Room.
- Losing Access to Advanced Rooms: If a character's Skill Level drops back down to the Basic Skill Track, they lose access to their Advanced Room. Return the Advanced Room Card to the character's deck. If the Character's Skill Marker moves back up to the Advanced Track, they may select any of their 4 Advanced Rooms, including the previously used rooms or a new one.
Mission Card
During setup, each crew member is dealt a personal Mission Card from their corresponding deck.
The missions are tough, and it will require planning and time to achieve them. However, if you succeed, your mission can have a big impact on the crew's ultimate goal.
- Most missions will require you to achieve multiples of an objective before you may claim the reward. Each time you complete the objective, place a star marker on the card to track your progress.
- If a Mission Card states "You must," only your character can complete the objective on the card.
- Claiming the Rewards: As soon as a Mission Card objective is met, you may claim the rewards printed on the card.
The Starship EOS
The EOS has eight rooms, each providing specific actions for the crew. At the start of the game, five rooms are locked. The Engine Room, Command Room, and Shield Control Room are available from the beginning.
Labels on the Starship EOS diagram:
- A. Room Name – The name of the room where actions take place.
- B. Action Space – The designated area where a Character or Assistant is placed to activate the room's effect.
- C. Hull Track – A track that monitors the Starship EOS's hull integrity.
- D. Hull Marker – A marker used to track the current status of the ship's hull on the Hull Track.
- E. Locked Room Token – A token indicating that a room is currently unavailable for use until unlocked.
- F. Shield Charge Levels – Action spaces that require one or more Characters or Assistants to activate the action.
- G. Shield Tokens – Tokens representing shield energy, used to absorb damage and protect the Starship EOS.
- H. Scanner Reward Track – A track that shows the potential rewards gained from scanning actions.
Room Damage Rules
During Alien Retaliation, the crew totals the damage inflicted by all Alien Ships involved in the attack. The Engineer is responsible for calculating the total damage and assigning it to a single room.
The full damage must be applied to one room at a time.
If the chosen room's remaining Hull Points are not enough to absorb all the damage, it is reduced to zero and goes offline.
Any excess damage must then be applied to another room, following the same process.
Example: If a room with 2 Hull Points takes 4 damage, it is reduced to zero and is offline. The remaining 2 damage is applied to another room, and so on until all damage is applied.
Consequences for Rooms Going Offline
When a room takes damage that reduces its hull marker to zero, the following consequences apply:
- Built Rooms: Any built rooms that go offline must be repaired before crew actions can be performed in them again.
- Engine Room: If the engine room goes offline, the crew cannot warp the EOS until at least one hull point is repaired.
- Command Room: If the command room goes offline, it cannot be repaired, and the game is over.
Alien Ship Cards
Alien Ships come in three classes: Dexer (weakest), Galagat, and Vorde (strongest). Each ship card provides important details:
- A. Ship Name (class): Indicates ship strength and characteristics.
- B. Movement Distance: Maximum Warp Lanes the ship can move during its movement phase.
- C. Destination Logic: The ship's target (either an FRB or the EOS).
- D. Damage: Amount of damage the ship deals when it successfully attacks or retaliates against the EOS.
- E. Hit Dice: D6 dice results needed for the ship to hit the EOS.
- F. Hull Strength: Damage required to destroy the ship.
- G. Rewards: Earned by the crew for successfully defeating the ship.
Alien Ship Threats
During the game, Alien Ships will constantly attempt to engage the Starship EOS. The risk of being overrun is real and can easily lead to mission failure. To help your team plan ahead and avoid dangerous situations, the following information outlines the most likely behavior and durability of different Alien Ships.
| Ship | Movement | Damage | Destroyed by |
|---|---|---|---|
| Dexer | 4 | 2 | 3 |
| Galagat | 4 | 4 | 8 |
| Vorde | 3 | 6 | 14 |
Gameplay Overview
Project EOS Rise consists of five phases per game round. A game round represents one year. Complete each phase, then reset for the next round:
- Event: Starting from the second round, draw an Event card to introduce new conditions for the round.
- Crew Actions: Players place characters in Starship EOS rooms to take available actions. Skill Cubes are replenished, and Deep Space Scanner rewards are collected at the start of this phase.
- Starship EOS Warp and EOS Attack: The Pilot moves the EOS, based on unlocked WARP Icons, navigating through galaxies and encountering tokens and enemy ships along the way.
- Alien Pursuit and Engagement: Alien Ships pursue the EOS or FRB Tokens and attack if they reach the EOS.
- Extinction, Redeploy, Refill, Funding, and Refresh: Advance the Extinction Track, deploy new Alien Ships, collect funding, reset character positions, and prepare the game board for the next round.
Continue playing rounds until either the Last Dash is triggered or Earth reaches extinction, concluding the game.
Project EOS Rise is a sandbox adventure. How you choose to complete the mission is entirely up to the team. Remember, it's up to your Game Facilitator to decide when it's time to move on – and it's up to all of you to honor their decision and press forward with the game.
If you find that even the pre-designed difficulty levels feel overwhelming, you can adjust the challenge by only redeploying the first three Alien Ships on the Redeploy Track each game round.
Phase 1: Event
Note: Skip this phase in Round 1.
In this phase, the crew draws an event card to introduce new challenges for the round. Draw one new Event Card from the event deck matching the region the EOS is currently in.
Read and Apply Event Card Effects: The Game Facilitator reads the new Event card aloud and explains its impact on the game. The card may introduce various effects:
- Game Changer: These permanently add, move or remove an element in the game.
- Try Your Luck - Optional: A few Event Cards allow you to take your chances.
- Round Rule: Most events will change the rules of the game during the current game round only.
Phase 2: Crew Actions
Before players take Crew Actions, they must decide if they wish to do any of the following:
- Replace Skill Cubes: At the start of this phase, each player may replenish their Skill Cubes based on their character's replenish cost. Players can pay the cost and replace as many cubes as they can afford.
- Collect Scanner Rewards: The crew collects a single reward from the Deep Space Scanner according to its current reward level. This reward is received before any Crew Actions are taken.
- Scrap Technology Cards: If desired, players can scrap any unwanted Technology Cards to gain the value printed on the bottom right of the card. Discard the Technology Card to the discard pile, and add the scrap value to the crew's credit pool.
Available Crew Actions
During this phase, each player performs 1 or 2 actions depending on whether their Assistant is available. They do this by placing an Action Token (Character or Assistant) on an empty Action Space in a room on the Starship EOS. Only one character or assistant can occupy a space, and the action is resolved immediately upon placement.
Players can take actions simultaneously, but when learning the game or when discussion and collaboration are needed, it may be helpful to take turns one at a time.
Note: Assistants may be used as soon as they are unlocked on the Commander's Skill Track. However, they may not be placed in the Training Center, or for Basic or Advanced Treatment at any time during the game.
Training
Action: Move the character's Skill Marker one hex forward (to the right) on their Skill Track. This unlocks any bonuses or abilities associated with the new hex and those before it.
Note: Once a character completes the Basic Skill Track, they may choose one of the three Advanced Skill Tracks to continue their progression.
Upon reaching the first hex of an Advanced Skill Track, the character immediately unlocks an Advanced Room, giving them access to a powerful action or ability.
Build a Room
Action: Unlock a room on the Starship EOS, increasing its hull strength and providing new actions for the crew.
Requirements: The Engineer must have unlocked enough Tool Icons on their Skill Track to build additional rooms. Each TOOL Icon allows the crew to construct one new room.
Example: In the illustration, the Engineer has passed two Tool Icons. Therefore, the team is allowed to construct two additional rooms on the Starship EOS.
Details: To build a room, pay the credits indicated on the room's locked Token. Place a hull marker on the room's hull track according to its maximum hull strength, indicating that it is now available to be used during the Crew Actions phase. The new room action can be used immediately following the build a room action.
Repair the EOS
Action: Restore up to 3 Hull Points to a single room on the EOS.
Details: Hull Points from this action must initially be allocated to a single room. If the room being repaired reaches its maximum hull strength and there are still Hull Points remaining from this action, the excess points may then be allocated to another room.
Basic Treatment
Action: Reduce a character's stress level by 3 hexes (to the left) on their Stress Track.
Details: Stress can only be reduced down to the STRESS TOLERANCE level currently unlocked by the Commander on their Skill Track.
Example: The Engineer is two stress away from becoming stressed out. They decide to take a Basic Treatment action. The Engineer's Stress Marker is moved two hexes to the left but cannot move past this position. This is because the Commander has currently unlocked the Stress Tolerance Icon with two lightning bolts only, setting a limit on stress recovery.
Advanced Treatment
Action: Reduce a character's stress level by 5 hexes on their Stress Track.
Details: Similar to Basic Treatment, this action allows characters to reduce stress but is more effective, making it ideal for those with high stress levels.
Gain Technology
Action: Draw one Technology Item Card and equip it to the character's board.
Details: Technology items primarily provide benefits to the mission, most commonly in the form of dice mitigation, which can help improve roll outcomes during critical actions.
Most technology items feature an instant reward in the bottom left corner. When a card with an instant reward is drawn, the character immediately receives this benefit, such as credits, skill boosts, or other valuable resources.
Each Technology Card also has a scrap value printed in the bottom right corner. During the crew action phase, players may choose to scrap technology items to gain this value in credits, adding an additional layer of resource management.
Each character can hold up to two technology items at a time. If a character already has two items and draws a third, they must either discard one item, or Pass an item to another character with available inventory space.
Take a Contract
Action: Draw three Contract Cards, select one to activate, and place the character's Cargo Delivery Token on the universe by Rolling for Location. Gain the instant ("ON PICK UP") reward shown on the chosen contract card.
Details: Contracts require the crew to transport cargo to specific galaxies within the Universe. Once the EOS reaches the galaxy with the Cargo Delivery Token, they receive the On Delivery Reward.
Completing a contract commonly grants Intel that advances the Intel Track, moving the crew closer to their objectives.
Build a Mining Station
Action: Deploy a Mining Station Token in an Asteroid field within 2 Warp Lanes of the EOS.
Details: Each Mining Station generates 1 additional credit during Funding, contributing to the crew's resources.
Universe benefit: When the Starship EOS visits a galaxy containing a deployed Mining Station, the crew may collect 1 credit and the EOS does not take damage from the Asteroid field.
The EOS is limited to deploying a maximum of five Mining Stations throughout the game. Only one Mining Station can occupy each Asteroid field.
Deep Space Scan
Action: Move the scanner's marker one level up on the reward track.
Details: If this is the first time taking the Deep Space Scan action, place the marker at the bottom of the reward track on the +2 credits space. Subsequent uses of this action will move the marker one level up.
Rewards vary depending on the marker's position on the track and are collected at the start of the next Crew Action Phase.
Charge the Shields
Action: Collect Shield Tokens based on the Charge Level activated.
Details: Shields provide critical protection during combat by absorbing damage to the EOS.
The Shield Control Room offers three levels of charge, each requiring a specific number of characters or Assistants to activate:
- Charge 1: One character/assistant provides two Shield Tokens.
- Charge 2: Two characters/Assistants provide three Shield Tokens.
- Charge 3: Three characters/Assistants provide four Shield Tokens.
Note: A number of collected Shield Tokens will be discarded at the end of the round based on the value above the Extinction Track (see page 22).
Visit a Space Station (Space Station Card)
Action: Perform actions at an Alien Space Station if the EOS is in the same galaxy.
Details: Each region in the Universe has a unique space station, with three available actions specific to that station. These actions provide various benefits, such as trading resources, gaining temporary abilities, or accessing station-specific features.
The three station actions for each region are printed on that region's Alien Space Station Card:
Borealis Region
- Charge the Compactor Welder: Repair any 1 room to its full hull strength.
- Magnetize the Wave Cooler: Repair the EOS at any time by spending 1 Quick Fix Cube for 1 point of hull damage.
- Clean the Iron Flow Booster: Repair 4 points of hull damage anywhere on the EOS. Replenish 1 Afterburner cube.
Chandra Region
- Disinfect the Caesium Circuits: Reduce the stress of 2 characters by 4 points each.
- Study the Battle Protocols: Initiating a "Focused Target" does not increase stress.
- Completely re-synchronize: Draw a contract card. After rolling for location, you may move the cargo delivery token up to 3 warp lanes from that point.
Hawkins Region
- Energize the Radial Ray Flinger: Remove the Alien ships from Redeploy hexes 03 and 04.
- Scan for Thero-magnetic clusters: Roll for location and place an asteroid and 3 credits there.
- Destroy the Neon Impulser: Move any 3 Alien ships on the Universe board 2 warp lanes each.
Perseus Region
- Re-route power to the Pulse: Draw 1 additional damage card during any EOS attack.
- Increase the Shift Stabilizer: Any 1 or 6 rolled in step 7 (Aliens retaliate) of an EOS attack is a miss. (Printed as "step 7" on the card; in the EOS Attack Sequence above, Alien retaliation is step 9. Transcribed as printed.)
- Completely re-synchronize: Any 1 STRESS DAMAGE rolled can be ignored and re-rolled.
General Space Station Rules
- Space stations are never removed from the game board.
- Aliens can occupy the same galaxy as a space station and can attack the EOS when it is docked at a space station.
Advanced Room
Action: If a character has reached the first hex of an advanced Skill Track and selected an advanced room card, this action will now be available to that Character and their Assistant.
Phase 3: Starship EOS Warp and EOS Attack
Determine Warp Distance: Each WARP Icon on the Pilot's Skill Track allows the EOS to move one Warp Lane (the gray lines connecting galaxies). The Pilot may use all available WARP Icons or stop at any point along the way.
Example: if the Pilot has unlocked three WARP Icons, the EOS can move up to three galaxies in a single Warp phase.
Use the EOS Start Token: If the Pilot anticipates a long movement phase with multiple encounters and actions, they can place the EOS Start Token in the galaxy where the EOS begins its round. As the phase progresses, players can refer back to the EOS Start Token to keep track of how many spaces they have already moved during the phase.
Resolve Galaxy Encounters: Each time the EOS enters a new galaxy, resolve any encounters based on the tokens present. Encounters include Alien Ships, FRBs, Skill Tokens, credits, cargo deliveries, Asteroid Fields, or combinations of these tokens.
-
Alien Ships: If the EOS enters a galaxy containing Alien Ships, an EOS Attack occurs immediately. Draw and reveal the top card of each Alien ship's class deck for each ship present in the galaxy and place it near the Combat Specialist. Remove the Alien ship token(s) from the board and return them to the bag. If there are additional tokens (FRB, skill, or credits) in the galaxy, move these tokens to the Alien Ship Card with the highest hull value. These tokens become additional rewards for defeating that Alien ship.
Resolve combat by following the EOS Attack Sequence (see page 17).
-
FRB (Fast Radio Burst): Advance the Progress Track by one hex and return the FRB Token to the supply. Some hexes on the Progress Track grant a Skill Level reward that can be assigned to any 1 crew member.
-
Skill Tokens: Choose one crew member to advance by one Skill Level, then return the token to the supply.
-
Credits: Add the credits directly to the crew's credit pool.
-
Cargo Delivery: The character with an active contract may deliver the cargo, claim the reward, and return the Cargo Token to their Character Board.
-
Asteroid Fields: The EOS takes damage from Asteroid Fields. Draw a Damage Card for each field encountered and apply the printed damage to the EOS as indicated. Apply damage according to the Starship EOS section of the rulebook (page 9).
-
Mining Stations: The token is NOT removed from the board. Each time the EOS visits a galaxy with a deployed Mining Station, they may receive one credit and do not take damage from the Asteroid Field.
Note: Encounters with tokens or Alien Ships do not end the EOS's movement. The decision to stop movement is entirely up to the Pilot, based on the number of WARP Icons available and strategic considerations.
EOS Warp Example
The example below illustrates the warp phase:
- A. The Pilot has unlocked 3 WARP Icons, allowing the EOS to move up to 3 Warp Lanes.
- B. They move to Sector 5, Galaxy 4, and collect a Skill Level Token. The crew decides to give this to the Engineer.
- C. Next, they move to Sector 5, Galaxy 3. Here, they draw a Galagat and Dexer Ship Card and place them by the Combat Specialist. They then move the FRB to the Galagat Card as an additional reward. Finally, they return the Alien Ships to the bag and conduct an EOS Attack Sequence.
- D. The crew defeats the ships and moves next to Sector 5, Galaxy 2. Here, they collect 1 credit and draw the top card from the Damage Deck because of the Asteroid field. The Engineer applies 4 hull damage to the EOS.
- E. Now the Pilot has used all their WARP Icons. However, the team decides that taking out the Galagat in Sector 1, Galaxy 3, is an important move as they want the potential rewards. The Pilot uses an Afterburner by removing a cube from their board. The Pilot moves the EOS to Sector 1, Galaxy 3, draws a Galagat Card, and places it by the Combat Specialist. The crew then begins another EOS Attack Sequence. After winning, the warp phase is over, and the team can proceed to the Alien Pursuit and Engagement phase.
EOS Attack Sequence
When the EOS moves to a galaxy with one or more Alien Ships, movement is paused to immediately resolve the attack. After drawing the Alien Ship Card(s), resolve the combat sequence following the steps below. Combat ends when:
- All Alien Ships have been defeated, or
- The EOS decides to flee, or
- The EOS is destroyed (ending the game)
-
Determine Combat Participants: Decide which crew members will participate in the attack. All involved crew members will roll dice in step 3. The more crew members involved, the greater the odds of triggering Damage Cards and damaging Alien Ships. The Combat Specialist must be involved.
-
Draw Damage Cards: The Combat Specialist counts the DAMAGE icons unlocked on their Skill Track, draws this number of Damage Cards and places them them face-up for all players to see.
-
Roll for Damage: Participating crew members roll their total Dice Count.
-
Modify Results: Use any Technology Items to reroll or modify dice results rolled by any character.
-
Apply Stress Icons: Any stress icons rolled increase the stress level of the character who rolled them.
-
Place Dice on Damage Cards: Players move their dice to matching icons on Damage Cards.
Note: The DAMAGE icon on the Skill Dice are considered wild and can be used to match any icon on the Damage Cards.
-
Assigning Damage to Alien Ships: When the icons on a Damage Card are completely matched, select an Alien ship to damage and move the Damage Card to that Alien ship tucking it under the Alien Ship Card. If the damage meets or exceeds the ship's hull strength, it is defeated. Claim any rewards, such as FRBs or Skill Tokens placed on the Alien Ship Card and claim the rewards printed on the lower right side of the Alien Ship Card. Discard the defeated Alien Ship Card.
Example: The EOS is in combat with a Dexter and a Galagat. The Dexer has Hit Die results for 2, 3, 4 and 5, while the Galagat has the same. The crew has two Shield Tokens available and decides to cover the 4 on the Dexer and the 5 on the Galagat. During retaliation, if a 5 is rolled, the Galagat misses; however, the Dexer still hits as its 5 is not covered.
Combat Specialist board (Basic Skill Track, EOS attack icons, as printed on the Character Board):
- Basic Level Track: After an EOS attack, gain 1 credit for each defeated Alien ship. After an EOS attack, gain 2 Missile Barrage Cubes if you defeated all the Alien ships. Missile Barrage Cubes now cost 1 credit each. In any combat, reroll 1 STRESS DAMAGE result. During an EOS attack, you may redraw 1 damage card in each combat round. During the 1st combat round of an EOS attack, take any 1 advanced dice and set the result to any icon.
- Missile Barrage Cubes: During Phase 4 (EOS attack), the Combat Specialist can use up to 4 Missile Barrage cubes. They may be placed on 1 or more Damage cards to increase the Card's damage by +1 per cube. Replace a cube for 3 credits.
Example: the Combat Specialist has unlocked 3 Damage Cards.
Phase 4: Alien Pursuit and Engagement
In this phase, Alien Ships on the board pursue their targets and, if they reach the EOS, engage in an immediate attack. Alien Ships target either the EOS or an FRB, moving along Warp Lanes to reach their destination.
Alien Pursuit Sequence
-
Movement Logic: For each class of ship present on the board, draw one Alien Ship Card from that class's deck. The movement logic in the top left corner of the card determines the maximum distance and target the Alien ship will move toward.
- EOS Pursuit: The ship moves toward the EOS.
- FRB Pursuit: The ship moves toward the closest FRB.
If two or more FRBS are equidistant, the Aliens will move towards the one in the lowest-numbered Sector. If there's still a choice, they move towards the FRB at the lowest-numbered Galaxy within that Sector.
-
Alien Ship Movement: Move each Alien Ship the number of spaces indicated on its Ship Class Card, following the shortest possible path toward its target. If an Alien Ship reaches its target, it stops moving.
If the Alien Ship cannot reach its target and multiple paths end at the same distance, the players may choose which path it takes.
Note: Alien Ships do not pick up or move with tokens. As well Asteroid Fields do not cause damage or impede their movement.
Example: The Dexer ships have a movement logic of 4 towards the Starship EOS. As illustrated, all Dexer ships would engage the EOS since they are within 4 Warp Lanes of its position.
Once all ships have moved toward their target, any Alien Ships that reach the EOS immediately engage in a attack. All ships will attack together at the same time, and the EOS will not have a chance to retaliate.
-
Draw ship card(s): for each Alien Ship that reaches the EOS draw a card and place it next to the Combat Specialist. Return the Alien ship token(s) to the bag.
The EOS does not have a chance to retaliate and does not collect any rewards printed on Alien Ship Cards. Alien ship tokens are removed back to the Alien Ship Bag.
Gameplay Tips for Phase 4
As the game progresses, the Universe will become crowded with Alien Ships. While you are hunting for the Paradise Planet, the Aliens will be hunting you. The threat of being overrun and ending your game in Phase 4 is real. Pay close attention to Alien Ships nearby and plan ahead to avoid getting swarmed.
If you can't move far enough to outrun the Alien Ships, consider attacking them. Whether or not you defeat them, this will remove them from the Universe board.
If you are attacked, Shield Tokens are your only line of defense against incoming damage. Carefully manage your shields to turn the odds in your favor.
To survive and succeed, you will need to strike a balance between:
- Thinning Alien ship numbers through EOS attacks.
- Managing EOS hull strength to absorb unavoidable damage.
- Strategically using Shield Tokens when under attack.
With careful planning and tactical decisions, you can improve your chances of survival and complete your mission.
Phase 5: Clean-up
This phase resets the game state for the next round. To keep things moving, the Game Facilitator should assign roles—one player deploys Alien Ships, another refills the Redeploy Track, and a third checks shield replenishment. Dividing tasks keeps the game flowing smoothly and players engaged.
Follow these steps to reset for the next round.
-
Advance the Extinction Track: Move the marker on the Extinction Track one hex forward (left). This track represents the escalating threat level in the Universe and the impending danger facing Earth and the EOS crew.
If the marker moves beyond Year 7 at the end of the Extinction Track (reaching the Dead Planet), Earth is lost to extinction. The crew has failed their mission and the game ends in a loss.
-
Redeploy Alien Ships: Starting with Redeploy hex 01, Roll for Location separately for hexes 01–04 and place each Alien Ship in the resulting galaxy. The first three ships deploy with a token, meaning that in each regular game round, 4 new Alien Ships, an FRB, a Skill Token, and 1 credit will enter the Universe.
If any ships are in the Mass Invasion region, they also deploy to the Universe.
-
Refill Redeploy Track: Draw four new Alien Ships from the Alien Ship Bag and place them on Hexes 01 to 04 of the Redeploy Track. Place the following tokens next to the designated hexes on the Redeploy Track for the next round:
- Hex 01: FRB Token
- Hex 02: Skill token
- Hex 03: Credit token
-
Collect Funding: First collect the credits indicated by the number on the next hex (to the left) of the Funding Track Marker and then move the marker to that next hex.
Collect 1 additional Credit for each Mining Station you've built/deployed.
-
Reset Crew Positions: Return all characters and Assistants back to their respective Character Boards.
Continue playing game rounds until your Progress Marker reaches the Paradise Planet at the end of the Progress Track, the Command Room is destroyed, or the Extinction Track reaches the dead planet. If you're successful in reaching the Paradise Planet, immediately proceed with the Last Dash.
Mass Invasion Rules
If a "20" is rolled at any point after setup, draw an Alien ship from the bag and place it in the Mass Invasion region on the Universe board. After doing this, reroll the D20 and continue Rolling for Location as usual. At the end of the redeploy phase, all Alien Ships in the Mass Invasion region will deploy to the Universe one at a time.
If an Alien ship deploys to the galaxy where the EOS is located, it triggers an Alien Attack after redeployment has finished. If the EOS takes no damage, the crew may claim any token that the Alien ship was deploying with. If the EOS takes damage, the token is deployed to the Universe board through a new Roll for Location.
The Last Dash
If the Progress Track Marker moves beyond the last space and reaches the Paradise Planet, congratulations! You can now attempt to reach the source of the signal: The Paradise Planet.
The Last Dash Structure
In the Last Dash, the round structure is reversed, and some regular phases are removed. This means that in each round of the Last Dash:
- Alien Ships move and attack before the EOS can move.
- All crew actions take place at the end of the round.
Reaching the Paradise Planet
When you collect the last FRB and reach the Paradise Planet on the Progress Track, Immediately:
- Set the Extinction Track to Year 5, giving the crew a limited amount of time to reach the Paradise Planet.
- Roll for Location and place the Paradise Planet Token on the Universe board.
If you are engaged in combat, finish it first. This could happen if an Alien ship reward provides the Intel needed to gain progress. Then, follow these steps:
Phase A – Alien Pursuit and Engagement: During the Last Dash, Alien Ships move before the EOS. Follow the same movement rules for Alien Ships as outlined in Phase 4: Alien Pursuit and Engagement, but with two key differences:
- FRB icon – Alien Ships move directly toward the Paradise Planet.
- EOS icon – Alien Ships move directly toward the EOS.
Any Alien ship at the location of the Paradise Planet will remain there and ignore any pursuit logic that would normally have them engage the EOS.
Phase B – Starship EOS Warp and Attack: Move the EOS following the same rules as in Phase 3 - Starship EOS Warp and EOS Attack. The Pilot moves the EOS along Warp Lanes, and any Alien Ships encountered along the way must be engaged with an EOS Attack.
If the EOS reaches the Paradise Planet, you must defeat any Alien Ships occupying the Paradise Planet using the standard EOS Attack rules, with one critical change: the EOS cannot flee during this attack. You must continue fighting until either the Alien Ships are defeated or the EOS is destroyed.
If the Starship EOS reaches the Paradise Planet and no Alien Ships remain, the game is won!
If the EOS does not reach the Paradise Planet, proceed to the next step.
Phase C – Funding, Replace Skill Cubes,
- Funding: The funding level is now 1 credit for the remainder of the game. Mining Stations will continue to provide passive income as usual.
- Replace Skill Cubes: Players can now pay to replace their Skill Cubes as they normally would. (Printed as "Replace Skill Cubess" in the source.)
Phase D – Crew Actions: The crew may take actions as in the Crew Actions phase of a normal game round.
Phase E – Move the Extinction Track: Move the marker on the Extinction Track one hex forward (left). If the marker reaches the dead planet after the 7th year, the crew has taken too long, and Earth's mass extinction event takes place, ending the game in failure.
After completing these steps, return to Phase A – Alien Ship Movement and Attack and repeat the sequence until the game is won or lost.
If it's a win, congratulations! Project EOS Rise is a challenging game, and you've earned the right to share the comic on the next page with your crew!
Last Dash Clarifications
In the Last Dash, Alien Ships will not redeploy, Event Cards are no longer drawn, and the Shield room will not be restocked. Plan accordingly if you are close to reaching the Last Dash, as you may need to save shields for this final phase.
Common Questions
How do we advance the Progress Track? Each Fast Radio Burst (FRB) advances the Progress Track 1 hex. Collect them as you travel the Universe. Reaching the end of the Intel Track also advances the Progress Track.
How do we gain Intel? By picking up and/or delivering some contracts or defeating Alien Ships in an EOS attack.
Why do we need credits? Credits are used to open rooms and replenish Skill Cubes. Gain credits by collecting them from the Funding track and Mining Stations, or by scrapping Technology Items.
How do we gain Skill Levels? Skill Levels can be gained by:
- Taking the Training action (Phase 2).
- Entering a galaxy containing a token (Phase 3).
- Defeating an Alien ship (Phase 4).
- Some Event Cards (Phase 1).
I have a question about a card in the game. Where can I find help? You can reach out to us on BoardGameGeek.com or write to us in the chat on our website (randomworldgames.com).
Additional Rules
Quick Start Scenarios
If you prefer a more structured start or want to jump right into the action, we've provided three Quick Start scenarios on our website. These scenarios offer pre-arranged Universe setups, letting you bypass random setup for a more curated adventure.
Feel free to design your own Quick Start scenarios! You can also download the Universe template from the Files section on our site. Once you've crafted your favorite starting map, we encourage you to share it with the EOS community, helping others experience new and exciting ways to play.
Discarding Cards
Place discarded cards face-up in a discard pile separate from the draw deck. When a draw deck is empty, shuffle its discard pile to create a new draw deck.
Intel Track
The Intel Track advances as the crew fulfills contracts or defeats Alien Ships. Each Intel reward moves the star marker one hex along the track.
When the star marker reaches the final hex, advance the Progress Track one hex and reset the Intel Track. If Intel gained exceeds the number needed to reach the end of the Intel Track, continue counting from the start hex.
Skill Levels – "Who Earned It?" Rule
This rule clarifies who receives Skill Levels gained during gameplay:
- Crew Actions: When a crew member performs an action that results in a skill reward, the character who took the action gains the Skill Level.
- Universe Rewards: Skill Tokens collected from the Universe, combat victories, or the Progress Track can be assigned to any crew member.
Pull & Place Alien Ships (Event Cards)
Certain Event Cards will instruct players to Pull and Place Alien Ships onto the Board. When instructed to "Pull and Place" an Alien Ship, randomly draw it from the bag and Roll for Location using the D20 and D6 dice.
If you need to Pull and Place more than one Alien ship, draw and roll separately for each ship.
If an Alien ship is placed in the same galaxy as the Starship EOS, the Alien ship attacks immediately.
Select a Character (Event Cards)
Some Event Cards may instruct a specific character to "Select a Character." In this case:
The specified character must select another character, not themselves.
Focused Target (Optional EOS Attack Rule)
During any EOS attack, the crew can choose to focus their attack on a specific Damage Card to deal extra damage if the card is activated.
- Choose a Target and Pay Stress: If two or more Damage Cards share the same keyword (Terminal, Core, or Array), the crew may choose one of the matching-keywords cards for a Focused Target attack. Select a character to take stress (based on the amount shown in the top right of the card) and place a star marker on that Damage Card.
- Apply Extra Damage: If the Focused Target card is activated during the round (all matching icons are placed), the card will deal additional damage based on the number of stress icons shown on the card.
Example: The crew has two Damage Cards with the keyword CORE. They decide to focus on both cards, requiring a total of 4 stress to be taken by the crew. The Pilot takes 2 stress, and the Combat Specialist takes 2 stress. Both CORE cards will deal 2 extra damage if the crew successfully triggers them during the attack.
Random Alien Ship Selection
If blindly drawing an alien ship from the bag feels too predictable, use the following rule for a more randomized selection:
Roll a D20 whenever you need to draw an alien ship and use the result to determine which ship to select:
- 1-9 = Dexer
- 10-16 = Galagat
- 17-20 = Vorde
Game Phase Summary
- Event
- Crew Actions
- Starship EOS Warp
- Alien Pursuit and Engagement
- Extinction, Redeploy, Refill, Funding, and Refresh
Last Dash Summary
- Phase A – Alien Pursuit and Engagement
- Phase B – Starship EOS Warp and Attack
- Phase C – Funding & Skill Cubes
- Phase D – Crew Actions
- Phase E – Move the Extinction Track
EOS Attack Sequence Summary
- Set Up Combat
- Draw Damage Cards
- Roll for Damage
- Apply Damage
- Use Shield Tokens
- Alien Retaliation
- Continue or Flee?
Phase 4 - Alien Pursuit and Engagement Summary
- Movement Logic
- Alien Ship Movement
- Draw Ship Cards
- Use Shields
- Alien Ship Attack Roll
- Total Up the Damage
- Apply Damage
- End of Phase