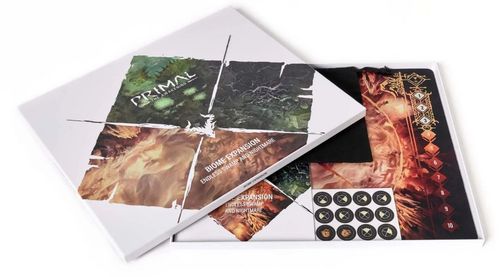
Primal: The Awakening – Endless Swamp and Nightmare
Primal: The Awakening – Endless Swamp and Nightmare Rulebook
Table of Contents
Table of Contents
Expansion Overview
This expansion introduces two new biome combat boards, provided as a double-sided playmat, each featuring unique special rules. These biomes can be used in Expedition mode, Campaign mode, or custom scenarios with any monster from the Core Game or other expansions.
Components
- 1x Double-sided Playmat
- 1x Token Bag
- 5x Transformation Token
- 4x Toxic Fume Token
- 1x Rulebook
How to Use Biomes
Each biome features unique artwork and comes with special rules that create a distinct gameplay experience, reflecting the thematic environmental conditions of the battlefield.
- Campaign Mode: Replace the standard board with the biome board that matches the monster's element. Follow the Biome Rules on page 3 but use the terrain configuration provided in the scenario's instructions in the Campaign Book.
- Expedition Mode: Follow the Biome Rules on page 3 and use the setup configurations for the new scenarios included in this expansion (see page 6).
Create Your Own Scenario
Each biome can be used with any monster in the game. To create your own custom scenario, simply choose a biome to set the scene, then select a monster, aggression level, and terrain setup of your choice.
Keep in mind that some monsters require specific terrain for their mechanics to function properly. Below are the recommended restrictions for each monster.
Thunder
- Ozew: No restrictions
- Jekoros: Use at least 1 Water
- Zekath: No restrictions
- Zekalith: No restrictions
Ice
- Sirkaaj: Use 1 Ice terrain in each sector
- Mamuraak: Use 1 Ice terrain in each sector
Coral
- Korowon: Use at least 2 Water
- Orouxen: Use 1 Plateau and at least 2 Water
Feather
- Pazis: No restrictions
- Nagarjas: No restrictions
- Xitheros: Use at least 1 Water
Fire
- Vyraxen: No restrictions
- Kharja: No restrictions
- Taraska: No restrictions
Horn
- Toramat: Use 1 Plateau and at least 1 Rock
- Dygorax: No restrictions
Metal
- Hurom: No restrictions
- Tarragua: No restrictions
Crystal
- Felaxir: No restrictions
- Morkraas: No restrictions
Venom
- Hydar: Use at least 1 Baethanis
- Reikal: Use at least 1 Swamp
The Awakened
- You can only play at aggression level 3; use Ballista tokens as normal (see note below).
Note: When using the Awakened on a biome board, place the Ballista tokens at the four corners of the board as you would on the monster's dedicated board. Even though the biome board does not show the Ballista slots, you may consider the corners as valid placement areas, following the standard Awakened rules.
Biome Rules
This section provides a detailed explanation of the rules for the biomes included in this expansion.
Nightmare
In restless sleep, hunters dream of striking the beast over and over—yet their blades leave no mark. To overcome the Nightmare, they must awaken a force buried deep within.
In this biome, each player's base weapon damage is considered equal to their weapon level (rounded down, if needed).
At the start of round 4, each player gains a Transformation token and places it near their hunter board with the human side face up. From that point on, the following rules apply:
- To restore their base weapon damage to its printed value, a player must transform. When you play three consecutive offensive cards in your sequence, flip your Transformation token to its monster side. Your base weapon damage is now restored to its printed value for the rest of the fight.
- A player who has flipped their Transformation token to the monster side can no longer perform or receive assists.
Note: The source prints the three-card requirement with three offensive-card icons, rendered here as words.
Endless Swamp
The fumes rising from the swamp are as deadly as any monster's venom.
This biome uses a bag with 16 Toxic Fume tokens. During setup, shuffle all tokens in the bag. Then, draw one token per player and place it in the sector of the board indicated on the back of the token (see the example below).
Toxic Fume Tokens: The front side of the token displays a toxic fume icon, while the back shows a diagram of the monster's sides. When you draw a token, place it on the board in the sector that corresponds to the monster's side highlighted on the diagram. Note: The front side in the diagram is always at the bottom.
Throughout the game, at the start of each round, draw one token from the bag and place it in the indicated sector. Tokens remain on the board until a player is instructed to pick them up. The following rules apply:
- At the end of your turn, if you are in a sector containing one or more Toxic Fume tokens, pick one of them up and place it on your hunter board.
- A player who accumulates 3 Toxic Fume tokens (i.e., upon receiving the third one) is eliminated from the game.
Example: Toxic Fume token. Alice draws a toxic fume from the bag, checks the back of the token, and places it on the correct sector (i.e., the one corresponding to the monster's current right flank, as shown on the diagram).
Biome Setup (Expedition Mode)
Expedition mode uses the setup configurations below for the new scenarios included in this expansion. Each entry lists the monster, the scenario's special rules, and the terrain for Expedition 1 and Expedition 2.
Vyraxen
Expedition 1: 2x Rock Expedition 2: 1x Rock, 2x Sand
Special Rules
- Dust tokens: This scenario uses dust tokens. Keep these tokens near the board and use them when instructed by card abilities during the game. Dust tokens are explained in detail on page 95 of the Core Game Rulebook.
- Hardening track: Set the hardening level to 0 by placing the corresponding marker in the space on the Hardening track. The Hardening track is explained in detail on page 95 of the Core Game Rulebook.
Dygorax
Expedition 1: 2x Rock, 2x Wildmaw Expedition 2: 4x Sand
Special Rules
- Dust tokens: This scenario uses dust tokens. Keep these tokens near the board and use them when instructed by card abilities during the game. Dust tokens are explained in detail on page 95 of the Core Game Rulebook.
- Hardening track: Set the hardening level to 0 by placing the corresponding marker in the space on the Hardening track. The Hardening track is explained in detail on page 95 of the Core Game Rulebook.
Hydar
Expedition 1: 2x Baethanis, 2x Swamp Expedition 2: 2x Swamp, 2x Brush, 2x Baethanis
Special Rules
- Venom cards: Each player has a reserve of 3 Hydar's Venom cards associated with their hunter (see the matching class icon on the card back). Keep these cards close at hand and use them when instructed by card abilities during the game. Venom cards are explained in detail on page 3 of the Venom Expansion Rules.
- Thornvine tokens: This scenario uses thornvine tokens. Keep these tokens near the board and use them when instructed by card abilities during the game. Thornvine tokens are explained in detail on page 3 of the Venom Expansion Rules.
Reikal
Expedition 1: 2x Fog, 2x Swamp Expedition 2: 4x Swamp
Special Rules
- Venom cards: Each player has a reserve of 4 Reikal's Venom cards associated with their hunter (see the matching class icon on the card back). Keep these cards close at hand and use them when instructed by card abilities during the game. Venom cards are explained in detail on page 3 of the Venom Expansion Rules.
- Venomous Serpent cards: Take Reikal's Venomous Serpent cards and place them near the monster board. These cards are considered to be out of play until a card ability instructs you to interact with them. Venomous Serpent cards are explained in detail on page 3 of the Venom Expansion Rules.