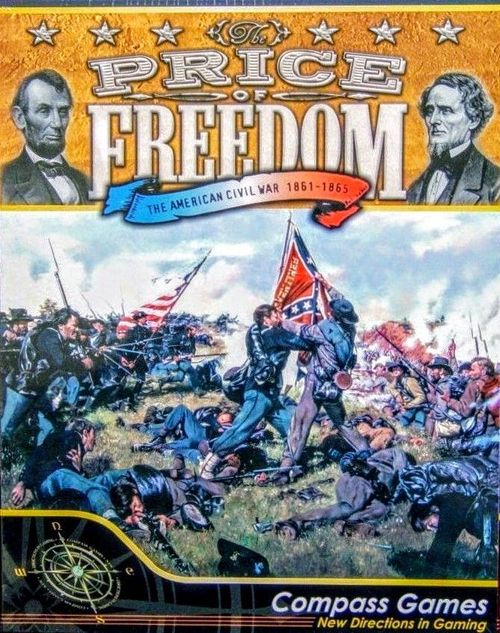
The Price of Freedom: The American Civil War 1861-1865
The Price of Freedom: The American Civil War 1861-1865 Rulebook
Table of Contents
Table of Contents
- 2.0 Components
- 2.1 The Game Board
- 2.2 The Game Pieces
- 2.2.1 Commanders
- 2.2.2 Theater HQs
- 2.2.3 Corps
- 2.2.4 Union Garrison and Blockade Markers
- 2.2.5 DRAFT, CONFEDERATE INFLATION and Emancipation Markers
- 2.2.6 KENTUCKY Markers
- 2.2.7 Battle DRM Markers
- 2.2.8 War Effort Markers
- 2.2.9 Deployment Markers
- 2.2.10 Grant, Sherman & Thomas Promotion Record Track Markers
- 2.2.11 Turn and Campaign Round Markers
- 2.3 The Cards
- 2.4 The Player Aid Cards
- 2.5 The Dice
- 2.6 Abbreviations
- 2.7 Some Essential Definitions
- 3.0 Game Objectives & Victory Conditions
- 4.0 War Effort
- 5.0 Kentucky
- 6.0 Emancipation Proclamation
- 7.0 Military Organization
- 8.0 Set-Up
- 9.0 General Course of Play
- 10.0 Card Phase
- 11.0 Reinforcement Phase
- 12.0 Campaign Phase - General Principles
- 13.0 Campaign Phase - Drawing New Cards
- 14.0 Campaign Phase - Deploying Additional Reinforcements
- 15.0 Campaign Phase - Reorganizing Spent Corps
- 16.0 Campaign Phase - Moving Armies and Transferring Corps
- 17.0 Campaign Phase - Fighting Battles
- 18.0 Campaign Phase - Garrisoning
- 19.0 End Phase - Removing Campaign Attrition Losses
- 20.0 End Phase - Victory
- 21.0 Additional Design Notes
- 22.0 Strategic Considerations
2.0 Components
Each copy of The Price of Freedom includes:
- 1 game board
- 132 game pieces
- 55 cards
- 1 24-page rulebook
- 2 player aid cards (identical)
- 2 dice
- 1 box and lid set
2.1 The Game Board
The game board displays a "point-to-point" representation of the Eastern and Western theaters of operations, from the Atlantic in the East to the Mississippi River in the West, and from Illinois, Indiana, Ohio and Pennsylvania in the North to the Gulf Coast in the South. Secondary theaters, such as the Trans-Mississippi theater, are handled through the card system.
Each round or square space on the land portion of the map is called a "region" and represents a much larger area than the city or place for which it is named (for instance, while Forts Henry & Donelson were in Tennessee, their name is used to designate an area including Western Kentucky). Union "home" regions are blue, Confederate home regions are butternut, and neutral Kentucky's regions are green. The "capital" region of the Union is Washington and the capital region of the Confederacy is Richmond.
A square space indicates a "resource" region. Both capital regions are resource regions.
All regions are connected via a network of brown links, representing roads and/or railroads, or blue links, representing the major rivers used for transportation. Two regions directly connected by a link are said to be "adjacent." Regions connected by rivers (i.e., blue links) are called "riverine" regions, and those located on a coast and marked with an anchor icon are called "coastal" regions.
The boxes next to all Confederate coastal regions are called "blockade boxes". Note that there is only 1 blockade box for both Yorktown and Norfolk.
The gray-dotted line across the map separates the Western Theater of operations from the Eastern Theater, a distinction that is relevant to initial commander deployment and army organization in general (see 7.0).
Design Note: The Eastern Theater concerns primarily the area fought over by the Army of the Potomac and the Army of Northern Virginia. Players will note that the density of spaces (i.e., regions) is higher in the Eastern Theater than it is in the Western Theater, yet it takes the same movement allowance to move from one region to another in the East as it does in the West; that is because Eastern armies relied more on road movement and less on train or river transportation, and because their progress was often hindered by rivers that ran parallel to the front line and therefore across the roads that led from one capital to the other.
The game board also displays the Turn Record Track; the Campaign Round Record Track; the War Effort Level Track (also used for Deployment Level); the Kentucky Box; the Emancipation Box; the Draft Box; the Confederate Inflation Box; the Battle DRM Record Track; the Grant, Sherman & Thomas Promotion Record Track; and various other play aids.
2.2 The Game Pieces
2.2.1 Commanders
There are 10 Confederate commander game pieces and 15 Union commander game pieces, representing most major historical army commanders.
Each commander is rated -1, 0 or +1 along three dimensions:
- The attack die roll modifier (ADRM - left-most number) modifies the commander's battle die roll when attacking.
- The defense die roll modifier (DDRM - middle number) modifies the commander's battle die roll when defending.
- The movement allowance modifier (MAM - right-most number) modifies the movement allowance of the commander's army.
Design Note: All commanders are rated for army command, so their historical performance as corps commanders is usually irrelevant except where some extrapolation is needed because the evidence of their performance as army commanders is scant - someone like A. Johnston is given the benefit of the doubt because of his early war reputation. Rating commanders is a very subjective endeavor, and so the chosen ratings are based on my interpretation of the facts as conveyed by various sources, within the self-imposed constraints of the system.
Five commanders (McClellan, Halleck, J. Johnston, A. Johnston and R.E. Lee) are marked with a star. A commander with a star cannot be used as a field commander in a theater where another friendly commander is the theater commander, and his presence in a theater prevents the deployment or promotion of another friendly commander as the theater commander (see 7.3.5).
Three commanders (Grant, Sherman and Thomas) are marked with a diamond. This is a reminder that they must have met special requirements in order to be deployed as theater commanders (see 7.3.5).
In addition, each commander game piece also specifies in which theater the commander must be initially deployed as well as the earliest turn in which he can be deployed.
Design Note: This ensures that commanders appear where and when (more or less) they historically rose to a sizable army command - at least the equivalent of 1 corps in The Price of Freedom. As a variant, players could randomly draw commanders whenever they are deployed, paying no attention to these initial deployment requirements.
Finally, each commander game piece has a "fresh" side and a "spent" side. Commanders never become spent per se, but the spent side is used to indicate that half or more of their corps are spent. If the situation changes such that fewer than half of their corps are spent, the commander game piece is flipped back to its fresh side.
2.2.2 Theater HQs
These markers are used to identify the theater commanders on each side. Each side has an Eastern Theater HQ marker (Army of the Potomac for the Union; Army of Northern Virginia for the Confederacy) and a Western Theater HQ (Department of the West for the Union; Army of Tennessee for the Confederacy).
2.2.3 Corps
The building blocks of armies in The Price of Freedom are called corps. Each corps game piece represents approximately 20-25,000 front line soldiers.
Design Note: Corps is a convenient term to call the units used in The Price of Freedom. Of the two sides, the Union is the side that first used a corps structure, but Union corps were generally smaller in size (10-15,000 soldiers). In order to maintain a low density of counters on the map, I decided that each corps should be the equivalent of a Confederate corps, which also fits nicely with the size of the armies on both sides at the beginning of the war.
There are 36 Union corps game pieces and 24 Confederate corps game pieces, and they represent an absolute limit.
Each corps game piece has a fresh side and a spent side. Corps that are brought in as reinforcements must be deployed spent side up and need to be "reorganized" in order to become fresh. Once fresh, corps become spent as a result of march attrition or combat, but can be reorganized again. Armies comprised of half or more spent corps do not move as fast (-1 movement allowance modifier) and are less effective in battle (-1 die roll modifier).
2.2.4 Union Garrison and Blockade Markers
The Union player must use garrison markers to indicate which regions he has garrisoned (see 18.0).
Design Note: The Confederates do not have garrison markers because of their limited resources.
The reverse side of the Union garrison markers shows the Union blockade markers. Union blockade markers must be placed in blockade boxes to indicate which Confederate coastal regions are blockaded by the Union navy (see BLOCKADE ACTION cards).
Design Note: The naval conflict could be the object of a full game, but to keep things simple the BLOCKADE ACTION cards are relied upon to abstractly cover the struggle between the Union navy and the Confederate navy and blockade runners.
2.2.5 DRAFT, CONFEDERATE INFLATION and Emancipation Markers
The DRAFT and CONFEDERATE INFLATION markers are placed in their respective boxes on the game board to indicate when the corresponding event cards have been played. The Emancipation marker is placed in the appropriate box when the Union player chooses to proclaim the Emancipation of the Slaves (see 6.0).
2.2.6 KENTUCKY Markers
The appropriate KENTUCKY marker (USA or CSA) is placed in the Kentucky Box to indicate when Kentucky has turned pro-Union or pro-Confederate (see 5.0).
2.2.7 Battle DRM Markers
These markers are used to keep track of the modified die roll number on the Battle DRM Record Track.
2.2.8 War Effort Markers
These 2 markers are used to keep track of the players' War Effort levels (see 4.0) on the War Effort Level Track.
2.2.9 Deployment Markers
These markers are used to keep track of the number of corps or (Union only) garrisons each player currently has deployed on the map (see 11.9 and 18.2) on the War Effort Level Track.
2.2.10 Grant, Sherman & Thomas Promotion Record Track Markers
These 6 markers - representing Commanders removed from East Theater command, Halleck, McClellan, Grant, Sherman & Thomas - are used on the Promotion Record Track (see 7.3.5).
2.2.11 Turn and Campaign Round Markers
The turn marker is used to keep track of the game turn on the Turn Record Track. The campaign round marker is used to keep track of the current campaign round (see 8.0) on the Campaign Round Record Track.
2.3 The Cards
The deck of 55 cards represents events benefitting one player or the other.
Each card also has an "operational value" of 1 to 3 "operational points" (OPs) which can be used to deploy new corps (see 14.0), reorganize spent corps (see 15.0), move armies (see 16.0), and/or garrison regions (Union only - see 18.0).
The shape of the flag in which the operational value of a card is printed indicates when the card can be played as an event in the campaign phase:
- Round flag: during one's impulse as the active player only;
- Arrow-shaped flag (pointing right): during either impulse;
- Crossed (X-shaped) flag: during the other player's impulse only.
Note #1: The DRAFT card can only be played in the reinforcement phase and bears no flag.
Note #2: SPIES and IN GOD WE TRUST can be played in any phase or impulse and bear no flag. However, any card picked from the discard pile when playing IN GOD WE TRUST remains subject to its own restrictions.
Note #3: The WAR WEARINESS card can be played during the reinforcement phase or during any of the other player's impulses during the campaign phase, and is coded according to its campaign phase use.
Note #4: The CAVALRY RAID card can be played during any of the other player's impulses during the campaign phase or during the end phase, and is coded according to its campaign phase use.
Note #5: Friendly COMMANDER-IN-CHIEF (C-IN-C) cards (i.e., ABRAHAM LINCOLN for the Union; JEFFERSON DAVIS for the Confederates) can only be played during the reinforcement phase or during one's own impulse. The other side's C-IN-C cards can be played during any impulse for the purpose of sacking defeated enemy commanders.
Three cards (KENTUCKY, DRAFT and CONFEDERATE INFLATION) must be removed from the game when played as events. All other cards except "CORE" cards (see next) must be discarded face up whether played as events or for their operational values.
Each player has a friendly C-IN-C card marked as a "CORE" card. These cards are never placed in the discard pile, but only set aside when played and recovered in the following card phase.
Design Note: This ensures that each player always has at least 1 C-IN-C card worth 3 OPs per turn, limiting the range of available OPs to 6-12 per side per turn.
"Battle" cards are identified with a crossed swords icon. They modify battle die rolls.
The discard pile and remaining deck must be shuffled together immediately after the play of KENTUCKY, DRAFT or CONFEDERATE INFLATION as events or after the Emancipation of the Slaves is proclaimed by the Union player.
2.4 The Player Aid Cards
The player aid cards summarize the main concepts of the game and should be sufficient to play the game for players who have otherwise mastered the general concepts of the rules.
2.5 The Dice
The 6-sided dice are used to resolve march attrition (see 16.3), battles (see 17.0) and campaign attrition (see 19.0).
2.6 Abbreviations
The following abbreviations are used throughout these rules:
- ADRM = Attack Die Roll Modifier
- DDRM = Defense Die Roll Modifier
- CSA = Confederate States of America
- DRM = Die Roll Modifier
- LOS = Line of Supply
- MA = Movement Allowance
- MAM = Movement Allowance Modifier
- OP = Operational Point
- USA = United States of America
- WE = War Effort
2.7 Some Essential Definitions
Army: A commander with 1 or more corps.
CORE or CORE C-IN-C card: A specifically identified C-IN-C card that each player receives at set-up and recovers at the beginning of each turn (see 10.0).
Friendly C-IN-C card: ABRAHAM LINCOLN for the Union player (5 in all) and JEFFERSON DAVIS for the Confederate player (5 in all).
Field Commander: An army commander who can control a maximum of 2 corps and does not have reinforcement priority (see 7.0).
Friendly-Controlled: For the Union, any enemy-free Union home region, or any Confederate region occupied by a Union army or garrison. For the Confederates, any enemy-free home region, or any Union region that is occupied by a Confederate army.
In Supply: The "in supply" concept is relevant for corps deployment (see 11.0 and 14.0), corps reorganization (see 15.0), garrisoning (see 18.0) and campaign attrition (see 19.0) purposes. Use the following table to determine supply status:
| Region Seeking Supply or Location of Army Seeking Supply | USA Supply Status | CSA Supply Status |
|---|---|---|
| Enemy-Controlled Region | Never in supply | Never in supply |
| Friendly-Controlled Union Resource Region | Always in supply | Never in supply |
| Friendly-Controlled Union Non-Resource Region | In supply if a LOS can be traced to at least 1 friendly-controlled Union resource region | Never in supply |
| Friendly-Controlled Confederate Resource Region | In supply if a LOS can be traced to at least 1 friendly-controlled Union resource region (see Ex. #1) | In supply if a LOS can be traced to at least: 1 different friendly-controlled Confederate resource region, or 2 unblockaded friendly-controlled Confederate coastal regions, or 1 unblockaded friendly-controlled Confederate coastal region, but only if tracing from an unblockaded Confederate coastal region (see Ex. #4). |
| Friendly-Controlled Confederate Non-Resource Region | In supply if a LOS can be traced to at least 1 friendly-controlled Union resource region (see Ex. #2) | In supply if LOS can be traced to at least 1 friendly-controlled Confederate resource region which itself is in supply. |
Example #1: A Union army occupying Atlanta can only be in supply if a LOS can be traced to friendly-controlled and pro-Union Louisville.
Example #2: A Union army occupying Meridian can only be in supply if it can trace a LOS to Union-controlled St. Louis or Louisville (but in the latter case only if Kentucky is pro-USA).
Example #3: A Confederate army occupying Richmond can only be in supply if it can trace a LOS to the friendly-controlled Shenandoah or to two (or more) unblockaded, friendly-controlled home coastal regions among Yorktown, Norfolk, Wilmington or Charleston.
Example #4: A Confederate army occupying New Orleans (a resource region and coastal region) is in supply even if it can only trace a LOS to friendly-controlled Mobile, provided both Mobile and New Orleans are unblockaded.
Line of Supply (LOS): A LOS is necessary to establish supply. It is an uninterrupted chain of up to 3 friendly-controlled regions between two given regions (not counted in the LOS). By definition, a LOS cannot go through a neutral region. To be clear, a LOS is always traced from the region or army that needs supply to the region or regions that provide supply. The supply status of the regions in the LOS has no bearing on the supply of any region.
Example: A Union army occupying Mobile can never be in supply as there are more than 3 regions between Mobile and the nearest Union resource region (but see 15.1 exception).
Theater Commander: An army commander who can control a maximum of 6 corps, has reinforcement priority, and is identified with a HQ marker (see 7.0).
3.0 Game Objectives & Victory Conditions
Victory conditions are always checked in the end phase after campaign attrition.
3.1 Confederate Victory
The Confederate player may win in 1 of 4 ways. These are:
3.1.1 Dixie Victory: The Confederate player scores a Dixie victory if his War Effort level (see 4.0) is greater than the Union's War Effort level at the end of any turn.
Design Note: This type of victory can usually only be achieved through a combination of daring and luck early in the game, before the Union starts reducing the Confederate WE level and/or pushing up its own WE level.
3.1.2 Political Victory: The Confederate player scores a political victory if, at the end of Turn #7, (a) the difference between the Union WE level and the Confederate WE level is (i) less than 9 in favor of the Union if DRAFT has not been played as an event or (ii) less than 11 if DRAFT was played as an event and (b) the Union player is not meeting any of his own victory conditions.
Example: Historically, the Union gained control of Atlanta and the Shenandoah (a combined -2 against the Confederate WE level) just before the elections, which increased the differential from 10 to 12 and narrowly prevented a Confederate political victory.
3.1.3 Military Victory: The Confederate player scores a military victory at the end of any turn except Turns #1-2 if the number of Confederate corps on the map is at least twice that of Union corps.
Design Note: Achieving a military victory is not going to be easy for the Confederate player even though the requirements are not as stringent as they are for the Union player to achieve a military victory of his own. It will take both a substantial reduction in the Union's WE level and numerous Union corps losses for the South to pull this off.
3.1.4 Default Victory: The Confederate player scores a default victory if the Union player has not met any of his own victory conditions by the end of Turn #8.
Design Note: If the South is still standing when the game war has lasted as long as the real war, then the Confederate player should be considered the winner because he did better than his historical counterpart.
3.2 Union Victory
The Union player may win in 1 of 2 ways. These are:
3.2.1 Attritional Victory: The Union player scores an attritional victory if the differential between the Union WE level and the Confederate WE level is at least 14 in favor of the Union at the end of any turn.
Design Note: Achieving an attritional victory is what the Anaconda plan was all about: control the Mississippi, blockade the coasts, but also capture the South's economic centers in order to win. The North is under serious time pressure to achieve this by Turn #8.
3.2.2 Military Victory: The Union player scores a military victory at the end of any turn except Turns #1-2 if the number of Union corps on the map is at least thrice that of Confederate corps.
Design Note: If the detractors of the Anaconda plan were to be believed, no amount of economic pressure could replace the simple and hard truth: the Union had to win battlefield victories and reduce the Confederate army to a point at which it simply could not fight. More often than not, the path to a military victory is parallel to the path to an attritional victory, but you do not have to rely on the blockade to win, and that can be a blessing.
4.0 War Effort
The War Effort (WE) level measures a side's ability and willingness to fight. It aggregates political, social, economic, military and diplomatic considerations. Each player must keep track of his WE level at all times. All changes must be reflected immediately.
Each side's WE level affects the game in the following ways:
- It plays a role in determining certain victory conditions (see 3.0).
- It affects the number of cards each side can draw and hold (see 10.5).
- It determines the maximum number of corps each side can have on the map (see 11.9).
- It determines the maximum number of garrisons the Union player can have on the map (see 18.2).
Design Note: War effort is a critical game concept. Read and understand it well!
4.1 Confederate War Effort
The starting level is 6 and must be adjusted as follows:
- +2 At the beginning of Turn #2
- +2 At the beginning of Turn #3
- +1 Kentucky becomes pro-CSA (see 5.0) [footnote 1]
- -1 Emancipation proclaimed
- -1 CONFEDERATE INFLATION card played
- -1 Mississippi Union-controlled [footnotes 2, 3]
- -1 Memphis & Nashville Union-controlled both [footnote 2]
- -1 Shenandoah Union-controlled [footnote 2]
- -1 Atlanta Union-controlled [footnote 2]
- -1 Gulf Coast blockaded [footnotes 2, 4]
- -2 Atlantic Coast blockaded [footnotes 2, 4]
- -3 Richmond Union-controlled [footnote 2]
Footnotes:
- Cancelled if all of Kentucky is Union-controlled.
- Cancelled if no longer valid.
- The Mississippi is Union-controlled when New Orleans, Vicksburg, Memphis, St. Louis and Cairo are Union-controlled.
- A coast is blockaded if each of its coastal regions is Union-controlled and/or the corresponding blockade box contains at least 1 Union blockade marker, e.g., the Gulf Coast is blockaded if the Union controls New Orleans and Mobile is blockaded.
Design Note: The increases in Turns #2 and #3 represent the ramp-up of the economy and mobilization of the population from prewar levels. The bonus for a pro-CSA Kentucky accounts for the economic, morale and manpower boost provided by Kentucky, but it is lost if the Union subsequently controls all of Kentucky. The Emancipation Proclamation negatively affects the Confederate WE because it removes most of the European powers' support for the Confederacy. The negative modifiers for the blockade, the Union control of the Mississippi and the loss of various major regions represent their economic, morale and manpower impacts.
4.2 Union War Effort
The starting level is 8 and must be adjusted as follows:
- +2 At the beginning of Turn #2
- +2 At the beginning of Turn #3
- +1 DRAFT card played
- +1 Emancipation proclaimed
- +1 Kentucky becomes Pro-Union
- -1 The Union violates Kentucky's neutrality
- -1 Per Confederate-controlled Union resource region other than Washington [footnote 1]
- -1 The first time the Emancipation is not proclaimed when possible [footnote 2]
- -2 The first time Washington becomes Confederate-controlled
- -2 Any time, including the first, Washington is Confederate-controlled [footnote 1]
Footnotes:
- Cancelled if no longer valid
- Cancelled as soon as the Emancipation is proclaimed
Design Note: Many of the Union WE modifiers are similar in concept to those existing for the Confederate WE. The DRAFT increases the Union WE, but makes a Confederate political victory easier to achieve (see 3.1.2). The Union is penalized if it does not proclaim the Emancipation of the Slaves when it is first possible, due to European pressures and other domestic political considerations. That penalty is only temporary and cancelled if and when the Union finally emancipates the Slaves. Washington DC is given special treatment due to how important it was to the Union's morale and foreign perception that it be maintained as the capital of the United States of America.
5.0 Kentucky
5.1 The state of Kentucky is neutral at the beginning of the game.
5.2 If one side enters any of Kentucky's regions - Forts Henry & Donelson, Bowling Green, Louisville or Lebanon - while Kentucky is still neutral, Kentucky immediately joins the other side, i.e. it becomes pro-USA if its neutrality is first violated by the Confederates, or it becomes pro-CSA if its neutrality is first violated by the Union. The Union's WE level is decreased by 1 if the Union violates Kentucky's neutrality.
5.3 A player can also win Kentucky over by playing the KENTUCKY card, which is then removed from the game.
5.4 Once Kentucky joins one side or the other, regardless of the reason, place the KENTUCKY marker appropriate side up in the KENTUCKY box as a reminder. Kentucky's allegiance can no longer change. The KENTUCKY card becomes moot as an event card and must be removed from the game - replace it immediately if it is subsequently drawn from the deck.
5.5 Once Kentucky joins one side or the other, Kentucky's regions become home regions of the player having won Kentucky over for all purposes including supply considerations.
5.6 Winning Kentucky to one's side increases one's WE level by 1. However, if, and for as long as the Union controls all 4 regions of a pro-CSA Kentucky, the increase in the Confederate WE is cancelled.
Design Note: The Kentucky rules are meant to test the patience of each player. Is it better to move into Kentucky and open up the Western theater at the cost of giving up the resources provided by a friendly Kentucky? Or is it better to wait for Kentucky to fall into your hands through political action (e.g., the KENTUCKY card) or thanks to the other player's own impatience?
6.0 Emancipation Proclamation
6.1 Starting in Turn #3, the Union player may proclaim the Emancipation of the Slaves immediately after he wins a battle in the Eastern Theater against a Confederate army at least 2 corps strong.
Design Note: Lincoln thought he needed a substantial victory in the field before he could claim enough political capital to proclaim the Emancipation of the Slaves.
6.2 The Emancipation can be proclaimed only once in a game. The Emancipation marker is then placed in the Emancipation box on the map as a reminder.
6.3 If the Union player does not proclaim the Emancipation when first possible, his WE level is decreased by 1, but this penalty is cancelled if and when he does proclaim the Emancipation.
6.4 The Emancipation Proclamation:
- causes the discard pile and remaining deck to be reshuffled together to create a fresh deck;
- decreases the Confederate WE level by 1;
- if applicable, cancels the WE penalty suffered for not being proclaimed the very first time it was possible; and
- increases the Union WE level by 1 (separately from any penalty cancellation).
7.0 Military Organization
7.1 Armies, Corps and Garrisons
7.1.1 An army is defined as a group comprised of 1 commander (only) and 1 or more corps. Armies must always be kept distinct, even when present in the same region.
7.1.2 Corps can only exist as part of an army. There can never be a corps without a commander on the map (or a commander without at least 1 corps) although corps can be transferred between armies without being accompanied by commanders.
7.1.3 Only the Union player can deploy garrisons. Garrisons never combine with armies and never move, but they provide a +1 DRM to armies defending against Confederate attacks, and they can also defend on their own although with a -2 DRM (see 17.0).
7.2 Commanders
7.2.1 There are 2 types of commanders: field commanders and theater commanders.
7.2.2 A field commander is any commander on the map who is not assigned an HQ marker. A field commander can command up to 2 corps. The number of field commanders allowed on the map at any time is limited only by the counter-mix.
7.2.3 A theater commander is any commander on the map who is assigned an HQ marker. A theater commander can command up to 6 corps and benefits from reinforcement priority (see 11.7). Each side may have 1 theater commander per theater.
Design Note: To be clear, a theater commander in The Price of Freedom is also in the field, but he is given the special designation of theater commander as the most senior officer in the theater. In fact, not having a theater commander deployed on the map in The Price of Freedom does not mean that there is no theater commander at all, but simply that the great man is staying behind his desk, leaving the actual conduct of war to others.
7.2.4 At no time can a field commander's army be deliberately reduced to fewer than 1 corps or a theater commander's army be deliberately reduced to fewer than 2 corps (CSA) or 3 corps (USA). A reduction in army size due to march attrition (16.3), combat (17.0) or campaign attrition (19.0) does not count as a deliberate reduction. Any transfer, pick-up or drop-off (see 16.2.4) does.
7.3 Deploying New Commanders
7.3.1 Except for the commanders deployed at set-up, commanders are usually deployed during the game by playing friendly C-IN-C cards as events in the reinforcement phase (maximum of 1 C-IN-C card play per side) and/or during one's impulses in the campaign phase (no limit).
7.3.2 New commanders may also be deployed during the campaign phase without playing a C-IN-C card, whenever other commanders are replaced on a 1-for-1 basis (see 7.5).
7.3.3 Any commander deployed for the first time must be deployed in the theater specified on his game piece, and no earlier than the turn indicated on his game piece.
7.3.4 A new commander may always be deployed as a field commander unless the corresponding game piece displays a star on the right side, in which case, that commander can only be deployed as a field commander in a theater where there is no theater commander in place.
7.3.5 A new commander may be deployed as a theater commander only in a theater in which there is neither an existing theater commander nor a field commander whose game piece displays a star on the right side. Stack and keep the appropriate HQ marker with the newly deployed commander to mark him as the new theater commander.
Special Rule: Three Union commanders (Grant, Sherman and Thomas) must meet certain requirements in order to be used as theater commanders:
- Grant can only be used as the Union's Western theater commander after (a) Halleck has been previously removed from Western theater command after a defeat (i.e., sacked) and (b) Grant has won at least 2 battlefield victories without being removed from command in between for reasons (see 7.4.2) other than being wounded when SHOT FROM THE SADDLE - remove Grant's battle victory marker if this occurs.
- Grant can only be used as the Union's Eastern theater commander if (a) Grant has already been deployed as the Union's Western theater commander and (b) the Union has used and removed from Eastern theater command at least 3 other Union commanders, including McClellan.
- Sherman and Thomas can only be used as theater commanders if Grant has preceded them in that role. If Grant is SHOT FROM THE SADDLE and killed before being himself used as a theater commander, then either Sherman or Thomas (Union player's choice if both are available) must finish meeting Grant's promotion requirements in order to be promoted. As for Grant, the same commander must win two battles of his own.
Markers are provided to keep track of which requirements have been met on the Grant, Sherman & Thomas Promotion Record Track.
Design Note: To keep the game simple, the other field commanders, whether on the Union or Confederate side, can be promoted to theater command without meeting such requirements, but it seemed essential to force the players to simulate Grant and company's slow rise from corps and minor army commanders to foremost Union military leaders essential to the war's outcome. This system also helps put pressure on the Union player to attack and stimulates activity in an Eastern theater otherwise prone to inertia.
Optional Rule: The players may decide at start that neither Early nor Sheridan can ever be deployed or promoted as theater commanders given their very late rise to army commander status.
7.3.6 A new theater commander must always be assigned a minimum of 2 (CSA) or 3 (USA) corps and no more than 6 corps. A new field commander must always be assigned either 1 or 2 corps.
7.3.7 The corps assigned to a new commander may be transferred without a change in their individual status (fresh or spent) from any existing army in the same region, provided this does not result in a theater commander having fewer than 2 (CSA) or 3 (USA) corps or in a field commander being left without any corps.
Example: Grant is deployed as a new field commander in Corinth where the Union's Western theater commander, Halleck, is present with 5 corps. Up to 2 corps can be transferred from Halleck's existing army to Grant's new army.
7.3.8 The corps assigned to a new commander may also, or instead, be drawn spent from the force pool during the reinforcement phase (see 11.0) or when playing a friendly C-IN-C card both as an event (to deploy the commander) and for its operational value (to pay for the new corps) during the campaign phase (see 14.0). Be mindful that new corps can only be deployed in a region that is in supply.
7.4 Promoting or Demoting Existing Commanders
7.4.1 An existing field commander may be promoted to theater command during the reinforcement or campaign phase under the same conditions as a new commander directly deployed as a theater commander (7.3.5 and 7.3.6). Simply promoting an existing field commander does not require the play of a C-IN-C card.
7.4.2 An existing theater commander cannot be demoted to simple field command, but he may, like any field commander, be removed from command after losing all of his corps (see 16.3.6, 17.4.5 and 19.4), be sacked after a defeat (see 17.5.7) or a CLASH OF EGOS, or SHOT FROM THE SADDLE. Depending on circumstances, a removed commander may return at a later time as a field commander or a theater commander.
7.5 Replacing Commanders
7.5.1 A commander just transferred (see 7.6) or removed from command for any reason other than losing all his corps, must be immediately replaced, unless his corps are also immediately transferred to 1 or more friendly armies in the manner described under 7.3.7. or via STRATEGIC TRANSFER card (see card).
7.5.2 The replacing commander may either be transferred from another existing army - which requires the play of a friendly C-IN-C card as an event - or chosen from the force pool - which, in this case only, does not require the play of a friendly C-IN-C card as an event (unlike when forming a new army).
7.5.3 A theater commander may be replaced with another theater commander, or with enough field commanders that each such field commander has at least 1 corps, and none have more than 2 corps. If a theater commander is not replaced with another theater commander, the theater HQ marker must be returned to the force pool.
7.5.4 A field commander may be replaced with another field commander or with a theater commander; but, in the latter case, under the same conditions as a new commander directly deployed as a theater commander (7.3.5 and 7.3.6).
7.6 Transferring Commanders
7.6.1 A commander can only be transferred to another friendly army whose commander has just been removed from command for any reason other than losing all of his corps, or who is himself being transferred.
7.6.2 Transferring a commander always requires the play of a friendly C-IN-C card, and can be accomplished in the reinforcement phase or campaign phase.
7.6.3 A commander cannot be transferred in the same reinforcement phase or campaign round that he is deployed.
8.0 Set-Up
8.1 Place the game board in the center of the playing area between the two players. See pages 12 and 13 for the full set-up illustration.
8.2 Place the following markers on the board:
- Turn marker in the '1' space of the Turn Record Track
- Campaign round marker in the '3' space of the Campaign Round Record Track
- CSA War Effort Level marker in the '6' space of the War Effort Level Track (WE track)
- CSA Corps Deployed marker on the '4' space of the WE Track
- USA War Effort Level marker in the '8' space of the WE Track
- USA Corps Deployed marker on the '6' space of the WE Track
- USA Garrison Deployed marker on the '1' space of the WE Track
8.3 Remove all the battle cards from the deck and set them aside; they will be added back to the deck at the beginning of Turn #2. Give each player his CORE C-IN-C card. Shuffle the remaining deck of cards and deal 4 cards to each player.
Design Note: This simulates both sides' relative tactical inexperience at the outset of the war. Game-wise, it also prevents either player from being excessively lucky by getting lots of good battle cards in the first turn, when both sides are weak, and thus being able to easily march into the other player's capital.
8.4 The Confederate player places his at-start armies as follows:
- J. Johnston and 1 fresh corps in the Shenandoah
- Beauregard and 1 spent corps in Manassas
- A. Johnston and 1 spent corps in Nashville
- Polk and 1 spent corps in Knoxville
8.5 The Union player places his at-start armies as follows:
- McDowell, 1 fresh corps and 1 spent corps in Washington
- Butler and 1 spent corps in Baltimore
- Fremont and 2 spent corps in St. Louis
- Pope and 1 spent corps in Indianapolis
Design Note: These represent all the major concentration of forces at the beginning of the war, with the preponderance of spent corps simulating their general lack of preparation.
8.6 The Union player also places 1 Union blockade marker in the Yorktown/Norfolk blockade box and 1 garrison marker in Yorktown.
Design Note: This simulates Union control of Fort Monroe, VA at the entrance of the Chesapeake Bay.
8.7 Place all commanders available after Turn #1 in the relevant spaces of the Turn Record Track (not shown on the page 12 example).
8.8 Place all other unused game pieces within reach of the appropriate player.
9.0 General Course of Play
9.1 Following set-up, The Price of Freedom plays in a maximum of 8 turns, with each turn corresponding to 6 months from April to September or October to March.
Design Note: The game never plays later than the historical end of the war in order to keep game time under control.
9.2 Each turn is made up of the following sequence, except that the first turn starts in the third campaign round:
- Card Phase (see 10.0). This phase does not occur in Turn #1. Remember to shuffle the battle cards into the deck at the beginning of Turn #2 and to add +2 to each side's WE in Turns #2 and #3. Discard remaining cards, recover CORE C-IN-C card and draw new cards, subject to WE level (see 4.0).
- Reinforcement Phase (see 11.0). This phase does not occur in Turn #1. Collect newly available commanders from the Turn Record Track. Place and/or transfer commanders by playing a friendly C-IN-C card, and deploy "free" corps and garrison reinforcements. The DRAFT card can only be played in this phase.
- Campaign Phase (see 12.0 to 18.0). The campaign phase is divided into 4 campaign rounds, and each round is divided into 2 impulses, with one player being the active player and the other player being the reactive player in the first impulse, and vice versa in the second impulse. In each impulse, the active player may play up to 1 card for its operational value only and any number of cards as events only, in the order of his choice. By spending OPs, the active player can deploy additional reinforcements, reorganize spent corps, move armies and (Union only) garrison regions. The reactive player may also have the opportunity to play cards as events and/or to attempt withdrawals and interceptions. All battles are resolved at the end of each impulse.
- End Phase (see 19.0-20.0). First, campaign attrition die rolls are made in all regions where armies and/or garrisons are present. Then, victory conditions are checked to see if either player has won the game; if not, a new turn begins.
10.0 Card Phase
10.1 This phase is skipped in Turn #1.
Design Note: Each player starts the game with an equal number of cards that is lower than what he would get based on his WE level in order to simulate general lack of preparedness.
10.2 At the very beginning of Turn #2, all the battle cards (which were set aside at set-up) must be shuffled back into the remaining deck.
10.3 Both players must then discard all of their remaining cards 1 by 1 face up in the discard pile.
10.4 Each player must then recover his core C-IN-C card.
10.5 Finally, starting with the Confederate player, each player must draw a number of cards from the deck, if possible equal to his WE level, but subject to a minimum hand size of 6 and a maximum hand size of 10, including the CORE C-IN-C card.
Example: The Union's WE level is 8 and the Confederate WE level is 7. The Confederate player recovers his CORE C-IN-C card and draws 6 additional cards for a total of 7. The Union player recovers his CORE C-IN-C card and draws 7 additional cards for a total of 8.
Another Example: The Union's WE level is 12 and the Confederate WE level is 4. The Confederate player recovers his CORE C-IN-C card and draws 5 additional cards for a total of 6. The Union player recovers his CORE C-IN-C card and draws 9 additional cards for a total of 10.
10.6 If the deck runs out of cards, reshuffle the discard pile to form a new deck from which the player draws his remaining cards.
10.7 Increase each side's WE level by 2 in Turns #2 and #3.
11.0 Reinforcement Phase
Note: Unless the reinforcement phase is specifically referenced, the rules described henceforth in this section also apply to the play of any card for its operational value in order to deploy additional reinforcements (see 14.0).
11.1 The reinforcement phase is skipped in Turn #1. The Union player must play first in Turns #2-4 and second in Turns #5-8.
11.2 During the reinforcement phase, each player may play 1 and only 1 friendly C-IN-C card as an event to deploy any number of new commanders or transfer any number of existing commanders (see 7.0). Each player may also place new corps at no OP cost or promote existing field commanders to theater command.
11.3 All these actions may need to, and can, be carried out simultaneously, e.g., in order to form a new army, a player must deploy a new commander, which requires the play of a C-IN-C card, and 1 or more corps together.
11.4 During the reinforcement phase, the number of corps that can be drawn from the force pool and deployed on the map is subject to the following limits per turn:
| Turn | USA | CSA |
|---|---|---|
| #2-4 | 3 | 2 |
| #5-8 | 2 + 1 for DRAFT | 1 |
All such corps are free reinforcements, i.e., received at no OP cost.
11.5 New corps may only be deployed in regions that are in supply and subject to the following limits per reinforcement phase or per campaign round:
- Up to 1 spent corps in any regular (i.e., non-resource) home region or (USA only) any enemy region
- Up to 2 spent corps in any resource home region other than the capital region
- Up to 3 spent corps in the capital home region
Design Note: The spent side is used here to represent green troops.
11.6 All new corps must be placed with existing armies or new armies being formed. In the latter case, the commander must be chosen first, then the new corps (if any) assigned to him, which may be combined with transferring corps from an existing army in the same region (see 7.3.7).
11.7 Reinforcement Priority: Whenever a new corps is deployed, priority must be given to reinforcing the Eastern theater commander first, then the Western theater commander, before any field commander may be reinforced or any field army created. A Union theater commander loses priority if he has at least 4 corps under his command while a Confederate theater commander loses priority if he has at least 3 corps under his command.
Example: At the beginning of the reinforcement phase, the Confederate player has the following armies on the map: Lee (Eastern theater commander) with 2 corps, Early and Hood (field commanders) each with 1 corps, and J. Johnston (Western theater commander) with 2 corps. If the Confederate player is entitled to deploy 2 new corps, he must place 1 with Lee first, then 1 with Johnston.
11.8 A theater commander can never have more than 6 corps and a field commander can never have more than 2 corps.
11.9 Neither player can ever deploy new corps such that the number of corps he would have on the map exceeds his WE level. Neither player can deliberately remove any of his already-deployed corps to make room for new corps. Free reinforcements that cannot be deployed for whatever reason cannot be saved for future deployment.
Exception: It is always possible to place the 1-corps army provided by the MILITIA card, regardless of one's WE level.
Note: Union garrisons (see 18.0) do not count against the maximum number of Union corps allowed on the map.
11.10 If at any point in time a player's WE level decreases below the number of corps he already has on the map, he must not remove any of his corps in excess of his WE level; but he will not be able to deploy new reinforcements until the number of his corps on the map falls below his WE level.
11.11 In the reinforcement phase only, the Union player also receives a free garrison in Washington, if Washington is not occupied by the Confederates and does not already have a garrison.
11.12 The DRAFT card can only be played in this phase.
Example: The Union player cannot deploy new corps to Meade in Wilmington for two reasons: Wilmington is beyond LOS requirements per 2.7; Meade is acting as a Field Commander and cannot command more than 2 corps. If Meade was in Goldsboro or Raleigh, had a valid LOS and only one corps, another corps could be deployed to his command. Note however, if this was the case, the corps being deployed would be spent (per 11.5) causing Meade to flip to his spent side as half of the corps under his command would then be spent.
12.0 Campaign Phase - General Principles
12.1 Each campaign phase is divided into 4 rounds (but note that the game starts in the 3rd round of Turn #1). Each round is divided into 2 impulses. During each impulse, one player is the active player and the other player is the reactive player.
12.2 In each round of Turns #1-4, the Confederate player has the initiative and decides whether he is the active player in the first impulse or in the second impulse. In each round of Turns #5-8, it is the Union player's decision.
Design Note: This reflects the South's initial advantage and eventual disadvantage in both political and military leadership.
12.3 During his impulse, the active player may either (a) discard his entire hand and draw a new hand with 1 less card (see 13.0) or (b) play up to 1 card for its operational value and any number of other cards as events, in the order of his choice. A card can either be played for its operational value or its event, not both, with the following exception.
Exception to the single use rule: The active player may play 1 friendly C-IN-C card in his impulse both as an event and for its operational value (which counts as the 1 card he can play for operational value in his impulse). Note that there is no limit to the number of C-IN-C cards that can be played as events only.
Note: The QUARTERMASTER event allows a player to spend 1 OP. That is different from playing a card for its operational value, and therefore it increases the number of OPs a player can use in his impulse by 1.
12.4 Actions that the active player can undertake by playing a card for its operational value are as follows:
- Deploy new corps for 1 OP each (see 14.0)
- Reorganize up to 4 spent corps per region for 1 OP per region (see 15.0)
- Move armies of any size for 1 OP each if by land (see 16.2) or at a cost of 2 OPs per corps if by sea (Union only - see 16.6)
- Garrison regions for 1 OP each (Union only - see 18.0)
12.5 When playing a card that has an operational value greater than 1, the active player can spend his OPs on more than 1 type of action, e.g., when playing a 3-OPs card, he could deploy 2 new corps (2 OPs) and garrison 1 region (1 OP). He alone chooses the order of his actions.
12.6 OPs cannot be saved for future rounds, but not all have to be used.
12.7 The active player is allowed to play any number of cards as events before, after, during, or in between spending the OPs of the 1 card he is playing for its operational value.
12.8 The active player is allowed to spend OPs on reorganizing (see 15.0) or garrisoning (Union only - see 18.0) - but not any other action - before, during or after the active army moves, but not in the region where it engages in battle. All such actions must concern the region entered by the moving army and reduce its remaining movement allowance (see 16.2.2).
Example: The Union player plays a 3-OPs card. Sherman departs from Chattanooga (1 OP for moving), enters Atlanta and garrisons it for 1 OP, then moves on to Augusta (which cannot be garrisoned because it is not, and cannot be, in supply.
12.9 The reactive player may play any number of cards as events at any time subject to each card's own restrictions (cards with the arrow-shaped or crossed flags).
12.10 Unless specified otherwise by a card's text (e.g., INDECISION) or by the rules (e.g., battle resolution), the player who has the choice of the initiative in the round per 12.2 always has priority when it comes to playing event cards.
12.11 Each card that is played must be placed face up to the discard pile except that (a) each player's CORE C-IN-C card must be set aside when played (and is automatically returned to its owner in the following card phase) and (b) KENTUCKY, DRAFT and CONFEDERATE INFLATION must be removed from the game when played as events.
12.12 As previously mentioned, the discard pile and deck must be shuffled together to form a new deck immediately after the play of KENTUCKY, DRAFT or CONFEDERATE INFLATION as events, or after the Emancipation Proclamation by the Union player.
13.0 Campaign Phase - Drawing New Cards
If he so chooses, the active player may discard his entire hand of cards (CORE C-IN-C card excluded) and draw a new hand, but with 1 less card than he discarded. This action precludes him from any other action, including any card play, during his impulse.
Example: The Confederate player has 7 cards including his CORE card. He may discard all 6 cards except his CORE card and draw 5 new cards.
14.0 Campaign Phase - Deploying Additional Reinforcements
14.1 By playing any card for its operational value, the active player can reinforce existing friendly armies with new spent corps from his force pool, at a cost of 1 OP per new corps. See 11.0 for all applicable restrictions.
14.2 If a player wants to create one or more new armies with such reinforcements, he must play a friendly C-IN-C card to deploy the new commander(s).
15.0 Campaign Phase - Reorganizing Spent Corps
15.1 By playing any card for its operational value, the active player can reorganize up to 4 friendly spent corps per region at a cost of 1 OP for each such region, but only if they are in supply. Such corps may belong to more than 1 army, provided they are in the same region, of which 1 may be an active army on the move.
Exception: Naval Supply: In each of his impulses, the Union player may also reorganize up to 1 Union corps that is not in supply per the definition provided in 2.7 at the cost of 1 OP, provided it occupies a garrisoned coastal region.
15.2 All reorganized corps are flipped fresh side up.
16.0 Campaign Phase - Moving Armies and Transferring Corps
16.1 General Comments
16.1.1 By playing any card for its operational value, the active player can move friendly armies at the cost of 1 OP per army of any size if moving by land (see 16.2) or at the cost of 2 OPs per corps if moving by sea (Union only - see 16.6).
Design Note: Moving by sea is expensive, but sea-borne invasions can definitely take the South off guard.
Note: The CONCENTRATION card allows a player to move up to 4 corps and their commanders together by land at the cost of 1 OP as if they were 1 army only.
16.1.2 The active player cannot move commanders without corps or corps without commanders, but he can transfer commanders by playing a friendly C-IN-C card (see 7.6) and he can transfer 1 or 2 corps between regions by playing a STRATEGIC TRANSFER card (see card).
Note: A STRATEGIC TRANSFER card can also be played to move an army of 1 or 2 corps, as permitted by the card.
16.1.3 No army, commander or corps can ever move more than once, or move and transfer between regions, or transfer between regions more than once, in any 1 impulse, whether by land or by sea.
16.1.4 A theater commander can only move with his army out of his assigned theater in order to attack or intercept an enemy army that left the same theater in the same or prior impulse (including if it were in the prior turn). He must attempt to engage said enemy army as soon as possible and must attempt to move back to his assigned theater as soon as possible once said enemy army has been entirely eliminated.
16.1.5 The active player must always designate what he is going to move or transfer before actually doing it, in order to give the reactive player the opportunity to play a MUD MARCH or CAVALRY RAID card.
16.1.6 Union garrisons never move, transfer, withdraw, or intercept.
16.2 Land Movement
16.2.1 Land movement occurs between adjacent regions, including along river links. Both sides can move by land. The moving army is also called the active army.
16.2.2 Each moving army has a base movement allowance (MA) of 3 that is modified as follows and indicates the number of adjacent regions it can successively enter in 1 move:
- -1 At least half of its corps are spent
- -1 Its move is intended to conclude with an attack [footnote 1]
- -1 Per action completed while moving [footnote 2]
- -1 The other player plays a MUD MARCH card against it [footnote 3]
- +/- MAM of its commander
- +1 Force-marching [footnote 4]
Footnotes:
- Such intent, although not the target of the intent, must be declared at the start of the move. The negative modifier applies even if the targeted enemy army withdraws before battle (see 16.4), but not if the active army was intercepted while it did not intend to attack (see 16.5).
- Provided it is not intercepted and not force-marching, the moving army may reorganize, or (Union only) deploy a garrison, in any enemy-free region after it enters it, but each action reduces its remaining MA by 1 and is subject to the rules described in 15.0 or 18.0 respectively.
- The MUD MARCH card must be played by the reactive player immediately after the active player indicates which army he is going to move - the active player cannot then choose another army instead. If an army's MA is reduced to zero due to MUD MARCH, it cannot move at all, but the OP used to activate it is still spent.
- The decision to force-march must be indicated at the start of the move. Force-marching prevents any action while moving and increases the risk of incurring march attrition losses (see 16.3).
Example: The Union player plays a 2-OPs card to move Sherman (+1 MAM) with 2 fresh corps and 1 spent corps from Nashville to Atlanta (2 regions away), concluding the move with an attack against Johnston. Sherman's initial MA is 3, as Sherman's MAM and the attack penalty cancel each other. 1 OP is spent to move the army. Entering Chattanooga reduces the army's MA by 1 to 2. The Union player decides to garrison Chattanooga at the cost of 1 OP and his army's MA is further reduced by 1, which is all that is needed to enter Atlanta and attack Johnston (remember that the MA penalty for intending to attack is applied at the start).
Note: MA and interception (see 16.5) rules do not apply to STRATEGIC TRANSFERS. A STRATEGIC TRANSFER cannot be affected by a MUD MARCH card, but a STRATEGIC TRANSFER by land can be interrupted by the adverse play of a CAVALRY RAID or GUNBOATS card depending on the type of land link used.
16.2.3 The active army must stop moving as soon as its MA is reduced to zero, or as soon as it enters a region occupied by 1 or more enemy armies, whether or not the enemy successfully withdraws (see 16.4), or possibly as the result of a successful interception by the enemy (see 16.5). Confederate armies may, but do not have to, bypass Union garrisons without stopping and fighting. The active army may also stop moving before using up its MA. Unused MA is lost; it cannot be carried over to future rounds or turns.
16.2.4 While on the move, the active army can pick up corps from friendly armies or drop off corps with friendly armies along the way, but only as long as no field commander ends up with less than 1 corps or more than 2 corps and no theater commander ends up with fewer than 2 (CSA) or 3 corps (USA) or more than 6 corps. MA is not affected.
16.3 March Attrition
16.3.1 March attrition only affects active armies moving by land other than via STRATEGIC TRANSFER and it is assessed on a corps by corps basis. Its effects are immediately applied prior to any interception or withdrawal attempt, as well as prior to any further movement or battle.
16.3.2 Any corps that enters a third or further region during the same move is subject to march attrition upon entering each such region.
16.3.3 March attrition causes fresh corps to become spent, which immediately reduces the army's remaining movement allowance if a majority of the corps in the army are now spent.
Note: As previously mentioned, it is permitted to spend 1 OP to reorganize while on the move and not force-marching, thus returning up to 4 corps to fresh status, but the army's MA is still reduced by 1 (action completed while moving) and, as for all reorganizations, this requires the army to be in supply.
16.3.4 March attrition may cause losses among any corps that were spent at the time they became subject to march attrition. The owning player must roll 1 die, subtract 1 if force-marching, and compare the result to the number of spent corps subject to march attrition. If the result is lower than or equal to that number, 1 spent corps is lost to march attrition.
Example: Led by Lee (+1 MAM), the Army of Northern Virginia force-marches with 2 fresh corps (I & II) and 1 spent corps (III) out of Richmond. Its starting MA is 5. 1 spent corps (IV) is picked up in Gordonsville. The first 3 corps (I, II & III) have moved 3 regions by the time they reach Harper's Ferry, so I & II become spent and the Confederate player must determine whether III is lost to march attrition - he rolls 4, subtracts 1 for force-marching, obtaining a result of 3 > 1, and incurs no loss. At this point a majority of the corps are spent, therefore the army itself is spent, reducing its remaining MA to 1, enough to reach Baltimore. All 4 corps must roll for march attrition losses upon entering Baltimore since they are all spent and entering their 3rd or 4th region - the Confederate player rolls 2, subtracts 1 for force-marching, obtaining a result of 1 < 4, and incurs 1 loss.
Design Note: March attrition losses will never exceed more than 1 corps per region, but the larger the army subject to march attrition, the likelier a loss will be incurred. Also, the longer the move, the greater the risk of losing more than 1 corps...
16.3.5 March attrition losses must be immediately removed from the map and returned to the owning player's force pool.
Design Note: It is assumed that most losses from march attrition - the stragglers and even the deserters - make it back to camp or home and are available for future recruiting. Permanent losses are covered through campaign attrition (see 19.0).
16.3.6 Any commander who loses all his corps to march attrition must be returned to the force pool, with his HQ if he is a theater commander.
16.4 Withdrawal
16.4.1 If the active army enters a region that is occupied by an enemy army (not garrison), then, subject to 16.4.2, that army may entirely withdraw from the region without fighting, i.e., complete a free, immediate move to 1 adjacent, friendly-controlled region other than the region from which the active army is coming.
16.4.2 Each player must roll 1 die, modified by his commander's MAM, and subtract 1 if his army is spent. The withdrawal attempt is successful if the reactive player's score is at least equal to the active player's score.
16.4.3 Failure to withdraw results in a -1 battle DRM for the side that failed to withdraw.
Example: Using the prior example of Lee's march, let's instead assume that a 1-corps Union army led by Burnside (0 MAM) is in Harpers Ferry. Rather than facing Lee's might, the Union player decides to withdraw. Lee's MAM is +1, but his army is spent after entering the Shenandoah. The Union player rolls 2+0 = 2 while the Confederate player rolls 4+1-1 = 4. Burnside fails to withdraw and is caught flat-footed by Lee.
16.4.4 The active army cannot pursue a successfully withdrawing enemy army even if the former has not used up its movement allowance; it must stop in the region previously occupied by the successfully withdrawing army.
16.4.5 Withdrawing by sea is not allowed.
16.4.6 Withdrawing and intercepting, or withdrawing more than once, in the same impulse is not allowed.
16.5 Interception
16.5.1 If the active army enters a region (the "interception region") where there is no other friendly army and which is adjacent to 1 or more regions occupied by 1 or more enemy armies, then, subject to 16.5.2, any or all such enemy armies may intercept the active army, i.e., complete a free, immediate move to occupy the interception region and force a battle with the active army.
Special Situation: It is also possible for an enemy army to intercept the active army while, thanks to the TURNING MOVEMENT card, the latter is moving through the region occupied by the former.
16.5.2 Each player must roll 1 die, modified by his commander's MAM, and subtract 1 if his army is spent. The interception attempt is successful if the reactive player's score is greater than the active player's score.
16.5.3 A successful interception provides the intercepting side with a +1 DRM in battle.
16.5.4 The reactive player must then indicate if his side fights the ensuing battle as the attacker or the defender.
Example: Using the prior example of Lee's march, let's instead assume that McClellan (-1 MAM) is deployed in Washington with 4 fresh corps and attempts to intercept Lee's army in Harpers Ferry. The Union player rolls 5-1 = 4 while the Confederate player rolls 3+1-1=3. McClellan successfully intercepts Lee and the Union player chooses to defend to benefit from McClellan's better DRM in defense in addition to the bonus received for a successful interception.
16.5.5 Withdrawing and intercepting, or intercepting more than once, in the same impulse is not allowed.
16.6 Sea Movement
16.6.1 Only the Union can move by sea.
16.6.2 There is no movement allowance concept when moving by sea (but see 16.6.5). A sea move may only originate from a coastal region and terminate in another coastal region. It cannot be combined with a land move.
16.6.3 If a sea move is conducted between Washington or Baltimore at one end and Yorktown or Norfolk at the other end, the Union player can move up to 3 corps for each STRATEGIC TRANSFER card played or every 2 OPs spent. That is an exception to 16.1.1.
Design Note: This simulates the favorable conditions existing for the transport of a large number of Union troops in this area.
16.6.4 Amphibious Attack: The destination region of a sea move may be enemy-occupied, in which case the sea move is deemed an amphibious attack and results in a penalty for the attacker when the resulting battle is resolved.
Example: The USA has played a STRATEGIC TRANSFER card, and makes an amphibious assault on Yorktown from Baltimore. Hooker and the 2 USA corps began the impulse in Baltimore. Per 16.6.3, up to 3 corps could participate in the assault, if available, with this card-play. In the ensuing battle, the USA will receive a -1 DRM for the Amphibious Assault in addition to any other normal modifiers. If the battle goes badly for Hooker, he and the surviving corps will be able to retreat back to Baltimore or any other Union-controlled coastal region (see 17.5.4).
16.6.5 Sea movement does not cause march attrition, but can trigger interception or withdrawal attempts at the end of the move, with the active army suffering an additional -1 penalty on its die roll when determining the success or failure of the attempt.
17.0 Campaign Phase - Fighting Battles
17.1 Circumstances
A battle occurs whenever an army enters a region (the "battle region") occupied by 1 or more enemy armies, but only after all moves, withdrawals and interceptions for the impulse have been completed and the active player is done spending OPs.
Exception: ON THE WINGS OF VICTORY allows an active army to finish using its movement allowance after winning a battle without incurring any loss (see card).
A Confederate army may choose to fight or bypass without fighting a Union garrison if the latter is alone in the region.
Battles are resolved in the order of the active player's choice.
17.2 Orders of Battle
17.2.1 Only 1 commander can be in charge of a battle on each side.
17.2.2 If a theater commander is present in the battle region, he must be the commander in charge for his side. If only field commanders are present in the battle region on a given side, the owning player may choose who the commander in charge is.
17.2.3 The commander in charge on the defending side may only engage corps belonging to his own army, unless he is a theater commander, in which case he may also engage corps belonging to any other friendly army present in the same region, but only if he engages all of his own corps and the total number of corps he engages does not exceed 6.
17.2.4 The commander in charge on the attacking side may engage corps belonging to any other friendly army present in the same region, but only if he engages all of his own corps and the total number of corps he engages does not exceed 2 if he is a field commander or 6 if he is a theater commander.
Design Note: The option not to engage all available corps is useful when the odds favor one side so overwhelmingly that it is almost sure to win and wants to avoid "spending" corps unnecessarily (as all surviving engaged corps usually become spent after a battle regardless of whether they win or lose).
Exception (to 17.2.3 and 17.2.4): The CONCENTRATION card allows a player to (a) engage up to 4 corps from 2 or more armies present in the battle region regardless of what type of commander is present in the battle region and (b) choose which commander is in charge.
17.2.5 Union garrisons never engage alongside Union armies, but their presence gives the Union player a +1 DRM, and they are automatically eliminated if the Union side loses. However, when no army is present, a Union garrison can defend on its own, with a -2 DRM.
17.3 Resolution
17.3.1 Once the orders of battle are defined the players must alternate playing battle cards face up, starting with the attacker. If a player skips his chance to play a battle card, he cannot play any more battle cards for this battle.
17.3.2 Card Notes:
- Battle cards only apply to the battle in which they are played.
- The FOG OF WAR, ART OF WAR and SHOT FROM THE SADDLE cards are not battle cards, but they can, and must, be played after both players are done playing battle cards and before they roll dice, with the attacker playing first.
- The SHOT FROM THE SADDLE card can target any commander (i.e., including your own!) who has at least 1 corps engaged in the battle even if he is not the commander in charge. A commander who is successfully shot can and must be immediately replaced (no C-IN-C card play needed). If no replacement is available in the force pool (which is rare), the targeted commander stays in place and his player suffers a -1 DRM instead.
- FOG OF WAR, ART OF WAR, SHOT FROM THE SADDLE, SPIES and IN GOD WE TRUST are the only non-battle cards that can be played during a battle (until losses are known).
Example:
- First card round: The Union player plays WILDERNESS, the Confederate player replies with BICKERING GENERALS.
- Second card round: The Union player passes and the Confederate player plays BLUNDERING FOOL.
- Third card round: Since the Union player passed, he is not allowed to play any more battle cards, while the Confederate player plays SURPRISE and announces that he is done playing cards.
- If the Union player were then to play FOG OF WAR, he would cancel his own battle card and the Confederate player's 3 battle cards; the battle dice would then be rolled with no battle card DRM being applied on either side.
17.3.3 Each player must then roll 1 die and apply the relevant modifiers to his die roll:
- +1 Defending in Turns #5-8
- +1 Defending own capital region
- +1 Fighting in a home region
- +1 Supported by Union garrison
- +1 Successful interception
- +/- Relevant DRM of commander in charge
- +/- Depending on battle cards played
- -1 Failed withdrawal
- -1 Commander SHOT FROM THE SADDLE, but not replaceable
- -1 Amphibious attack
- -1 CSA army attacking along a river link
- -1 Engaging half or more spent corps
- -1 USA army attacking Washington, Vicksburg or Atlanta
- -1 CSA army attacking Richmond
- -2 Union garrison defending by itself
- -2 Attacking enemy capital region
Design Note: The various modifiers applying to capital and other regions take into account permanent fortifications. The negative modifier for attacking in Turns #5-8 reflects the growing tendency to entrench.
Example: Continuing the card play example above, let's assume that in Turn #6 the Union player engages 3 spent corps and 1 fresh corps led by Sherman against 2 spent corps in Knoxville led by Hood. Assuming the FOG OF WAR card was not played, the Union player's DRMs are:
- +1 WILDERNESS
- -1 BICKERING GENERALS
- -1 BLUNDERING FOOL
- -1 Engaging half or more spent corps
for a net of -2.
The Confederate player's DRMs are:
- +1 Defending in Turns #5-8
- +1 Fighting at home (Knoxville)
- -1 Hood's DDRM
- +1 BLUNDERING FOOL
- +1 SURPRISE
- -1 Engaging half or more spent corps
for a net of +2.
17.3.4 Each player must then cross-reference his modified die roll (left column) with the number of corps he engaged in the battle (top row) on the following table to determine his battle score.
Battle Results Table
| Die Roll \ # of Engaged Corps | 1 | 2 | 3 | 4 | 5 | 6 |
|---|---|---|---|---|---|---|
| <0 | 00 | 00 | 01 | 02 | 03 | 04 |
| 1 | 00 | 01 | 02 | 03 | 04 | 10 |
| 2 | 01 | 02 | 03 | 04 | 10 | 11 |
| 3 | 02 | 03 | 04 |
Note: A modified die roll < 0 is treated as 0; a modified die roll > 11 is treated as 11.
17.3.5 The side with the higher battle score wins the battle. The defender wins ties.
Example (continued): The Union player rolls 5-2 = 3 on the "4" column, for a battle score of 10, and the Confederate player rolls 2+2 = 4 on the "2" column, for a battle score of 04. The Union wins the battle and causes 1 loss.
17.3.6 If the Union player wins, he may be in a position to proclaim the Emancipation of the Slaves (see 8.0).
17.4 Losses
17.4.1 The first digit of each player's battle score indicates the number of losses inflicted upon the other player, e.g., a score of 04 indicates no loss and a score of 21 indicates 2 losses. The second digit is irrelevant for losses.
Design Note: While somewhat unusual, this combat resolution table offers enough result differentiation to quickly determine the winner despite the narrow range of possible losses imposed by the unit scale.
17.4.2 Each player must apply his losses to his engaged corps. If a side engaged corps from 2 or more armies, each loss must be removed from the largest remaining army at the time the loss is removed (owner's choice in the event of a tie).
Example: The Union sustains 2 losses after engaging 2 corps under McClellan (theater commander) and 1 corps under Butler (field commander). The Union player must choose 1 of McClellan's 2 corps as his first loss, but may choose McClellan's remaining corps or Butler's corps as the second loss.
17.4.3 Losses in excess of the number of engaged corps can never be applied against unengaged corps; however, if the number of Union losses exceeds the number of engaged Union corps, then the local Union garrison must be eliminated too.
17.4.4 All corps and garrison losses are removed from the map and become unavailable for the remainder of the game.
17.4.5 It is possible for either or both sides to be entirely eliminated as a result of combat. This does not change who the winner and loser are, even if the winning side is entirely eliminated and the losing side is not.
17.4.6 Any commander who loses all his corps in battle must be returned to the force pool, with his HQ if he is a theater commander.
17.4.7 Surviving engaged corps on both sides become spent except that fresh corps on the winning side remain fresh if they completely eliminated their enemy. There is no penalty for corps that were already spent. Union garrisons never become spent. Surviving unengaged corps stay in the same condition as they were prior to the battle, fresh or spent, as the case may be.
17.5 Reactions
17.5.1 The losing side, if it attacked or intercepted, must retreat to the region, or any 1 of the regions, from which it came.
17.5.2 The losing side (including any unengaged corps), if it defended but did not intercept, must retreat to any 1 adjacent friendly-controlled (if possible) region other than the region(s) from which the victorious side attacked or intercepted.
17.5.3 Even if a Union garrison survived a Union defeat, it must be removed from the map and returned to the force pool.
17.5.4 A Union army forced to retreat after an amphibious attack may return by sea to any 1 Union-controlled coastal region - that is the only instance in which a retreat by sea is possible.
17.5.5 If the loser cannot retreat, all of his remaining corps must be removed from the map. One half (rounded down) becomes unavailable for the remainder of the game and the other half returns to the force pool.
Note: The above is true even if the winning side is entirely eliminated.
17.5.6 All surviving corps, commander(s) and/or garrison on the victorious side stay in the battle region.
17.5.7 Sacking Defeated Commanders: The owner of a defeated commander may immediately remove him from command and replace him as per 7.5. No card play or OP is needed. The sacked commander can be either returned to the force pool or removed for the remainder of the game altogether. The USA player may also play a JEFFERSON DAVIS card to immediately sack a defeated CSA commander, but only if the CSA player has a replacement available. Similarly, the CSA player may play an ABRAHAM LINCOLN card to immediately remove a defeated USA commander, but only if the USA player has a replacement available.
Design Note: As heads and commanders-in-chief of democratic states, Abraham Lincoln and Jeff Davis often found themselves under great pressure to appoint incompetent, but politically important generals to army command. As a result, it usually required these generals being defeated to make their removal from command politically acceptable.
18.0 Campaign Phase - Garrisoning
18.1 By playing a card for its operational value, the active Union player can place Union garrisons in the regions of his choice at a cost of 1 OP per garrison, subject to the following conditions.
18.2 The Union player can never deploy new garrisons such that the number of garrisons he would have on the map would exceed his WE level. However, he may remove any number of garrisons from the map during the campaign phase, provided that each such garrison is in supply and/or occupies a coastal region and he does not use them again in the same round.
18.3 If at any point in time the Union player's WE level decreases below the number of garrisons he already has on the map, he does not have to remove any of his garrisons in excess of his WE level, but he will not be able to deploy new garrisons until the number of his garrisons on the map falls below his WE level.
18.4 The Union can garrison any Union region that is in supply or any Confederate region that is either a friendly-controlled coastal region and/or in supply. However there can never be more than 1 garrison per region.
19.0 End Phase - Removing Campaign Attrition Losses
19.1 The players must determine campaign attrition losses in all regions where they have armies and/or a garrison. In each such region, the owning player must roll 1 die, apply the relevant modifiers, and compare the result to the number of corps and garrisons present in the region. If the result is lower, then 1 corps or garrison is permanently lost to campaign attrition. Any or all of the following modifiers may apply to each die roll:
- +2 In capital region
- +1 In resource region other than capital region
- -1 Out of supply (*)
- -1 In non-home region
- -1 Adverse CAVALRY RAID play
- -1 Half or more spent corps
(*) Ignore if single Union corps or garrison in a coastal region.
Example: The 6-corps Army of the Potomac occupies Gordonsville and is in supply. Four of its corps are spent. The Confederate player plays a CAVALRY RAID card. The Union player rolls a 4, modified to 2, and therefore loses 1 corps to campaign attrition.
Design Note: With a little practice, the players will find out that they can easily determine whether a die roll is even needed.
19.2 In the event 2 or more armies are present in the same region, the loss must be removed from the largest army (owner's choice in the event of a tie). Garrisons are considered as 1-corps armies for this purpose.
19.3 All campaign attrition losses must be immediately removed from the map and become unavailable for the remainder of the game. Campaign attrition is simultaneous.
19.4 Any commander who loses all his corps to campaign attrition must be returned to the force pool, with his HQ if he is a theater commander.
20.0 End Phase - Victory
Check the victory conditions listed in 3.0. If neither player has won, the next turn begins.
21.0 Additional Design Notes
I have been wargaming since I was a kid. As I grew up, got a job and founded a family, I found less and less time for gaming, so I looked for wargames that could be played in 2, 3, maybe four hours and found few that were satisfactory, either from a gaming standpoint, a historical standpoint or both. That is how I came to design my own games. My first published design, Age of Napoleon (Phalanx Games, 2003), was rather well-received, but it was not perfect - the rules had a few holes and errors and some considered that luck played too significant a part. Still, most players welcome the possibility to recreate the entire Napoleonic Wars in fewer than 4 hours. The Price of Freedom: The American Civil War, 1861-1865 aims to do the same for the American Civil War. There are many similarities with Age of Napoleon, but quite a few differences, not only because these are not the same wars, but also because I drew a few lessons from Age of Napoleon and tried to improve the game experience.
The key to achieving a short playing time is first and foremost choosing the right time, map and unit scales.
The American Civil War was a lot shorter than the Napoleonic Wars and the war effort more continuous, so I decided to use semi-annual turns, each comprised of 4 campaign rounds, for a maximum number of 8 turns. Why not allow the war to go beyond the winter of 1864-65, which was the historical last turn? Because it prevents the game from going on and on, and because it is a fair bet that the Union should (and would) win in the end - better to give the Confederate side a shot at a game victory by lasting longer than its historical counterpart.
The map and unit scale were chosen together from the perspective of the commander-in-chief that a player by and large represents. The Price of Freedom is a grand-strategic game after all. Commanders-in-chief do not delve into too much detail. So I decided that the basic unit would be the equivalent of the armies in the very early war or a CSA corps later on. Some may think that the implied maximum field army sizes are small, especially for the Union, but they only concern front-line troops. While the Union had many more troops in the later stages of the war, a great many were second- or third-rate troops reserved for garrison duty, which are represented and simulated differently in The Price of Freedom.
Having defined the maximum size of each side's field army, it was easy enough to determine how many regions I should have on the map to allow for the right mix of open and closed spaces. Essentially, there should be enough spaces that the Confederate side would have a hard time containing Union attacks from multiple directions while the Union side would face enough logistical hurdles to take and keep control of the Confederate regions it conquered. I chose a point-to-point map to represent the theaters of war east of the Mississippi River because it allowed me to channel the action along the natural lines of transportation used by American Civil War armies without having to use complicated terrain rules.
The second key to making a fast-playing game is good, simple rules. Not easy, especially if you want to preserve some good historical flavor and present players with many choices and decisions to make the gaming experience worthwhile. For these reasons I like to use my own version of a so-called card-driven engine. Cards allow the introduction of multiple special rules that do not need to be retained because they are right there on the cards you hold in your hand. Cards are also (hopefully) controlled randomizers that help simulate the uncertainty of war. And of course, the cards in The Price of Freedom also add historical flavor to the game, but it is more a side benefit than the primary reason for their use - after all, many games do not use cards and yet manage to provide historical flavor.
One particular role given to the card engine relates to organizational decisions made at the C-in-C level concerning the forming of new armies and the appointment, transfer or removal of commanders. Abraham Lincoln and Jefferson Davis were among the first commanders-in-chief who did not take the field and had to contend with the political constraints of a pluralistic democracy. The C-IN-C card mechanism is how The Price of Freedom simulates this situation - they represent those times when a commander-in-chief has acquired enough confidence and/or support to create sizable independent commands (i.e., armies in The Price of Freedom parlance) and appoint, transfer or remove the commanders of these armies. Yet I decided that all should not be left to chance, therefore, each player was given 1 of his 5 C-IN-C cards to keep at all times as his core card - yes, it can be played only once per turn, but it ensures that the player can form up to three new armies and transfer any number of commanders at least once per turn. A further twist to the system is that commander removal is also placed in the other player's hands - most players would never remove 1 of the good commanders even though they are defeated, but actual commanders-in-chief might still have to do it in response to external pressure.
22.0 Strategic Considerations
As the Confederate player, the question usually is, how aggressive should you be? If you are trying to achieve a Dixie victory or a military victory, the answer is: a lot - and you have to be lucky. Not only to eliminate Union corps, but perhaps more importantly to drive the Union war effort level down and make it difficult for the Union player to deploy a large number of Union corps. The risk, of course, is that you overextend yourself and leave the Confederacy open to counter-attacks and amphibious assaults. If you are trying to achieve a political or default victory, you probably need to be more discerning. You still want to attack, but carefully, when the odds really are in your favor. Your main goal is to keep the Union player on his toes, to slow him down until he runs out of time, without sustaining too many Confederate losses. So attack every now and then, but mostly defend and make sure you leave no holes - keep some strength on the coasts to fight off amphibious invasions; contain the Western theater to Cairo as long as possible (generally speaking, keeping Kentucky neutral works to your benefit because it channels Union efforts along the Mississippi); use STRATEGIC TRANSFERS wisely to rapidly move troops between theaters.
As the Union player, there is no question - you must attack! And you will suffer in the process - your early theater commanders are poor compared to the Confederates and while the balance shifts in the late game, the benefits provided to the side fighting at home and defending in battle means that you will have to accept your share of defeats and losses even in 1864-65. Your best bet is to find the right mix of frontal attacks - the Confederate player has more to lose, troop-wise - and flank attacks. Make good use of amphibious invasions and it may make sense to violate Kentucky's neutrality if you have to, as you could really benefit from a wider open front in the West. Also, garrison as much as you can - that will keep your armies available for attacking instead of occupying.
A Confederate victory will most often be political or by default, although a Dixie or military victory is not impossible. A Union victory is a bit more likely to be military than it is to be attritional, although it is often both at the same time.