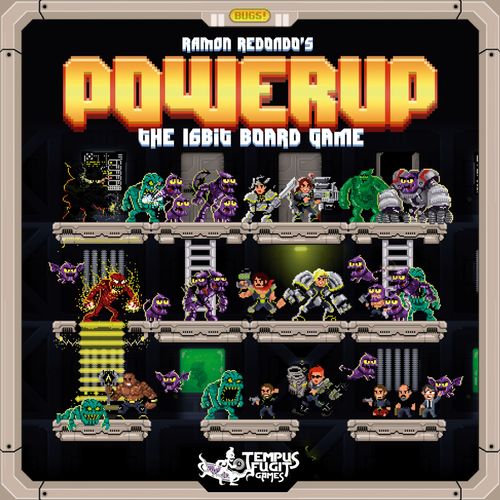
POWERUP
POWERUP Rulebook
Table of Contents
Table of Contents
- Introduction
- Box Contents
- New Game
- Game Modes
- Turn Sequence
- Press Start: Character Overview
- BUGBUSTER
- BUGBUSTER Actions
- POWERUP
- POW! Actions
- Buy New Equipment
- Equipment Cards
- Basics
- Movement
- Combat
- Loss of Lives
- CONTINUE
- EPIC
- Glitches or Assault Vehicles
- Reaction
- Being the BUGMISTRESS
- Rewards
- Protection
- BUGs
- Specials
- POW! Cards
- BUG Cards
- Artificial Intelligence
- Story Mode
- Arcade Mode
- Deathmatch
Introduction
POWERUP is a 2D dungeon crawler that emulates 16-bit platform games. It is a cooperative game. You can play with an artificial intelligence leading the BUGs, or with one player as the BUGMISTRESS, the evil overlady of this game.
Choose from 3 game modes. STORY mode, which has series of set-ups with a background stories. ARCADE mode, where we play a scenario with pre-established victory rules. And DEATHMATCH mode, which sets us up for combat between all players.
The board is your battlefield. This is where the BUGBUSTERs will fight using different strategies. Should you improve your character with new weapons, or try to go EPIC? In each game you decide your best strategy.
In POWERUP one of the players will control the evil BUGMISTRESS, supreme leader of the BUGs. This player will rule over the hordes of BUGS and conspire to keep the BUGBUSTERs from carrying out their mission.
The other players will each take a BUGBUSTER, and work together to carry out the mission.
The STORY mode and some ARCADE modes can be played either solo or cooperatively. To play these modes without a player as the BUGMISTRESS read the Artificial Intelligence section.
Box Contents
Component list as printed on the Box Contents page:
- 12 map tiles
- 8 BUGBUSTER Sheets
- 4 Help Cards (including the ARCADE Turn Help Card and the DEATHMATCH Turn Help Card)
- POWERUP Store Card, DEATHMATCH POWERUP Store Card
- DAMAGE Card, CONTINUE Card
- Turn-Cycle Card
- 29 BUG Cards
- 31 POW! Cards
- 38 Equipment Cards
- 6 Profession Sheets
- 9 BUG Sheets
- 1 BUGMISTRESS Sheet, 1 BUGMISTRESS Token
- 4 Pairs of SCORE Cards
- 8 BUGBUSTER Tokens, 8 EPIC BUGBUSTERs Tokens
- 15 POWERUP Tokens
- 15 Explosive Drum Tokens
- 3 Obstacles for Cover Tokens
- 2 ROBOT Tokens
- 1 Machine-Gun Turret Token
- 10 Non-Player Character Tokens
- 6 INITIATIVE Cards
- 2 GLITCH Tokens
- 5 White Dice, 5 Yellow Dice
- 14 BUGGIE Tokens, 4 BATBUG Tokens, 12 BIGBUG Tokens, 2 BICEFALUS Tokens, 4 BRASAS Tokens, 3 BLOB Tokens, 1 BUGDOZER Token, 4 BURP Tokens, 2 BOSS Tokens
- 34 COINs
- 20 LIFE Counters, 23 AMMO Counters, 27 REACTION Counters
- 2 ON and OFF Markers, 6 NUMBER Markers, 2 TURN Markers
New Game
1. Set up the tiles
Each mode (STORY, ARCADE or DEATHMATCH) has different scenarios to choose from. Pick one from the list at the end of this manual, then following the tile placement diagram to form a board. The scenario description also includes victory conditions.
2. Place the cards
Place the pile of equipment cards to the right of the board. Set up the POWERUP store below that pile: laying out 4 of equipment cards face up, and then the store card. The side of the store card to use depends on the game mode. Next, place the BUG cards above the board. Place the free BUG cards (BUGGIES and BATBUGS) face up, and the other BUG cards face down. Set the POW! card deck to the left. On the same side, place the DAMAGE and CONTINUE cards, and the turn-cycle marker.
3. Choose your BUGBUSTERS
When a player is controlling the BUGMISTRESS, he or she should sit near the top of the board. That way they keep the BUG cards handy. The rest of the players will place their chosen BUGBUSTER character sheet in front of them. Each player takes 3 life counter tokens. They also take as many ammunition and reaction counters as noted on the card.
4. Help cards and final details
Lay out the help cards for novice players. Hand out SCORE cards to keep track of points. Read through the scenario rules once more. Then grab the dice, some snacks and you're ready to play POWERUP.
Setup diagram (page 25)
The setup diagram labels the following placements, as printed:
- Place the BUG cards here. Next to it, leave a space to discard BUG cards after playing them. When you run out of BUG cards, shuffle the discard pile and set it as the new BUG pile.
- Place the BUGS sheets in front of the player who is going to play BUGMISTRESS. Place all the sheets, except BUGGIES and BATBUGS, face down.
- Place the Turn Cycle card face down. Place the DAMAGE card below it. Then set the CONTINUE card to the first level. This card won't be necessary for some missions. It is also a good idea to place the coins near the BUGMISTRESS.
- Place the POW! card pile here, leaving space next to it for used cards. If you run out of POW! cards, shuffle the discard pile and set it as a fresh pile of POW! cards.
- Open the POWERUP store. Place the deck of equipment cards here, then draw 4 initial cards and set them face up. Place the store card below them.
- Build the board following the mission instructions. Keep in mind that you will use a different number of tiles for each set-up. In this case, for 2 players we have formed a 6 tile scenario.
- Place a POWERUP on each tile. The BUGMISTRESS gets to decide on the exact placement. Next, place the other elements as described in the mission details.
- Place your character sheet in Normal mode. In some missions, you will use the Profession sheet. In that case, display the active ability by placing the Profession sheet under the character sheet.
- Take your life counters (3 each), reaction and ammo tokens.
- Place this Help card where players can see it.
- Give each player SCORE cards. Use these two cards to keep track of how many points you have made in the game.
- Remember that the POWERUP store is different in DEATHMATCH mode.
Game Modes
In POWERUP there are 3 game modes: STORY, ARCADE and DEATHMATCH.
STORY (for 1 to 5 players) In STORY mode, players follow the missions from the manual one by one. As you go forward, you will discover new parts of the story and unlock game elements.
ARCADE (for 2 to 5 players) Select the card for the ARCADE mission you want to undertake. Each ARCADE mission has different goals and Victory Conditions.
DEATHMATCH (for 2 to 6 players) In this mode, the players compete against each other with their respective BUGBUSTERS.
The best way to begin is to play in STORY mode.
Turn Sequence
Each turn sequence will go as follows:
- BUGs turn 1.1. Draw BUG cards (1 per BUGBUSTER in play) 1.2. Activate new BUGs 1.3. Spawn of the BUGs (when possible) 1.4. Use an Event card (when possible) 1.5. Use Special BUG cards 1.6. BUGs use actions
- BUGBUSTERs turns 2.1. The BUGBUSTER players choose the order 2.2. Each BUGBUSTER uses 4 actions
- End of turn sequence
Press Start: Character Overview
The characters (BUGBUSTERs) and their colour-coded stat bars are shown on the page, with the following printed text:
- ANA — "It's always a good time for a fight." Her idea of fun is an afternoon of weightlifting at the gym, followed by binge watching Rocky flicks for a little motivation. A native of the remotest European Steppes, she is capable of easing through the toughest combat situation then kicking back with a little absynth-laced chocolate milk.
- RAY — "Mission first. Now." He commands the 13th Group of BUGBUSTERs. He is the leader that'll show you the way out when you're lost, and the friend that'll stay with you when you fall behind. He combines the strategic vision of Alexander the Great with the courage and empathy of Chewbacca.
- PNK — "Hey, ho! Let's go!" As her nickname suggests, she is a punk-rock fanatic, enjoying endless nights of distortion. She's as capable with a guitar as she is with high-tech. To her, combat is like pogo: if it's happening, she wants in.
- TOR — "Sayonara, BUGs." He was weaned on the Governator's filmography, where he picked up some of Arnie's combat skills too. If you asked him to name a hobby, it would be massaging his enemies with his beloved axe. Coincidentally, it's named after his Nana.
- PAM — "Yipi ka yei!" Her parent's wanted a Pamela, but "Pam!" was more fitting from the moment she picked up her first toy. Guess what it was. On one occasion, The Punisher admitted to being the world's 2nd top weapons expert. We suspect you're looking at the first.
- MAC — "Ya don't wear anything under the kilt." The Scott. He's the tough and sensitive type. The lasses say he's an interesting fella, but the rest of us are still trying to figure out what he said. He is proud of his homeland, the castles, the fields... but especially of its whiskey.
- MAI — "Shh!" She's a ninja from the legendary Miautoshi Kuawisipisi clan. Her stealth is unheard of (silent drum roll, please). Some say she was raised by cats, and quietly purrs at the end of each combat.
The character sheet stat key shows four colours: MELEE (red), RANGE (green), ARMOR (blue) and REACTION (yellow).
BUGBUSTER
Player Setup
Each BUGBUSTER is different. Some have powerful melee combat skills, allowing them to face the BUGS up close. Others are experts in distance weapons. Choose your attack squad well.
Look at the sheet for your character. Here you have the name of the BUGBUSTER (1), the dice to roll for melee combat (2) or for distance combat (3). It shows your reaction points (4) and ammunition (5) as well. At the top are the basic weapons the BUGBUSTER begins the game with (6), and the armor points (7).
When you become EPIC, turn the sheet over to see your character's skills in this mode. While EPIC you may only use the weapon that comes with this mode.
The moment a character becomes EPIC, the player receives extra reaction points (8) and ammunition (9). The bonus can raise them above the character's maximum. When the EPIC effect is gone, any remaining surplus of reaction or ammo points is also removed.
Help Card
New players can use this card as a reference of actions your character can take. One side shows options and costs during your turn. The other side shows the same for outside of your turn.
Score Cards
You can use the two score cards to keep track of points. Do this by placing one underneath the other, and slide the top one down to display the total. The number of points received for each fallen BUG is the BUG's SPAWN cost x 100.
The Dice
In POWERUP there are two types of dice: white and yellow. The white dice are less powerful than the yellow ones, but more stable. The yellow ones can be more powerful but are riskier.
- Each skull is a hit.
- The sides with POW! on them give you 3 hits and a draw from the POW! pile.
- The faces with a BUG are blunders. When you get them, you have to discount a die from the roll. The discarded die should have at least 1 hit.
BUGBUSTER Actions
POWERUP games are divided into turn sequences. In each turn, a player has 4 action points (AP) to spend. The available actions and their costs are:
| Action | Cost |
|---|---|
| Move 1 square | 1AP |
| Flip character (change facing) | 1AP |
| Jump | 2AP |
| Attack | 1AP |
| Revive a partner | 2AP |
| Rest and recover 1 RP (reaction point) | 1AP |
| Hand equipment to an adjacent partner | 1AP |
| Pick up ally / obstacle | 1AP |
| Throw ally / obstacle | 1AP |
During your turn, you may use your allowed actions as you wish. Any unused actions are lost, you cannot roll them over to your next turn.
Move 1 Square (1 AP)
You may move your characters to an adjacent space by spending 1 AP. These are the possible movements:
- Sideways, in the direction your character is facing.
- Up or down, if there are stairs, and as long as no obstacles prevent it.
- Backwards without changing the direction you are facing (moonwalking).
Flip character (1 AP)
You can change the direction your character is facing (See Basics page).
Jump (2 AP)
Under normal circumstances, your character can jump one square in the direction it is facing. This costs 2 action points, as if they were 2 movements to this action.
You can jump ahead, in the direction your character is facing, or upwards diagonally (45 degrees).
Attack (1 PA)
Heading as printed ("1 PA"); the action table gives the cost as 1AP.
You can spend 1 AP to attack. For more on attacking, go to the Combat section.
Revive partner (2 AP)
When a character loses all its life points it remains, unable to continue, in the square it died in. When a character is in the square adjacent to it, it may revive its ally using 2 AP's. The revived BUGBUSTER will have 1 life point and be able to keep playing. If the revived character has not taken any actions during this turn, it will have 2 actions (instead of 4). If it has already used actions in this turn, it won't be able to act for the rest of the turn.
Rest (1 AP)
When resting, your character recovers 1 reaction point. You can't have more reaction points than those noted on your card. The only exception is having acquired extra reaction points through a POW! card.
Give equipment to another player (1 AP)
By placing your character in an adjacent square, you can pass equipment from one BUGBUSTER to the other. You can also pass over coins and ammunition.
Pick up an ally or obstacle (1 AP)
You can pick up and carry an ally or movable obstacle from a square adjacent to yours, in the direction you are facing. You can only carry one ally or obstacle at a time. The carrier and cargo occupy the same square. When a character carrying an ally or obstacle is pushed away, the cargo falls to the square where the character was.
Throwing an ally or obstacle (1 AP)
If you are carrying an ally or obstacle, you can throw it in the direction your character is facing. To determine where it should land, roll your melee combat dice. The ally or obstacle will end up as many squares away as succes points achieved in that roll. If zero hits turn up, the ally or obstacle will fall in the next square.
POWERUP
To survive in the world of POWERUP, our characters must improve their skills and equipment... or risk becoming some BUG's dinner. Gear up using the POWERUP capsules.
Once your character enters an active POWERUP, it goes ON. Two things happen now: the player draws a POW! card from the pile, and has the option of using the POWERUP store. When you're done, turn this POWERUP to OFF by flipping the token over. After that, turn back ON another POWERUP on the board.
POW! cards
POW! cards are special actions that you can save for later. Use them whenever you want during the game. This reserve of cards gives us special advantages when fighting the BUGS.
- Special cards can only be used during your turn. Once used, they must be discarded.
- Trick cards can be used at any time. Their effect is immediate and, once used, they are placed in the POW! discard pile.
The maximum number of POW! cards in one hand is 4. If a player has 4 cards and wants to draw a new one, he or she must discard one first.
(Card anatomy diagram: Type of card, Cost of using the card, Name of the card, Letter to form EPIC, Card action.)
POW! Actions
The POW! card icons as printed:
- Add 1 hit to your roll results.
- Add an extra yellow or white die to your roll.
- Add 1 armor point until the end of the turn.
- The BUGMISTRESS must discard 2 random BUG cards.
- YOUR PLAYER CANNOT ATTACK OR BE ATTACKED UNTIL END OF TURN: The BUGBUSTER can't be attacked, nor attack, until the end of the turn.
- Gives ammunition, life or reaction points.
- Draw 2 POW! cards.
- Keep the BUGMISTRESS from spawning in the next turn.
- You may re-roll as many times as you want.
- Pick up all coins from a square of your choice.
- Teleport a BUGBUSTER to any POWERUP that is on, then turn it off (without turning on another).
- Turns on a POWERUP for each ammo point spent.
- Opens or closes a door.
- Changes the direction the BUG is facing.
- USE IT LIKE ANY EPIC LETTER: Use this card as any letter to form the word EPIC.
Buy New Equipment
Buy new equipment for your BUGBUSTER with the coins you have won in the game. You may accumulate as much equipment as you want. But you can only have one weapon equipped at a time. That means one for each category: one for distance, one for melee combat and one for armor.
Buy equipment or supplies
The POWERUP store will have 4 equipment cards that you can acquire. In there is also a permanent store. The card shows the cost of what you can buy: ammunition, life points, a reset of the 4 equipment cards or switching on a POWERUP.
Sell equipment
When you enter a POWERUP, you may sell your equipment. You receive half its value, rounded down.
The Store in DEATHMATCH
In Deathmatch mode the POW! store works differently. In this case, when you enter a POWERUP, turn off the POWERUP and choose from one of these options:
- Draw a POW! card (remember: 4 in hand maximum).
- Draw an equipment card and activate it. If you already had a weapon equipped, you lose that one and place the new weapon card on top of it.
- Recover 3 ammunition points.
- Recover 1 life point.
Also, when you turn the POWERUP off, you DO NOT TURN ANOTHER BACK ON. The Deathmatch turn counter has a cycle where POWERUPs turn back on.
Equipment Cards
Card anatomy (as labelled on the printed example card): Type of equipment; Cost of purchase; Card name; Speed (DEATHMATCH); Feature that improves attack range; Type of damage; Bonus dice; Special actions; Weapon destruction rule.
Types of weapons/equipment
- Bonus for melee attack.
- Bonus for ranged attack, the distance it reaches is the number at the center.
- Bonus for ranged attack, the distance it reaches is the number of hits in a yellow die roll.
- Bonus armor.
Special Actions
- Ammo to yellow die: By spending an ammo point, you gain a yellow die for the attack roll. No limit.
- Reaction to yellow die: By spending a reaction point, you gain a yellow die for the attack roll. No limit.
- 2x to yellow die: If you attack 2 times in a row during this turn, the second attack has an extra yellow die.
- DRILL: If you have surplus hits when destroying a target these go on to the next square until spent. Or until the range is over.
- AREA DAMAGE 2: Attack does the same damage to 2 targets that are in the adjacent squares. This happens to both friends and foes.
- PUSH 2: With a successful attack, it pushes the target 2 more squares.
- White die (melee): Adds a white die to your melee attacks.
- Two reaction points: Adds two reaction points, can go over those allowed on your character sheet.
- JUMP 1A: Jumps only cost you 1AP.
- MOVE 2A / JUMP 4A: Moving and jumping cost twice as many action points as usual.
Basics
Basic physics for a 2D platform world.
POWERUP maps are built using the tiles.
Each tile has 9 squares. Some of these squares have special rules. On some of them, there are obstacles that keep the characters from falling into the abyss.
Outside the board there is empty code, a void where video games converge. This void can only be accessed through special vehicles like the Glitch. If a character is in the void (off the board), without the protection of the GLITCH, it dies instantly.
Facing
Facing is the direction that your character is looking at. It's important because it determines what squares it may attack and where it can walk to. Use your character token to keep track of the facing direction, just flip it to face left or right. For facing, you consider the direction ahead from the player and the diagonals. You can also consider up and down, as long as there are no obstacles.
Square occupation
Unless the character sheet says otherwise, there can only be one BUGBUSTER, one BUG or Non-Player-Character in each square. In the case of allies coinciding, there are rules to allow a character to "pass" or "push". If you are not an ally of the character occupying the square, you can only get through by pushing the character in combat.
Two characters cannot be in the same square at the same time. If you want to, you may pass a character or push it. The player with the overcome character shall choose what to do.
Your character may be in any square that has an obstacle underneath. It is considered that at the edge of the board there is an obstacle.
Types of squares
- Normal square with an obstacle at the top.
- Gateway: By spending an action, you can go through it into any other unlocked gateway. Then immediately put a closing marker (OFF) on that gate. When repeating this action, move the closed marker to the newly closed gate.
- Ladder: This square has a ladder. You may climb the ladder up or down using 1AP.
- Automatic staircase: When a character arrives at this square, it automatically moves up unless it is blocked by a character in the square above.
- Acid square: Everything that falls into it dies and disintegrates. A character that falls into it can only be revived with a CONTINUE.
- Spike trap: If a character falls or is pushed onto one of them it receives 1 damage point and is pushed to the side of their choice (up, down, right or left).
Diagram notes: the obstacle square with the yellow stairs is labelled "This obstacle DOES allow sight and attack. It also allows automatic upward movement, at no cost." Squares with different design and elements are irrelevant for some game modes, but may have value in missions.
Line of shot
Your character's line of shot depends on the side it is facing and any obstacles blocking its vision. See the Combat section for more info. The character's line of shot includes squares straight ahead and at a 45 degree angle, provided there are no obstacles.
Movement
Heading added for structure; the printed page has no heading for this block.
You can move your players to an adjacent square by spending 1 action point. You may move in the following directions: sideways towards where your character is facing, up or down if there are stairs, and backwards (opposite to the direction it's facing, moonwalking!).
Push
There can only be 1 character per square. It may be the case that you want to go over one of the players or move forward. If the player is an ally, it shouldn't be a problem. When we want to enter a square occupied by an ally we can do two things: push or pass. This will always be decided by the player that is passed or pushed. This movement only requires 1 action.
Diagram notes: a "PUSH 3" example and a second "PUSH 3" example, with a "TRANSFER 2" label.
Pushing enemies
The only way to push a rival is in combat. When you attack an enemy, you push it in the opposite direction to the attack. The number of squares to push back is the number of hits in the roll. When the attack is from above or from below, the attacker decides which side to push the enemy to (only right or left).
If you push a character and it bumps into another, the movement affects them both. This is regardless of whether the second character is an enemy or an ally of yours.
Jump
You may jump a square in the direction your character is facing. This spends 2 action points. You can make a straight or diagonal (45°) jump in the direction you are facing. During the jump, if you have an enemy within your reach, you may attack once by spending 1 action point and then completing the jump. You can only attack once per jump.
Diagram notes: "JUMP 2 AP", "MOVE 1AP" and "GRAVITY (no cost)" are labelled on the example board.
Jump-Attack
You can make a jump to the square above, attack and fall back in the same square doing a Jump-Attack. The cost is 2 action points, 1 action for the jump and 1 action for the attack.
Gravity: Falling
If you move to a square where there is no obstacle to support your character, gravity's effect will make it fall to the next square below with an obstacle. Falling 1 square does not affect the health of your character, but falling more than one square will.
Your character can use 1 action during the fall (attack or any other action), but only once per fall.
Lethal Falls
When falling several squares, your player loses as many life points as the number of squares fallen, minus one.
Example as printed: Falling 3 squares = losing 2 life points... ouch!
Walking over heads
POWERUP characters can walk on top of others as if these were any other surface. You may stack as many as you want. If the character at the bottom moves, it will take the others with him.
When the character below moves, and the top character is blocked by an obstacle, the player on the top will fall down.
You can walk over the heads of the BUGs too!
Facing after a fall
After falling from a height or going through a door, you can choose the direction your character will face.
Combat
Ranged attack
If your enemy is within your line of sight, and the number of squares between you is equal or less to the "Range" of your equipped weapon, you may attack. Ranged attack uses 1 action and 1 ammo point.
For a ranged attack, roll the dice that your card allows + any bonus dice from the weapon you're equipped with.
Count the hits obtained in the roll and subtract the armor points that the target had. If the result is greater than zero, check the DAMAGE card to see what damage the target received. If you have not removed all its life points, then the target is not defeated. If so, then push the target as many squares as hits you had in the roll. Do not subtract its armor points in that calculation.
Worked example (printed; dice and icon values are shown as graphics on the page and are not reproduced here): RAY prepares his weapon to attack the BURP in front of him. If he doesn't defeat it, it will catch up with him and give him more than a hug. RAY decides to fire his weapon. He spends 1 ammo and 1 action point. His ranged attack is the bonus shown on his card, and the bonus from his weapon is also shown. He rolls the dice and achieves the hits shown.
The BUG has 2 points of armor, so these are subtracted from the hits obtained. The tally is 1 success. We check the DAMAGE card and see that 1 hit means the target loses 1 life point. Since it has three lives, we place a life icon on top of it. This is to show that it is wounded. We then push the BUG 3 squares, the number of hits we have achieved before subtracting the armor.
Melee combat
If you are next to your target and no obstacle prevents it, you can engage it in melee combat. The cost is 1 action point.
In melee combat, each contender rolls the dice from their melee reserve + the dice for their currently equipped melee weapon. Compare the hits in each contender's roll. Whoever has the most hits wins. Subtract the loser's armor points from the number of hits they have lost by. Use the DAMAGE card to see how many life points to subtract.
Unless it is killed, the loser is pushed back. The number of squares to push equals the difference of hits obtained by each contender in the roll.
Worked example (printed): TOR engages a BIGBUG in melee combat. They both roll their melee dice. TOR gets his hits and the BURP gets its hits. By subtracting the BURP's hits from TOR's, we see that the BURP gets 3 hits. Since the BURP has 2 armor points, 1 hit makes it through. The DAMAGE card indicates that we took 1 life and pushed the BURP 3 squares.
From behind
If you attack a character or BUG from the opposite side it is facing, they cannot roll dice in their defense. You do have to subtract their armor from your hits.
Grenades
Grenades are for 1 single use. The range of the grenade is variable, roll one yellow die to calculate it. IMPORTANT: Start counting from the square next to where you threw the grenade. Then go through as many squares as the range index indicates. Don't go through the same square twice.
To calculate the strength of the attack, roll your range attack dice plus the grenade's dice bonus. The attack will occur both in the square it hits, as well as the adjacent cells (top, bottom, left and right). Unless there is an obstacle.
When the grenade reaches the target, it will attack that square and those adjacent (top, bottom, left and right). Unless there is an obstacle. Damage is calculated as for any other ranged attack.
Destruction of Equipment
Conditions under which equipment can be destroyed are shown at the bottom of the equipment cards. These conditions are different for each card. If the condition happens while performing an attack, it is not carried out.
For example: In the shotgun card shown at the top, if at any time the BUGBUSTER equipped with it runs out of ammunition, the equipment card is destroyed. Discard the cards for destroyed equipment.
Damage types (as printed): piercing, electric, fire.
Loss of Lives
Use the DAMAGE card to see how many life points to subtract from each character. With 1 hit, the target loses 1 life point. With 3 hits, the target will lose 2 life points. With 6 hits the target loses 3. The maximum number of life points that a target can lose is 4, with 9 hits or more.
When a BUG is destroyed by losing all its life points, it leaves behind as many reward coins as its card indicates.
If a BUGBUSTER loses all its life points, the target is defeated. It's left laying in the square where it was defeated. The character can do nothing for the rest of the game, until it is revived or pays for a CONTINUE.
CONTINUE
A way to revive a player is to pay for a CONTINUE. Behind the DAMAGE card, you will find the current cost. Each time you use it, raise the cost by sliding the card. The cost of using CONTINUE can be split among the players.
After a player chooses CONTINUE, their character appears in any POW that was on. Turn the POW off now. The character has all its initial lives, ammo and reaction points. If the player hasn't taken any actions during this turn, they will have 2 actions available. If they have already taken actions during this turn, the player will have to wait for the next turn.
EPIC
Form the word
Each POW! card has a letter in the center. If you pick up POW! cards that form the word EPIC, then you may turn your BUGBUSTER into EPIC.
When doing this, discard the 4 cards used to form the word. Then flip the character sheet and add whatever BONUS in reaction points and ammo it allows. Your character is EPIC until the beginning of its next turn. You can only use the weapons that come with your EPIC character.
Glitches or Assault Vehicles
The GLITCH is a special weapon. These ships can fly on the outside of the board. They can only move when there is a BUGBUSTER inside to pilot the vehicle. When a second BUGBUSTER is on it, they will have access to weapons with a ranged attack of 6.
The edges of the board aren't obstacles to the GLITCH. Add the BUGBUSTER's own ranged attack roll to the Glitch's. No ammunition is spent. For each action point that you spend piloting, the GLITCH moves 2 squares.
The GLITCH can be attacked. It has 2 armor points and 2 life points. Upon losing these life points, the vehicle explodes and kills the passengers inside.
You may carry any number of non-player-characters in the vehicle.
Diagram notes: "1 AP = 2 MOVE"; "RAY can move the GLITCH around the board. But he would need a second passenger to be able to shoot from it at the squares below."
Reaction
As in classic platform games, in POWERUP you have to move fast to survive. Reaction points allow you to move your character outside of its turn, anticipating the actions of the BUGs. This gives BUGBUSTERs the ability to dodge attacks or set traps for the BUGs.
Reaction Points
Reaction Points (RP) are Action Points (AP) that the player can use at any time of the game, even when it is not his or her turn. At any point, the player can stop the game and spend RPs to perform an action.
Note: the source prints "Action Points (PA)"; read as AP, the abbreviation used everywhere else in the rulebook.
Each time you use an RP, flip the reaction token next to your character sheet.
You can recover RPs by resting during a regular turn. Unless they have a special modifier, a player is limited to the RPs they begin the game with.
In the case of using RP to act outside of your turn, the costs of the actions are the same as using normal actions. (See Actions). The only regular action that cannot be done out of turn is resting. Allowing this would create an infinite loop, thus endangering the integrity of the universe. RP's have three extra action types: Roll, Assist and Mid-Jump Action.
Roll
Rolling allows you to dodge ranged attacks. You can use as many RPs as you want when Rolling. For each use of an RP, roll a yellow die. Then subtract the hits from the ranged attacker's roll as hits achieved in your roll of the yellow die.
Diagram note: RAY has been surprised by one of the BIGBUGs and, being in range for a melee attack, is going to be attacked. So RAY spends 1 RP to be able to take a step back, dodging the attack. The enemy's attack is performed and therefore lost. If the BUG still has actions, it can continue using them. It may even choose to attack again.
Assist
You may assist another character in attacking an enemy. This will make the attack more powerful. You can do this as long as your character is in a position to help. See Combat rules. Assisting means you will add your dice to your ally's attack roll and spend 1 RP.
Mid-Jump Action
You can use RPs to move 1 square, left or right, while in mid-air. That way you can reach inaccessible places or avoid falling into a void. The cost is 1 RP and you can only do it once per jump or fall.
DEATHMATCH reaction points
In DEATHMATCH mode, reaction points are used differently. See the DEATHMATCH section.
Initiative
Use the INITIATIVE cards so players know when it's their turn. In DEATHMATCH, the initiative of the players is the number of unused reaction points they have at the moment. If there is a tie, we see which of them has the most initial reaction points in their character sheet. If there is still a tie, take the INITIATIVE cards that are being played and hand them out randomly.
Bullet-time and weapon speed
At any time, a player can use their RPs to react, even between regular actions of a rival player. YOU MAY ONLY USE ONE REACTION FOR EACH ACTION THAT THE ACTIVE PLAYER TAKES.
If a player under attack wants to use a reaction point, he must pay the speed value of the weapon before responding.
For example, to dodge an attack from a speed 1 shotgun, you would have to spend 1 reaction point to dodge and 1 to move away.
The speed of a weapon is next to the weapon name. If there is no number on the equipment card, the weapon's speed is 1.
Being the BUGMISTRESS
The BUGMISTRESS is the supreme leader of the BUGs. For rules explaining how to play with an automatic BUGMISTRESS, see Artificial Intelligence. POWERUP is divided into turn sequences and the BUGMISTRESS is always the first to go.
BUG actions
1. Draw BUG cards. The player controlling the BUGMISTRESS draws one BUG card for every BUGBUSTER playing. There is no limit to the amount of cards in the BUGMISTRESS's hand.
2. Activate a BUG wave. The BUGs have a number behind them. This number is the activation cost for that type of BUG. The Buggies and Batbugs are active from the start. Once the activation cost is paid, place the BUG card face up. From then on, you can spawn that type of BUG.
3. BUGs move and attack. You can move any BUGs that have not been generated during this turn's SPAWN phase. Each BUG can perform the number of actions per turn specified on its card. Once a BUG attacks, it can no longer take action, even if it has actions remaining. To show that the BUG is done, turn the card 90 degrees.
Diagram: an ACTIVE BUG card and an INACTIVE BUG card (turned 90 degrees).
| BUG action | Cost |
|---|---|
| Advance 1 square | 1 AP |
| Flip BUG (change facing) | 1 AP |
| Jump | 2 AP |
| Attack | 1 AP |
4. Spawn of the BUGs. The BUGMISTRESS can use BUG cards in one of two ways: performing the card action or using the SPAWN value on the card to generate new bugs from the BURPS on the board. BUGs emerge from the mouths of upright BURPS, facing in the same direction. BUGs are dizzy from the trip and take no actions during the turn they were spawned in.
There can never be more BURPs than BUGBUSTERs in the game.
BUG cards
Card anatomy: card name; card type; card action; SPAWN value; automatic SPAWN for solo or AI games.
- Special cards can only be used during the BUGMISTRESS' turn. Discard after use.
- Trick cards can be used at any time. Their effect is immediate and once used they are left in the BUG card discard pile.
- Event cards can only be used during the BUGMISTRESS' turn. Their effect is maintained until BUGMISTRESS's next turn. There can only be one event in use during each turn sequence.
BUG sheet
Sheet anatomy: cost of the SPAWN; name of the BUG; lives; range attack; melee combat; actions per turn; attacks per turn; special ability; coins left behind after killing.
- FLYING: This bug can fly and float. It does not need an obstacle underneath it to stay in a square.
- TEAM 4: You can stack up to 4 of these BUGs in the same square. When they attack or defend they add up all their dice. You can stack them and unstack them anytime you want. Any actions taken as a group are also counted for the separate bugs.
- BACKEYE: This BUG has two heads and can look back. There's no way to sneak up on it.
- SPAWN: During a SPAWN phase, this BUG can throw up other bugs. Place the spawn BUGs in the squares next to the spawner, either in front or above it.
- REGENERATE 1: At each turn this BUG regenerates, receiving 1 life point.
Rewards
Example (printed): The BUGMISTRESS has used BUG cards with a total of 8 points (4 + 4). She has released a BRASAS and a BIGBUG. They appear on the side that the BURP is facing.
When a BUG dies, it disappears leaving coins behind. The exact number is on its sheet. The BUGBUSTER that dealt the mortal blow will receive points for it: the BUG's SPAWN cost x 100.
Other characters can pick up the coins. Waste no time and sweep them up!
Protection
- Armor: Each armor icon on a BUG means one less hit in your attack.
- Protected from piercing weapons: These BUGs are immune to attacks with piercing weapons. They are not damaged by the hits but can be pushed back by them.
- Protected from fire weapons: These BUGs are immune to fire weapons. They are not damaged by the hits but can be pushed back by them.
- Protected from ranged weapons: These BUGs are immune to ranged weapons. They are not damaged by the hits but can be pushed back by them.
BUGs
Printed BUG descriptions (the BUG sheets carry the stats):
- BUGGIE: They are small and slippery. These little devils are capable of stacking up to a maximum of 4 and can attack together. They die one at a time.
- BATBUG: These little BUGs have unique abilities: they can fly and spit. They defy gravity and float in the air.
- BIGBUG: When a BUGGIE grows it becomes a BIGBUG, an unbeatable warrior, armed with claws and a retractable tail.
- BICEFALUS: These BUGs have two heads. That means it is facing in two directions and cannot be caught by surprise.
- BLOB: A disgusting mass of mucus. It is immune to perforating weapons. You will need special weapons to destroy it.
- BRASAS: Straight outta hell, these lavalike creatures spew fireballs and are immune to fire damage.
- BUGDOZER: This BUGGIE has stolen a combat armor from the Nexus. It is now a force to reckon with and immune to ranged attacks.
- BURP: They are the spawn points of the BUGs. They are harsh, rude and have terrible breath.
- BOSS: The Boss is the BUG-in-Chief. He has the ability to blink! like the characters. And he's an exceptional warrior.
- BUGMISTRESS: She only manifests in a handful of missions, and is the ultimate final monster. In her initial state, her body regenerates and she is able to SPAWN like the BURPS. If we manage to defeat her in this early state, she will go into VERY ANGRY mode. In this mode, she won't be able to spawn or regenerate, but will immediately open fire on the BUGBUSTERs.
Specials
Explosive Drums
These drums are on the board. You can use them in one of two ways:
- Pick up and throw: explosive drums are a movable obstacle that any character can pick up and throw. They explode in whatever square they fall on.
- Shoot them: if you attack the drum with range weapon, you only need 1 hit for the drum to explode.
Drum explosion. The drums have an area damage in the shape of a cross, like grenades. If there is an obstacle, that square is not affected.
The place where the drum exploded remains on fire. Flip the drum token to show this. Anyone entering this square receives 1 damage point and is pushed away 1 square. They can choose the square.
Non-Player Characters
Some POWERUP missions involve Non-Player Characters. These characters have specific rules for each mission. They have 1 life point unless the mission says otherwise. They also have 2 movement actions in every turn, to be decided by the players leading the BUGBUSTERs.
Obstacles for Cover
Through some POW! cards we can create obstacles. These will give us a cover of 2 armor points when our character is shot at. This only applies to shots coming through the square where the obstacle is. This square is blocked and no one can pass through it. You can melee attack a cover obstacle to destroy it. You'll need 3 hits in your roll to destroy it.
Secret Tokens
These tokens have different results behind them:
- Coin Bonus: You receive the number of coins that appears on the token.
- Goal Tokens: They are labeled A, B and C. They have different uses depending on the mission.
- Buggie Trap: Place a BUGGIE in the square where the Secret Token was. The character is pushed back to the square it came from.
Team Robots
These tokens are used in some missions, mainly for the DEATHMATCH. Consider them as an ally or obstacle that can be picked up or thrown.
Profession Sheets
In some missions your BUGBUSTER can have PROFESSION within the squadron. There are two possible abilities for each profession. Chose which one and place it below your BUGBUSTER sheet. When you enter a POWERUP you can turn around the profession sheet and change your ability.
Machine-Gun Turrets
Characters with engineering abilities can build machine guns. There may only be one machine-gun at a time. After creating them, leave ammunition counters in them. The creator can activate the machine-gun at any time. It will shoot for a range of 6 squares. Once the ammunition is spent, the turret disappears.
Diagram note: the Machine-Gun Turret shows a turret with the ammunition counters beside it.
POW! Cards
- Adrenalyn (Special, Free): The BUGBUSTER gets 2 extra reaction points.
- Ammo Found (Special, Free): The BUGBUSTER wins 1 extra ammo point. This may exceed the maximum ammo allowed for your character.
- Armory (Special, 1 reaction point): The BUGBUSTER wins 3 extra ammo points. This may exceed the maximum ammo allowed for your character.
- Assemble (Special, 1 reaction point): The entire team may exchange their POW! cards as they wish.
- Attack Advantage (Trick, must be used with a melee attack): Add 1 white die to your attack roll. It may be added at any time.
- Barrier Granade (Special, 1 ammo point): Generates a barrier of 2 armor points in an adjacent square. (Card name as printed.)
- BrainWash (Special, 1 reaction point): The BUGMISTRESS discards two random BUG cards from her hand. The BUGMISTRESS may use tricks in her hand before discarding these two cards.
- Concentration (Trick, must be a ranged attack): Add 1 hit to your attack. Can be used at any time.
- Copycat (Trick, 2 reaction points): Use it when someone uses a POW! card. You get to keep their card and to use it whenever you like. You cannot copy the effect of the 4 combined EPIC cards but may use one of the cards from that play.
- Disruptor (Special, 1 reaction point): The BUGMISTRESS cannot spawn in the next turn.
- (Special, 1 reaction point): The BUGBUSTER draws two POW! cards. You cannot have more than 4 cards in your hand. You can discard after drawing, but may not use the cards in this turn.
BUG Cards
- Acid Corruption (Special): Destroy all coins that are in a square.
- Acid Vomit (Trick): If a BUGBUSTER is adjacent to a BURP that you control, select one of the weapons the BUGBUSTER is equipped with and destroy it.
- Ambush (Special): Generate 2 BUGGIES next to 1 BUGBUSTER.
- Bicevolution (Trick): Transform a BIGBUG into a BICEFALOUS.
- Charge (Special): Move your BUGS twice as many squares during this turn.
- Creeper (Event): The BUGBUSTER's movements cost double the action points until the start of the BUGMISTRESS's next turn.
- Deplete 3 powerups (Special): Turn off 3 POWERUPs from the board.
- Evolution (Trick): Transform a BUGGIE into a BIGBUG.
- Explosive Gas (Event): No one can use distance attacks until the next turn begins.
- Inmolation (Trick): Sacrifices a BRASAS by making it explode with an area of damage 1. This would take away 1 life point from any character adjacent to it. It ignores the armor. Leave a fire token in its place.
- Metal Corrosion (Special): You can remove 1 ammunition from each BUGBUSTER or 3 ammunition points from a single BUGBUSTER.
- Mortal Gas (Special): You can remove 1 reaction point from all BUGBUSTERs or 2 reaction points from a single BUGBUSTER.
Artificial Intelligence
POWERUP is a game you can play cooperatively, or even solo, against the BUGs. Moving the BUGs, determining their reactions, and putting these into play is the most difficult part to learn. It will become easier after a little PRACTICE. But at first you'll need to pay attention to the instructions. If at any time you forget something, like making a particular move or attack, it's OK. POWERUP's most important rule is fun over simulation!
When something like that happens, think of it as a bug in the game...
Turn card
Use this marker to keep track of each turn. A cycle of 8 turns is a round. Use the second marker to count rounds.
Spawn
Draw as many cards as there are BURPS in play. Then go ahead with the auto-spawn as shown on the card, below the spawn number. Each card releases a BUG from a different BURP on the board.
Note that the first SPAWN of the game is different when using the AI. If it includes BUGs that are stronger than BUGGIES or BATBUGS, still follow the SPAWN value on the BUG card you drew, but release only BUGGIES.
Move & Attack
In this turn, we will move the BUGs. Draw as many BUG cards as BUGBUSTERS playing, and then place the cards face up. Discard the Events. If at any time you can put any of their effects into play, do this by starting by the events on the left.
Moving the BUGs
Here are the rules to follow when guiding the BUGs with the Artificial Intelligence:
- First we see if there are any players within the attack range of a BUG. If there are, start by resolving that attack.
- Then we move the BUGs, starting with the ones with the lowest SPAWN cost. We begin by moving the BUGs closer to the bottom of the board. If a BUG moves into an attack position when doing this, then perform that attack right away. The direction the BUGs are heading is explained in "Where are the BUGs going?"
Event
Draw from the BUG cards until you find an event, then put it into play. There are some missions that have their own events, in that case roll the dice and select one of the events that comes with the mission.
Pushing
BUGS push other BUGs, which in turn push other BUGs. This is normal. This may cause BUGs to stack up on, and in some cases to move many more squares. They can also push each from the top or from below. In that case, the BUG that was pushed would move forward in the direction it is facing.
Where are the BUGs headed?
When moving the BUGs, here are the rules to follow:
- Some missions give the BUGs PRIMARY TARGETS. They will normally move towards these targets. However, if a BUG sees a BUGBUSTER, it will always go towards it.
- In its current position does the BUG see any players? (Make sure they are in the line of sight, see Basics.) If you don't see any, the BUG moves towards the PRIMARY TARGET. Alternatively, the BUG goes on in the direction it is facing.
- If the BUG is in the position to attack a PRIMARY TARGET or a BUGBUSTER, it will attack.
- Repeat step 2 until the BUG runs out of action points or attacks. Each BUG has a number of actions and attacks noted on its sheet.
How BUG cards work
Here's how to use the cards that you draw in automatic mode:
- Knock Knock: Move the most powerful BUG, that is also furthest away from the BUGBUSTERS. Place it either at the door closest to the PRIMARY TARGET or next to the BUGBUSTER with the highest SCORE.
- Open/Close Door: Close the door nearest to the BUGBUSTER with the highest SCORE.
- Immolation: If you have a BRASAS in play, this BUG throws itself kamikaze-style against a BUGBUSTER.
- Metal Corrosion, Mortal Gas, Psychic Attack: These have effect over all players, unless you are playing solo where it would only affect you as a single character.
- Teleport: Teleports towards the PRIMARY TARGET or the BUGBUSTER with the highest SCORE.
- Reinforcement: Use it to have 2 cards instead of this one.
- Deplete 3 POWERUPs: Turns off POWERUPs that are near the BUGBUSTERs with the highest SCORE.
- Surprise: Use these cards at the end, with the BUGs that are closest to the PRIMARY TARGET or that are closer to the BUGBUSTER with the highest SCORE.
- Acid Vomit: If a BUGBUSTER is next to a BURP use it automatically with him. It can only be used on BUGBUSTERs that have weapons equipped.
- Acid Corruption: Use this on the square with the most coins.
- Thief Buggie: If one of the BUGGIES is next to a BUGBUSTER, use this card and escape.
Story Mode
The printed STORY mode is a narrative campaign. Its dialogue and narration are omitted here; each mission's printed Goal and Reward is kept. The printed board diagrams for each mission are not reproduced.
Mission 1: Gimme my POWERUP
- Goal: The whole group has to make it alive to a POWERUP. If someone dies, you have to start over from the beginning.
- Reward: The whole group can buy equipment from the POWERUP store. Each player gets a POW! card at the end.
Mission 2: What happened here?
- Goal: Exterminate all the BUGGIES and help PDR.
- Reward: Talk to PDR.
Mission (PDR rescue)
- Goal: Exterminate the BUGs and defend PDR from their attacks.
- Reward: PDR is saved.
Mission (the BLOB)
- Goal: Take out the BLOB.
- Reward: Find ROM inside the BLOB.
Mission (the BRASAS)
- Goal: Beat the 3 BRASAS and save ROM.
- Reward: Speak to GUS.
Mission 3: EXODUS
- Goal: Save the scientists. Take each one to a POWERUP. Gus will be the last one you save.
- Reward: Keep reading.
Mission (the BURP)
- Goal: Take out as many BURPS as there are players. Take out the turn card and start the spawn cycle as if it were an arcade game. The objective is to destroy one of the BURPS and exit through a POWERUP with GUS. GUS has 2 actions to be able to move in the turn of the BUGBUSTERs.
- Reward: Saving GUS.
Mission 4: Point of No Return
- Goal: Destroy the BOSS. Keep any BUGs from the previous mission. If the square is occupied, the occupant is pushed.
- Goal (as printed, second heading): Avenge GUS.
No reward is printed for this mission. Story mode closes with the note that you can continue your adventures in ARCADE mode.
Arcade Mode
Fight the BUGs and defeat them. Each ARCADE card sets its own minimum players, goal, preparation, starting coins and special rules.
Save the VIPs
The Nexus is being attacked and in the hasty civilian evacuation, 3 VIPs were left behind. They wait for a teleportation and they carry very important documents. We won't have enough power to evacuate them until 8 turn sequences have passed. Can you hold on until then?
- Minimum players: 1
- Goal: In this mission, the BUGBUSTERs must keep the 3 non-player characters alive for a ROUND (8 turn sequences).
- Preparation: It can be played with any combination of 12 tiles, in a 3x4 board. Place the non-player characters on one end of the board, and the BURPS at the other end. Set out as many BURPs as BUGBUSTER players.
- Initial coins: 4 coins for each player.
- Special rules: Non-Player Characters have 2 movement actions in each turn. They can't use the doors. If a BUG reaches its square it attacks from a distance, the NPC dies automatically.
Dimensional Portal
Some BURPs have slipped into the Nexus and are starting to build a strange contraption. It looks like the machine would allow BUGs to enter our dimension in massive waves. You must destroy the machine within the 8 turns, or an immense wave of BUGs will come through it.
- Minimum players: 2
- Goal: In this mission the BUGBUSTERs have a round (8 turn sequences) to destroy a machine the BUGs are building.
- Preparation: It can be played in any combination of 12 tiles. Place 3 reaction tokens, in adjacent cells. This will be the dimensional portal. The BUGBUSTERs start the game on the tile at the other end of the board.
- Initial coins: 6 coins for each player.
- Special rules: If the 8 turn sequences pass, and all three parts of the dimensional portal have not been destroyed, the portal will be activated. For each piece of the portal that remains, one more BUG card will be drawn. You may spawn BUGs from each token as if it were a BURP. If in 4 turns of the second round the portal has not been completely destroyed, the BUGMISTRESS has won.
Hidden Keys
The Nexus is the point from which you can reach all classic games. There are portals here which allow us to travel to classic games. If the BUGs could do it, they would destroy these. The portals are protected with coded keys that have been lost along the Nexus. We must find them before the BUGs do, and escape on a GLITCH.
- Minimum players: 2
- Goal: In this mission the BUGBUSTERs have to uncover the three keys (A, B and C) in the secret tokens. They must do this before the BUGs find them and use them for their own evil purpose. Once you have the keys, you have to escape using the GLITCH.
- Preparation: It can be played in any combination of 12 tiles. See the example. There must be at least 3 portals in sight. Place the GLITCH 7 and its chip near the characters so they can use it.
- Initial coins: 6 coins for each player.
- Special rules: When a BUG or a BUGBUSTER finds one of the keys or coins, they can keep it without showing what they have found. The BUG that finds the secret keeps it with them. If it dies, the secret falls to the ground and can be picked up. If a BUG gets one of the keys and makes it to one of the map portals, the BUGs win.
Board note: the secret tokens are placed RANDOMLY across the middle of the board.
Kill the BUGMISTRESS
The BUGMISTRESS has appeared in the Nexus. This is our chance to get her, once and for all! To reach her you will have to eliminate her minions, but you can do this!
- Minimum players: 2
- Goal: In this mission, the BUGBUSTERs must destroy the BUGMISTRESS. She is in the center of the board.
- Preparation: Place the BUGMISTRESS card in the center of the board. This card occupies 1 square completely. In the beginning, you are at level 1. The BUGMISTRESS starts with one less BURP than usual. Place the BURPS around the BUGMISTRESS. There is no time limit for this mission.
- Initial coins: 16 coins for each player.
- Special rules:
- The BUGMISTRESS is also a SPAWN point and she cannot move. (As printed; the same rule block then says she can change places as long as the move is allowed, see below.)
- When she dies in level 1, she immediately moves to level 2, becoming much more powerful.
- She can change places as long as the move is allowed (there are no players in the square she enters), and she can flip up to 3 tiles. When she does this, place the chips that were in the same places as they were on the other side.
- In level 2 the BUGMISTRESS can shoot and defend herself much more ferociously, although she cannot regenerate.
- The maximum of BURPs allowed is the number of players minus 1.
- The BUGMISTRESS can SPAWN in any direction and is immune to attacks from the back.
Deathmatch
BUGBUSTERS against BUGBUSTERS in a fierce battle.
Fight squadron against squadron in a capture-the-flag battle. In this mode, two teams will play against each other. It can be one against one or two against two.
If 3 players want to participate, 1 can manage 2 characters.
Deathmatch preparation
Prepare the board by setting tiles in any position you want. In DEATHMATCH it's usually much more fun if you place acid traps or spike traps throughout the board. The tile size of the board depends on the number of players.
Place tiles 21 and 22 at positions for RED TEAM and BLU TEAM. These will be their bases. The printed diagrams show the base positions for 2, 4 and 6 players.
Take a POWERUP token for each tile on the board. Give half of the POWERUP counters to each team. Each team will place the POWERUP counters one by one wherever they want. Do not place more than 1 POWERUP on each tile.
Take the secret chips with coins, POWERUPs and buggie traps. Mix them and give half to each team. Players can place these wherever they want on the board.
Each team places 1 explosive drum wherever they want.
Each team places the robot with its team color on its base tile.
Now, the board is ready. Each player places his or her character at any point on their base. The game begins.
In Deathmatch, the character's initiative is determined by the number of reaction points they have left. If there is a tie, look at whoever had the greater number to begin with. If there is still a tie, the remaining INITIATIVE cards are distributed among those players.
Goal and scoring
The goal is to reach the opponent's base, steal their robot and bring it to their own base.
To be able to score you have to get to your own base with the robot. Your team's robot must also be in your own base. Otherwise, you won't score.
The robot will fall off the character whenever it receives enough damage to be pushed in combat. The robot remains in the square the character was originally.
Once you touch your team's fallen robot, it automatically teleports to your base.
When you score, the robots return to their base. Each player is teleported to their base and all POWERUPs are turned on again.
Final score: The first one that captures to score twice, wins.
Death of the contenders
When a BUGBUSTER loses all its lives it disintegrates. It then reappears in the active POWERUP that is closest to your base. Remove this POWERUP from the board. Then place it on the square where the BUGBUSTER perished.
When a BUGBUSTER dies, it loses all weapons and equipment, but not its POW! cards.
The returned BUGBUSTER has 3 lives again. Its original ammunition and reaction points are restored as well.
If the player has already played that turn, they wait for the next turn to play again. If they haven't played in this turn yet, they'll have 2 actions.
Until the player takes the first normal action the BUGBUSTER is protected: it cannot attack or be attacked.