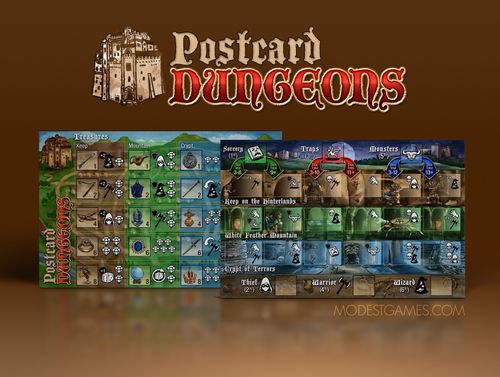
Postcard Dungeons
Postcard Dungeons Rulebook
Table of Contents
Table of Contents
Setup and Choosing a Dungeon
Greetings Lord! I'm going to walk you through your first ADVENTURE into one of our three local DUNGEONS.
-
Your first decision will be to choose a dungeon, keeping in mind that the dungeon closest to the surface (Keep on the Hinterlands) is the safest (relatively) of the three, but has the least valuable loot. Conversely, the dungeon farthest from the surface (Crypt of Terrors) is the most deadly, but has within it treasures unimaginable. I recommend choosing the Keep on the Hinterlands for your first adventure and trying the later dungeons when you have some magical items to help you out, but some people just love rushing into danger. I should also mention, it's important to place one of your player tokens next to the dungeon you choose, or at least loudly declare before rolling any dice what your choice is. If you don't do either of these things and you start rolling dice, it's customary for the player to your right to choose what dungeon you are heading into, and they probably don't have your best interests in mind.
-
Next you'll be populating the dungeon with SORCERY, TRAPS, and MONSTERS - and the dice that end up on them are called DUNGEON DICE. This step is a bit complicated, so let me walk you through it.
First you'll roll 1 die (and only 1 die) and put it on the SORCERY icon. SORCERY is the evil book icon on the top of the board on the upper left. It represents the dark sorcery that spawned the dungeon or the evil mastermind behind its traps and monsters.
Once that die is in place you roll 1 die again and put it on TRAPS. This icon is to the right of the SORCERY ICON, in the top middle part of the board. It represents traps. Pretty straightforward.
Finally you'll once again roll 1 die and put it on the MONSTERS icon, which is on the top right of the board. Remember what these three icons mean and where they are located because it will come up later.
Note that there are TWO arrows below each die. Each die will move along one of those arrows into the corresponding space (ROOM) within the dungeon you have chosen.
To find out which space the dice go into, simply add the total of all 3 dice. In this case 4+3+4 = 11. Based on the arrows, the first die (SORCERY) will move to the RIGHT room under sorcery, the second die (TRAPS) will move to the RIGHT room under traps, but the third die (MONSTERS) will move to the LEFT room under MONSTERS.
The board should now look like this. You are done setting up the dungeon. Note that each die is in its own room, and each of those rooms also encloses an ICON or ICONS to the right of the die. These will come up later.
Keep in mind if you had chosen a different dungeon (Say, White Feather Mountain), the dice would have been moved down to the appropriate rooms in THAT dungeon.
Rolling and Placing Hero Dice
-
Next you roll your HERO DICE. You get 3 dice and this time you can roll them all at the same time. If you have a HIRELING, you'll roll 4 dice and choose any 3 of them. We'll talk about HIRELINGS more later. Anyway you choose which HERO each die represents (THIEF, WARRIOR, or WIZARD). You can put them on whichever HERO space you want, but each space only gets only ONE die, and you can't choose to leave a HERO space unoccupied. Each space must get a corresponding die. Notice that each HERO has an ICON associated with it just like the CHALLENGES of the dungeon. When you're done you'll see something like this.
You're probably wondering at this point "How do I know which die to place where?" And that's a good question. Some people might say it's the MOST IMPORTANT QUESTION OF THE GAME. People like me. I would say that. In fact it's SUCH an important question and so tricky to answer that some delvers take a REAL long time choosing where to put these dice. Some groups find this to be irritating, others enjoy sitting around smoking pipes at the inn and discussing together what the best strategy is. You'll have to gauge what kind of group you are yourselves, but we recommend the following optional rules:
Optional rules for placing Hero Dice:
- Once a Delver lets go of a die on or near a hero space - THAT'S WHERE IT GOES. No moving it after that. Kinda like CHESS.
- Each Delver gets 1 MINUTE to make their decision. Use an hourglass. Or just count to 60.
Remember these are OPTIONAL rules, make sure everyone agrees to them before you start your game, and if it's your first game we really recommend you don't use them.
Stunned and Defended Hero Dice
-
Next adjust any of your HERO DICE that are STUNNED or DEFENDED (by TREASURES). Now look at the DUNGEON DICE and see if any of them are in a room with a symbol like the STUN icon. That DUNGEON DIE is stunning one of your HERO DICE (in this case your WIZARD). To indicate this, move the STUNNED die down until it's slightly below the square.
If you have captured a TREASURE with the DEFEND icon it will DEFEND one of your HEROES, in this case your THIEF. TREASURES are explained in more detail later. To signify that your HERO DIE is DEFENDED, rotate it an eighth turn like you did when DUNGEON DICE are DEFENDING each other.
Resolving Attacks
-
Next you're going to resolve the outcome of your decisions so far. The dungeon will try to kill you, you'll try to not get killed. This part is also a bit complicated, so I'll walk you through it. First of all ATTACKS happen in a certain order, and conveniently that order is printed on the board. The dungeon always goes 1st with SORCERY. Unfair you say? Consider - if you constantly had a bunch of unruly heroes marching through your living room, you might start to set things up so you have an advantage against them. So the ORDER that ATTACKS goes - SORCERY, THIEF, TRAPS, WARRIOR, MONSTERS, and finally WIZARD. So far so good? Great.
Notice we are saying ATTACKS here. WHAT IS AN ATTACK? It's one die trying to kill another. If it's one of your HERO DICE and it's your turn to attack you get to choose which DUNGEON DIE you are attacking. So it might be useful to say "My THIEF is going to ATTACK the MONSTER DIE." If the ATTACKING die is equal to or greater than the DEFENDING die, the defending die is removed from the board. It doesn't get to counterattack. It's just defeated. Dice are only removed from the board when they are defeated. Also keep all defeated dice nearby, you'll need them later for scoring. If your HERO DIE is too low to attack any of the DUNGEON DICE, it can't really do anything. It's sad but that hero just kind of sits there looking pathetic during their turn. Alternately, a hero can't decide not to attack if it can potentially defeat any DUNGEON DIE.
The DUNGEON DICE are a bit different when their turns come up - they DON'T ALWAYS ATTACK. The icon to the right of the DUNGEON DIE determines what it's doing:
Dungeon Icons During Attacks
Standard attack (dungeon claw icon). This is an ATTACK by the dungeon. When this ICON comes up the dungeon will attack one of your HEROES. Now dungeons are notoriously full of underpaid and poorly motivated labor, so this ATTACK will use only the most rudimentary tactics. It will always defeat a HERO DIE if it can defeat one, and it will test each of your 3 HERO DICE in turn. First it tries to attack the HERO whose turn is coming up. So SORCERY will try to attack THIEF, TRAPS will try to attack FIGHTER, and MONSTERS will try to attack WIZARD. If it can't attack the targeted HERO for whatever reason, it will move to the right looking for a target (wrapping back around to THIEF). If it defeats a HERO, it stops. If it can't defeat any HERO, its turn ends. Just like HERO attacks, they are successful if the DUNGEON DIE is equal to or greater than the targeted HERO DIE.
Instant defeat (skull and hood icon). This icon is the INSTANT DEFEAT icon, it counts as an ATTACK. So when this DUNGEON DIE comes up in the turn order it defeats the targeted HERO DIE (in this case the THIEF) even if the DUNGEON DIE is too low to attack that HERO DIE. Also this die will ONLY attack a THIEF.
Obviously if a DUNGEON DIE is defeated before its turn comes up, it doesn't get to attack, and the same applies to HERO DICE. If a hero is defeated before they get a chance to attack, they don't attack.
Other Dungeon Icons
There are a couple of other nasty things the dungeon might do to make the lives of heroes challenging:
Defend (shield icon). The DUNGEON DIE next to this icon is DEFENDING ANOTHER DUNGEON DIE in a different room. In this case it's DEFENDING MONSTERS. So no HERO DIE can attack the MONSTER DIE until this one is defeated. Also this isn't an attack, so it's in effect from the moment you enter that dungeon. Rotate the DEFENDED die an eighth turn to show it is DEFENDED.
Stun (axe icon with Zzz). The DUNGEON DIE next to this icon stuns one of your HERO DICE, in this case your WIZARD. If your WIZARD'S turn comes up and the STUNNING die is still on the board, your WIZARD'S turn is skipped. Just like the defending icon above, this isn't an attack. It's in effect immediately. You must defeat this die before the targeted HERO'S turn comes up or that turn is skipped. Move your WIZARD die down below its box to show it is STUNNED.
Some rooms in the harder dungeons have 2 icons, both icons are active. That's why they're hard. In case there's a question, they activate from the top down.
Example Adventure
Let's see an example ADVENTURE. Here we see that SORCERY is defending TRAPS, TRAPS is ATTACKING, and MONSTERS is attacking and INSTANTLY defeating the THIEF.
- SORCERY goes first, but it doesn't attack.
- The THIEF goes 2nd, but both SORCERY and MONSTERS are 4s and the THIEF is only a 3. The THIEF could attack TRAPS, but it is DEFENDED by SORCERY, so the THIEF'S turn is wasted.
- Next TRAPS (3rd) attacks, first checking to see if it can defeat the WARRIOR, and then the WIZARD. Those dice are too high, but the THIEF is only a 3. The THIEF is defeated and its die is removed from the board.
- The trusty WARRIOR'S turn arrives 4th. The current player chooses to have her WARRIOR attack the SORCERY DIE and it is defeated; TRAPS are now no longer DEFENDED.
- MONSTERS comes up next (5th), but these particular beasts are only interested in defeating thieves, and no THIEF remains on the board. They do nothing.
- Finally the WIZARD goes last (6th) and the current player decides to attack TRAPS. She blasts the TRAPS with magical fire (they are no longer defended by SORCERY). The TRAPS die is defeated and removed from the board.
The board now looks like this, and the current adventure is done (each die only gets ONE ATTACK). Now it's time to see if you can claim a TREASURE!
Capturing Treasure
-
If things went well you get to claim a treasure! Huzzah. Here's how that works. Remember those dice that were removed from the board when attacks were resolved? Well you're going to look at them now. All of the DUNGEON DICE that your heroes defeated and removed from the board ADD to your score, HOWEVER you may have lost some friends down there, and that makes heroes sad - so SUBTRACT the total combined value of the HERO DICE that were defeated by the dungeon. The result is your TREASURE SCORE. If we're looking at the example above these are the defeated dice:
- There are two DUNGEON DICE here adding up to 7 (YAY!)
- But there is also 1 HERO DIE worth 3 (BOO!)
The total TREASURE SCORE is 7-3=4. 4 points.
Now you get to use your TREASURE SCORE to claim a TREASURE. You ONLY get to claim 1 TREASURE, and you can't save these points for your next adventure - so now is the time to use that big Master Delver brain of yours to choose wisely:
Find the column with the name of the DUNGEON where your adventure took place. You can buy ANY ONE TREASURE that has not yet been claimed that is equal to or less than your TREASURE SCORE - the number in the little square. Put one of your PLAYER TOKENS in there to show everyone you are now claiming that treasure. It belongs to you and your descendants until the end of time. See that Column labeled "ANY"? Well you can always buy from that column no matter what dungeon you went in to, as long as you have a high enough TREASURE SCORE and there is an available treasure.
Of course now you are asking "What treasure is the best treasure?" And once again it's a bit of a tricky question. See those little gems? Those are worth VICTORY POINTS, so whoever has the most of those at the end of the game is the winner. However, the other ICONS will give you special abilities which help you in upcoming adventures.
So in general you need to decide between powering up your heroes or scoring points. The other icons are explained below.
What If My Treasure Score Is Zero?
If your score is zero or negative (which is essentially the same thing) then you don't get a treasure. At all. Adventuring life can be tough. However your resolve is hardened and you gain a HIRELING for your next adventure. Put one of your PLAYER TOKENS on the CASTLE next to the Postcard Dungeons logo to signify this. When you have a HIRELING, you roll 4 HERO DICE on your next ADVENTURE and place 3 of them. Then remove your PLAYER TOKEN from the castle space. You can only ever have 1 HIRELING and you never roll more than 4 HERO DICE, even if you have a magical HIRELING (see below).
Treasure Icons
Here are all the fancy things that TREASURES can do for you:
- Attack bonus (+2 icon). Add 2 to the attack value of the shown HERO DIE (WARRIOR in this case) - but ONLY WHEN ATTACKING. The die is considered to be its unmodified number for purposes of defense and determining TREASURE SCORE.
- Magical Hireling (+1 die icon). This player gets a HIRELING die every round regardless of how their last turn went. A player may only have 1 HIRELING per turn, Magical or otherwise.
- Defended (shield icon). The targeted HERO DIE is DEFENDED and can't be attacked (even by an Instant Defeat). The hero can still be STUNNED. You should rotate your hero an eighth turn just like you do with the dungeon's dice when they are defended.
- Imp Familiar (thieving imp icon). When you claim this treasure, instead of putting your player token on this space, choose a treasure already claimed by an opponent and move their player token onto this treasure. Then put your token where theirs was. This can only be used once per game. I guess we lied about your descendants getting your treasure.
- Foresight (dice with circular arrow icon). After rolling the DUNGEON DICE and seeing the result of all three, you may reroll all three of them. You must keep the result of the second roll, and you must do this before rolling any HERO DICE.
- Hasted Hero (wizard with circular arrow icon). This hero's turn activates one turn EARLIER than it normally would. So in this case the WARRIOR would go 3rd and TRAPS would go 4th.
- Victory Points (gem icon). Whoever has the most of these wins the game.
Winning the Game
- WINNING: After each Delver has gone on 3 ADVENTURES, the player with the most VICTORY POINTS wins. In case of a tie, the player with the TREASURE worth the MOST Victory points in the MOST dangerous DUNGEON wins.
Advanced Rules, Optional Rules, and Variants
Make sure everyone playing the game agrees to these before you begin.
- Course Correction. This rule makes the game a bit more interesting, but we really recommend you don't use it during your first game. It's pretty simple - once all the DUNGEON DICE are on the board and all the HERO DICE have been assigned, the current player may re-roll ONE DUNGEON DIE and then place it back in the room it came from.
- Clever Girl. A variation on COURSE CORRECTION. In this version the OTHER PLAYERS choose which die to re-roll with a vote. If they can't decide then the person to the current player's left decides. A really nice version for 2 player games, and it gives the other players something to do on someone else's turn.
- TPK. If your entire party is wiped out (All 3 of your heroes are defeated in the same adventure) the town takes up a collection out of pity. You get the lowest available TREASURE in the last column marked "ANY", for free! Purposefully wiping out your own party to get this reward is frowned upon. Note that this could lead to stealing someone else's treasure...
- TMK. If you defeat every DUNGEON DIE in a particular dungeon you can loot it at your leisure. You may choose treasures from the Treasure Column for the dungeon to the right of the actual dungeon you are in. Doesn't really give a bonus for the Crypt of Terrors, but who defeats everything in the Crypt of Terrors?
- Competent Hirelings (Ash's Rule). Some people feel that Hirelings don't give enough of a boost. This optional rule makes them more powerful but can slow down play a bit. If you are rolling a Hireling die you MAY place two dice in one HERO DIE space. If you do this the attack value of both dice is added together when that HERO is attacking. An Instant Defeat attack on the space with two dice defeats BOTH DICE. A regular attack on this space will defeat the HIGHEST die that can be defeated (i.e. the dice DO NOT defend together). Stunning effects stun BOTH dice. Treasures which give a bonus to attack are only added once. Treasures which defend a hero defend only one hero, chosen before attacks are resolved. Note that you may only double up dice when you have a hireling, you may still only have 1 hireling die per adventure, and you MUST place at least 1 HERO die on each HERO space.