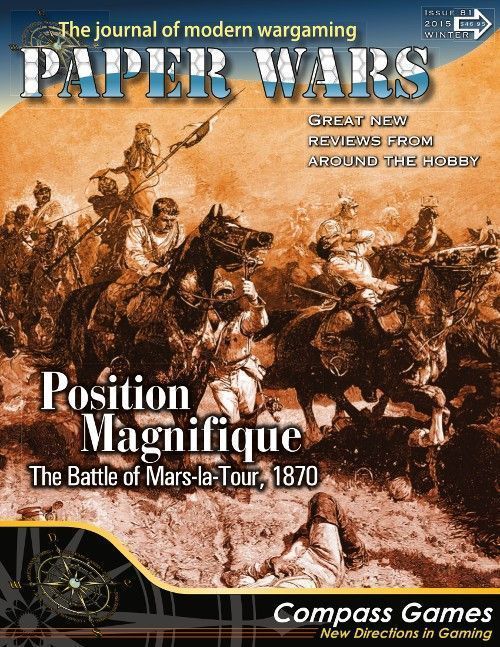
Position Magnifique: The Battle of Mars-la-Tour, 1870
Position Magnifique: The Battle of Mars-la-Tour, 1870 Rulebook
Table of Contents
Table of Contents
- 1.0 Introduction
- 2.0 How to Win
- 3.0 Game Scale
- 4.0 Unit Counters, Markers and Chits
- 5.0 Unit ID & Organization
- 6.0 Scenario Setup & Reinforcements
- 7.0 Stacking and Zones of Control
- 8.0 Sequence of Play
- 9.0 Activation and Event Chits
- 10.0 Fire Combat
- 11.0 HQ Orders and Command
- 12.0 Movement
- 13.0 Assault Combat
- 14.0 Rally Phase
- 15.0 Housekeeping
- 16.0 Victory Determination
- 17.0 Event Chit Descriptions
- 18.0 Designer's Notes
- 19.0 Comprehensive Example of Play
- 20.0 Scenarios
- References
- Appendix: Event Chit Reference
1.0 Introduction
The Battle of Mars-la-Tour was fought on August 16th, 1870 and represents the pivotal battle of the Franco-Prussian War. In fact, many historians consider it to be one of the most important battles of European history, as it essentially sealed the fate of Napoleon III and his Second French Empire and confirmed the rise of Bismarck's German Empire.
2.0 How to Win
The French player must secure his tactical retreat route back to Metz while paradoxically keeping open up his strategic retreat route to Verdun and beyond. The Prussian player must skillfully direct his vastly outnumbered advance guard in order to trap the French army. These goals are represented by the need to capture and control key towns.
3.0 Game Scale
Each map hex is about 500 yards. Infantry and cavalry units represent brigades. Artillery units represent groupings of batteries by weight of gun. Each HQ Unit represents the Corps or Division commander, his staff and logistical train. One Combat Factor equals about 600 men or a half-battery of cannon. One turn is approximately 1 hour. There are 12 game turns, starting at 0800 hours and ending at 2000 hours. There are five terrain elevation levels (each of about 30 meters) depicted on the map: Flat (1), Low (2), Raised (3), Elevated (4) and High (5).
4.0 Unit Counters, Markers and Chits
4.1 Unit Counters
Unit counters represent the fighting troops of each side and display game information in the following order (top to bottom): Combat Factor - Range - Movement Allowance. The front of the counter shows the unit at its full-strength values and the reverse side shows the unit after a step loss and thus at reduced-strength (indicated with a lighter-colored bar through the middle of the counter).
Combat Factor (Combat units) is the relative combat strength of a unit. Artillery units whose factor is followed by an "h" are Horse Artillery. A French artillery unit whose factor is followed by an "m" means the unit contains a Mitrailleuse battery (and thus can be used with a "Mitrailleuse Fire" Event chit). A unit's Combat Factor is halved when it has a "Shaken" marker (see 10.5). If a unit takes a Step Loss result while on its reduced-strength side, it is eliminated (but is eligible to be Rebuilt).
Command Rating (HQ's only) is the relative command efficiency of a headquarters, expressed as a range of hexes. One side is the "Aggressive/Attack" Orders range (A) and the other is the "Defensive/Deploy" Orders range (D). The Command Rating determines which units are in command and is also used in the Rally Phase for Recovery and Rebuilding.
Range is used for rifle and artillery fire and is given as two numbers. The large white number is the unit's Effective Range in hexes (up to which it can fire normally). The smaller yellow number is the maximum number of hexes over which a unit can fire and represents the unit's Extended Range (see 10.4). Cavalry and HQ units do not have a Range number as they are not able to issue fire.
Movement Allowance is the movement ability or speed at which a unit can move, expressed in the number of total Movement Points that can be spent in a turn. A unit's Movement Allowance is halved when it has a "Shaken" marker (12.7).
[Figure key, printed page 30: HQ unit (HQ ID, Command Rating, Movement Allowance, Orders "A" and "D" sides); Prussian Horse (h) Artillery backside; French Artillery Battery; French Mitrailleuse-Equipped (m) Battery; Prussian Infantry (Unit ID, Combat Factor, Range (Extended), Movement Allowance); French Cavalry backside (Unit ID, Combat Factor, Movement Allowance).]
4.2 Markers
Markers are available to help players indentify certain game conditions and are placed as instructed by the relevant rules section. It is suggested, since there is no stacking in the game, that players place relevant markers under the affected unit to keep the identity of units clear to each side. "Artillery Fired" and "Out of Command" markers are removed at the conclusion of the relevant formation's activation.
4.3 Chits
Chits are the counters that are drawn from an opaque container and tell the players which formation will be activated next or which event can be enacted. There are two types of chits: Activation (showing the name of one of the French or Prussian HQ units - see 9.1) and Event (displaying an Event on each side - see 9.2).
[Figure, printed page 30: example Activation chit (a French HQ unit name) and an Event chit (Feu de Bataillon).]
5.0 Unit ID & Organization
Units are identified by Brigade / Division / Corps. Units belonging to a particular Corps or independent Division have a color-coded band on their counters matching the corresponding HQ unit. When an HQ activates, all units marked with the identical color are activated along with it.
6.0 Scenario Setup & Reinforcements
6.1 Scenario Setup
There are three separate Scenarios offered in Position Magnifique. Refer to the separate Scenario Sheet for instructions on how to set up each game. The French player always sets up first. All units are deployed on their full-strength sides (unless indicated otherwise in that Scenario) and HQ units can be placed alone or stacked with any unit of their formation and on either side ("A" or "D"). Place the "Game Turn" marker in the space that represents the first turn of that specific Scenario.
6.2 Reinforcements
Reinforcements (again, as indicated by the Scenario you are playing) should be placed on the Turn Record Track on the turn of entry. Reinforcing units enter the game on the indicated turn only when their Unit Activation chit is drawn. They are automatically considered to be In Command (see 11.2) until the Game Turn after they enter the map. Thereafter, normal command rules apply. Reinforcing units enter the game on their full-strength sides (unless otherwise indicated by that Scenario). HQ units of reinforcing Corps enter alone or stacked with any unit of their formation and on either their "A" or "D" side.
7.0 Stacking and Zones of Control
7.1 Stacking
There is a maximum of one Combat unit allowed per hex. This is determined at the end of a unit's movement. Moving units may temporarily over stack a hex with a friendly unit as long as they do not end their movement doing so. HQ units and game markers stack freely. Units may never stack with enemy units, except as follows:
- Charging Cavalry must stack with the targeted enemy unit (see 12.5);
- A moving unit may overrun an enemy HQ unit (see 13.10) and keep moving without affect.
If a unit is halted by Interdiction Fire (from an Event Chit) while moving through a friendly-occupied hex, it must backtrack to the last legal hex passed through, unless it is retreating, in which case it simply continues to retreat.
7.2 Zones of Control
There are no Zones of Control as found in other games! Units exert their influence with Defensive Fire (see 12.4).
8.0 Sequence of Play
8.1 Activation Phases
At the beginning of each turn, players place eligible Activation Chits and Event Chits (per the Scenario instructions) for both sides into an opaque container. Either player (it does not matter who) then randomly draws one chit from the cup. Proceed as follows:
a) If the drawn chit is an Activation Chit, all units belonging to the indicated formation on the chit are activated. All activated units then conduct the following four phases in the order shown. Activated units must complete each phase before continuing to the next one:
- Fire Combat Phase
- HQ Command Phase
- Movement Phase
- Assault Combat Phase
After all activated units have completed the fourth phase, the drawn chit is placed aside and a new chit is drawn from the cup.
b) If the drawn chit is an Event Chit, the player who owns the chit immediately selects which event to use and implements its effects. Afterwards, the drawn chit is placed aside (unless it was an event that is held or placed on the map) and the next chit is drawn from the cup.
8.2 Turn End Phases
After all Activation Chits (only) have been drawn from the cup and acted upon, both players conduct the final two Turn End phases:
- Rally Phase
- Housekeeping Phase
Note: The Activation Phases are over when there are no HQ units left to activate. There may still be undrawn Event Chits remaining in the cup and these will not be used this turn. Chalk this up to the "fog of war".
9.0 Activation and Event Chits
9.1 Activation Chits
Activation Chits are each labeled with one of the Prussian or French HQ units. All eligible Activation chits, as indicated by the scenario, are placed in the cup at the beginning of each turn. Those chits representing units that are not yet in the game are left to the side. When drawn, the HQ unit matching the name on the drawn chit is activated, along with all its subordinate units. After activation, place the chit aside (not back into the cup).
9.2 Event Chits
Event Chits have game events listed on them. These are added to the cup as per the scenario instructions at the beginning of the turn. When drawn, the chit applies only to the player who owns it (Red = French, Blue = Prussian). The owning player then immediately chooses which event to use, either the one on the front of the chit or on the back. He then follows the instructions (see 17.0 and the player aid) to implement that event. Once an event is chosen, the player must stay with that choice. When resolved, the chit is placed aside (not back into the cup).
Example: If Henri (the French player) is picking the chits and draws the Krupp Guns/Colonel Caprivi Event chit, he hands it to Horst (the Prussian player). Horst must immediately decide whether he will use the Krupp Guns event (and then additionally must choose whether to employ it right away or hold it for future use) or use the Colonel Caprivi event.
Note that any movement or combat conducted by a unit due to an Event is in addition to its normal activation allowance. There is no limit to how many Event Chits can be held or used during a turn or on the same unit (enemy or friendly). The only stipulation is that only one Interdiction Fire (see Event Chits description) can be played per hex moved by a targeted unit. Event Chits that are impossible to enact are treated as having no effect and placed aside. Note that all Event Chits are picked up and placed back in the cup during the Housekeeping Phase - whether they have been used or not.
10.0 Fire Combat
10.1 Eligibility
Fire Combat is voluntary and can only be issued by active units during the Fire Combat Phase. Cavalry and HQ units may not issue Fire Combat. Units issue fire individually and each fire is resolved completely before moving to the next one. A unit can only fire once in the phase, but enemy units can be targeted a multiple number of times. Foot Artillery units that fire in the Fire Combat Phase may not move in the subsequent Movement Phase (place an "Artillery Fired" marker on them as a reminder). Horse Artillery units may fire with ½ of their Combat Factor (rounded up) and still move the following phase (place an "Artillery Fired" marker on them only if they fired with their full Combat Factor).
10.2 Procedure
The owner of the firing unit declares an eligible enemy target unit. HQ units cannot be targeted. He finds the column along the top of the table that equals the Combat Factor of the firing unit. He then consults the list of conditions below the table that could potentially shift that column to the left or right of that initial column. Shifts are cumulative and you should only apply the final net shift. Shifts can never be made to the right of the "10" column or to the left of the "C" column. After determining the final column, the player rolls two dice and adds the dice together to get a total. He then cross-references the total die roll with the final adjusted column. Apply the result indicated to the targeted unit.
10.3 Line of Sight (LOS)
When a unit issues Fire Combat at a target two or more hexes away, it must be able to "see" the target unit. To determine LOS, draw an imaginary line from the center of the firing unit's hex to the center of the target unit's hex. The LOS is blocked, which prohibits the fire, if either of the following is the case:
a) Any portion of an intervening hex, including a hex edge, is Forest, Town or contains any Combat unit (enemy or friendly) and that intervening hex is on the same or higher terrain level than the firing unit;
b) Any portion of any type of intervening hex or hex side is of a higher level than both the firing and target unit's hexes.
In all other cases, the LOS is clear and the firing unit may issue its fire.
Example: If a Prussian artillery unit is in hex 1214 and a French unit is in hex 1111, the Prussian unit can see the French unit. It cannot see into hexes 1011 or 1110 (because the unit blocks) or into 1310 (because the town blocks). The artillery unit can see into 1211 because 1212 is of equal height and there is no blocking feature in it.
10.4 Fire Ranges
Range is measured from the firing unit to the target unit in hexes. A unit's Range is divided into two categories: Effective and Extended. Effective Range is the first (white) number on the counter. This is the normal engagement range for the unit and has no affect on its fire. Extended Range is the second (yellow) number on the counter. Units firing at more than Effective Range and up to Extended Range apply a "<-2" column shift when resolving the fire.
Example: A French Infantry unit in hex 1313 with an Effective Range of "2" and an Extended Range of "3" can fire normally at a Prussian unit in hex 1512 or at a Prussian unit in hex 1612 with a "<-2" shift.
10.5 Shaken Fire
If the firing unit has a "Shaken" marker, its Combat Factor is halved (rounded up) for that fire.
10.6 Fire Combat Results
Fire Combat results are applied immediately on the targeted unit. Consult the Fire Combat Table for an explanation of the results.
10.7 Morale Tests
If a unit is required to take a Morale Test because it received an "MT" result on the Fire Combat Table (and from other game play causes as well), the owning player consults the Morale Test Table. He cross-references the testing unit's nationality and type with its current condition (full-strength or reduced-strength) and gets the unit's Morale Rating (the red or purple numbers indicated on the table). He then rolls two dice and adds them together and compares that total to the testing unit's Morale Rating. The Morale Rating can be adjusted for the following conditions:
a) Reduce a unit's Morale Rating by "-1" if it has a "Shaken" marker;
b) Reduce a Prussian unit's Morale Rating by "-1" if it is testing due to the "Mitrailleuse Fire" Event chit;
c) Reduce a French unit's Morale Rating by "-1" if it is part of a Battle Worn formation (see below);
d) Reduce all French unit's Morale Ratings by "-1" if the French Imperial Guard Corps becomes Battle Worn. This is applied regardless of the testing unit's actual condition and is not an additional modifier if the testing unit's formation is already Battle Worn.
A unit's formation (Corps or independent Division) is said to be Battle Worn if over half of its units (of any type) are eliminated or at reduced-strength at the time of the test.
If the die roll total is less than or equal to the modified Morale Rating of the testing unit, the unit passes and there is no effect. If the die roll is greater than the modified Morale Rating, the testing unit fails and is given a "Shaken" marker.
10.8 Low Ammunition
If a unit issuing Fire Combat rolls any "doubles" (for example, a "6" result by rolling two "3's") while resolving that Fire Combat, the unit has run low on ammunition and is given a "Low Ammo" marker. Apply the combat result normally. One "Low Ammo" marker applies a "<-2" column shift to the unit's Fire Combat resolution. Should a unit receive a second "Low Ammo" marker, it is out of ammo and cannot issue any Fire Combat until one of the markers is removed.
11.0 HQ Orders and Command
11.1 Orders
HQ units are either on their "Aggressive/Attack" orders side (A) or "Defensive/Deploy" orders side (D). A player may change an active HQ's order (only) during the HQ Command Phase by simply flipping the unit to show the desired side. Each order has the following effects on game play:
a) Attack Orders (A) - HQ's under Attack orders have a smaller Command Rating, but no restrictions to movement or combat.
b) Defend Orders (D) - HQ's under Defend Orders have a larger Command Rating but its activated units may not move adjacent to an enemy unit this turn. Units already adjacent may remain there. In addition, Infantry units may not conduct Assault Combat this turn. Cavalry units may still assault an enemy unit but only if they begin the turn already adjacent to that same enemy and don't move at all.
11.2 Command
An HQ's Command Range is equal to its Command Rating in hexes (ignore normal terrain MP costs). The Command Range can be traced through any terrain, but not through an enemy unit. When traced into a Forest hex, each such hex counts as two hexes for Command Range purposes (and thus an HQ with a Command Range of only "1" cannot trace into a Forest hex). When traced along a Road hex, each such hex counts as ½ hex for Command Range purposes. An Overrun HQ unit could only place a unit currently stacked with it in Command. The Command Range is in effect for the entire turn. During the HQ Command Phase, every unit of the active formation must check if it is within Command Range of its HQ unit. If within range the unit may activate normally in the upcoming Movement Phase.
If outside the Command Range, a unit is still considered to be In Command if it is adjacent to a unit that is itself In Command (this can cause a chain of eligible In Command units). The owning player then places an "Out of Command" marker on each unit that is Out of Command. He will have to roll on the Out of Command Table for each such unit during the Movement Phase to determine their movement ability, but this is done after all In Command units have moved.
12.0 Movement
12.1 Procedure
Only units that are currently active can move during the Movement Phase. Shaken units may only move ½ of their normal movement allowance (rounded up). Foot Artillery units that issued any fire and Horse Artillery units that fired only at full effect in the previous Fire Combat Phase may not move this phase (10.1). A friendly unit may not move into or through an enemy unit unless it is Charging Cavalry (12.5) or overrunning an enemy HQ unit (13.10). Units that are In Command are all moved first; Out of Command units are moved last.
12.2 Terrain Costs and Movement
Units have a number of Movement Points (MPs) available to use each turn, as indicated by its Movement Allowance. Each hex has a dominant terrain feature and costs one or more MPs to enter (exception: see 12.8 - Road March Bonus). Active units move from hex to adjacent hex, paying the MP cost of the hex being entered. If a unit does not have sufficient MPs left over to enter a hex, it must halt its movement. However, a unit may always move at least one hex during its Movement Phase, regardless of terrain costs. Refer to the Terrain Effects Chart for terrain costs.
12.3 Out of Command Units
After all In Command units have moved, Out of Command units must determine what they can do. For each unit with an "Out of Command" marker, the owning player rolls two dice, adds them together and consults the Out of Command Table. Apply the results as follows:
a) Withdraw = the unit must move one hex directly away from the nearest enemy unit (measured in total number of hexes, ignoring normal terrain MP costs). This can be to any hex as long as the newly-entered hex is at least one hex further away from the nearest enemy unit. If there is more than one "nearest enemy unit", the enemy (non-moving) player chooses which enemy unit to use. If no hex can be entered without overstacking, the withdrawing unit must move one additional hex until it reaches a legal hex.
b) No Movement = the unit may not move this turn.
c) ½ Movement Allowance = the unit may move normally but using only half of its normal Movement Allowance (rounded up).
d) Normal Movement = the unit may move normally.
e) Advance = the unit must move one hex directly toward the nearest enemy unit. This can be to any hex as long as the newly-entered hex is at least one hex closer to the nearest enemy unit. If there is more than one "nearest enemy unit", the enemy (non-moving) player chooses which enemy unit to use. If no hex can be entered without over stacking, the unit does not advance and must remain in place. If the unit is already adjacent to an enemy unit, it remains in place and must conduct an Assault Combat (regardless of its Order) against one adjacent enemy-occupied hex. If more than one such hex is available, the owning player chooses the hex which must be assaulted.
Note that units are always subject to the abilities and restrictions of their HQ's Order (see 11.1) - even if Out of Command!
Example: An infantry unit is currently adjacent to an enemy unit. Its HQ is activated with an Attack Order but the infantry unit is Out of Command. After all active In Command units are moved, the owning player rolls two dice for the Out Of Command infantry unit to see what happens. If he rolls any of the totals listed below, the results are indicated:
"2" = the unit must fall back one hex from the adjacent enemy unit. It may assault a new adjacent enemy unit.
"4" = the unit may not move at all, but may assault the adjacent enemy unit.
"7" = the unit may move, but at half its normal move. It may assault enemy units.
"10" = the unit may move and assault normally.
"12" = the unit may not move and must assault the adjacent enemy.
12.4 Defensive Fire
At the instant an enemy unit moves into a hex adjacent to a friendly Infantry or Artillery unit during any type of movement (with some exceptions), that friendly unit may immediately issue Fire Combat (10.0) at that moving unit (only). Should the moving unit move adjacent to two or more friendly units, each unit may fire. Temporarily halt the enemy unit's movement and resolve the fire normally. If any result other than "No Effect" is achieved, the enemy unit may not move any further this phase, unless retreating (in which case it continues to retreat). If the result is "No Effect", the moving unit may continue to move (and be subject to more Defensive Fire further along - even from the same units!). Note that there is no limit to the number of Defensive Fire shots that may be taken by a unit, but the firing unit may only use half of its Combat Factor (rounded up) for each Defensive Fire after the first during that same phase. Note that the firing unit is subject to the Low Ammunition rule (10.8).
Example: A Prussian Infantry unit with a "5" Combat Factor is being assaulted by three French infantry units. When the first French unit moves adjacent, the Prussian unit may issue Defensive Fire with a Combat Factor of "5". When the second unit moves adjacent, the Prussian unit may only fire with a factor of "3". The same would be the case when the third French unit moves adjacent.
Defensive Fire may not be issued if the moving unit is:
- Conducting Breakthrough Movement (13.9);
- Charging Cavalry moving into the targeted hex (12.5);
- If a unit has been successfully Charged (i.e. there is an enemy cavalry unit stacked with it), it may no longer issue any Defensive Fire until that Assault Combat is resolved;
- Temporarily stacked with another enemy unit during its move;
In all these four cases it is assumed that the fire would be blocked.
12.5 Cavalry Charge Movement
Active Cavalry units (not Horse Artillery) may conduct a special Charge move during the Movement Phase, which doubles their Combat Factor in the subsequent Assault Combat. The player must announce the charge before the unit moves.
The selected Cavalry unit must first qualify as follows:
a) It must be under an "Attack" Order;
b) It cannot have a "Shaken" marker;
c) It may not be adjacent to the intended target;
d) It cannot be adjacent to an enemy Combat unit at the start of the move (but may Overrun an enemy HQ unit);
d) It may not pass through any enemy or friendly Combat units;
e) It may only enter Clear and Roman Road hexes and may move up or down a Steep Slope hexside. It may not cross any other movement penalizing terrain hexsides during the move (including the targeted hex);
f) It must have enough movement to enter the target unit's hex and thus end the move stacked with the enemy unit.
Only one Cavalry unit can successfully charge the same enemy unit. An Assault Combat (13.0) must then be fought in that charged hex after any other eligible non-Charging units join the combat. A Cavalry unit that has conducted a Charge Move is always given a "Shaken" marker at the conclusion of the Assault Combat Phase (i.e. after any Breakthrough Movement) if it does not already have one.
If a Charge Move is halted by enemy Defensive Fire, the cavalry unit may still conduct a normal Assault Combat against its original target (but does not receive the Charge bonus). It is still given a "Shaken" marker after the combat.
12.6 Cavalry Countercharge
There are two cases where a non-active friendly Cavalry unit under a "Defend" Order may attempt to Countercharge a charging enemy Cavalry unit.
a) If the friendly Cavalry unit is itself designated to be the target of an enemy Cavalry Charge;
b) If another friendly unit is the target of the enemy charge and the friendly Cavalry unit is adjacent to the last hex the charging enemy cavalry unit would enter before contacting the target of its charge.
The Countercharging Cavalry unit rolls two dice, adds them together and compares the die roll total to the unit's Morale Rating (modified if necessary). If the die roll total is greater than the Morale Rating, the Countercharge fails and cannot be conducted. If less or equal to the Morale Rating, the Cavalry unit is moved one hex (only) into the last hex the charging enemy Cavalry unit will enter before contacting its intended target unit. The two opposing Cavalry units will then share that hex and conduct an Assault Combat at the end of the enemy's movement (the original charging unit is still considered to be the Attacker). Both Cavalry units are considered to be conducting a Charge Move and normal rules (and consequences) apply. The enemy (initially charging) player (only) may bring up supporting units to join in the Assault Combat attack normally. If there are multiple friendly units that are eligible to Countercharge, each may be rolled for separately but only one may Countercharge.
12.7 Movement of Shaken Units
Units with a "Shaken" marker have their Movement Allowance halved (rounded up). This is cumulative with any Out of Command effects.
Example: A unit with a Movement Allowance of "7" that is Shaken and suffers a half-movement result from its Out of Command die roll can move two hexes (half of "7" is "4" and then half of "4" is "2").
12.8 Road March Bonus
Units that move along connected Road terrain hexes pay only ½ Movement Point per hex. If a unit using the Road March Bonus passes through a hex with another friendly Combat unit, the hex will instead cost the moving unit the normal terrain cost of the hex (it is forced to go around the units in the road).
12.9 Reinforcements
If two or more reinforcing units enter the map on the same entry hex, they are assumed to be lined up in a column off map in March Order. The first unit pays the normal MP cost to enter the map edge hex, the second unit pays twice the MP cost to enter, the third unit triple the cost and so on. If an enemy unit is in the entry hex, the reinforcing units are delayed one turn and then enter on the map edge hex closest to the original entry hex.
13.0 Assault Combat
13.1 Eligibility
Except for Cavalry Charges, Assault Combat is completely voluntary and can be conducted by eligible units in hexes adjacent to a single enemy target hex. Only Infantry units under Attack orders (see 11.1) and Cavalry units (under either Order) can initiate Assault Combat. Artillery units may never Assault. Lone enemy HQ units may not be the target of an assault. Cavalry Charges result in a mandatory Assault Combat and are conducted in the targeted unit's hex. Note that Cavalry units may Assault normally - they are not required to Charge. If a unit is the target of a successful Cavalry Charge, other non-charging attacking units can also join the same Assault Combat.
13.2 Procedure
Sum the Combat Factors of all assaulting units attacking the same defending unit and then subtract the Combat Factor of the defending unit in the targeted hex. The assaulting player finds the column that represents this Combat Factor Differential (which can be negative). He then consults the list of conditions below the table that could potentially shift that column to the left or right of that initial column. Shifts are cumulative and you should only apply the final net shift. Shifts can never be made to the right of the "+7 & more" column or to the left of the "-5 & less" column. After determining the final column, the player rolls two dice and adds the dice together to get a total. He then cross-references the total die roll with the final adjusted column. Apply the result indicated.
13.3 Flank Attack
If two Assaulting units attack from hexes not adjacent to each other, or if three or more Assaulting units attack the same target, the attacking units receive the Flank Attack die roll modifier.
13.4 Cavalry Charges
A Charging Cavalry unit doubles its Combat Factor.
13.5 Shaken Assault
Units with a "Shaken" marker have their Combat Factor halved (round up) for Assault Combat resolution.
13.6 Assault Combat Results
Apply the result as indicated on the Assault Combat Table immediately to the affected unit(s). All losing units that are not already "Shaken" are given a "Shaken" marker after the result is applied. If the result is asterisked (*), one of the affected units MUST lose at least one step. In addition, if the Assault Combat is due to a Cavalry Charge, the losing side must retreat at least one hex.
Example: If two units are attacking a defending unit and the combat result is "A2*", the attacking units lose the combat and could either:
a) Both retreat one hex and apply one step loss to one of the units or;
b) Apply two step losses (one step loss on each unit) and they can remain in their hexes.
Note that because the result has an asterisk (*), the units could not opt to both retreat two hexes. Additionally, if the combat had resulted from one of the attackers conducting a Cavalry Charge, the only option the losing units could choose is option "a)".
13.7 Retreat Movement
Retreat movement is given in total hexes - not MP's! The terrain MP cost of hexes retreated through is ignored. Retreats are conducted by the owning player and follow this order of priority:
- The unit must increase the distance between the retreating unit and the victorious enemy unit(s);
- The unit should move closer to its HQ unit, if possible;
- The unit should avoid moving through a friendly unit, if possible.
Note that if the retreating unit moves adjacent to any enemy units, those enemy units may issue Defensive Fire. If the retreating unit is forced to end its retreat on a hex that causes over stacking, it must keep retreating until it reaches an eligible hex. If the Retreat move causes the unit to move off the map or move through an enemy-occupied hex, it is eliminated instead.
13.8 Retreat Before Combat
A Cavalry unit assaulted by only Infantry units may apply an automatic "D1" result and retreat one hex (only). It is not given a "Shaken" marker and no die roll is made. All other rules apply normally.
13.9 Breakthrough Movement
An attacking unit (only) that wins an Assault Combat and does not have a "Shaken" marker may advance into the losing defender's hex if it has been vacated. Infantry and non-Charging Cavalry units can only advance into the vacated hex itself. Charging Cavalry units may remain in the vacated hex or advance into any adjacent vacant hex (regardless of MP cost), but the new hex must maintain or reduce the distance to the recently defeated enemy unit or, if that unit was eliminated in the Assault Combat, to the nearest enemy unit. Units conducting a Breakthrough are not subject to any kind of Defensive Fire. Charging Cavalry is given a "Shaken" marker at the conclusion of its Breakthrough Move if it does not currently have one.
13.10 HQ Units and Combat
An HQ unit stacked with another friendly unit does not take part in any combat. The HQ unit may retreat and breakthrough with that unit, but it cannot take step losses. Should a lone HQ unit find itself in the same hex with an enemy unit at any time, the HQ is Overrun. Simply pick up the HQ and stack it with the nearest friendly unit. An HQ unit so displaced has a "0" Command Rating for the remainder of this turn (place an "HQ Overrun" marker on the unit as a reminder). The HQ unit returns to normal at the end of the turn - remove the marker during the Housekeeping Phase.
14.0 Rally Phase
14.1 Procedure
The French player always acts first in the Rally Phase, performing Recovery and then Rebuilding. The Prussian player then does the same.
14.2 Recovery
The active player may remove one "Shaken" and one "Low Ammo" marker from an eligible unit(s). An eligible unit is a unit from the HQ's formation, within the current Command Range of its HQ unit and not adjacent to a Combat enemy unit. If qualified, the player simply removes the marker. A maximum of one "Shaken" and one "Low Ammo" marker (total) can be removed per turn by each HQ unit (however, see 14.3 for an exception). An Overrun HQ unit can only remove markers from a unit currently stacked with it. Note that this is the only time "Shaken" and "Low Ammo" markers can be removed from a unit.
14.3 French Artillery Doctrine and Supply Problems
French Artillery units may only have a "Low Ammo" marker removed if they are stacked with their HQ unit during this phase. In addition, French Heavy Artillery units can never have their "Low Ammo" markers removed - the marker(s) remain with them for the remainder of the game.
14.4 Rebuilding
The active player may then attempt to Rebuild one eliminated unit of any type per HQ unit on the map. The unit must belong to the HQ's formation and the HQ unit cannot be adjacent to a Combat enemy unit. Eliminated units are not eligible for Rebuilding until the turn following their elimination. Players place eliminated units (on their reduced-strength side) on the Game Turn Track one turn later as a reminder that they cannot be Rebuilt until the Rally Phase of the next turn.
The player selects one eligible unit to be Rebuilt per HQ and rolls two dice, adding them together. This die roll can be modified, depending on the current Command Rating of the HQ unit, as follows:
-1 from the total dice roll for a Command Rating of "3" or "4".
-2 from the total dice roll for a Command Rating of "5" or "6".
If the net dice roll result is less than or equal to the eliminated unit's reduced-strength side Morale Rating, the unit may be placed back on the map on its reduced-strength side. The Rebuilt unit is stacked with, or placed adjacent to, the HQ unit, but not adjacent to an enemy Combat unit nor can it be over stacked. If there are no eligible hexes to place a Rebuilt unit, no Rebuild attempt can be made. If the net dice roll is greater than the unit's Morale Rating, the unit must wait until next turn to attempt to Rebuild (place the unit in the next turn's space on the Game Turn Track).
15.0 Housekeeping
After all the Rally Phase activities for both sides are finished, replace all eligible Activation and Event Chits into the cup. Any Event Chits that were placed on the map or that are still being held are also returned to the cup (yes, if you don't use them, you lose them). Remove all "HQ Overrun" markers and any remaining "Artillery Fired" and "Out of Command" markers. Then advance the Game Turn marker one space. If Game Turn 12 was just completed, the game is over - proceed to Victory Determination.
16.0 Victory Determination
The tutorial scenario, Crisis on the Left, has its own victory conditions - refer to the Scenario Sheet for details.
The other two scenarios, A Day of Battle and A Beckoning Victory, use the following rules for determining victory.
After Game Turn 12 is completed, players determine who wins the game. This is done by checking control of key towns and comparing them to the Victory Conditions listed below. The game can end in an Overwhelming Victory, Major Victory, Minor Victory or Draw. Control of towns is determined by the nationality of the last unit to enter the hex or hexes in question (use the appropriate "Control" markers to help note ownership when unclear). Mars-la-Tour and Rezonville must have both their hexes controlled in order to count towards victory, otherwise no one controls it. Vionville and Rezonville begin the game in French control. Puxieux and Tronville begin the game in Prussian control. The other towns are controlled by neither side.
[Figure, printed page 36: French and Prussian control markers (French flag and Prussian flag icons).]
Prussian Overwhelming Victory: The instant any Prussian unit enters either hex of Gravelotte, the game ends immediately in a Prussian Overwhelming Victory. This can happen anytime during the game. This result represents a tangible threat to Bazaine's line-of-communications with Metz and would therefore compel his immediate withdrawal from the field.
French Overwhelming Victory: The instant the French player controls all three Road hexes exiting the south side of the map (hexes 0920, 2021 and 2221) after Game Turn 3, the game ends immediately in a French Overwhelming Victory. This can happen anytime during the game. This result represents the isolation of Prussian units from their main body and/or the securing of the Army of the Rhine's flank and would thus be a strategic defeat for the Prussians.
If there is no Overwhelming Victory for either side during the game, then check for a Major Victory, Minor Victory or Draw as follows:
Prussian Mandatory Victory Conditions: Control of both Mars-la-Tour and Puxieux at the end of Turn 12.
French Mandatory Victory Conditions: Control of both Rezonville and Bruville at the end of Turn 12.
The Mandatory Victory Conditions represent those towns that each side must control or they cannot win the game. If one side does not control both of the required towns, the opponent wins a Major Victory. If neither side meets its Mandatory Victory Conditions, then the game is declared a Draw. If both sides control their mandatory towns, a Minor Victory is awarded to the player who controls the greater number of the following towns: Vionville, Tronville and Flavigny.
17.0 Event Chit Descriptions
Detailed descriptions of each Event chit can be found on the back of the Combat Results Tables (one French sheet and one Prussian sheet). Remember that in almost all cases ("Feu de Bataillon" is the exception) there is one event on the front of the chit and another on the back. When the chit is drawn, the owning player must select which of the two events he wishes to use, even if the chit is held. Simply place the chit on the table with the selected event facing up. Note that some chits have to be played immediately and some can be held for future use in the turn. Players are encouraged to study these sheets before starting the game as proper chit play is important to good play! Here is a brief historical description of each chit so the player can put the event in proper context:
17.1 French Event Chits
Artillery Barrage - the French artillery of this era was antiquated by every measure. Little was done to improve this arm of the military since the 1859 war against Austria. The breech-loading Prussian Krupp guns were superior in all categories to the French muzzle-loaders. However, there were high concentrations of French cannon at Mars-la-Tour and at close range they could overwhelm Prussian forces if given the opportunity to fire unhindered.
Beaten Zone - the French Chassepot rifle was a weapon that should have, by all accounts, single-handedly won the war for the French. It had better range, superior killing power, a higher rate of fire and allowed the French infantryman to carry more ammunition than the Chassepot's Prussian counterpart, the Needlegun. In fact, the range was so great that the French infantry could lay down an indirect "beaten zone" of fire, which was effectively a curtain of falling bullets.
Feu de Bataillon - this represents the distinctly defense-oriented doctrine adopted by the French army which emphasized firepower and entrenchment. The French infantry would dig in or lie behind their backpacks and wait for the Prussians to attack. Officers would direct the fire with great emphasis on accuracy and successive fire but little consideration was given to actual maneuvering.
Mitrailleuse Fire - the Mitrailleuse was a machinegun-like weapon that had multiple gun tubes strapped in a circular arrangement on its chassis. It was fired by hand-cranking and was affectionately called the "coffee grinder" by French troops. Its effective range was between 1200 and 1500 yards and it threw out an astounding 100 to 200 rounds per minute. The machinegun was so deadly that Prussian troops claimed that no one was ever wounded by a Mitrailleuse - the bullet's impact was so powerful, no man could possibly survive being hit! The problem was that the French deployed the Mitrailleuse batteries with the regular artillery batteries, rather than with the infantry. In the rear-deployed artillery zones, the Mitrailleuse was too far from the enemy infantry to be very effective and could be easily counter-batteried by the longer-ranged Prussian cannon.
Prussian Aggressive Tactics - sometimes, too much independence and initiative can lead to some bad, deadly decisions. One such occurrence happened toward the end of the battle at the Fond de la Cuve. The Westphalian 38th Infantry Brigade was ordered to attack various French forces defending the Fond de la Cuve defile. When the attack was finally recalled, over 1,000 Westphalian soldiers had been killed in less than 30 minutes of fighting. There are many other examples of these kinds of brutal, poorly planned Prussian assaults at this battle and all during the Franco-Prussian War.
17.2 Prussian Event Chits
Auftragstaktik - translated as "mission tactics", this event represents the underlying Prussian infantry doctrine of decentralized small-unit tactics whereby seemingly isolated and separate forces were actually fully briefed and working towards a common goal. These tactics were misconstrued by the French as being chaotic and unformed and they were never properly countered on the battlefield. Note that a "Division" is represented by the second number in the Unit ID and that many Prussian Divisions consist of two units.
Bazaine's Malaise - this chit simply represents French Marshal Bazaine's indecisive and sometimes bizarre command decisions. By being able to possibly "freeze" a French corps, the event replicates in a simple way the inconsistent and confusing (for the other French generals) orders that were emanating from Bazaine's tent.
Colonel Caprivi - as Chief of Staff of the Prussian Xth Corps, Georg Leo von Caprivi distinguished himself not only at the Battle of Mars-la-Tour, but throughout the war. He showed great initiative by taking charge of the battlefield early on and directing the deployment of Prussian forces. It was his foresight and quick assessment of the situation that allowed the Prussians to catch the French off guard. His actions are very reminiscent of those of another famous German staff officer - Max Hoffman during the Tannenberg campaign at the beginning of World War I. Colonel Caprivi eventually succeeded Bismarck as Chancellor of the German Empire in 1890. This chit represents not only his efforts, but the overall superior staff officer corps of the Prussian army.
Deathride ("Todesritt") - no Mars-la-Tour game would be complete without allowing for the possibility of recreating von Bredow's famous "Deathride". This near-suicidal charge against the French VIth Corps' artillery line was actually quite successful, resulting in the overrunning of the guns and massive confusion in the French ranks. But it came at a high price; the brigade suffered 50% casualties (400 men).
Krupp Guns ("Kruppkanonen") - the Prussian artillery batteries were armed with the new Krupp steel breech-loading gun which outperformed the older French muzzle-loading artillery pieces by leaps and bounds. It had a greater rate of fire, longer range, better accuracy and higher destructiveness. In addition to the material superiority, the Krupp guns were handled efficiently and aggressively by the Prussian artillery crews.
Needle-gun Fire - this was the standard issue breech-loading rifle of the Prussian army and gave the infantry a decided advantage over their Austrian opponents in the 1866 war. However, by the time the Franco-Prussian War broke out, the Dreyse needle-gun ("Zündnadelgewehr") was significantly outclassed by the French Chassepot rifle. Nonetheless, the Prussian infantry was well trained, agile and used small-unit tactics that could still inflict heavy casualties at closer ranges.
17.3 Both Players Event Chits
Battlefield Conditions - battle accounts are rife with details about smoke obscuring sight lines and oddities of terrain affecting combat. In fact, one of the reasons that von Bredow's "Deathride" succeeded was because the Prussian cavalry was hidden for much of its approach by smoke and terrain undulations. This chit is even more relevant at Mars-la-Tour as there are no major, dominant terrain features. Rather, the ground is of a rolling nature with low hills and shallow valleys. These are difficult to accurately reflect on a hex map, and thus this chit can accomplish that purpose to a certain degree.
Bloody Struggle - the Assault Table is set up to have only the losing side be adversely affected by the result. This is intentional - during a charge to contact, more often than not one side or the other would lose its nerve before melee was joined. So rarely does actual hand-to-hand fighting occur. One side or the other would give way, thus suffering the consequences of morale loss, being fired upon by the opponent and close pursuit. This chit, when played, represents a more vicious fight in which melee is joined and thus in this case the winner could suffer some loss as well.
18.0 Designer's Notes
The Battle of Mars-la-Tour was a critical turning point of not only the Franco-Prussian War but of European history in general. The French loss at this battle essentially lead to the end of the Second Empire of Napoleon III and helped give birth to the German Second Reich. Why then has it received such scant treatment in the wargaming community? Other than Charles Vasey's excellent Deathride game and scenario treatments in various miniature gaming systems, this highly important battle has been ignored. Why is that?
One factor is that Mars-la-Tour has a reputation as being just a cavalry battle, thanks to von Bredow's famous (and amazingly successful) cavalry charge and the large, but ultimately indecisive, cavalry battle that occurred at the end of the day (this was the last large cavalry vs. cavalry engagement fought in western Europe). But more importantly, the military situation on the morning of 16 August, 1870 was an unusual one. The entire French Army of the Rhine, almost 130,000 men and under the command of the newly-appointed Marshal Francois Bazaine, was moving ponderously out of the Metz fortifications toward Verdun. The goal was to escape the rapidly advancing Prussian pincers and join up with the French Emperor (who had earlier left Metz) and his army near Chalons. However, Bazaine carried out this task in an inexplicably lethargic manner. He seems to have been paralyzed by the fear that the overwhelming mass of two pursuing German armies would crush him at any moment. This looming threat, added to the weight of his new command responsibilities, was apparently a burden that was just too much for him to bear. His plan of action was none at all - Bazaine dawdled and longed for the protection of the fortress walls of Metz. In fact, the Prussian army had become strung out and, while advancing quickly, was somewhat blindly searching for the location of the French army. The Prussian command assumed that the Army of the Rhine was much further along, well on its way to Verdun. When Rheinbaben's 5th Cavalry division first spotted the French tents that August morning outside of Vionville, the troopers at first assumed that they had encountered the rearguard of the escaping French army. To their shock, they soon realized that they were staring at the van of the entire French army! The French outnumbered the Prussians five to one during the opening phases of the battle and should have, by all rights, crushed the Prussians as they force-marched piecemeal onto the field. So what happened? Well, in typical Teutonic fashion, the outnumbered Prussians attacked! By doing so they further flustered an already desultory Bazaine, who needed to continue west to Verdun but did not want to become separated from his protective burrow at Metz. The Prussian strategy intimidated the French into indecision and after a bitter and vicious fight (inflicting a total of more than 30,000 casualties), Bazaine finally ordered a retirement during the evening to better defensive positions nearer Metz. This retreat and redeployment was pursued by the Prussians and resulted in the even bloodier Battle of Gravelotte-St. Privat two days later.
It's obvious that in a wargame setting, any competent French player should defeat the Prussians in this situation with relative ease. Perhaps this is the main reason Mars-la-Tour has not been simulated in game form very often: it is not an easy task to create a balanced battle game of this military situation. Well, far be it for me to refuse a challenge and thus was born my first design called Duel of Eagles. That game has since gone out of print for various reasons and the guys at Compass were kind enough to allow me to bring the game back, now reborn as Position Magnifique.
As far as hard numbers and military abilities are concerned, the game accounts for unit sizes, equipment and morale in a rather straightforward manner through the size of the unit's combat factor. The Prussian's combat factors are slightly inflated to account for their overall strategic momentum (gained by their recent victories in the war), their infantry's superior tactical training and because the Prussian artillery was equipped with advanced breech-loading Krupp cannons. Prussian leaders also have an advantage in that they are more aggressive and can thus order attacks much more efficiently than the French. The French, on the other hand, have the edge in the number of units and small arms firepower, as the Chassepot rifle allows the infantry to fire further and with greater affect. In addition, some French artillery units have Mitrailleuse batteries assigned to them. But the "hardware" part of the game was not the tough portion.
Obviously the major design problem to overcome was Marshal Bazaine's lethargic performance as the French commander. Just creating a vast array of "idiot" rules to curtail the French player would not only make the game feel forced and artificial, but also would mean more rules and conditions. My solution was to this dilemma was to utilize a chit-pull mechanic - but with a twist. Chits are used in Position Magnifique in their traditional role of activating units by random draw and thus mirroring chaos, fog-of-war, and the friction of combat. This function also helps recreate the slow French reaction at the beginning of the battle by gradually increasing the number of French corps that can be activated in a turn, simulating a giant slowly awakening from a deep slumber. The twist that I added to this mechanic is that the players can also draw "events" from the chit pool. This enhanced chit-pull system also allows battle- and era-specific events to occur. These events model the advantages and disadvantages of each side's historic weaponry, tactics and leadership. The Event chits can frustrate a player's tactical plan-making but do reflect actual events that occurred at this and other Franco-Prussian War battles. The chit system weaves player tactical opportunities with each army's particular martial character. It simultaneously supplies all the "bells and whistles" to give the game the feel for this period of warfare while also building a tense fog-of-war with which the commanders must contend. Players are forced to plan ahead as they are never sure in what order their formations will activate nor when. I'm hoping that this one central mechanic can drape the player with the same frustrations, opportunities and decision-making challenges that their historical counterparts had to face. A final nod to the French command situation is the way that the Victory Conditions are constructed. They are set up to give the French player certain factors to consider about which Bazaine was concerned (rightly or wrongly). How the French player ultimately handles those concerns is up to his game play decisions.
Importantly, both players have certain problems that they must overcome in order to win the game. The French player must get past his hesitant, almost paranoid, commander-in-chief and the overall depressed state of the army's morale. But he has the raw strength and the equipment to get the job done if he handles his forces correctly and takes advantage of his opportunities as they arise (i.e., he plays his advantageous chits effectively). The Prussian player has a big edge in the efficiency of his artillery, the assault power of his infantry and the command acumen of his officers. But he is heavily outnumbered and his forces come on in piecemeal fashion. If he has any bad luck or misses his windows of opportunity to strike hard and fast at the French, he will soon find that his lines are vulnerable, with beckoning gaps that an aware French player can exploit. Carelessness could lead to his ultimate defeat. Hopefully, Position Magnifique successfully blends together these various systems to produce an interesting and entertaining game. Mars-la-Tour is such an intriguing and important battle that it deserves to be well represented on more gaming tables.
Important Points to Remember!
- Follow the Sequence of Play carefully. Note that Fire Combat occurs before Movement!
- Before the game starts, there is a Surprise Attack turn (call it Turn "0", if you will). Only the Prussian player is active and he gets a "2->" column shift combat bonus. The French player can only issue Defensive Fire, if eligible.
- The HQ's Command Rating only affects Movement, Recovery and Rebuilding.
- When the last Activation chit is pulled, the Activation Phases are over - even if there are still Event chits left in the cup.
- Only a total of one "Low Ammo" marker and one "Shaken" marker can be removed per HQ unit during Recovery - not two markers per unit.
- Note that Infantry units can fire during the Fire Combat Phase and still move during the subsequent Movement Phase. Horse Artillery can only fire half and still move. Foot Artillery that fires cannot move.
- Artillery units with an "m" notation represent those batteries which also contained one or more Mitrailleuse batteries in their complement. They still act as normal artillery units. The Mitrailleuse feature simply allows the use of the "Mitrailleuse Fire" Event chit to be enacted from these units. Also remember that the chit does not utilize the printed Combat Factor of the Artillery unit - the Combat Factor for the "Mitrailleuse Fire" chit is always "6" or "3".
- Note that the "Town" and "Forest" modifiers in Assault Combat apply only to Infantry units.
- Once a unit suffers a step loss, there is no way for it to recover to its full-strength side.
19.0 Comprehensive Example of Play
[Figure 1, printed page 39: map of the Flavigny area showing French and Prussian counters, labelled "Figure 1".]
In Figure 1, the French are trying desperately to hold on to Flavigny as the Prussian player plans his counter-offensive. Pierre, the French player, has held a previously-drawn "Beaten Zone" chit, anticipating just such an attack. The Prussian player, Wilhelm, has held the "Battlefield Conditions" chit so he can use it for his planned assault on Flavigny. Wilhelm has been pulling chits from the cup this turn and continues to do so. He pulls the "Mitrailleuse Fire/ Beaten Zone" Event chit and hands it to Pierre as it is a French event. Pierre sees that the II Corps Div. Field Artillery unit is a Mitrailleuse-armed battery (per the "m" on its counter) and thus decides to use the "Mitrailleuse Fire" side of the chit. He will issue fire at the Prussian 9/5/III infantry unit directly to the battery's front since it is within three hexes and eligible to be fired at. The fire will be resolved using the 3 column of the Fire Combat Table. Note that the actual Combat Factor of the artillery unit is ignored when issuing Mitrailleuse fire. LOS is clear as both the firing unit and the target are at Level 3 and the intervening terrain is either at the same level with no blocking obstacles or at Level 2 and thus lower. There are no applicable columns shifts, so Pierre consults the 3 column of the Fire Combat Table and rolls two dice, adding them together. He rolls an "8", which is an MT result. This means that the Prussian unit must take a Morale Test. Wilhelm rolls two dice and rolls a "5", which means the unit passes (since its Morale Rating is a 7) and there is no further effect of the fire. If he had rolled an "8", the Prussian unit would have failed and been given a "Shaken" marker.
The "Mitrailleuse Fire/Beaten Zone" chit is placed aside and Wilhelm draws another chit. It is the Prussian "6th Cavalry Division" Activation chit and thus all 6th Cavalry Division units are active. The 6th Cavalry Horse Artillery unit has no fire this turn so it skips the Fire Combat Phase. The 6th Cavalry Division HQ unit is placed on its Attack (A) side but is far to the west (off the example map) and thus the 12th Brigade on our map is given an "Out of Command" marker. A roll on the Out of Command Table yields a "6" and this means its movement allowance is reduced to 4 (but because of the Attack order, it may still Charge and Assault). Wilhelm would love to charge the French artillery battery but doing so would subject the cavalry to Defensive Fire from the French infantry units on either side of the battery (whichever one the cavalry moves adjacent to) and from the charged artillery itself. Note also that the Prussian cavalry could not charge the infantry in Flavigny as it would not only be crossing a Stream hexside, but it also may not charge into a Town hex. Instead, Wilhelm decides to have the cavalry charge the French Imperial Guard infantry unit to see if he can open up that flank a bit. He announces a Cavalry Charge and moves the 12/6 cavalry unit into hex 1714. Pierre has the "Beaten Zone" chit in-hand and could use it now but decides not to. The Prussians continue on to hex 1814 where they must temporarily stop as the 2/1G/IG unit can now issue Defensive Fire. But before Pierre does that, Wilhelm grabs his "Battlefield Conditions" chit and places it on the map next to the combat, declaring that he is using the "Battlefield Smoke" event and thus Pierre must apply a "<-2" shift to his units Defensive Fire. The range is one hex, which is Effective Range, and the French unit has a Combat Factor of 5. Pierre grabs his dice and rolls on the 3 column of the Fire Combat Table. Unfortunately for him, he rolls a total of "4", a "2" and a "2"! So not only does he do no damage to the cavalry but the 2/1G/IG also gets a "Low Ammo" marker for the "doubles". The cavalry is then moved into hex 1813 and stacked with the French unit. Note that when moving into this final hex, no more Defensive Fire can be issued against the charging cavalry - even if the targeted French unit had other friendly units adjacent to it. Wilhelm declares the end of the 6th Cavalry Division's Movement Phase and proceeds with the Assault Combat Phase. First, he figures out the Combat Differential. The assaulting cavalry has successfully charged, so its Combat Factor of 2 is doubled to 4. The defending French infantry has a Combat Factor of 5, so the Combat Differential is -1 (4 - 5 = -1). Wilhelm rolls dice on the column of the Assault Table and there are no column shifts. He rolls the dice and gets an "11", which results in a . The defending French unit loses and since this is a Cavalry Charge, the French unit must retreat at least one hex. Therefore, its choices are either retreat two hexes or take one step loss and retreat just one hex. Pierre opts to retreat the unit two hexes toward the unit into hex 1911. Since the French infantry lost the combat, the unit must be given a "Shaken" marker at the end of its retreat. The victorious Prussian cavalry may now conduct Breakthrough movement and moves one hex toward the retreated French unit into hex 1812 (as it must decrease or maintain the distance to the retreated unit). After that move, the cavalry unit is also given a "Shaken" marker because it conducted a charge. That ends the activation.
Wilhelm draws another chit and gets the "Krupp Guns / Colonel Caprivi" Event chit. As much as Wilhelm is tempted to use the "Colonel Caprivi" side, it is chancy as he must roll a "1" through "4" to get it to work. Instead, he takes the "sure thing" and elects to use the "Krupp's Guns" chit for an immediate Free Fire by one of his batteries. He places the chit aside. Unfortunately for Wilhelm, the III Corps Heavy Field Artillery unit has its Line of Sight blocked to all French units by the Prussian infantry unit directly in front of it on the same level (if the intervening infantry had been on a lower level, the artillery could have fired). Instead, he chooses the III Corps Field Artillery unit, which by being on a Level 5 hex can see over everybody and can shoot into any hex in the picture. Wilhelm selects the French 1/1/II unit in Flavigny as its target, hoping to "loosen the enemy up" a bit for the attack. The range is four hexes and therefore just within the artillery's Effective Range. It will thus fire with a 9 Combat Factor and will have the following column shifts: "1->" for Plunging Fire (shooting from Level 5 to Level 2) and "<-2" for the target unit being in a Town hex, for a net "<-1" shift on the table. The combat is resolved on the 8 column and Wilhelm rolls an "8" total. This is an SH result and places a "Shaken" marker under the French unit.
Wilhelm draws the next chit from the cup and it's the French "Beaten Zone / Bloody Struggle" Event chit. Pierre immediately decides to hold the "Bloody Struggle" side of the chit, as he anticipates a difficult fight at Flavigny. The next chit drawn is the Prussian "III Corps" Activation chit. Just what the Prussians needed! First thing, Wilhelm conducts any Fire Combat for all III Corps units (regardless of orders or command status). Unfortunately for him, both Prussian infantry units are out of range of any French units (their Extended Range is only two hexes). The III Corps Heavy Field Artillery unit still has a blocked LOS. His only shot is a repeat of the III Corps Field Artillery fire on Flavigny. The situation is unchanged and on the 8 column Wilhelm rolls a "5". This is an MT result and the French unit in Flavigny must take a Morale Test. Since the unit is Shaken, its actual Morale Rating is 7. Pierre reluctantly grabs his dice and rolls a "10", which is a morale failure. The unit must apply an SH result, but since it is already Shaken, this becomes a step loss. Pierre curses (in French) and flips the French 1/1/II unit over to its reduced-strength side, keeping the "Shaken" marker under the unit. Flavigny is now there for the taking! Wilhelm places an "Artillery Fired" marker on the III Corps Field Artillery unit to remind him that he can't move it in the upcoming Movement Phase. This completes the Fire Combat Phase and it is now the HQ Command Phase. Wilhelm keeps the III Corps HQ unit on its Attack side. All III Corps units are within Command Range (4) of Gen. Alvensleben so they will operate normally this turn. The game now continues to the Movement Phase and Wilhelm moves his III Corps units as follows: the 9/5/III infantry unit to 1515 and then 1415; the III Corps Heavy Field Artillery unit to 1617 and then 1616; and the 10/5/III infantry unit to 1515, heading for 1514. But Pierre yells "hold it!" when the unit enters 1515 and produces his held "Beaten Zone" chit to issue Interdiction Fire from the 1/1/II French infantry unit at the moving Prussian infantry in hex 1515 (note that he could not have done so in 1514 because Interdiction Fire must be issued at a range of at least two hexes). A Fire Combat is resolved immediately with the French unit at 1 Combat Factor (2 halved to 1 for being Shaken) within Effective Range. There are no column shifts. Pierre rolls the dice on the 1 column and gets a "7", which is . Pierre then puts the "Beaten Zone" chit just used aside and out of play. Wilhelm continues the movement of the Prussian (note that if the unit received any other result from the just-issued fire, it would have had to halt its movement in hex 1515) and moves it into hex 1514. As it does so, the French unit may immediately issue Defensive Fire. This is again conducted on the column of the Fire Combat Table and Pierre rolls a "10", which gives the Prussian unit a "Shaken" marker. Thus ends the Movement Phase, and Wilhelm now begins the Assault Combat Phase by announcing that the infantry unit will assault the adjacent French cavalry unit. Pierre decides that despite the Prussians being penalized for attacking across the stream hexside, he will opt to . He takes the automatic result and retreats the cavalry back to hex 1413. Wilhelm has the Prussian unit do Breakthrough Movement into the formerly occupied hex and ends its turn there (note that the French infantry unit in Flavigny could not issue Defensive Fire since the Prussian unit was doing a Breakthrough Move). He then announces the assault on Flavigny with the unit. The attacking Prussian unit has a Combat Factor of 5 (its normal factor of 9 is halved for being Shaken) and the defending French unit has a Combat Factor 1. The Combat Differential is therefore , which would use the column, and the column shifts are a "" for attacking across a Stream hexside and another "" for attacking Infantry in a Town hex, for a net shift of "" and putting the combat on the column. Wilhelm is not happy about this, as any die roll under an "8" will result in trouble for his unit! He rolls the die and gets a "9", resulting in a ! Pierre retreats the French unit one hex (note that if the unit was not already on its reduced-strength side, Pierre could opt to take a step loss instead of retreating and thereby stay in Flavigny!). Note that the unit is not given a "Shaken" marker again for losing the combat because it already has one. Unfortunately for the French, this also means that Pierre can't use the "Bloody Struggle" chit he's been holding because his unit retreated. By the same token, the Prussians cannot conduct a Breakthrough Movement because the attacking unit is Shaken. A hard fight for Flavigny indeed! So the end result is that the French are pushed out of Flavigny but the Prussians are too hurt to pursue. Flavigny is still technically controlled by the French and the players place a "French Control" marker there to remind them until it is occupied by one of their units. What will happen next turn?
[Figure 3, printed page 41: map of the Flavigny and Vionville area at the end of the example turn.]
20.0 Scenarios
20.1 Crisis on the Left (Tutorial Scenario)
FRENCH SETUP
All units setup on their full-strength side. HQ units can set up on either side.
IV Corps: 1/4Cav/IV - 0202, 2/4Cav/IV - 0402, IV Horse Art. - 0403, 1/1/IV - 0504, IV Div. Fld Art. - 0603, 2/1/IV - 0604, IV HQ - 0504 [sic: printed hex is the same as 1/1/IV], IV Corps Hvy Fld Art. - 0506, 1/2/IV - 0606, 2/2/IV - 0705
III Corps: 2/3Cav/III - 0601, 1/ResCav/III - 0702, 3/3Cav/III - 0801, 1/3Cav/III - 0701, 1/4/III - 0805, 2/4/III - 0905, III HQ - 1005, III Div. Fld Art. - 1006, 2/2/III - 1104, 1/2/III - 1105
PRUSSIAN SETUP
Units setup on their full-strength side except those that are coded with an "(R)" - these units setup on their reduced-strength side. HQ units can set up on either side.
5th Cavalry Div.: 5th Cav. HQ - 0714, 11/5Cav. - 0311, 12/5Cav. (R) - 0714, 13/5Cav. - 1114, 5th Cav. Div. Horse Art. - 1014
6th Cavalry Div.: 6th Cav. HQ - 0316, 14/6Cav. - 0217, 15/6Cav. - 0316, 6Cav Div. Horse Art. - 0416
III Corps: III HQ - 1011, 11/6/III (R) - 0907, 12/6/III (R) - 1008, III Corps Fld Art. (R) - 1011, Corps Hvy Fld Art. (R) - 1112
X Corps: 37/19/X (R) - 0708, 39/20/X - 0919, 40/20/X - 0920, X HQ - 0818, Corps Fld Art. (R) - 0711, Corps Hvy Fld Art. (R) - 0612, Div. Hvy Fld Art. - 0819
Prussian Control Markers: Tronville and Mars-la-Tour.
PRUSSIAN REINFORCEMENTS SCHEDULE
Turn 9 (1600): Guard Cavalry Div. - Guard Cav. HQ, Guard Horse Art., 3/GdCav. = enter via Road hex 0011 (when activated and in the indicated order) in March Order. X Corps: X Div. Fld. Art., 38/19/X = enter via Road hex 0011 (when activated and in the indicated order) in March Order. The Prussian player adds the Guard Cav. Activation Chit to the cup.
FRENCH SETUP (continued)
Imperial Guard Corps: 1/1G/IG - 2502, 2/1G/IG - 2603, 1/GCav/IG - 2404, 2/GCav/IG - 2403, Imperial Guard HQ - 2706, 1/2G/IG - 2706, 2/2G/IG - 2707, 3/GCav/IG - 2607, Imperial Guard Div. Fld. Art. - 2705, Imperial Guard Horse Art. - 2503
French Control Markers: Rezonville and Vionville
FRENCH REINFORCEMENTS SCHEDULE, ELIGIBLE ACTIVATION CHITS AND NOTES
Surprise Attack: before the game begins, the Prussian player receives one free activation with his deployed units. In addition, all Prussian Fire and Assault Combats this activation get an additional "2->" column shift. The French player may do nothing except issue Defensive Fire, if eligible. There is no Rally Phase.
This is to simulate the unpreparedness of the French Army as it was encamped and just having breakfast.
Turn 1 (0800): the 3rd Reserve Cav. and II Corps Activation Chits are placed into the cup, along with all five French Event chits.
Turn 2 (0900): the French player adds the Imperial Guard Activation Chit to the cup.
Turn 3 (1000): Artillery Reserve: Artillery Reserve HQ, Art. Res. Horse Art. and Art. Res. Heavy Fld. Art. = enter the game (when activated and in the indicated order) via Road hex 2706 in March Order (see 12.9). The French player adds the Artillery Reserve Activation Chit to the cup.
Turn 4 (1100): IV Corps: 1/4Cav/IV, 2/4Cav/IV, IV Horse Art., 1/1/IV, IV HQ, 2/1/IV, 1/2/IV, 2/2/IV, IV Div. Fld. Art. and IV Corps Heavy Fld. Art. = enter the game (when activated and in the indicated order) via Road hex 2501 in March Order. The French player adds the III Corps and IV Corps Activation Chits to the cup.
Turn 5 (1200): the French player adds the VI Corps Activation Chit to the cup.
Turn 11 (1800): III Corps: 1/ResCav/III, 1/3Cav/III, 2/3Cav/III, 3/3Cav/III, and III Horse Art. = enter the game (when activated and in the indicated order) via Road hex 0701 (Bruville) in March Order.
SPECIAL SCENARIO RULES
-
The game begins on Turn 7 (1500) and ends at the conclusion of Turn 11 (1900). Place the "Turn" marker in the "7" box of the Game Turn Track. Game play in this scenario only occurs on the left (west) map - the right side map is only used for the Turn Record Track. No movement by either side is allowed off the left map.
-
The French player starts with the III Corps and IV Corps Activation chits and the following three Events chits (only): Prussian Aggressive Tactics/Beaten Zone, Artillery Barrage/Battlefield Conditions and Mitrailleuse Fire/Beaten Zone. The other chits are not used in this scenario.
-
The Prussian player starts with the III Corps, X Corps, 5th Cavalry Div. and 6th Cavalry Div. Activation chits and the following three Event chits (only): Colonel Caprivi/Krupp Guns, Auftragstaktik/Krupp Guns and Battlefield Conditions/ Bloody Struggle. The other chits are not used in this scenario.
-
Special Scenario Victory Conditions: The French player wins the game if he controls Tronville - OR - both hexes of Mars-la-Tour. If the French player controls both Tronville and Mars-la-Tour, this is a Major French Victory.
-
The Prussian player wins if he holds both Tronville and both hexes of Mars-la-Tour. Any other result is a Draw.
20.2 A Day of Battle (Historical Scenario)
FRENCH SETUP
Any units not initially deployed are listed as Reinforcements. All units are on their full-strength side. HQ units can set up on either side.
3rd Reserve Cav. Div.: 3 Res. Cav. HQ - 1311, 1/3ResCav. - 1012, 2/3ResCav. - 1111, 3ResCav Horse Art. - 1311
II Corps: II HQ - 2109, 1/1/II - 1910, 2/1/II - 2011, 1/2/II - 2210, 2/2/II - 2209, 1/A/II - 2312, 1/2Cav/II - 1710, 2/2Cav/II - 1811, II Div. Fld. Art. - 2110, II Corps Heavy Fld. Art. - 2010
III Corps: III HQ - 1602, 1/1/III - 1303, 2/1/III - 1403, 1/2/III - 1502, 2/2/III - 1602, 1/4/III - 1701, 2/4/III - 1801, III Div. Fld. Art. - 1901, III Corps Heavy Fld. Art. - 2001
VI Corps: VI HQ - 1906, 1/1/VI - 1805, 2/1/VI - 1806, 1/2/VI - 1906, 1/3/VI - 2007, 2/3/VI - 2008, 1/4/VI - 2207, 2/4/VI - 2306, VI Div. Fld. Art. - 1807, VI Div. Horse Art. - 2106, VI Div. Heavy Fld. Art. - 1706
PRUSSIAN SETUP
Any units not initially deployed are listed as Reinforcements. All units are on their full-strength side. HQ units can set up on either side.
5th Cavalry Div.: 5th Cav. HQ - 0814, 11/5Cav. - 0815, 12/5Cav. - 0814, 13/5Cav. - 0913, 5th Cav. Div. Horse Art. - 1014
Prussian Control Markers: Puxieux and Tronville
PRUSSIAN REINFORCEMENTS SCHEDULE, ELIGIBLE ACTIVATION CHITS AND NOTES
Surprise Attack: See French section above for details.
Turn 1 (0800): The Prussian player adds the 5th Cavalry Div. Activation Chits to the cup, along with all five Prussian Event chits.
Turn 3 (1000): 6th Cavalry Div.: 6th Cav. HQ - 1720, 14/6Cav. - 1720, 15/6Cav. - 1821, 6Cav Div. Horse Art. - 1920 = units enter the map from the indicated hexes.
III Corps: III Div. Fld. Art., III Div. Heavy Fld. Art. = enter the game (when activated and in the indicated order) via Road hex 2021 in March Order (see 12.9). The Prussian player adds the III Corps and 6th Cavalry Div. Activation Chits to the cup.
Turn 4 (1100): III Corps: 10/5/III = enter the game (when activated) via Road hex 2021 in March Order. 9/5/III = enter the game (when activated) via Road hex 2221 in March Order. III HQ, III Corps Fld. Art., III Corps Heavy Fld. Art., 11/6/III, 12/6/III = enter via Road hex 0920 (when activated and in the indicated order) in March Order.
Turn 5 (1200): X Corps: X HQ, X Div. Heavy Fld. Art., 37/19/X = enter via Road hex 0920 (when activated and in the indicated order) in March Order. The Prussian player adds the X Corps Activation Chit to the cup.
Turn 6 (1300): X Corps: X Corps Fld. Art., X Corps Heavy Fld. Art. = enter via Road hex 0920 (when activated and in the indicated order) in March Order.
Turn 7 (1400): X Corps: 39/20/X, 40/20/X = enter via Road hex 0920 (when activated and in the indicated order) in March Order.
Turn 9 (1600): Guard Cavalry Div.: Guard Cav. HQ, Guard Horse Art., 3/GdCav. = enter via Road hex 0011 (when activated and in the indicated order) in March Order. X Corps: X Div. Fld. Art., 38/19/X = enter via Road hex 0011 (when activated and in the indicated order) in March Order. The Prussian player adds the Guard Cav. Activation Chit to the cup.
Turn 10 (1700): VIII Corps: VIII HQ, VIII Div. Fld. Art., VIII Div. Heavy Fld. Art., 32/16/VIII = enter via Road hex 2021 (when activated and in the indicated order) in March Order. IX Corps: IX HQ, IX Div. Fld. Art., IX Div. Heavy Fld. Art., 36/18/IX, 49/25/IX = enter via Road hex 2221 (when activated and in the indicated order) in March Order. The Prussian player adds the VIII Corps and IX Corps Activation Chits to the cup.
20.3 A Beckoning Victory (Variable Scenario)
FRENCH SETUP
Any units not initially deployed are listed as Reinforcements. All units are on their full-strength side. HQ units can set up on either side.
3rd Reserve Cav. Div: 3 Res. Cav. HQ, 1/3ResCav, 2/3ResCav & 3ResCav Horse Art.: within 4 Road hexes directly west of hex 1311 (inclusive), out to hex 0911.
II Corps: II HQ, 1/1/II, 2/1/II, 1/2/II, 2/2/II, 1/A/II, 1/2Cav/II, 2/2Cav/II, II Div. Fld. Art. & II Corps Heavy Fld. Art.: within 2 hexes of hex 2109 (inclusive), on or south of Road hexes 1910 to 2308.
III Corps: 1/1/III, 2/1/III, 1/2/III, 2/2/III, 1/4/III, 2/4/III, III Div. Fld. Art. and III Corps Heavy Fld. Art.: one unit in each hex in a string of adjacent hexes stretching from hex 1303 to hex 2001 (inclusive). The III HQ may deploy stacked with any unit. All remaining units enter as Reinforcements.
VI Corps: VI HQ, 1/1/VI, 2/1/VI, 1/2/VI, 1/3/VI, 2/3/VI, 1/4/VI, 2/4/VI, VI Div. Fld. Art., VI Div. Horse Art. & VI Div. Heavy Fld. Art.: within 2 hexes of hex 1906 (inclusive), adjacent to or on a Road hex.
Imperial Guard Corps: 1/1G/IG, 2/1G/IG, 1/GCav/IG & 2/GCav/IG: within 1 hex of hex 2502 (inclusive). Imperial Guard HQ, 1/2G/IG, 2/2G/IG, 3/GCav/IG, Imperial Guard Div. Fld. Art. & Imperial Guard Horse Art.: within 1 hex of hex 2706 (inclusive).
French Control Markers: Rezonville and Vionville
FRENCH REINFORCEMENTS SCHEDULE, ELIGIBLE ACTIVATION CHITS AND NOTES
Surprise Attack: before the game begins, the Prussian player receives one free activation with his deployed units. In addition, all Prussian Fire and Assault Combats this activation get an additional "2 ->" column shift. The French player may do nothing except issue Defensive Fire, if eligible. There is no Rally Phase.
This is to simulate the unpreparedness of the French Army as it was encamped and just having breakfast.
Turn 1 (0800): the French player secretly adds one of the following Activation Chits, of his choice, to the cup: II Corps, III Corps, VI Corps, 3rd Reserve Cav. or Imperial Guard.
Turn 2 (0900): the French player adds one more of the Activation Chits not selected on Turn 1 to the cup.
Turn 3 (1000): Artillery Reserve: Artillery Reserve HQ, Art. Res. Horse Art. and Art. Res. Heavy Fld. Art. = enter the game (when activated and in any order) via Road hex 2706 in March Order (see 12.9). The French player adds Artillery Reserve Activation Chit plus one more of the Activation Chits not selected on previous turns to the cup.
Turn 4 (1100): IV Corps: IV HQ, 1/1/IV, 2/1/IV, 1/2/IV, 2/2/IV, 1/4Cav/IV, 2/4Cav/IV, IV Div. Fld. Art., IV Horse Art. & IV Corps Heavy Fld. Art.: enter the game (when activated and in any order) via Road hex 2501 in March Order. The French player adds the IV Corps Activation Chit plus one more of the Activation Chits not selected on previous turns to the cup.
Turn 5 (1200): The French player adds the last remaining Activation Chit to the cup.
Turn 11 (1800): III Corps: 1/ResCav/III, 1/3Cav/III, 2/3Cav/III, 3/3Cav/III, and III Horse Art. = enter the game (when activated and in any order) via Road hex 0701 (Bruville) in March Order.
PRUSSIAN SETUP
Any units not initially deployed are listed as Reinforcements. All units are on their full-strength side. HQ units can set up on either side.
5th Cavalry Div.: 5th Cav. HQ, 11/5Cav., 12/5Cav. & 13/5Cav: within 2 hexes of hex 0814. 5th Cav. Div. Horse Artillery: within 4 hexes of hex 0814.
Prussian Control Markers: Puxieux and Tronville
PRUSSIAN REINFORCEMENTS SCHEDULE, ELIGIBLE ACTIVATION CHITS AND NOTES
Surprise Attack: See French section above for details.
Turn 1 (0800): The Prussian player adds the 5th Cavalry Div. Activation Chits to the cup, along with all five Prussian Event chits. Turn 3 (1000): 6th Cav. Div: 6 Cav. Div. HQ, 14/6 Cav., 15/6 Cav. and 6 Cav Horse Art. - enter the game (when activated and in any order) via any mapedge hex from 1720 through 1920 (inclusive) in March Order (see 12.9).
III Corps: III Div. Fld. Art., III Div. Heavy Fld. Art. = enter the game (when activated and in any order) via Road hex 2021/2221 in March Order.
The Prussian player adds the III Corps and 6th Cavalry Div. Activation Chits to the cup.
Turn 4 (1100): III Corps: 9/5/III, 10/5/III = enter the game (when activated and in any order) via Road hex 2021/2221 in March Order. III HQ, III Corps Fld. Art., III Corps Heavy Fld. Art., 11/6/III, 12/6/III = enter via Road hex 0920 (when activated and in any order) in March Order.
Turn 5 (1200): X Corps: X HQ, X Div. Heavy Fld. Art., 37/19/X = enter via Road hex 0920 (when activated and in any order) in March Order. The Prussian player adds the X Corps Activation Chit to the cup.
Turn 6 (1300): X Corps: X Corps Fld. Art., X Corps Heavy Fld. Art. = enter via Road hex 0920 (when activated and in any order) in March Order.
Turn 7 (1400): X Corps: 39/20/X, 40/20/X = enter via Road hex 0920 (when activated and in any order) in March Order.
Turn 9 (1600): Guard Cavalry Div.: Guard Cav. HQ, Guard Horse Art., 3/GdCav. = enter via Road hex 0011 (when activated and in any order) in March Order. X Corps: X Div. Fld. Art., 38/19/X = enter via Road hex 0011 (when activated and in any order) in March Order. The Prussian player adds the Guard Cav. Activation Chit to the cup.
Turn 10 (1700): VIII Corps: VIII HQ, VIII Div. Fld. Art., VIII Div. Heavy Fld. Art., 32/16/VIII = enter via Road hex 2021/2221 (when activated and in any order) in March Order. IX Corps: IX HQ, Div. Fld. Art. & IX Div. Heavy Fld. Art., 36/18/IX, 49/25/IX = enter via Road hex 2021/2221 (when activated and in any order) in March Order. The Prussian player adds the VIII Corps and IX Corps Activation Chits to the cup.
VARIABLE SCENARIO RULES
-
This scenario plays exactly like the A Day of Battle scenario but with a more relatively free setup and the option to alter the arrival time and/or place of Reinforcements.
-
The French player must setup his units first. The Prussian player then sets his units up, but Prussian units cannot be placed with or adjacent to a French unit.
-
During each turn's Housekeeping Phase, both players may attempt to either move up a Reinforcement Group or change its entry location. The French player may attempt to do so first and then the Prussian player.
-
A Reinforcement Group consists of all the units from the same Corps or Cavalry Division scheduled to arrive on the same turn. If units from two or more Corps/Cavalry Divisions arrive on the same turn, they are considered to be two separate Groups.
-
The player identifies any one eligible Reinforcement Group that he wishes to affect and announces whether he will be trying to get the Group to enter earlier or to a different entry location. He then rolls two dice, adds them together and cross-references this total on the following table:
- 2 = Move the Group back one turn later. There is no change of location.
- 3 - 9 = No Effect
- 10 - 12 = Move the Group up one turn earlier or change its entry place to an eligible adjacent location.
-
If the Group changes its Game Turn of entry, place one of its units onto the Turn Record Track in the box representing its new turn of entry. When that Game Turn begins, the appropriate Reinforcement Group may enter the game normally.
-
If the Group successfully changes location, the Group may enter a new location according to the following allowed alterations and special conditions:
FRENCH
- A Group entering at 2706 may be changed to 2501.
- A Group entering at 2501 may be changed to 2706 or 1601. From 1601, it may then change to 0701. From 0701, it may then change to 0301.
- A Group entering at 0701 may be changed to 0301 or 1601.
PRUSSIAN
- Hexes 2021 and 2221 are interchangeable and units scheduled to enter at either may freely (without a die roll) enter at the other.
- The 6th Cavalry Division can have its location changed to either 2021/2221 or 0920.
- A Group entering at 2021/2221 may be changed to 0920.
- A Group entering at 0920 may be changed to 2021/2221 or 0016. From 0016 it may then be changed to 0011.
- A Group entering at 0011 may be changed to 0016. From 0016 it may then be changed to 0011.
If successful in the location change attempt, place one of the Group's units off map at the new entry point as a reminder.
- Groups may have their entry turn and location changed a multiple number of times during the game, but only one allowed change per attempt.
References
Ascoli, David. A Day of Battle
Vasey, Charles. "Deathride" (ATO Magazine)
Wawro, Geoffrey. The Franco-Prussian War
Waxtel, David. They Died For Glory (Miniatures Rules)
Appendix: Event Chit Reference
The following event descriptions are printed on the reverse of the Combat Results Tables (printed pages 28 and 45) and are reproduced here as printed.
Prussian Events
AUFTRAGSTAKTIK: The Prussian player may immediately play this chit and choose one Prussian Infantry Division (identified by the second number in the Unit IDs). Each unit(s) of the Division (this includes both units if two are in the game) may move up to ½ of their Movement Allowance (rounded up), even if they have already activated this turn, as if under an "Attack" Order. Any Division unit(s) then adjacent to an enemy unit may conduct an immediate Assault Combat with an additional "1 ->" column shift.
BATTLEFIELD CONDITIONS: The Prussian player holds this chit. He may play it for either one of two effects:
a) Battlefield Smoke Obscures Enemy Fire = Play before any one enemy unit's Fire Combat to apply an additional "<- 2" column shift or;
b) Terrain Undulations Mask Movement = Play before any attacking friendly unit's Assault Combat to apply an additional "2 ->" column shift.
BAZAINE'S MALAISE: The Prussian player immediately places this chit with any French HQ unit on the map that has not yet been activated this turn (if any). When that HQ's Unit Activation Chit is drawn, the French player first rolls a die: on a roll of 1 - 5, the HQ's activation is cancelled for this turn and it can do nothing during the Activation Phases (its units may still, however, issue Defensive Fire and be chosen for eligible events); on a roll of 6, the French Corps commander acts on his own and the HQ activates normally.
BLOODY STRUGGLE: The Prussian player holds this chit. He may play the chit immediately after the results of any Assault Combat (only) in which at least one Prussian unit does not Retreat from the combat. If so, one such Prussian unit takes a normal Morale Test - if passed, the Prussian player immediately inflicts one Casualty Hit on any French unit that took part in the just-concluded Assault Combat. Note that this Casualty Hit is in addition to any normal results the French unit may have suffered from that Assault Combat.
COLONEL CAPRIVI: The Prussian player may immediately place this chit on any Prussian unit. He then rolls a die: on a roll of 1 - 4, that Prussian unit (only) may first have any "Shaken" marker removed and then it may be immediately activated, even if it already activated this turn, and perform eligible Fire Combat, Movement and/or Assault Combat; on a roll of 5 - 6, Colonel Caprivi is delayed, wounded or ignored and the chit has no effect.
DEATHRIDE!: The Prussian player holds this chit. He may play it on any Prussian Cavalry unit with which he wishes to conduct a Cavalry Charge move during its activation. He then rolls a die: on a roll of 1 - 2, that Prussian unit rides gallantly at the enemy and must Charge an enemy unit. It does not halt if hit by any French Defensive Fire (but other effects are applied normally) and the Charging Cavalry receives an additional "2->" column shift in the ensuing Assault Combat; on a roll of 3 - 6, the troopers are not up to it and the chit has no effect (though they may still Charge normally if they wish).
KRUPP GUNS: The Prussian player holds the chit and uses when he chooses to (and when eligible). There are three ways to use the chit:
a) Free Fire = He may play this chit in between chit pulls to allow a selected Prussian Artillery unit an immediate Fire Combat, resolved normally and immediately. Simply announce the play before the next chit is pulled. This chit may be played at the end of the turn before the Turn End Phases.
b) Interdiction = He may play the chit at any time against a currently moving French unit when it enters a hex that is eligible to be fired upon by a Prussian Artillery unit and is at least two hexes away. He announces the play, temporarily halts the French unit's movement and then conducts an immediate Fire Combat from that same Prussian Artillery unit (only) on that moving French unit (only). If any result other than "No Effect" is achieved with the fire, the French unit must also end its movement for the turn in its current hex (also - see 9.2). This chit cannot be played against an enemy unit conducting Breakthrough Movement or one stacked with a friendly unit during a Cavalry Charge.
c) Return Fire = He may play the chit immediately after a Prussian Artillery unit is fired upon. The unit may immediately issue Fire Combat, if eligible, back at the unit that just fired on it, resolved normally.
NEEDLEGUN FIRE: The Prussian player holds the chit and uses when he chooses to (and when eligible). There are two ways to use this chit:
a) Free Fire = He may play this chit in between chit pulls to allow a selected Prussian Infantry unit an immediate Fire Combat, resolved normally and immediately. Simply announce the play before the next chit is pulled. This chit may be played at the end of the turn before the Turn End Phases.
b) Return Fire = He may play the chit immediately after a Prussian Infantry unit is fired upon. The unit may immediately issue Fire Combat, if eligible, back at the unit that just fired on it, resolved normally.
French Events
ARTILLERY BARRAGE: The French player holds the chit and uses when he chooses to (and when eligible). There are two ways to use the chit:
a) Free Fire = He may play this chit in between chit pulls to allow a selected French Artillery unit an immediate Fire Combat, solved normally and immediately. Simply announce the play before the next chit is pulled. This chit may be played at the end of the turn before the Turn End Phases.
b) Return Fire = He may play the chit immediately after a French Artillery unit is fired upon. The unit may immediately issue Fire Combat, if eligible, back at the unit that just fired on it, resolved normally.
BATTLEFIELD CONDITIONS: The French player holds this chit. He may play it when needed for either one of two effects:
a) Battlefield Smoke Obscures Enemy Fire = Play before any one enemy unit's Fire Combat to apply an additional "<- 2" column shift or;
b) Terrain Undulations Mask Movement = Play before any attacking friendly unit's Assault Combat to apply an additional "2 ->" column shift.
BEATEN ZONE: The French player holds the chit and uses when he chooses to (and when eligible). There are three ways to use the chit:
a) Free Fire = He may play this chit in between chit pulls to allow a selected French Infantry unit an immediate Fire Combat, resolved normally and immediately. Simply announce the play before the next chit is pulled. This chit may be played at the end of the turn before the Turn End Phases.
b) Interdiction = He may play the chit at any time against a currently moving Prussian unit when it enters a hex that is eligible to be fired upon by a French Infantry unit and is at least two hexes away. He announces the play, temporarily halts the Prussian unit's movement and then conducts an immediate Fire Combat from that same French Infantry unit (only) on that moving Prussian unit (only). If any result other than "No Effect" is achieved with the fire, the Prussian unit must also end its movement for the turn in its current hex (also - see 9.2). This chit cannot be played against an enemy unit conducting Breakthrough Movement or one stacked with a friendly unit during a Cavalry Charge.
c) Return Fire = He may play the chit immediately after a French Infantry unit is fired upon. The unit may immediately issue Fire Combat, if eligible, back at the unit that just fired on it, resolved normally.
BLOODY STRUGGLE: The French player holds this chit. He may play the chit immediately after the results of any Assault Combat (only) in which at least one French unit does not Retreat from the combat. If so, one such French unit takes a normal Morale Test - if passed, the French player immediately inflicts one Casualty Hit on any Prussian unit that took part in the just-concluded Assault Combat. Note that this Casualty Hit is in addition to any normal results the Prussian unit may have suffered from that Assault Combat.
FEU DE BATAILLON: The French player must place this chit with any French Infantry Corps HQ unit on the map (i.e., not the 3rd Reserve Cavalry or Artillery Reserve HQ's) that has not yet been activated this turn and has a Unit Activation Chit still in the cup. If all eligible French HQ units have already been activated, then the French player must place it with any Infantry Corps HQ unit. When this HQ's Unit Activation Chit is drawn, it must be placed under Defend orders, its units (only) may only move one hex this turn and any In Command units (only) that issue Fire Combat receive a "1 ->" column shift. This chit may not be placed with an HQ that already has the Bazaine's Malaise chit on it, unless there is no choice. Note also that this chit only affects those units that are physically on the map - not units that are entering the game as reinforcements.
MITRAILLEUSE FIRE: The French player may immediately conduct Fire Combat with any one Mitrailleuse-equipped Artillery unit (with an "m" on the counter) on any eligible target within a 3-hex range. This fire is always at Effective Range. Resolve the fire normally starting with the "6" Combat Factor column (if the unit is on its full-strength side) or with the "3" column if on its reduced-strength side (regardless of the actual Combat Factor of the Artillery unit!). Adjust normally for all other conditions. If an "MT" result is achieved, reduce the Morale Rating of the targeted unit by "-1".
PRUSSIAN AGGRESSIVE TACTICS: The French player may immediately select any one Prussian Infantry unit that is within two hexes of any French non-HQ unit. The French player rolls a die. If the selected Prussian unit is currently out of Command Range, add "+2" to the die roll. If the total is 1 - 4, Prussian officers retain control and this chit has no effect. If the total is 5 - 6, that Prussian unit is immediately moved (if not already adjacent), by the French player, one hex closer to any French unit within two hexes. Normal Defensive Fire rules apply. If that Prussian unit is then adjacent to a French unit, it must conduct an immediate Assault Combat against a French unit chosen by the French player, resolved normally. Note that the selected Prussian unit can be under either HQ Order.