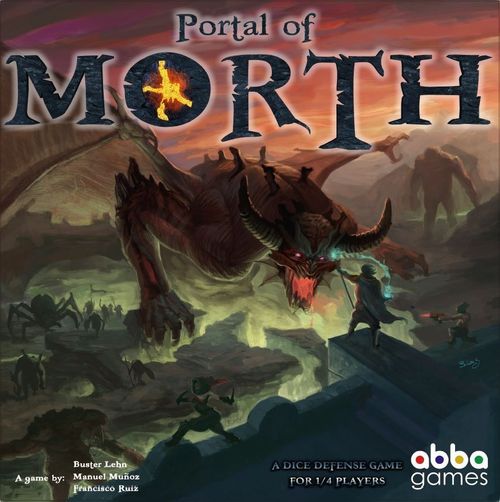
Portal of Morth
Portal of Morth Rulebook
Table of Contents
Table of Contents
1. Introduction
Short game summary
In Portal of Morth, players will take the role of the brave defenders of the various races that inhabit Sylth, struggling to prevent the invasion of Lord Morth's army. Lord Morth will not stop sending enemies and casting powerful spells against the heroes from his dark castle in the mountains.
Each player will defend a territory criss-crossed by paths and must make sure that they eliminate any enemies who are travelling along these paths before they can reach the end, cross the border and attack their lands. To do this, the players will have the aid of the brave heroes of Sylth, who will fight for their cause in exchange for recompense and experience to increase their ranks and improve their skills.
The threat will constantly grow, so the players will have to position their heroes wisely to optimise their efforts. The winner will be the player who manages to keep the least enemies from reaching the end of the path which they are travelling along and cross their frontiers.
The duration for a standard Portal of Morth game is 5 rounds, with 1 wave per player each round.
Every wave has 4 phases:
- Lord Morth phase
- Portal phase
- Hero phase
- Assault phase
2. Components
- 4 double-sided map game boards (4 single maps + 2 cooperative maps). Each map has an enemy start space, a starting space, enemy tracks and a player zone. Each enemy space has room for three dice, the limit per space, except in the enemy start spaces.
- 2 double-sided portal game boards (number of players, turn track, space for spinner).
- 1 plastic portal spinner (with a marked side).
- 97 enemy dice: 23 green, 22 yellow, 44 orange, 8 red. Each die face shows an enemy, a movement value and a resistance value.
- 1 three-sided die (d3), 1 four-sided die (d4), 1 twelve-sided die (d12).
- 3 cloth bags.
- 32 Lord Morth cards.
- 16 character sheets (experience track, improvement trees, basic abilities, prices).
- 32 character tokens:
- 8 Elf tokens (2 Warriors, 2 Wizards, 2 Priests and 2 Huntresses).
- 8 Dwarf tokens (2 Warriors, 2 Wizards, 2 Priests and 2 Miners).
- 8 Human tokens (2 Warriors, 2 Wizards, 2 Priests and 2 Assassins).
- 8 Gnome tokens (2 Warriors, 2 Wizards, 2 Priests and 2 Inventors).
- 10 specialist tokens: 6 Trap tokens for the Human Assassin, 4 Barrier tokens for the Dwarf Miner.
- 40 wooden experience cubes (2 colours). The colours of these cubes match the colours of the bases of the character tokens.
- 8 5mm wooden discs (2 colours): wound marker and gold marker.
- 1 turn marker.
- 2 cancel/delete space tokens.
- 1 Lord Morth token.
- 4 help sheets.
Take all game components out of their frames.
3. Setup
- Portal board: Put the portal board in the centre of the table with the correct side facing up, depending on the number of players, as shown in the upper left-hand corner of the board.
- Turn marker: Put the turn marker in start space (Round 1 Wave 1) of the turn track.
- Portal spinner: Put the portal spinner in the space reserved for it (the round area in the centre of the portal board). Put the marked side of the spinner in position 12 on the portal board (the marked side of the spinner is shown with a white triangle in this rulebook).
- Map boards: It is important to pay close attention to the colours in the centre of the portal board, as these will be the colours of the background on the map boards that it will be necessary to use during the game. Give one game board to each player. (The player with the blue map will pay attention to the blue area of the portal.)
- Money and wounds track: Each player should also receive 1 Money & Wounds track, that should be placed near the player's map board.
- Character sheets: Each player will choose a race to play the game (humans, elves, dwarves or gnomes), and receives the character sheets for the Priest and Warrior of the chosen race. Each character sheet has the possibility to have the information of up to two heroes of the same type, one on the blue spaces and the other on the yellow spaces.
- Experience cubes: Put an experience cube in space 0 of the experience track located on the upper part of each of the character sheets. Always use the same colour for the experience cube to match the base of the character token.
- Character tokens: Each player receives the tokens for their heroes, making sure that the base of the token matches the colour of the experience cube which is on the track for this character. Put them in the fortress on the upper part of the map board (starting space).
4. Introductory Game
When the gnomes reached the Portal, they could not help feeling terrified when they saw the evil creatures of Lord Morth rising from the underworld.
In this introductory game, you will learn the basic rules for Portal of Morth while playing your first game.
Start of round 1: Wave 1
1. Lord Morth phase
LM advances the turn marker on the turn track of the portal board to the space marked "Round 1 - Wave 1".
At this point, the players will receive 2 cards at the start of the game, and an additional card at the beginning of each new round. However, the cards will not be used in this first introductory game, but will be explained later on page 30 of this rule book, as well as on the quick reference sheet.
Next, the player takes as many dice as indicated on the turn track. (Example: the player will take 6 dice from the green bag.) The dice will come from the bag indicated on the turn track, either green or orange.
For this introductory game, only dice from the green bag will be used during the Lord Morth phase for the entry of enemies. When the turn track indicates that it is necessary to roll dice from the orange bag, replace them with the same amount of dice from the green bag, which have to be added to those indicated by the corresponding square. For example, in a 3 player introductory game, in wave 4, nine dice will be rolled, all of them from the green bag, instead of the 7 indicated from the green bag and 2 from the orange bag, which would normally be rolled for that wave.
LM rolls the dice over the centre part of the portal spinner. LM also rolls the position die (d12) and turns the spinner until the side marked on the portal board matches the number rolled on the die.
2. Portal phase
On the portal board there is a round space reserved for the portal spinner, with colours and numbers. Both the colours and the entrance icons are associated to the paths on the players' map boards. The colour of each spinner space will indicate which player's map the enemies will go to, while the icon will tell us which path of that map they will enter.
At the start of the portal phase, starting with LM and in order of turn, each player may pay gold to turn the portal in any direction. 1 coin is paid for each step that you want the portal to take. (Pay one coin to turn the spinner one position in any direction.)
Once all of the players have moved the portal, or have passed if they prefer to do so, starting with LM, each of them will pick up the enemy dice that ended in their part of the spinner and put them on the corresponding paths, making sure that the spinner's space colour matches with the player's map colour, and that the path's enemy entrance matches the icon on that space. (Example: on the spinner, this area corresponds to the yellow board; therefore the enemies will go onto the green and blue paths on the yellow board.)
It's very important that the players pay close attention to what die face they put face up on the upper part.
First, it is necessary to check what enemy came out on the roll of the die, for example a Cerberus. Then, having placed the enemy at the start of the path, it is necessary to see which die face provides the highest resistance against this enemy. In the case of a Cerberus, it would be necessary to put 2 facing up on the board, visible to all players.
NOTE: Some dice have more than one enemy on them, such as green or yellow dice.
Once all players have put their enemies in place and the portal is empty, the next phase can begin.
IMPORTANT: The enemies located on the enemy's starting spaces are still not on the board and cannot be attacked or affected until they enter the map's paths.
3. Hero phase
The advance of the Minotaurs seemed unstoppable, their heavy hoofs destroying anything in their path. Luckily, the brave, beautiful human warrior was waiting for them.
Now it is the turn of the heroes. Starting with LM, during their turn each player can carry out the following two actions in this order:
Buy and upgrade: in the first wave, there is not enough money to buy or go up a level, so we will start directly with the movement and attack phase. You can skip this explanation until the next wave, if you want.
The players may use the gold and experience that they have earned in previous turns to upgrade their heroes or add new members to their team.
To do an upgrade: look on the character sheet that is of most interest and check its cost. (Example: the cost for this level 1 upgrade is 6 and the cost for level 2 upgrades is 10.)
The player pays the upgrade cost with the hero's experience and, if there is not enough, they can pay the rest of the requested price with gold. (Example: the human priest wants to buy a level 1 upgrade with a cost of 6 and has 4 experience points and 3 gold coins. The priest spends 4 experience points and 2 gold coins to pay for the level 1 upgrade. Once paid for, mark it with a blue experience cube, the character's base colour, in the blue space for that upgrade.)
Once the upgrade has been paid for, put a cube of the colour of your hero in the space reserved next to the upgrade.
If you want to acquire a second level upgrade, you will need to buy the first level upgrade that leads to it, either on the same turn or on a previous one. After paying for the second level upgrade, simply move the experience cube to its space. On acquiring it, the player will also be able to enjoy the first level upgrade.
A hero cannot have more than two upgrades, a level one and a level two upgrade, both from the same upgrade tree. Each upgrade has two spaces, a blue one and a yellow one, one for each of the two possible heroes of this type.
To buy a new hero: each player can have up to 5 heroes in their team, with a limit of two heroes of the same type per team. Choose a hero and look on its character sheet for the price to hire it.
Each hero has three different prices on its character sheet, depending on whether it is bought as the 3rd, 4th or 5th team member. For example, a priest will cost 6 coins when bought as the 3rd character, 8 coins when bought as the 4th and 10 coins when bought as the 5th team member.
The player discounts as much gold as is necessary to pay for the new hero from their track. If you do not have it yet, take the character sheet for that hero and add an experience cube to the experience track in square 0. If it is a character that you already have, add a second experience cube of the colour of the base of the new hero and put it on square 0 of the free track on that character's sheet. Now the player has two characters of the same kind and will be able to control the information for each one easily on the same character sheet, each of them with their own coloured spaces reserved, either blue or yellow.
Place the token for the new hero on the starting space of your map board. You may use the new character on the same turn that you bought it.
Movement and attack:
To move: the active player can move their heroes on the map board in any order. In this case, they can start either with the Warrior or the Priest (starting characters). They can move, one at a time, up to 2 squares with the Warrior and 3 with the Priest (their basic movement value, as can be seen on their character sheets).
When moving, heroes spend one movement point to advance to an adjacent square, either horizontally or vertically but never diagonally.
If during their movement heroes reach a path, they can cross over it, but can never finish their movement on it. Likewise, a hero can go over a square on which there are other heroes, but will always have to finish moving on an empty square which is not on a path.
To attack: an attack can be made at any time during a move and can be made before or after moving or even part of the movement can be used to attack and the rest of the movement can be made afterwards.
When attacking, there are three factors to keep in mind:
-
Type of attack: not all of the heroes fight in the same way and not all enemies are affected in the same way by attacks. Some enemies may only be affected by certain types of attack (e.g. skeletons), while others are not affected by some attacks (e.g. centaurs). It is important to pay close attention to any restrictions that each enemy may have when planning your movements. These 4 exceptions are marked on the enemy dice, so you can spot them easily.
There are four types of attack: PHYSICAL, SPIRITUAL, SPECIAL and ARCANE. All of them will affect one enemy in each square, with the exception of the arcane attack, which affects all enemies in the square.
-
Attack strength: on their character sheet, you can see the strength of each of the heroes. The attack strength is the number which accompanies the type of attack on the character sheet.
-
Attack pattern: each hero attacks in a different way, as shown on their character sheet. The attack pattern shows that the hero will hit the squares marked in red for the attack pattern. For example, the Warrior attacks the squares adjacent to its position horizontally and vertically, while the Priest attacks the squares diagonally. Each hero has a different attack pattern which you will need to be aware of to plan attacks.
A hero's attack affects ALL spaces in their attack pattern. Bear in mind that you can always turn a hero in its square, before attacking, with no movement cost, so that its attack affects the spaces that you most want it to.
When a hero attacks, all affected enemies within the hero's attack pattern will lose as many resistance strength points as the hero's attack strength. To show this damage, turn the die for each enemy until the visible face of the die shows the current strength of that enemy. For example, if a Cerberus with a resistance strength of 2 receives an impact of strength 1, you must turn the die of the Cerberus until it shows a strength of 1 (Resistance Strength 2 - Attack Strength 1 = Resistance Strength 1).
When a player eliminates an enemy, they receive one experience point, which they will mark on the experience track of their hero, and the player also receives between 1 and 4 gold coins, depending on the colour of the eliminated die. (See the table of dice and their cost at the end of this section.)
All dice eliminated in this way will go back to their respective bags: to the green one if the dice are green or yellow, to the orange one if the dice are orange, and to the red one if the dice are red.
During the first wave, there are still no enemies on the board, so no hero can attack. Nevertheless, it is advisable to start positioning your heroes near the paths for future waves.
4. Assault phase
LM rolls the movement die (d3). Simultaneously, players will move all of the enemies on the paths on their respective map boards, including the enemy starting spaces.
Add the movement value of an enemy to the result of rolling a die to know how many spaces that enemy has to move during this assault phase. For example, with a roll of 2 on the die, goblins (basic movement value 2) will move 2+2=4 spaces, while the cerberus (basic movement value 5) will move 5+2=7 spaces.
When moving enemies, it is important to bear in mind:
- You must move the enemies in order, starting with the most advanced enemy die on the left path (yellow path in the example), move all of the enemies on that path in order. Once all of the enemies on that path have moved, do the same for the central path (the blue path in the example), and finally for the right path (the green path in the example).
- If there is more than one enemy in a single square (the limit is 3 enemies per square), move the enemy with the highest movement value first. In the case of a tie, move the most resistant/strongest enemy first.
- If, after moving, an enemy ends up in a square where there are already 3 enemies, the enemy moving will go on the previous square.
- If an enemy manages to reach the end of a path on a map, it leaves the map board and the player will receive one damage point, advancing the damage marker disc one space on the wounds track. Occasionally, some enemies will cause more than one damage point when reaching their goal, such as orcs, for example.
- Enemies will never change path (except Goblins). If an enemy starts on a green path, they will continue on that path until reaching their destination.
Once all of the enemies have moved, the player holding the Lord Morth marker will pass it on to the player on their left, who will play as the new LM during the next wave.
After these 4 phases have been completed, the first wave ends and the next wave can begin, starting with a new Lord Morth phase.
This introductory game has a duration of 4, 5 or 6 waves (for 2, 3, 4 players respectively) and it is intended for players to become used to the distribution of enemies, moving heroes and attacking. Once the players have finished playing all the waves, the player who has the fewest damage points will be the winner. In the case of a tie, the player with more money wins. If there is still a tie, all tied players win.
Experience and gold for eliminating an enemy (by die colour):
| Die | Experience | Gold |
|---|---|---|
| Green | 1 experience point | 1 coin |
| Yellow | 1 experience point | 2 coins |
| Orange | 1 experience point | 3 coins |
| Red | 2 experience points | 4 coins |
5. Advanced Rules
After the challenge, the tired heroes took advantage to take a short break and prepare their weapons, their eyes lost on the horizon, where they could already see the dust cloud rising from the latest advancing wave of Lord Morth's troops..
In this section, we will explain all of the advanced and optional rules for Portal of Morth.
A standard game of Portal of Morth is played over 5 rounds, with one wave per player. Therefore, there will be 10 waves in 2-player, solitaire or cooperation games, 15 waves in 3-player games and 20 in 4-player games.
OPTIONAL: A complete game is played in 5 rounds with one wave per player to get the full Portal of Morth experience, but you can increase or reduce the duration of the game at will, either adding or subtracting waves and rounds from the game. For example, you can play a 4-player game with only 4 rounds, or with half the waves. It's up to you!
Summary of rounds
5 rounds, each of 1-4 waves (one per player). Each wave: Lord Morth phase, Portal phase, Hero phase (buy and upgrade heroes; movement and action), Assault phase.
Lord Morth cards
At the beginning of the game, players will receive 2 Lord Morth cards and an additional one at the start of each later round, as indicated in the turn track on the portal board.
These cards are the spells that evil Lord Morth casts against players. To use a card, just announce that you want to do so, at any time, even if it's not your turn. They may be used at ANY time, there are no restrictions. The only rule is that the cards can NEVER, under any circumstances, be used to directly benefit a player; as an example, a "Move a hero" card cannot be used to move one of your heroes closer to the action. Form a discard pile next to the pack, to leave all discarded or used cards.
No player may have more than three cards in their hand at the beginning of a new round. If they have more cards than those permitted, leave those that exceed that limit on the discard pile. The cards to be discarded are chosen by the player.
Effects of Lord Morth cards
(Quick reference guide; a larger version is included among the components.)
- Change an enemy's path: Choose an enemy from the board of another player, and change the path it is on. Make sure to put it on the same square number as it was in the old path.
- Cancel movement: The target hero will not be able to move this turn.
- Cancel attack: Target hero will not be able to attack this turn.
- Advance an enemy: Choose another player's enemy and move it forward 1 space on its path.
- Change an enemy: Pick an enemy on your map board and exchange its position with the enemy of one of your opponents. Both enemies arrive at their new positions with no damage.
- Steal money: Steal 1 or 2 coins from an opponent, depending on the card. Cooperative game: in this game mode, all players will lose 1 coin if any of these cards appear.
- Deduct movement: A hero will have 1 or 2 movement points less until the end of the turn, depending on the card.
- Move a hero: Move an opponent's hero to an adjacent space.
- Heal an enemy: Heal 1 resistance strength point of a wounded enemy.
- Change attack type: The attack type of an opponent's hero changes until the end of the turn, according to the information on this card.
- Block 1 board square: Choose an empty square on an opponent's board, and that square will be blocked until the end of the turn. Heroes won't be able to step on that square. Place a closed square token on that square.
Characters
At the beginning of the game, each player will choose a race with which to play Portal of Morth. Every race has 4 different character types: Warriors, Priests, Wizards and Specialists. The attributes of the first three are common to all of the races, while the Specialist is unique for each race.
In addition, each character type has their own attack type, the difference between them being which enemies that attack can harm and how many of them per space. (A chart of which attack types affect which enemy dice is printed in the rulebook and on one of the included quick reference sheets; possible upgrades for all heroes are also detailed on one of the quick reference sheets. The chart is a grid of ticks and crosses and is not reproducible in text; the enemy restrictions are listed in the Enemy dice chart below.)
Warriors
The warriors of Sylth are brave fighters, specialising in physical combat. Their attack only affects one enemy per square. Basic attributes (from the character sheet icons): physical attack strength 2, movement 2, attack pattern the four orthogonally adjacent squares.
In their evolution tree:
- Strength 4.
- Spiritual fist: a Warrior's attack does physical and spiritual damage.
- Movement 3.
- Movement 4.
- Strength 3.
- Improved reach.
Priests
Priests have dedicated their life to the divine, and use their spiritual powers to slay their enemies. Their attack affects only one enemy per square. Basic attributes (from the character sheet icons): spiritual attack strength 2, movement 3, attack pattern the diagonal squares.
In their evolution tree:
- Arcane ritual: The Priest's attack will be spiritual and arcane, affecting all of the enemies in a square.
- Movement 4.
- Full attack: The Priest's attack will do spiritual and physical damage, and being arcane as well, it will affect all of the enemies in a square.
- Improved reach.
- Spiritual fist: The Priest's attack does physical as well as spiritual damage.
- Strength 3.
Wizards
Wizards are fervent students of the arcane arts and are masters of the most powerful spells. With their arcane attacks they attack all of the enemies in a square. Basic attributes (from the character sheet icons): arcane attack strength 2, movement 2.
In their evolution tree:
- Strength 3.
- Improved reach.
- Arcane ritual: The Wizard's attack will be both arcane and spiritual.
- Movement 3.
- Arcane fist: The Wizard's attack will be both arcane and physical.
- Improved reach.
Specialists
Every race has its own specialist, each with their own peculiarities. All specialists use special attacks, harming one enemy per square.
Human Assassin: Assassins are trained to slay their enemies when they least expect it. Their special skills are the traps that they lay on the paths of enemies. The human assassin can both attack and leave a trap during its turn. Basic attributes (from the character sheet icons): special attack strength 1, movement 2.
As a part of their action, an Assassin can leave a trap in an empty square of an adjacent path. The first enemy to step on the trap will receive 1 damage point, with the trap being removed afterwards. Regardless of whether this happens during that player's turn or not, the Assassin will receive the corresponding experience and gold for each enemy that dies from stepping on the trap. An Assassin can only leave one trap per turn. Once a trap has been laid, it stays where it is until an enemy activates it and it cannot be moved.
Evolution tree:
- Special ritual 2: an Assassin's attack is now special and spiritual and has an attack strength of 2.
- Trap 2: traps do 2 points of damage instead of the usual 1. The reward for killing an enemy like this does not change.
- Movement 3.
- 3 Traps: an Assassin can leave up to three traps on the board, instead of the usual 2.
- Special magic: an Assassin's attack is now special and arcane, affecting all of the enemies in a square.
- Attack 3.
Dwarf Miner: A Miner always carries his working tools with him, so he can set barriers and obstacles for enemies, preventing them from advancing as quickly. The dwarf miner can both attack and leave a barrier during its turn. Basic attributes (from the character sheet icons): special attack strength 2, movement 2.
Just like an Assassin, a Miner can leave a barrier token on an empty square of an adjacent enemy path. When an enemy steps on a barrier, they will activate it and lose 2 movement points until the end of the wave. A barrier will affect all enemies that step on it during the assault phase in which it is activated, after which it will be removed from the board.
Evolution tree:
- Movement 3.
- Improved reach.
- 2 Barriers: a Dwarf Miner can leave up to two barriers on the map board.
- Strength 3.
- Barrier -3: a barrier deducts 3 movement points from every enemy that steps on it instead of 2 points.
- Special magic: a Miner's attack is now special and arcane, affecting all of the enemies in a square during their attacks.
Elf Huntress: Huntresses are specialists in long-range attacks and can hit enemies who are at a distance. The Elf Huntress can both attack and use her bow during its turn. Basic attributes (from the character sheet icons): special attack strength 1, movement 2.
As part of their action, Huntresses can make a strength 1 attack with their bows on an enemy located exactly 2 squares away in any direction (including diagonally), but cannot attack enemies that are closer or further away.
Evolution tree:
- Movement 3.
- Special magic: a Huntress's attack is now special and arcane, affecting all of the enemies in a square.
- Bow 2: The bow of the huntress is now worth 2 damage points instead of 1. The reward for killing an enemy like this does not change.
- Attack 2.
- 2 Bows: Huntresses may use their special attack twice per turn.
- Improved reach.
Gnome Inventor: Inventors are scientific and engineering geniuses and they always carry some new experimental weapon to test in the battlefield. Basic attributes (from the character sheet icons): special attack, movement 3.
Inventors do not have a special action. However, instead of having a fixed attack value, they roll the 3-sided die (d3) to determine how much damage their attacks will do. The player decides where they want the Inventor Gnome to attack, within their attack range, and rolls the 3-sided die. Apply the result of the die as the damage to all of the enemies which the Inventor Gnome is attacking.
Evolution tree:
- Attack 1d4+1: instead of rolling a d3 die, roll a four-sided die (d4) and add 1 to the result. That will be the attack strength for this turn.
- Divide attack: an Inventor can split their attack value and make up to two separate attacks that turn. The strength of these attacks will be a fraction of the total attack strength available. For example, if an Inventor has 4 attack points this turn, this could be used to make one strength 4 attack, 2 strength 2 attacks, or one strength 3 and one strength 1 attacks.
- Special fist: an Inventor's attack is now special and physical.
- Movement 4.
- Attack 1d3+1: Add one damage point to the result from rolling the die to determine the attack strength for this turn.
- Special magic: an Inventor's attack is now special and arcane, affecting all of the enemies in a square.
OPTIONAL: Racial skills
As an optional rule, players can use the special skills of their race. These skills can only be used once per turn by one of the heroes.
- Elves & humans: elves and the humans are agile, as a result of which once per turn players who are using one of these races can add 1 movement point to one of their heroes.
- Dwarves & gnomes: these two races are characterised by their attacking ability, as a result of which once per turn players who are using one of these races can add 1 strength point to the attack of one of their heroes. This bonus applies to the player's complete attack, i.e. it will affect all of the squares within the character's attack pattern.
Bear in mind that, when using these skills, heroes will be stronger, therefore slightly reducing the difficulty of the game.
Enemy dice
In the introductory game, only the dice in the green bag are used, but, in a full game, all of the game dice are used. Before starting the game, remember to ensure that all of the green and yellow dice are in the green bag and that all of the orange dice are in the orange bag. The red dice will be kept in the red bag until needed.
During the Lord Morth phase, when picking enemy dice, pick the number of dice from the green and orange bags as indicated on the turn track and roll them over the centre of the portal spinner.
In the quick reference guides you will find a detailed description of each of the 15 enemies, their maximum resistance and movement values, and their skills (see chart below).
OPTIONAL: If, during a game of Portal of Morth, you run out of dice in one of the bags, take as many dice as needed from the other bag for that wave. For example, if during a wave you have to roll 8 dice from the green bag and there are not enough, use as many from the orange bag as you need to complete the enemies entering the game.
If at any point of the game there are not enough dice for the enemies to enter the game, use the dice that are available and ignore the rest.
Enemy chart
Green dice:
- Skeletons: they can only be damaged by face-to-face physical attacks.
- Goblins: they change paths. When a Goblin reaches an intersection on the path, it will change route and go down the path that crosses the path that it was on. Goblins will change route every time they reach an intersection and will change route several times during their journey. When they change route, Goblins will always try move towards the exit.
- Rat people: Rat people will steal 1 coin from the player if they manage to reach the end of one of the paths.
Yellow dice:
- Cerberus: they have no special skill but they are very fast.
- Centaur: Centaurs are agile, so they cannot be attacked face-to-face physical attacks.
- Orc: Orcs are fearsome warriors. If an Orc reaches the end of a path, the player will receive 2 damage points.
Orange dice:
- Troll: Trolls are big but they are not very fast and one movement point will be deducted from any hero that moves from an adjacent square to the troll. This penalty does not apply when a hero moves into a square adjacent to the Troll, only when it moves from an adjacent square.
- Spider: Spiders are very fast and will steal money if they reach the end of a path.
- Minotaur: strong and fearsome, they can only be attacked using face-to-face physical attacks.
- Demon: Because of their magical nature, they can only be attacked using spiritual attacks.
- Gargoyle: Gargoyles fly, and cannot be attacked using face-to-face physical attacks.
- Ogre: Ogres are slow, but very strong. They have no special skill.
Red dice:
- Cyclops: a Cyclops inflicts double the damage, resulting in 2 damage points if they manage to reach the end of a path.
- Hydra: with its multiple heads, this creature is not easy to kill. If it reaches the end of a path, the player will receive 2 damage points.
- Dragon: the most horrific creature in Lord Morth's army. When it first arrives, you will need to make an initial impact on it of at least strength 2 to break its scales and be able to attack it. If the dragon reaches the end of a path, the player receives 2 damage points and loses 2 gold coins.
Red dice
In addition to these dice, there is a third type of enemy die: the red dice. They are special dice with really powerful enemies, and they will only go in play when a player decides to support Lord Morth by paying him 3 gold coins. By doing so, they can take a red die at random from the red bag and place it on the start tile of an opponent of their choice. This new enemy will be placed on the start square of the path chosen and will move normally during the assault phase.
6. Example of a Wave
Juan, Carlos, Ivan and Javi are currently in round 3, wave 2 of a Portal of Morth game. It is Carlos's turn to be LM, so he starts the Lord Morth phase by moving his marker on the turn track on the portal board.
Next, Carlos takes 11 dice from the green bag and 4 dice from the orange bag to allow the enemies to enter, as indicated on the turn track for this wave. He rolls the dice on the portal spinner and then rolls the position die (d12), getting a 4. Carlos turns the portal spinner to position 4 on the board.
Once this is done, the Portal phase begins. Carlos is LM so he plays first, deciding to pay 2 coins to turn the spinner two positions to the right. Ivan is next, but this movement did not affect him much, so he decides not to pay anything and passes his turn. Juan, on the other hand, has been severely affected by Carlos's move, so he decides to pay another 2 coins to turn the spinner two more positions to the right and send some of the enemies to Javi. Now Javi has a good number of the enemies coming on to his board, so he decides to pay 1 gold coin to turn the spinner one position to the left, sending some of the enemies back to Juan.
After all four players have had their chance to turn the spinner, each of them picks up the enemies that ended up in their sections of the portal board and puts them on the corresponding enemy starting spaces on their boards, with the highest resistance strength face up and visible for each enemy.
It's time for the Hero phase, and Carlos starts his turn. First, he decides to pay 2 coins and 4 experience points to upgrade his Priestess. He has 3 coins, so he moves his gold marker back 2 squares to square 1 and his experience marker back 4 to square 0, using up all his available experience. He places a cube of his Priest's colour on the upgrade square he just acquired, Arcane ritual, which he can start using in this same turn.
He begins his actions by moving his Warrior 2 squares, its maximum movement, and attacks the 2 adjacent paths, killing a skeleton and doing 2 points of damage to one of the orcs in square 10. Carlos collects the dice from the skeleton and puts them back in the green bag, adds 1 experience point to his Warrior sheet and moves his gold coin marker one space forward. Finally, he turns the orc's die to show 2 resistance points and puts it back where it was.
After finishing with the Warrior, he then decides to attack with the Priestess before moving her, slaying the 2 goblins and the gargoyle on the centre path, because, having bought the Arcane ritual upgrade, she affects all of the enemies in these squares. He puts the 2 goblins back into the green bag and the gargoyle back into the orange bag. He adds 5 gold coins to his gold track, 1 for each goblin and 3 for the gargoyle, and raises the experience points of the Priestess by 3, one for each enemy killed. He then moves the Priestess 2 spaces, leaving her ready for a future attack.
It is Ivan's turn, who starts his turn by buying an Assassin which he places in the starting space on his board. First, he moves his Priestess 1 square, kills 2 rats and damages a centaur with his attack, turning the die to the appropriate face to show this, and crosses over the path with his two remaining movement points, receiving the corresponding experience and gold. Then, he moves his Warrior to position it, but without making an attack. Finally, he moves his Assassin 2 squares, leaves a trap in a nearby square and attacks the Cerberus, inflicting 1 damage point, turning the face of the die to reflect this.
Juan and Javi also play their turns and they move on to the Assault phase.
Carlos rolls a 3 on the movement dice. All of them simultaneously move the enemies on their boards. Carlos moves the damaged orc forward 4 spaces, 4 spaces for the centaurs, 8 spaces for the Cerberus and 6 for the rat people. Ivan also moves the enemies on his board at the same time. The Cerberus he damaged during his last turn steps on the trap his Assassin left, inflicting one damage point and thus killing the Cerberus, giving 1 experience point to his Assassin and 2 coins. Javi moves his enemies and a goblin reaches the end of a path, meaning he has to advance his damage marker by 1 point. Meanwhile, Juan moves his enemies as well.
Finally, Carlos hands the LM marker to Ivan, who then gets ready to start the new Lord Morth phase for round 3 wave 3, advancing the turn track again.
7. Cooperative Mode
The Dwarf Sorceress was reading the last runes from her spell when the Elfin Priestess went by. Despite the fact that their races had had their differences in the past, the common threat had made them join forces for a greater good: to defend their lands from Lord Morth at all costs.
In Portal of Morth, the players can choose to play a cooperative game, playing together to prevent the hordes of Lord Morth crossing the borders. By turning the map boards over, you will find the cooperative boards. There are two different cooperation boards, so the players can choose which one they want to use.
Place the chosen board in the centre of the table, making sure that the city in the middle is correctly formed. Take the 2 players portal board and place the spinner over it. Keep the cooperative wound and marker track close to the game boards. Put the turn marker at the start of the cooperative turn track, just above the square marked Round 1 Wave 1. In cooperative mode, players will always start with the same number of heroes on the board and a total of 10 waves are played, regardless of the number of players in the game.
Players will always start the game with 4 heroes to be shared between all of them. In two-player games, each will begin with 2 heroes; in four-player games, each will have 1 hero initially. However, in three-player games, one of them will start with 2 heroes, while the rest begin with 1; decide among yourselves which player will have this extra hero before starting the game. These initial heroes must always be Priests and Warriors. Like in standard games, each player will choose a race of heroes to form their team.
OPTIONAL: Optionally, in cooperative games players can freely mix characters from any race in the same team. This way, each player may have characters from different races at the same time.
A cooperative game is played almost exactly like a basic game, but it has a few minor variants. The most significant one is that they will not compete against each other, but cooperate to prevent Lord Morth's troops crossing into their lands.
Lord Morth cards (cooperative)
The fact that the players are working together doesn't mean that Lord Morth will stop casting spells against them. Every three waves, Lord Morth casts a spell against the heroes. Therefore, the current LM will have to take the top card from the pack and apply its effect immediately, WITHOUT consulting the other players. Secretly, LM will have to decide which character takes the hit.
Some cards will have a special red die icon on the top part of the card. If LM draws a card with a red die icon during cooperative mode, he will have to take a red die from the red bag, roll the 12-sided die (d12) and put the red die on the path corresponding to the resulting number. This new enemy will move normally during the Assault phase.
Cooperative phases
- Lord Morth phase: Use the cooperative mode turn track on the 2 player board to know how many dice you have to roll each wave, and when to apply LM cards.
- Portal phase: During this phase, the players may use all or some of their gold to move the portal normally. However, given that the players are all in the same team, they must agree to move the portal only once, the number of squares they want. Once the Portal has been turned, the enemies enter the paths normally.
- Hero phase: Players can move and attack normally. On the cooperative game board, there are special tunnel spaces, which allow them to move their heroes quickly from one side of the board to the other. To do this, they have to move their hero over the tunnel square and spend 1 movement point to go to the other side. Having done so, put the hero's token on the other tunnel square on the map.
- Buying and upgrading heroes: In this game mode, players will have one common track for the stock of gold coins that they have won during the game. In the same way, the cost for purchasing additional heroes will be calculated over the total of heroes in the playing board, regardless of who buys the new character. So, the 5th hero you buy will cost you its basic price, the 6th this basic price + 2 coins, the 7th its basic price + 4 coins, the 8th its basic price + 6 coins, and so on.
- Assault phase: Enemies will advance normally, following the usual movement rules. LM rolls the movement dice and the players will move the enemies in an orderly fashion on the board. The damage received by players will be added together, having one common damage track for all of them.
In cooperative mode, damage will count for the entire team as a whole. To evaluate your overall results, use the table below.
8. Solitaire Mode
Portal of Morth allows for solitaire games. To do this, use the 1-player portal board.
Solitaire mode is played like a normal game, with the following exceptions:
- LM cards: In this game mode, LM cards are not used. Nevertheless, in the middle of the game, a red die will come into play on a random path. For this, take a random red die from the red bag and roll the position die (d12) to determine to which path the new enemy goes onto.
- LM Phase: Played normally.
- Portal phase: Played normally.
- Hero phase: Played normally.
- Assault phase: Played normally.
Results of a solitaire or cooperative game
To determine the results of your solitaire or cooperative game use the following chart (total damage):
| Damage | Result |
|---|---|
| 15+ | Defeated: Lord Morth's armies have devastated the lands of Sylth. |
| 11 - 14 | Mediocre: You have barely survived LM's attack. You have prevented the destruction of Sylth, but a long time will pass before things go back to what they were. |
| 6 - 10 | Victory: Your heroes have bravely defended the lands of Sylth. Although you have suffered damage, this battle will be remembered as a victory. |
| 0 - 5 | Heroic: You've won. Your heroes' deeds will be sung upon for centuries to come. |
9. Characters List
Elf Warrior, Elf Priestess, Elf Wizard, Elf Huntress; Dwarf Warrior, Dwarf Priest, Dwarf Wizard, Dwarf Miner; Human Warrior, Human Priest, Human Wizard, Human Assassin; Gnome Warrior, Gnome Priestess, Gnome Wizard, Gnome Inventor.