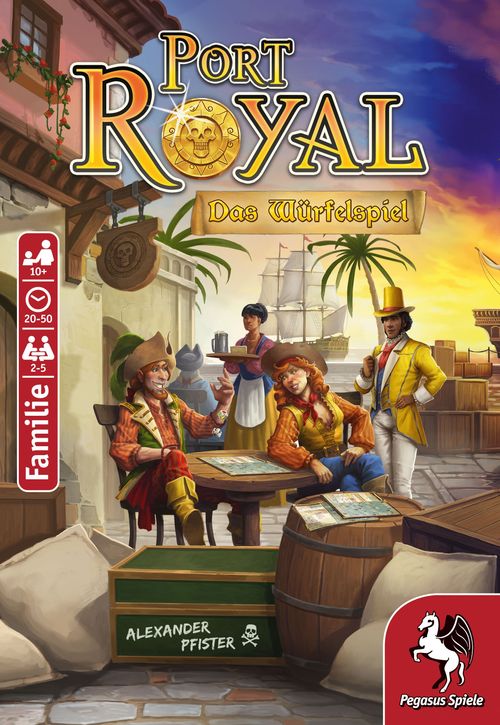
Port Royal: The Dice Game
Port Royal: The Dice Game Rulebook
Table of Contents
Table of Contents
Contents
- 1 game board
- 1 victory point board
- 2 double-sided pads with 100 game maps for each of the 4 Chapters
- 6 wooden ships in yellow, orange, green, blue, red and black
- 5 wooden ship wheels in yellow, orange, green, blue and red
- 10 wooden victory point markers: 2 each in pink, purple, blue, beige and gray
- 2 wooden dice: 1 color die and 1 letter die
- 1 treasure chest (only needed in a five player game)
- 5 pens
Setup
-
Select a Chapter and have each player take 1 game map of the selected Chapter. Lay out the map face-up in front of you. (We recommend playing the Chapters in order, starting with Chapter 1.)
-
Take 1 pen each.
-
Place the game board in the middle of the play area and the victory point board to its right.
-
Place the 6 ships and 5 ship wheels near the game board.
-
Have each player choose a color and place 1 matching color victory point marker on space 0 of the victory point board and the other one in front of them.
-
The player who was last on a ship is given the pair of dice, and will be the first active player of the game.
-
Before play begins, the 4 starting islands must be prepared.
The 4 starting islands are the islands that are connected to the starting space by a sea lane (see picture on the map: sea lane, start space, space, starting islands).
First prepare the Jester starting islands according to the number of players in the game.
- If you are playing with two players, immediately cross the 3 spaces shown on the Jester starting island (the spaces marked 2/3, 2/3 and 2).
- If you are playing with three players, immediately cross the 2 spaces shown on the Jester starting island (the spaces marked 2/3 and 2/3).
- If you are playing with four or five players, do not cross any of the spaces on the Jester starting island.
Example: You are playing with two players. Both players cross off 3 spaces on their Jester starting island.
Then players take turns choosing 1 of the 4 starting islands, starting with the active player and continuing in clockwise order. Each player must select a starting island that has not yet been chosen by any previous player.
Game Overview
In Port Royal - The Dice Game, players will each take a turn with the dice as the active player. Each turn has two Phases: first Discover, then Trade and Hire. The active player is the only one who takes actions during Phase 1: Discover. In Phase 2: Trade and Hire, all players will have an opportunity to perform an action.
Phase 1: Discover - The active player rolls both dice and, depending on the results, places either a ship or ship wheel on the board. After each dice roll has been resolved, they may choose to roll again or to stop. If they stop, Phase 1 ends and play moves to Phase 2: Trade and Hire.
The more ships and ship wheels there are on the board, the better it is for the active player. But be careful—if the active player ever has to place a ship of a color that matches a ship already on the board, they have failed Phase 1 and may not take any ships or ship wheels in Phase 2.
Phase 2: Trade and Hire - Players each perform an action to remove ships and ship wheels from the board. Ships allow you to cross off spaces on your game map and hire skilled members to your crew, while ship wheels grant you special abilities.
The first player to reach 20 victory points wins. Alternatively, if a player has 11 or more victory points they can win by Sudden Death. See the Sudden Death section below to learn how to win by Sudden Death.
Gameplay
Note: First we will explain the rules when playing with 3 or 4 players. If you are playing with either 2 or 5 players, please review the 2 and 5 player rules below for a few additional rules.
Hand the dice to the active player, who can then begin the game.
A player's turn consists of 2 Phases:
- Phase 1: Discover (Only the active player takes actions during this Phase)
- Phase 2: Trade and Hire (All players may take actions during this Phase)
Phase 1: Discover (active player only)
In this Phase, the active player will attempt to place as many ships and ship wheels on the board as they can, after rolling the dice. First, they must decide whether to repel the dice or deal with the rolled results. Then, they can decide to either roll the dice again or end Phase 1.
Roll the dice
Roll both dice. Now decide if you want to repel the dice roll, if able. If you do not or cannot successfully repel, you must deal with the results of your roll.
Repelling
Count the number of cutlasses on both dice. If you have as many, or more, cutlasses marked on your map than the total shown on the two dice, the repel attempt is successful. Next, you choose to either roll the dice again or to end the Discover Phase.
Cutlasses are gained by hiring people (sailors and pirates - see the Hiring section) and are never spent. Once you have gained a cutlass, you will have it for the rest of the game.
The following 2 ship wheels can also help you repel (see the ship wheel rules below):
Orange ship wheel: You may use any number of orange ship wheels on a dice roll. To do so, cross off any number of circled orange ship wheels to add 2 cutlasses to your repel total for each wheel you crossed. The value of these temporary cutlasses only counts towards the current repelling attempt, then is lost.
Blue ship wheel: You may use exactly 1 blue ship wheel on a dice roll to immediately re-roll both dice, regardless of how many cutlasses you have. To do this, cross off 1 of your circled blue wheels. After using a blue wheel, you must roll the dice again and continue your turn; you may not choose to end the Phase prematurely.
Example: Katharina has rolled yellow and the letter A. Katharina only needs 1 cutlass to repel this combination. Since she has already gained 1 cutlass from a sailor, she decides to repel, then chooses to roll her dice again. She does not have to give up the cutlass she gained.
On her next roll, she rolls black and the letter B. Since the black ship is already on the board and she cannot repel this roll, she uses a blue ship wheel to immediately re-roll the dice and continue her turn.
Dealing with the dice
If you do not repel a dice roll or use a blue ship wheel, you will next deal with the dice results.
The color die identifies a row of the board and the letter die identifies a column. First locate the space on the board, either in the ship area or the ship wheel area, that matches the row and column indicated by your dice roll result. Depending on the space, you will place either 1 ship or 1 ship wheel on the board.
(The game board shows the columns A to E on the top, with the cutlass value of each letter 1 to 5, and the rows yellow 0, orange 1, green 1, blue 2, red 2, black 3 cutlasses. The right-hand part of the columns D and E in the yellow, orange, green, blue and red rows is the ship wheel area; all other spaces are the ship area.)
If the resulting space is in the ship area, you must place a ship of the corresponding color there.
Important: If the ship of the corresponding color is already on the board (and you could not or did not choose to repel the dice), then you have failed Phase 1 and must end your Discover Phase immediately. You may not take ships or ship wheels during Phase 2: Trade and Hire.
If the resulting space is in the ship wheel area, you must place the ship wheel of the corresponding color there. If the wheel of the corresponding color is already on the board, you must remove it and place it next to the board instead. Then, continue with your Discover Phase.
Example: Paul has rolled orange and the letter C. The resulting space is in the ship area. Paul takes the orange ship that is currently next to the board and places it on the third column in the orange row. If the orange ship was already on the board and Paul could not repel the dice, he would end his Discover Phase immediately, and would not be allowed to take any ships or ship wheels during the Trade and Hire Phase. He also would not be allowed to use any ship wheels.
If Paul had rolled the letter D, the resulting space would be in the ship wheel area and he would typically place the orange ship wheel on the fourth column of the orange row. However, since the orange ship wheel is already on the board, he would remove it and return it next to the board.
If you did not fail Phase 1, decide whether you want to roll again or end Phase 1: Discover. As long as you do not fail, you may choose to re-roll multiple times consecutively, resolving your results each time.
If you fail Phase 1, or choose to end your Discover Phase, play moves to Phase 2: Trade and Hire.
Phase 2: Trade and Hire (all players)
In Phase 2, the active player first takes ships and/or ship wheels from the board, provided they did not fail Phase 1.
Then, in clockwise order each other player may perform an action, choosing to take either 1 ship or 1 ship wheel.
Active player's choice
If you have failed Phase 1 as the active player, you may not take any ships or ship wheels. Instead, you must cross out 1 skull on the left side of your map (for skulls, see the Skulls section), and you may cross off 2 spaces of your choice on your game map (for crossing off spaces, see the How to cross off spaces section), then, the other players in clockwise order may choose to take either 1 ship or 1 ship wheel (detailed below).
If you voluntarily ended Phase 1: Discover, add up the total number of ships and ship wheels that you placed on the game board during your turn. Depending on the sum, you may take the appropriate number of ships and/or ship wheels.
| Sum of ships and ship wheels on the board | Number of ships and/or ship wheels you are allowed to take |
|---|---|
| 1 | 1 ship or 1 ship wheel, then cross out 2 skulls |
| 2 | 1 ship or 1 ship wheel, then cross out 1 skull |
| 3-4 | 1 ship or 1 ship wheel |
| 5 | a total of 2 ships or ship wheels, in any combination |
| 6+ | a total of 3 ships or ship wheels, in any combination |
If your sum total is...
- ...1, you may take 1 ship or 1 ship wheel, then you must cross out 2 skulls.
- ...2, you may take 1 ship or 1 ship wheel, then you must cross out 1 skull.
- ...3 or 4, you may take 1 ship or 1 ship wheel.
- ...5, you may take a total of 2 ships or ship wheels, in any combination.
- ...6 or more, you may take a total of 3 ships or ship wheels, in any combination.
Red ship wheel: Before you make your choice during your action, and if there are at least 4 ships or ship wheels on the board in any combination, you may cross off one of your circled red wheels to immediately cross off 3 spaces of your choice on your game map. Note: if you failed Phase 1 as the active player, you may not use a red ship wheel the same turn.
Example: There are 3 ships and 2 ship wheels on the board during Paul's turn. Since there are 5 ships and ship wheels, Paul may take 2 ships or ship wheels of his choice in any combination. He selects the green ship and the red wheel.
(In the illustration, the yellow ship is in column A, the green ship in column C, the blue ship in column B, the orange ship wheel in column D and the red ship wheel in column E.)
Ship wheels
When you take a ship wheel, immediately circle an available ship wheel of the corresponding color on your game map. When you use a ship wheel during the game, cross it off; it is used up. A crossed-off ship wheel is no longer available and cannot be used a second time.
(The red ship wheel box on the map reads: with at least 4 ships and ship wheels on the board, circled wheel: cross off 3 spaces.)
Green ship wheel: These ship wheels work differently than the other 4 wheel colors. Whenever you take a green ship wheel, you immediately cross it off and score victory points, as follows. The first, second, fourth and fifth green ship wheels each score you 1 victory point. The third and sixth green ship wheels each score you 2 victory points.
Ships
When you take a ship, you may cross off a certain number of spaces on your game map. The exact number depends on which column the ship is in.
If the ship is in column...
- ...A, you may cross off 1 space.
- ...B, you may cross off 2 spaces.
- ...C or D, you may cross off 3 spaces.
- ...E, you may cross off 4 spaces.
If you take more than one ship, you will add together the number of spaces you gain for each ship. Once you have taken all your allowed ships, cross off the corresponding total number of spaces on your game map.
Important: If you take the blue, red or black ship in column C, you must also cross out 1 skull. If you take the black ship in column E, you must cross out 2 skulls (skulls, see below).
Yellow ship wheel: At the time you take a yellow ship, you may use 1 yellow ship wheel to double the number of spaces that you may cross off for that ship. Cross off exactly 1 circled yellow wheel. If you take additional ships, their values are not also doubled.
Example: Katharina takes a yellow ship, which is in column C. This would normally allow her to cross off 3 spaces on her game map. She chooses to use a yellow ship wheel, which is why she can cross off 6 spaces instead.
How to cross off spaces
Whenever you are allowed to cross off 1 or more spaces, the following rules apply: Each crossed space must be adjacent to an already crossed space, beginning with the starting space. You may only cross off spaces of an island if you have already crossed off all spaces of a sea lane leading to the island.
Special spaces in Chapter 1
Some spaces have additional requirements before you can cross them off.
- Spaces marked with a ship color: You can only cross off these spaces if you have taken a ship of the corresponding color this turn.
- Spaces marked with a skull: If you cross off such a space, you must immediately cross out 1 skull.
Skulls
You must cross out skulls if...
- ...you fail Phase 1: Discovery as the active player (see Dealing with the dice),
- ...you voluntarily end Phase 1 and the total number of ships and ship wheels on the board is 1 or 2,
- ...you cross out a space with a skull on your map,
- ...you take a ship from a board space that displays 1 or 2 skulls.
You must cross out skulls from left to right. If there are negative points displayed beneath a skull, you will lose that many points the moment the skull is crossed out. Once all of the skulls on your map have been crossed out, you can ignore instructions to cross out skulls for the rest of the game. (The skull track shows the first skull with -1 beneath it, then further skulls with -1, -1, -1, -2, -2, -2 beneath the later ones.)
Victory points
You track victory points using your victory point marker on the victory point board. Move your marker forward on the victory point board when you gain victory points and backward when you lose victory points.
Note: If you ever fall below -5 victory points, remove your victory point marker and place it next to the victory point board; you do not need to keep track of victory points below this level. As soon as you have -5 or more victory points, return your marker to the victory point board on the corresponding space.
Other players' choices
After the active player has completed their Trade and Hire action, all the other players have the opportunity to take an action: either take 1 ship or 1 ship wheel, starting to the left of the active player. This is true even if the active player is not allowed to take ships or ship wheels, due to failing Phase 1.
Clockwise, each player may take 1 ship or 1 ship wheel from the board and resolve its effects. (When playing with 4 or 5 players, it's not uncommon that some will go away empty-handed and out of luck, unless they have and use a Jester.)
Important: If you take a yellow ship, you can use a yellow ship wheel to double the number of spaces you can cross off. If you use a green ship wheel, you immediately receive victory points (see the Ship wheels section). If there are at least 4 ships/ship wheels in any combination on the board before you make your choice, you can use a red ship wheel to cross off three spaces on your map.
After each player has taken an action, Phase 2 ends. If there are still ships or ship wheels on the board, place them back next to the board. Also, return any ships and ship wheels taken, next to the board. The active player passes the dice to the player on their left, who becomes the new active player and begins a new turn with Phase 1: Discover.
Islands and People
On each island of the game map, there is a person who will assist you with their abilities. If you have crossed off all the spaces on an island, you will have access to their special ability and also gain their victory points. Mark the corresponding person on the left side of your game map. This will give you an overview of all the victory points and abilities you have received so far. Only the people found in Chapter 1 are described here. The people from Chapters 2-4 are described in the Chapter sections below.
- Sailor: Sailors contribute 1 cutlass, which you may use during any dice roll you choose to repel.
- Pirate: Pirates contribute 2 cutlasses, which you may use during any dice roll you choose to repel.
- Trader: Traders give you a bonus for 2 specific ship colors. If you take a ship of a corresponding color, you may cross off 1 additional space. You may only begin using this ability after the turn in which you first gain it ends.
- Wholesaler: Wholesalers give you a bonus for 2 specific ship colors. If you take a ship of a corresponding color, you may cross off 2 additional spaces. You may only begin using this ability after the turn in which you first gain it ends.
Important: If Traders (found in Chapters 1 and 3) or Wholesalers (found in Chapters 2 and 4) provide a bonus for yellow ships, this bonus is not doubled when using a yellow wheel.
-
Jester: The Jester allows you to cross off 1 space whenever it is your action in Phase 2 and you come up empty, i.e. you cannot take a ship or a ship wheel. You may only begin using this ability after the turn in which you first gain it ends.
Note: You may trigger this ability even if you are the active player and you cannot take ships or ship wheels because you failed in Phase 1: Discover.
-
Vice-Admiral: The Vice-Admiral allows you to cross off 1 additional space when it is your action in Phase 2 and there are a total of at least 4 ships or ship wheels, in any combination, on the board.
-
Admiral: The Admiral allows you to cross off 2 additional spaces when it is your action in Phase 2 and there are a total of at least 4 ships or ship wheels, in any combination, on the board.
Important: If you fail Phase 1 as the active player, you cannot take advantage of the Vice-Admiral or Admiral bonus of additional spaces, regardless of how many ships and ship wheels are on the board.
- Señorita: The Señorita allows you to immediately fill in 1 space on every island, ignoring any island where you have already crossed off all spaces. A filled in space does not need to be crossed off when completing an island to gain access to the person and their victory points. All other spaces on the island must be crossed off, as usual.
- Passenger: The Passenger has no special ability beyond awarding you victory points.
Treasures
Treasures are special spaces. If you cross off a treasure, you immediately receive its victory points and mark the treasure on the left side of your game map. By doing so, that treasure is no longer available to be claimed by any other player. You should clearly announce when you gain a treasure, so that all other players know to cross off the matching treasure on the right side of their maps. It is possible that a treasure you were about to greedily loot will be snatched right out from under your nose!
Ship Wheels Overview
Here you will find an overview of all ship wheels:
Green ship wheels give you an immediate advantage. The other 4 ship wheels give you benefits that you can use at specific times during the game. When you take a ship wheel, circle the matching ship wheel on your game map. Cross it off when you use it later.
Yellow ship wheel: You may use exactly 1 yellow ship wheel in Phase 2: Trade and Hire when you take a yellow ship. You may then cross off double the number of spaces you normally receive from this ship. If you have a matching Trader or Wholesaler, their bonus is not doubled. You may use a yellow ship wheel obtained in the same turn that you take a yellow ship.
Orange ship wheel: You may, as the active player, use orange ship wheels to help repel any dice roll in Phase 1: Discover, temporarily increasing your cutlasses by 2 for each ship wheel crossed. You may use as many orange ship wheels as you have available, if needed, to repel a dice roll.
Green ship wheel: Green ship wheels get you victory points. For the first, second, fourth and fifth green ship wheel, you receive 1 victory point each. For the third and sixth ship wheel, you receive 2 victory points each. Cross off these ship wheels immediately upon scoring them.
Blue ship wheel: As the active player, you may use 1 blue ship wheel for each dice roll in Phase 1: Discover to immediately reroll the dice. By using a blue ship wheel, you do not have to repel the dice with cutlasses.
Red ship wheel: You may use exactly 1 red ship wheel during your action there are at least 4 ships or ship wheels on the board, in any combination. If so, you may cross off 3 spaces on your map.
Important: If you have failed Phase 1 as the active player, you may not use a red ship wheel regardless of how many ships or ship wheels are on the board.
End of Game
The game ends immediately when a player reaches 20 victory points or higher. This player is declared the winner and a great celebration is held by all.
Sudden Death
Alternatively, the game ends immediately if the active player has at least 11 victory points on their turn and manages to place the required number of ships or ship wheels on the board in any combination.
To determine how many ships or ship wheels are required, if the active player has...
- ...11 or 12 victory points, they win immediately if they place a total of 7 ships or ship wheels on the board, in any combination, during Phase 1: Discover.
- ...13 or 14 victory points, they win immediately if they place a total of 6 ships or ship wheels on the board, in any combination, during Phase 1: Discover.
- ...15 or more victory points, they win immediately if they place a total of 5 ships or ship wheels on the board, in any combination, during Phase 1: Discover.
Changes for a Two-Player Game
In a two-player game, there is one change to Phase 2: Trade and Hire.
First, the active player takes 1 to 3 ships or ship wheels, as usual. If the active player fails Phase 1, they must cross out 1 skull and 2 spaces, as usual.
Then, the other player may take 1 ship or 1 ship wheel.
Finally, the active player has one additional action and may take 1 last ship or ship wheel. This additional action is available even if they failed Phase 1: Discover.
Important: The active player may only use Jesters once per turn.
Changes for a Five-Player Game
In a five-player game, there are changes to Setup, as well as Phase 2: Trade and Hire.
When setting up the game, the fifth player is free to select any of the starting islands and will cross 4 spaces on it. In addition, the treasure chest will be placed next to the game board.
In Phase 2: Trade and Hire, you may choose to take the treasure chest instead of 1 ship or 1 ship wheel. It allows you to cross off 2 spaces on your map.
The treasure chest does not count towards the number of ships and wheels that the active player has placed on the board in Phase 1. In this respect, it never changes the number of ships and ship wheels that the active player may take in Phase 2.
The treasure chest is returned next to the board at the end of each Phase 2.
Chapter 2
Dangerous reefs require especially careful navigation - and sometimes a Gunner to blast the way clear.
New special spaces
In Chapter 2, the following are added to the special spaces from Chapter 1:
- Spaces marked with a yellow, orange or blue ship wheel: You may only cross off these spaces if you also cross off a matching and available yellow, orange, or blue ship wheel, without using its ability (see Ship wheels rules above).
- Numbered spaces (3, 4): You can only cross off a numbered space by using the same total number of crosses as is displayed in the space.
Example: Katharina may make 5 crosses during her turn. She wants to cross a space with a 3. To do this, she must use 3 of her 5 crosses. After that, she may make 2 more crosses.
New people
- Gunner: The Gunner reduces the number of crosses you need for a numbered space by 1, for the rest of the game.
- Captain: The Captain allows you to immediately circle 1 or 2 different and available ship wheels of your choice, as if you had taken a ship wheel in Phase 2.
Chapter 3
For even more fame, you can accept missions from high-ranking dignitaries. But remember: speed is of the essence! The reward will be greater the faster you complete your mission.
Missions
Missions are special spaces that you can only cross when you have completed the mission. The player who crosses a mission first receives 2 victory points for it. All other players who later cross the corresponding mission receive 1 victory point each.
In Chapter 3, there are three different missions available:
- 2 treasures: You may only cross off this mission once you have marked 2 or more treasures.
- 4 ship wheels: You may only cross off this mission once you have circled or crossed 4 or more ship wheels.
- 5 islands: You may only cross off this mission once you have crossed off all the spaces of 5 or more islands.
New people
- Diplomat: The Diplomat gives you 3 green skulls, which are immediately available to you. If you have green skulls, you can cross them out instead of regular skulls. Green skulls never earn you negative points.
In addition to the starting island Jester, there are 2 other Jesters. If you have more than one Jester, you can use all of them if you end up empty-handed in Phase 2.
With the Jester that shows an additional skull (crossed spaces and a green skull), you can cross 2 spaces instead of just 1, but you must also cross out 1 skull.
Chapter 4
With the lessons learned from your past adventures, you are ready to set sail again and experience the adventure of a lifetime.
New people
-
Clerk: The Clerk gives you a permanent bonus for taking ship wheels. If you take a ship wheel, you may cross off 1 additional space. Add this to the sum total number of spaces you are allowed to cross off by taking ships.
You may begin using this ability after the turn in which you first gain it ends.
New missions
- 7 skulls: You may only cross off this mission once you have crossed out 7 or more skulls, including green skulls.
- 4 cutlasses: You may only cross off this mission once you have 4 or more cutlasses from sailors and pirates.
- 3 missions: You may only cross off this mission once you have crossed off 3 or more missions.