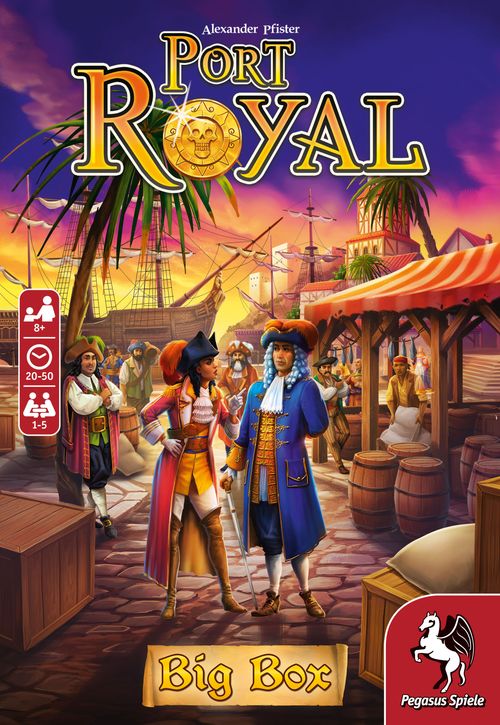
Port Royal: Big Box
Port Royal: Big Box Rulebook
Table of Contents
Table of Contents
Components
Port Royal – Base Game (2-5 players)
120 Play Cards, including:
- 60 Profession Cards (Some have hiring costs and Influence points that vary.)
- 10 Traders
- 5 Settlers
- 5 Captains
- 5 Priests
- 3 Jack of all Trades
- 10 Sailors
- 3 Pirates
- 4 Señoritas
- 5 Jesters
- 6 Admirals
- 4 Governors
- 6 Expeditions (only for 5-player games)
- 4 Tax Increases
50 Ships, 10 of each color
- Pinnace (yellow): 4× worth 1, 3× worth 2, 3× worth 4
- Flute (blue): 4× worth 1, 3× worth 2, 3× worth 5
- Barque (green): 4× worth 1, 3× worth 3, 3× worth 5
- Frigate (red): 3× worth 1, 3× worth 3, 2× worth 6
- Galleon (black): 3× worth 2, 3× worth 4, 2× worth 7
Promo Cards: Gambler — 4 Cards. These 4 cards are marked with a P in the lower right corner.
Port Royal Make Sail! (2-4 players) — A standalone game that can also be combined with the base game
- 60 Play Cards, including:
- 32 Profession Cards (Some have hiring costs and Influence points that vary.)
- 10 Merchants
- 10 Sailors
- 2 Pirates
- 10 Passengers (5 each male and female)
- 32 Profession Cards (Some have hiring costs and Influence points that vary.)
- 3 Tax Increases
- 25 Ships, 5 of each color
The cards for Port Royal Make Sail! are marked with a U in the lower right corner.
Expansion: Just One More Contract (1-5 players)
- 14 Profession Cards
- 5 Clerks
- 4 Gunners
- 5 Vice Admirals
- 10 Ships, 2 of each color
- 18 large Contract Cards. For this expansion, you will need up to 15 wooden markers: 3 of each color per player.
The cards for Just One More Contract are marked with an A in the lower right corner.
Expansion: The Adventure Begins (1-4 players)
- 5 double-sided Character Cards
- 4 Crown Cards
- 1 double-sided Overview Card (Cooperative Victory)
- 16 Event Cards
- 39 Play Cards
- 55 Story Cards (including the Book Cover & 4 Chapter cards)
For this expansion, you will need up to 20 wooden markers: 5 of each color per player.
Insert Notes
The 3 lower compartments are intended for cards as follows: base game in the left, Just One More Contract in the middle, and The Adventure Begins in the right.
In the upper half, the left hand compartment is for Make Sail! and the Promo cards go next to those. The right side compartment holds the wooden markers with the large Contract cards for Just One More Contract above them.
The Base Game
Setup
First, find the special Expedition card (the only Play card without a Coin on the back). If you are playing with fewer than 5 players, return it to the box. If you are playing with 5 players, place this card in the middle of the table instead.
Now shuffle all remaining Play cards and set them facedown on the table. This is the Play deck. Leave a little space next to it for a faceup discard pile. Each player is now dealt 3 cards facedown into their personal display with the Coin showing.
Important note regarding the cards: The front side of the cards depict various Ships, Professions, Tax Increases, and Expeditions. The back of each card depicts a gold Coin. Whenever a player gains Coins, draw the appropriate number of cards from the Play deck without looking at their fronts and place them facedown with each Coin visible in your personal display. Each card represents 1 Coin owned by the player.
Goal of the Game
Use your Ships to gain Coins so that you can hire various Professions to assist you with their permanent abilities.
They, along with Expeditions, will also provide the Influence points you need for victory in a game of Port Royal.
Sequence of Play
Beginning with the start player (the last player who visited a body of water) and then continuing in clockwise order, each player becomes the active player. The active player performs 2 phases in order, though the 2nd phase might sometimes be skipped. If there is a 2nd phase and after the active player has finished, the non-active players also have an opportunity to act in clockwise order from the active player. Then the active player changes.
The 2 phases are:
- Discover: Draw cards from the Play deck into the harbor display.
- Trade & Hire: Take cards from the harbor display.
1. Discover
First, the active player must draw a card from the Play deck and place it faceup in the middle of the table – this forms the harbor display. Now they must decide if they want to draw and reveal another card or stop. This process continues until they voluntarily stop and begin the 2nd phase, or if they turn up a second Ship of the same color as another Ship already in the harbor display, which forces them to stop and forfeit the rest of their turn (as discussed further below).
There are 4 different card types:
- Professions
- Ships
- Expeditions
- Tax Increases
If the revealed card is a Profession, it goes into the harbor display. Each Profession has an ability depicted on the top part of the card and a shield with an amount of Influence points. An explanation of Profession abilities can be found below.
If the revealed card is a Ship, the active player may put it into the harbor display as a possible source of income.
Alternatively, they can repel a Ship to place it in the discard pile instead. To repel a Ship, you must have 1 or more Sailors and/or Pirates who provide Cutlasses in your personal display. Additionally, the number of Cutlasses they provide must be equal to or higher than the number depicted on the Ship. If this is the case, you may place the Ship in the discard pile instead of the harbor display – otherwise the Ship cannot be repelled, and you must place it in the harbor display. You may only repel a Ship that has just been drawn and you can never repel a Ship with a Stop symbol on it.
Cutlasses are never spent, so you can use them multiple times during your turn.
Note: Each Ship shows the possible number of Cutlasses that Ships of this color can have.
Example: Alex wants to repel a flute with 2 Cutlasses. Since his Sailor gives him 1 Cutlass and his Pirate adds 2 Cutlasses, he has a total of 3 Cutlasses and he succeeds. He can repel the flute to the discard pile.
A player may always stop voluntarily and proceed to the 2nd phase. Once a player has started the 2nd Phase, they can't return to the 1st Phase.
A player can continue with Phase 1 until they draw a Ship of an identical color to one that is already in the harbor display that they can't repel. If that happens, the player must discard all of the cards in the harbor display. Don't forget that Expeditions are not part of the harbor display and so are not discarded.
This means that Phase 2: Trade & Hire is forfeited. Instead, all players gain 1 Coin from the Play deck for each Jester in their personal display. The active player may still fulfill Expeditions before ending their turn.
Play now continues with the next player in clockwise order becoming the active player and performing Phase 1: Discover.
Whenever the Play deck is depleted during the game, simply shuffle the discard pile and create a new facedown Play deck.
If the drawn card is an Expedition, place it in the middle of the table but apart from the harbor display. An Expedition remains in place until an active player claims it by fulfilling it.
To fulfill the requirements of an Expedition (as shown on the bottom of the card) a player must discard a number of Profession cards with matching abilities from their personal display. Then they may place the Expedition in their personal display and draw Coins from the Play deck equal to the number of Coins depicted on the Expedition. The active player may claim as many Expeditions as they can at any time during their turn.
Example: Dagmar is the active player and wants to claim an Expedition with 2 (matching icons). Therefore, she discards her Priest and her Jack of all Trades. She takes the Expedition card as well as 2 Coins from the Play deck.
If the drawn card is a Tax Increase, all players that currently possess 12 or more Coins must lose half of their Coins (rounded down). For example, a player with 12 or 13 Coins must lose 6 Coins. These cards are placed in the discard pile. Afterwards – depending on the Tax Increase drawn – either the player with the most Cutlasses or the player with the least Influence points gains 1 Coin. In case of a tie (for example, if no players have Cutlasses or Influence points yet), all tied players gain 1 Coin.
Once the Tax Increase has been resolved, it is discarded and play resumes as normal.
2. Trade & Hire
In this phase the active player may take 1–3 cards from the harbor display. Then, all other players may take 1 card. Exactly how many cards the active player may take depends on the number of different colored Ships in the harbor display:
- 0–3 different colored Ships: may take 1 card from the harbor display
- 4 different colored Ships: may take 2 cards from the harbor display
- 5 different colored Ships: may take 3 cards from the harbor display
Cards are taken one by one – so the ability of a card just taken may be immediately used beginning with the next card taken.
Trade
The player takes 1 Ship from the harbor display and places it into the discard pile. They then gain as many Coins as are depicted on the banner at the top of the discarded card.
Example: Klemens takes the flute from the harbor display, places it in the discard pile, and gains 2 Coins.
Hire
To hire 1 Profession, a player must pay an amount of Coins equal to the cost depicted on the bottom part of the Profession they wish to hire. (Place the Coin cards faceup in the discard pile.) They place the Profession in their personal display and from now on they may use the ability on the top part of the card (the banner). All abilities are explained below.
Example: Andrea chooses to hire a Sailor. She pays 3 of her Coins by placing them in the discard pile and then places the Sailor in her personal display.
Once the active player has finished taking 1 or more cards (Ships or Professions), the other players may now also take 1 card, if available, in clockwise order following all rules for taking cards. However, each player who takes a card must pay the active player 1 Coin as compensation. When taking a Ship, the payment may come from the income for that Ship.
Once all other players have had a chance to take 1 card, any leftover cards are discarded. Note that it's possible, depending on the number of cards in the harbor display, that there may not be enough cards for everyone to take one.
Now the next player in clockwise order will become the active player and starts with their Phase 1: Discover.
Example: It's Andrea's turn. She drew and placed 5 cards in the harbor display during her Discover phase. 4 of those were different colored Ships, which allowed her to take 2 cards. First, she took and discarded a Ship worth 3 Coins. Then she spent the Coins to hire 1 Profession. Now, the other players may take a card, if possible. Alex decides to take 1 of the Ships that are left. He chooses 1 Ship, places it in the discard pile and takes the appropriate number of Coins, and then pays Andrea 1 Coin for compensation. Once the rest of the players have had a chance to take 1 card, any leftovers are discarded.
End of Game
The end of the game is triggered as soon as 1 player has acquired 12 Influence points in their personal display. Game play continues through the current round until the player sitting to the right of the start player has been the active player.
The Winner of the game is the player who has the most Influence points in their personal display. In case of a tie, the tied player with the most Coins left over is the winner. If still tied, these players share the win.
End of Game Variant
As a variant, you can play with the following End of Game rules:
The end of the game is triggered as soon as 1 player has acquired 12 Influence points and has at least 1 Expedition in their personal display. All other rules stay the same. The winner of the game is the player who has the most Influence points and at least 1 Expedition. Tie breaks are resolved in the same way as in the regular game.
Port Royal Make Sail!
Port Royal Make Sail! is a quick and easy standalone variant for 2–4 players. It's ideal for travel by land or by sea, or for initiating a few landlubbers into the intricacies of trade and hire. You can also add some of its cards to the Base Game to add more variety to your usual Port Royal adventures!
Combining Port Royal Make Sail! with the Base Game: You can add all of the Port Royal Make Sail! cards that have the U symbol in the lower left corner. These consist of 5 Merchants, 5 Passengers, and 10 Ships.
Playing Port Royal Make Sail! all of the Base Game rules apply with the following exceptions:
Goal of the Game
In contrast to the Base Game, there are no Expeditions. You must try to earn enough Coins with Ships so that you can hire Sailors, Pirates, Merchants, and Passengers to gain the most Influence points.
Sequence of Play
Trade & Hire is the same as described in the Base Game with 2 exceptions: ignore the rules for Expeditions and use the new rules for the Tax Increase cards.
If the active player draws a Tax Increase card, all players with 9 or more Coins in their display must discard down to 8 Coins. In addition, the player with the fewest Influence points gains 1 Coin. In case of a tie (even when players haven't gained any Influence points), all tied players gain 1 Coin.
End of Game
The end of the game is triggered as soon as 1 player has 8 or more Influence points in their personal display.
Game play continues through the current round until the player to the right of the start player has been the active player. The winner is the player with the most Influence points. Ties are broken by the player with the most Coins leftover. If still tied, these players share the win.
Profession Abilities
Profession abilities are depicted in the banner at the top of their card. The Influence points you gain are depicted on the shield to the right of the ability banner. Whenever you act – either as the active or as an inactive player – you can use any of the Profession abilities in your personal display. If you have multiples of one type of Profession, their abilities stack. For example, if you have 2 Señoritas, you can hire Profession cards using a discount of 2 Coins.
Priest / Captain / Settler (5 each) / Jack of all Trades (3)
These Professions must be discarded in order to complete Expeditions. The ability banners for these cards are shaded. The Jack of all Trades is a wild card for the 3 abilities on these 3 Professions (Priest, Settler, Captain) and so can be discarded in place of a Priest, Settler, or Captain.
Trader (2 of each color)
A player gains 1 additional Coin for each Trader of the appropriate Ship color in their personal display.
Admiral (6)
Whenever it is your turn to take cards during Phase 2: Trade & Hire and there are currently 5 or more cards in the harbor display at the start of your turn, immediately take 2 Coins per Admiral in your personal display. Remember that Tax Increase and Expedition cards do not count as cards in the harbor display.
Non-active players also gain 2 Coins for each Admiral in their personal display if there are still 5 or more cards in the harbor display at the start of their turn.
A newly hired Admiral won't provide any Coins. (It is no longer the start of the player's turn if they've hired a new Admiral.)
Jester (5)
Whenever it is your turn to take cards during Phase 2: Trade & Hire and the harbor display is empty at the start of your turn, you immediately gain 1 Coin for each Jester in your personal display. Tax Increase and Expedition cards do not count as cards in the harbor display.
If there is no Phase 2: Trade & Hire, all players (including the active player) receive 1 Coin for each Jester in their personal display.
A newly hired Jester won't provide any Coins. (It is no longer the start of the player's turn if they've hired a new Jester.)
Governor (4)
Whenever it is your turn to take cards during Phase 2: Trade & Hire, you may take 1 extra card from the harbor display as per the normal rules for each Governor in your personal display. If you are not the active player, you must pay the active player 1 Coin in compensation for each card taken.
A newly hired Governor won't allow you to take an extra card. (It is no longer the start of the player's turn if they've hired a new Governor.)
Señorita (4)
The hire cost for a Profession is discounted by 1 Coin for each Señorita in your personal display. Hire costs can never be discounted to less than 0.
Sailor (10) & Pirate (3) PLUS Sailor (10) & Pirate (2) from Make Sail!
The depicted Cutlasses on these Professions can be used to repel Ships (see Phase 1: Discover).
Merchant (2 of each color, Only in Port Royal Make Sail!)
Whenever a player trades and gains Coins with a Ship of the same color as one of their Merchants during Phase 2: Trade & Hire, they place that Ship offset beneath their corresponding Merchant instead of discarding it. Each of these Ships are worth 1 additional Influence point.
Passenger (10, Only in Port Royal Make Sail!)
Passengers don't have any abilities, but they are worth Influence points.
Gambler Promo (4)
Fitting both the game and his passion, the Gambler tends to push his luck more than most. Even if you're not a gambler yourself, this card will boost your game. The Gambler can be added to the Play Cards of the Base Game.
Once during the Discover phase as the active player, you may use your Gambler to draw 4 cards from the Play deck at the same time and place them in the harbor display. When revealing these 4 cards you may not repel any Ships drawn, but you do resolve Tax Increase cards as they are revealed.
If the harbor display now has:
- at least 2 Ships of the same color, then you must end your turn without any effect. As usual, you must skip Phase 2: Trade & Hire.
- only Ships of different colors, you must end Phase 1: Discover and begin Phase 2: Trade & Hire. You may take 1 additional card as per the normal rules during this phase.
Exception: If you have 2 or more Gamblers, you may choose to use another one immediately after you have finished using the previous Gambler. However, once you have completed using your Gamblers, you must move on to Phase 2: Trade & Hire.
Just One More Contract
Port Royal – Just One More Contract is an expansion for Port Royal that requires the Base Game to play and allows you to play with 1–5 players. We recommend you play the Base Game a few times before adding in the new components.
Combining the Port Royal Base Game with – Just One More Contract: You can add the new Professions and Ships to the Base Game without using the Contracts. However, if you do use the Contracts, you must also use the new Professions and Ships.
Profession Abilities
Clerk (1 per Ship color)
For each Clerk that matches the color of a Ship you trade with during Phase 2: Trade & Hire, you may take 1 additional card from the harbor display as per the normal rules. (If you aren't the active player, you must still pay 1 Coin per card to the active player.)
Gunner (4)
Whenever it is your turn to take cards during Phase 2: Trade & Hire, for each Gunner in your personal display you immediately receive a number of Coins equal to 1 less than the number of Ships in the harbor display at the start of your turn.
A newly hired Gunner won't provide any Coins. (It is no longer the start of the player's turn if they've hired a new Gunner.)
Vice Admiral (5)
Whenever it is your turn to take cards during Phase 2: Trade & Hire and there are currently 3 or 4 cards in the harbor display at the start of your turn, immediately gain 1 Coin per Vice Admiral in your personal display. Remember that Tax Increase and Expedition cards do not count as cards in the harbor display.
Non-active players also gain 2 Coins for each Vice Admiral in their personal display if there are still 3 or 4 cards in the harbor display at the start of their turn.
A newly hired Vice Admiral won't provide any Coins. (It is no longer the start of the player's turn if they've hired a new Vice Admiral.)
New Ships
This expansion introduces 2 new Ships per color. One Ship in each color also has a new effect: in addition to the 3 Coins gained when taking this Ship, one other player of your choice also gains 1 Coin. (As usual, the Coins are taken from the Play deck, and you must also pay the active player 1 Coin if you are not the active player.)
In the Solo Variant, ignore the gain of 1 Coin for another player. You simply gain 3 Coins.
The Contracts
If you play with the Contracts, you will need all of the cards from the Base Game and the Just One More Contract expansion. Shuffle all of the Professions, Ships, Expeditions, and Tax Increases to create the Play deck and place the Contracts in the playing area. Each player also takes 3 markers in the color of their choice.
Decide which variant you want to play:
- in the competitive variant, Contracts provide an additional source of Influence points.
- in the cooperative variant, you can play Solo or as a team to complete as many Contracts as you can to become Lord of the High Seas – but time is working against you.
Port Royal – Just One More Contract follows the rules for the Base Game with the following changes:
Competitive Variant
First, remove the 2 white Contracts with a blue seal – they are only used with the cooperative variant. Shuffle the remaining 16 Contracts, place 4 Contracts faceup on the table, and place the remaining Contracts aside facedown as a deck. Note: Ignore the seals in the top right corner in this variant. The course of play remains the same as the base game with the addition of completing Contracts.
To complete a Contract, you must meet its requirements (see Contract Details below). You can complete a Contract at any time during your turn, regardless of whether you are the active player or not. Once you complete the Contract, place 1 of your 3 markers on the leftmost free Coin space on the Contract. The marker remains on this Contract for the rest of the game. Each player can only complete each Contract once, but multiple players can partake in and complete the same Contract.
Usually, you gain Coins from the Play deck for completing a Contract – and the earlier you complete it, the more Coins you gain. When you complete your second Contract, you also gain 1 Influence point. If you manage to complete a third Contract, you gain another 2 Influence points. You can't complete more than 3 Contracts.
For each Influence point you gain from Contracts, take a Contract card from the deck and place it facedown in your personal display. (The Contracts all depict 1 Influence point on their backs. If the deck runs out, use the backs of the white Contract cards or some other tracking method.)
The end of game is triggered as usual. Of course, a player can trigger the end of the game and can win the game without completing any Contracts.
Example: Klemens (red) is the second player to complete this Contract and therefore gains 3 Coins from the Play deck to place in his personal display. Since this is also his second completed Contract, he also gains 1 Influence point from the Contract deck to place facedown in his personal display.
Solo and Cooperative Variant
In a solo or cooperative game, you must complete a specified number of Contracts within a specified amount of time. Time is measured by using a separate Time deck created with cards from the Play deck. At the start of each player's turn, you must draw 1 card from the Time deck.
First shuffle all 18 Contract cards and turn the specified number of Contracts faceup, as shown in the following table:
| Players | 1 | 2 | 3 | 4 | 5 |
|---|---|---|---|---|---|
| Contracts | 3 | 5 | 7 | 9 | 11 |
Then shuffle the Play cards (Base Game + Just One More Contract) to create the facedown Play deck as usual. Then draw the specified number of cards from the top to create the Time deck, which must be clearly separate from the regular Play deck. Determine the specified number of cards in the Time deck as follows:
- 13 cards (regardless of player count)
-
- the sum of the numbers (-1, 1, 2) shown in the seals of the faceup Contract cards
-
- 1 card for each different letter in the seals of the faceup Contract cards (each letter only counts once; for example, if there are 3 A's, this only adds 1 additional card.)
Example: These 3 Contracts illustrated in the rulebook are on display for a Solo game. The Time deck will consist of 13 + (1 + 0 - 1) + 2 (G&H) = 15 cards.
The base game's rules apply with the following changes:
The active player must always draw the very first card of their turn from the Time deck (and place it in the harbor display). Then any additional cards are drawn from the Play deck as usual. If you can't reveal a card from the Time deck and haven't completed all of the Contracts yet, you have lost the game. You win the game only if all of the Contracts have been completed by at least one player before the Time deck is exhausted.
You play as a team. If you take a card in Phase 2: Trade & Hire as an inactive player, you must still pay the active player 1 Coin. This makes a Ship with 1 coin quite interesting, because although you individually won't gain a Coin, the team will.
Use the Contracts as described in the competitive rules (see above).
Solo Game Note: You are always the active player, so you never pay any additional Coins in Phase 2. If you reveal a Tax Increase card, you always gain the specified bonus.
How well did you do?
During the game, you may choose to set aside the top card of the Time deck each time you reveal a Tax Increase card. The cards you set aside create a Point deck. If you manage to complete all of the Contracts before the Time deck is depleted, each card in the Point deck will be worth 1 Point.
Additionally, you can decide to add a number of cards from the Time deck to the Point deck before the game starts to increase the difficulty even more, and to gain more Points. This leaves less time to complete the Contracts but allows for more Points if you're successful!
Example: Using the same Contracts from the previous example, Klemens's Time deck consists of 13 + (1 + 0 - 1) + 2 (G&H) = 15 cards. Since he's already played several games, Klemens feels confident he can move 5 cards from the Time deck to the Point deck. This leaves him with only 10 turns to complete the 3 Contracts. If successful, he'll now be able to obtain the title of "Pirate" at best. For a better result, Klemens would need to put exactly 1 additional card aside for each Tax Increase for the rest of the game.
You can determine how well you did by using the table below:
| Points | Title |
|---|---|
| 0-1 Points | Landlubber |
| 2-3 Points | Sailor |
| 4-5 Points | Pirate |
| 6-7 Points | Captain |
| 8+ Points | Lord of the High Seas |
Note: Remember, you can complete a Contract at any time during your turn, regardless of whether you are the active player or not. On the other hand, you can complete Expeditions only if you are the active player.
Contract Details
The Contract requirements explain what you must have in your personal display or what you must do to complete the Contract. Any numbers are the minimum necessary; you can have more Cutlasses in your personal display than required. You don't have to complete most Contracts as soon as you meet their requirements. You can complete them later if you want. The only Contracts you must complete immediately are the Tax Inspector, Jinx, (Major) Speculator, and the Frigate and the Galleon Nemesis Contracts. Note: only the active player can complete the Pirates' Nest, (Major) Speculator, and Jinx Contracts.
Luminary, Bruja, Maritime Supremacy, New Colony, Trade Outpost, Trade Master If you have both mentioned Professions in your personal display, you may immediately place one of your markers to complete this Contract. The Jack of all Trades does not count for any depicted Professions. (Once you complete this Contract you can still use your Settlers, Priests, and Captains for Expeditions.)
Thrifty Staff If you have 4 Professions in your personal display costing 3 Coins (or less in the future…), you may immediately place one of your markers to complete this Contract. (Discounts from Señoritas don't count.)
Mercenary If you have at least 3 Cutlasses in your personal display, you may immediately place one of your markers to complete this Contract.
Explorer If you have at least 1 Expedition in your personal display, you may immediately place a marker to complete this Contract.
Frigate Nemesis If you decline all Coins when trading with a Frigate (including matching Traders), you may immediately place a marker on space [1]. The next time you decline Coins, move your marker to space [2]. The third time you decline Coins, you immediately complete the Contract. Once you place a marker on this Contract, it remains there for the rest of the game, even if it's not completed. Multiple players can have markers on these spaces.
Galleon Nemesis Similar to Frigate Nemesis, but you only need to decline Coins twice when trading with a Galleon to complete the Contract.
Tax Inspector When paying taxes, you may immediately place a marker to complete this Contract.
Jinx If you must end your turn as the active player due to drawing a Ship of the same color as another already in the harbor display (including when using the Gambler), you may immediately place one of your markers to complete this Contract.
Speculator If you are the active player and there are 3 Ships of different colors in the harbor display, you may immediately decide whether or not to place one of your markers on space [1]. Once you place a marker on this Contract it remains there for the rest of the game, even if you don't complete it. Multiple players can have markers on these spaces. The next time you are the active player and have 3 Ships of different colors in the harbor display, you immediately complete the Contract.
Major Speculator If you are the active player and there are 4 Ships of different colors in the harbor display, you may immediately place one of your markers to complete this Contract.
Pirates' Nest Whenever you repel a ship as active player using your Sailors and Pirates, you may take a repelled Ship of a color you don't have to place in your display, otherwise discard it as usual. Once you have all 5 colors of Ships, immediately discard them and place your marker to complete this Contract.
Small Estate (used only in the cooperative variant) If you have 12 Influence points, you may immediately place a marker to complete this Contract.
Ransom (used only in the cooperative variant) Pay 15 Coins to immediately place a marker to complete this Contract.
The Adventure Begins
Port Royal – The Adventure Begins is an expansion for Port Royal that plays with 1–4 players and requires the Base Game to play. We recommend you play the Base Game a few times before you play your first game with the new components. Port Royal – The Adventure Begins is comprised of 5 consecutive chapters. Each game session consists of exactly one chapter.
The cards for this expansion can't be used as an addition to the Base Game or any other expansion. When playing with the cards for this expansion, you must always use the rules for this expansion.
We recommend that you play this expansion only with the cards from the Base Game. Although you can use the cards from Make Sail! and Just One More Contract as well as the Gambler Promo, the game becomes significantly more difficult because certain cards will be much harder to discover.
Note: Do not shuffle the cards until you are told to do so! Also, carefully follow the instructions in the game setup.
Card Details
- 5 double-sided Character Cards with different Characters on the front and back – each with its own special ability and the number of Coins the player receives to begin the game.
- 39 Play Cards that are shuffled with the Play Cards from the base game when directed during the course of the 5 Chapters. These consist of Ships, Professions, Expeditions, and Tax Increases.
- 16 Event cards that form a separate deck. The 13 Event cards with the number 0 constitute the base deck. The card with the number 1 is added for solo and 2-player games only. The card with number 2 will be used in (almost) every game. The card with number 3 replaces the number 2 card in the variable competitive game.
- 55 Story Cards (including the Book Cover & 4 Chapter cards). The front side narrates the story as well as instructions for shuffling new Play cards into the Play deck. The back side shows Missions to be completed as well as information on the requirements for the next Story card.
Each chapter consists of card numbers assigned by a series (cards 10–17 for Chapter 1, cards 20–28b for Chapter 2, etc.). The End-of-Chapter cards are all in the 60 series (card 61 for Chapter 1, card 62 for Chapter 2, etc.). Between the chapters are the unnumbered Chapter Title cards. These show the chapter number and title on the front side and a summary of the story so far on the back side (to make it easier to pick up the story between game sessions).
Setup
Decide whether your adventure is competitive (playing against one another) or cooperative, (playing together against the game).
Note for Solo Play: You are always the active player, so you don't need to play an extra Coin during Phase 2. In addition, whenever you discover a Tax Increase, you always gain the specified amount.
Shuffle all of the Play Cards from the Base Game and form a facedown Play deck. Leave room for a faceup discard pile.
Place the new Play Cards from this expansion on the edge of the play area without shuffling them. These are comprised of Ships, Professions, Expeditions, and Tax Increases that are added to the Play deck when directed during the course of the 5 chapters. The Story cards let you know when to shuffle these cards into the Play deck.
Randomly deal each player 1 Character card. Players can choose which side of the card they want to play and place it with that side faceup in their personal display.
Alternative selection of Character cards: Determine a start player and let the player to their right choose 1 of the 5 Character cards first. Then, in counterclockwise order, the remaining players each choose their own Character card with the start player choosing last. Players can choose which side of the card they want to play and place it with that side faceup in their personal display.
Return any remaining Character cards back to the box.
Now take the number of Coins indicated on your Character card from the Play deck. In addition, each player takes 1 Crown Card and 5 markers in the color of their choice. Place 4 markers on your Character card (1 on the door and the others on the 3 windows) and then place the remaining marker next to your Crown Card.
Next, create the Event Deck. You can identify the Event cards by the gold framed book cover on the backs. First locate the 13 Event cards with the number 0 in the lower right corner and shuffle them together. Depending on the number of players and the chosen game variant (competitive or cooperative), draw the following number of Event cards facedown:
| 1 Player | 2 Players | 3 Players | 4 Players | |
|---|---|---|---|---|
| cooperative | 1 | 1 | 2 | 3 |
| competitive | — | 3 | 4 | 4 |
Place any remaining Event cards with the number 0 facedown on the edge of the playing area as you will need them later.
For 2-player and solo games, shuffle in the Event card with the number 1. If you are playing with 3 or 4 players, return the card back to the box.
Now put the card with the number 2 (Month's End) under the facedown Event Deck. Return the card with the number 3 back to the box as it's only needed for the Variable Competitive Game.
You have now completed the facedown Event deck. Place it next to the Play deck leaving room for a faceup discard pile.
Return the overview card for Cooperative Victory back to the box if you are playing competitively. If you are playing cooperatively, leave it out as you'll be needing it soon.
Now, only the Story cards with a Book Cover card on top should be remaining. Never shuffle this deck! In subsequent games, you may leave Story cards for completed chapters in the box. If so, the Chapter card for the next chapter should be on top of the deck.
Now, the adventure begins!
Sequence of Play
Start by reading the Chapter card out loud (or, for the first chapter, the card with the Book Cover.) This card contains the title of the chapter and, beginning with the second chapter, on the back of the card is a summary of what has happened so far.
Immediately afterwards, the start player reads aloud the first Story card (card 10 for Chapter 1), and then shuffles the indicated Play Cards into the Play deck. The icon on the right always tells you which cards and how many must be shuffled in. (It is best to add the new cards into the deck at different points and then shuffle them thoroughly.)
Then, turn the Story card over and place it in your play area to reveal your first Mission. (Once you have read the story, you must always turn the card over. This icon serves as a reminder.)
If you complete a Mission, place 1 marker from your Character card in the square box below the window on the right of the Mission.
You must always take the leftmost marker from your Character card; the first is the one on the door. Once you complete your first Mission, your Character's special ability is enabled (see the appendix below). Completing your second Mission reveals the trophy, which is of critical importance for victory in the competitive game (see Game End below). Completing the third and fourth Missions will gain you 1 and 3 crowns respectively. (See below for details on Crowns). Once placed, your markers cannot be taken back. This means no one can complete more than 4 Missions.
If you are the first to complete a Mission, you will sometimes receive a small reward in the form of 1 or 2 Coins (and in one case, 1 Crown). In addition, you can gain 1, 2, or 3 Crowns for some Missions as shown in the area below the ship's deck.
All other players completing this Mission only receive the last reward: the Crowns displayed below the wooden board.
Crown Cards
When you gain or return Crowns, move your marker on the Crown card to reflect the change. The track starts at the bottom left (at the foot of the throne). When you gain Crowns, advance your marker to the next adjacent spaces accordingly. In order to return Crowns, you must have at least as many Crowns as you wish to return. Move your marker backwards down the Crown track by the number returned. Crowns provide a new alternative for gaining Influence points (up to a total of 6). During the game, you always add the number of Influence points from the last shield whose (corresponding) space you have reached or surpassed to your total Influence points. This means that as soon as your marker reaches the first shield's space, you add 1 Influence point to your total score. Once your marker reaches the shield space with 2 Influence points, add 2 points to your total score instead, and so on. If you return Crowns, your Influence points may also be reduced.
Victory Conditions for the Cooperative Game
If you are playing cooperatively, take card number 9. This summarizes the victory conditions based on the number of players (indicated by the number of hats) on the left- and right-hand sides of the front and back of the card. Use the edge corresponding to your number of players and tuck Card 9 under the left side of the first Mission of the chapter so that you have the relevant information to the left of the Mission card. (Details on the victory conditions can be found in the section Game End below.)
Missions
You may always complete Missions whenever it is your turn to act as an active or inactive player. Each player is allowed to complete each Mission only once. In order to complete a Mission, you must
- return the indicated number of items to the discard pile if there is a minus in front of the number on the card (Ares Pirates, Coins, Books of Ritual, etc.)
- otherwise simply have the items in your personal display (Professions, Cutlasses, etc.).
Addition to Sequence of Play
Port Royal: The Adventure Begins follows the rules for the Base Game for Phase 1: Discovery and Phase 2: Trade & Hire. However, these 2 phases are now preceded by a new phase:
Note: If you take a card in Phase 2: Trade & Hire as the inactive player, you must still pay the active player 1 Coin in the cooperative game.
Phase 0: Reveal 1 Event Card
As the first action in their turn, the active player must always reveal the top card of the Event deck. Depending on the card's instructions, its effect takes place either immediately, or in Phase 1, or in Phase 2. After resolving the event, discard the Event card.
The last card in the Event deck is a special event: Month's End. It triggers the Month's End effect for the most recent Mission. This continues the story and may bring a new Mission into play, depending on your level of success.
What needs to be done is specified in the lower half of the most recently assigned Mission card as shown next to the hourglass icon.
If a brown Mission card with a number and question mark is shown, determine whether at least 1 player has completed the indicated Mission. If so, read aloud the Story card with the number next to the green check mark.
If none of you have completed the required Mission, you must read aloud the Story Card with the number next to the red X. This new Mission will be more difficult.
Place the new Mission to the right of the previous Mission. This way, you always know which Mission was most recently assigned.
If a fist or handshake icon is depicted next to the hourglass, you must follow the instructions for the fist if you are playing competitively or follow the instructions for the handshake if playing cooperatively.
Finally, discard the Month's End card to the Event card discard pile. Then, flip the discard pile over without shuffling it to create a new Event deck. Randomly draw a new Event card with number 0 and place it on top of the new deck. The next active player starts their turn by revealing this event.
New Ships: A 6th Color and Items
The Ares Pirates represent a new, sixth Ship color. If there are ever 6 Ships of different colors in the harbor display, the active player may take 4 cards from the harbor.
In addition, all of the expansion Ships carry items. The Ares Pirates carry either the Book of Rituals or Medicinal Herbs. The other 5 Ships carry either Bread or Rum.
If you take any of these Ships in Phase 2, you always have 2 options:
- As usual, take the Coin(s) or, in some cases, the Crown and then place the Ship in the appropriate discard pile. (For the Coin, take 1 card from the Play deck as usual, for the Crown, advance your marker on your Crown card).
OR
- Place the Ship card in your personal display. You now have this item that can be used later for a Mission, an Expedition, or for the Innkeeper. For some Missions, you will also need to discard Ares Pirates from your personal display.
Important: In both cases you receive 1 additional Coin if you have a Trader of the Ship's color or a Captain, Priest, or Settler from this expansion in your display.
For further information on cards from this expansion consult the Appendix below.
Game End
The cooperative or solo game ends immediately during the Month's End Event once the hourglass icon has directed you to Card 9. The player who revealed Month's End Event must end their turn immediately. To be successful, you must have completed all of the conditions stated on card 9:
- Each Mission must have been completed by at least 1 player.
- Collectively, you must have placed at least as many markers on the Missions as indicated on the conditions list.
- Collectively, you must have collected at least as many Influence points as indicated on the conditions list.
If you have completed all of these conditions successfully, take the Story Card with the number next to the green check mark and read the end of the chapter aloud. You can start your next game with the next chapter. (At the beginning of the next game, leave all of the completed Chapter Cards in the box).
If you did not succeed, you must play this chapter again. You can keep the cards in the Play deck that were shuffled in. Place all other game components (cards in the displays, the Story cards, your Coins) back in the corresponding decks and reset the game afresh. You can begin with 3 additional Coins in total to replay this chapter the first time. Collectively decide how to best distribute the Coins among the players. For each additional failure for this chapter, you gain an additional allotment of 3 Coins for the next game. After 3 failures, you will have 9 Coins to distribute to the players according to your group's decision. Once you have successfully finished the chapter, begin the next chapter without any additional Coins! Your adventure is successful when you have completed all 5 chapters.
The ultimate achievement for a successful cooperative adventure is to play through all 5 chapters one after the other without a single defeat.
The competitive game ends as soon as one player has reached at least 12 Influence points (via Profession cards, Expeditions, and/or the Crown Card) and has completed at least 2 missions to reveal the trophy in the first window on their Character card. In other words, no one can win unless they have revealed their trophy. For this reason, as an alternative to completing the second Mission, there is a specific Month's End hourglass effect that allows you to pay 8 coins to return the left-most marker on your Character card to the box at the end of the month. Then prepare the Event Deck as usual.
Once the game end is triggered, finish the current round (so that each player has been active player an equal number of times). The player who revealed their trophy and has the most Influence points wins. Influence points include points from Professions, Expeditions, and the Crown Card. In case of a tie, the tied player with the fewest markers left on their Character card wins. If still tied, the winner is the tied player with the most Coins.
You may then begin a new game with the next chapter.
Important: Prior to the next game, prepare things as described in the Setup section. Any Play Cards that were shuffled in with the base game Playing Cards remain in the Play deck; do not sort them out after a defeat or win (unless you want to play the base game without this expansion). These Play Cards may still play a role in later chapters.
The Variable Competitive Game
If you have already completed the entire adventure, you can continue to play as follows (leaving the 39 new Play Cards in the deck):
From the Story cards, sort out the 15 Mission cards with the small red star at the top right. Shuffle these, and randomly select 4 and place them faceup side by side. These are your Missions for the game.
Create the Event deck as described in the table in the Setup section. Place the card with the number 3 under the stack instead of the card with the number 2. You will now be able to remove the leftmost marker from your Character card and return it back to the box at the end of each month for 10 Coins. There are no other changes.
Appendix: The Cards
Character Cards
As soon as you complete your first Mission, remove the leftmost marker from your Character card to unlock the special ability on your Character. You can use it just as you would use a Profession's ability or in addition to it.
Grace "Kid" May: If there are 4 or fewer cards in the harbor display and your turn ends due to 2 Ships of the same color in the harbor display, gain 2 Coins. (You must end your turn).
Jacques Grandeur: Whenever you fulfill an Expedition, gain 2 crowns.
Jean Blackbeard: Same as Sailor*
Señora Anne: Same as Señorita*
Don Ferdinando: Same as Trader* (however, you gain 1 Crown instead of 1 Coin)
Officer Scott: Same as Admiral* (however, you gain 1 instead of 2 Coins)
Peter "Snug" Landman: Same as Trader*
Cutthroat Mary: Whenever it is your turn to take a card or cards during Phase 2: Trade & Hire and there are currently 3 or more Ships in the harbor display at the start of your turn, immediately gain 1 Coin.
Samuel Blackguard: You once get 2 Coins.
Thomas Fishborn: Same as Lookout* (see below)
* Although your Character may have the same ability as a Profession card, it is not that Profession. Your Character doesn't count when completing Missions as if you had the corresponding Profession in your display.
Play Cards
Ares Pirates (8×): If you trade with the Ares Pirates (a very tough situation), place the card in the discard pile. You only gain 1 Coin for this. Alternatively, you may place the card in your display instead. This represents your acquisition of an item from the pirates, either a Book of Rituals or Medicinal Herbs. You can use these later in the game for a Mission or an Expedition. In addition, you will need to discard Ares Pirates to complete some Missions.
Tybuk Brothers (3×): Their Cutlasses count towards repelling Ships the same as for the Sailors and Pirates in the Base Game.
Lookout (5×): Once per turn as the active player, you may look at the top 3 cards of the Play deck. Then place 2 of these cards into the discard pile without effect. Place the 3rd card back on top of the Play deck. Then you may decide whether to reveal more cards (as you know the next card) or to proceed to Phase 2.
Captain, Priest, Settler (1 of each): In addition to the icon that is used for Expeditions, these Professions enable you to take 1 additional Coin when you trade with the Ares Pirates – either when you place their Ship in the discard pile or when you place it in your personal display for the item.
Expeditions (3×): The new Expeditions are used in the same way as those in the Base Game.
Innkeeper (5×): If there are 4 or more cards in the harbor display at the start of your turn as either the active or inactive player, gain 1 Crown. You may also sell 1 Bread or 1 Rum from your display at the price listed on your Innkeeper card.
Tax Increase: The new Tax Increase cards are used the same way as those in the Base Game. However, the tax only affects players with 16 or more Coins. These players must immediately discard half of their Coins (rounded down) to the discard pile. Then the player(s) with the fewest Influence points gain 2 Coins from the Play deck (even if they have no Influence points).
Missions
Each Mission shows what is required to complete it. If there is a minus sign in front of the number, the corresponding cards must be discarded. Otherwise, you only need to have the cards in your personal display to complete it. The stated number is the minimum required; for example, you can have more Cutlasses than needed in your display.
Usually, you are not required to complete a Mission as soon as you meet its requirements; you can do so later, if you wish.
Mission 13: To complete this Mission, the player must discard 4 Coins and have at least 1 Priest in their display.
Mission 15: To complete this Mission, the player must have at least 2 cutlasses in their display and must discard 2 Ares Pirates.
Mission 30: To complete this Mission, the player must have at least 1 Expedition in their display.
Mission 40: To complete this Mission, the player must have at least 3 Professions in their display that cost 3 Coins (or maybe less in the future). (Possible discounts from the Señorita do not apply).
Mission 41: To complete this Mission, the player must discard 1 Ares Pirates card with Medicinal Herbs and 1 Ship with Bread.
For the following 5 Missions, you must immediately decide whether you want to complete the Mission or not.
Mission 33 & 34: These 2 Missions may only be completed by the active player. If there are at least 4 Ships of different colors in the harbor display, they may immediately place 1 of their markers on this Mission. For task 34, they must also discard 5 Coins to complete the Mission.
Mission 50: For this Mission, players must immediately decide whether they want to place one of their markers on this Mission when they have to pay taxes.
Mission 51: This Mission may only be completed by the active player. To complete this Mission, they must immediately stop after placing the 4th card in the harbor display. They must also pay 5 Coins and take 1 card less than allowed, which almost always means they take no card.
Mission 52: This Mission may only be completed by the active player. To complete this Mission, they must stop after placing only 1 card in the harbor display. Then they may place 1 of their markers in the first space on the top. Any markers in this space do not count as being placed on a Mission (important for the Victory Conditions in the cooperative game). On any future turn when they are the active player, they must stop again after only placing 1 card in the harbor display. They may then move their marker from the first space to the second space on the card. Markers on this second space do count as being placed on a Mission.