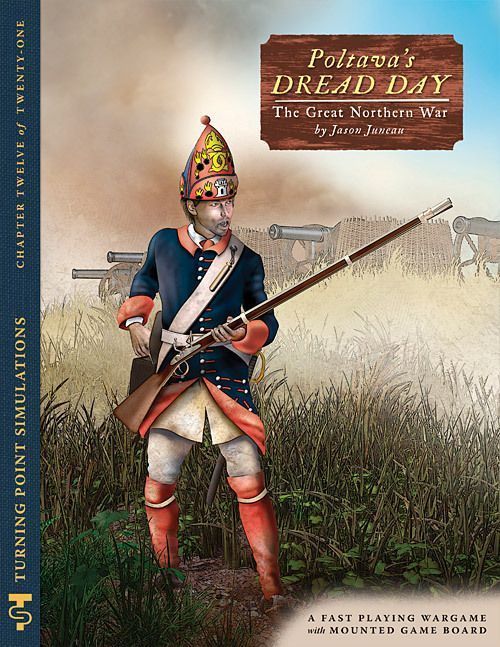
Poltava's Dread Day: The Great Northern War
Poltava's Dread Day: The Great Northern War Rulebook
Table of Contents
Table of Contents
1.0 Introduction
For nearly a quarter of a century, from 1700 until the peace of Nystad in 1722, Sweden fought a Coalition of powers attempting to dismember her Baltic empire. These enemies originally included Denmark, Saxony, and Russia, and later Hanover and Prussia. They sought to take advantage of the youth of the new Swedish king, Charles XII. The subsequent war would show how mistaken this view was, with Charles mounting a serious invasion of Russia. It was here, in 1709, that the turning point occurred at a small Russian town called Poltava. Sweden was routed and while still gamely fighting on, in the end, Sweden lay prostrate and finished as an imperial power, with Russia stepping into her place.
Poltava's Dread Day: The Great Northern War is a strategic game of that conflict, pitting one player as Sweden against another representing the Coalition of her enemies. Poltava's Dread Day is a fast-playing, fun game of low complexity. To that end, much detail has been either omitted or factored into the overall mechanics. We have tried to provide as much period flavor and historical accuracy as we can, within that focus. The game should take about 3 hours to play to conclusion, about 50% more the first time.
1.0.1 Game Scale
Each hexagon is about 50 miles (or 80 km) across. The playing pieces represent groups of around four regiments each, various individual City garrisons, fleets of approximately ten warships, or individual leaders. There are two game turns per year.
How This Book Is Organized
This rulebook is structured to introduce concepts following the game's sequence of play. They are written in a format known as the Case System. This approach divides the rules into Modules, each dealing with an important aspect of play. Modules are numbered sequentially and possess a title. Each Module is divided into Sections, dealing with major sub-topics within the Module. These are also numbered sequentially. Finally, the majority of each Section consists of Cases: the specific, detailed rules that govern play. Their sequential numbering follows a logical progression based upon the Module and Section of which the Cases are a part. Look to these numbers to determine where a Case is located in the rules.
3.1.4: The fourth Case of the first Section of the third Module of the rules.
Learning to Play the Game
Begin by familiarizing yourself with all of the components listed for this game. Then skim through the charts and rules, reading all the titles of the Modules and Sections. Set up a game scenario or portion of a scenario (after reading the applicable Module) and play a trial game against yourself. Try referring to the rules only when you have a question and remember the numbering system we employ makes it easy to look up rules. While a trial game may take you an hour or two, it is the quickest and most pleasant way to learn (short of having an experienced friend teach you). We don't recommend attempting to learn the rules word-for-word. We've written these rules to be as comprehensive as possible—but they are not designed to be memorized. Taking in the rules as you play along is the best approach to mastering this game. We're always open to suggestions on how to improve the comprehension of our rules. Write to us (see addresses in 2.0) if you have an idea on how we can communicate better with you.
2.0 Game Components
Your copy of Poltava's Dread Day: The Great Northern War should contain the following components:
- One 11" x 17" mounted mapboard depicting the terrain the battle was fought over
- One set of 200 die-cut ½" playing pieces
- One 8.5" x 11" cardstock sheet printed with Leader Holding Boxes, the Turn Record Track, and the Terrain Effects Chart
- This 12-page rulebook
- Three 6-sided dice used to determine Movement Allowances and resolve battles, and other factors for which performance will vary
If any of these parts are missing or damaged, write to:
Turning Point Simulations PO Box 165 Southeastern PA 19399-0165 USA Attn: Poltava's Dread Day
Or e-mail us at: [email protected]
We hope you enjoy this game. Should you have any difficulty interpreting the rules, please write to us at the above postal address, or e-mail: [email protected]
Phrase your questions so that a simple sentence, word, or number can answer them. If you send a letter by mail, you must enclose a stamped, self-addressed envelope to receive a reply. We recommend e-mail as the best way to resolve a query. Although we welcome comments and suggestions about the game's interpretation of events, we cannot promise to respond to questions on theory or design intent.
2.1 The Game Map
The game map covers the area over which the campaigns were fought. The map is overlaid with a grid of hexagons (hexes) that are used to regulate movement of pieces. The hexes facilitate positioning and movement of the playing pieces.
2.1.1 Map Features
Various types of terrain and certain features are denoted on the game map, and are defined and their effects explained on the Terrain Effects Chart. These terrain types and features are: Clear, Rough, Impenetrable, Coastal, All-Sea, and City. In addition, Rivers and Borders run along the hex grid around many of the terrain features above.
2.1.2 Sweden
For game purposes, one player controls the Kingdom of Sweden, an area on the map including modern Sweden, Finland, Norway, Estonia, Latvia, and parts of modern Lithuania and Germany.
2.1.2 The Coalition
For game purposes, one player controls the group of powers opposing Sweden, starting with Denmark, Saxony, and Russia.
2.1.3 Germany
In the early eighteenth century, Germany was a Central European region sharing a culture and language, but not yet a separate nation state. No player begins controlling Germany. For the purposes of movement and attrition, Germany consists of these territories on the map: Hanover, Bremen, Verden, Mecklenberg, Wismar, Pomerania, Holstein, Brandenburg, Prussia, Saxony, and Silesia. Note that Brandenburg and Prussia are considered one country at this time.
2.2 The Playing Pieces
The cardboard playing pieces (or counters) in the game should be carefully separated before trying to play. The pieces are of different types depending on the information that appears on each. In general the pieces represent either land or naval Combat Units or Leaders, or informational markers.
2.2.1 Colors
The color of each playing piece broadly identifies its nationality (and by extension, which side it is on). The colors are:
- Sweden: purple
- Swedish Ally: purple with hashing
- Denmark/Norway: orange
- Saxony: brown
- Poland: pink
- Russia: green
- Prussia/Brandenburg: black
- Hanover: red
- Anglo-Dutch: white
2.2.2 Land Units
Land units are the basic currency of military force in the game, portraying the building blocks of the armies. The top face of each land Combat Unit is used to show it is "in the field," ready for battle. The reverse side of each land Combat Unit is used to show the unit is "inside a City" when stacked in such a space.
Unit Type: There are two different basic types of land Combat Units: Foot and Horse. The Unit Type determines the number of dice that are rolled to generate the unit's Movement Allowance during the turn.
Unit Designation: Indicates a unit's basic level of quality, and may affect its performance in combat and ease of mobilization.
- Guard: Any formation of an elite nature, with superior training and/or experience.
- Regular: Any formation, made up of conscripts or volunteers, with adequate training and experience.
- Militia: Any formation, usually conscripts, without adequate training and/or experience.
- Indelta: Swedish formations conscripted under a national allotment system, the Indelningsverket.
- Cossack/Tartars: Freebooting cavalry formations from the Russian steppes.
2.2.3 Garrisons
Garrisons are a special type of non-mobile land Combat Unit tasked with defending their named City. They cannot move, cannot attack, and cannot be replaced.
2.2.4 Naval Units
Similar to land units, naval units form the core of a side's seapower. There is one type of naval unit, the Fleet. The top face of a Fleet is used to show it is "at sea," while the reverse side of a Fleet is used to show the unit is "in port" when stacked in such a space. Fleets have no additional information printed on them.
Developer's Note: Naval warfare in the Baltic actually involved two very different sorts of vessels. There were the broadsail-powered ships typical of the North Atlantic, using broadsides of large guns to destroy the enemy, as well as oar-powered galleys copied from the Mediterranean. In game terms they are treated identically.
2.2.5 Leaders
Leader pieces represent the named individual (and their retinues) and are necessary to command land Combat Units and give them mobility. They are not necessary to move purely naval forces. In addition, some countries (but not all) have a Leader who is also the Sovereign (head of state), denoted by the leader's signature.
Developer's Note: Actually, all countries in the game have Sovereigns, but not all were battle-worthy Leaders, as were Peter the Great of Russia or Charles XII of Sweden. Therefore they do not appear in the game.
Name: The historical name of the Leader.
Initiative Rating: This measures a Leader's general energy level and competence, so that a higher number is better.
Important! Augustus II, King of Saxony and Poland, has two Initiative Ratings, one in parentheses that affects movement, and a second one that affects combat. Every other Leader has one Initiative Rating that influences both.
Leader Rank: A commander's place in his nation's leadership hierarchy, with men with lower numbers being senior and superior to those with higher numbers. Often the Leader with a Rank of 1 is his nation's sovereign.
2.2.6 Markers
Markers are special pieces used to record various game functions, such as the current Turn, a devastated hex or an entrenched force. Markers generally contain only a symbol or notation for their use.
2.3 Game Charts and Tables
Various charts and tables simplify and illustrate the game and furnish results for certain game actions. These include the Turn Record Track and the Terrain Key, the Mobilization Table and Swedish Assault Table, and the other charts and tables.
3.0 Important Concepts
Before getting on with the main body of the rules, there are several important concepts with which players should familiarize themselves. These are presented here and include the rules on Stacking, Zones of Control, and Supply.
3.1 Stacking
Unlike many other games, there are no stacking limits in Poltava's Dread Day. Each side may stack an unlimited number of units in any hex. Units may move into an enemy-occupied hex, resulting in combat.
3.1.1 Joint Movement by Stacks
Combat Units and Leader(s) that move together as a stack are limited to the Movement Allowance generated for that stack. Note: Players are provided with Holding Boxes on a card separate from the map. They may place units in boxes corresponding to each commander, to prevent unwieldy stacks on the map. This is simply a matter of convenience, and has no effect on play.
3.2 Zones of Control (ZOC)
Unlike in many other games, Combat Units do not project a "Zone of Control" into any of the hexes surrounding the hex they occupy.
3.3 Facing
Facing refers to how Combat Units and Leaders sit within a hex. Pieces must always be clearly placed to be within a specific hex. But their orientation within the hex has no effect on play.
3.3.1 Displaying Status in Cities
Flip Combat Units and Leaders in a friendly City hex face down to indicate when they are "inside the City." Fleets are inverted likewise to show that they are "in the Port." Exception: Players do not have to invert garrisons, as they are always considered to be inside the City, and cannot move outside or away from it.
3.4 Supply
Unlike many other games, there are no supply rules in Poltava's Dread Day: The Great Northern War. The effects of supply are built into the season and Attrition rules.
3.5 Weather
Also, there are no weather rules in this game. The effects of weather and climate are integrated into the rules for differing Winter and Summer phases, and for Attrition.
3.6 The Fog of War
Unlike many other games, there are no particular "fog of war" rules in this game. Players may freely peek under markers or at their opponent's Holding Boxes to see the identities of enemy units or where the opposing Leaders are.
4.0 Sequence of Play
Poltava's Dread Day: The Great Northern War is played using yearly Game-Turns running from 1700 to 1722. The game keeps going until one player wins outright, as determined in Module 12.0, or the last turn has occurred, at which point a winner is then determined.
Each game-turn includes three phases:
4.1 The Summer Campaign Phase
This phase consists of a series of alternating moves by both sides:
- First the Coalition player may select a single unit or stack and move up to the maximum Movement Allowance generated for it. Along the way it may enter enemy occupied hexes, and engage in combat and/or siege.
- When its move is finished, the Swedish player may select a unit or stack and do likewise.
This goes back and forth until no more units may move, or both sides pass (decline to move). Players may want to orient the top Leader counter clockwise to indicate that a stack has moved and thus avoid confusion.
4.2 The Winter Campaign Phase
Players repeat the steps of the Summer Campaign phase, only under Winter conditions.
4.3 The Administrative Phase
After the Winter Campaign has ceased, players determine Attrition of their existing forces, mobilize new units, and resolve diplomatic issues. At the very end of the turn, players check to see if either side has surrendered. If neither side has given up yet, go to the next turn.
5.0 Land Movement
Land Combat Units cannot move by themselves. They must be stacked with a Leader of the same nationality.
5.1 Movement Allowances
To move a stack of one or more land Combat Units, there must be a friendly Leader present in the stack as well. Roll one die (for stacks composed solely of Foot, or mixed stacks) or two dice (for stacks composed solely of Horse, or those consisting only of Leaders) and add the Initiative Rating of the highest ranking Leader present. The resulting sum is the total number of Movement Points (MPs) available to that stack for the phase. MPs may not be traded between stacks nor saved for future turns. As a stack moves, it expends its MPs based on the terrain of the hex and the season of the current phase (Summer or Winter), until either none are left, or the phasing player decides to stop movement. Consult the Terrain Effects Charts for the MP costs of entering various types of terrain in Summer or Winter. Once a stack has stopped moving, it may not move further in that phase, except to retreat (which is not considered movement).
Note 1: Once the player has rolled to generate MPs for the stack, that stack is considered to have moved, even if the player rolls too low for his planned move and subsequently does nothing. He may not roll again for that stack.
Note 2: Players are provided with a MPs Used and MPs Max marker to help keep track of MP expenditures by moving forces. After generating a force's MPs, place the MPs Max marker on the Turn Record Track in the year space whose last two digits is equal to the number of MPs generated. Move the MPs Used marker up the track as the force expends MPs on the map till it reaches the MP Max marker or the player ceases Expending MPs.
5.2 Picking Up and Dropping Off Units
Moving stacks may drop off Combat Units/Leaders en route. Combat Units/Leaders dropped off may not move further in that phase. Moving stacks may also pickup Combat Units/ Leaders, provided those picked up have not already moved. Picked up Combat Units/Leaders have the same Movement Allowance as that remaining for the active moving stack. In addition, Foot Combat Units picked up by a previously all-Horse stack cannot expend more than six MPs.
Example: A stack of units rolled seven MPs and picked up a new unit after having expended three MPs. The stack of moving units and the newly picked up unit would have four more MPs to move.
5.3 Movement into Enemy Occupied Hexes
Moving stacks may enter enemy hexes and engage in combat and siege. It costs one extra MP to enter any enemy-occupied hex, including those in which the opposing forces are inside a City. If all the enemy troops are inside a City, and the active stack has MPs remaining, it may continue movement. However, if any of the enemy units are outside the City, the stack must stop movement.
5.4 Leaders Alone in a Hex
If a stack moves into a hex containing no enemy units except Leaders, those Leaders are immediately captured and removed from the game permanently, even if they are in a City. If a country's Sovereign is so captured, his country surrenders immediately and permanently. A Leader unaccompanied by Combat Units moves the same as though it is a Horse unit, that is with MPs equal to the sum of two dice plus its own Initiative Rating. Leaders never count for surrender.
5.5 Devastation
Cossack and Tartar units only may devastate hexes they pass through. The cost is one extra MP per hex. Place a Devastation marker on the hex. It remains until the beginning of the next turn. Devastated hexes affect attrition.
5.6 Entrenchment
All Coalition units, regardless of designation, may entrench. Swedish units may not. This costs one extra MP. Once entrenched, the stack in question may not move further that phase. Place a trench marker on top of the stack; if additional friendly units enter the hex, they are automatically entrenched at no cost. Trenches affect combat. If all Coalition units move from an entrenchment any reason, the counter is removed.
Developer's Note: Some historically perceptive players will note that Charles XII was killed while standing in a trench. In game terms, this was not an entrenchment, but a siege. Swedish doctrine and practice was typified a lot more by naked aggression, which carried the day at Narva but resulted in disaster at Poltava, rather than digging in and waiting for the enemy to seize the initiative.
5.7 Multi-National Stacks
Coalition stacks may at times contain Leaders and Combat Units of two or more nations. If this happens the Initiative Rating of only one Leader is used for movement and combat. Use the Initiative Rating of the Leader with the highest Rank. If there are two Leaders from different nations with the same rank, then use the Leader with the largest contingent. If both are equal, the Coalition player chooses which one to use. Swedish-Allied units are not affected by this rule and function as Swedish units in every way.
Example: A joint Saxon-Russian stack is about to move. The stack has two Saxon units under Steinau (Rank #2) and six Russian units under Repnin (Rank #5). Since Steinau has the higher rank, the force would use his Initiative Rating for movement and combat. If, however, Repnin was replaced by Du Croy (rank #2), the force would use his Initiative Rating instead since his Rank is equal to Steinau and he commands a larger force.
6.0 Naval Movement
Fleets do not need Leaders to move. Roll three dice for a Fleet (or stack of Fleets). Fleets may only move in All-Sea, Coastal, and Port hexes, expending 1 MP to enter each type. Fleets may enter enemy occupied hexes and attack enemy Fleets.
6.1 Restrictions
Stacks consisting of Fleets from different countries may not move together; they must be activated separately. Fleet units must end the Winter phase in a friendly Port hex or be eliminated.
7.0 Naval Transport
Fleets may also transport Leaders and land Combat Units. Each Fleet may carry two Foot or one Horse Combat Units, plus an unlimited number of Leaders.
7.1 Movement Costs
Fleets carrying land units continue to expend 1 MP per hex. It costs Fleets and land units each one extra MP to embark and disembark in a Port hex, and two extra MPs to do so in a Coastal hex. Land units expend no MPs while embarked, only while moving on land to reach the Fleet(s), and upon disembarking and moving on land again.
7.2 Naval Transport Procedure
When a player wishes to attempt naval transport, he selects both a stack of land units, and the Fleet (or stack of Fleets) that will carry them. They do not have to start in the same hex. He rolls for both groups separately to determine their respective MPs, then performs transport. Fleets may continue moving after dropping off any passengers, until they have no more MPs remaining. Land units transported by sea may continue to move after disembarking too, if they have any MPs remaining. Should the Fleets not have enough MPs to carry the troops to a Port or Coastal hex, or if the player decides to abort the transport for any reason, the Fleets are still considered to have moved, and can not move until the next turn. Under no circumstances can a Fleet end its turn in an All-Sea hex at the end of its move if it has land units aboard.
8.0 Land Combat
When a stack enters an enemy occupied hex, combat and/or siege occurs. It costs a moving stack one extra movement point to enter an enemy occupied hex, and it must stop.
8.1 Mandatory Combat
Land combat is mandatory between opposing Combat Units in the same hex, except for those inside Cities, for whom the player has a choice. Those units do not have to be attacked, nor must they attack out of their fortifications. But if a player decides to sortie from a City against the besiegers, he pays one extra MP per Section 5.3 to move out of the City, and then must attack the enemy force in the City's hex.
8.2 Odds Determination
Total the number of Combat units on each side. Compare the totals and round them to a ratio that corresponds with one of the odds columns on the Swedish Assault Table. Round all fractions down. The table is not structured attacker vs. defender, but rather Coalition vs. Swede–regardless of whose player turn it is. The column may shift due to other factors: terrain, trenches, and other factors. Consult the table for more details. Shifts for specific units apply only once per type of unit. All shifts are cumulative. Final combat odds of less than 1-2 are treated as 1-2, and those greater than 5-1 are treated as 5-1.
Developer's Note: At least one person involved with the game asked why it is called the "Swedish Assault Table" and not something more generic or customary, such as "Assault Table" or "Combat Results Table." It was even proposed to change the name, on the grounds that if there is a Swedish Assault Table there has to be a Coalition Assault Table in there somewhere. The reason is that in the era of Charles XII, the Swedes were the soldiers whom one could count on doing the assaulting. There were exceptions to the rule, such as the Battle of Lesnaya, but regardless of the numbers, the Swedes had the doctrine and the innate aggressiveness to take the battle to the enemy, no matter that the circumstances. Consider that a cold, hungry, and exhausted Swedish army under Charles deployed from the march and immediately assaulted Narva early in the war, and destroyed the Russian army there. Or that they behaved almost as rashly at Poltava and were themselves destroyed. It was a law that seemed almost as immutable as the gravity recently quantified by Newton: Swedes attack! In terms of the game as well as history, I wanted to keep the name to remind players how to calculate combat odds. It is Swedes vs. the World, not Attackers vs. Defenders. One look at the table is an extra reminder of how to resolve combat properly.
8.3 Leadership in Combat
When combat occurs, compare the Initiative Ratings of the highest ranking Leader from both sides. Select the highest ranking Leader at the instant of combat, who might not be the one whose Initiative Rating was used for movement; this occurs if a higher-ranked Leader is picked up in the course of movement. Subtract the lesser Leader's Initiative Rating from the greater. The side with the greater value has that difference added/subtracted from the die roll in its favor.
Note: Remember, the Saxon Leader Augustus II has separate Initiative Ratings for combat and movement.
8.4 Combat Results
After the final odds column is determined, the phasing player rolls one die and consults the Swedish Assault Table. The results are described under the table. Implement the results as described. If the moving player's stack was victorious, it may continue to move, provided it still has movement points available.
Example: A Danish stack of 4 Combat Units under Rantzau (Initiative Rating of 3) attacks 2 Swedish Combat Units under Stenbock (Initiative Rating of 4) in a clear hex. The Danish units include 1 Guard Foot, 2 Regular Foot and 1 Regular Horse. The Swedish units are 1 Indelta Foot and 1 Regular Horse. This starts as a 2-1. The presence of the Danish Guard unit would shift it to a 3-1. The Coalition player rolls one six-sided die and subtracts 1 as Stenbock's Initiative Rating is one more than Rantzau's. The roll is a 4, which becomes a 3, resulting in an Retreat outcome on the table. The Coalition player loses 1 unit and the remainder must now retreat.
8.5 Definition of Defeat
A stack is considered defeated if:
- it suffers an Eliminated result or
- it suffers an Routed result or
- it suffers an Retreat result or
- the owning player elects to retreat after an Engaged result in combat.
8.6 Retreat
Defeated stacks must retreat in the direction of the nearest friendly-controlled City hex, including one in the same hex, if the combat occurred in a City hex. The destination cannot be currently occupied by enemy units. When a stack retreats, the player rolls one die if it is purely Foot or mixed, or two dice for a purely Horse stack, adds the result to his highest ranking Leader's Initiative Rating, and moves the stack that many MPs.
8.7 Retreats into City Hexes
If a force is defeated in battle in the same hex as a friendly-controlled City, the owning player has a choice. He can retreat away from the hex, as he would in any other battle, or he can elect to retreat into the City proper. In this instance, the attacker may follow up with a siege, per Sections 9.1 and 9.2.
8.8 Leader Casualties
A stack that loses all of its units to an Eliminated result has all of its Leaders present captured (Section 5.4). Leaders whose forces eliminated through Rout or Retreat results may still Retreat from the hex (Section 8.6) by themselves. If the combat result includes an asterisk, a Leader has been either wounded or killed. Take all the Leaders in that combat and put them in an opaque cup. The moving player randomly selects a Leader and then rolls one die. On a 1-3, the selected Leader is wounded and is removed for the rest of the year. On a 4-6, he is dead and removed permanently.
Important Note: Follow the Leader Casualty procedure above even when the rare Eliminated with Leader Loss (Eliminated) result occurs. It is entirely possible for all the common soldiers to be killed, wounded and captured, and for the Leaders to get away alive, as Charles did after Poltava.*
8.9 Automatic Elimination
If a stack of land Combat Units is defeated in battle, and it has no Leaders left at the end of the battle, all of its pieces are eliminated, regardless of any other combat results. The winner is never automatically destroyed; however, remember that without at least one Leader, a stack cannot move.
8.10 Fleets in Land Combat
Fleets may not participate in land combat, either as attackers or defenders. If a Port falls and there are Fleets friendly to the defenders in it, they immediately move to the nearest friendly-controlled Port. If there is no such Port, the Fleets are destroyed.
8.11 Permanent Elimination
Combat Units destroyed in combat cannot be brought back into the game; put them aside for good. The two exceptions are all Russians, and the Swedish Indelta; these may be rebuilt as replacements.
Developer's Note: In a world in which soldiers tended to be professionals or mercenaries, the Indelta were raised according to an "allotment system," by which localities within Swedish territory contracted to raise regiments. As for Russia, even three hundred years ago it was a sleeping giant with superior manpower resources; there were plenty of Russian men to draft.
9.0 Sieges
When a moving stack moves into a City hex and the enemy units are inverted, garrisoning the City, the moving player may decide to bypass the City or besiege it.
9.1 Initiating a Siege Procedure
It costs one MP to besiege a City, in addition to the MP cost for entering an enemy occupied hex. The moving stack must also have at least as many Combat Units in it as the garrison. To besiege, the moving player takes the total remaining number of MPs for his stack and subtracts from this the number of units in the garrison. The moving player then rolls one die. If the roll is equal or below the difference, the City falls and he loses a number of MPs equal to the die roll. The defeated units inside the City are eliminated. If the roll is above, the siege stalls and the stack's move ends. A roll of six is an automatic failure.
9.2 Continuing Sieges
A siege can extend from one turn to the next. If the besieging force remains in the hex, and remains strong enough to maintain a siege, it neither expends MPs, nor has a need to do so. If other units join the siege, they must expend one extra MP to enter an enemy-occupied hex.
9.3 Attrition in Sieges
Attrition (Section 11.1) affects both the besieging and besieged units.
9.4 Battle Before Siege
If the defenders elect to defend outside the City, then a standard land combat is fought first. Not all defenders have to be outside the City; some can be inside. If all the defenders on the outside are eliminated or compelled to retreat through combat, the attackers can then besiege the City. If there are no Combat units inside the City after the combat, then the City falls to the attackers without any additional process.
9.5 Garrisons
Garrison units are the equivalent of around one regiment. They cannot move, and are always inside the City where they are deployed. If a garrison is destroyed, it is removed from the game permanently, and cannot reenter the game through mobilization. Garrisons may not be destroyed or removed voluntarily by the owning player.
10.0 Naval Combat
Moving Fleet stacks may attack enemy Fleets. Both players roll one die. If the defender's Fleets are "in Port" (Case 3.1.1), the defender instead rolls two dice. These rolls are modified by nationality. Add the sum to the total number of Fleets on that side. The higher number wins.
10.1 Mandatory Combat
When friendly Fleets enter a hex containing enemy Fleets, and there is no Port, or the enemy ships are not in a Port if there is one, the friendly units must stop and conduct naval combat. If all enemy Fleets are in a Port, the moving units may keep on going, or stop and attack, as the player wishes. If some enemy units are in Port and some are not, see Section 10.4.
10.2 Combat Results
The defeated stack must lose one Fleet and retreat to the nearest Port hex, not including the hex of combat. This hex may not currently contain enemy units. Retreats follow the same rules as land Combat Units (Section 8.6). If a stack has no friendly Port, it is eliminated. If a Fleet(s) is lost, any land Combat Units they were carrying at the time are lost too.
10.3 Ties
If the modified results are equal, then the moving player, that is, the one who attacked, has a choice. He can elect to keep both Fleets in the hex, with no loss on either side. Additionally, if the Fleets were transporting land Combat Units, they may disembark. Or he can attack again. If there is another tie, he has the same choice, so there can be any number of combat resolutions in the same hex until one side or the other emerges the victor.
10.4 Two Battles in the Same Hex
It is possible to have two naval battles in the same hex, during the same activation, if some of the defenders are in Port, and others are outside of it. The moving player first must attack the enemy Fleets outside of the Port. If he wins, then he may attack the Fleets in Port. The first is mandatory, and the second is up the attacker.
Note: Battle was only one of several causes of casualties in the eighteenth century, and often caused fewer losses than the others. Bad food, lack of food, disease, overwork, and especially the Great Northern War frostbite, all sapped the strength of the armies.
Example: Four Swedish Fleets sail to the hex with Copenhagen. Two Danish Fleets are in Port and one is outside the Port. The Swedes attack the lone Fleet and overwhelm it. Then they enter the Port and attack the 2 remaining Fleets. Two separate battles are fought.
10.5 Permanent Elimination
Like land Combat Units, all Fleets eliminated in combat are eliminated for the rest of the game. There is no rebuilding of destroyed Fleets.
11.0 Administrative Phase
After finishing the Summer and Winter campaign phases, both players must conduct the Administration phase.
11.1 Attrition
After the end of the Winter campaign, both players must roll for Attrition. They roll for each stack on the map with over one land Combat Unit in it. Fleets are ignored, as Attrition does not affect Fleets. Simply roll one die and consult the Attrition Table for each stack in question. There are several modifiers to this roll and they are cumulative. Consult the Attrition Table for more information. Combat Units eliminated by Attrition are removed immediately and permanently, except for Russian units and Swedish Indelta; these can be brought back through mobilization.
11.2 Mobilization
After determining Attrition, both players may now raise new units and Leaders via Mobilization. A roll is made for each nation at war. There are some modifiers to this roll. Consult the Mobilization Table for more details. The result is the number of new units. These are randomly drawn from a pile off map. Fleets may not be drawn unless the nation has a controlled Port.
11.3 Unit Placement
New units are placed in the nation's capital, or if occupied, in another friendly City of that nation. If the player receives new units, he may also randomly draw a new Leader and/or sack an existing Leader. Eliminated Russian units and Swedish Indelta units are returned to the new unit pile and can be mobilized again on a future turn. All other units that are eliminated are gone for the rest of the game.
Developer's Note: One obvious question that emerged in playtesting is: why would a player voluntarily remove a Leader from his order of battle? The equally obvious answer is that said Leader is an idiot. A player might have a senior Leader of dubious merit, such as the Belgian Du Croy (a Russian Leader in the game, as he was in the service of Peter the Great). In the course of the game, the Russian player can be expected to mobilize better Leaders, whom he would prefer to lead troops in battle. But with Du Croy's higher rank, he would take precedence in battle. A good way to eliminate Du Croy's ineffectual leadership, and by inference promote a younger generation of commanders, would be to sack Du Croy.
11.4 Diplomacy
The following rules cover Swedish Allies, Anglo-Dutch, Turkish, Hanoverian and Prussian intervention, Poland, Germany, and Surrender.
11.4.1 Swedish Allies
Sweden gains allied units by occupying specific hexes on the map. These allied units function like Swedish units in every way. These units appear during the Mobilization phase, for free, in the appropriate hex. Like Swedish units, these units, once eliminated, may not return.
| Hex | Ally | No. of Units |
|---|---|---|
| Warsaw | Leczinski Poles | 2 |
| Baturin | Cossacks | 3 maximum (see below) |
| Poltava | Tartars | 2 |
Baturin: When Swedish units occupy Baturin, the Swedish player rolls one die and divides by two, rounding fractions down. This is the number of Cossack units raised. For every Cossack unit raised by the Swedes, deduct one permanently from the Russian force pool. Cossacks, like other Swedish Allies, may only be raised once.
Developer's Note: It is possible for the Swedes to occupy Baturin and get no allies in return.
11.4.2 Anglo-Dutch and Hanoverian First Turn Intervention
On the first turn of the game, Hanoverian land, Anglo-Dutch land and Fleets are available to the Swedish player. These units are part of a force to defend Holstein against the Danes. The land Combat Units start in Hanover and may only operate in Hanover, Bremen, Verden, and Holstein. The Anglo-Dutch Fleet starts on the West map edge. These units may stack with and operate with Swedish units. They are removed from the map at the end of the 1701 game turn, after checking for national surrender. Later, the Hanoverian land Combat Units may return, but not the Anglo-Dutch ships and land Combat Units.
Developer's Note: Historically, William of Orange wanted these units back to fight his real enemy, France, in the War of Spanish Succession.
11.4.3 Turkey
Swedish units only may exit off the south edge of the Russian part of the map and enter the Turkish box on the Charts and Tables Sheet. It costs one MP to exit the map and to re-enter from the Turkish box. While in the Turkish box, the Swedish player may roll for Turkish aid during the Administration phase after mobilization. Note that while in Turkey, units are still subject to Attrition, and are treated as a single stack.
11.4.4 Hanover and Prussia/Brandenburg
Starting on the 1715 turn, Hanover and Prussia may enter the war on the Coalition side. Hanover will enter if Swedish units still occupy Stade. Prussia will enter if Swedish units still occupy Stettin, Stralsund or Wismar. Place all units of the country on the map at start. Hanoverian and Prussian units may only operate in Germany proper (see the Attrition Table). Reinforcements are never rolled for either country. If Swedish units occupy Bremen, then Hanover will exit the war permanently. Prussia/Brandenburg will do so likewise if Swedish units occupy Berlin. Neither player's units can enter Prussia until it is a belligerent.
11.4.5 Poland
At the start of the game, Poland is neutral, although it too is ruled by Augustus II of Saxony. Saxon units may set up and operate in Poland normally. They may attack out of Poland as well. After the first turn, units of other nations, including Sweden, may enter Poland. The Coalition player may raise Polish units only after Swedish units have entered Poland. He may raise one unit per turn as long as Augustus II is present in a Polish City.
Crown Army: The Crown Army unit is special. It is a Horse unit. It is not counted in combat. Instead the Coalition player rolls one die. On a 1-5, the unit is eliminated; on a 6 the Coalition player gets 2 shifts to the right on the Swedish Assault Table.
11.4.6 Germany
Saxon units may freely enter Silesia and transit between Saxony and Poland. If Swedish units enter Silesia, roll one die and add the last number of the year to the roll.
Example: If the year is 1703, then 3 would be added to the roll.
If the roll is less than 8, Austria declares war on Sweden and the game ends in an automatic Coalition victory. A roll of 8 or above allows for normal movement. Units of both sides may freely enter and transit Bremen and Mecklenburg without restriction. Swedish units may not enter any other German state unless they are at war with that state (e.g. Saxony, Prussia/Brandenburg). Units from both sides may freely enter Mecklenburg at any time.
Defining Germany: For game purposes, Germany includes all of these territories: Hanover, Bremen, Verden, Mecklenberg, Wismar, Pomerania, Holstein, Prussia/Brandenburg, Saxony, and Silesia. This is very important for determining the restrictions on Hanover and Prussia when they become belligerent, and also for resolving Attrition (Section 11.1).
11.5 Surrender
Surrender of a Coalition nation may happen one of two ways. First, if the sovereign is killed or captured, the nation surrenders, permanently. Second, if Swedish Combat Units are present in a Coalition country, and they currently outnumber the Coalition Combat Units in that country by a 2-1 margin, the nation will surrender.
Note: To force a Saxon surrender, Swedish/Swedish-Allied units must be in Saxony. Units in Poland do not count. Also, in determining a Danish surrender, only count those units in Denmark proper. Units in Norway, whether Coalition or Swedish, do not count.
11.5.1 Disarming Procedure
When a Coalition nation surrenders, all its current Combat Units are moved to Cities still under its control at the time of surrender. If the capital City is not a Port, then the country's entire navy is permanently eliminated. The Swedish player may continue to garrison any City he has so far captured. Only the capital must be returned. The country is now neutral and may not be attacked by either player.
11.5.2 Resuming Hostilities
Surrendered Coalition nations may re-enter the war on a later turn. If the nation's Leader is not dead or captured, and the current Coalition land Combat Units total is 4-1 over that of the Swedes, a surrendered nation will re-enter the conflict. Re-entered nations fight in the same manner as before. If forced to surrender again, they are out of the war permanently.
11.6 Peter's Capital City
Russia can change its capital city from Moscow to a captured Port during the game. The City must be a Port located in Finland or Livonia, and occupied by at least one Russian land Combat Unit and Leader. The Coalition player declares that the City will be Russia's new capital, and at the start of the tenth turn after capture, that City becomes the Russian capital for the rest of the game. In the interim, the Russians must maintain control of the City; if the Swedes or their allies capture it before the tenth turn, then Moscow is the Russian capital, permanently, and the Coalition player can never again attempt to relocate the capital.
Example: The Russians take Nyen in 1704, and in 1706 the Coalition player declares that it will be the new Russian capital. At the start of the 1716 game turn, Moscow ceases to be Russia's capital, and Nyen is the new seat of the Imperial government. But if the Swedes were to recapture Nyen in any turn between 1706 and 1716, Nyen never becomes the Russian capital, and the Coalition player cannot attempt to change it from Moscow through the rest of the game.
Developer's Note: The foundation of St. Petersburg was one of the two most important events of the Great Northern War, at least as crucial as Poltava. Historically, Peter founded it near the site of Nyen, but just as easily could have made Riga his new capital and "Window on the West." In game terms, moving the capital to the Baltic helps advance one of Peter the Great's chief goals, the creation of Russian seapower. The Coalition player can build Fleets at any Port, but should Russia surrender, the nascent Russian navy evaporates. If the Russian capital is a Baltic Port, then the Fleets survive.
12.0 Victory Conditions
Each side has different conditions to fulfill in order to win the game. Failure by both sides to achieve their victory conditions by 1722 results in a draw.
12.1 Coalition Victory Conditions
To win the Coalition player must, at the end of any Administrative phase (or by game end in 1722), have eliminated all Swedish garrison units on the map, and have control over those Cities. If he manages to kill/capture Charles XII along the way, he need not eliminate the garrisons in Sweden proper, nor control any of the Cities there, to claim the win.
12.2 Swedish Victory Conditions
To win the Swedish player must, at the end of any Administrative phase (or by game end in 1722), have forced the surrender of all three original Coalition members: Denmark, Saxony, and Russia. They can be forced to surrender on different turns, and some may surrender, only to reenter the war, and then surrender again. The important thing is that all three powers are in a state of surrender simultaneously.
12.3 Draw
If neither side achieves its victory conditions by the end of 1722, then Poltava's Dread Day: The Great Northern War ends in a draw (assume mutual exhaustion on all sides).
13.0 Setting Up the Game
Put the game turn marker on 1700. Setup units in the order given. Units must be placed in City hexes (but may be set up inside or outside the City, player's choice) in the given locations. There are some requirements on set-up further below.
13.1 Coalition Set-Up
| Nation | Location(s) | Units |
|---|---|---|
| Denmark | Denmark, Norway | Frederick IV, 1 Guard Foot, 2 Reg. Foot, 2 Mil. Foot, 3 Reg. Horse, 1 Mil. Horse, 3 Fleets |
| Saxony | Saxony, Poland-Lithuania | Augustus II, Steinau, Fleming, 2 Guard Foot, 2 Guard Horse, Dresden Garrison |
| Russia | Russia | Peter I, Du Croy, Repnin, 1 Guard Foot, 4 Reg. Foot, 5 Mil. Foot, 3 Reg. Horse, 3 Cossack |
Restrictions
- Russian units may not move until the Winter phase of the first turn.
- At least three Danish units must set up in Norway.
- Saxon units must set up in Poland, except for the Dresden Garrison, which must set up in Saxony.
13.2 Swedish Set-Up
| Nation | Location(s) | Units |
|---|---|---|
| Sweden | Sweden, Finland, Livland, Pomerania | Charles XII, Rehnsköld, Gyllenstierna, Wellingk, 4 Indelta Foot, 2 Reg. Foot, 1 Indelta Horse, 2 Reg. Horse, 13 Garrison |
| Sweden | Wismar, Holstein, Verden | 4 Fleets |
| Anglo Dutch | Hanover | 1 Reg. Foot, 1 Reg. Horse (these units under Hannoverian Command) |
| Anglo-Dutch | Open Sea (West Edge) | 3 Fleets |
| Hanover | Hanover | Von Sommerfelt, 1 Reg. Foot, 1 Reg. Horse |
Restrictions
- At least one Swedish Leader and two Swedish units must set up in Holstein.
- Charles XII and Rehnsköld must start in Sweden and must remain stacked together for the first turn.
- Swedish units may not enter Russia until the Winter phase of the first turn.
- Hanoverian and Anglo-Dutch units are withdrawn when:
- Denmark surrenders or
- Danish units occupy Tonningen.
- All garrison units set up in the Cities named on their counters.
14.0 Optional Rule
Capitals were inherently tough nuts to besiege with local forces and defenses and supplies in place (not depicted in the game) making it all the more difficult. Printed beside each capital is a number that indicates how many extra regiment equivalents are present in the hex when resolving a siege. These extra defensive forces cannot attack or be used in battles outside the capital, and require the presence of real regiments to count towards the defense on a 1 for 1 basis. A capital with a value of 7 and only 3 regiments inside can only count up to 3 additional defenders when besieged.
15.0 Bibliography
- Bengtsson, Frans. Translated by Naomi Walford. The Sword Does Not Jest: The Heroic Life of Charles XII of Sweden. New York: St. Martins Press, 1960.
- Chandler, David. The Art of Warfare in the Age of Marlborough. Batsford, 1976.
- Fuller, William C. Strategy and Power in Russia: 1600-1914. Free Press, 1992.
- Hatton, Ragnhild Maria. Charles XII. The Historical Association, 1974.
- Höglund, Lars-Eric and Sallnäs, Åke. The Great Northern War 1700-1721: Colours And Uniformes. Karlstad: Acedia Press, 2000.
- Massey, Robert K. Peter the Great: His Life and World. New York: Ballantine, 1980.
- Poul Ib Liebe. "The Battle of Wismar 1711". Translated by Daniel Schorr, (www.northernwars.com). 1967.
- Poul Ib Liebe. "The Battle of Stresow and The Conquest of Rügen 1715". Translated by Daniel Schorr, (www.northernwars.com), 1969.
- Konstam, Angus. Poltava 1709: Russia Comes of Age. Osprey, 1994.
- Reddaway, William. Cambridge History of Poland: Volume 2. University Press, 1950.
- Schorr, Daniel. "Notes on the Saxon Army". (www.northernwars.com), 1997.
- Schorr, Daniel. "Notes on the Norweigan Army 1700-1720". 2001.
- Upton, Anthony. Charles XI and Swedish Absolutism. Cambridge University Press, 1998.
- Velikanov, Vladimir. "Russkaia armia in 1700: a Summary". Translated by Daniel Schorr. (www.northernwars.com).