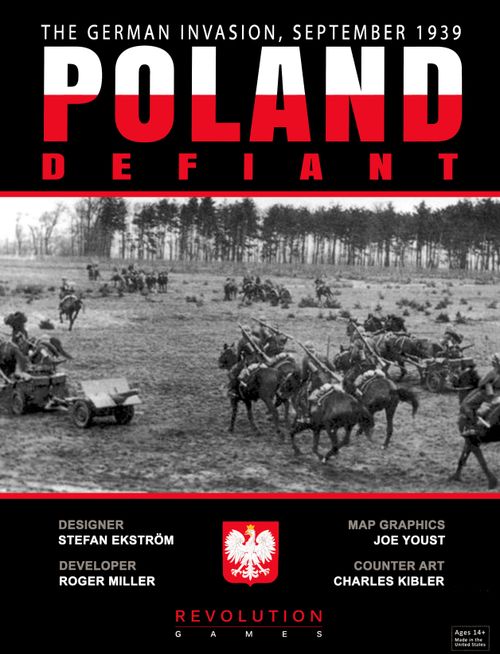
Poland Defiant: The German Invasion, September 1939
Poland Defiant: The German Invasion, September 1939 Rulebook
Table of Contents
Table of Contents
- 1.0 Introduction
- 2.0 Components
- 3.0 Sequence of Play
- 4.0 Command
- 5.0 Zones of Control (ZOCs)
- 6.0 Movement
- 7.0 Stacking
- 8.0 Reinforcements
- 9.0 Combat
- 10.0 Supply and Isolation
- 11.0 Special Rules
- 12.0 Air Units
- 13.0 How to Win the Game
- 14.0 Set Up
- Random Event Table
1.0 Introduction
Poland Defiant represents the first 10 days of the Polish campaign in September 1939 with each turn representing a day. Polish, German and Slovak units are included with units being a mix of divisions and brigades. The Soviet invasion is not portrayed as that happened after the period of this game.
2.0 Components
Poland Defiant includes the following components:
- One 22" by 34" map
- One sheet of 1/2" die-cut counters
- This rule booklet
- One cover/player aid
2.1 Rules
Each major grouping of the rules is called a rule; a part within a rule is a section. A specific section can contain several related cases, which would be identified as 3.5.1, 3.5.2 etc. The Table of Contents is located on the back of this rule book.
2.1.1 Cumulative Effects
In all cases where a unit is subject to multiple modifiers to its strength, the effects are cumulative. A unit halved for terrain and halved for supply in combat is quartered overall.
2.1.2 Standard Rounding Rule
When units involved in a combat must halve (or quarter) their combat strengths, first add up all fractions and then round down. Units that would round down to a strength of zero are treated as having a strength of ½ strength point. Example: A 3 strength point unit which is attacking while out of supply and across a major river would be quartered, to ¾ of a strength point which would then round down zero so is treated as having ½ strength point.
Fog of War (Optional)
Except when calculating the odds for an attack he has committed to undertake, a player cannot examine the units comprising an enemy stack. He can only observe the stack's top unit (or marker if applicable). A player cannot cancel an attack after announcing it (unless at least 1-2 odds are not achieved).
2.1.3 Preparation for Play
The players select their side (German or Polish), setting up their units according to the set up. See Section 14.0 Place the Turn marker on Turn 1 of the Turn Record Track (TRT). Place all reinforcements on their correct arrival turn on the TRT. Place the German air units in their respective Luftflotte boxes and the Polish air unit in the Polish Air force box. The players will also need a cup to draw Command and Action Chits from. Place all Command and Action Chits that do not have a turn number on them in the cup to start the game.
2.2 Map
The map represents the parts of Germany, Slovakia, Danzig and Poland over which the historical campaign was fought. The map scale is approximately 10 miles per hex. Several charts, tables, tracks, and boxes are printed around the map.
2.2.1 Turn Record Track (TRT)
This track provides a place to mark the current turn. Advance the Turn Marker one box at the end of each turn.
2.2.2 Terrain Effects Chart (TEC)
The TEC provides a map key and shows the effects of the different terrain features on movement and combat.
2.2.3 Combat Results Table (CRT)
The CRT is used to resolve combat.
2.2.4 Luftflotte and Polish Air Force Boxes
These boxes are used to hold German Air units of the 1st and 4th Luftflotte and the Polish Air unit.
2.2.5 Polish and German Activations Tracks
These boxes are used to hold the Polish and German Command Chits after they have been drawn. Box 1 for first chit drawn, etc.
2.2.6 Replacement Table
The table is used to roll for Polish replacements when the replacement chit is drawn.
2.2.7 Operational Group Roll Table
This table is used to see how many Polish Operational Groups (OG) may be activated when the OG command chit is drawn.
2.2.8 Victory Point Hex Track
This track is used to record the current number of in supply Victory Point Hexes held by the German player.
2.2.9 Supply Source Hexes
Hexes with a black and white supply source symbol are supply sources for German units. Polish units draw supply from any hex of Warsaw.
2.3 Command Chits
Command Chits are used to activate specific HQs, which in turn allow combat units under their command to move and attack. All available Polish and German Command Chits are placed in the same cup, from which they are randomly drawn one at a time. Command chits with a turn number on the counter are added to the cup on the turn indicated. The Turn Track specifies how many of the German and Polish HQs can be activated once their Command Chit has been drawn. Note that the Karpaty Army HQ starts on the map, but its command chit does not enter till turn 3.
Example: In Turn 3, the Germans would activate the first five German HQs who's Command Chit had been drawn from the cup. The sixth and subsequent HQs could not be activated that turn. The Polish would activate the first 4 Polish HQ drawn.
2.4 Special Command Chits
2.4.1 Polish: OG Chit
The Polish player draws this chit and then rolls on the table labeled Operational Group Roll Table. This indicates the number of OG groups that may be activated. There are three OG in the game, Narew, Unrug, and Wyskow. Narew and Unrug start on the board and Wyskow enter as a reinforcement on turn 7.
2.4.2 Polish: Malopolska Army
On turn 7 this command chit replaces the Krakow Army and Karpaty Army command chits. When the Malopolska command chit is drawn it activates the Malopolska Army HQ which can command all units that were formerly part of the Krakow Army and the Karpaty Army.
2.4.3 German: Army Group North (AGN)
This chit enters on turn 7 and may activate any HQ in AGN; 3rd Army, 4th army or Falken. The HQ may have already been activated by its own command chit this turn or the player may activate it with its own command chit after using AGN. This ability to potentially activate a HQ twice in a turn is key for both players to remember.
2.4.4 German: Army Group South (AGS)
This chit enters on turn 7 and may activate any HQ in AGS; 8th Army, 10th Army, 14th Army, Bernolak or Gienath. It otherwise acts just like the AGN command chit.
2.4.5 German: 14th Army/Bernolak
On turn 7 this command chit replaces the 14th Army and Bernolak command chits. When this chit is drawn it activates both of those HQ.
2.5 Action Chits
Poland Defiant contains Action Chits. Each Action Chit has one or both national insignia on it, indicating which side is affected. Action Chits with a turn number on them are added to the cup on the turn indicated. Action Chits do not count against the number of activated Command Chits drawn per turn. However, once all Command Chits are drawn for that turn then no further chits are drawn so action chits may remain in the draw cup. All drawn action chits are returned to the draw cup during the next Turn Advance Sequence.
2.5.1 Polish Replacement Chit
When this chit is drawn the Polish player rolls on the Replacement Table. Instantly apply the result before proceeding with the new chit draw.
2.5.2 Random Event Action Chit
When this Action Chit is drawn roll 2d6 and compare the result with the Random Event Table (on the back of these rules). Instantly apply the result before proceeding with the new chit draw.
2.6 Markers
The following markers are used in the game:
2.6.1 Turn Marker
This is placed on the TRT to record the turn currently in progress.
2.6.2 Victory Points (VPs)
Use the VP marker to keep track of VP objectives taken.
2.6.3 Out of Supply/Isolated
Units that are 'out-of-supply' have an 'out-of-supply' marker placed on them. Their reverse side is used when a unit becomes Isolated.
2.6.4 Damaged
These markers are provided for players to mark damaged bridges. See 2.2.9
3.0 Sequence of Play
The game proceeds following the phases outlined below.
AIR UNIT PHASE
- Ground Attack Segment
- Interdiction Segment
REINFORCEMENT PHASE
- Reinforcement Segment
COMMAND PHASE
- Command Segment
- Movement Segment
- Combat Segment
SUPPLY PHASE
- Supply Segment
END OF TURN PHASE
- Air Unit Return Segment
- Sudden Death Victory Segment
- Turn Advance Segment
4.0 Command
All combat units must be activated by a HQ to move and attack other units. Exception: See 2.5.2 chit. A HQ may be activated more than once in a turn as long as the following rules are followed.
4.1 Command Phase
4.1.1 Command Chit Draws
In the Command Phase, Command Chits are randomly drawn one by one from the cup; who draws the chit does not matter. Check once that limit has been reached, no more Command Chits for that force can be activated that turn. The owner of the drawn chit becomes the active player and activates the HQ matching the Command Chit. The activated HQ can now activate all units of its formation and within its command range to move and attack. Once all applicable units have moved and/or attacked, the player then places the drawn Command Chit face up into his Activations Track in the first empty box available.
4.1.2 German Operational Pace
On the TRT the German player has marked how many Victory Point Hexes, VPH, he must have controlled and in supply at the end of the turn. If he is short of this goal the German activations for the following turn are reduced by one. The maximum reduction is one regardless of how short of VPH the Germans are. However, if the German player manages to achieve his goal, and lose none back to the Poles, before the end of the following turn, he immediately regains the lost activation.
Example: On the TRT turn 1 is marked with a goal of one VPH. If the Germans fail to achieve this then on turn 2 their activations are reduced from 6 to 5. On the 5th and would be final activation the Germans take a VPH and it is supplied. The Germans would get a sixth activation as they have caught up with the goals of the high command.
4.2 HQs & Command Execution
The HQ corresponding to the drawn command chit is activated.
4.2.1 Combat Unit Activation
An activated HQ can activate all combat units under its command (the units have color coded bars that match the HQ color), as well as two independent combat units. If the HQ has no units under its command (no colored bar on the HQ) then the HQ may activate any 5 combat units; it does not matter what commands they are from or if they are independent.
4.2.2 Independent Units
Units without a color bar are independent. Independent units can be activated each time they are within Command Range of the activated HQ up to the limits in section 4.2.1. Units that start under the command of an HQ can become independent if their HQ is eliminated. See 11.1.6
4.2.3 Command Range
Command Range is measured in terms of hexes, counted from the HQ unit. An HQ with a Command Range of four can thus activate friendly combat units up to four hexes away. Determine Command Range at the instant the HQ is activated: a combat unit may only be activated if it is within the Command Range of a suitable HQ at that moment. Activated combat units may later leave the HQ's Command Range during movement or combat.
4.2.4 Command Range Limitations
Command Ranges do not extend through water hexes or across water hexsides. They extend across an unbridged major river one hex. It may only be traced into or through a mountain hex along a road. Supply status, enemy units, and enemy zones of control (EZOCs) have no effect on Command Range.
4.2.5 Out of Command
Any unit that is not within command range when the HQ is activated is considered Out of Command. An out of command unit may not move or attack. A unit is only out of command while its HQ's activation is resolved. It does not persist through the turn and has no effect on supply status or defense strength.
4.2.6 First Turn
All German units of a command are automatically activated on turn 1 when their HQ is activated regardless of if they are in Command Range of their HQ. Note: A fair number of German units are beyond Command Range at the start of the game and players should take advantage of the one turn grace period to set most of them up to be in range for turn 2. A few units in the south will not be in range on turn 2 and this is a deliberate design decision as these units took some local ground but did not advance further until they linked up with the main German drive.
5.0 Zones of Control (ZOCs)
Zones of Control (ZOCs) represent a unit's ability to inhibit enemy movement, retreat, and supply around them. The ZOCs of enemy units are called Enemy Zones of Control (EZOCs). A unit exerts a ZOC into all adjacent hexes. Exceptions: See 5.6
5.1 ZOC Effects
Units pay +1 Movement Point (MP) to enter or leave an EZOC; moving directly from one EZOC to another is +3MP. These extra costs are cumulative. Given the MPs, units can move directly from EZOC to EZOC and can move into and exit any number of EZOCs.
5.2 ZOC Capable Units
Units with a printed Attack (NOT Defense) combat strength of '1' or more have ZOCs. Exception: See 5.2.1
5.2.1 Units with No ZOCs
HQs, Armored trains, and units with a printed Attack strength of '0'. Combat units without a ZOC are marked with a no ZOC symbol.
5.3 ZOC and Reinforcements
Reinforcements can be placed directly into EZOCs. (change here from Konigsberg and Across the Narva)
5.4 Retreats and EZOCs
Remove one step from a stack that retreats into an EZOC. Retreating stacks lose one step total, not one step per unit. Do this for each EZOC entered on a hex by hex basis. Friendly units do not negate EZOCs for retreat purposes.
5.5 ZOC and Supply
EZOCs block supply lines. Friendly units negate EZOCs in their hexes for supply purposes ONLY.
5.5.1 Units Out of Supply and ZOCs
Out of supply units continue to exert ZOCs in the normal manner.
5.6 ZOC Limitations
ZOCs do not extend into water hexes or across water hexsides or across unbridged major rivers. ZOC only extend into and out of mountain hexes along roads.
6.0 Movement
In the Movement Segment, the active player can move his activated HQ and commanded combat units as far as he wants within each unit's movement allowance and any other applicable restrictions.
6.1 How to Move Units
The active player can move all, some, or none of his commanded units. Units are moved one at a time. The movement of a unit must be fully completed before another unit can be moved.
6.1.1 Movement Allowance
Each unit has a movement allowance (MA) on the counter. A unit cannot expend more movement points (MPs) than its movement allowance.
6.1.2 Use of Movement Points
To enter an adjacent hex, a unit must expend the MP cost indicated by the TEC for the hex (and hexside, if applicable) plus any applicable EZOC costs. The unit may not be able to move even a single hex if the costs are higher than its movement allowance.
6.2 Terrain Effects on Movement
According to the Terrain Effects on Movement Chart (TEC), each hex and hexside feature costs MPs.
6.2.1 Roads
Units may use roads only when following a continuous path along the road to enter a given hex. Such units pay the road movement cost and ignore the MP costs of the hex entered or hexside crossed.
6.2.2 Bridges
A river crossed by a road or railroad, is a bridged river hexside. A bridge cancels all movement, combat, command range, supply, and ZOC effects of a river. Conversely, a river hexside not crossed by a road or railroad is an unbridged river hexside. The 5 temporary bridges printed on the map are used by the Polish player only. If the German player ever moves a combat unit adjacent to the bridge the bridge is damaged and may no longer be used (no movement, no combat, no zoc). Damaged markers are provided to mark this.
6.2.2 Unbridged Minor River Hexside
To cross an unbridged minor river hexside, a unit must expend one additional MP, as well as the regular MP cost of the hex entered. It moves across the river but must then stop and can go no further in the current Movement Segment. Note that if crossed by a road or rail the hexside is a bridged river hexside and the 1 MP cost and stopping after crossing would not apply.
6.2.3 Unbridged Major River Hexside
An unbridged major river may not be crossed.
6.2.4 Restrictive Terrain
A unit may not move off map under any circumstances, into a water hex, a mountain hex except along a road, or across water hexsides. The combat and movement restrictions regarding water hexsides only apply to hexsides that are completely covered by water. If there is some land between the hexes it is not a water hexside.
6.3 Movement Restrictions
Units cannot enter enemy occupied hexes. Exception: a combat unit (with an attack strength greater than zero) can overrun a lone enemy HQ by simply entering the hex, See 11.1.4. This can be done during regular movement, strategic movement or during advance or retreat after combat.
6.4 Strategic Movement
A mechanized, motorized, or HQ unit using a road to enter an adjacent road hex expends only ½ MP if it starts the Movement Segment in a road hex and only moves along a road for its entire movement. Infantry and Cavalry units may not use strategic movement.
6.4.1 Strategic Movement Restrictions
(1) The unit must neither start nor end in an EZOC, nor may it enter an EZOC during any part of its movement.
(2) Railroads cannot be used for strategic movement.
(3) A unit may never exceed the stacking limit at any time while performing strategic movement, for example, a combat unit passing through a hex already occupied by two combat units, or a HQ passing through another HQ while using strategic movement.
6.5 Rail Movement
A unit with a movement allowance of 'R', not in EZOC, starting its move on a rail hex may move an unlimited distance along rail hexes. Such a unit stops when entering an EZOC, or if the rail line is physically blocked by an enemy unit with no ZOC, it stops adjacent to such units. This can be limited by aircraft Interdiction. See 12.2 Reinforcements may also move by rail when placed. See 8.0
7.0 Stacking
A stack occurs when a hex contains more than one unit. A maximum of two combat units (whether full- or reduced-strength) and one HQ can occupy a hex. Enforce stacking at each phase's end and at the instant a unit finishes its retreat or advance after combat.
7.1 Overstacking
Reinforcements and Rebuilt units can overstack initially upon placement but must be stacked legally by that phase's end. If a unit exceeds the stacking limit in the last hex of a retreat, it must attempt to retreat one additional hex. If it cannot legally do so, it is eliminated instead. If through retreat, two or more HQs end up stacked in the same hex, retreat the HQ one additional hex. If it cannot do so, it is eliminated.
8.0 Reinforcements
Place reinforcements into the hex containing their entry area designation. Reinforcements are treated as being in supply and in command upon entering, and have a movement phase upon entering, being able to use either regular, strategic (if mechanized, motorized, or a HQ) or rail movement. This rail movement can be used by all types of units and is the only time this is possible for units that do not have an 'R' movement allowance. If the reinforcing unit is railing into a hex in an enemy country, Germans into Poland or Poles into Germany or Slovakia, the unit must end its rail movement within 3 hexes of another friendly unit that was not moving in the reinforcing phase.
8.0.1 Stacking
Reinforcements can overstack on placement provided they split up during that phase.
8.0.2 Movement Allowance
Placing reinforcements does not cost MPs. Units have a full MA upon placement.
8.0.3 EZOCs
Reinforcements cannot be placed upon enemy units but may be placed in EZOC. If enemy units occupy the reinforcement's entry hex the reinforcements are delayed to the next turn where they will try to enter again at the same location.
8.0.3 Interdiction
If a reinforcing armored train is to be placed in an interdicted hex it may alternatively be placed at any in supplied rail hex within 5 hexes of its original location. It may then move normally by rail in the reinforcement segment. Other units must be placed in an interdicted hex and are affected by the interdiction in their movement in the reinforcement segment.
8.0.4 Malopolska HQ
On turn 7 the Malopolska HQ replaces the Krakow and Karpaty HQ. Remove those from the map and place the Malopolska HQ in the former location of either of those HQ. If both those HQ have been eliminated it may be placed with any supplied unit of its command. The Malopolska HQ commands all troops of the Krakow and Karpaty HQ. (All units color coded for those 2 HQ)
8.1 Reinforcement Command and Action Chits
Chits due to arrive this turn are placed in the drawing cup. Note that Command and Action chits do not have reminders of their entry printed on the Turn Record Track like combat units and HQ. You need to place them on the track when setting up the game.
9.0 Combat
In the Combat Segment, the active player can attack enemy units adjacent to his activated combat units. Empty hexes or HQs alone cannot be attacked. A player is never forced to attack, although units must defend if attacked.
9.1 Combat Results
The Combat Results Table (CRT) gives results that either affects the attacker (A) or the defender (D). The defender always executes his result first.
The possible results are:
- A = The result affects the Attacker
- D = The result affects the Defender
-
= Number of steps lost
- r# = Number of hexes to be retreated.
- A1* = The attacker must take this result if the defender is in a town or city. Note that this is different than Konigsberg or Across the Narva.
Example: A result of D1r2 would mean that the Defender must lose one step and retreat two hexes.
9.2 Combat Restrictions
9.2.1 Attack Direction
Any number of units can attack in a single combat, and attacks can be made from any direction or set of directions. Exception: Units may only attack into or out of mountain hexes along roads. Units stacked together could attack different hexes, but no single unit can contribute to more than one attack.
9.2.2 Defining Defending Target
Attack all units in a hex as a single defending strength. The defender cannot withhold units in a hex from attack. Units within a stack cannot be attacked singly – stacks always defend together.
9.2.3 Zero Combat Value Units
Units with a combat value of zero can participate in an attack with other non-zero units. While they add nothing in the way of combat strength, such units can help absorb step losses and may advance after combat. Exception: Units with zero movement allowances may not advance.
9.2.4 Cavalry Retreat before Combat
A cavalry unit that is attacked by cavalry or infantry, motorized or foot, may retreat 1 hex before combat. Attacking units may advance after combat. Cavalry may not retreat before combat if attacked by mechanized units, air units, or the Schleswig-Holstein attacking by itself.
9.2.5 Combined Arms
An attack made solely by mechanized units get a column shift to the left, i.e. In the defender's favor.
9.2.6 First Turn
All German attacks made on turn 1 suffer a column shift to the left, i.e. in the defender's favor. This includes air units making ground attacks or the Schleswig-Holstein attacking by itself.
9.3 Odds Determination
Total the modified attack strength and divide by the total modified defense strength; this produces the Combat Ratio. Apply the Standard Rounding Rule See Section 2.1.2 to the totals and express the two numbers as a ratio, Attacker to Defender. Several factors can affect the attack and defense strengths:
(1) Out of Supply units have their attack strengths halved.
(2) Isolated units have both their attack and defense strengths halved.
(3) Terrain effects (Unbridged Major and Minor rivers which halve attack strengths) are cumulative with supply effects.
9.3.1 Terrain Features
When occupied by defending units, some terrain types provide favorable ratio combat shifts to the defender (See TEC). One shift changes the column to be used on the CRT by one column. Terrain effects are cumulative.
The combat and movement restrictions regarding water hexsides only apply to hexsides that are completely covered by water. If there is some land between the hexes it is not a water hexside.
9.3.3 Restrictions
If the final Combat Ratio is less than 1-2 once any terrain and combined arms effects have been applied, the attack is not possible and is cancelled. If it is greater than 8-1, the combat is resolved on the 8-1+ column on the CRT. Also, if the total defense strength in a hex is reduced to zero by rounding down, the combat is resolved on the 8-1+ column of the CRT, regardless of any potential shifts.
9.4 Step Losses
Full strength units that take a step loss are flipped over and become reduced. Reduced strength units which take a step loss are destroyed and removed from play. Not all units have two steps. HQ do not have a step as they are not a combat unit.
9.4.1 First Step Loss
When a result calls for a step loss, the first step to be removed must be from that side's strongest unit which participated in that combat. Strongest unit means the one with the highest printed attack strength (for the attacker) and defense strength (for the defender). If two units have equal strength, owning player's choice. Exception: If an armored train is in the hex the first loss must come from the train.
9.4.2 Multiple Step Losses
Beyond the requirement for the strongest unit to take the first loss, any additional losses can be distributed as seen fit by the owning player. There is no requirement for every unit to take one loss before any units take a second one.
9.4.3 Single Step Units
Some units have only one step. These units have printing on only one side. A single step loss eliminates any such unit.
9.4.4 Negating First Step Loss
Units located in a town or city ignore the first loss result from the CRT. Units taking multiple losses may ignore the first loss but must take any additional losses as normal. Exception: If an armored train is in the hex the first loss is not negated.
Example: A unit defending a city is attacked and a D1r result is rolled. However, since it is placed in a city, the loss result is negated (as is the retreat result; see Section 9.5.7). Had the result been D2r2, the unit would have taken one loss, and retreated one hex.
9.5 Retreats
The owning player retreats his own units, defender first. Units may not retreat through enemy units. Exception: A retreating combat unit can overrun a lone enemy HQ by simply entering the hex. Retreat priorities are listed below; in order of precedence.
9.5.1 Terrain Restrictions
Units can retreat only into or through hexes that the units could move through during movement. Units which cannot complete their retreat for this reason must lose one step per hex the stack cannot retreat. The owning player freely selects which unit takes these losses.
9.5.2 Length
Retreats are given as the number of hexes the affected units must retreat. Each retreat path hex must be further away from the unit's original hex than the last (e.g. the second hex retreated is two hexes away from the combat hex.) Units which cannot complete their full retreat must lose one step per hex the stack cannot retreat. The owning player freely selects which unit takes these losses.
9.5.3 Retreat into EZOC
If possible, the unit must not retreat into an EZOC. If the unit must retreat into an EZOC it must retreat into the fewest possible. Each hex containing an EZOC entered by retreating unit costs the retreating unit one step. This loss is in addition to the combat result itself. If a stack must do so, the stack loses one step per EZOC entered, not per unit. The strongest unit in the stack takes the loss. Defense strength if defender retreat and attack strength if attacker retreat. Friendly units do not negate EZOCs for this purpose.
9.5.4 Supply
The retreating units must retreat to a hex in supply if one is available.
9.5.5 Retreats and Zero Movement Units
Some units have a MA of zero. These units take all retreat results as loss results unless located in a village, town, or city in which case the first retreat would be negated, and all other retreat results would result in a loss for each hex not retreated. Units with movement allowances stacked with a zero-movement allowance unit retreat normally. The requirement to retreat is not cancelled by the zero movement point units taking losses because it is unable to retreat.
9.5.6 Retreating Stacks
Retreating units can stay together as a stack or retreat using separate paths, at the owning player's discretion. If a unit exceeds the stacking limit in the last hex of a retreat, it must attempt to retreat one additional hex. If it cannot legally do so, it is eliminated instead. If through retreat, two or more HQs end up stacking in the same hex, retreat the HQ one additional hex. If it cannot do so, it is eliminated.
9.5.7 Negating First Retreat Result
Units located in a village, town or city ignores the first increment of a Retreat result. Note that attacking units in villages, towns and cities have their first retreat negated as well.
Example: A unit defending a city is attacked and a Dr result is rolled. However, since it is in a city hex, the result is negated. Had the result been a Dr2, the unit would have to retreat one hex, since only the first hex of the retreat is negated.
9.6 Advance after Combat
Any time an attack results in the Defender's hex becoming vacant, attacking units can occupy that hex. Advancing after combat is optional; the Attacker may advance all, some, or none of his attacking units, subject to stacking limits. The Defender's original hex must be the first advance hex. While advancing after combat, advancing units do not expend MPs and EZOCs are ignored.
9.6.1 Advance Restrictions
No unit can advance after combat over an unbridged major river hexside.
9.6.2 Defending Units
The defender cannot advance after combat.
9.6.3 Mechanized Units
When the Defender retreats or is eliminated, mechanized combat units (only) can advance up to two hexes. Mechanized units that participated in the same combat can end their advance in different hexes, normal stacking restrictions apply. Motorized units may not advance two hexes.
9.6.4 Mechanized Units and Terrain
A Mechanized unit that crosses an unbridged minor river hexside or enters a town or city in the first hex of its advance after combat must stop and cannot advance a second hex.
9.6.5 HQ's
HQs may advance after combat with the unit/units in their stack.
9.6.6 Overrun
An advancing combat unit may overrun a lone enemy HQ by simply entering its hex.
10.0 Supply and Isolation
During the Supply Phase, both players check each of their units to determine if a supply line exists. If no supply line can be traced, mark the unit with an Out of Supply marker. If the unit is out of supply and already has an Out of Supply marker on it, it is isolated instead, and the Out of Supply marker should be flicked over to its Isolation side. If the unit already has an Isolation marker, it suffers no further penalties. If, in a later Supply Phase, a supply line can be traced for such units, the owning player removes the Out of Supply or Isolation marker.
10.1 Tracing Supply Lines
A Supply Line is a path free of enemy units and EZOCs traced from a unit to its side's supply source. The first four hexes of a supply line may be of any passable terrain. The remainder of the supply line must be road or railroad hexes (it may be a combination of road and railroad hexes) or have reached a supply source with its first 4 hexes of trace.
10.1.1 Supply Restrictions
A supply line cannot cross unbridged major river hexsides or water hexsides, unless the hex/hexside is crossed by either a road or railroad. Exception: The Polish player only may use the printed temporary bridges. The path cannot go through hexes occupied by enemy units or their ZOCs. Remember that friendly units negate EZOCs in their hexes for supply purposes.
10.1.2 Supply Duration
After a successful trace, units are supplied until the next Supply Phase, regardless of changing circumstances. Conversely, Out-of-Supply units must wait until (at least) the next Supply Phase to qualify as being in supply.
10.2 Supply Sources
The Polish player may trace supply to any of the hexes of Warsaw. The German player may trace supply to any of the German supply sources on the map edges (black/white circles) as well as the city of Königsberg.
10.2.1 Königsberg
Starting with the supply phase of game turn 3 the German player must be able to trace a line of supply from Konigsberg to another German supply source. If this cannot be done, then Konigsberg functions as a limited supply source.
10.2.2 Limited Supply Source
Units using Konigsberg as a limited supply source become Out-of-Supply but never become Isolated.
10.3 Out of Supply
10.3.1 Out of Supply Effects
Out of Supply units have their attack strength halved. Their defense strength and movement allowance are not affected.
10.3.2 Isolation
Isolated units have their attack strength, defense strength and movement allowance halved.
10.3.3 Zero Movement Units and Supply
Zero movement units never become out of supply.
11.0 Special Rules
11.1 HQ Special Rules
11.1.1 Retreats
An HQ stacked with combat units at the start of a combat must retreat with them if they are forced to retreat because of this combat.
11.1.2 Advance after Combat
An HQ stacked with combat units at the start of a combat may advance with them, at the Attacker's option, if they advance after this combat. It can advance two hexes if it is stacked with Mechanized units advancing two hexes.
11.1.3 Removal
An HQ (and its corresponding Command Chit) is removed from the game under the following circumstances:
(1) If it is lost due to combat, i.e. all units it was stacked with are eliminated. Exception: If a HQ is in a stack that is eliminated by air attack the HQ follows the retreat portion of the result but is not eliminated.
(2) If it is overrun. (see below)
11.1.4 Lone HQs and Overruns
Lone HQs can be overrun by enemy combat forces in the movement accompanying the Reinforcement Segment or Replacement Segment, the regular Movement Segment, and as part of retreating and advancing after combat. The enemy unit must have the MPs to enter the hex; being adjacent is not enough. Note: Defending HQs with friendly combat units is an important tactic to use.
11.1.5 Bernolak HQ
The Slovak HQ, Bernolak, may never leave Slovak territory. It may only command Slovak units.
11.1.6 Units Commanded by Eliminated HQ
When a HQ is eliminated all units formerly commanded by that HQ (color coded for that HQ) become independent units and remain so for the rest of the game. (Change from Konigsberg here) Exception: When the Polish Malopolska HQ enters the game, it regains command of the units it normally controls even if the previous HQ's had been eliminated. Units from both original armies may be rebuilt by the Malopolska HQ.
11.2 Replacements
Replacements can be used to rebuild lost steps for in supply units on the board or rebuild eliminated units. You may replace a lost step while in an EZOC. Single-step units and zero movement allowance units may not be given replacements. Replacements cannot be accumulated. The Polish get replacement from the Polish Replacement Chit and the Random Event Chit. The Germans get them from the Random Event Chit. There are no Slovak replacements.
11.2.1 Replacement Costs
The cost of rebuilding infantry is one replacement. Mechanized, motorized and cavalry costs 2 replacements. A unit may only return from being previously eliminated at reduced strength.
11.2.2 Placing Rebuilt Units
Rebuilt units must be placed in the hex with the units' HQ. The hex must be in supply. Independent units, those that were originally independent not any that became independent with the loss of their HQ, may be placed with any friendly HQ. Units that have lost their HQ may not be rebuilt. Exception 11.1.6. Rebuilt units may be placed in EZOCs. After the unit is placed it may immediately move using regular movement, or strategic movement if the unit is mechanized or motorized. Rebuilt units may overstack, but they must be stacked legally after their movement.
11.2.3 Replacements and Out of Supply
Units that are out of supply may not be rebuilt. Rebuilt units may not be placed with a HQ that is out of supply.
11.3 Schleswig-Holstein
(1) Schleswig-Holstein can only enter all water hexes or coastal hexes of the Baltic Sea. It can stack in a coastal hex with friendly or enemy units and has no effect on them while doing so. (it is using the water portion of the hex)
(2) The Schleswig-Holstein can only attack coastal hexes.
(3) Any HQ of AGN can activate it; does not have to be in range of a HQ to be activated and use its attack strength in a combat. It may move to any Baltic coastal hex and attack by itself or combine with other units. It may only be activated once per turn.
(4) Schleswig Holstein cannot retreat or take any kind of losses.
12.0 Air Units
The German player has two types of air units, ground attack and interdiction. Ground attack aircraft have the attack factor in a brown box and interdiction aircraft have the interdiction range in a blue box. The German air units are also split into those of Luftflotte 1 supporting Army Group North and Luftflotte 4 supporting Army Group South. The map has a boundary line across it and Luftflotte 1 may only operate to the north of the line and Luftflotte 4 to the south of the line. The Polish player has a single ground attack air unit that may operate anywhere.
12.1 Air Attack
During the Ground Attack Segment, the German player may use his Ground Attack aircraft to attack any Polish occupied hex that has a German (not Slovak) unit adjacent to it. Multiple aircraft may combine in a single attack. The attack is done on the normal CRT. The attacking aircraft ignore all attacker results. However, if a 1 is rolled on the attack the defender takes his result normally and one of the attacking aircraft, attackers' choice which one, is damaged. A damaged aircraft is placed 2 turns ahead on the TRT and will reenter the game in the Reinforcement Segment. After the German player has completed his ground attacks the Polish player may use his air unit in the same fashion. Ground Attack aircraft that have completed their attacks are place back in their respective boxes on the map.
12.1.1 Ground Attack against HQ
If a HQ is attacked by air while stacked alone in a hex it only takes the retreat portion of any combat result against it. It ignores all loss results. If it is stacked with other units and the result is more steps then the other units can take the HQ ignores the excess loss and only takes the retreat portion of the combat result.
12.2 Interdiction
At the start of the Interdiction Segment the German player rolls a die. On a roll of 1 an interdiction aircraft is damaged, German players choice which one. A damaged aircraft is placed 2 turns ahead on the TRT and will reenter the game in the Reinforcement Segment. The German player then places his remaining undamaged interdicting aircraft on the map. The hex the aircraft occupies, and all adjacent hexes are interdicted. Exception: On turn 1 the German interdicting aircraft project a 2-hex zone of interdiction from the aircraft. Any unit, German, Polish or Slovak, that starts its move in an interdicted hex or enters an interdicted hex is affected as follows:
- No strategic movement allowed.
- No rail movement allowed.
- Mechanized and motorized units lose 2 movement points
- Foot infantry, cavalry, and HQ lose 1 movement point
A unit that does not have the movement points to pay the penalty for entering an interdicted hex may not enter such a hex. Interdicting aircraft return to their respective boxes on the map in the Air Unit Return Segment.
12.3 Damaged Aircraft Return
When a damaged aircraft is set to return roll a die. On a roll of one the unit does not return and is eliminated from the game.
13.0 How to Win the Game
13.1 Victory Points
At the start of the game the Polish player controls all Victory Point hexes. See Section 13.2.2
13.2 Sudden Death Victory
If the German player occupies any hex of Warsaw with a unit in supply at the end of any turn, the game ends in a sudden death victory. If this never happens, determine victory using the conditions below.
13.2.1 Victory Conditions
The Victory conditions are based on the German possession of supplied Victory Point Hexes (VPH).
- Polish Overwhelming Victory: 1-2 VPH
- Polish Major Victory: 3-7 VPH
- Polish Minor Victory: 8-9 VPH
- German Historical Victory: 10 VPH
- German Major Victory: 11-13 VPH
- German Overwhelming Victory: 14 VPH
13.2.2 Victory Point Hexes
The following locations are the Victory Point Hexes and have their names in red type, each worth 1 point: Poznan, Bydgoszcz, Katowice, Czestochowa, Lodz, Danzig, Krakow, Plock, Siedice, Radom, Rzeszow, Lomza, Lublin, Lwow.
14.0 Set Up
Set up listed by unit identifications. If you have the right unit type and values in a hex from the right HQ the unit designations do not matter, except for historical purposes of course. Units with a number and letter in upper left corner are reinforcements.
Polish (light green units)
Unrug (purple band) HQ in 1303, Mar (inf 1-1-3) in 1203, Mor ON (inf 1-1-2) in 1304, Kas PP (train 0-1-R) in 1305, West (fortress 1-2-0) in 1505 (a Polish garrison in neutral Danzig)
Pomoroskie (light blue band) HQ in 1211, 27 (inf 2-2-3) in 1208, Pomo (cavalry 3-2-4) in 0909, 8 (inf 2-2-3) in 0911, 15 (inf 2-2-3) in 0812, Bydo (fortress 0-1-0) in 0913, Pom ON (inf 1-1-2) in 1013. Chel ON (inf 1-1-2) in 1313, 16 (inf 2-2-3) in 1411, 4 (inf 3-3-3) in 1512.
Poznan (violet band) HQ in 0619, 26 (inf 2-2-3) and 11PP (train 2-1-R) in 0416, Poz ON (inf 1-1-2) in 0417, Podo (cavalry 3-2-4) in 0217, 14 (inf 2-2-3) in 0220, Wiel (cavalry 2-1-4) in 0320, 17 (inf 2-2-3) in 0522, 25 (inf 2-2-3) and 12PP (train 2-1-R) in 0723, Kali ON (inf 2-2-2) in 0922.
Lodz (green band) HQ in 1225, 2Lg (inf 3-3-3) in 1125, 10 (inf 3-2-3) in 0825, Sier ON (inf 1-1-2) in 1026, WDY (cavalry 2-1-4) and 52PP (train 2-1-R) in 1227, 28 (inf 3-3-3) in 1228, 30 (inf 3-2-3) in 1229. 53PP (train 2-1-R) in 1430, Kres (cavalry 3-2-4) in 1422, 1 KOP (cavalry 2-1-4) in 1523
Krakow (red band) HQ in 1335, 7 (inf 2-2-3) in 1230, Igna (inf 1-1-3) in 1131, Krak (cavalry 3-2-4) in 1132, Chor (fortress 0-1-0) in 1133, Rybn (fortress 0-1-0) in 1033, Kato (fortress 1-1-0) in 1134, Ruda (fortress 0-1-0) in 1232, Sosa (fortress 0-1-0 in 1233) 55 (inf 1-1-3) and 54PP (train 2-1-R) in 1034, 23 (inf 3-3-3) in 1135, 6 (inf 2-2-3) in 1036, 21 Mt (inf 2-2-3) in 0937, 51PP (train 2-1-R) in 1437, 10 Mot (mech 4-3-6) and Nowy (fortress 0-1-0) in 1539
Karpaty (blue band) HQ in 2539, 22 Mt (inf 2-2-3) in 2136, Kar ON (inf 1-1-3) in 2636, 2 Mt (inf 1-1-3) in 2439, 3 Mt (inf 1-1-3) in 3041, 38 (inf 1-1-3) in 3038
Prusy (mustard band) HQ in 2027, 39 (inf 1-1-3) in 1931, 12 (inf 2-2-3) in 2130, Wile (cavalry 3-2-4) in 2129, 36 (inf 1-1-3) in 2128, 3 Lg (inf 3-3-3) in 1729, 29 (inf 2-2-3) in 1626, 19 (inf 2-2-3) in 1625, 44 (inf 1-1-3) in 1821.
Modlin (pink band) HQ in 2216, Modl (fortress 1-4-0) and 8 (inf 2-2-3) in 2219, War ON (inf 1-1-2) in 2419, Mazo (cavalry 3-2-4) in 2414, 20 (inf 2-2-3) in 2115, Nowo (cavalry 3-2-4) in 1914, Dzia (fortress 1-1-0) in 2014, Mlaw (fortress 1-1-0) in 2114, Orzy (fortress 1-1-0) in 2214
Narew (orange band) HQ in 3113, Ostr (fortress 0-1-0) in 2616, 18 (inf 3-3-3) in 2815, Lomz (fortress 0-1-0) in 3015, Podl (cavalry 3-2-4) in 3113, Suwa (cavalry 3-2-4) in 3410, Such (fortress 0-1-0) in 3412, Roza (fortress 0-1-0) in 3512, 33 (inf 1-1-3) in 3415
Independent (no band) 13PP (train 2-1-R) in 2218, 1Lg (inf 3-3-3) in 2619, 5 (inf 1-1-3) in 1237, 1 Mt (inf 1-2-3) in 2039, 11 (inf 2-2-3) in 2639, 24 (inf 2-2-3) in 2339, 13 (inf 2-2-3) in 1128
German (gray units)
3rd (blue band) HQ in 2008, Gold (inf 1-1-3) in 3111, Lotz (inf 1-1-3) in 2809, 1 (cavalry 1-1-4) in 2512, 12 (inf 3-3-3) in 2412, 1 (inf 3-3-3) in 2313, 11 (inf 3-3-3) in 2212, Kemp (mech 4-3-6) in 2113, 61 (inf 2-2-3) in 2012, 217 (inf 2-2-3) in 2111, 228 (inf 2-2-3) in 1711, 21 (inf 3-3-3) in 1510, 541 (inf 1-1-3) in 1806, Eber (inf 1-1-3) in 1506 (yes this unit starts in the neutral territory of Danzig and represents the local police which had been militarized and taken control of by the Germans.)
4th (purple band) HQ in 0410, 207 (inf 2-2-3) in 1003, 218 (inf 2-2-3) in 0507, 20 Mot (inf 3-3-6) in 0608, 2 Mot (inf 3-3-6) in 0709, 3 Pz (mech 7-4-8) in 0710, 32 (inf 3-3-3) and 3 (inf 3-3-3) in 0610, 50 (inf 3-3-3) in 0511, 23 (inf 3-3-3) in 0309, Netz (inf 1-1-3) in 0411.
8th (yellow band) HQ in 0226, 30 (inf 3-3-3) in 0525, 24 (inf 3-3-3) and 10 (inf 3-3-3) in 0625, 17 (inf 3-3-3) and LAH (mech 2-1-6) in 0626
10th (orange band) HQ in 0530, 29 Mot (inf 3-2-6) in 0429, 13 Mot (inf 3-3-6) in 0729, 1Lt (mech 4-2-6) in 0827, 19 (inf 3-3-3) and 18 (inf 3-3-3) in 0928, 4Pz (mech 6-3-8) and 31 (inf 3-3-3) in 0929, 1 Pz (mech 6-3-8) and 14 (inf 3-3-3) in 1029, 46 (inf 3-3-3) in 0930, 4 (inf 3-3-3) in 0931, 3Lt (mech 3-2-6) in 0732, 2 Lt (mech 4-2-6) in 1031
14th (brown band) HQ in 0637, 28 (inf 3-3-3) and 5 Pz (mech 6-3-8) in 0833, 8 (inf 3-3-3) and Germ (mech 2-1-6) in 0933, 44 (inf 3-3-3) in 0836, 7 (inf 3-3-3) in 0839, 45 (inf 3-3-3) in 0939, 2 Pz (mech 6-3-8) in 1340, 4Lt (mech 3-2-6) and 3Mt (inf 3-3-3) in 1440, 2Mt (inf 3-3-3) in 1941
Independent units (no band) 10 Pz (mech 4-3-6) in 0408, 73 (inf 2-2-3) in 0110, 208 (inf 2-2-3) in 0112, 183 (inf 1-1-3) in 0524, 221 (inf 2-2-3) in 0424, 213 (inf 2-2-3) in 0527, 62 (inf 1-2-3) in 0630, 27 (inf 3-3-3) in 0631, 68 (inf 2-2-3) in 0832, 239 (inf 2-2-3) in 1032, 206 (inf 2-2-3) in 3006
Slovaks (tan units) HQ in 2243, 1 (inf 2-2-3) in 2441, 3 (inf 2-2-3) in 2542
All air units start in their respective air boxes. The Schleswig Holstein starts in hex 1604. Reinforcements should be put on the Turn Record Track in the turn of their entry.
The Polish player places his command chits Krakow, Lodz, Modlin, Ponzan, Pomoroskie, Prusy and OG in the draw cup. The German player places his command chits 3 Army, 4 Army, 8 Army, 10 Army 14 Army and the Slovak Bernolak in the draw cup.
Players should remember the turn one rules, 4.2.6, 9.2.6, and the Exception in 12.2.
Random Event Table
| Roll | Result |
|---|---|
| 2 | Polish Air Force Success. The Polish player may remove one German ground attack air unit from the game. |
| 3 | Polish Free Movement. Five Polish units may move if they do not start in an EZOC or enter one during movement. No rail or strategic movement allowed. |
| 4 | Polish Replacements. The Polish player gets 2 replacement points to be spent immediately. |
| 5 | Polish Armies Merge. Apply rules 8.0.4 and 2.4.2 early. No effect on turn 7 or later. |
| 6 | German Replacements. The German player gets 2 replacement points to be spent immediately. |
| 7 | German Replacements. The German player gets 2 replacement points to be spent immediately. |
| 8 | German Free Movement. Two German units may move if they do not start in an EZOC or enter one during movement. No rail or strategic movement allowed. |
| 9 | Withdrawal to the Western Front. A German infantry unit that currently has 2 steps is removed from the game. German players choice of unit. |
| 10 | Bernolak Chit Removed. Apply 2.4.5 immediately if the 14th Army and Bernolak have not yet been activated. If one or both of them have been activated this turn do this at the end of the turn. No effect on turn 7 or later. |