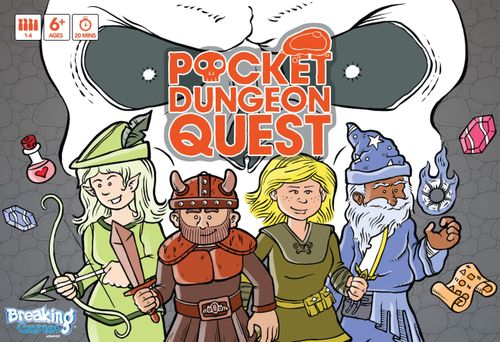
Pocket Dungeon Quest
Pocket Dungeon Quest Rulebook
Table of Contents
Table of Contents
- Setup
- The Goal
- Which Hero Should I Choose?
- Taking Turns
- What Is Circle Of Sight?
- Resolving Tiles
- Boss Fight!
- Items & Spells
- Death
- Help!
- You Found... The Merchant!
- You Found... The Pegasus Mount!
- You Found... A Master Relic!
- The Exit
- Index of Tiles
- Selling Items
- Ending a Session
- Don't Go Alone Expansion
Setup
-
Find and set aside all of the Hero tiles and Heart tiles.
-
Turn the remaining Dungeon tiles face-down in a pile and shuffle them. Deal these tiles onto the 10 x 10 grid on the Dungeon Floor Mat.
Note the four corners of the Dungeon Floor Mat:
- The Discard Pile
- The Monster Pile
- The Gem Pile
- The Merchant Pile
As play goes on, the Dungeon will slowly disintegrate into these Piles.
-
Set the Attack Die within reach of all players.
-
Each player chooses their Hero tile and takes 3 Heart tiles and places them in the Health Squares on their side of the Dungeon Floor Mat.
-
The player who had most recently been in a dungeon (basements count!) is the first player. If you're all in a dungeon right now, choose randomly.
The Goal
All Heroes are working together to find the 3 Master Relic tiles and the Exit tile without dying. When a Hero dies, the remaining Heroes get one last turn to attempt to revive their fallen friend. If the dead Hero cannot be revived, the game is over, the Dungeon Floor is shuffled and the game starts over.
Which Hero Should I Choose?
Each Hero has a unique ability that will help the entire Party. Follow the Skelly Archer to discover the Hero within you!
Warrior
Your power is in your brute strength. Foes tremble before you, but the traps hidden within the dungeon's labyrinth could be your undoing. Will you rise to the challenge and restore the world to its former glory?
Brute Strength: When attacking, each roll gains +1 Sword.
Rogue
Your cunning ability allows you to move swiftly without notice from the dungeon's menacing residents. Beware of the Boss. His presence looms overhead, watching your every move. Will you brave the darkness and take back the Relics and bring light back into the world?
Swift Cunning: You may take ONE Item or Spell from the Dungeon Floor before attacking.
Wizard
Your intellect has no equal. Wielding Spells and Items with ease, you have the potential to do harm to your enemies, and much good to your friends. Watch your back, the dungeon does not take kindly to you. Will you keep your mind sharp and unlock its mysteries?
Sharp Mind: You may use TWO Spells/Items per turn.
Archer
Your eagle eye vision can mark an enemy from miles away. Your bow strikes hard and fast and has no equal. Monsters surely outnumber you within the cold caverns of the dungeon. Will you be fast enough to knock back your foes?
Eagle Eye Vision: You may re-roll the Attack Die once on your turn.
Taking Turns
Each of your turns, do all of the following in this order:
- A. Move one Space in any direction, including diagonally. On your first turn, this will be next to any one of the outermost tiles in the Dungeon.
- B. Reveal all tiles within your Circle Of Sight. (see below.)
- C. Once tiles are revealed, resolve them in this order:
- Resolve Traps, and pick up any Effects in the order in which they were revealed.
- Attack Monsters.
- After attacking, stash any revealed Gems in the Gem Pile.
- Lastly, you may pick up only 1 Item or Spell.
Moving & Revealing Example
On the Warrior's first turn, they choose to enter the dungeon at this point, and can 'see' these three tiles. They will reveal these tiles and resolve them.
On the Warrior's next turn, they can move one space into A, B, or C. If they choose A or C, Circle Of Sight will be 4 tiles, but only 3 tiles if they choose B.
What Is Circle Of Sight?
Each Hero has a Circle Of Sight that is each tile directly adjacent to their Hero, including diagonals. This is what they can 'see' each turn. Sight is not blocked by walls.
Resolving Tiles
After moving and revealing tiles, resolve the revealed tiles in this order:
- Traps & Effects
- Attack Monsters
- Stash Gems
- Take an Item or Spell
Traps & Effects
- Spike Trap: When revealed, the Hero immediately loses 1 Heart. Discard the Trap. Traps can be disarmed with a Multitool. Disarmed Traps do no harm and are discarded immediately.
- Effects can be thought of as Blessings or Curses upon your Hero, and are placed in your Effects area on your side of the Dungeon Floor Mat the moment they are revealed. Effects happen at the next opportunity to do so, then are discarded. One Effect (the most recent one) is resolved at a time.
- Sword: The Sword Effect gives +1 Sword to your next Attack Roll.
- Broken Sword: The Broken Sword gives -1 Sword to your next Attack Roll.
Attack Monsters
If 1 or more Monsters are revealed, you must fight each Monster one at a time. If there is more than 1 Monster, choose which order to fight them.
Monsters: Slime, Goblin, Flayer, Minotaur, Skelly Archer, and The Boss.
When The Boss is revealed, a Boss Fight happens immediately! (See Boss Fight!)
Roll To Hit!
- A Hero must roll 2 or more Swords to hit a Monster. 1 Sword misses.
- Hit Monsters are placed in the Monster Pile.
- Yellow flashes are misses, Red Skulls are Critical Misses.
- On a miss, the Hero loses 1 Heart, and the Monster runs off to the Monster Pile.
Critical Miss?!
In addition to losing a Heart, Critical Misses do different terrible things depending on the Monster being fought at the time:
| Monster | Critical Miss effect |
|---|---|
| Slimes | Steals (Discards) 1 Item from the Hero's Inventory. (Hero's Choice) |
| Goblins | Steals (Discards) 1 Gem randomly from the Gem Pile. |
| Flayers | Hero loses their next turn. |
| Minotaurs | Deals +1 point of damage to the Hero. |
| Skelly Archers | Stays on Dungeon Floor. Must be attacked before taking next turn. |
| The Boss | All Heroes lose 1 Heart. |
Stash Gems
- Once all Monsters in your Circle Of Sight are either defeated or have run off, place all revealed Gems into the Gem Pile.
- The number in the top right denotes the value of the Gem.
- Each player may spend Gems from the Gem Pile on their turn if the Merchant tile is found, and the Merchant Pile is open.
Take an Item or Spell
- If an Item or Spell tile is in your Circle Of Sight, you may take one. Place the rest in the Merchant Pile face down.
- Unless otherwise stated, a Hero may only have two Items/Spells in their inventory.
- If a Hero's Inventory is full, they may place one of their Items/Spells in the Merchant Pile to pick up an Item/Spell.
Dungeon Tiles
- When revealed, Dungeon tiles remain on the Dungeon Floor Mat.
- Floor tiles are valid for movement.
- Wall tiles block a Hero's path.
If a Hero gets stuck by walls in their first 2 turns, that player may remove their Hero tile and choose a new entry point.
Boss Fight!
When the Boss tile is revealed, the Boss Fight begins. This is a special event in the game that will involve all of the players, but their Hero tiles remain where they are on the Dungeon Floor.
The Boss has a number of Henchmen (Monsters) to protect themselves from the party of Heroes. Roll the die to determine how many Henchmen help the Boss:
- Any number of swords: 2 Henchmen
- Yellow flash: 4 Henchmen
- Red Skull: 6 Henchmen
Select* that many Henchmen from the Monster Pile, and place them in a stack on top of the Boss tile. *Hardcore players may select Monsters randomly.
If there are not enough Henchmen in the Monster Pile, then each Hero in turn reveals 1 tile anywhere on the Dungeon Floor until enough Henchmen are found. (Any Items and Spells revealed during this time are placed in the Merchant Pile, Gems into the Gems Pile, and Traps into the Discard Pile.)
Beginning with the Hero who revealed the Boss, players take turns attacking the stack, starting with the Monster on top.
- Henchmen do not run away to the Monster Pile when a Hero rolls a miss.
- The Boss Fight continues until the stack is defeated or all the Heroes die.
- When the Boss is defeated, you still need to find the 3 Relics and the Exit to win.
Items & Spells
Using an Item or Spell
- Heroes may use one of the Items or Spells in their Inventory at any time on their turn.
- Used Items and Spells are placed face down in the Merchant Pile.
- A Hero may choose to give an Item or Spell to another Hero, but this counts as 'using' the Item or Spell. The Hero receiving the Item or Spell does not need to be adjacent to be able to take it, but they can only take the item if they don't go above the two item limit in their inventory.
Items
- Potion: Discard to heal any Hero 1 Heart.
- Bomb: Discard to defeat 1 Monster or remove a Dungeon Wall.
- Big Bag: Does not take up space in a Hero's Inventory. Your Inventory limit is now three.
- Multi-Tool: Disarm a Trap. Do not discard.
Spells
- Teleport: Move a Hero or Monster to any open Dungeon Floor space. Moved Monsters go to the Monster Pile. Heroes moved this way reveal their Circle Of Sight on their next turn.
- Swap Tiles: Swap any 2 tiles on the Dungeon Floor. If a tile swapped this way enters your Circle Of Sight, reveal and resolve it. Traps, Items, Spells, Monsters and Gems go to their respective Piles if they leave your Circle of Sight. If used on a Hero, this works like the Teleport Spell.
- Extra Move: Take an additional turn.
- Phoenix Feather: Revives a Dead Hero. That Hero refills all of their Hearts.
- Foresight: Reveal any 3 tiles on the Dungeon Floor. Revealed tiles are resolved. Gems are placed in the Gem Pile, Monsters in the Monster Pile, and Items/Spells in the Merchant Pile.
- Confusion: Any 2 Monsters in your Circle of Sight fight each other! Roll 2+ Swords and both monsters are sent to the Monster Pile. Otherwise fight them normally.
Death
When a Hero loses all of their Hearts, they are Dead. The Hero tile remains in the space they died on the Dungeon Floor Mat. They lose all Items/Spells in their Inventory, as well as any Effects. Place lost Items/Spells in the Merchant Pile, and lost Effects in the Discard Pile.
- Any Monsters within the Dead Hero's Circle Of Sight are placed in the Monster Pile.
- Any Items/Spells are place in the Merchant Pile.
- Traps, Gems and Effects are placed in the Discard pile.
Help!
When a Hero dies, the remaining Heroes each take one final turn. During that final turn, they must try to revive the Dead Hero by using a Phoenix Feather.
- A Hero does not need to be next to the Dead Hero to revive them.
- When a Hero is revived, they continue their next turn in the space where they died.
- If the Dead Hero is not revived, the Dungeon Floor Mat is reset, and the game starts over!
You Found... The Merchant!
When the Merchant tile is revealed, the Merchant Pile is open for business!
- The Merchant tile stays on the Dungeon Floor Mat where you revealed it.
- Heroes may purchase one tile from the Merchant on their turn.
- A Hero does not need to be next to the Merchant to purchase a tile.
Make A Purchase
- To purchase a tile, discard 30 Gems from the Gem Pile.
- You may not 'make change' from the discard pile.
- Randomly reveal 2 tiles from the Merchant Pile: Choose 1 tile to keep. The other tile is placed face down to the Merchant Pile. You may make a purchase even if you have 2 Items/Spells in you Inventory, but you must return one of the tiles in your Inventory to the Merchant Pile.
You Found... The Pegasus Mount!
When the Pegasus Mount is revealed, immediately befriend it!
- The Pegasus Mount does not take up space in a Hero's Inventory.
- The Pegasus Mount allows the Hero to use Wall tiles as valid movement spaces.
- The Pegasus Mount is bound to the Hero that found it. It cannot be given or traded.
You Found... A Master Relic!
When a Master Relic is revealed, it is immediately collected by the Party!
- There are THREE MASTER RELICS. Find them all, then find the Exit!
- The Master Relics do not take up space in any Hero's Inventory.
- Relics are never lost or discarded if a Hero dies.
The Exit
Once all 3 Master Relic tiles and the Exit tile have been found, YOU WIN!
Index of Tiles
Here is a list of all the tiles in the base game, and how many of each there are.
| Tile | Count |
|---|---|
| Warrior | 1 |
| Rogue | 1 |
| Wizard | 1 |
| Archer | 1 |
| Merchant | 1 |
| Heart | 16 |
| Potion | 5 |
| Bomb | 4 |
| Big Bag | 1 |
| Multitool | 1 |
| Sword | 3 |
| Broken Sword | 3 |
| Swap Tiles |
Selling Items
Items and Spells may now be sold to the Merchant for a portion of Gems.
- The Merchant must be revealed, and there must be at least 10 Gems in the Discard Pile.
Place the Item you wish to sell into the Merchant Pile and reclaim 10 Gems from the Discard Pile.
- Each Hero may Sell a maximum of 1 Item or Spell per turn.
- You may make change with the Discard Pile to facilitate a Sale.
- Gear is bound to the Hero and may not be sold.
Ending a Session
If all 3 Master Relics and the Exit were found without dying, the Session was Successful! Each Hero keeps track of all XP, Keys, and Gear they finished the session with. Heroes begin the next Session in the Campaign with those tiles.
For ease, 4 little zip-top baggies were included in the box, so players can easily locate all the tiles they need to begin the next Session.
Don't Go Alone Expansion
The Don't Go Alone Expansion introduces Campaigns and Leveling Up! There are also two new Heroes, different Monsters to fight, and special Gear! In a Campaign, Heroes carry over Gear, XP and Keys between Sessions.
Don't Go Alone Setup
- Set up the Dungeon Floor Mat with the base game tiles as normal. You may swap in any of the New Monsters in place of any original Monsters for difficulty and variation, but don't swap out the Boss. (You should have 24 Monsters, plus the Boss)
- Place 4 Keys, one in each corner three spaces away from the edges.
- Place the XP tokens, Poison tokens and the Gear tokens within reach of all players. (Gear is a separate pile from the Merchant Pile.)
- Each player takes a Hero and three Hearts. There are two New Heroes!
New Terms
- Turn - A turn is any given Hero's turn of play.
- Round - A Round is when all Heroes have taken one turn.
- Session - One game of PDQ, no matter the outcome is called a Session. If The Heroes lose a Session, they lose the Campaign.
- Campaign - A collection of Sessions that lead to either a Campaign Win or Loss.
The Goal (Don't Go Alone)
The Goal of a Session remains the same (find the three Master Relics and the Exit). However, the Goal of a Campaign is for each Hero to reach Level 3. To do this, Heroes need to collect enough XP, and Keys to spend to Level Up! This is going to take multiple Sessions to accomplish!
New Heroes
- Adventurer: You've been in a dungeon or two. (duck!) You KNOW there are traps... (jump!) Your reflexes are honed, and Relics your goal. Are your reflexes quick enough for everything?
- Quick as a Whip: If the first revealed tile on your turn is a Trap or a Monster*, discard it. *If it's the Boss, discard the top Henchman.
- Farmer: Swords were turned to plowshares at some point in your lineage, but the itch for adventure yearns for yesteryear! Will you bring honor to your Ancestry?
- Ancestral Token: Begin the game with any one piece of Gear.
Leveling Up
During a Session, Heroes can earn enough XP and Keys to Level Up.
- At the beginning of a Campaign, all Heroes are Level Zero.
- XP and Keys are spent on your turn to gain the next Level. Discard spent Keys.
- You must gain Levels in order, you may not skip Levels.
- When you gain a Level, you earn 1 piece of Gear.
- When a Session ends, Heroes keep their current Level for the next Session.
| Level | Cost |
|---|---|
| Level 1 | 3 XP and 1 Key |
| Level 2 | 5 XP and 2 Keys |
| Level 3 | 7 XP and 2 Keys |
Gaining XP & Keys
To gain XP, you must defeat Monsters!
- 1 XP is awarded to the Hero who defeated* the Monster.
- XP cannot be given or traded to other players, and do not take up Inventory slots.
- *The Adventurer's Hero Ability is not "defeating a monster", so no XP is gained in this instance.
To gain Keys, move your Hero so that a Key is within your Hero's Circle Of Sight.
- Keys may be given or traded to other Heroes. This counts as using an Item for your turn.
- Keys do not take up inventory slots, and taking them does not count as taking an Item when you resolve tiles. They are taken automatically.
New Monsters
- Winged Shrieking Eel: When taking damage from the Winged Shrieking Eel, do your best impression* of an underwater creature! *Don't shriek like an Eel if you're in a Library, or similar 'noise sensitive' situation. In those cases, simply make a funny face, and utilize silly hand motions.
- Red Beholder: When revealed, any Hero in direct line of sight across the entire Dungeon Floor (the four cardinal diections) needs to make a "saving roll".
- Green face: You are safe!
- Yellow flash or Red Skull: Lose 1 Heart.
- Acid Slimer: When revealed, the Hero is Poisoned. they take the Poison Effect Token. Poison! Roll on your turn:
- Green face: Cure Poison Effect.
- Yellow flash: No result.
- Red Skull: Lose 1 Heart.
- A Potion can cure this Effect.
Gear
When a Hero gains a Level, they may select* a piece of Gear as their reward. Heroes can only have three pieces of Gear during a Campaign. Heroes keep Gear between Sessions. Gear is bound to the Hero that gained it, and it may never be traded, given, or sold. Some Gear requires a Cool Down of one or more Rounds before it may be used again.
*Hardcore players gain Gear randomly.
- Torch: On Your turn, peek at any 1 tile that is 1 space beyond normal Circle Of Sight. After peeking return that tile face down.
- Shield: Prevents the loss of 1 Heart during combat. Cooldown: 2 Rounds.
- Boomerang: Stun one Monster for a single turn. Stunned Monsters don't fight or run if you miss your attack. If you miss your attack, fight the Monster as normal.
- Grapple Shot: Snatch and hold an Item or Spell from the Dungeon Floor. Held items can be placed into Inventory if there is room. Grapple Shot may only hold 1 tile at a time. May be used once per round.
- Bed Roll: To use Bedroll, first move one space. The rest of the your turn is forfeit. On your next turn, reveal 1 tile in your Circle Of Sight. If it is a Monster, it must be fought and your rest was not successful. The Hero rests successfuly if the tile was anything but a Monster or a Trap. A successful rest restores 1 Heart. Cooldown: 1 Round.
- Spell Tome: Keep up to 2 Memorized Spells in the Tome. Memorized Spells do not count towards Inventory limits. Do not discard Memorized Spells when used. One Memorized Spell may be used on another Hero's turn, only if it was not used during your turn. Cooldown: 2 Rounds.
- Hero Cape: When gained, gain 1 Heart. Wearer has 1 additional Heart. (Max 4 Hearts)
- Magic Ring: Spend 20 Gems for 1 Item or Spell from the Discard Pile. Cooldown: 2 Rounds.
- Holy Water: Use before fighting a Monster. Prevents the effects of a Critical Miss. May be used once per round, and on another Hero.
- Makes a Monster sleep for 1 Round. Heroes may move past sleeping Monsters without engaging it in a fight. When the Monster wakes up, any Heroes in its Circle Of Sight must fight it on their turn, otherwise place it in the Monster Pile. May be used once per round, and only on another Hero's turn.
Hero Hats
The wearer of a Hero Hat may also use the ability of that Hero. A Hero may only wear one Gear Hat. Abilities of Hero Hats don't stack. For example: An Archer wearing an Archer Cap may not reroll the die twice.
- Warrior Helmet
- Archer Cap
- Wizard Hat
- Rogue Hood