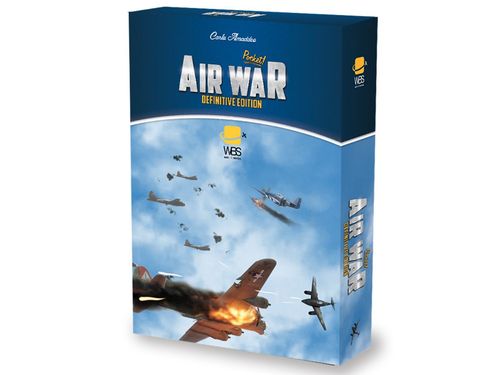
Pocket Air War: Definitive Edition
Pocket Air War: Definitive Edition Rulebook
Table of Contents
Table of Contents
Game Overview
Pocket Air War is a fast-paced game of aerial combat in WWII that you can play anywhere. Before each game, players can choose between a quick battle, a scenario, or a campaign, and then select the plane(s) they want to control.
Components List
- 279 Counters
- 70 Plane Dashboards
- 5 Turning Templates
- 3 Machine Gun Range Templates
- 74 Yellow Energy Tokens
- 8 Red Low Altitude Discs
- 15 White High Altitude Discs
- 1 20-sided die (1d20)
- 1 Rulebook
Core Concepts
Planes
Planes are the core of the game: they fly and fight until one side achieves its mission objectives!
Each plane is represented by a counter, which is used to track the plane's position and orientation.
The counters are double-sided: the back side is used when the plane is damaged.
Energy
Each plane has an Energy value, which represents its Movement potential: with a lot of Energy, you can go far or you can go high!
Contrary to other values, like Acceleration or Durability, Energy changes often, even several times during a single turn! Indeed, the plane will gain or lose Energy as it evolves in the sky.
To keep track of the Energy, you use yellow Energy tokens, kept in separate piles (one for each plane) next to you. Simply add or remove tokens as the Energy is gained or lost.
Beware, a plane without any Energy will stall at the beginning of its round (see page 7).
A plane can't have more than a certain value of Energy (otherwise, it would eventually turn into a fireball!). It is called the max Energy, and each plane has two values of max Energy: one for when the plane is undamaged and another for when it is damaged.
Planes carrying bombs, rockets, or torpedoes (see pages 10 and 12) have their max Energy limited to the damaged value (whether they are damaged or not) until they have gotten rid of all their loads.
Aircraft Dashboards
Each plane has a specific Dashboard, which is the main tool for controlling a plane, providing all necessary information. It is also used to measure distances during Movement and Combat.
The Dashboard includes:
- Acceleration: the plane's ability to gain Energy.
- Deceleration: the plane's ability to lose Energy.
- Size: the plane's size as a target.
- Durability: the plane's ability to sustain damage.
- Max Energy: the highest Energy values when undamaged (white) and when damaged (red).
- Best turning value: the plane's ability to turn for each speed value. The letter refers to a specific Turning template (from A to E).
- Hit Threshold (Roll to Hit/Kill): the minimum value the plane needs to roll on the black d20 to hit its target.
An additional Dashboard is provided for Flak and AAA.
Altitude (Optional)
A game of Pocket Air War is played on a flat, two-dimensional surface. However, in reality, planes use the third dimension.
To represent the third dimension, the game uses a simple Altitude system: a plane can be at Low, Standard, or High Altitude.
Low Altitude is mainly used to attack ground targets with guns, rockets, or torpedoes. Standard Altitude is the main flight level of the game, where any normal operation takes place. High Altitude is mainly used by strategic bombers, and fighters trying to intercept them. Moving between Altitude is also a way to gain an advantage over enemy planes.
A damaged plane can't fly as high as it would normally (see page 6).
To indicate a plane's Altitude, place a red disc next to its counter for Low Altitude and a white disc for High Altitude.
Since Altitude rules can add too much complexity while learning the game, even for some experienced players, they are optional.
If you decide to play without the Altitude rules, the changes are:
- Climb and Descent are unavailable (see page 6)
- A plane that Stalls is destroyed (see page 7)
- Actions available "only at [Low/High] Altitude" are always available
Crew Skills (Optional)
Each plane has a crew, whose experience can greatly impact combat. An experienced pilot maximizes the plane's abilities and reacts faster and more effectively in battle.
There are three levels of crew skill: Rookie, Trained, and Ace. Use markers to track the skill level of each plane. There is no "Trained" marker because it is the default crew skill.
Crew skills are important in Solo play (see page 32) because they influence the AI's ability.
A Skill marker features two values used in Multiplayer mode: the Crosshair value and the Energy Token value. The Crosshair value modifies the Hit threshold: for example, a Hit Threshold of 12 is modified to 14 for a Rookie pilot. The Energy Token modifier adds (+1) or subtracts (-1) one Energy Token from the max available Energy Tokens pool for a plane, depending on the pilot's skill.
Since it adds complexity and additional bookkeeping, Crew Skills and their associated rules are optional.
Movement
Using its Movement points, a plane can move on the board in various ways, called maneuvers, which are explained in this section.
Movement Points
Movement points are used to move the plane.
A plane's movement allowance for a round is equal to the number of Energy tokens in the plane's energy pile at the beginning of that round.
However, a plane can increase or decrease its current Energy according to its Acceleration or Deceleration value, before moving. Since this occurs at the very beginning of a plane's round, it impacts the Movement allowance.
If the plane gains or loses Energy during its round due to its maneuvers, it doesn't affect its Movement points for the current round.
The Movement points are spent to move the plane in various ways (see below).
The plane must spend its entire Movement allowance during its round.
General Procedure
When Moving, a plane can use either the Movement ruler on the Dashboard or a Turning template. For ease of use, Dashboards and Turning templates have the same information printed on their reverse side. This mirroring allows you to align the plane on either the right or left side, depending on whether you're turning left or right or if one side of the plane is obstructed by other game elements.
In both cases, start by aligning the plane's side mark with the first mark on the ruler/template (indicated by an arrow). Then move the plane to align its mark with the next mark. That's called a "step". Repeat as long as you want and can (each step costs 1 Movement point).
A plane can combine different maneuvers during its turn without any conditions or restrictions, as long as it has Movement points to spend. Use the Energy tokens to keep track of the Movement points spent and the changes of Energy as the maneuvers go on.
Mind that whenever you lose Energy you must discard Energy tokens from your pile; anytime you gain Energy, you must add Energy tokens to your pile. However, these Energy variations will affect next round and not the current movement allowance.
If a plane already has as many Energy tokens as its max Energy and intends to perform a maneuver during which it would gain Energy, it can still perform that maneuver but doesn't gain more Energy.
If the plane intends to perform a maneuver during which it would lose more Energy than it has, it can't perform that maneuver, unless the pilot intentionally wants to stall the plane (see page 7).
Level Flight
Level flight consists of flying in a straight line.
Move the plane any number of steps you want.
Each step costs 1 Movement point.
Turning
Turning consists of flying along a curved trajectory.
You can choose any Turning template whose letter is equal to or greater (e.g. B is greater than A) than the letter written on your Movement ruler next to your current Energy. For example, if the letter next to your current Energy is C, you may choose the C, D, or E template.
Move the plane any number of steps you want.
Each step costs 1 Movement point.
The plane loses 1 Energy each time it reaches or crosses a mark with a yellow circle. In general, tighter turns (smaller letters) cost more Energy.
Examples of Turning
A Spitfire starts its round with a Movement allowance of 6. Since it currently has 6 Energy, its tightest turning template is C. Its player considers different ways to use its Movement points:
-
Use the Turning template C and spend all its Movements points. The plane would lose 3 Energy from it starting pile.
-
Use the Turning template D, which makes a wider turn and lose less Energy. That would cost 2 Energy (remove 2 Energy tokens from its pile).
-
Turn left, using the Turning template D, spending 3 Movement points and losing 1 Energy, then Turn right, using the Turning template C, spending 3 Movement points and losing 2 Energy, for a total of 3 Energy tokens lost.
Wingover
A Wingover consists of quickly turning around.
Move the plane in a straight line at least until you reach the mark indicated by the Wingover icon, then rotate the counter 180°.
Each step costs 1 Movement point, the rotation is free.
The plane loses as much Energy as the value next to the mark indicated by the Wingover icon.
If the plane is damaged and can't reach the icon or there is no relevant icon on its Dashboard, it can't perform a Wingover.
Side-slip
A Side-slip consists of drifting left or right.
Move the plane in a straight line at least until you reach the mark indicated by the Side-slip icon, then move the plane from a step on the movement ruler to the closest step ahead on the combat ruler.
The plane loses as much Energy as the value next to the mark indicated by the Side-slip icon.
Movement Between Altitude Levels
If you play without Altitude, skip this section: you can't (and don't need to) use these maneuvers.
Climb
A Climb consists of moving the plane to the next Altitude level above.
Move the plane in a straight line at least until you reach the mark indicated by the Climb icon, then place or remove the relevant Altitude disc accordingly. You may replace the last step of the straight line with one step of any Turning template.
The plane loses as much Energy as the value next to the mark indicated by the Climb icon.
Example of Climb. A Spitfire starts its Movement phase at Low Altitude with a Movement allowance of 5. To climb at Standard Altitude, it moves 3 steps straight and loses 3 Energy. The player removes the Low Altitude disc. It still has 2 remaining Movement points to spend.
Descent
A Descent consists of moving the plane to the next Altitude level below.
Move the plane in a straight line at least until you reach the mark indicated by the Descent icon, then place or remove the relevant Altitude disc accordingly. You may replace the last step of the straight line with one step of any Turning template.
The plane gains Energy up to its max Energy.
Example of Descent. A Spitfire starts its Movement phase at High Altitude with a movement allowance of 5. To descend at Standard Altitude, it has to move at least 3 steps (Descent icon). It moves 2 steps straight and 1 step using the A Turning template. The player removes the High Altitude disc. The next turn's movement allowance is 6.
Stall
A stall happens if the plane has 0 Energy at the beginning of its round. It doesn't matter if the Energy was lost intentionally or not.
If you play without the Altitude rules, the plane is destroyed and the crew is killed as it crashes.
If you play with the Altitude rules, the plane moves to the next Altitude level below (adjust the Altitude disc accordingly), but its counter doesn't move. If it was already at Low Altitude, it crashes on the ground.
Then, if not crashed, the plane gains half its max Energy (rounded down) and its round ends.
A plane that stalled during its Movement Phase can't do anything during the Combat Phase (see page 15).
Stall can be voluntarily induced to shake an opponent off your tail, provided you are playing with Altitude and you are not flying at Low Altitude.
Combat
Every round, planes have the opportunity to attack and be attacked by other planes, ground targets or ships. This section describes how these attacks work.
There are 3 kinds of targets:
- Planes, which can be attacked with Guns, Gunners and Air-to-air rockets.
- Ground targets, which can be anything from a tank to a bridge. They can be attacked with Guns, Bombs, and Air-to-Ground rockets.
- Ships, which are similar to ground targets, but can also be attacked with torpedoes.
A core tool for attacking is the Combat ruler, which is the left part of the Dashboard (see page 3). All the information needed for attacking is there.
Golden rule: each weapon the plane has (guns, gunners, bombs, etc.) can only attack one target per round, even if multiple targets are in range. You can choose freely which target to attack with each weapon. You don't have to attack the same target with different weapons, but you can.
Guns
Most planes are equipped with one or several gun(s) and/or cannon(s) (from hereafter, "guns"). These are mounted in the plane and can't pivot. Therefore, they shoot straight ahead.
A plane has guns if its Combat ruler is grey (even partially). Be sure to look only at the Combat ruler, not the Movement ruler, or any other part of the Dashboard.
Acquiring the target
You can attack planes and ground targets with your guns. If you attack a ground target, it's called Strafing and it has minor differences, which are clearly indicated.
To shoot at a plane with guns, place the Combat ruler next to your plane, aligning the red arrow with the upper edge of the plane counter. The rectangle defined by the upper edge of the plane counter and the Combat Ruler upper limit (see the red striped rectangles on the picture) is the shooting area. If the target is at the same Altitude as the shooting plane and has any part of its counter within the shooting area, then you can shoot at it.
Strafing exception: You can only Strafe at Low Altitude.
Shooting at the target
If the plane has a target within its guns' range, measure the distance between them with the Combat ruler. It is the distance between the plane counter and the projection on the Combat ruler of the closest part of the target counter (see the examples of combat).
The black value next to the grey box of the Combat ruler for this distance is the Hit Threshold.
Roll 1d20, then add to the die result the Size value of the target (printed on target's Dashboard), as well as any other optional combat modifiers (see below). If this modified result is equal to or higher than the Hit Threshold, you hit and damage your target! Otherwise, you miss it.
Strafing exception: Instead of applying the Size value of the target, modify the die result by its Strafing Defense value (see below).
Note: modifiers are always applied to the die result and not to the Hit Threshold.
Planes equipped with cannons feature a Kill Threshold on the Combat ruler, next to the Hit Threshold.
If the result is equal to or higher than the Kill Threshold, the target is immediately destroyed, no matter the damage model used (see below) or its Durability (see page 3).
Mind also that a roll of 1 or 20 can never be modified.
Air-to Air Guns combat modifiers (OPTIONAL)
Target's aspect. Engaging targets from the side or head-to-head is more difficult than shooting them from the rear. If you want a more realistic, but more complex and longer gameplay, add the following modifier to the die result:
- Side attack: -2
- Head-to-head attack: -1
- Rear attack: 0
To define the target aspect, refer to the corners of the target's counter. If the attacker is positioned between two aspects, check which sector contains the majority of the attacker's counter. If it's still unclear, use the side aspect modifier.
Dive attack. If the plane performed a descent during the current round, add 2 to the die result.
Crew Skill. Apply the Crosshair modifier printed on the Crew skill token of the firing plane to the Hit Threshold.
Damage Assessment
General rules
If the result is equal to or higher than the Hit Threshold, then the target is damaged. The consequences depend on the damage model you chose and are explained below.
Strafing exception: anytime a ground target is hit, it's destroyed, no matter the damage model used.
Example of Strafing. An Me-110 strafes the Foreness's radar station, near Dover. At this distance, the Hit Threshold is 7. The German rolls 1D20 and gets a 15. Even applying the radar station Strafing Defense value of -2, the roll is higher than 7, destroying the ground target. While strafing any scored hit is treated as a destroyed result.
Basic damage model
The basic damage model is great at keeping the game simple and fast by destroying planes faster.
When using this damage model, whenever a plane receive damage, flip it to its Damaged side. If it is already on its Damaged side, the target is destroyed and removed from the game.
Damaged planes:
- Halve their Acceleration value (rounded up)
- Can't fly at High Altitude. If a plane was flying at High Altitude when it was damaged, it must reach an allowed Altitude within its next turn. Otherwise, it will lose all its Energy and stall. (see page 7).
- Their max Energy value is now the Damaged (red) one.
Example of Combat using the Easy damage model. A Spitfire I attacks a German Me-110 during the Battle of Britain. The target is acquired, since it is in front of the Spitfire. At this distance, the Hit Threshold is 11. The Briton rolls 1D20 and gets a 11, not enough to hit the German because, although the 110 Size is 0, the -2 aspect modifier reduces the result to 9. The Spitfire had to roll at least 13 to hit!
If the Briton had rolled a 13, damaging the Me-110, the German player would have to flip his plane to its damaged side.
If the positions were reversed, with a roll of 7+ the Me-110 would have damaged the Spitfire as well, but with a roll of 20 the Spitfire would have been shot down right away, since a roll of 20 cannot be modified.
Advanced damage model (OPTIONAL)
The advanced damage model is great at making the fights more realistic: sometimes, the first hit could be critical, while other times, a plane could be hit many times and still fly. Moreover, the hit location would cause different kinds of failures or limitations, which the advanced damage model simulates.
Each time a plane is damaged, check the aspect of the target plane (i.e. "where do the bullets come from").
As soon as the plane loses one point of durability, flip its counter to the damaged side.
Draw randomly one damage marker from the corresponding category: front (F), side (S) or back (B). These markers have one generic front side, indicating to which aspect they belong to and, on the back side, is indicated which component of the plane has been damaged. The effects of the damage are specified by icons which are explained below.
Keep the drawn damage markers close to the plane's Energy tokens pile, to remind the penalty the plane is suffering. Damage can't be repaired during the game and they are cumulative. Each damage token features a number of heart icons: when the sum of these icons exceeds the aircraft Durability value (printed on its dashboard), the plane is destroyed and the tokens are returned to their respective bag/cup/pile.
Effects are cumulative. If the same component is hit multiple times, the effects are combined. For example, if the aileron is hit twice and the first effect is Can't turn right, and the second effect is Can't turn left, the plane can no longer perform any turns on either side.
Below some effects icon examples:
- Can't Climb.
- Can't Wingover.
- Acceleration is reduced by this value.
- Can't Right Side-Slip.
- Can't turn left.
- Hit Threshold is modified by this value.
- Gunners are affected.
- H: Can't fly at High Altitude.
- The tightest available turn is D, no matter the current Energy.
- The max Energy is modified by this value.
- Crew or gunners killed.
Gunners
Some planes have gunners, which are dedicated crew members manning machine guns able to pivot to attack enemy planes in a large area around the plane.
A plane has gunners if its Combat ruler is orange (even partially). Be sure to look only at the Combat ruler, not the Movement ruler, or any other part of the Dashboard.
Acquiring the target
To shoot at an enemy plane with gunners, check the type and position of the Fire templates. It can be found on the plane's Dashboard. To help you identify the type, you can refer to the letter G1, G2, or G3 printed on it.
Place the relevant Fire template at its position: align the mark on the plane's counter and the Fire template. If the target is at the same Altitude as the shooting plane and has any part of its counter within the Fire template, then you can shoot at it.
Shooting at the target
If the plane has a target for its gunners, measure the distance between them with the Combat ruler. It is the distance between the mark on the plane's counter from which the gunner put its Fire template and the closest part of the target counter.
The black value next to the orange box of the Combat ruler for this distance is the Hit Threshold.
Roll 1d20, then add the Size value of the target to the die result (along any optional modifier). If this modified result is equal to or higher than the Hit Threshold, you hit the target! Otherwise, it was missed.
Damage assessment
The Damage assessment for Gunners is the same as for Guns (See page 8).
Example of Combat with Gunners and detailed damage. The German Me-110 has guns firing forward (as indicated by the grey strip on the Combat ruler) and a rear gunner, as indicated by the orange strip on the Combat ruler: it covers the rear sector with a Fire template G2. As a British Spitfire tries to attack the German from behind, it ends up in the Gunner's Fire template.
Using the Combat ruler positioned on the Gunner's mark, the player learns that the Hit Threshold is 14. The gunner will need a roll of 16+ to hit, considering the Spitfire Size value of -1 and the frontal aspect modifier that add another -1. It won't be an easy shot, but at least the Me-110 is not totally defenseless. In case the German gunner hits the Spitfire and detailed damage model is in place, the Briton would flip a Front Damage marker, since the fire comes from its nose.
Ordnance
Dashboards show the ordnance carried by each plane. It can be rockets (either Air-to-Air or Air-to-Ground), bombs or torpedoes. Planes can carry only one ordnance at time, except for the Heinkel 111 that can carry 2 torpedoes.
Planes carrying ordnance are "loaded" and their max Energy can't exceed the red value on their Movement ruler, as if they were Damaged, as long they haven't release their ordnance.
Players take the relevant Ordnance marker during the setup and discard it when they release their ordnance.
Rockets
Planes featuring on their Dashboard a dark plate, marked with "AA" and the rocket icon can carry Air-to-Air rockets (or A-A rockets), used to attack aerial targets.
Planes with the rocket icon on a light plate marked with "AG" can carry Air-to-Ground rockets (or A-G rockets), used to attack ground targets.
A plane can carry either A-A or A-G rockets, but not both: players have to select the correct ordnance before the start of the game, taking the relevant Ordnance marker. They may also choose to start without rockets.
Players can use A-A rockets when attacking aerial targets with guns, and A-G rockets when attacking ground targets by strafing, to get the bonus printed on the corresponding plate on their die roll. The use of rockets must be declared before resolving an attack.
A plane can shoot its rockets only once per game. When it does, discard its Rockets marker to keep track of it.
Example of Strafing with Rockets. A USN Helldiver loaded with A-G rockets strafes a bunker in Ryukyu Islands. At this distance, the Hit Threshold is 9. The Helldiver is determined to destroy this bunker, so it uses its rockets to balance the Defensive modifier of the target. It rolls 1D20 and gets a 12. The rockets' modifier is +3, balancing the bunker's Defense of -6. 9 is enough to hit the bunker and destroy it.
Bombs
Some planes have bombs, used to attack ground targets. Only planes with the bomb icon or the dive-bomber icon on their Dashboard can carry bombs. However, depending on the scenario, they may start without bombs.
The dive-bomber icon represents a dive bomber. It works similarly to a regular bomber, but one exception detailed below.
The black values below the bomb icon are the Hit Threshold. If a ground target is hit, it is also destroyed.
Dropping bombs. A bomber must be at a specific Altitude to drop its bombs. Check above the Hit Threshold values:
- If there is a white dot, it's High Altitude.
- If there is no dot at all, it's Standard Altitude.
- If there is a red dot, it's Low Altitude.
To bomb a target, the plane must cross any part of the target's counter while level flying at the correct Altitude. Roll 1d20, then add the Bombing Defense value of the target to the die result. If this modified result is equal to or higher than the Hit Threshold, the bombs hit and destroy the target.
Dive bombers exception: dive bombing allows better chances to hit. To dive bomb, a plane must cross any part of the target counter while performing a descent to Low Altitude (see page 6). Then resolve the attack as for level bombing.
A plane can drop its bombs only once per game. When it does, discard its Bombs marker to keep track of it.
Example of Bombing. A German Ju-88 level bombs a RAF airfield at Standard Altitude. It crosses the target's counter in a level flight at Standard Altitude, dropping its bombs. It rolls 1d20 to see if it hits. The die result is 12, to which he adds the Defense value of the target which is -3. The final result is 9, lower than the Hit Threshold of 10. Therefore, the target is missed!
If the same plane attempted a dive bombing, things would have unfolded in a very different way. It descents to Low Altitude and crosses the Airfield counter. At the end of the descent, the player puts a Low Altitude disc next to the Ju-88 counter and he resolves the attack. The same result as above, 9, this time it would be enough to destroy the airfield, since the Hit Threshold for dive bombing is 8.
Torpedoes
You can use Torpedoes to attack ships. Only planes with the torpedo icon on their Dashboard can carry torpedoes. However, depending on the scenario, they may start without torpedoes.
Releasing torpedoes. To attack a ship with a torpedo, the plane has to release the torpedo and then the torpedo has to intercept the target, running straight ahead. Thus the torpedo must be aimed at the target considering its course.
To release a torpedo, a plane has to spend its entire Movement Allowance in level flight at Low Altitude. Then, place a torpedo marker right in front of the plane. If the torpedo marker overlaps a ship at the moment it is released, remove it from the game without effect: it hadn't had enough time to arm itself.
From there, the torpedo is independent of the plane. With the only exception of the He-111, a plane can release its torpedoes only once per game. When it does, discard its Torpedoes marker to keep track of it.
Torpedo movement. When a torpedo moves (see page 15), it moves 1 step straight ahead.
If a torpedo marker overlaps a ship counter while moving, resolve the impact (see below). Otherwise, the torpedo stays on the board and will move during the next rounds, until it hits a ship or exits the play area.
Torpedo impacts a ship. The black number below the torpedo icon on the Dashboard is the Hit Threshold.
Whenever the torpedo marker overlaps a ship counter while moving, roll 1d20, then add the Bombing Defense value of the target to the die result. If this modified result is equal to or higher than the Hit Threshold, the torpedo hits the ship and sinks it. Remove the torpedo marker, no matter the result of the attack.
Example of torpedo attack. A USN Helldiver intercepts a Japanese Battleship during the Battle of Leyte Gulf. The Helldiver is already at Low Altitude, so it can fly its entire Movement Allowance in a level flight to release the torpedo.
During the next round, the ship attempts to evade the incoming attack, turning to port (left), using the E Turning template, as indicated on the Battleship's counter. However, as the torpedo moves, it overlaps the ship: impact! To be sure to sink the Battleship, nonetheless its Defense Value of 5, the Helldiver player now must roll a 10+ in order to achieve a modifed roll of 5, the required Hit Threshold.
AAA
Anti-Aircraft Artillery, hereafter AAA, are weapons designed to attack planes from the ground. They can be stationary guns, mounted on vehicles, or attached to another ground or naval counter.
When the AAA wants to attack a plane, it behaves exactly like a plane's Gunner (see page 9). The only difference is that the target must be flying at Low Altitude.
A AAA Dashboard is provided for all the stats and references: note that on the left is provided the combat ruler for Troop counters and on the right the combat ruler for all the others armed counters.
Flak
Flak represents heavy anti-aircraft artillery. Contrary to the AAA, it doesn't rely on hitting directly the planes with bullets but instead fires shells which detonate at a certain altitude and fill the area with shrapnel and hopefully hit the plane.
The following rules are unnecessary if the scenario doesn't include Flak.
There were different techniques, and the game provides two of them: Barrage and Continuously Point Fire. Only one technique can be used at a time, and the former is easier to use, so it is recommended for new players to ignore the latter.
Barrage
The idea of a Barrage is to prohibit enemy planes from entering a large area, most of the time to defend ground targets against bombers. The shells being fired in a large area make this technique less deadly, but it could cover large sections of the sky, making it particularly useful against large formations or unpredictable flying planes like dive bombers.
The Barrage can be set up during the last subphase of the Combat phase of a round (see page 15).
To set up a Barrage, place the 4 BRG Flak markers as follows:
- Ensure that each marker is at least 5 steps away from any enemy plane counter (using the shortest distance between them).
- Arrange the markers to form a square, with each corner being one of the BRG markers (note: all sides of the square must be of equal length).
- The distance between two markers must correspond to a given number of steps on the Flak Dashboard, measured from the red arrow.
- Place a white disc next to the markers if you want the Barrage to be at High Altitude, or use a red disc if you want to set Barrage at Low Altitude.
Any planes (including your own!) that began, flew through or ended their round within the square defined by the outer edges of the BRG markers and at the same Altitude are attacked once by the Flak during the first subphase of Combat as follows:
- Roll 1d20 and check the Flak dashboard.
- The Hit Threshold is given by the distance between 2 BRG markers.
- If you play with the advanced damage model, the attack comes from the side. But do not apply the side attack modifier if playing with the optional target's aspect rules.
In any subsequent round, during the last subphase, you can either:
- Leave the Barrage as is, OR
- Remove it from the board. To place a new one, you must wait for the next round.
Note: only one Barrage can be set up on the board at any time, no matter the number of units equipped with Flak.
Example of a Flak attack - Barrage. A German Ju-88 is participating in a large attack over London. It ends its movement within a Barrage area designated by BRG Flak markers. At the beginning of the Combat phase, the Flak owning player will resolve an attack against the Ju-88. He measures the distance between the Flak markers (from edge to edge) and checks the Hit Threshold: 15. The British player toss 1d20 and rolls 9. Even with the size modifier of the Ju-88 (+1) the flak can't hit the German bomber.
Continuously Pointed Fire
The idea of CPF (Continuously Pointed Fire) is to create a pattern of bursts along a plane's predicted flight path. CPF accuracy represents both its strength and its weakness: because the bursts are so concentrated, CPF fire is lethal, but it is also easier for a plane to dodge it completely compared to a Barrage.
The CPF can be set up during the last subphase of the Combat phase of a round (see page 15).
To set up the CPF, place as many CPF Flak markers as the units equipped with Flak (check the Flak Dashboard), as follows:
- Ensure that each marker is at least 5 steps away from any enemy plane counter (using the shortest distance between them).
- Place a white disc next to the markers if you want a CPF marker to be at High Altitude, or use a red disc if you want to set it at Low Altitude. Each marker is independent, so they can be at any distance from each other, and any Altitude.
Any planes (including your own!) that began, flew through or ended their round within 1 step of any CPF marker and at the same Altitude are attacked once per close CPF marker by the Flak during the first subphase of Combat as follows:
- Roll 1D20 and check the Hit Threshold on the FLAK - CPF Dashboard.
- If you play with the advanced damage model, the attack comes from the side. But do not apply the side attack modifier if playing with the optional target's aspect rules.
In any subsequent round, during the last subphase, for each CPF marker you can either:
- Leave the marker as is, OR
- Remove it from the board. To place a new one, you must wait for the next round, OR
- Move the marker one Altitude level up or down, OR
- Move the CPF marker up to 2 steps in any direction.
Switch between Barrage and CPF
In order to switch from one firing technique to the other, you must remove all the markers of the current technique when you are allowed to, and then place the new markers, following the rules above.
Example of a Flak attack - Continuous Pointed Fire. A British battery of coastal flak is aiming its Continuous Pointed Fire against a lone Ju-88. At the beginning of the combat phase the flak attack is resolved measuring the distance between the CPF Flak marker and any plane within its blast radius. However, the German bomber is outside the attack range of the CPF Flak marker. Unfortunately, a reckless Spitfire ends up in the blast radius of the flak: with a roll of 19, not only the Spit is hit, but it is even destroyed by friendly flak fire!
Gameplay
Setup
A game of Pocket Air War takes place on a play area, which is any flat surface you want! For your convenience, we provide on our website www.gameshop.wbsgames.com 4 different play mats specifically designed for Pocket Air War.
Even though a very small play area may not be fit for all kinds of missions (a long-range bombing where the ground target is one round away from the bomber's starting position for example), you can always have fun with Pocket Air War, even on the corner of a table!
Each player chooses one or several planes, depending on the kind of mission you want to plan, and takes:
- The chosen plane(s) counter(s).
- The chosen plane(s) Dashboard(s).
- Enough Energy tokens for the planes, i.e. as many tokens as the total of Max Energy of all planes.
- 1 red and 1 white Altitude disc per plane (if you play with the Altitude rules).
If playing with the Advanced damage model, sort the Damage markers according to the target's aspect (front, side, back) and collect them in separate piles or cups. Keep them within reach for easy access during gameplay.
Structure of a Game
A game of Pocket Air War is divided into rounds. Each round is made of two phases: the Movement phase and the Combat phase.
Initiative
The order of Initiative determines who moves first during the Movement phase (see below).
To determine the plane that has the highest Initiative (therefore moves first), check the following conditions from top to bottom. When two planes are tied for a condition, check the following one:
- The least Energy.
- The lowest Altitude.
- The plane of the faction with more planes.
- Lowest result from a 1d20 roll.
Exception: if a plane starts the round with an enemy plane in its front sector, within firing range from it, at the same Altitude and in the enemy's rear quarters, then it is tailing it. The tailing plane moves directly after the tailed plane, ignoring its normal Initiative order.
Example regarding Initiative. During the Battle of Britain, a German Me-110, a Ju-88 and a British Spitfire are engaged in a dogfight. They have respectively 5, 4, and 4 Energy, and are all at Standard Altitude. Therefore one between the Spitfire and the Ju-88 should move first. Having the Germans more planes in flight than the British, the Ju-88 will move first, followed by the spitfire. The Me-110 will move last, having the highest Energy.
However, if the Spitfire was flying at a Low Altitude, it would have moved first, since Altitude has a higher priority than factions' number of planes.
In an alternative scenario, the Spitfire is flying faster at Low Altitude tailed by a slower Me-110. Either the Ju-88 and the Me-110 should move first, having the least Energy, with the 110 goings first being at lower Altitude. However, since it's tailing the Spitfire, no matter its Energy, the Spit must go before the 110. Check below the correct order:
Movement Phase
The first phase of a round is the Movement phase. One by one, each plane moves in order of Initiative. Ground targets' owner side, can move its moving targets at the end of the Movement phase, one time per round (see page 15).
When it's a plane's turn to move, before moving (after having selected the maneuver for AI planes, see page 33), it can gain or lose Energy, up to its Acceleration/Deceleration value.
After doing it, check if the plane stalls (see page 7). If not, determine its Movement Allowance for this round (see page 4).
Then, the plane has to use all its Movement points, combining maneuvers freely (see page 4).
If the plane drops ordnance (see page 11), resolve the attack at the end of the current maneuver.
When it has spent all its Movement points and resolved the bombing, if any, its round is over, and the next plane in order of Initiative takes its round.
When all planes have taken their round, the Movement Phase ends and the Combat phase begins.
If two or more planes at the same Altitude are overlapped at the end of the Moving Phase, there is a collision and they are all destroyed.
Combat Phase
During the Combat phase, all the planes can use their weapons to attack each other.
There are 3 subphases of Combat, which occur in a defined order. Resolve all the attacks from one subphase before resolving the next. It means that a plane destroyed during a subphase cannot attack in a subsequent subphase. However, within one of these categories, all attacks are simultaneous.
The subphases are:
- Attacks from AAA and Flak (see page 12).
- Air-to-air and air-to-ground attacks (see page 7).
- Torpedoes and Flak movement/placement (see page 12).
When all the torpedoes movements are done and the impact resolves, the round ends and another one begins.
Ground Target Movement
Some ground targets are stationary (like a bridge), and some can move. Only targets with a letter referring to a turning template on their counter can move.
The owner of the ground targets can move in the order of his choice every non-stationary ground target. Ships must move.
When a ground target moves, the player who owns it can move it 1 step either straight ahead or turning. To know which Turning template to use, follow the same rule as for planes (see page 4), based on the letter printed on the counter.
Time Freeze (Optional)
Time Freezing is an optional advanced rule set that enables opportunity fire during the movement phase. The idea is to break down the whole movement into smaller fractions, during which the planes can pick up the best firing opportunity.
Any player can initiate a Time Freeze for one of their planes, provided the plane hasn't moved yet (even partially).
Any plane within one Dashboard from the original plane that haven't moved yet must take part to the Time Freeze.
Any player can also designate any other planes to join the Time Freeze, as long as they are within one Dashboard from any involved plane and they haven't moved yet.
Refer to the Time Freeze table (page 35): there are 10 rows, labeled 1 to 10, which refers to the Energy a plane has at the beginning of the Time Freeze. There are also 10 columns, labeled a to j, corresponding to each Movement interval, or impulse.
Check each column one by one, from "a" to "j". For each colored cell of the column, check if one or more participating planes have the corresponding starting Energy. If so, these planes move. If more than one plane move, use the usual order of initiative to break ties. For example, at impulse "a" will move any aircraft with a starting Energy of 7 or more. At impulse "e", only planes with a starting Energy of 2, 4, 6, 8 and 10 will move.
When a plane has to move, it moves exactly one step. As usual, it can perform turns or special maneuvers, but one step at a time.
Another way of explaining it is from a given plane's perspective. Following the row corresponding to its starting Energy, it moves one step each time there is a colored cell, and don't when the cell is blank. It can fire at each cell, after all the planes have moved.
When all the planes in a given column have moved, all the participating planes can fire if they want to. As usual, each weapon can fire only once per round.
Example of Time freeze. An Me-262 and a P-51D are flying head-on. The American pilot anticipates he might find a fire solution against the German, before ending his movement within the deadly range of fire of the Me-262. The P-51 has a starting Energy of 5, while the Me-110 has 8. The American pilot calls for a Time Freeze.
Following the standard initiative, during impulse "a" (column "a") only the 262 moves one step. In impulse "b", the P-51 moves its first step and the German stands still, to move his second step on impulse "c". On impulse "d", both planes move, following the initiative: the P-51 flies its second step and the Me-262 its third.
At this distance, the Me-262 is within the shooting range of the P-51, but not vice-versa: the American pilot resolves the attack against the German, but misses.
Now, the two planes complete their movements: the P-51 has to move out the guns scope of the 262 as soon as possible. Too bad that on impulse "e" only the German moves, closing enough to open fire against the P-51, unable to fire back, having already fired on the previous impulse. The result is a 3 hits (hearts) damage for the P-51 which is being shot down. Having no counterparts for the Me-262, the Time Freeze is over and the German plane can complete its movement spending the remaining movement points as usual.
During the next Combat phase, the Me-262 will not be allowed to open fire. However, its gunner, who didn't fire during the Time Freeze, would be allowed to fire during the Combat phase.
Mission Generator
Introduction
The mission generator helps you create random scenarios to add excitement and longevity to the game. It can be used for a single mission or to generate random missions throughout a Campaign (see page 20).
To create a scenario, you need to follow these steps in order:
- Determine the Mission Type.
- Select the Planes.
- Set up the game.
Mission Type
You can select a mission type for a single game or a campaign, either by choice or at random, rolling on the table below.
| Roll | Mission |
|---|---|
| 1 - 6 | Close Air Support |
| 7 - 15 | Strategic Bombing |
| 16 - 20 | Fighter Sweep |
For historical campaigns, specific mission tables are provided, offering thematic and historically accurate missions types. You can roll on these tables if you want to add historical flavor to your campaign.
Planes Selections
If you are playing a campaign, or you want your scenario to take place in a specific historical setting, refer to the Planes Availability Chart of the relevant campaign. Otherwise, you can choose planes from any factions and dates.
For a balanced game, make sure that the total Victory Points (VP) of each sides' planes are as equal as possible. You can voluntarily give more VP to one side to have a greater challenge, or want to compensate for a difference of skills between players. VPs are listed on the Planes Availability Chart of each campaign.
General Setup for a Game
Playing area
To play Pocket Air War, use any flat surface. There are no specific dimensions for the game area, but smaller areas result in shorter, less tactical games, while larger areas allow for longer gameplay. You can play on a bar's table, on a bench, or on the living room oak table!
Then, designate one half of the playing area as the Allied side and the other as the Axis side.
Playing mats are available at WBS Games website for a more immersive and standardized gameplay experience. The mats feature stunning artwork depicting the sky, sea, countryside, and sandy coastline.
General Deployment
To determine how the engagement begins and how the planes are deployed (e.g., if one faction is ambushed), both factions roll 1d20, adding 1 to the result for each plane they have (the larger the force, the less likely they are to be caught by surprise):
- If one faction scores double or more than the other, the latter is Surprised
- If one faction scores more than the other, the latter is Jumped
- If both factions have the same roll, make a Neutral set up.
Surprised. The Surprised faction (the lower score) deploys their planes first, within their own area, either at Low or Standard Altitude, at least 6 steps away from any edge, facing towards the most distant edge. Then, the opposing faction can deploy their planes at any Altitude and anywhere on the map, except:
- Within 5 steps of any enemy plane
Moreover, during the first round, all Surprised planes must spend all their movement points on level flight, without acceleration or deceleration.
Jumped. The Jumped faction (the lower score) deploys their planes first, within their own area and at any Altitude, at least 3 steps away from any edge, facing towards the most distant edge. Then, the opposing faction can deploy their planes at any Altitude and anywhere on the map, except:
- Within 6 steps of any enemy plane
- In the rear sector of any enemy plane.
Neutral. Each faction takes turns deploying one plane at a time (determine who goes first randomly).
Planes are deployed within their own area, at any Altitude, adjacent to the side farthest from the opponent's area, and facing towards the enemy.
Notes on deployment. Whenever multiple bombers of the same model are deployed, they must be in formation with no plane more than 2 steps away from another one.
Further details and requirements are provided by the mission briefing.
Mission Briefings
Close Air Support (CAS)
Enemy fighter-bombers (Attacker) fly-in at Low Altitude to destroy key targets, while defenders try to stop them.
REQUIRED PLANES: The attacker must select at least 1 fighter-bomber (check Availability chart for planes types). They must deploy at the lowest allowed Altitude.
LOADOUT: The fighter-bombers can be loaded with A-G rockets, bombs or torpedoes at the owner's choice. The loadout must be selected after the target has been defined, but before starting the mission. It cannot be changed in-flight.
TARGETS: The Defender rolls 1D20 in the relevant Target Table provided in the selected campaign.
VICTORY CONDITIONS: Depending on the selected target (see page 18).
Strategic Bombing
Enemy bombers (Attacker) approach their target at very high altitude to drop their payload. Defenders must stop them or at least hinder their bombing attempt.
REQUIRED PLANES: The attacker must select at least a formation of 3 bombers (check Availability chart for planes types). They must deploy at the highest allowed Altitude.
LOADOUT: The bombers are equipped with bombs.
TARGETS: The Defender rolls 1D20 in the relevant Ground Target Table provided in the selected campaign.
VICTORY CONDITIONS: Depending on the selected target (see page 18).
Fighter Sweep
Fighters are patrolling the skies to wipe any incoming enemy airplane out.
REQUIRED PLANES: The defender, the faction to which this mission is assigned, must select at least one fighter.
LOADOUT: Fighters can be equipped with A-A Rockets, provided the plane can carry them. It cannot be changed in-flight.
VICTORY CONDITIONS: The game ends when one faction has no planes left on the board, either due to being shot down or having exited. The faction that has shot down the most VP wins. However, if the most shot down VP is less than half of the initial VP, the game is ends in a draw.
Target Type
Bridge, Airfield, Factory, Railyard and Port
SETUP: Place the relevant target counters (typically 1 bridge/airfield/etc. and several AAA/Flak) within the defender's area, ensuring they are at least 4 steps from any edge and at least 2 steps apart from each other.
VICTORY CONDITIONS: Attacker wins if he destroys the bridge/airfield/etc. and at least one attacking aircraft (bombers or fighter-bombers) exits the map from its own edge. If the Attacker destroys the bridge/airfield/etc. but all the attacking aircraft are destroyed, the result is a draw.
Radars and Bunkers
SETUP: Place the relevant target counters (typically one or more radar/bunkers, and several AAA/Flak) within the defender's area, ensuring they are at least 4 steps from any edge and at least 2 steps apart from each other.
VICTORY CONDITIONS: Attacker wins if he destroys all radar/bunker counters and at least one attacking aircraft (bombers or fighter-bombers) exits the map from its own edge. If the Attacker destroys all radar/bunker counters but all the attacking aircraft are destroyed, the result is a draw.
Ground Forces
SETUP: The defender places the target counters (typically one or more troops and tanks) within the defender's area, at least 4 steps from any edge of the board, and no more than 2 steps away from each other's. Note that some ground targets have an intrinsic AAA capability (see the AAA Dashboard).
VICTORY CONDITIONS: Attacker wins if he destroys at least half of the defending troops and one tank (if any deployed), and at least one attacking aircraft exits the map from its own edge. If the Attacker destroys at least half of the defending troops and one tank (if any deployed), but all the attacking aircraft are destroyed, the result is a draw.
Column/Train
SETUP: If the target is a column, form a row with all relevant target counters and place them within the defender's area, with the last counter adjacent to one side and at least 4 steps away from any other edge. During the Movement Phase, move every target counter one step toward the opposite edge of the map. Note that tanks and troops have an intrinsic AAA capability (see the AAA Dashboard).
If the target is a train, place its counter within the defender's side, with the last counter adjacent to one side and at least 4 steps away from any other edge. During the Movement Phase, move the train two steps toward the opposite edge of the map. Note that trains have an intrinsic AAA capability (see the AAA Dashboard).
VICTORY CONDITIONS: Attacker wins if he destroys at least half of the counters on the column (or the train counter) before they have left the map. At least one of the attacking planes must exit the map from their own edge If the Attacker destroys at least half of the counters on the column (or the train counter) but all the attacking aircraft are destroyed, the result is a draw.
Submarine
SETUP: Place the Submarine (SS) within the defender's area, at least 4 steps from any edge, with the surface side up. At the beginning of the Movement Phase, the Defender rolls the die. On the first turn, if the result is 20 or more, the Submarine dives to Periscope Depth (flip it to its Periscope Side). On each subsequent turn, reduce the threshold by 1 (e.g., 19 on the second turn, 18 on the third turn, etc.). If the die result exceeds the threshold, the Submarine dives to Periscope Depth. Once at Periscope Depth, continue rolling the die at the beginning of each Movement Phase using the same mechanics without resetting the threshold to 20. If the die result exceeds the threshold, the Submarine dives deeper and flees the battle.
During each Movement Phase, move the Submarine up to 1 step. Note that its performance changes from the Surface Side to the Periscope Depth Side.
VICTORY CONDITIONS: Attacker wins if he destroys the Submarine before it disappears and at least one attacking aircraft (bombers or fighter-bombers) exits the map from its own edge. If the Attacker destroys the Submarine before it disappears but all the attacking aircraft are destroyed, the result is a draw.
Convoy/Task Force
SETUP: Form one or more parallel rows with all relevant target counters, within 2 steps of each other. Place the counters within the defender's area, keeping the last counter of each row at least 4 steps away from any other edge. During the Movement Phase, move every target counter one step toward the opposite edge of the map.
Note that some vessels have intrinsic AAA and Flak capabilities. Check the relevant Dashboard for more info.
VICTORY CONDITIONS: In case of a Convoy, the attacker wins if he destroys:
- at least half of the transports (TR) and one escort, or
- all the transports
In case of a Task Force, the attacker wins if he destroys the main ship (either a CV, BB, or CL).
Any vessel that leaves the map is safe. Moreover, at least one of the attacking planes must exit the map from their own edge. If the Attacker destroys the required targets but all the attacking aircraft are destroyed, the result is a draw.
Extended Missions
To fulfill a mission, a plane must take off, travel to the target (the inbound leg), which can be hundreds of kilometers away, and then return to land (the outbound leg). While these segments are generally less exciting than the mission itself, they can still involve significant events.
For a more realistic and immersive experience, include these legs in your mission. However, keep in mind that they often result in damage to the attacking force. Therefore, players should be aware of this possibility when planning balanced, competitive games.
To include inbound and outbound legs, roll a 1d20 die to determine the event. For the inbound leg, roll after selecting planes but before setting up the game. For the outbound leg, roll after the main mission ends. Check the table below:
| Roll | Event |
|---|---|
| 1 - 10 | Nothing happens |
| 11 | Limping Home |
| 12 - 13 | Lone Wolf |
| 14 - 15 | Interception |
| 16 - 19 | Flak Barrage |
| 20 | CPF Flak |
The details of each event are explained below. Important notes:
- whenever the defender must select planes, use the availability chart of the relevant campaign. These planes are independent from the ones of the main mission.
- Deploy any planes following the rules for general deployment (see page 17).
Nothing Happens
The mission proceeds without any additional contacts or issues.
Inbound: Proceed to the main mission.
Outbound: Mission is over. Proceed to the next scenario.
Limping home
A plane struggles to return due to mechanical issues or enemy fire.
Inbound/Outbound: The attacker selects one damaged plane from their formation or flips one plane of their choice to the damaged side. If playing with the advanced damage model, randomly draw one Damage marker for each side of the plane (Rear, Side, Front) until the sum of the inflicted damage equals or exceeds half the durability of the bomber.
Then the defender selects as many planes as he wants, for a total VP value equal to (or less than) half the damaged plane's value.
The event ends when the damaged plane exits the board from his side or is destroyed.
Lone Wolf
A brave defending lonely plane attempts to stop the attacking formation.
Inbound: The attacker uses his whole force. The defender selects one plane only.
The event ends when the defender shoots down at least 1 enemy plane (bomber or fighter-bomber, if deployed) and then exits from his side.
Outbound: The attacker deploys its remaining planes.
Interception
Defender intercepts the attacking force mid-route.
Inbound: The attackers use their entire force, while the defender selects as many planes as he wants, with a total VP value equal to or less than the attacking bombers' value (or fighters' value if no bombers are present).
Outbound: The attacker deploys its remaining planes.
Play the Interception using the Fighter Sweep rules.
Flak Barrage
The attacking group flies through a flak barrage.
Inbound: The attacker deploys its whole force 4 steps from any edge on his area, facing the defender's area. The defender places a Flak Barrage (see page 12), at least 5 steps away from any attacker's planes. The defender doesn't deploy any plane.
Check the slowest plane's movement ruler to determine the number of rounds required to reach the defender's opposite edge if flying straight at maximum speed. This is the Time Reference.
The game ends when all the attacker's planes have reached (and therefore left) the defender's side opposing edge. For each round beyond the Time Reference, the defender gains a +2 modifier on his deployment roll (see page 17) for the main mission, representing the extra time given to detect and engage the attackers.
Outbound: Similar to Inbound, but any delay beyond the Time Reference results in the defender rolling 1d20 with a +2 modifier per delayed round. A result of 20 or more triggers an additional Interception mission.
CPF Flak
The attacking group passes through a Continuously Pointed Fire Flak area.
Inbound/Outbound: The attacker deploys its whole force 4 steps from any edge on their side, facing the defender's side. The defender places 2 CPF Flak markers (see page 13), at least 5 steps from any attacker's planes. The defender does not deploy any planes.
The game ends when all attacker planes have left the defender's opposite edge.
Campaign
If you want to play an immersive, deeply engaging, experience, keeping track of the pilots' progression, the damages to planes and their victories, you can play a campaign. For that, download for free the Squadron logbook (at www.wbsgames.com), which details not only how to handle your Squadron, but also the whole Campaign organization.
Campaigns are typically split into two or more Timelines based on historical events and dates. Refer to the specific Timeline you are currently playing for any related tables. You also freely determine in advance how many missions to fly before a Timeline ends and a new one begins.
In a multiplayer game, players can fight for opposing factions, the same faction, or both. If you are playing solo or a cooperative game against the system, the opponent will be controlled by the AI (see page 32).
Whenever you need to select additional planes for a mission, refer to the availability table (e.g., if you fly for a fighter squadron and have to escort bombers, select the bomber model using the availability table. The same applies to enemy planes).
A faction gets 1 point for each successful mission. At the end of the campaign, the faction with the most points wins.
Theaters of Operations
Battle of Britain
Having defeated France, in 1940 Germany was seeking a peace settlement with Great Britain. In order to achieve this goal, Hitler ordered a total blockade of the British islands. The last resort was an invasion of England but, to succeed, air superiority over Britain was required.
FACTIONS: Axis as Germany (Luftwaffe) and Italy (CAI) are the Attackers. Allies as the Great Britain (RAF) is the Defender. Axis always roll for the mission and RAF responds with a Fighter Sweep mission. Select planes either from the players' Squadrons or using the Availability tables below.
RAF Squadron logbook includes more specific information regarding detection and replacements.
Kanalkampf
(July 4th - August 12th 1940)
The Kanalkampf (the Channel Battle) refers to German air operations against the RAF over the English Channel in 1940, marking the start of the Battle of Britain. During this first phase, the Luftwaffe targeted British convoys in the English Channel and increased attacks on ports, coastal airfields and aircraft manufacturing sites.
MISSION TYPE
| Roll | Mission Briefing |
|---|---|
| 1 - 6 | Close Air Support |
| 7 - 16 | Strategic Bombing |
| 17 - 20 | Fighter Sweep |
GROUND TARGETS
| Roll | Target | Composition |
|---|---|---|
| 1-2 | Convoy | 2 TR |
| 3-4 | Convoy | 2 DD + 2 TR |
| 5-6 | Convoy | 1 DD + 2 TR |
| 7-9 | Port | 1 Port + 1 Flak |
| 10-12 | Radar | 2 Radars + 1 Bunker + 1 Flak |
| 13-14 | Airfield | 1 Airfield + 2 AAA + 1 Flak |
| 15 | Bunker | 2 Bunkers + 2 AAA |
| 16 | Factory | 1 Factory + 1 Flak |
| 17 |
RAF AVAILABILITY
| Roll | Role | Plane | Points |
|---|---|---|---|
| 1-9 | Fighter | Spitfire I | 23 |
| 10-18 | Fighter | Hurricane I | 20 |
| 19 | Fighter | Blenheim | 17 |
| 20 | Fighter | Gladiator | 13 |
LUFTWAFFE AVAILABILITY
| Roll | Role | Plane | Points |
|---|---|---|---|
| 1-15 | Fighter | Bf-109E | 27 |
| 16-20 | Fighter | Bf-110 | 30 |
| 1-20 | Fighter-Bomber | Bf-110 | 30 |
| 1-7 | Bomber | He-111 | 23 |
| 8-12 | Bomber | Ju-88 | 27 |
| 13-17 | Bomber | Ju-87 | 13 |
| 18-20 | Bomber |
CORPO AEREO ITALIANO AVAILABILITY
| Roll | Role | Plane | Points |
|---|---|---|---|
| 1-15 | Fighter | Cr.42 | 13 |
| 16-20 | Fighter | G.50 | 17 |
| 1-18 | Bomber | SM.79 (as B.R.20 M) | 23 |
| 19-20 | Bomber | Cant Z.1007 | 27 |
Adlerangriff
(August 13th - September 6th 1940)
The Adlerangriff (The Eagle attack) was the main assault phase of the Battle of Britain, aimed to destroy the RAF to secure air superiority for a potential invasion. Luftwaffe targets included radar stations, airfields, and aircraft, with the goal of crippling British air defenses and forcing a peace negotiation or enabling Operation Sea Lion, the landing on the English coasts.
MISSION TYPE
| Roll | Mission Briefing |
|---|---|
| 1-8 | Strategic Bombing |
| 9-14 | Close Air Support |
| 15-20 | Fighter Sweep |
GROUND TARGETS
| Roll | Target | Composition |
|---|---|---|
| 1-7 | Airfield | 1 Airfield + 2 AAA + 1 Flak |
| 8-12 | Radar | 2 Radars + 1 Bunker + 1 Flak |
| 13-14 | Factory | 1 Factory + 1 Flak |
| 15-18 | Port | 1 Port + 1 Flak |
| 19 | Bunker | 2 Bunkers + 2 AAA |
| 20 | Convoy | 2 DD + 2 TR |
RAF AVAILABILITY
| Roll | Role | Plane | Points |
|---|---|---|---|
| 1-8 | Fighter | Spitfire I | 23 |
| 9-16 | Fighter | Hurricane I | 20 |
| 17-19 | Fighter | Blenheim | 17 |
| 20 | Fighter | Gladiator | 13 |
LUFTWAFFE AVAILABILITY
| Roll | Role | Plane | Points |
|---|---|---|---|
| 1-16 | Fighter | Bf-109E | 27 |
| 17-20 | Fighter | Bf-110 | 30 |
| 1-20 | Fighter-Bomber | Bf-110 | 30 |
| 1-6 | Bomber | He-111 | 23 |
| 7-12 | Bomber | Ju-88 | 27 |
| 13-17 | Bomber | Ju-87 | 13 |
| 18-20 | Bomber |
CORPO AEREO ITALIANO AVAILABILITY
| Roll | Role | Plane | Points |
|---|---|---|---|
| 1-17 | Fighter | Cr.42 | 13 |
| 18-20 | Fighter | G.50 | 17 |
| 1-13 | Bomber | SM.79 (as B.R.20 M) | 23 |
| 14-20 | Bomber | Cant Z.1007 | 27 |
Blitz
(September 7th - September 25th 1940)
By September 1940, Germany had lost the Battle of Britain and the Luftwaffe attempted to draw RAF fighters into a battle of annihilation, by conducting mass air attacks against industrial targets, towns, and cities.
Refer to the Adlerangriff for all the tables with the exception of the Ground targets table.
GROUND TARGETS
| Roll | Target | Composition |
|---|---|---|
| 1-2 | Port | 1 Port + 1 Flak |
| 3-7 | Factory | 1 Factory + 1 Flak |
| 8-9 | Railyard | 1 Railyard + 1 Flak |
| 10-14 | Airfield | 1 Airfield + 2 AAA + 1 Flak |
| 15-16 | Bunker | 2 Bunkers + 2 AAA |
| 17 | Radar Station | 2 Radars + 1 Bunker + 1 Flak |
| 18 | Train | (none printed) |
| 19 | Task Force | 1 CL + 2 DD |
Seelöwe
(September 11th 1940)
Unternehmen Seelöwe (Operation Sealion) was the codename for the planned invasion of Britain by the German forces. The operation was canceled, since Luftwaffe never gained the air superiority of the British skies. In this game, however, if the Axis wins all the timelines above, the landing occurs and RAF will have to withstand the invasion.
MISSION TYPE
| Roll | Mission Briefing |
|---|---|
| 1-7 | Strategic Bombing |
| 8-15 | Close Air Support |
| 16-20 | Fighter Sweep |
GROUND TARGETS
| Roll | Target | Composition |
|---|---|---|
| 1-6 | Troops | 2 Troops + 1 Tank |
| 7-12 | Vehicle Column | 2 Tanks + 2 Trucks |
| 13-14 | Bridge | 1 Bridge + 2 AAA + 2 Flak |
| 15 | Train | (none printed) |
| 16 | Factory | 1 Factory + 2 Flak |
| 17 | Railyard | 1 Railyard + 2 AAA + 1 Flak |
| 18 | Task Force | 1 BB + 2 DD |
| 19 | HQ Bunker | 2 Bunkers + 2 AAA + 1 Flak |
RAF AVAILABILITY
| Roll | Role | Plane | Points |
|---|---|---|---|
| 1-9 | Fighter | Spitfire I | 23 |
| 10-17 | Fighter | Hurricane I | 20 |
| 18-19 | Fighter | Blenheim | 17 |
| 20 | Fighter | Gladiator | 13 |
CORPO AEREO ITALIANO AVAILABILITY
| Roll | Role | Plane | Points |
|---|---|---|---|
| 1-8 | Fighter | Cr.42 | 13 |
| 9-14 | Fighter | G.50 | 17 |
| 15-19 | Bomber | SM.79 | 23 |
| 20 | Bomber | Cant Z.1007 | 27 |
North Africa Theater
Fighting in North Africa started with the Italian declaration of war on 10 June 1940. The Allies opened this new front to ease the pressure in Europe, while the Axis was seeking the control over the Suez Canal and the important oil supply lines from the Middle East.
Early phase
(March 3rd 1941 - June 30th 1942)
The first battles for North Africa involved Italy and Great Britain, across the Egyptian borders, around Sidi Barrani. After the destruction of their 10th Army, the Italians requested the support of the German Afrika Corps.
FACTIONS: Axis as Germany (Luftwaffe) and Italy (RAI). Allies as the Great Britain (RAF). Only the faction with a points advantage rolls for the mission, while the other faction performs a Fighter Sweep mission. In case of a tie, Axis mission occurs.
AXIS MISSION TYPE
| Roll | Mission Briefing |
|---|---|
| 1-7 | Strategic Bombing |
| 8-14 | Close Air Support |
| 15-20 | Fighter Sweep |
ALLIES MISSION TYPE
| Roll | Mission Briefing |
|---|---|
| 1-6 | Strategic Bombing |
| 7-12 | Close Air Support |
| 13-20 | Fighter Sweep |
AXIS GROUND TARGETS
| Roll | Target | Composition |
|---|---|---|
| 1-4 | Airfield | 1 Airfield + 2 AAA + 1 Flak |
| 5-7 | Column | 2 Tanks + 2 Trucks |
| 8-10 | Troops | 2 Troops + 2 Tanks |
| 11-13 | Port | 1 Port + 2 Flak |
| 14-15 | Troops | 1 Troops + 2 Tanks |
| 16 | Radar Station | 1 Radar + 2 AAA |
| 17 | Bunker | 1 Bunker + 2 AAA |
| 18 | Railyard | 1 Railyard + 1 Flak |
ALLIES GROUND TARGETS
| Roll | Target | Composition |
|---|---|---|
| 1-5 | Troops | 2 Troops + 2 Tanks |
| 6-8 | Column | 2 Tanks + 2 Trucks |
| 9-11 | Airfield | 1 Airfield + 2 AAA + 1 Flak |
| 12-14 | Port | 1 Port + 2 Flak |
| 15-16 | Column | 1 Troop + 2 Trucks + 1 Tank |
| 17 | Radar | 1 Radar + 2 AAA |
| 18 | Bunker | 1 Bunker + 2 AAA |
| 19 | Railyard | 1 Railyard + 1 Flak |
LUFTWAFFE AVAILABILITY
| Roll | Role | Plane | Points |
|---|---|---|---|
| 1-14 | Fighter | Bf-109E | 27 |
| 15-20 | Fighter | Bf-110 | 30 |
| 1-20 | Fighter-Bomber | Bf-110 | 30 |
| 1-8 | Bomber | He-111 | 23 |
| 9-15 | Bomber | Ju-88 | 27 |
| 16-20 | Bomber | Ju-87 | 13 |
REGIA AERONAUTICA AVAILABILITY
| Roll | Role | Plane | Points |
|---|---|---|---|
| 1-8 | Fighter | C.200 | 17 |
| 9-14 | Fighter | Cr.42 | 13 |
| 15-17 | Fighter | G.50 | 17 |
| 18-20 | Fighter | C.202 | 37 |
| 1-10 | Fighter-Bomber | Cr.42 | 13 |
| 11-17 | Fighter-Bomber | C.200 | 17 |
| 18-20 | Fighter-Bomber |
RAF AVAILABILITY
| Roll | Role | Plane | Points |
|---|---|---|---|
| 1-5 | Fighter | Hurricane Mk.I | 20 |
| 6-10 | Fighter | Hurricane Mk.II | 23 |
| 11-14 | Fighter | Spitfire Mk.V | 33 |
| 15-17 | Fighter | P-40 | 23 |
| 18-19 | Fighter | Gladiator | 13 |
| 20 | Fighter | Spitfire Mk.I | 23 |
| 1-13 |
Late phase
(July 1st 1941 - March 9th 1943)
With the stalemate of the 1st Battle of El-Alamein, the deadlock was only broken with Operation Torch, the US landings in Morocco and Algeria. Caught in a vise between the US Army, the British Army, and the Sahara desert, the Axis began to give ground, eventually surrendering control of North Africa to the Allies.
FACTIONS: Axis as Germany (Luftwaffe) and Italy (RAI). Allies as the Great Britain (RAF) and USA (USAAF). Only the faction with a points advantage rolls for the mission, while the other faction performs a Fighter Sweep mission. In case of a tie, Allied mission occurs.
AXIS MISSION TYPE
| Roll | Mission Briefing |
|---|---|
| 1-5 | Strategic Bombing |
| 6-14 | Close Air Support |
| 15-20 | Fighter Sweep |
ALLIES MISSION TYPE
| Roll | Mission Briefing |
|---|---|
| 1-5 | Strategic Bombing |
| 6-11 | Close Air Support |
| 12-20 | Fighter Sweep |
AXIS GROUND TARGETS
| Roll | Target | Composition |
|---|---|---|
| 1-4 | Airfield | 1 Airfield + 2 AAA + 1 Flak |
| 5-7 | Column | 2 Tanks + 2 Trucks |
| 8-10 | Troops | 2 Troops + 2 Tanks |
| 11-13 | Port | 1 Port + 1 Flak |
| 14-17 | Convoy | 2 TR + 1 DD |
| 18 | Radar Station | 1 Radar + 2 AAA |
| 19 | Railyard | 1 Railyard + 1 Flak |
| 20 | Task Force | 1 CL + 1 DD |
ALLIES GROUND TARGETS
| Roll | Target | Composition |
|---|---|---|
| 1-4 | Troops | 2 Troops + 2 Tanks |
| 5-7 | Airfield | 1 Airfield + 2 AAA + 1 Flak |
| 8-10 | Column | 2 Tanks + 2 Trucks |
| 11-13 | Convoy | 2 TR + 1 DD |
| 14-16 | Port | 1 Port + 2 Flak |
| 17-18 | Troops | 2 Troops + 1 Tank |
| 19 | Railyard | 1 Railyard + 1 Flak |
| 20 | Submarine | 1 SS |
LUFTWAFFE AVAILABILITY
| Roll | Role | Plane | Points |
|---|---|---|---|
| 1-8 | Fighter | Bf-109E | 27 |
| 9-13 | Fighter | Bf-109G | 47 |
| 14-18 | Fighter | Bf-110 | 30 |
| 19-20 | Fighter | Fw-190 A4 | 40 |
| 1-13 | Fighter-Bomber | Bf-110 | 30 |
| 14-20 | Fighter-Bomber | Fw-190 A4 | 40 |
| 1-6 |
REGIA AERONAUTICA AVAILABILITY
| Roll | Role | Plane | Points |
|---|---|---|---|
| 1-11 | Fighter | C.202 | 37 |
| 12-17 | Fighter | C.200 | 17 |
| 18-20 | Fighter | G.50 | 17 |
| 1-10 | Fighter-Bomber | Cr.42 | 13 |
| 11-17 | Fighter-Bomber | C.200 | 17 |
| 18-20 | Fighter-Bomber | G.50 | 17 |
| 1-10 | Bomber |
RAF AVAILABILITY (Late phase)
| Roll | Role | Plane | Points |
|---|---|---|---|
| 1-5 | Fighter | Hurricane Mk.I | 20 |
| 6-11 | Fighter | Hurricane Mk.II | 23 |
| 12-15 | Fighter | Spitfire Mk.V | 33 |
| 16-19 | Fighter | P-40 | 23 |
| 20 | Fighter | Beaufighter | 37 |
| 1-10 | Fighter-Bomber | Hurricane Mk.II | 23 |
| 11-17 |
USAAF AVAILABILITY (Late phase)
| Roll | Role | Plane | Points |
|---|---|---|---|
| 1-10 | Fighter | P-40 | 23 |
| 11-17 | Fighter | P-38 | 40 |
| 18-20 | Fighter | P-51B | 40 |
| 1-12 | Fighter-Bomber | P-40 | 23 |
| 13-20 | Fighter-Bomber | P-38 | 40 |
| 1-12 | Bomber | B-17 | 63 |
| 13-20 | Bomber |
Italian Theater
The opening of a new front after the North African Campaign was crucial for the Allies to divert German troops from Central Europe. This strategy translated into the invasion of Southern Italy and the subsequent slow advance up the Italian peninsula.
The initial amphibious landings
(July 7th 1943 - February 11th 1944)
With the landings in Sicily, Salerno, and Anzio, the Allies attempted on several occasions to trap the retreating German troops in a vise, while the main forces advanced from the South.
FACTIONS: Axis as Germany (Luftwaffe) and Italy (RAI). Allies as the Great Britain (RAF) and USA (USAAF). Only the faction with a points advantage rolls for the mission, while the other faction performs a Fighter Sweep mission. In case of a tie, Allied mission occurs.
AXIS MISSION TYPE
| Roll | Mission Briefing |
|---|---|
| 1-12 | Strategic Bombing |
| 13-17 | Close Air Support |
| 18-20 | Fighter Sweep |
ALLIES MISSION TYPE
| Roll | Mission Briefing |
|---|---|
| 1-12 | Strategic Bombing |
| 13-16 | Close Air Support |
| 17-20 | Fighter Sweep |
AXIS GROUND TARGETS
| Roll | Target | Composition |
|---|---|---|
| 1 | Airfield | 1 Airfield + 2 AAA + 1 Flak |
| 2-3 | Port | 1 Port + 1 Flak |
| 4-5 | Railyard | 1 Railyard + 1 Flak + 1 AAA |
| 6-9 | Bridge | 1 Bridge + 1 AAA + 1 Flak |
| 10-12 | Troops | 1 Troops + 2 Tanks |
| 13-15 | Column | 2 Tanks + 2 Trucks |
| 16 | Train | (none printed) |
| 17 | Task Force | 1 CL + 2 DD |
ALLIES GROUND TARGETS
| Roll | Target | Composition |
|---|---|---|
| 1 | Factory | 1 Factory + 2 Flak |
| 2 | Radar | 1 Radar + 2 AAA |
| 3-4 | Bridge | 1 Bridge + 2 AAA + 2 Flak |
| 5-8 | Port | 1 Port +2 AAA + 2 Flak |
| 9-10 | Troops | 1 Troops + 2 Tanks |
| 11-12 | Column | 2 Tanks + 2 Trucks |
| 13-15 | Airfield | 1 Airfield + 2 AAA + 1 Flak |
| 16-17 | Railyard | 1 Railyard + 1 Flak + 2 AAA |
LUFTWAFFE AVAILABILITY
| Roll | Role | Plane | Points |
|---|---|---|---|
| 1-3 | Fighter | Bf-109E | 27 |
| 4-9 | Fighter | Bf-109G | 47 |
| 10-13 | Fighter | Bf-110 | 30 |
| 14-20 | Fighter | Fw-190 A4 | 40 |
| 1-8 | Fighter-Bomber | Bf-110 | 30 |
| 9-20 | Fighter-Bomber | Fw-190 A4 | 40 |
| 1-5 | Bomber |
REGIA AERONAUTICA AVAILABILITY
(The roll for the second Fighter row is printed as "20-15".)
| Roll | Role | Plane | Points |
|---|---|---|---|
| 1-15 | Fighter | C.202 | 37 |
| 20-15 | Fighter | G.50 | 17 |
| 1-17 | Fighter-Bomber | G.50 | 17 |
| 18-20 | Fighter-Bomber | Cr.42 | 13 |
| 1-15 | Bomber | SM.79 | 23 |
| 16-20 | Bomber | Z.1007 | 27 |
RAF AVAILABILITY
| Roll | Role | Plane | Points |
|---|---|---|---|
| 1-3 | Fighter | Hurricane Mk.I | 20 |
| 4-6 | Fighter | Hurricane Mk.II | 23 |
| 7-10 | Fighter | Spitfire Mk.V | 33 |
| 11-13 | Fighter | Spitfire Mk.IX | 47 |
| 14-17 | Fighter | P-40 | 23 |
| 18-20 | Fighter | Beaufighter | 37 |
| 1-7 |
USAAF AVAILABILITY
| Roll | Role | Plane | Points |
|---|---|---|---|
| 1-6 | Fighter | P-51 B | 40 |
| 7-12 | Fighter | P-47 | 37 |
| 13-17 | Fighter | P-38 | 40 |
| 18-20 | Fighter | P-40 | 23 |
| 1-9 | Fighter-Bomber | P-47 | 37 |
| 10-16 | Fighter-Bomber | P-38 | 40 |
| 17-20 | Fighter-Bomber |
The long way North
(February 11th 1944 - April 25th 1945)
The Allies advanced through Italy at a pace much slower than expected, with the Germans moving from one prepared defense line to another. To soften what turned out to be a not-so-soft underbelly, the air component was crucial in interdicting Axis supply lines and slowing down their retreat.
FACTIONS: Axis as Germany (Luftwaffe). Allies as the Great Britain (RAF) and USA (USAAF). Only the faction with a points advantage rolls for the mission, while the other faction performs a Fighter Sweep mission. In case of a tie, Allied mission occurs.
AXIS MISSION TYPE
| Roll | Mission Briefing |
|---|---|
| 1-9 | Strategic Bombing |
| 10-15 | Close Air Support |
| 16-20 | Fighter Sweep |
ALLIES MISSION TYPE
| Roll | Mission Briefing |
|---|---|
| 1-10 | Strategic Bombing |
| 11-15 | Close Air Support |
| 16-20 | Fighter Sweep |
AXIS GROUND TARGETS
| Roll | Target | Composition |
|---|---|---|
| 1 | Airfield | 1 Airfield + 2 AAA + 2 Flak |
| 2-3 | Port | 1 Port + 2 AAA + 2 Flak |
| 4 | Bridge | 1 Bridge + 1 AAA |
| 5-10 | Troops | 2 Troops + 2 Tanks |
| 11-15 | Column | 2 Tanks + 2 Trucks |
| 16-17 | Task Force | 1 CL + 2 DD |
| 18-20 | Convoy | 2 TR + 1 CL + 2 DD |
ALLIES GROUND TARGETS
| Roll | Target | Composition |
|---|---|---|
| 1-3 | Factory | 1 Factory + 2 Flak |
| 4-6 | Bridge | 1 Bridge + 1 AAA + 2 Flak |
| 7-8 | Port | 1 Port +2 AAA + 2 Flak |
| 9-11 | Troops | 2 Troops + 1 Tanks |
| 12-15 | Column | 1 Tank + 2 Trucks |
| 16-17 | Airfield | 1 Airfield + 2 AAA + 2 Flak |
| 18-20 | Railyard | 1 Railyard + 1 Flak + 2 AAA |
LUFTWAFFE AVAILABILITY
| Roll | Role | Plane | Points |
|---|---|---|---|
| 1-5 | Fighter | C.202 | 37 |
| 6-11 | Fighter | Bf-109G | 47 |
| 12-13 | Fighter | Bf-110 | 30 |
| 14-16 | Fighter | Fw-190 A4 | 40 |
| 17-18 | Fighter | Fw-190 A8 | 53 |
| 19-20 | Fighter | Me-262 | 70 |
| 1-6 | Fighter-Bomber |
RAF AVAILABILITY
| Roll | Role | Plane | Points |
|---|---|---|---|
| 1-12 | Fighter | Spitfire Mk.V | 33 |
| 13-17 | Fighter | Spitfire Mk.IX | 47 |
| 18-20 | Fighter | Beaufighter | 37 |
| 1-12 | Fighter-Bomber | Spitfire Mk.IX | 47 |
| 13-17 | Fighter-Bomber | Hurricane Mk.II | 23 |
| 18-20 | Fighter-Bomber | Beaufighter | 37 |
| (no roll printed) |
USAAF AVAILABILITY
| Roll | Role | Plane | Points |
|---|---|---|---|
| 1-5 | Fighter | P-51 B | 40 |
| 6-10 | Fighter | P-51 D | 50 |
| 11-16 | Fighter | P-47 | 37 |
| 17-20 | Fighter | P-38 | 40 |
| 1-12 | Fighter-Bomber | P-47 | 37 |
| 13-20 | Fighter-Bomber | P-38 | 40 |
| 1-6 | Bomber |
Western Europe Theater
Planning the invasion of Fortress Europe was not an easy task for the Allies. In many ways, they faced similar strategic challenges to those Hitler encountered when contemplating an invasion of Great Britain. Achieving air superiority and disrupting the Axis supply chain were crucial elements of their strategy.
Paving the road to D-Day
(November 1st 1943 - June 6th 1944)
To increase the chances of a successful landing in Normandy, the Allies used tactical bombing and close air support against troop concentrations and small logistical targets such as trains, barges, and bridges. Concurrently, daylight and nighttime strategic bombings over Germany and other occupied territories aimed to hamper Axis production, thereby reducing the number of opposing forces the Allies would face after the landings.
FACTIONS: Axis, as Germany (Luftwaffe), defends. Allies, as the Great Britain (RAF) and USA (USAAF), attack. Allies roll for their mission while the Axis performs a Fighter Sweep mission.
ALLIES MISSION TYPE
| Roll | Mission Briefing |
|---|---|
| 1-10 | Strategic Bombing |
| 11-15 | Close Air Support |
| 16-20 | Fighter Sweep |
ALLIES GROUND TARGETS
| Roll | Target | Composition |
|---|---|---|
| 1 | Bridge | 1 Bridge + 2 AAA + 2 Flak |
| 2 | Radar | 1 Radar + 2 AAA + 1 Flak |
| 3-4 | Train | (none printed) |
| 5-7 | Factory | 1 Factory + 3 Flak |
| 8-10 | Railyard | 1 Railyard + 2 AAA + 2 Flak |
| 11-13 | Airfield | 1 Airfield + 2 AAA + 2 Flak |
| 15-17 | Port | 1 Port +2 AAA + 3 Flak |
| 18-19 | Bunker | 2 Bunkers + 2 AAA + 1 Flak |
(The roll range 14 is not printed in the original table.)
RAF AVAILABILITY
| Roll | Role | Plane | Points |
|---|---|---|---|
| 1-3 | Fighter | Hurricane Mk.II | 23 |
| 4-7 | Fighter | Spitfire Mk.V | 33 |
| 8-17 | Fighter | Spitfire Mk.IX | 47 |
| 18-19 | Fighter | Mosquito | 33 |
| 20 | Fighter | Beaufighter | 37 |
| 1-2 | Fighter-Bomber | Spitfire Mk.IX | 47 |
| 3-4 |
USAAF AVAILABILITY
| Roll | Role | Plane | Points |
|---|---|---|---|
| 1-8 | Fighter | P-51 B | 40 |
| 9-15 | Fighter | P-47 | 37 |
| 16-20 | Fighter | P-38 | 40 |
| 1-12 | Fighter-Bomber | P-47 | 37 |
| 13-20 | Fighter-Bomber | P-38 | 40 |
| 1-6 | Bomber | B-17 | 63 |
| 7-13 | Bomber |
LUFTWAFFE AVAILABILITY
| Roll | Role | Plane | Points |
|---|---|---|---|
| 1-9 | Fighter | Bf-109G | 47 |
| 10-14 | Fighter | Fw-190 A4 | 40 |
| 15-17 | Fighter | Fw-190 A8 | 53 |
| 18-20 | Fighter | Bf-110 | 30 |
From Normandy to Berlin
(June 7th 1943 - May 8th 1945)
From the landings in Normandy, the air force played a crucial role in supporting the Allied advance through France, Flanders, and Germany, and its contribution was decisive. By targeting the supply lines and the production hubs deep within occupied Europe, the Allies were able to erode any German resistance.
FACTIONS: Axis as Germany (Luftwaffe). Allies as the Great Britain (RAF) and USA (USAAF). Only the faction with a points advantage rolls for the mission, while the other faction performs a Fighter Sweep mission. In case of a tie, Allied mission occurs.
ALLIES MISSION TYPE
| Roll | Mission Briefing |
|---|---|
| 1-9 | Strategic Bombing |
| 10-16 | Close Air Support |
| 17-20 | Fighter Sweep |
AXIS MISSION TYPE
| Roll | Mission Briefing |
|---|---|
| 1-5 | Strategic Bombing |
| 6-13 | Close Air Support |
| 14-20 | Fighter Sweep |
ALLIES GROUND TARGETS
| Roll | Target | Composition |
|---|---|---|
| 1-2 | Bridge | 1 Bridge + 2 AAA + 2 Flak |
| 3-4 | Train | (none printed) |
| 5-10 | Factory | 1 Factory + 3 Flak |
| 11-14 | Railyard | 1 Railyard + 2 AAA + 2 Flak |
| 15 | Airfield | 1 Airfield + 2 AAA + 2 Flak |
| 16 | Port | 1 Port +2 AAA + 3 Flak |
| 17 | Troops | 2 Troops + 1 Tank |
| 18 | Troops | 2 Troops + 2 Tanks |
AXIS GROUND TARGETS
| Roll | Target | Composition |
|---|---|---|
| 1 | Port | 1 Port + 2 Flak |
| 2-4 | Railyard | 1 Railyard + 1 Flak |
| 5-9 | Airfield | 1 Airfield + 2 AAA + 1 Flak |
| 10-14 | Bridge | 1 Bridge + 2 AAA + 2 Flak |
| 15-17 | Column | 2 Trucks + 1 Tank |
| 18-20 | Troops | 2 Troops + 2 Tanks |
RAF AVAILABILITY
| Roll | Role | Plane | Points |
|---|---|---|---|
| 1-3 | Fighter | Spitfire Mk.V | 33 |
| 4-10 | Fighter | Spitfire Mk.IX | 47 |
| 11-18 | Fighter | Spitfire Mk.XIV | 53 |
| 19-20 | Fighter | Meteor | 70 |
| 1 | Fighter-bomber | Hurricane Mk.II | 23 |
| 2-3 | Fighter-bomber | Beaufighter | 37 |
| 4-7 |
USAAF AVAILABILITY
| Roll | Role | Plane | Points |
|---|---|---|---|
| 1-2 | Fighter | P-38 | 40 |
| 3-5 | Fighter | P-51 B | 40 |
| 6-12 | Fighter | P-51 D | 50 |
| 13-20 | Fighter | P-47 | 37 |
| 1-6 | Fighter-bomber | P-38 | 40 |
| 7-20 | Fighter-bomber | P-47 | 37 |
| 1-6 | Bomber |
LUFTWAFFE AVAILABILITY
| Roll | Role | Plane | Points |
|---|---|---|---|
| 1 or 20 | Fighter | Me-262 | 70 |
| 2-3 | Fighter | Me-110 | 30 |
| 4-10 | Fighter | Bf-109 G | 47 |
| 11-16 | Fighter | Fw-190 A8 | 53 |
| 17-19 | Fighter | Fw-190 D | 57 |
| 1-2 | Fighter-Bomber | Me-262 | 70 |
| 3-7 | Fighter-Bomber |
North Sea Theater
Throughout the war, the Axis powers tried to interrupt supply lines from the US to both Great Britain and Russia. Although the U-boat was the primary weapon, the Luftwaffe and the Kriegsmarine were also involved in this task. Great Britain was on the frontline, fighting Germany with both planes and ships.
FACTIONS: Axis as Germany (Luftwaffe). Allies as the Great Britain (RAF). Only the faction with a points advantage rolls for the mission, while the other faction performs a Fighter Sweep mission. In case of a tie, Axis mission occurs.
AXIS MISSION TYPE
| Roll | Mission Briefing |
|---|---|
| 1-7 | Strategic Bombing |
| 8-14 | Close Air Support |
| 15-20 | Fighter Sweep |
ALLIES MISSION TYPE
| Roll | Mission Briefing |
|---|---|
| 1-3 | Strategic Bombing |
| 4-12 | Close Air Support |
| 13-20 | Fighter Sweep |
AXIS GROUND TARGETS
| Roll | Target | Composition |
|---|---|---|
| 1 or 20 | Task Force | 1 CV + 1 CL + 2 DD |
| 2-3 | Convoy | 2 TR + 1 DD |
| 4-5 | Task Force | 1 BB + 1 CL + 2 DD |
| 6-7 | Convoy | 2 TR + 1 CL + 1 DD |
| 8-10 | Task Force | 1 CL + 2 DD |
| 11-14 | Convoy | 2 TR + 2 DD |
| 15-17 | Convoy | 2 TR + 1 CL + 2 DD |
| 18 | Task Force | 2 DD |
| 19 |
ALLIES GROUND TARGETS
| Roll | Target | Composition |
|---|---|---|
| 1 | Task Force | 1 BB + 1 CL + 2 DD |
| 2-3 | Task Force | 1 CL + 2 DD |
| 4-6 | Task Force | 1 DD |
| 7-9 | Task Force | 2 DD |
| 10-14 | Submarine | 1 SS |
| 15-18 | Task Force | 1 CL + 1 DD |
| 19-20 | Task Force | 1 BB + 2 DD |
LUFTWAFFE AVAILABILITY (Feb.1940 - Feb.1943)
| Roll | Role | Plane | Points |
|---|---|---|---|
| 1-13 | Fighter | Bf-190 E | 27 |
| 14-20 | Fighter | Fw-190 A4 | 40 |
| 1-4 | Bomber | Ju-87 | 13 |
| 5-12 | Bomber | Ju-88 | 27 |
| 13-20 | Bomber | He-111 | 23 |
LUFTWAFFE AVAILABILITY (Feb.1943 - May 1945)
| Roll | Role | Plane | Points |
|---|---|---|---|
| 1-10 | Fighter | Bf-190 G | 47 |
| 12-14 | Fighter | Fw-190 A4 | 40 |
| 16-19 | Fighter | Fw-190 A8 | 53 |
| 20 | Fighter | Fw-190 D | 57 |
| 1-3 | Bomber | Ju-87 | 13 |
| 4-13 | Bomber | Ju-88 | 27 |
| 14-19 | Bomber |
RAF AVAILABILITY (Feb.1940 - Feb.1943)
| Roll | Role | Plane | Points |
|---|---|---|---|
| 1-13 | Fighter | Hurricane Mk.I | 20 |
| 14-20 | Fighter | Spitfire Mk.V | 33 |
| 1-14 | Fighter-Bomber | Beaufighter | 37 |
| 16-20 | Fighter-Bomber | Mosquito | 33 |
| 1-3 | Bomber | Blenheim | 17 |
| 4-8 | Bomber | Mosquito | 33 |
| 9-20 |
RAF AVAILABILITY (Feb.1943 - May 1945)
| Roll | Role | Plane | Points |
|---|---|---|---|
| 1-6 | Fighter | Hurricane Mk.II | 23 |
| 7-14 | Fighter | Spitfire Mk.V | 33 |
| 15-16 | Fighter | Spitfire Mk.IX | 47 |
| 17-18 | Fighter | Spitfire Mk.XIV | 53 |
| 19-20 | Fighter | P-51 B | 40 |
| 1-9 | Fighter-Bomber | Beaufighter | 37 |
| 10-20 |
(Roll ranges in this and the preceding tables are transcribed as printed, including any gaps.)
Eastern Europe Theater
The Molotov-Ribbentrop Pact, signed in August 1939, was a non-aggression agreement between Germany and the Soviet Union. It was clear that this pact was fragile, and war nonetheless erupted in June 1941. The capture of Berlin by the Russian forces not only ended the war on this front but also concluded the conflict in the entire European theater.
Blitzkrieg in the East and Stalemate
(June 22th 1941 - July 4th 1943)
After an initial phase of German advances into Russian territories, Russia began a counter-offensive as early as the following winter. The harsh environmental conditions and the overwhelming numbers of Russian forces, bolstered by weapons and supplies from the Allies, quickly slowed down the German Blitzkrieg.
FACTIONS: Axis as Germany (Luftwaffe) and Italy (RAI). Allies as Russia (VVS). Only the faction with a points advantage rolls for the mission, while the other faction performs a Fighter Sweep mission. In case of a tie, Axis mission occurs.
AXIS MISSION TYPE
| Roll | Mission Briefing |
|---|---|
| 1-8 | Strategic Bombing |
| 9-18 | Close Air Support |
| 19-20 | Fighter Sweep |
ALLIES MISSION TYPE
| Roll | Mission Briefing |
|---|---|
| 1-6 | Strategic Bombing |
| 7-17 | Close Air Support |
| 18-20 | Fighter Sweep |
AXIS GROUND TARGETS
| Roll | Target | Composition |
|---|---|---|
| 1 | Port | 1 Port +2 AAA + 2 Flak |
| 2-3 | Bridge | 1 Bridge + 2 AAA + 1 Flak |
| 4-5 | Factory | 1 Factory + 2 Flak |
| 6-7 | Airfield | 1 Airfield + 2 AAA + 2 Flak |
| 8-9 | Train | (none printed) |
| 10-12 | Railyard | 1 Railyard + 2 AAA + 2 Flak |
| 13-16 | Troops | 2 Troops + 2 Tanks |
| 17-19 | Column | 2 Trucks + 2 Tanks |
ALLIES GROUND TARGETS
| Roll | Target | Composition |
|---|---|---|
| 1-2 | Airfield | 1 Airfield + 2 AAA + 1 Flak |
| 3-5 | Bridge | 1 Bridge + 1 AAA + 1 Flak |
| 6-8 | Train | (none printed) |
| 9-15 | Troops | 2 Troops + 2 Tanks |
| 16-20 | Column | 2 Trucks + 2 Tanks |
LUFTWAFFE AVAILABILITY
| Roll | Role | Plane | Points |
|---|---|---|---|
| 1-3 | Fighter | Bf-110 | 30 |
| 4-7 | Fighter | Fw-190 A4 | 40 |
| 8-14 | Fighter | Bf-109 E | 27 |
| 15-20 | Fighter | Bf-109 G | 47 |
| (no roll printed) | Fighter-Bomber | Bf-110 | 30 |
| 1 | Bomber | Do-17 | 17 |
| 2-4 | Bomber |
REGIA AERONAUTICA AVAILABILITY
| Roll | Role | Plane | Points |
|---|---|---|---|
| 1-13 | Fighter | C.200 | 17 |
| 14-20 | Fighter | C.202 | 37 |
VVS AVAILABILITY
| Roll | Role | Plane | Points |
|---|---|---|---|
| 1 | Fighter | P-40 | 23 |
| 2-3 | Fighter | Spitfire Mk.V | 33 |
| 4-6 | Fighter | MiG-3 | 23 |
| 7-11 | Fighter | I-16 | 23 |
| 12-18 | Fighter | Yak-9 | 63 |
| 19-20 | Fighter | Hurricane Mk.II | 23 |
| 1 or 20 | Fighter-Bomber |
From Kursk to Berlin
(July 5th 1943 - May 8th 1945)
The Battle of Kursk was one of the major turning points on the Eastern Front. The tide was changing, and Russia's aggressive posture became unbearable for the German Army, which started to fall back. The Russian pursuit was relentless and unstoppable, ending only with the fall of Berlin and the termination of the Nazi regime.
FACTIONS: Axis as Germany (Luftwaffe). Allies as Russia (VVS). Only the faction with a points advantage rolls for the mission, while the other faction performs a Fighter Sweep mission. In case of a tie, Allied mission occurs.
AXIS MISSION TYPE
| Roll | Mission Briefing |
|---|---|
| 1-4 | Strategic Bombing |
| 5-16 | Close Air Support |
| 17-20 | Fighter Sweep |
ALLIES MISSION TYPE
| Roll | Mission Briefing |
|---|---|
| 1-5 | Strategic Bombing |
| 6-15 | Close Air Support |
| 16-20 | Fighter Sweep |
AXIS GROUND TARGETS
| Roll | Target | Composition |
|---|---|---|
| 1-2 | Airfield | 1 Airfield + 2 AAA + 1 Flak |
| 3-5 | Bridge | 1 Bridge + 1 AAA + 1 Flak |
| 6-8 | Train | (none printed) |
| 9-15 | Troops | 2 Troops + 2 Tanks |
| 16-20 | Column | 2 Trucks + 2 Tanks |
ALLIES GROUND TARGETS
| Roll | Target | Composition |
|---|---|---|
| 1-2 | Factory | 1 Factory + 2 Flak |
| 3-4 | Railyard | 1 Railyard + 2 AAA + 1 Flak |
| 5-8 | Train | (none printed) |
| 9-11 | Troops | 2 Troops + 2 Tanks |
| 12-16 | Column | 2 Trucks + 2 Tanks |
| 17-18 | Bridge | 1 Bridge + 2 AAA + 1 Flak |
| 19-20 | Airfield | 1 Airfield + 2 AAA + 1 Flak |
LUFTWAFFE AVAILABILITY
| Roll | Role | Plane | Points |
|---|---|---|---|
| 1 | Fighter | Bf-110 | 30 |
| 2-5 | Fighter | Fw-190 A4 | 40 |
| 6-10 | Fighter | Fw-190 A8 | 53 |
| 11-18 | Fighter | Bf 109 G | 47 |
| 19 | Fighter | Fw-190 D | 57 |
| 20 | Fighter | Me-262 | 70 |
| 1-4 | Fighter-Bomber |
VVS AVAILABILITY
| Roll | Role | Plane | Points |
|---|---|---|---|
| 1 | Fighter | Spitfire Mk.V | 33 |
| 2-3 | Fighter | Spitfire Mk.IX | 47 |
| 4-6 | Fighter | La-7 | 50 |
| 7-12 | Fighter | Yak-3 | 47 |
| 13-20 | Fighter | Yak-9 | 63 |
| 1-20 | Fighter-Bomber | Il-2 | 27 |
| 1-20 | Bomber |
Pacific Theater
With the attack on Pearl Harbor on December 7th, 1941, the Japanese Empire hoped to wipe out the carrier force of the US Navy. The main objective was missed, as the carriers were out of the harbor, but the 'sleeping giant' had been awakened, in the words of Admiral Yamamoto. It became a race against time for Japan: they needed to destroy the US naval power in the Pacific before American industrial might could outclass Japanese military power in the Pacific Theater.
The logbook of the Pacific Theater's squadrons includes more specific information regarding the campaign, factions, and when to use carrier based or land based aircrafts, depending on the mission location.
The sleeping giant
(December 7th 1941 - October 24th 1942)
The initial advance in the insular Pacific by Imperial Japan appeared to be unstoppable. On the same day as the attack at Pearl Harbor, the Japanese forces invaded Borneo and with a series of quick actions threatened Australia. With the naval operations at Midway, Coral Sea, Eastern Solomons and Santa Cruz, the Allies were able to slow down and eventually stop the Japanese advance in the Pacific.
FACTIONS: Axis as Japan. Allies as US (Navy, Air Force or Marines), Great Britain (RAF) and Australia (RAAF). Only the faction with a points advantage rolls for the mission, while the other faction performs a Fighter Sweep mission. In case of a tie, Axis mission occurs.
Since the Allies operated mixing their assets, the Availability table is one for all the Allies forces.
AXIS MISSION TYPE
| Roll | Mission Briefing |
|---|---|
| 1-2 | Close Air Support |
| 3-17 | Strategic Bombing |
| 18-20 | Fighter Sweep |
ALLIES MISSION TYPE
| Roll | Mission Briefing |
|---|---|
| 1-5 | Close Air Support |
| 6-17 | Strategic Bombing |
| 18-20 | Fighter Sweep |
AXIS GROUND TARGETS
| Roll | Target | Composition |
|---|---|---|
| 1 | Radar | 1 Radar + 1 Bunker + 2 AAA |
| 2-4 | Port | 1 Port + 2 Flak + 2 AAA |
| 5-10 | Airfield | 1 Airfield + 2 AAA + 2 Flak |
| 11-12 | Convoy | 2 TR + 2 DD |
| 13-14 | Convoy | 1 TR + 1 DD |
| 15-16 | Task Force | 1 CV + 1 CL + 2 DD |
| 17-18 | Task Force | 2 DD |
| 19 | Convoy | 1 TR + 2 DD |
| 20 |
ALLIES GROUND TARGETS
| Roll | Target | Composition |
|---|---|---|
| 1-5 | Airfield | 1 Airfield + 2 AAA + 2 Flak |
| 6-10 | Port | 1 Port + 2 Flak + 2 AAA |
| 11-12 | Convoy | 1 BB + 1 CL + 2 TR + 2 DD |
| 13-14 | Convoy | 1 CL + 2 TR + 2 DD |
| 15-16 | Convoy | 2 TR + 2 DD |
| 17 | Task Force | 1 CV + 1 CL + 2 DD + 1 TR |
| 18 | Task Force | 1 BB + 1 CL + 2 DD |
| 19 | Task Force | 1 CV + 1 BB + 1 CL + 2 DD |
JAPAN AVAILABILITY - CARRIER BASED
| Roll | Role | Plane | Points |
|---|---|---|---|
| (no roll printed) | Fighter | A6M2 Zero | 33 |
| 1-10 | Bomber | D2A1 Val | 13 |
| 11-20 | Bomber | B5N2 Kate | 17 |
JAPAN AVAILABILITY - LAND BASED
| Roll | Role | Plane | Points |
|---|---|---|---|
| 1-18 | Fighter | A6M2 Zero | 33 |
| 19-20 | Fighter | Ki-43 Oscar | 23 |
| 1-16 | Bomber | G4M2 Betty | 30 |
| 17-19 | Bomber | D3A1 Val | 13 |
| 20 | Bomber | B5N2 Kate | 17 |
ALLIES AVAILABILITY - CARRIER BASED
| Roll | Role | Plane | Points |
|---|---|---|---|
| (no roll printed) | Fighter | F4F Wildcat | 30 |
| 1-14 | Bomber | SBD3 Dauntless | 17 |
| 15-18 | Bomber | TBD Devastator | 17 |
| 19-20 | Bomber | TBF1 Avenger | 20 |
ALLIES AVAILABILITY - LAND BASED
| Roll | Role | Plane | Points |
|---|---|---|---|
| 1-2 | Fighter | F4F Wildcat | 30 |
| 3-5 | Fighter | Hurricane Mk.II | 23 |
| 6-16 | Fighter | P-40 | 23 |
| 17-19 | Fighter | Blenheim | 17 |
| 20 | Fighter | Beaufighter | 37 |
| 1-10 | Fighter-bomber | P-40 | 23 |
| 11-20 | Fighter-bomber |
Nightfall on the Rising sun
(October 25th 1942 - August 15th 1945)
The tide had turned and the Allies slowly started to recapture all the islands previously occupied by the Japanese forces, in a slow and bloody process, over three long years. Imperial Japan couldn't rely on its Navy anymore, with its force projection substantially hampered by the destruction of many of its carriers. Moreover, with the Allies slowly approaching the Japanese mainland, the air force moved to land bases to defend the holy soil of the Rising Sun. The battles were fierce and many Japanese sacrificed themselves as kamikaze. To put an end to this tragedy the US opted for an even more tragic solution, with the atomic bombing of Hiroshima and Nagasaki, the black shadow of which, still haunts humanity nowadays.
FACTIONS: Axis as Japan. Allies as US (Navy, Air Force or Marines), Great Britain (RAF) and Australia (RAAF). Only the faction with a points advantage rolls for the mission, while the other faction performs a Fighter Sweep mission. In case of a tie, Allies' mission occurs.
Since the Allies operated mixing their assets, the Availability table is one for all the Allies forces.
AXIS MISSION TYPE
| Roll | Mission Briefing |
|---|---|
| 1-2 | Close Air Support |
| 3-17 | Strategic Bombing |
| 18-20 | Fighter Sweep |
ALLIES MISSION TYPE
| Roll | Mission Briefing |
|---|---|
| 1-9 | Close Air Support |
| 10-16 | Strategic Bombing |
| 17-20 | Fighter Sweep |
AXIS GROUND TARGETS
| Roll | Target | Composition |
|---|---|---|
| 1 | Port | 1 Port + 2 Flak + 2 AAA |
| 2-3 | Airfield | 1 Airfield + 2 Flak + 2 AAA |
| 4-5 | Convoy | 1 TR + 1 DD |
| 6-8 | Task Force | 1 CV + 1 CL + 2 DD |
| 9-11 | Troops | 2 Troops |
| 12-15 | Task Force | 1 CV + 1 BB + 1 CL + 2 DD |
| 16-17 | Convoy | 2 TR + 2 DD |
| 18-19 | Convoy | 1 TR + 2 DD |
| 20 |
ALLIES GROUND TARGETS
| Roll | Target | Composition |
|---|---|---|
| 1-2 | Task Force | 1 BB + 1 CL + 2 DD |
| 3 | Convoy | 1 CL + 2 TR + 2 DD |
| 4 | Task Force | 1 CV + 1 CL + 2 DD + 1 TR |
| 5-6 | Convoy | 1 BB + 1 CL + 2 TR + 2 DD |
| 7-8 | Factory | 1 Factory + 2 AAA + 2 Flak |
| 9-10 | Port | 1 Port + 2 Flak + 2 AAA |
| 11-12 | Airfield | 1 Airfield + 2 AAA + 2 Flak |
| 13-14 | Troops | 2 Troops |
JAPAN AVAILABILITY - CARRIER BASED
| Roll | Role | Plane | Points |
|---|---|---|---|
| 1-20 | Fighter | A6M5 Zero | 47 |
| 1 | Bomber | D2A1 Val | 13 |
| 2-10 | Bomber | B5N2 Kate | 17 |
| 11-20 | Bomber | D4Y Judy | 27 |
JAPAN AVAILABILITY - LAND BASED
| Roll | Role | Plane | Points |
|---|---|---|---|
| 1 | Fighter | J2N Jack | 50 |
| 2-3 | (none printed) | Ki-61 Tony | 33 |
| 4-9 | Fighter | Ki-43 Oscar | 23 |
| 10-16 | Fighter | A6M5 Zero | 47 |
| 17-19 | Fighter | Ki-84 Frank | 63 |
| 20 | Fighter | N1K George | 60 |
| 1 | Bomber |
ALLIES AVAILABILITY - CARRIER BASED
| Roll | Role | Plane | Points |
|---|---|---|---|
| 1 | Fighter | F4F Wildcat | 30 |
| 2-14 | Fighter | F6F Hellcat | 37 |
| 15-20 | Fighter | F4U Corsair | 33 |
| 1-9 | Fighter-bomber | F6F Hellcat | 37 |
| 10-20 | Fighter-bomber | F4U Corsair | 33 |
| 1 | Bomber | SBD3 Dauntless | 17 |
| 2-9 |
ALLIES AVAILABILITY - LAND BASED
| Roll | Role | Plane | Points |
|---|---|---|---|
| 1 | Fighter | F6F Hellcat | 37 |
| 2-3 | Fighter | P-38 | 40 |
| 4-5 | Fighter | P-47 | 37 |
| 6-13 | Fighter | F4U Corsair | 33 |
| 14-20 | Fighter | P-51 D | 50 |
| 1 | Fighter-bomber | F6F Hellcat | 37 |
| 2-8 | Fighter-bomber |
War of Korea
On June 25th 1950, ten divisions of the North Korean Army invaded the unprepared neighbor, South Korea. To prevent its collapse, the UN voted to send military support to South Korea. A coalition of Western countries directly intervened in the conflict, with the USSR unofficially supporting the North, in the first proxy war of the Cold War era. It took three years and a huge loss of lives to re-establish the original borders between the two countries. Nonetheless, the conflict is still technically ongoing, as a peace treaty has never been signed.
FACTIONS: North Korea and its allies (Russia and China). South Korea and UN (USAF, USN, RAAF). Only the faction with a points advantage rolls for the mission, while the other faction performs a Fighter Sweep mission. In case of a tie, North Korea mission occurs.
N.KOREA MISSION TYPE
| Roll | Mission Briefing |
|---|---|
| 1-4 | Strategic Bombing |
| 5-15 | Close Air Support |
| 16-20 | Fighter Sweep |
S.KOREA MISSION TYPE
| Roll | Mission Briefing |
|---|---|
| 1-4 | Strategic Bombing |
| 5-13 | Close Air Support |
| 14-20 | Fighter Sweep |
N.KOREA GROUND TARGETS
| Roll | Target | Composition |
|---|---|---|
| 1 | Radar | 2 Radar + 2 AAA + 1 Flak |
| 2-3 | Railyard | 1 Railyard + 2 AAA + 2 Flak |
| 4-6 | Airfield | 1 Airfield + 2 AAA + 2 Flak |
| 7-10 | Bridge | 1 Bridge + 2 AAA + 2 Flak |
| 11-14 | Troops | 2 Troops + 2 Tanks |
| 15-17 | Column | 2 Trucks + 2 Tanks |
| 18-19 | Port | 1 Port +2 AAA + 2 Flak |
| 20 | Bunker | 2 Bunkers + 2 AAA + 1 Flak |
S.KOREA GROUND TARGETS
| Roll | Target | Composition |
|---|---|---|
| 1 | Radar | 2 Radar + 2 AAA + 1 Flak |
| 2-3 | Port | 1 Port +2 AAA + 2 Flak |
| 4-6 | Railyard | 1 Railyard + 2 AAA + 2 Flak |
| 7-9 | Bridge | 1 Bridge + 2 AAA + 2 Flak |
| 10-13 | Troops | 2 Troops + 2 Tanks |
| 14-16 | Column | 2 Trucks + 2 Tanks |
| 17-19 | Airfield | 1 Airfield + 2 AAA + 2 Flak |
| 20 | Bunker | 2 Bunkers + 2 AAA + 1 Flak |
N.KOREA AVAILABILITY
| Roll | Role | Plane | Points |
|---|---|---|---|
| 1-2 | Fighter | La-7 (as La-9) | 50 |
| 3-10 | Fighter | Mig-15 | 83 |
| 11-20 | Fighter | Yak-9 | 63 |
| 1-20 | Fighter-Bomber | Il-2 (as Il-10) | 27 |
| 1-20 | Bomber | Il-2 (as Il-10) | 27 |
S.KOREA AVAILABILITY
| Roll | Role | Plane | Points |
|---|---|---|---|
| 1 | Fighter | Meteor | 70 |
| 2-4 | Fighter | F-84 | 77 |
| 5-8 | Fighter | P-51 D | 50 |
| 9-14 | Fighter | F-80 | 70 |
| 15-20 | Fighter | F-86 | 87 |
| 1 or 20 | Fighter-bomber | F-86 | 87 |
| 2-4 | Fighter-bomber |
Solo and Coop Mode
Pocket Air War can be played against planes flown by AI pilots. It is possible to play Solo, or in cooperative mode, against one or more aircraft managed by the game system.
AI Planes
This system is neither a simple automaton nor a bot. The AI pilots make decisions based on the tactical situation and their mission objective. Moreover, you can't predict what they are going to do, making it impossible to exploit the system.
From now on, a plane that is controlled by the system is referred to as an AI plane.
Of course, a human player has to roll the die for them, as well as move their counters and perform other minor tasks.
AI System
To use the AI system, we first need to explain some core concepts of this system: focal point and relative positioning.
Focal Point
The focal point is the center of attention of the AI plane, where its pilot "looks", or at least where its focus is.
The focal point of an AI plane is determined by the AI table, based on its mission and the condition of the plane.
The general rule is that an AI plane must point its nose toward the focal point, or at least attempt to do so.
Relative Positioning
The relative positioning of the plane from its focal point is determined by three parameters:
- The distance to the focal point. It can be either within one Dashboard's length or farther than one Dashboard's length.
- The relative horizontal position. The focal point is either in front of the plane, on its side or behind it. Use the reference schematics at page 9.
- The relative vertical altitude. The focal point is either above, below, or at the same level as the plane.
Determine the AI Plane Maneuver
When it's an AI plane's round, a player has to determine the maneuver it has to perform: check the ACE AI table, using the parameters of the relative positioning to determine the relevant column.
Roll a die and move 1 row down if the AI Pilot is an Expert, or 2 rows down if he is a Rookie.
Once the maneuver to perform has been selected, a human player will have to adjust the AI plane's Energy (accelerating or decelerating) according to the following guidelines:
- Make sure the AI plane can perform the selected maneuver without stalling. If this is not possible, shift one row down and select another maneuver.
- If engaged in combat, keep as much Energy as needed to perform the tightest turn of the plane, at the highest Energy level for that given turn (e.g. 4 Energy to perform a B-turn for a Me-110).
- Make sure the AI plane does not overshoot its target.
However, in some cases, you are forced to shift one row down on the table until you can select a viable maneuver:
- If the maneuver would result in a crash, also as a consequence of a Stall.
- If the maneuver is not allowed (e.g., "Climb" while you are already at High Altitude).
AI Round
AI planes follow the same round structure as human players, in terms of initiative, movement and combat phase.
Concerning the combat, an AI plane will always target the nearest focal point, on the base of the hierarchy indicated on the AI table, using the most effective weapon suitable for the given target, ordnance included. For example, if an Me-262 equipped with A-A Rockets engages an aerial target, it will use the rockets first and then it will use the guns on the subsequent attacks.
AI Maneuvers
In this section, all the possible maneuvers an AI plane can do are explained in detail. AI pilots never collide, even if they overlap another plane's counter.
Forward
- Level: The AI plane must fly straight maintaining its current Altitude.
- Climb: The AI plane must fly straight, performing a climb to the next Altitude level above.
- Dive: The plane must fly straight, performing a descent to the next Altitude level below.
Turn & Alt.Change
The AI plane must change Altitude and use the one-step turn opportunity (see page 6). Specifically:
- If the focal point is above or at the same level, the AI plane must perform a climb.
- If the focal point is below, the AI plane must perform a descent.
(The original printed rulebook V.3.13 also shows a further bullet, "If the focal point is at the same level, move one row down on the table.", highlighted and struck through as a correction; it is omitted here.)
The player must choose which turning template to use, in order to allow the AI plane to point its nose as much as possible to its focal point.
C Turn/E Turn
The AI plane must perform a turn, using the C or E turn template, as indicated. If instructed to do a C turn but it's not available with its current Energy, use the tightest turning template available. Stop turning as soon as one of these conditions is met:
- The AI plane has no movement points left.
- The AI plane nose points towards its focal point (or as close as possible, since the plane has to perform full steps on the turning template). If the plane has movement points left at this point, spend them with a level flight.
Hardest Turn
The AI plane must perform a turn, using the tightest turn template possible (according to its current Energy). Stop turning as soon as one of these conditions is met:
- The AI plane has no movement points left.
- The AI plane nose points towards its focal point (or as close as possible, since the plane has to perform full steps on the turning template). If the plane has movement points left at this point, spend them with a level flight.
Side Slip
The AI plane level flights and performs a Side slip as the first step of its movement. Is up to the player whether to perform it to the right or to the left, in order to give to the AI plane the best combat opportunity.
Wingover
The AI plane must perform a Wingover. If the AI plane has more than the mandatory movement points, it must level flight before and/or after.
The player must choose at which point to perform the Wingover. The choice must be made to give to the AI plane the best opportunities.
AI Combat
AI planes follow the same rules as the human players, with the following exceptions:
- AI planes engage targets as they move. Check if a target is in sight and in range after each step moved (as if they were in Time Freeze (see page 15)). If there is such a target, the plane opens fire immediately, even if it has movement point left. The limit of firing to one single target applies normally.
- In addition to the fire opportunities during movement, AI planes also fire during the Combat phase with all of its weapons (no matter which ones already fired during movement).
Example of AI Combat
Round 1. An Ace AI pilot on a Me-110 (in red) and a Trained human on a Spitfire I are closing each other. Since the Me-110 is operating a Fighter Sweep, its Focal point is the closest, unengaged enemy plane, as instructed by the AI Table. The distance is greater than the length of its Dashboard and the relative positioning is on the side, with the Spit lower than the 110.
Since the two planes start with the same Energy, the Spit will go first, being at lower Altitude. The human player performs a climb and a C-turn, the tightest available for its current 6 Energy. The Briton ends its movement still more than 1 Dashboard away from the 110, on its side.
The human player rolls 1d20 to define how to move the 110. The range between the two planes is still greater than 1 Dashboard. The result is 17, Hardest turn, that is a D-turn for a 110 at 6 Energy. If the AI pilot was a Rookie, it had to shift two rows down: C Turn.
Round 2. The Spit now has 2 Energy, but the human player accelerates to 4 Energy. He selects a B-turn.
The range is now lower than 1 Dashboard. The roll for the 110 is 7: another Hard turn. It has 4 Energy, that allows it to perform a C-Turn, the tightest for the plane, at its highest speed; thus the Energy stays the same. If it was an Expert AI, it had to shift 1 row down: Turn and Altitude change.
Round 3. The human player opts not to accelerate and keep the Spitfire within its tightest turn Energy range, trying to overturn the German two-seater.
The 110 now has 2 Energy, thus it must be accelerated to 4, in order to achieve the highest Energy for the tightest turn. The roll result is 4. A Hard turn, once again.
Round 5. After a Wingover of the Spitfire and another Hard turn for the 110, the Spitfire opts for a Hard turn, putting itself on the rear sector of the German AI plane. The die roll is 20. The 110 has to perform a Wingover, but starting with 2 Energy, it needs to accelerate to 4, to avoid stalling. The Me-110 is in position to fire!
According to the Combat ruler it needs a roll of 12+ to hit the Spitfire and 18+ to shoot it down. The Ace ranking of the German pilot (+1 to the Hit Threshold) balances the size modifier of the Spitfire of -1. The Hit Threshold is 13 and, with a roll of 15, the Spitfire is damaged.
Time Freeze Table
Rows are the plane's starting Energy; columns a to j are the impulses. A number in a cell means the plane moves its Nth step at that impulse; a dash means the plane does not move.
| Starting Energy | a | b | c | d | e | f | g | h | i | j |
|---|---|---|---|---|---|---|---|---|---|---|
| 1 | - | - | - | - | - | - | - | - | - | 1 |
| 2 | - | - | - | - | 1 | - | - | - | - |
Focal Point and Mission Type
CLOSE AIR SUPPORT
- Mission objective avoiding enemy planes
- Closest friendly side (Standard Alt.)
If fired upon or tailed: 1. Closest threatening enemy plane
Damage >= 75%: 1. Keep formation; 2. Closest friendly side (Low Altitude)
BOMBING
- Mission objective avoiding enemy planes
- Closest friendly side (High Alt.)
If under Flak attack: 1. Avoid Flak & follow focal point
Damaged: 1. Keep formation; 2. Closest friendly side (Low Altitude)
FIGHTER SWEEP - INTERCEPTION
- Closest, unengaged enemy plane - Level
- Closest, unengaged enemy plane - Lower
- Closest, unengaged enemy plane - Higher
- Closest enemy plane engaged by 1 friendly plane
- Closest enemy plane engaged by 2+ friendly planes
- Closest friendly side (Standard Alt.)
If fired upon or tailed: 1. Closest threatening enemy plane
Damage >= 75%: 1. Closest friendly side (Low Altitude): gain max speed; use hardest turns
LIMPING HOME
- Closest friendly side (Level)
LONE WOLF
- Closest bomber
- Closest fighter-bomber
- Closest fighter
If tailed or after having shot down an (sic, as printed): 1. Closest friendly side (Low Altitude)
Damage >= 50%: 1. Closest friendly side (Low Altitude): gain max speed; use hardest turns
ACE AI Table
(Trained: d20, -1 row down / Rookie: d20, -2 rows down)
Range < 1 Dashboard
| Maneuver | Behind Higher | Behind Level | Behind Lower | Side Higher | Side Level | Side Lower | Ahead Higher | Ahead Level | Ahead Lower |
|---|---|---|---|---|---|---|---|---|---|
| Wingover | 11-20 | 9-20 | 16-20 | 19-20 | 16-20 | 19-20 | - | - | - |
| Hardest Turn | 7-10 | 1-8 | 8-15 | 17-18 | 1-15 | 10-18 | - | - | - |
Range >= 1 Dashboard
| Maneuver | Behind Higher | Behind Level | Behind Lower | Side Higher | Side Level | Side Lower | Ahead Higher | Ahead Level | Ahead Lower |
|---|---|---|---|---|---|---|---|---|---|
| Wingover | 13-20 | 13-20 | 13-20 | - | - | - | - | - | - |
| Hardest Turn | - | 9-12 | 11-12 | 15-20 | 14-20 | 15-20 | - | - | - |
| Turn & Alt Chng |