Planta Nubo
Planta Nubo Rulebook
Table of Contents
Table of Contents
- Game Components
- General Setup
- Personal Setup
- The Extension Cards
- The Energy Track
- Playing the Game
- The Tool Phase
- The Actions
- More Actions
- Step 2 - Personal Deliveries
- Step 3 - Free Module Action
- The Crafting Phase
- The Forests
- The Flowerpots
- The Forest Phase
- The Income Phase
- End of the Round
- Specific Actions and General Notes about Iconography
- Final Scoring
- Solo Game - Setup
- Solo Game - Gameplay
- Glossary - Arbor Level Requirements
- About Planta Nubo and the World of Overgrown
Game Components
- Game Board
- 12 Blueprints (front and back)
- 12 Flowerbed Action Tiles, 2 sets of 6 colors, 3 double-colored backs (6 tiles per color in different shapes: 3 squares each, 4 squares each, 5 squares each)
- Flowers: 23 Blue & Purple each, 25 White & Red each, 27 Yellow & Orange each
- 10 Starting Modules
- 40 Modules
- 40 Oxy Farms
- Freight Containers
- Crafts
- 1 "Energy Die"
- 1 "Arbor Level" Marker
- 4 Action Tiles "Tools" (+ 1 Telescope in reserve)
- 1 "Overtime" Marker
- 1 Garden Bot "Charge Marker"
- 1 Oxygen Point Disc "Point Marker"
- 4 "Barricade" Tiles, 2 different shapes each 2x
- Soil, Standby and Plugin markers
- Playing Aids (front: "Sequence of a Round"; back: "Overview Final Scoring")
Per player: 2 Personal Boards (Platform and Tool Shack), Forests, Tools, Bot Charge Marker, Overtime Marker, Barricades.
General Setup
Setup for 4 Players. Changes for 2-3 players are noted below.
- Place the Game Board in the middle of the table.
- a. Prepare the action area by taking the nine Blueprints and lay them randomly in a 3x3 grid. Leave some space between them. Important: Lay out the "airship blueprints" (A) in a way that they don't share an edge with another airship blueprint. b. After that, lay out the Flowerbed Action Tiles. Use the front sides to compose 2 identical sets of 6 tiles with different colors. Place 3 randomly chosen tiles of the first set on one side of the blueprints. Place the other 3 tiles from the first set on a different side of the blueprint that shares a connection to the first 3 tiles. This way the 6 tiles are placed like in a right angle. Repeat the procedure with the second set and the other two sides of the blueprint grid. Use only the side of the flowerbed action tiles that show one color. Use only the blueprint tiles that match the player count. Put the other tiles back in the box.
- Sort the Flowerbeds according to their colors. Stack randomly three of each color on top of the matching colored flowerbed action tiles.
- Place the Telescope on the spot for the first round. It points towards the young moon.
- Shuffle the Crafts and place them as a facedown stack besides the gameboard. Draw four tiles and place them onto the four crafting spots on the gameboard. Place the four bonus markers for bot charging besides them.
- Sort the Forests according to their shapes and stack them. Put the small Forests (2x2) to the side for now.
- Sort the modules and oxy farm cards according to their backs, shuffle them and put them as facedown stacks on the matching slots on the gameboard. Note: Put the 10 starting modules aside first. You will need them later. Put 1 oxy farm card faceup on each spot left of the telescope. Put 1 module card faceup on each spot right of the telescope.
- a. Shuffle the Freight Containers and place them facedown in a stack next to the gameboard. Draw 3 tiles and place them randomly faceup on the docking slots of the gameboard. b. After that, draw three more containers and place them faceup on the queue slots of the gameboard.
Changes for 2-3 players
- There are 2 versions of blueprint G. In your first play use the blueprint G showing one dot.
- 2 Players and Solo: In setup place one matching flower on top of each freight container on the docking slots to the rightmost spot.
- Forests with less than 4 players: For each player less than four, put one tile of each shape of the green and lilac Forests as well as two of the brown Forests back in the box.
- Action display for 2 players: Use only 1 set of Flowerbed Action tiles - place the second one back in the game box. Place all 6 of the Flowerbeds on top of the Action Tiles. In a 2 or 3 player game use two random "Airship" action tiles (marked A). Also use the blueprints marked for a 2 and/or 3 player game. The "Airship" blueprints must not share an edge.
- Action display for 3 players: Additionally use the double colored flowerbed action tiles. You don't stack flowerbeds on top of them! Place these and one set of the Flowerbed Action Tiles randomly (all three double colored tiles on the bottom of the action area). Place all 6 Flowerbeds of a given color on their corresponding Action Tile showing only one color.
- Solo game: Put the six solo game cards back in the box. Set up the grid like in a game with 2 players. See the solo rules for details.
Personal Setup
-
Take both your Personal Boards (Platform and Tool Shack) and place them in your personal playing area. The icons in the growing area of your platforms vary from board to board. Choose a player color, take all material of that color and any further personal material, then:
- a. Place 1 Barricade each in all 4 restricted areas with light brown coloring in your growing area.
- b. Place your Energy Die with the number 1 on the starting space of the energy track showing a small arrow.
- c. Place your Tools next to your Tool Shack.
- d. Place your Bot Charge Marker next to the Gardenbot Track.
- e. Place your Overtime Marker on the corresponding spot on your Tool Shack.
- f. Give all players 1 random Arbor Level Tile per level. Place the tiles on their corresponding spots on the window of your Tool Shack.
- g. Place your Arbor Level Marker on the starting spot of the Arbor Track.
-
Take one small Forest (2x2) of each color and put it into your personal stock. In a game with less than four players, put all the remaining small Forests back in the box.
-
Take 6 Soil Tiles. Place 3 of them on the starting spots in your growing area. Put the rest in your personal stock beside your Tool Shack.
-
Deal your Starting Module Cards: Divide the 10 Starting Module Cards in the 5 cards with standby symbols and the 5 cards with battery symbols. Shuffle both decks separately and randomly deal 1 card of each deck to each player. Put the standby card together with 1 Standby Marker in the slot on the upper right of your platform. Put the battery card together with 1 Battery Marker in the slot on the lower left of your platform. Put the unused starting module cards back in the box.
The Extension Cards
One of the main elements of the game are the Extension Cards which are used to extend your platform. There are modules and oxy farms. You will gain them by performing the actions of your module workshops on your platform.
Module Cards
Module cards offer additional actions and permanent effects. There are two different kinds:
Action Modules allow you to perform actions. When performing the action "Perform Module Action" discard one standby marker from the card you want to activate. Standby markers can be gained as follows:
- When gaining 1 Action Module Card, place 1 standby marker on the card right away.
- As soon as your energy die reaches or moves beyond a plugin marker that is connected to an action module card place 1 standby marker on the card.
Battery Modules may be activated as soon as their effect triggers. You may use their effect as many times as battery markers are on the card. Battery markers can be gained as follows:
- When gaining 1 Battery Module Card, place 1 battery marker on the card right away.
- As soon as your energy die reaches or moves beyond a plugin marker that is connected to a battery module card, place 1 battery marker on the card.
Additional Rules:
- There is no limit of standby markers on action module cards or battery markers on battery cards.
- Battery markers are never returned to the general supply when the card's effect is used. Battery markers accumulate on battery cards and increase their effects.
Oxy Farms
Oxy Farms will award oxygen points in the final scoring depending on the requirements of the given card. You will not place standby or battery markers on Oxy Farms. Still they need to be plugged in to the energy track by using plugin markers.
Flowerpots
You can find flowerpots on your platform board and many extension cards. At any time during your turn you may take flowers from your growing area and place them in your flowerpots to make room for forests. At the same time some flowerpots score oxygen points in the final scoring when equipped with flowers. A grey flower cube indicates any flower. Some flowerpots show spaces for any one flower and one purple flower. When equipped with a purple flower the flowerpot will score two oxygen points at the end of the game.
The Energy Track
During the game you will gain green energy from time to time. Powered by that green energy, your energy die moves clockwise around your growing area. It will provide the module cards with energy and generates oxygen itself.
How the Energy Track works:
- When gaining green energy by performing actions you will perform 1 Energy Track Action right after gaining the energy. Move your energy die a number of steps according to the energy gained during the complete action. For each energy gained move your energy die to the next space showing the energy icon. Skip the spaces without an energy icon.
- Every time you place a new extension card to your platform, you also have to place one plugin marker. Place the marker on the space that connects the used card slot with the energy track by a root wire.
- When reaching a space with a plugin marker that is connected with a module card by a root wire, place one standby marker (for an action module) or one battery marker (for a battery module) on the respective card.
- When the energy die passes a cupreous pipe that connects a planted space in your planting area with the energy track you may do the following:
- Either move any flower from this space to your compost pile. You will gain one Oxygen Point immediately. (This might trigger a Compost Action.)
- Or place a fitting flower on the space in case there is an empty spot. (In case the spot is cultivated with a soil tile, place any flower.)
During the game you can perform actions to upgrade the plugin markers. If you upgrade them, flip the marker to its backside that shows one oxygen point. When reaching or passing this plugin marker with your energy die, you will gain one oxygen point immediately.
The Extension Workshops: The energy track shows two extension workshops, connected to the track by root wires in the lower left and upper right corner. These are special action modules and can be used differently. Every time your die reaches or passes the plugin marker that connects the energy track with an extension workshop, you place a standby marker on it.
Tips for a smoother gameplay: Make sure you don't forget the effects of each step of the die on the energy track. We recommend to perform each and every single step after each other.
Playing the Game
A game of Planta Nubo is played over four rounds. One round is divided in these four phases:
- Tool Phase: Place three of your four tools, in order to perform actions.
- Crafting Phase: Use the remaining tool, in order to use the effect of the respective crafting tile.
- Forest Phase: Plant forests on cultivated spaces in your growing area or let them grow further.
- Income Phase: Gain income from your energy die, the planted forests and your Arbor level.
Then prepare the next game round. Skip this step in game round 4 and proceed to the final scoring.
The Tool Phase
The player with the starting tree takes the first turn in the Tool Phase. Proceed in clockwise order with each player's turn (play in counter-clockwise order when playing in Switzerland). After each player performed 3 player turns the Tool Phase ends and all players proceed to the Crafting Phase.
Description of a player turn in the Tool Phase - each player turn consists of 3 steps performed in this order:
- Step 1: Place a tool. You place one tool per player turn between two action tiles. Perform the actions of one of the two action tiles. These can be blueprint or flowerbed actions. In one of your three player turns in the tool phase, you have the opportunity to do "Overtime" and to perform the actions of both action tiles.
- Step 2: Deliver to your Personal Freight Containers. On your tool shack, there are two docking slots for your personal freight containers. You can now deliver to those freight containers, both exactly one time, if available, to produce green energy. You always have to deliver from left to right.
- Step 3: Free Module Action. In the last step of your turn, you can do one module action. This step is the only way to use the special module actions from your extension workshops to perform the "Extension Workshop" action and gather new extension cards.
You always do Step 1 of your player turn. Steps 2 and 3 you can do, if possible.
Step 1 - Place a Tool
On your player turn, you place one tool between two action tiles. Then you choose one of the action tiles and perform the actions on it. You can use the tools in any given order, but only one per turn.
Additional placement rules for tools:
- There can only be different tools next to blueprints.
- Tools have to be placed next to at least one blueprint.
- You are not allowed to place tools on spots next to only flowerbeds. Only "Shovels" and "Hammers" may be placed there.
Note: It does not matter if you use the blueprint or the flowerbed action tile.
Working overtime - Perform actions of both action tiles: Once per round, you can use the actions of both action tiles, where you have placed your tool next to. To do so, you need to spend 2 charges from your gardenbot, after you performed the actions of the first action tile. Immediately flip the overtime marker in the middle of the rondel to its backside as a reminder that you already used overtime in this round. After that you can perform the actions of the other action tile. You have to finish all the actions of the first tile, before you begin the actions of the second tile.
The Gardenbot
Your gardenbot helps you in multiple ways:
- Work overtime and perform the actions of both action tiles in your turn.
- Ignore the color requirement of your freight container, when you deliver to it in Step 2 of your turn.
- Use various module actions.
- Activate the flowerpot on your platform.
If you get charges, move your charge marker on the charge track forwards. If you spend charges to let the gardenbot work for you, move the charge marker backwards.
"Overcharged": If you get too many charges, so you would need to move your charge marker beyond the space "5", you can choose: Stay on space "5" and lose the remaining charges, or move your disc to space "0" (or even beyond that) and get four oxygen points immediately. Example: Your charging level is already "5" and you get 2 charges. The step to "0" counts as 1 charge and you get 4 oxygen points. But since you received 2 charges, your charge marker will move to space "1". You can think of it as exchanging 6 bot charges for 4 oxygen points.
The Actions
On the following, we explain the different actions in the game. You'll find them on the action tiles and also on the module cards or even as a bonus. Every action will be explained separately. On many occasions, you can perform the action multiple times.
The Actions - Getting Flowers
Activating a flowerbed action tile allows you to perform one "Flowerbed-Action", with which you can plant new flowerbeds into your growing area. You can also get flowerbed actions through your arbor level or module actions.
Action "Place Flowerbed and get flowers": Take the topmost flowerbed of the stack on the flowerbed action tile next to where you have placed your tool. In case there is no flowerbed left on this tile take a flowerbed from a stack of the same color on another flowerbed action tile. You also can get flowerbed actions when reaching your first arbor level or through module actions (in these cases take the topmost flowerbed from any of the flowerbed stacks).
After that, place the new tile on a free space in your growing area. Free means:
- There are no other tiles.
- The part of the growing area isn't blocked by a barricade and therefore accessible. You are only allowed to place in a light-brown area after removing the barricade there. (A barricade blocks the complete light-brown area. The dark-brown area is always accessible.)
Additional placement rules:
- You cannot place the tiles overlapping each other.
- The tiles cannot be placed outside of the growing area borders.
If you can't place the tile or all flowerbed tiles of the matching color have been already picked, you cannot perform the action. If you cover one or more placement bonuses with your tile, you may perform the bonus actions in any given order. After you have placed the flowerbed tile, you also have to plant flowers in the matching color on the flowerbed. Place 1 flower cube per flowerbed space.
3-player special: The flowerbed actions where you can choose from 2 different stacks are only available in a 3 player game. The flowerbed action tiles with two colors are only available in a 3 player game. If you carry out such a tile, you take the topmost flowerbed from a stack on another flowerbed action tile, which shows one of the two colors.
Action "Take or place Soil": Take 1 soil tile from the general supply and place it to your personal supply. Or place one soil tile from your personal stock on a free space in your growing area. After that, you have to plant one flower of the color of your choice on the soil tile.
Important rule about flowers! You can only remove flowers from flowerbeds and soil tiles if actions allow you to or if you can place them into a flowerpot. You may never discard them!
The Actions - Deliver Flowers to the Airport
Airship blueprints (A) allow you to deliver your energy charged flowers to public freight containers, which are going to be collected by airships from the airport on the gameboard. They are transformed by biomass converters into green energy. The blueprints let you perform up to three delivery actions in different combinations (three deliveries to different freight containers; three deliveries to the same freight container; or 2 deliveries to 1 freight container and 1 delivery to 1 other).
Action "Delivery to Freight Containers at the Airport": Deliver 1 flower to 1 freight container at the airport on the gameboard.
- Take 1 flower from your platform and put it on one free spot of a freight container at the airport. The color of the spot and the color of the flower have to match.
- You get green energy as indicated below the spot you delivered to. At first, do all the delivery actions as printed on the action tile. Then perform one energy track action with all gained energy.
- Immediately gain 1 oxygen point when delivering to the last spot on a given freight container.
Extra option: The Warehouse. If you perform an airship blueprint (A), you can use the warehouse for one of the deliveries. Place one flower from your growing area in the warehouse. The flower needs to have a color that currently is not present in the warehouse. Then pick one of the flowers that was already in the warehouse and put it on a free spot in a freight container at the airport. This "trade" is part of the up to 3 deliveries you gain from the blueprint! You do not lose or gain a delivery!
After you performed the three delivery actions, you replace the completely filled freight containers. Remove them from the airport and put them on the discard pile. The flowers go back to the general supply. Take the freight container from the uppermost queue slot and place it to the free slot. Move the remaining freight containers in the queue slots upwards to fill the empty slots. Then draw a new container from the stack and place it on the empty slot.
More Actions
These are the different actions found on blueprints, also on module cards or personal boards. You perform them the same way, as if you get the action through placing one of your tools.
Action "Personal Freight Container": Take one freight container from one of the queue slots or from the draw pile and place it on a free dock on your tool shack. If you place the freight container on the lower dock, you have to pay one oxygen point as a placement cost. If you have taken the container from the queue slots, refill them by drawing a new container. Note: If you currently have no free slot available you may place the new container next to your Tool Shack. You may place it as soon as one of your slots gets available.
Action "Gain Soil": Take 1 soil tile from the general supply and put it in your personal stock.
Action "Charge Gardenbot": To charge your gardenbot, move your charge marker as many steps clockwise on the gardenbot rondel, as the action symbol indicates.
Action "Module Action": Activate the action on one of your modules by discarding the standby marker from the module. After that, perform the action of that module. This icon only allows performing module actions on module cards (not extension workshops).
Action "Delivery to personal Freight Containers": Perform 1 delivery to any of your personal freight containers that is in a dock slot on your Tool Shack. You have to deliver to the leftmost empty spot in that container. After that, perform 1 action "Energy Track" with the energy you've collected.
Action "Upgrade Plugin Marker": Flip any 1 of your plugin markers to its backside. This backside shows you 1 oxygen point next to the energy symbol, which you still need to consider while moving your energy die. Upgraded plugin markers produce oxygen when your energy die reaches them.
Action "Remove Barricade and Perform Bonus Action": Remove any one of your barricades from your growing area. After that, perform 1 of the four following options:
- Perform 1 action "Charge Gardenbot" with 1 charge.
- Perform 1 action "Energy Track" with 2 energy.
- Perform 1 action "Gain or place soil".
- Perform 2 actions "Gain or compost flower".
More than one action at once: Always perform the whole action before you start with the next action. If you have multiple actions available, you can choose the order yourself. But if one action triggers another action, always finish the first action, before you start with the next one.
Action "Upgrade Arbor and Perform Bonusaction": Check if you meet the requirements of the next Arbor level.
- If you do not meet the requirements, you cannot perform the action.
- If you meet the requirements, move your Arbor level marker one step up. Then you may perform the covered bonus action:
- Level 1: Perform 1 action "Place Flowerbeds and Get Flowers" and take a flowerbed tile from any stack of your choice.
- Level 2: Perform 1 action "Gain Module Card".
- Level 3: Perform 1 action "Plant a Forest" or 1 action "Grow a Forest".
When reaching a new arbor level also your oxygen income at the end of the round increases.
Action "Gain Flower": Take 1 flower in the displayed color from the general supply and place it on a free spot on your platform.
Action "Compost Flower": Discard 1 flower from the displayed color from your platform and put it on your compost pile. This might trigger the immediate action "Take a Soil Tile": As soon as you have three flowers of any color on your compost pile, discard them and put them back in the general supply. Then take a soil tile from the general supply and put it in your personal stock.
Action "Energy Track": If you gain energy, move your energy die the displayed number of steps on your energy track.
Action "Gain Oxygen": If you get oxygen points, you move your point disc on the oxygen track the displayed number of steps forward.
Action "Plant Forest": Place one forest tile with the I-Side facing up in your growing area. It has to be planted on empty flowerbed tiles and/or soil tiles and cover those.
Action "Grow Forest": Flip one of your planted forest tiles from its I-side to its II-side.
Step 2 - Personal Deliveries
In Step 2 of your turn, you can deliver to your personal freight containers, if placed in your Tool Shack before. You are allowed to deliver to both freight containers only once in this step 2 of your turn and gain green energy for it. You always have to deliver to your personal freight containers from left to right. When a personal container is filled to its maximum capacity, you gain the total green energy and immediately perform 1 action "Energy Track". After that, you discard the completed container and the flowers into the general supply.
Help from the Gardenbot: When delivering to your personal freight containers, you may spend 1 charge of your gardenbot to ignore the requested color of the spot you have to deliver to. Instead of the requested flower, you deliver a flower of any color. Gain the green energy as usual. You may use this action of the gardenbot every time you deliver to your personal freight containers.
Step 3 - Free Module Action
In Step 3 of your player turn, you may perform any 1 "module action". Special Module Actions: Only in this step you are allowed to use the special module actions of your Extension Workshops. The actions from your Extension Workshops are:
Extension Workshop - Action "Gain New Extension Card": Choose any 1 of the 7 faceup extension cards from the gameboard. Place it in a free slot next to your platform. Don't forget to connect the card into your energy track by placing a plugin marker. Reminder: In case you chose a module card, place 1 standby or battery marker on the card right away. Refill the empty card space by placing a card of the type you chose. First move all remaining cards towards the telescope marker, to fill the gaps. Then refill the empty card space by drawing a card of the matching draw pile. If a card pile is empty, shuffle the discard pile into a new draw pile. If no cards are left, none can be taken.
Upgrade Energy Die: By activating the Expansion Workshop action in the upper right corner of your platform, you may also perform 1 Action "Upgrade Energy Die". Spend 2 gardenbot charges and turn your die to the next higher number. If the die is already on the 6, you can't upgrade the die any longer. Don't forget to use your starting battery modules! They get triggered when you upgrade your energy die!
Your turn ends after Step 3 and the next player in turn order can start their turn.
The Crafting Phase
After all players have finished their three player turns and used three of their tools, the Tool Phase ends and you move on to the Crafting Phase. In the Crafting Phase, you use your leftover tool and place it on the tool symbol below the crafting tile, which is matching your tool.
Perform the action(s) the crafting tile offers you. If there is a bonus marker on the crafting tile, you receive one or two charges for your gardenbot. Note: Bonus markers will be assigned to crafting tiles if they were not used in a given round. Which means there can only be bonus markers on crafting tiles in the second game round earliest. It is allowed that multiple players can use the same crafting tile. If so, then all of the players get all charges for the gardenbot through bonus markers.
After all of you have used one crafting tile:
- Discard all crafting tiles including bonus markers, that have a tool below them.
- Flip all existing +1 bonus markers on crafting tiles to the +2 side. (A crafting tile cannot have more than +2 bonus bot charge.)
- Put a bonus marker +1 on the crafting tiles that don't have a tool below them or a bonus marker on them. (The small symbol of a bonus marker above the tool symbol indicates if the bot charge bonus increases or not.)
- Put all discarded crafting tiles to a discard pile. If the draw pile should be empty, shuffle all discarded tiles and place them as a new drawing pile.
- Draw a new crafting tile for every empty spot and place them on the game board.
The tools remain on the game board until the end of the round. At the beginning of the fourth and last round, move all crafting tiles slightly upwards, so you can see the scoring categories. When choosing a crafting tile in round 4 you also choose a scoring category for leftovers in the final scoring. You can score either leftover flowers, soil tiles in your personal supply, unused standby markers or bot charges.
The Forests
When delivering flowers to freight containers you will earn green energy. Because you use the flowers, you make space to plant forests. Forests are one of the best ways to generate oxygen. You plant them on top of your empty flowerbeds and soil tiles. This is mainly done in the Forest Phase.
Forest Tiles Structure: There are three different colored forest tiles (brown, green and lilac). The color is important to some of the oxy farm cards. All forest tiles have two sides. You always plant forest tiles with its side I faceup. Later in the game, you can grow your forest and flip the tile to its side II. On the forest tiles, you'll find: the Side of the Forest Tile (I or II); the Immediate effect when placing; the Income (no income any longer on the flipside); and Oxygen Points in Final Scoring (only on side II, indicated on side I to show what is on side II).
You place forest tiles with the Action "Plant Forest", frontside (I) facing up. For planting a forest, you often receive oxygen points immediately and sometimes you raise your income at the end of the round. If you already have planted forests, you can use the action "Grow Forest" to flip a tile to its side II. Your income will decrease in favour of valuable oxygen points in the final scoring.
The Flowerpots
At any time in the game, you can move flowers from your growing area to your flowerpots. But only in this direction and not the other way around! The Flowerpots show you which kind of flower can be planted there. If there is a grey cube printed on them, you can plant any color you want. But if there is a certain color printed on the flowerpot, you can only plant a flower with the matching color there. Flowers that have been planted in pots, may still be used like the flowers in your growing area. You are allowed to move them from one pot to another pot anytime.
You can find 2 flowerpots you can use pre-printed on your platform board. Flowers of any color may be placed there. The flowerpot in the lower right corner has to be activated by spending 1 bot charge when placing a flower in it. Many extension cards have flowerpots on them.
Strategic advice: Use your flowerpots to make room in your growing area in order to be able to plant forests.
Many flowerpots show Oxygen Point icons for the final scoring. You will score these points if the indicated flowers are in the flowerpot by the end of the game.
The Forest Phase
You play the Forest Phase in turn order. When it is your turn, you can choose only one of the following two options:
- Take 1 forest tile from any 1 forest stack and perform 1 action "Plant Forest". If you cannot perform the action, you cannot take the tile. Additionally or alternatively you can perform another action "Plant Forest" with one of your personal forests that are next to your tool shack.
- Or: Perform 1 action "Grow Forest" with a forest tile already in your growing area. Flip the tile to its side II.
Action "Plant Forest": Place 1 forest tile with its side I faceup in your growing area. You have to place the forest on top of flowerbed tiles and/or soil tiles and cover those with it. The covered space has to be free of flower cubes and cannot have empty spaces inbetween.
Reline Forests with soil: Before placing the forest you may place as many soil tiles from your personal supply into your growing area, where you wish to place your forest. When you reline, you do not place flowers on the soil tiles! You also do not get any bonuses you cover! And the placed soil tiles have to be covered by the placed forest tile immediately.
Immediate Placement Effects from the Forests:
- For all forests, except for the small 2x2 personal forest tiles, you'll immediately get oxygen points for planting them. You'll get a number of oxygen points depending on the value of your energy die. On most of the forest tiles, there is also a number printed beside the die. Add this number to the number of the energy die. Example: With this symbol you'll get oxygen points equal to the number of your die plus 1. If your die shows 2, you'll get 2+1=3 oxygen points.
- For all the squared forest tiles, you'll get a free upgrade of your energy die as a placement bonus. Turn the die to the next higher number. An upgrade is no longer possible after reaching number 6. This is the only effect you'll get from your personal forests.
Note: Do not forget that all energy die upgrades trigger your starting battery modules. Upgrading your energy die is essential to produce oxygen points when planting forests. Also, your energy die gets you oxygen income each round in the income phase.
The Income Phase
In the Income Phase you get income of oxygen and energy. Add these 3 values together:
- Oxygen points indicated through the number of your energy die.
- Green energy and oxygen points as visible on the forest tiles.
- Oxygen points through the current level of your Arbor.
You gain the sum of oxygen points and move your disc on the oxygen track accordingly. Use the number of gained green energy to perform 1 Action "Energy Track".
End of the Round
At the end of round 4, you immediately perform the endgame scoring. At the end of any other round, follow these steps:
- Take back your 4 tool tiles and refresh your overtime marker.
- Discard the two extension cards left and right next to the telescope and put them on a separate discard pile for every different type.
- Move the telescope to the next space, pointing to the moon symbol of the next round.
- Move the extension cards towards the telescope to fill the empty card slots besides the telescope. Draw new extension cards to refill the empty card slots.
- Give the starting tree to the player to your left.
Note: In the unlikely case the draw stacks are empty, shuffle the discarded cards and create new draw piles.
Variant: If you want more extension cards in play, remove two cards on each side of the telescope instead of only one. Move the rest of the cards as usual and refill the empty slots. This way a new module card will come into play as well. This variant is recommended in plays with 2 players or solo.
Specific Actions and General Notes about Iconography
Symbols with actions: A wider "or" line separates 2 possibilities to perform a certain action. A filled blocky red arrow shows costs you have to pay in order to perform a given action; in addition, it is specified how often you are allowed to carry out the conversion.
Action "Compost potting soil": You can compost up to three flowers from 1 of your personal freight containers. Do not discard the freight container!
Action "Craft Services": You can use any one of the currently displayed crafting tiles. Perform the crafting as described in the Crafting Phase. If there are bonus markers on the crafting tile, you do not use them!
Action "Power-up": Place 1 standby marker on any of your action modules and 1 battery marker on any of your battery modules (not on your extension workshops).
Iconography on Battery Modules and Oxy farms: The action or requirement in the light blue arrow must be performed or fulfilled, so you can use the effect on the right side. A 1x means, you can do this once in a player's turn. For each element on the left of the colon, you'll get the effect on the right of the colon once.
Oxy farms examples
- Per 2 lilac forest spaces in your growing area you gain 1 oxygen point (maximum of 16 forest spaces for a total of 8 oxygen points).
- For your longest straight column of adjacent forest spaces you score 1 oxygen point for each forest space. The forest spaces do not need to be on the same forest tile.
- For each loading space not delivered to on your personal freight containers you score 1 oxygen point.
- For every covered space in your growing area framed by a cupreous pipe you gain 1 oxygen point.
- For each full moon icon on your extension cards you gain 1 oxygen point. This includes all oxy farms as well as module cards with flowerpots that have an oxygen point icon.
- For each visible unique type of flowerbed space in your growing area you gain 1 oxygen point (maximum of 6).
Final Scoring
After the Income Phase in round 4, the game ends and you perform the Final Scoring. You'll get oxygen points from different sources (indicated by an oxygen symbol on a light blue background). Add those oxygen points to the ones you collected during the game. The player who collected the most oxygen points wins. If there is a tie, the player who played the most extension cards wins. If there still is a tie, you share the victory!
Score the following categories in this order:
- Grown Forests: Forest tiles on side II.
- Flowerpots and Extension Workshops: Score flowerpots with the matching colored flowers on them. If you have remaining standby markers on your extension workshops cards, you receive 3 oxygen points for each marker remaining. Return the standby markers to the supply.
- Oxy farms: Score each card individually. If they require to convert certain components into oxygen points return those to the general supply. You may score the cards in the order of your choice.
- Leftover Scoring: In the Crafting Phase of the last round, while performing your crafting action, you also choose a scoring option for spare materials. Count the elements of your marked category and change them into oxygen points (if necessary, round down). Options: spend leftover standby markers from your action modules; spend 2 leftover flowers each from your platform; spend leftover bot charges from your gardenbot track; spend leftover soil tiles from your personal supply.
Solo Game - Setup
In the solo game, you are playing against Botbot and try to get more oxygen points than your bot opponent. Botbot has four different difficulty levels: Normal, Challenging, Hard or Very Hard. Choose the level before the beginning of the game and use the matching platform tableau (on the backside) for Botbot.
Set up a solo game in the same way as a two player game. Use the airship blueprints (A) with 1 dot and 2 dots. The third airship blueprint remains in the box. Then choose a player color for Botbot and set up his personal area:
- Place the solo board.
- Place the bot charge marker on space 0.
- Draw 1 freight container from the draw pile and place it on the uppermost docking slot on the solo board.
- Cover the other 4 free docking slots for containers with 4 barricade markers.
- Place 1 flower of each color into the flower supply on the solo board.
- Place Botbot's Arbor Level marker on the starting space of the Arbor track.
- Use Botbot's point marker to mark the rightmost freight container in the docking spaces on the game board.
- Shuffle the 6 Solobot tiles and place them as a face down draw pile next to the solo board.
- Randomly determine a starting player and assign the starting tree respectively. Choose your starting cards and hand out starting resources depending on playing order. For Botbot use the die instead of the disc on the oxygen point track (with 1 pip facing up). Botbot will not get starting cards.
- Prepare three small 2x2 forests for Botbot.
Remember to place flowers on the rightmost spaces on all freight containers in the docking slots on the game board.
Solo Game - Gameplay
During your turn, you play as in a multiplayer game. In Botbot's turn, you draw a solobot tile and perform the actions indicated on this tile.
- Tool Phase: You play your turns alternating from each other.
- Crafting Phase: Botbot gets one oxygen point and the gardenbot charges that are on the crafting tile.
- Forest Phase: Botbot does nothing.
- Income Phase: Botbot gets oxygen points according to the number on its energy die, Arbor level and forests with the side II facing up (only higher difficulty levels).
Special Bot Charge Track for Botbot: Botbot has a different charge track. Move the charge marker up and down depending on if Botbot receives or spends bot charges. If Botbot's charges move above space 5, the charge marker remains on space 5 and Botbot receives 1 oxygen point for each charge over 5.
Solo - The Tool Phase
Draw Solobot Tile: Draw the next solo tile at the beginning of the turn and place it on an open stack.
Define the action "Place Tool" for Botbot:
- Check the column with the blueprint symbols on the solobot tile: Start with the upmost blueprint symbol. On the solo board, there is a requirement and an action assigned to each blueprint symbol. For now, check only the requirement. If met, move on to step 2. If not, check the next blueprint symbol and so on.
- Check the column with the tools. Start with the upmost tool. Check if Botbot has used this tool already. If so, check the next tool and so on. If they haven't used the tool, check if Botbot can use this tool next to the matching blueprint from step 1. If so, move on to step 3. If not, move on to the next tool. Important: When checking the airship blueprints consider how many dots are indicated next to the symbol.
- Check the column with the position arrows. Start with the upmost position arrow. Check if Botbot can use the tool from step 2 in the displayed position next to the blueprint. If so, move on to step 4. If not, check the next position arrow.
- Place the tool on the determined position. Perform the action assigned to the blueprint on the solo board. After that, check the other blueprint where you had placed Botbot's action marker next to and perform also its action (or the action of that flowerbed). Botbot always works overtime. Important: In the rare case that Botbot can't place a tool next to a blueprint, take the unused tool which symbol is upmost in the column and place it on the blueprint from step 1 (ignore placement rules). This blueprint can't be used for the remainder of the round and Botbot doesn't work overtime.
- After performing actions, Botbot also performs the action printed on the active solobot tile.
Solo - Botbot's Actions
If Botbot used a tool, they always perform the special actions matching the selected action tile. Botbot always works overtime.
Substitute Action: If Botbot can't do any action, it will always take the action "Gain 2 Flowers". Check the lowest freight container with empty slots and give Botbot one flower matching the color of the leftmost empty spot. Repeat for the second flower with the second lowest freight container (or the second leftmost empty spot on the lowest container). If there is no empty slot, Botbot gains one bot charge for every flower it can't take.
Flowerbed - Action: Botbot takes the upmost flowerbed (if available) of the matching flowerbed stack and places it next to the solo board. Then put 3 flowers of the matching color in its flower supply.
Deliver to Airships - Requirement: Botbot has to have at least three different flowers in their flower supply. Action: Botbot delivers up to three flowers to the freight containers:
- Botbot delivers from right to left up to two matching flowers to the freight container marked with its point marker.
- Move the point marker one space left to the next container (circle back to rightmost if needed).
- Deliver up to two matching flowers to the new container until all three flowers are delivered or a delivery is not possible.
- For each 2 green energy from these deliveries, Botbot gets 1 oxygen point immediately. If there is 1 green energy left, indicate that by putting a soil marker to the battery symbol on their solo board.
- For each completed freight container, Botbot receives 1 oxygen point as a reward.
(Botbot never uses the warehouse.)
New Freight Container - Requirement: Botbot has available empty docks. Action: Botbot takes the container from the top queue slot and places it to the lowest empty dock on its solo board. It also receives one bot charge. Refill the queue.
Remove Barricade - Requirement: There is at least 1 barricade left on the docking slots. Action: Botbot removes the upmost barricade (no bonus action).
Fresh Flowers - Requirement: Botbot has 3 or less flowers in their flower supply. Action: Botbot performs "Gain 2 Flowers".
Growing Arbor - Requirement: Botbot meets the requirements to upgrade their Arbor. Action: Botbot upgrades their Arbor to the next level. Requirements (depending on chosen solo board) vary: number of freight containers, removed barricades, bot charges, flowers in supply, forests, or flowerbeds.
Additional effect on the current Solobot Tile: If Botbot has used a tool and performed the corresponding actions, they use the additional effect of the tile (printed in the lower half). Effects include: gain 1 flower of each color not currently in supply; remove all flowers from the lowest freight container; remove both cards next to the telescope and refill; gain 1 flower of each color; remove the freight containers in the queue and refill; roll an unused die and take the indicated forest tile (side II up) placing it at the right side of the solo board with its immediate effect; etc. If a "spend 1 bot charge" symbol is next to an additional effect, Botbot must spend 1 bot charge to receive it; if it cannot, the effect is ignored.
Deliver to Botbot's own freight containers: Botbot delivers one time to each of its personal freight containers from bottom to top and from left to right, gaining green energy. If Botbot doesn't have the matching flower, follow in order and perform the first possible: (1) Trade three of the same color for one flower of the needed color (choose color per trade order on the solo board, left to right); (2) Spend one bot charge and take the needed flower from the general supply; (3) Cancel the delivery to this freight container and continue with the next.
The die on the oxygen track: If the die on the oxygen track reaches one of the 10s spots (10, 20, 30 etc.), Botbot spends two charges and upgrades the die by one number. If it doesn't have two charges, it gets one charge instead.
Solo - The next phases
- Crafting Phase: Botbot places the remaining tool on the matching crafting tile. Botbot never performs the crafting action; instead it always receives one oxygen point. Additionally Botbot gets the bot charges in form of bonus markers on the crafting tile.
- Forest Phase: Botbot does nothing and skips this phase.
- Income Phase: Botbot receives oxygen points matching the faceup number of the die on the oxygen track, oxygen points for the Arbor level, and oxygen points for forests with the I-side facing up (only in higher difficulty levels). Note: At the end of round two, Botbot has used all six bot cards one time. Shuffle all cards and build a new draw pile.
- Final Scoring: Botbot gets oxygen points for all grown forests at the right side of its solo board (forest tiles on their II-side).
Difficulty Levels of Botbot
- Challenging: Botbot doesn't need to spend a bot charge to perform the additional effect of the bot cards.
- Hard: Additional to Challenging: Botbot trades two flowers of the same color (instead of three) from its flower supply to one needed flower when delivering to its personal freight containers.
- Very Hard: Additional to Challenging and Hard: If Botbot receives forests, they stay on their I-side at the right side of its solo board at first. They will be flipped to their II-side at the end of the game before the final scoring. Now Botbot receives in the income phase the income from the I-side of the forest tiles.
Glossary - Arbor Level Requirements
To upgrade your Arbor to Level 1, 2 and 3, you need to meet different requirements. The tiles with the different upgrade requirements you choose randomly at the beginning of the game, so they will be different every time. Requirements can be:
- Have removed the indicated number of barricades from your growing area.
- Have the indicated amount of flower cubes on your platform (all flowers in your growing area and in flowerpots count).
- Have planted the indicated number of forests in your growing area.
- Have placed the indicated amount of grown forests (II-Side faceup) in your growing area.
- Have planted the indicated number of matching colored forest spaces in your growing area.
- Your energy die has to have at least the indicated number faceup.
- Have placed the indicated number of soil tiles (not covered by forest) in your growing area.
- Have the indicated amount of matching extension cards added to your platform.
- Have a grid of 3x5 or 5x3 of your growing area covered by flowerbeds, soil or forests.
- Have upgraded the indicated amount of plugin markers in your energy track.
- Have covered the indicated amount of spaces of your growing area connected with a cupreous pipe to your energy cycle.
- Have reached the indicated amount of oxygen points.
- Have the indicated amount of flowerbed spaces of the matching kind faceup (not covered by forests) in your growing area.
About Planta Nubo and the World of Overgrown
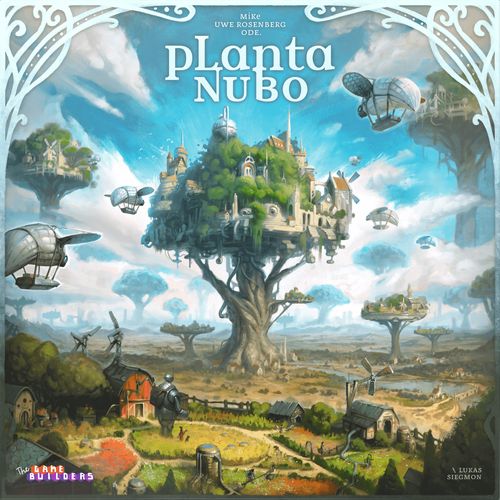
Planta Nubo is inspired by Esperanto. It roughly means "Plants in the clouds" or "Garden in the clouds". It is also the name of the landscape on the cover of the box. Planta Nubo is a part of Overgrown, our Earth 100 years in the future. After a big environmental disaster mankind has dared a new beginning. Salvation came from the plants: just before the final collapse of the ecosystem, the "arbors" grow out of the soil - gigantic trees, a safe haven for a great variety of species and mankind itself. The surviving members of mankind left the ground and built a new civilisation in the top of the arbors, now in harmony with nature.
Planta Nubo is set in the solarpunk genre - a movement aiming at a better and sustainable future, characterized by urban gardening, green energy, recycled materials, sustainable transport and renewable energies. In contrast to dystopian narratives, solarpunk features a positive vision of our future.