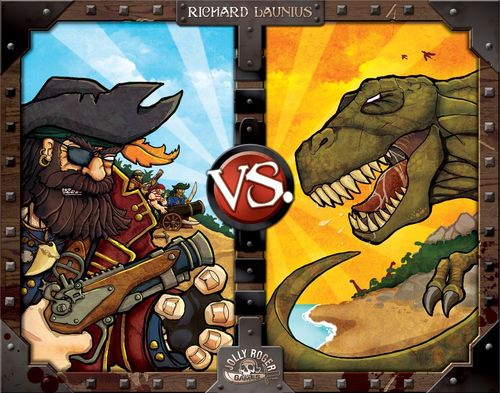
Pirates vs. Dinosaurs
Pirates vs. Dinosaurs Rulebook
Table of Contents
Table of Contents
- Players and Goal of the Game
- Components
- 1 Game Board
- 6 Captain Cards
- 12 Landmark Tokens
- 12 Map Fragments
- 60 Treasure Tokens (and bags to hold them)
- 16 Curse Tokens
- 16 Crew Replenishment Tokens
- 76 Event Cards
- 6 First Mate Cards
- 12 Weapon Cards
- 8 Relic Cards
- 85 Sailor Figures
- 42 Equipment Cards
- 6 Area Markers
- 6 Time Markers
- 1 Giant Tyrannosaurus Figure
- 10 Special Dice
- Game Setup
- Stage 1. Preparing to Land
- Stage 2: The Expedition
- Using the Dice
- Combat
- Desperate Actions
- Pirate's Share Cards
- What to Do If You Run Out of Sailors
- Lost and Forgotten
- Giant Tyrannosaurus
- Stage 3: Dig Up the Cursed Treasure
- End of the Game
- Optional Rule: Actions on the Ship
Players and Goal of the Game
2-6 players, ages 10 and up, 60-90 minutes.
Each player becomes a Pirate Captain, holding several scraps of a map leading to treasure buried on a mysterious island. While preparing for the expedition, players must gather a crew of pirates, hire a First Mate, buy weapons and equipment and choose a powerful pirate relic; all of this will help to overcome the dangers awaiting on the island. You are opposed not only by the other players: the island literally teems with monstrous dinosaurs and cruel natives, and treacherous sands and streams of fiery lava lie in wait at every step.
Despite the dangers, players must find on the island landmarks matching those marked on their map fragments. Finding the treasure does not end the troubles, for terrible curses await the players, and the digging may awaken the sleeping volcano, whose eruption will send the island to the bottom of the sea. Players will have to try not to disturb the ghosts, the guardians of the treasure, and manage to return with their loot to the ship before the island vanishes into the abyss. The winner is the player who manages to survive and carry off more treasure than the others!
Components
1 Game Board
- Treasure Location (Dig Site): This is your main goal. Here you can dig up treasure. Next to it is a place for Curse tokens, and their effects are listed.
- Awakening Volcano: Sometimes, when trying to dig up treasure, you may provoke an eruption of the volcano. The catastrophic consequences of the eruption are marked here.
- Areas: For most of the game you will explore the five areas of the island in search of the treasure: Swamp, Mountains, Beach, Plain, Jungle. In each area, Landmark tokens must be placed. The hourglass symbol shows how much time must be spent searching in that area.
- Harbor: Here your ship has dropped anchor. If you are lucky, you will return here at the end of the game. Perhaps even with treasure!
- Lost and Forgotten: Especially unlucky pirates end up here (except those who have been eaten).
- Crew Replenishment tokens: These let you take additional crew members from the ship.
6 Captain Cards
This is where your crew, gear and map fragments are located. The time of your search is also tracked here, and the Incident cards that you must play are laid out here.
- Time Track
- Map Fragments
- Upcoming Incidents
- Crew and Weapons
- Relic
- Equipment
12 Landmark Tokens
Shuffle them, and without looking place them in the areas of the game board. Your task is to find a landmark that matches your map fragment. (Examples: Moai statue, Stone Arch, Skeleton.)
12 Map Fragments
At the start of the game each player receives several map fragments and must find the matching landmarks. They have a back side with a question mark, and a front side showing the landmark.
60 Treasure Tokens (and bags to hold them)
Treasures of various value, as well as many dangers (ghosts, dinosaurs, volcano). The back side is a treasure chest; face sides show examples such as $7,000 and $3,000. Dangers are shown separately.
16 Curse Tokens
Each time you meet a ghost, you receive one such token.
16 Crew Replenishment Tokens
Each time you replenish your crew, you receive one such token (marked +6 / -1 in the illustration).
76 Event Cards
These cards let you decide what trials the players (including you) will go through during the expedition. Event cards are divided into Incident cards and Pirate's Share cards. The back side of an Event card shows an island seen through a porthole.
Sample Incident card:
- Area icon: Cards with Area icons (or the mark "Your area") at the top are Incident cards. You can play such a card only on a player who is in the indicated area.
- Card name (sample: "The Lost").
- Action description: This text explains to the player the card's action when it is played.
- Desperate Action: On many cards you will find a bomb symbol and the description of a Desperate Action. Such cards may be discarded at the indicated moment to gain the described effect. (Sample text: "Subtract 1 die from your Search Roll this turn. Also roll 1 die; on a failure, send 2 crew members to Lost and Forgotten." and "Discard this card before any roll to add 1 die to it.")
Sample Pirate's Share card:
- Title: The title shows that this card is a Pirate's Share card. It cannot be played in the same way as an Incident card.
- Sample card "Pet Monkey": "Play on your turn. Secretly draw 2 event cards from the hand of another player who is in the same area as you." Desperate Action: "Discard this card before any roll to count each success rolled as 2 successes."
6 First Mate Cards
Each First Mate has a unique ability. When you use it, flip the card to its reverse side. This means the card is "used" and will be available again at the indicated moment. (Sample: "De Groot -- Plunder: You may secretly draw 1 event card from a player who is in the same area as you. Refreshes at the start of a new expedition." The used side reads "Used" and states when it refreshes.)
12 Weapon Cards
The cards are divided into 6 pairs, 2 types of weapon in each. The color of the back of each pair of cards matches a player's color. Weapon cards determine the effectiveness of your crew in combat. (Samples: "Sabers and Muskets"; "Pistols and Pikes".)
8 Relic Cards
Relics give their owner a powerful ability. (Sample: "Mask of Lehru".)
85 Sailor Figures
These figures represent the members of your crew.
42 Equipment Cards
The cards are divided into 6 groups of 7 cards each. The color of the back of each group of cards matches a player's color. Each card gives its owner a useful ability, but you can choose only a few of them for your crew. (Samples: "Supplies" (3); "Rope" (2): "During a Search in the Mountains, you roll 1 die more. This also helps to deal with the Incidents 'Cliff' and 'Quicksand'.")
6 Area Markers
Needed to mark the area you are exploring. The color of each marker matches the player's color.
6 Time Markers
Needed to count the search time. The color of each marker matches the player's color.
1 Giant Tyrannosaurus Figure
Marks the area where the Giant Tyrannosaurus is rampaging.
10 Special Dice
Used in various game situations. Each die has two skull images, two crossed-saber images and two blank faces.
Game Setup
To be ready for adventure, use these instructions. A sample correctly prepared 4-player game is on the following page.
A. Lay out the game board. Place the 5 dice, the Giant Tyrannosaurus figure and the sailor figures next to the game board.
B. Put 2 sailor figures per player into the Lost and Forgotten zone (for example, with three players there should be 6 figures).
C. Shuffle the Event cards and place the deck face down next to the game board.
D. Put all Treasure tokens (including Ghost, Dinosaur Attack and Volcano tokens) into the bag and shuffle well. Place the bag next to the Treasure Location.
E. Place the Crew Replenishment tokens in the corresponding zone of the game board (next to the Harbor). Place the Curse tokens in the corresponding zone of the game board (at the Treasure location).
F. Shuffle the Relic cards and lay out one card per player on the table face up, and one more card face down. Return the remaining Relic cards to the box.
G. Shuffle the First Mate cards and lay out one card per player on the table. Return the remaining First Mate cards to the box.
H. Each player chooses a Captain card and their own color, and takes the Area Markers, Time Markers, and Weapon and Equipment cards of the corresponding color.
I. The number of Landmarks and Map Fragments needed for the game depends on the number of players. Regardless of the number of players, the Landmark tokens must be shuffled and laid face down, and the Map Fragments must be placed on the Captain card and kept secret from other players.
-
6 players: Shuffle all 12 Landmark tokens and place them in the corresponding zones of the game board. Shuffle all 12 Map Fragments and deal 2 to each player.
-
5 players: Remove any 2 pairs of matching Landmarks and Map Fragments. Shuffle the remaining 10 Landmark tokens and place them in the corresponding zones of the game board, except zones marked 5P (5ИГ). Shuffle the 10 remaining Map Fragments and deal 2 to each player.
-
4 players: Remove any 4 pairs of matching Landmarks and Map Fragments. Shuffle the remaining 8 Landmark tokens and place them in the corresponding zones of the game board, except zones marked 4P (4ИГ). Shuffle the 8 remaining Map Fragments and deal 2 to each player.
-
3 players: Remove any 3 pairs of matching Landmarks and Map Fragments. Shuffle the remaining 9 Landmark tokens and place them in the corresponding zones of the game board, except zones marked 3P (3ИГ). Shuffle the 9 remaining Map Fragments and deal 3 to each player.
-
2 players: Remove any 4 pairs of matching Landmarks and Map Fragments. Shuffle the remaining 8 Landmark tokens and place them in the corresponding zones of the game board, except zones marked 2P (2ИГ). Shuffle the 8 remaining Map Fragments and deal 3 to each player, and without revealing them, return the 2 unused fragments to the box.
(The following page of the rulebook is a 4-player setup diagram labeled A-I: shuffled Event deck; Treasure tokens in the bag; board, dice, Tyrannosaurus and sailor figures; 2 sailors per player into Lost and Forgotten; Crew Replenishment and Curse tokens in their zones; 1 Relic per player face up plus one face down; 1 First Mate per player; each player takes a Captain card, Area and Time Markers and Weapon and Equipment cards of their color; discard matching pairs of Landmarks and Map Fragments as required for the player count, place the remaining Landmarks on the board per the player-count rules, and deal the remaining Map Fragments to the players.)
Stage 1. Preparing to Land
At this step players choose Relics, First Mates, Equipment, Weapons, Starting Areas and determine the number of people in the crew. The decisions made at this stage affect the whole rest of the game, so choose carefully!
-
Determine who will be the First Player. We can suggest that this role go to the player who most resembles a pirate (players may pull faces and shout "Avast!" and so on, if they think it will help). If you cannot agree on who is the most convincing pirate, then the oldest player becomes First Player. The game proceeds clockwise from the First Player.
-
Choose Relics. The First Player chooses one Relic from those lying face down on the table [as printed; see setup: the face-up Relics]. Then the player sitting to his left chooses, and so on. When only one open Relic remains, flip over the Relic lying face down: the last player may choose from these two. Return the remaining Relic to the box. All players must place their Relics face down in the corresponding place on their Captain card.
-
Choose First Mates. The player who chose a Relic last chooses a First Mate from those laid out; after them chooses the player sitting to their right, and so on until everyone has a First Mate. (The last player, who is actually the First Player, will have no choice, and simply takes the remaining First Mate.) Players place their First Mates color side up in the corresponding place on their Captain card.
Note: Players perform step 4 simultaneously. When everyone is finished, go to step 5.
-
Weapons, Equipment, Crew. Each player is given 20 points, which he or she may spend on equipment or crew. A weapon can be chosen for free (the player must choose one of the two offered Weapon cards), the cost of Equipment items is shown on the corresponding cards (a player may acquire no more than 3 Equipment items), and each crew member costs 1. (For example, a player may acquire Cannon (6), Rope (2) and Shovels (2), as well as 10 crew members (each costs 1) and Pistols and Pikes as the weapon (free), for a total of 20 points.) When players complete their choice, they must place the chosen Equipment and Weapons in the places provided for them on the Captain card. The crew is also placed next to the weapon in the frame provided for it on the Captain card.
About the crew: crew members are incredibly important. The crew suffers losses in battles and in overcoming other difficulties awaiting the expedition. Crew members are also needed to carry the treasure when you find it. To carry 1 treasure, 2 crew members are required, so the more crew members you bring to the treasure, the better.
About weapons: battles will be described in detail later. In short, the weapon you choose (and the number of crew members) will affect the number of dice you roll in battle. With Sabers and Muskets you roll 1 die for every 2 crew members. Pistols and Pikes allow you to roll 1 die only for every 3 crew members, but they have other advantages, described on the card.
About equipment: each item gives you a useful ability, described on the card with that item. Do not forget to use these abilities during the game. In general, the more expensive an item, the more useful it is, but buying the most expensive items will leave you practically without a crew, so try to find your own balance between expensive equipment and a numerous crew. Do not forget that you can take no more than 3 Equipment items (but if you wish, you may take fewer).
-
Event cards. In turn order, players draw 7 Event cards each from the deck. You must not show your cards to other players.
Note: A player who owns the relic "Elison's Folio" draws not 7 cards, but 8.
Starting a New Expedition
To begin an expedition, place your Area Marker in the Area you want to explore (Beach, Valley [Plain], Jungle, Mountains or Swamp). You may explore an area already being explored by other players. The hourglass symbol in each area shows how much time will be spent exploring it. On your Captain card, set the Time Marker to the corresponding position on the track (for example, exploring the Jungle takes 3 hours; therefore, if you are going to explore the Jungle, you must set the Marker to the mark 3).
Note: The Cannon increases search time by 1 hour (as stated in the description on the card). If you have the Cannon, you place the Time Marker 1 position higher (so if you explore the Jungle, you set the Marker to the mark 4, not 3). Do not forget to do this each time you start a New Expedition.
Example of landing preparation:
- The Red player drew last place in turn order.
- He chooses a Relic last. He gets the Sextant, which shortens search times!
- He chooses a First Mate first. His choice falls on Black Jack Brenham, who is able to recruit additional crew members.
- As Weapon the player takes Sabers and Muskets for their versatility. As equipment the player buys the Machete (cost 3) and Rope (2) to explore some Areas even faster, as well as the Cannon (6) for additional firepower in battle (the Cannon will slow searches, but the player has enough items shortening the expedition time). In total these items cost 11 points. Therefore the player has 9 points left, which he spends on 9 crew members.
- The player draws 7 Event cards from the deck.
- He decides to start the search in the Swamp, where there is only 1 landmark (this same area was chosen by the Green player). He places his Area Marker in the "Swamp" area. The hourglass symbol in this area shows the number 3, but because of the heavy Cannon the search time increases by 1 hour. Therefore the Red player sets the Time Marker to the mark "4" of his time track.
When all players have prepared for landing and chosen their starting Areas, the main stage of the game begins: the Expedition.
Stage 2: The Expedition
This is the most important stage of the game. At this stage players explore the island in search of two Landmarks (three, if only two or three players are playing) marked on their Map Fragments. When you discover all the Landmarks you need, you move on to Stage 3: Dig Up the Cursed Treasure. For each player Stage 2 ends at a different time, since they cannot find their Landmarks simultaneously. This stage is played in several steps, and during each step each player gets a turn. Players go clockwise, starting with the first player.
On your turn perform the following actions in the order given:
- Draw 2 Event cards
- Play your Incidents
- Conduct a Search, attack another player, or replenish your crew
- Arrange Incidents for other players
- Discard excess cards down to the required limit
1) Draw 2 Event Cards
Draw 2 Event cards from the deck, even if the number of your cards then exceeds 7. If the deck has run out of cards, shuffle the discarded cards and create a new deck from them.
Note: A player who owns the relic "Elison's Folio" draws 3 cards per turn.
2) Play Your Incidents
On one of the previous turns, other players (or you yourself) could have arranged for you 2 (and no more) Incidents, one of each type marked on your Captain card. Only one of your Upcoming Incidents may be a Dinosaur Attack, and one an Incident of another type. You may play these Incidents in any order, but each of them must be played completely before you can move on to the next Incident or the next action of your turn.
There are many different Incidents. As a rule, to play an Incident you only need to read the Action description on the card and follow the instructions. (For Dinosaur Attacks and Aborigine Attacks there are special rules, described in the section "Combat" below.)
As soon as an Incident has been played, discard that card to the discard pile.
Example: Here you see that the Yellow player has two Upcoming Incidents of different types: a Dinosaur Attack (Pterosaur) and Rocks. The player may play them in any order. First the player decides to play the Incident "Rocks", and carries out the actions specified in the description.
Using the Dice
Many game events depend on a dice roll. Each game die has 2 blank faces, 2 faces with a skull symbol and 2 faces with a saber symbol. Depending on the card being played, its text may mention both successful and failed rolls (in accordance with the general game rules) and faces of any particular type. The skull symbol is always counted as a success. In some cases the saber symbol will also count as a success, if the roll conditions say so (for example, if you are fighting a dinosaur using Pistols and Pikes, or are using a Desperate Action satisfying those conditions; see below). Any unsuccessful roll counts as a failure.
Note: Sometimes you may need to roll more dice than you have available. In that case, roll a smaller number of dice the necessary number of times and add up the result.
Example: The Yellow player plays the Incident "Rocks". The conditions of the card require the player to roll 3 dice, losing 1 crew member for each failure. (It is additionally specified that with the Rope the player rolls only 1 die, but our player has no Rope.) The player rolls: one blank, one saber, one skull. The skull counts as a successful roll, and the other two as failures. So two crew members of the player fall from the cliff! (Put 2 of your sailor figures into the pile of unused figures.)
Combat
Combat is a special (and the most common) Incident. There are two kinds of combat: Dinosaur Attack and Aborigine Attack. Both are played by the same principle (but they differ in type; therefore your Upcoming Incidents may simultaneously be both a Dinosaur Attack and an Aborigine Attack, and you must play them separately).
Note: on some Dinosaur Attack cards you will find additional text; please follow the conditions it specifies (for example, the Triceratops card says that you must lose one crew member before the combat begins). (Sample: "Unstoppable Charge! Lose 1 crew member before combat. (Pistols and Pikes do not prevent this loss.)" Desperate Action: "Discard this card at any time to take 1 crew member from Lost and Forgotten.") (Sample Aborigine Attack: "War Party, Strength 4." Desperate Action: "Discard this card after any roll to re-roll (once) any two dice that came up in this roll.")
To fight a Combat you must make a Combat roll. The number of dice needed for the roll is determined by your Weapon and the number of members of your Crew.
If you are armed with Pistols and Pikes, roll 1 die for every three crew members, ignoring the extras. If you are armed with Sabers and Muskets, roll 1 die for every two crew members, ignoring the extras. (Remember that Pistols and Pikes have some advantages, indicated on the card.)
Note: Arranging your sailor tokens in groups of 2 or 3 (depending on your Weapon) can be quite convenient. That way you can simply count the groups and understand how many dice to roll.
With 10 crew members armed with Sabers and Muskets, you roll 5 dice. With 10 crew members armed with Pistols and Pikes, you roll 3 dice.
Combat (continued)
When you have determined how many dice to roll, roll them and count your Successes. Compare the resulting number with the enemy's Strength (the enemy's Strength is indicated on the card next to the name).
If your number of Successes is greater than or equal to the enemy's Strength, you have won. The Incident ends without losses; the card is discarded.
If your number of Successes is lower than the enemy's Strength, you lose the number of crew members equal to the difference between your number of Successes and the enemy's Strength.
Dinosaur Attack example: Remember the Pterosaur that attacked the Yellow player? The player has 10 crew members armed with Pistols and Pikes, so he rolls 3 dice. (Pterosaur: Strength 3.) Result of the roll: saber, skull, saber. When you are armed with Pistols and Pikes, the saber symbol also counts as a Success in a Dinosaur Attack. So the player has 3 Successes. That is equal to the enemy's Strength, and the Incident passes without losses. Bravo!
Aborigine Attack example: The Blue player was attacked by an Aborigine War Party (Strength 4). The player has 8 crew members armed with Sabers and Muskets, so he rolls 4 dice. Result of the roll: blank, skull, saber, skull. Only Skulls count as Successes, so there are 2 Successes in total. That is 2 less than the enemy's Strength, and the player loses 2 crew members.
Desperate Actions
At the bottom of many Event cards (both Incident cards and Pirate's Share cards) you can find a bomb icon and the description of a Desperate Action. These are special actions that can be played in the situation indicated in their descriptions. Many Desperate Actions affect dice rolls (Combat rolls and Search rolls), so always check the description to use the card correctly.
Examples of Desperate Actions: here you can see that their effects differ, and the moment of use is clearly stated. (Sample texts: "Discard this card before any roll to count all sabers rolled as successes in this roll." / "Discard this card before any roll to add two dice to it." / "Discard this card at any time to take 3 Event cards.") Shown here are actions that can be performed after a dice roll, before a dice roll, and at any time (even during another player's turn).
You may perform several Desperate Actions at once, if the conditions described on the cards allow. Usually Desperate Actions help you during Combat or during other Incidents, but they are not limited to these situations. Each card has its own restrictions on use.
Note: Do not forget about Desperate Actions! Using them in time will help you in Combat and in Searches, and will significantly increase your chances of success throughout the game.
3) Search, Attack a Rival, or Replenish Your Crew
In this phase you must choose only one of the following actions: Search, Attack a Rival, Replenish Your Crew.
Search
This is the action you will probably use most often. With it you can find Landmarks that point the way to the Treasure!
To use Search, roll 2 dice and add 1 automatic success to the result. This is called a Search Roll.
Note: if the Giant Tyrannosaurus is in the same area as you, subtract 1 from your Search Roll if the sum of all successes is higher than 1.
For each success, move the Time Marker on your Captain card 1 hour closer to the mark 0. (This means a Search Roll without additional modifiers will shorten the Search time by 1 to 3 hours. Some Relics, Items, First Mates, Pirate's Share cards and Desperate Actions can affect your Search Rolls.)
Example: The Green Player searches for Landmarks while in the Swamp. He has a Machete, which allows him to add 2 dice to the Search Roll in some Areas, including the Swamp. So the player rolls 4 dice. His result: blank, saber, saber, skull. Brr! Not very successful, only 1 success. Taking into account the 1 automatic success, the Green Player's Search Roll result is 2. He moves the Time Marker 2 hours closer to the mark 0 on his Time Track.
Completing the Search
If after a Search Roll your Time Marker reaches the mark 0 on the Time Track, you complete the exploration of the Area. You may choose one of the hidden Landmarks (if any remain) in that area and look at it without showing other players.
-
If the Landmark does not match those indicated on your Map Fragments, put it back face down and begin a new Search (maybe this time you'll be lucky!). Proceed to Phase 4 of your turn.
Example: You found the Landmark "Geyser", which does not match those marked on your Map Fragments (Skull Cave and Moai).
-
If the Landmark matches one of those indicated on your Map Fragments, take the Landmark token for yourself, show it to the other players and reveal the corresponding Map Fragment to confirm the match.
Example: The Green Player found the Landmark "Moai", which matches his Map Fragment! The player still has to find a second Landmark (Skull Cave), so his turn continues.
What next?
-
If you still have a Map Fragment (or Fragments), then you are getting closer to the Treasure! Begin a new Search and proceed to Phase 4 of your turn.
-
If you have no Map Fragments left, then you have found the Treasure! Move your Area Marker to the Treasure Location zone, discard all your Event cards and skip the rest of your turn. On your next turn you move on to the third Stage of the game: Dig Up the Cursed Treasure.
Example: When he finally finds the Skull Cave, he must move his Area Marker to the Treasure Location and begin Digging!
Although players are now at different stages of the game, the turn order remains the same.
-
Early Termination of a Search
In some situations you may need to end a search early (perhaps you obtained the necessary information thanks to one of the cards that let you look at a Landmark, or another player found the last remaining Landmark in your area... or perhaps you simply wanted to). To terminate a search early, roll 2 dice. For each blank face you lose 1 crew member, who is sent to Lost and Forgotten (your crew mutinies because of your inept leadership). After that you may begin a new Search according to the rules.
Early termination of a search replaces the normal Search!
Note: seeing even a pointless search through to the end may be wiser than risking a mutiny.
Example: Thanks to the card "Scouting", the Red Player learned that the only Landmark in the area being explored is not the one he needs. He decides to end the search early and rolls 2 dice. Result: blank, saber. The player loses 1 crew member (who is sent to Lost and Forgotten) and begins a New Search in another Area.
Attack a Rival
If you are in the same Area as another player, you may attack him. If several players are in the same Area as you, you must choose one of them; you cannot attack all at once.
To attack, make a Combat roll exactly as with an Incident (taking into account the effects of Relics and Equipment, the abilities of First Mates, and the Desperate Actions available to you). When you have counted your successes, the other player also makes a Combat roll. Then you compare your results.
- The player with more successes is considered the winner and loses 1 crew member.
- The player with fewer successes is considered the loser and loses the number of crew members corresponding to the difference of your rolls.
- If the roll results are equal, a draw is recorded and both players lose 1 crew member each.
Example: It is now the Blue Player's turn. He is on the Beach with the Yellow Player, and decides to attack him. The Blue player is confident in his strength. He has a large crew, a Cannon, and a pile of other tricks. For 10 crew members armed with Sabers and Muskets, the Blue Player gets 5 dice. For the Cannon he gets another 3, and in addition he uses the Desperate Action of the card "Pet Monkey", which lets him count each of his successes as two. He rolls: blank, skull, saber, skull, skull, blank, saber, skull. Thanks to the Pet Monkey, 4 Skulls count as 8 successes. What a roll! Now it is the Yellow Player's turn. 9 members of his crew are armed with Pistols and Pikes, and he gets 3 dice. The Yellow Player also uses the Desperate Action of the Tyrannosaurus card, adding 2 more dice to the roll. He rolls: skull, saber, skull, skull, blank. In total 3 successes... The Blue Player wins and loses 1 crew member, as befits the winner. The Yellow Player loses and, cursing the Blue Player's treachery, loses as many as 5 crew members.
Friendship is friendship, but business is business. It may seem to you that attacking other players is not nice. But do not forget, you are pirates after all... For you there is no such word as "not nice", and the fewer sailors your rivals have, the less treasure they will get!
Replenish Your Crew
If you are short of sailors, you may replenish your crew. Take 6 sailor figures from the reserve and place them on your Captain card. Also take 1 Crew Replenishment token from the stack on the game board.
Replenishing the crew has a price. At the end of the game, for each Crew Replenishment token you will have to discard 1 unique treasure. The more tokens you collect, the more expensive they will be to pay for.
After you have taken 6 sailors and a token, proceed to Phase 4.
Example: The Red Player finishes the game with 3 Crew Replenishment tokens. He has 7 treasures (three $1,000, one $2,000, one $6,000, one $7,000, one $12,000), but for each token he must discard 1 unique treasure. The player discards $1,000, $2,000 and $6,000 (the cheapest combination)... and in total loses $9,000!
4) Arrange Incidents
In this phase of the turn you may use Incident cards on other players (to complicate their life) and/or on yourself (to gain advantages). To do this, you must place Incident cards in the corresponding areas to the left of the Captain card of the player on whom you want to arrange the Incident. Incidents cannot be played immediately; the player plays them in Phase 2 of his next turn (thus, if you use an Incident card on yourself, you will be able to play it only on your next turn, since Phase 2 of your current turn has already passed). Also, do not forget the following restrictions:
-
You may arrange an Incident only for a player who is still exploring the island. Players who have moved on to Digging no longer receive Incidents.
-
The Area symbol on the Incident card must match the Area in which the player on whom you arrange the Incident is located (for example, if a player is exploring the Beach, the card must have the Beach symbol).
On some cards, instead of Area symbols, "Your Area" may be written. This means the card can be used only on a player who is in the same Area as you (counting you).
Example of Areas: The Blue Player is exploring the Mountains. You cannot use the card "Scouts" on him, because it has no Mountains symbol. But you can use the card "Rocks", which has this symbol.
-
The player on whom you want to arrange the Incident must have a free place to the left of his Captain card. The Incident must also be of the corresponding type. A player may have only 2 Upcoming Incidents at a time, 1 of each type (1 Dinosaur Attack and 1 any other, including Aborigine Attack).
Example of a free place: This player already has the place under "Other Incident" occupied. If you want to arrange an Incident for this player, it must be only a Dinosaur Attack.
-
You may arrange several Incidents in one turn, but no more than one for each player, including you. The type of the Incident does not matter.
Arranging Incidents is not mandatory; if you do not want to, you may simply skip this phase of your turn. When you have finished arranging Incidents, proceed to Phase 5.
5) Discard Excess Cards Down to the Required Limit
At the end of your turn you must have no more than 7 Event cards. If you have more than 7 Event cards, discard excess cards of your choice until you have 7 cards.
This ends your turn and play passes to the player on your left.
Note: A player who owns the Relic "Elison's Folio" may hold not 7 but 8 cards in hand.
Pirate's Share Cards
Besides Incident cards, the Event deck contains many Pirate's Share cards. These cards are not considered Incidents, and cannot be played as such in Phase 4 of a player's turn.
Each Pirate's Share card states when it may be played (for example, the text on the card "Dinosaur Taboo" reads: "can be used on a player playing a Dinosaur Attack [before the dice roll]").
Pirate's Share cards that say "Play on your turn" may be played at any moment of your turn, except the moments when you attack another player, play an Incident, or play another Pirate's Share card.
To play a Pirate's Share card, show it to all players, perform the described instructions and discard it.
Note: Pirate's Share cards affect only players who are in Stage 2 of the game: the Expedition. They do not affect players who have moved on to Digging.
What to Do If You Run Out of Sailors
Sooner or later your Crew will suffer losses. For a pirate captain like you it is unacceptable to be left without a reliable crew; therefore, if you find yourself in a situation that will inevitably lead to the number of your sailors reaching zero or less (be it an Incident or an attack by another player), you must perform an Emergency Crew Replenishment before this happens. To do this, take 4 sailor figures from the reserve (remember that a normal Crew Replenishment gives you 6 sailors) and place them on your Captain card. Then take a Crew Replenishment token from the game board, and only after that count the losses.
Example: The Green Player plays the Incident card "Tyrannosaurus" (Strength 6). He makes a Combat roll and gets only 1 Success. This means he must lose 5 crew members. But he has only 3 sailors. The number of his sailors would fall below zero, so the player performs an Emergency Crew Replenishment, takes 4 sailor figures and 1 Crew Replenishment token. Now the player has 7 sailors, he loses 5 of them in the battle, and 2 crew members remain.
It may happen that even after an Emergency Crew Replenishment you still have no sailors left when you count the losses. In that case you must perform one more Emergency Replenishment, again taking 4 sailor figures and 1 Crew Replenishment token.
Note: The Emergency Crew Replenishment rules apply in both the 2nd and 3rd Stages of the game.
Lost and Forgotten
If during the game you lose crew members (in combat with other players or as a result of Incidents), they normally go to the reserve. However, sometimes you may meet special instructions according to which your sailors "must go to Lost and Forgotten". Always follow these instructions.
Some Incidents, Desperate Actions or Pirate's Share cards let you take back several Lost and Forgotten sailors. This is a good way to increase your crew without using the very expensive Crew Replenishment.
Giant Tyrannosaurus
The Giant Tyrannosaurus is a terrifying creature (as if ordinary dinosaurs were not terrifying enough), incredibly huge and horrible, capable of frightening even the most desperate pirates and invulnerable to the mightiest cannons. At the start of the game the Giant Tyrannosaurus figure is not placed on the game board; during the game it can be placed in one of the Areas (or moved from one Area to another) by playing the Pirate's Share card "Giant Tyrannosaurus". The Giant Tyrannosaurus can be removed from the game board with the Pirate's Share card "Aborigine Shaman".
The "Giant Tyrannosaurus" Card
Play on your turn. Place the Giant Tyrannosaurus figure in any Area of the game board of your choice (or move it from one Area to another). Each player whose Area Marker is in that Area immediately loses 1 crew member (sent to Lost and Forgotten). In addition, all these players must immediately interrupt their Search and begin a new one (they may begin it in the same Area).
Remember that when you make a Search in an Area where the Giant Tyrannosaurus is, you must subtract 1 Success from your Search Roll (not counting the automatic Success).
Example: The Blue Player plays the card Giant Tyrannosaurus and moves its figure from the Mountains to the Jungle (three pirates are there, so the Blue Player will harm each of them). These three players send 1 crew member each to Lost and Forgotten and begin a new Search. The Green Player moves to the Beach, the Yellow to the Mountains, and the Red decides to stay in the Jungle, despite the fact that the Giant Tyrannosaurus will hinder him in his searches.
The "Aborigine Shaman" Card
Play on your turn. Immediately remove the Giant Tyrannosaurus figure from the game board. The Giant Tyrannosaurus no longer affects the game until one of the players returns it to the game by playing a new "Giant Tyrannosaurus" card.
Stage 3: Dig Up the Cursed Treasure
If you have found all the Landmarks matching your Map Fragments (2 or 3, depending on the number of players), then congratulations! You have found the place where the treasure is buried! Your turn order does not change, but while the other players are still in the second stage of the game, you move on to the third stage. The other players continue to search for Landmarks around the island, and you may begin to dig. Now Incidents cannot be arranged for you, and Pirate's Share cards do not affect you either.
- On moving to the third stage of the game, discard all your Event cards. You will not need them any more.
- If you are the first player to reach the dig site, you are entitled to a reward. You may draw one prize treasure from the bag. Draw a token from the bag and hold it in your fist without showing the other players. Then carefully look at what you drew. If you drew not a treasure but something else, show the token to the other players and put it back in the bag. You may keep drawing tokens until you get a treasure. Then place the token face down (with the treasure value shown on the face) so that nobody but you knows the treasure's value.
- In the third stage of the game, on any dice roll both Skulls and Sabers count as Successes.
Actions: Dig, Attack Another Player, Replenish Your Crew, Return to the Ship.
Dig Up Treasure
At last, the most interesting part! To dig, roll 2 dice. For each Success draw 1 token from the bag (do not forget that the Saber symbol now also counts as a Success). Draw tokens one at a time, because you may draw a Danger token that must be played out before you continue digging. Also, keep drawn tokens in your hand so that only you can look at them and hide them if you drew a treasure. When you draw a token, follow the instructions depending on what you got:
- Treasure: Excellent! Place the token face down so that other players do not see the treasure's value.
- Ghost: Take a Curse token from the stack on the game board and feel the effect of the Curse on yourself (the effects of the Curses are described on the game board in the Dig Site area, and each new Curse is more terrible than the previous one). Put the token back in the bag and shake it well.
- Dinosaur Attack: Draw Event cards from the deck until you draw a Dinosaur Attack card. Play it as an ordinary Combat, but remember that the Saber symbol on the roll still counts as a Success! Then put the token back in the bag and shake it well too. (See below for special rules for using the Cannon.)
- Volcano: Look at the area where the Awakening Volcano is shown, and place the token on the mark with the lowest numerical value. Feel the consequences on yourself (in some cases, the consequences may affect several players). If you cover all 6 marks, a mighty eruption will send the entire island to the bottom of the sea! All players who are on the island are considered losers, and in the Final Stage of the game only those who have already returned from the island to the ship take part.
Attack Another Player (Stage 3)
If other pirates have also reached the dig site, you may attack one of them. The attack is played similarly to Attacking a Rival in Stage 2 (see Stage 2 above), with the following exceptions:
- In addition to the normal losses after the battle, the winner gains the right to steal 1 random treasure from the loser (if the loser has one). In case of a draw, losses are calculated in the normal way, but nobody steals a treasure from the other.
(See below for special rules for using the Cannon.)
Replenish Your Crew (Stage 3)
Replenishing the crew in this stage of the game works the same as in Stage 2 (you get 6 sailors and 1 Crew Replenishment token). Replenishing the crew is very important, since it lets you carry away more treasure! Do not forget that two sailors are required to carry one treasure!
Return to the Ship
If you decide that you have dug up enough treasure (either because you cannot carry any more, or because you do not want to risk), you may return to the ship. To do this, move your Area Marker to the Harbor. Count how many treasures you can take with you. 2 sailors carry 1 treasure (so if you have 9 sailors, they can carry 4 treasures). All treasures that you cannot take are sent to the bag and mixed in.
When you have returned to the ship, the game is over for you. The actions of other players no longer affect you, and you cannot influence them in any way (unless you are playing with the optional rule "Actions on the Ship"). You skip your turn until the end of the game. The game ends when all players have returned to their ships, or when the volcano erupts completely and the island sinks.
Example of returning to the ship: The Red Player decided to return to the ship. He has 6 treasures, but only 9 crew members. This means he can take only 4 treasures. The player chooses 2 treasures and returns them to the bag, after which he moves his Area Marker to the Harbor.
Special Rules for Using the Cannon at the Dig Site
The Cannon is a very bulky and noisy weapon, and using it against dinosaurs or other pirates at the Dig Site is fraught with great risk. Therefore it may be wise not to use it, even if you have it. If you nevertheless decide to use the Cannon, then after the battle ends you must draw 1 token from the bag, and perform the following actions depending on which token you drew:
- Treasure or Dinosaur Attack: No effect. Put the token back in the bag.
- Ghost or Volcano: Play it by the normal rules, as if you had drawn this token during digging.
Note: In the case when both players use the Cannon in a battle against each other, both must draw a token and play them according to the rules; first the active player does this, then his opponent.
End of the Game
The game ends when all players have returned to their ships, or when the island sinks as a result of the Volcano's eruption.
- If no player has returned to the ship when the island sinks, there is no winner in the game.
- If only one player has returned to the ship when the island sinks, he is considered the winner. Simply staying alive is already a success!
- If several players have returned to the ship, the winner is the one whose total value of treasures is higher than the others' (as it should be in a true pirate hunt for profit!).
Each player claiming victory must show the other players his treasures, after which he discards one unique treasure for each Crew Replenishment token he has. Then players count the value of their treasures. The one with the higher value wins. In case of a tie, the winner is the player who kept more crew members... if a tie is recorded in this case as well, all players with an equal result are considered winners.
Example of counting treasure value: the Yellow Player has 5 treasures: two worth $1,000, one $3,000, one $7,000, and one $10,000. The player also has two Crew Replenishment tokens. This means he must discard two unique treasures. The player discards one treasure worth $1,000 and one worth $3,000, and is left with treasures of total value $18,000. Will that be enough to win? It will become clear when the other players count their treasures!
Optional Rule: Actions on the Ship
This rule is not mandatory! It allows players who have already returned to their ships to take part in the further course of the game. The decision to use this rule must be made by the players before the game begins!
If players use this rule, then after returning to the ship they may either skip their turn or draw 1 treasure token from the bag, performing the following actions depending on the result:
- Treasure: this token is removed from the rest of the game. Ha! Let nobody get you!
- Ghost: Blast! Ghosts haunt you even on the ship! Play the token according to the normal rules for Digging, after which put it back in the bag.
- Dinosaur Attack: choose a player who is still at the Dig Site. This player must play the token as if he had drawn it himself. Then return the token to the bag. If there is nobody at the Dig Site, simply return the token to the bag without any consequences.
- Volcano: play it according to the normal rules for Digging. Since you have already returned to the Harbor, the consequences of the volcano's awakening do not personally affect you, but awakening stages 4, 5 and 6 inflict damage on players remaining on the island, and may even bring the game to an end!