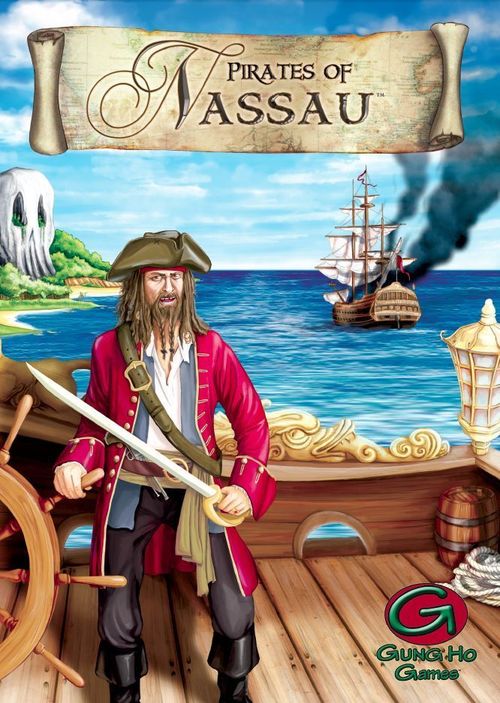
Pirates of Nassau
Pirates of Nassau Rulebook
Table of Contents
Table of Contents
- Components
- Cards, Counters and Symbols
- Pirate Ship Display
- The Game Board
- Set Up
- Winning the Game
- Sequence of Play
- 1. Buccaneering Rolls
- 2. Buccaneering Phases
- 3. Adjust Notoriety
- 4. Evade Royal Navy
- 5. Return to Nassau
- 6. Replenish Royal Navy Cards
- 7. Move Merchant Ships
- 8. Replenish Nassau
- 9. Prepare for Next Voyage
- Ending the Game
- Winning the Game (Detailed Scoring)
- Appendix One: Upgrades and Crew Counters
- Summary of a Turn of Play
Components
Your copy of Pirates of Nassau should include 1 Rulebook (you're reading it), 1 Game Board and the following components:
- 5 Ship Display Boards, one of each of the colours: black, green, yellow, red and blue. Each is made out of 4 separate sections. They represent your ship and have spaces for upgrade counters.
- 5 Ship markers, one of each of the colours: black, green, yellow, red and blue. They are used to keep track of the movement of each Pirate on the gaming board.
- 5 Notoriety markers, one of each of the colours: black, green, yellow, red and blue. They are used to keep track of the Notoriety of each Pirate.
- 15 Dice, three of each of the colours: black, green, yellow, red and blue. They are used to move on the gaming board.
- 5 Treasure chests, one of each of the colours: black, green, yellow, red and blue. These need dry assembling and are used to bury your treasure!
- 20 Pirate Captain Cards, four of each of the colours: black, green, yellow, red and blue. They are played during the Buccaneering phases to increase the values of your ships.
- 32 Hull upgrade counters. They can have a red or black border and upgrade the Gunnery value of your ship.
- 34 Mast counters. 25 are Sail upgrades (yellow or purple border) that upgrade the Sailing value of the ship, and 9 are Mizzen upgrades (green border) that provide miscellaneous benefits.
- 42 Crew counters. These can be flipped to use the special ability of the crew member.
- 10 Trade Wind counters, that add or subtract 1 from a dice roll if discarded or can be used to increase Notoriety.
- 7 Looted Port markers. They are used to show that a port has been looted and therefore players can no longer take any action in it.
- 30 Royal Navy cards. 20 Phase 1 cards (small ship, yellow border) and 10 Phase 2 cards (bigger ship, orange border). The Pirates need to beat them to get back to Nassau scot free.
- 1 End Game card. This card is part of the Royal Navy deck. As soon as this card is revealed, the game ends.
- 58 Merchant Ship cards. 20 for Region 1, 18 for Region 2 and 20 for Region 3. They are plundered by Pirates for Pieces of Eight, Rum, Cargo, Hostages and Gun Powder.
Cards, Counters and Symbols
Example Merchant ship: labelled with its Sailing Value, Gunnery Value, Plunder Resources, Ship name and Region symbol.
Symbols on Merchant cards:
- Black cylinder = Take 1 Gun Powder Resource.
- Yellow cube = Take 1 Cargo Resource.
- Brown cylinder = Take 1 Rum Resource.
- Hostage = Take 1 Hostage.
- Piece of Eight = Take 1 Piece of Eight.
- Region 1 symbol (single ship's wheel) = The card is part of the Region 1 deck and goes back to the same deck once discarded.
- Region 2 symbol (two ship's wheels) = The card is part of the Region 2 deck and goes back to the same deck once discarded.
- Region 3 symbol (three ship's wheels) = The card is part of the Region 3 deck and goes back to the same deck once discarded.
Example Royal Navy ship: labelled with its N. of players icon, Ship name, Sailing Value and Gunnery Value.
Symbols on Royal Navy cards:
- 4+ icon = The card is only used in games with 4 or more players; there are 4 of these cards in the deck.
- 5+ icon = The card is only used in games with 5 players; there are 2 of these cards in the deck.
- Yellow-bordered ship = The card is a Phase 1 card.
- Orange-bordered ship = The card is a Phase 2 card.
- Red-bordered ship = The card is the End Game card.
Example Pirate Captain card: labelled with the Captain name, Sailing Value and Gunnery Value.
Example counters:
- Sail counter: Best Ship points, and a Permanent Bonus.
- Mizzen counter: Best Ship points, and a ONE use per turn ability.
- Hull counter: Best Ship points, and a Permanent Bonus.
- Crew counter: Crew role, Motley Crew points, and a ONE use per turn ability.
Main symbols on the counters:
- Sailing Value
- Gunnery Value
- A Merchant ship card
- Any Port
- Any buccaneering dice
- Any resource
- Any 2 resources of your choice
- Any Royal Navy card
- A Hostage
- Notoriety
Pirate Ship Display
Each player's Pirate Ship Display is made of an Aft Section, Ship Upgrades (the middle sections) and a Fore Section. The labelled areas are:
- Mizzen Upgrades
- Plundered Merchant Ships
- Sail Upgrades
- Spanker Upgrade
- Starting Sailing Value
- Initial Best Ship points
- Crew
- Captain's cabin or Stern Chaser
- Initial Best Ship points
- Starting Gunnery Value
- Cargo Hold
- Ship Name
- Upgrades price list & rolled dice holding space (the Ship Broker's Tariff)
- Gained Trade Wind Counter
- Jib Upgrade
- Figure Head or Bow Chaser
- Gunnery Upgrades
The Game Board
- Port of Nassau: the space where the Hull, Mast and Crew counters are placed face-up each turn.
- Notoriety track: runs around the edge of the board.
- Revealed Royal Navy Cards: the space where the Royal Navy cards are revealed.
- Royal Navy Card Stock: the stack space for the face-down Royal Navy cards.
- Region 1, Region 2 and Region 3: each has six locations (numbered 1-6, 8-13 and 15-20 respectively), which are either ports or trade routes.
- Transit Locations: Transit Location 7 is the Region 1 transit space (the strip between Region 1 and Region 2), and Transit Location 14 is the strip between Region 2 and Region 3.
- Example Port Location: each port shows its Location Number, its Port Name, the Smuggling Income it provides (the resources shown), and its Port gunnery Value.
- Example Trade Route Location: each trade route shows its Location Number and a Trade Wind Counter icon.
- Region 1, Region 2 and Region 3 Merchant Ship Cards: the stock spaces for the three Merchant Ship card decks, placed at the right of the board.
Set Up
Set up the game as follows (you can refer to the image on the set up page for an example of a complete Set Up for a 4 player game):
- Lay out the game board.
- Split the Merchant Ship cards into 3 stacks, one with all the ships marked region 1, one for the ships marked region 2, and one for the ships marked region 3. Shuffle each stack, and place them face-down in the stock space for them on the game board. Each region is divided into six locations, which can either be ports or trade routes. Draw 1 merchant ship card for each trade route location from the deck of cards for the region. Place the cards face-up in the trade route locations, from left to right.
- Take the Royal Navy Cards. If you are playing a 3 player game, return the cards with the 4+ and 5+ players icons to the game box - they will not be used. Do the same, but only for the cards with the 5+ players icon, for 4 player games. In a 5 player game all cards are used. Split the cards into two stacks, one with all of the phase 1 cards (yellow border) and the other with all of the phase 2 cards (orange border). Add the End Game card to the stack of phase 2 cards. Shuffle the phase 2 and End Game cards and place them in a face down stack in the Royal Navy Card Stock space on the game board. Shuffle the phase 1 cards and place them face-down on top of the phase 2 cards. Then reveal a number of cards from the deck equal to the number of players in the game, and place them face-up in the Revealed Royal Navy Cards space on the game board.
- Each player randomly selects one of the Pirate Ship markers, and takes the Pirate Ship Display, treasure chest, dice, Notoriety marker and Pirate Captain cards in the same colour. Each player makes their initial Pirate Ship Display by putting together the fore (the front) and aft (the rear) sections; the other sections (the middle ones) are kept to one side and may be added later.
- Take the Hull Upgrade counters, place them face-down beside the board, and then shuffle them up so that no player knows which counter is which. Repeat this process for the Mast counters and Crew counters. Then draw as many counters as there are players from each set, and place them face-up in the Port of Nassau space on the game board. For example, in a 4 player game you would randomly select 4 Hull Upgrade counters, 4 Crew counters, and 4 Mast counters. The order that the counters are drawn in doesn't matter.
- Place the remaining playing pieces, grouped by type, beside the game board in easy reach of all players.
- Players roll their dice, and place them without changing their face-up values on their Pirate Ship Display. The dice will be used as the Buccaneering Roll for the first turn (see below). The player that rolled the lowest total on their 3 dice added together, places their Notoriety marker on the 1 space of the Notoriety track, the player that rolled second lowest places their marker on the 2 space, and so on. In the case of tie, the older player places their marker first. Markers can never occupy the same space.
You are now ready to play.
Winning the Game
The player with the most Victory Points wins the game. Victory Points are scored for the following achievements:
- Most Notorious Pirate (most Notoriety points)
- Most Motley Crew (most Motley Crew points)
- Best Ship (most Best Ship points)
- Richest Pirate (most treasure)
You can find a more detailed explanation on this, towards the end of this booklet.
Sequence of Play
Pirates of Nassau is played in a series of game turns. Each game turn has the following 9 step sequence of play:
- Buccaneering Rolls: Each player rolls their three dice, and places them on their pirate ship without changing their face-up value.
- Buccaneering Phases: Players alternate taking buccaneering phases, until all players have had three buccaneering phases each.
- Adjust Notoriety: Players adjust their Notoriety on the Notoriety track. The more merchant ships they have plundered, the greater their Notoriety will become.
- Evade Royal Navy: Players must fend off the Royal Navy sent to hunt them down.
- Return to Nassau: Players return to Nassau to make upgrades to their ship and hire additional crew.
- Replenish Royal Navy Cards: A number of Royal Navy cards equal to the number of players in the game is revealed. If the Game End card is revealed, then the game finishes immediately.
- Move Merchant Ships: The players move any surviving merchant ships up the board, and fill any empty trade route location with new merchant ships.
- Replenish Nassau: Any counters that remain in the Port of Nassau space are removed and replaced with a new set of counters ready for next turn.
- Prepare for next voyage: Face-down counters that were used during the turn are turned face-up, and any used Pirate Captain cards are returned to each player.
Once all 9 steps have been completed, a game turn has been finished and a new one can be started.
1. Buccaneering Rolls
At the start of each game turn apart from the first (in which the roll has been made during set-up), each player rolls their three dice, and places them on their Pirate Ship Display without changing the face-up value on any of the dice. As dice are used up during the buccaneering phases (as further explained later) they should be removed from the Pirate Ship Display and placed on the game board. Remember that on the first turn, the buccaneering roll also determines where players' markers are placed on the Notoriety track. This only happens on the first turn of the game.
2. Buccaneering Phases
The players alternate taking one buccaneering phase each. After all players have taken one phase, they each get a second phase. After all players have taken their second phase, they all get a third and final phase.
Buccaneering phases are always taken in order of Notoriety, starting with the player with the lowest Notoriety, and then working up. In each of their phases the player MUST make one move, and MAY then take one action.
Buccaneering Phase - Movement
Each player must make three buccaneering moves each turn, one in each of their buccaneering phases. Each move uses up one of the buccaneering dice from their pirate ship. Buccaneering dice may be used in any order.
First Buccaneering Move. To make their first buccaneering move each turn, the player takes one of their buccaneering dice as described below, and places it on a game location, along with their Pirate Ship marker. The Pirate Ship marker shows where the player is currently located.
On their first move, a player must either:
- Place the dice being used and the Pirate Ship marker on the trade route or port space whose number is exactly equal to the dice's value.
OR
- Place the dice being used and their Pirate Ship marker on the region 1 Transit location, no matter what the dice's value.
At the end of each move the players may take an action. Actions are described on pages from 7 to 9.
Example: Anja (the yellow player) rolls a 3, a 5 and a 6; and Jonah (the red player) rolls a 1, a 4 and a 2. On her first turn, Anja chooses to use her value 3 dice and moves both it and her Ship marker onto location 3. Jonah has decided to use his value 1 dice and places both it and his Ship marker on the region 1 Transit space (location 7).
Second & Third Buccaneering Moves. When making their second and third buccaneering moves, a player must either:
- Add or subtract the value of the dice being used from the number of the location the player's Pirate Ship currently occupies. Then place the dice being used and the pirate ship marker on the location whose number is exactly equal to this new value. If the total would be below 1 or above 20, move to respectively location 1 or 20.
OR
- Place the dice being used and their pirate ship marker on one of the Transit locations, no matter what the dice's value. Ships in locations 1-6 may only move to Transit location 7, and ships in locations 15-20 may only move to Transit location 14. Ships in locations 8-13 may move to either Transit location. Ships in Transit location 7 may also move to Transit location 14, and vice versa.
Example: For their second move Anja decides to use her value 5 dice to move to location 8 and Jonah uses his value 2 dice to move to the region 2 Transit space (location 14). On her last move, Anja uses her value 6 dice to go back by subtracting it from her current location and ending on location 2. Jonah instead uses his value 4 dice to go to location 18. Note that while the pirate ship is moved each phase, the dice used in the previous phase remains on the space. This allows buccaneering moves to be tracked.
Buccaneering Phase - Actions
Players may take one action after each move that they make. The actions that they can take are described below. The action is made immediately after making the move, before the next player makes their move.
The actions that can be taken are:
- Plunder Merchant: If the pirate is in a Trade Route location with a merchant ship card on it, the pirate may try to plunder the merchant.
- Ply The Trade Winds: If the pirate is in a trade route or Transit location, they may take a Trade Winds counter.
- Smuggle Goods: If the pirate is in a port location, they may smuggle goods from the port and may additionally Ransom a Hostage if the pirate has one in the hold.
- Loot Port: If the pirate is in a port location, they may loot the port.
- Pass: The pirate may do nothing.
These actions are described in more detail in the following pages.
Pirate ship Sailing and Gunnery value: All pirate ships start with a Sailing and Gunnery value of 1 (these are printed on the Pirate Ship Display). Any bonuses received from upgrades and crew counters are added to this value to determine the current total Gunnery and Sailing values.
Plunder Merchant
In order to plunder a ship, the player must first out-sail it and out-gun it. In Pirates of Nassau, the Sailing and Gunnery Values represent both the fittings of the ship and the ability to use them: "seamanship" and "gunmanship".
Follow the procedure below:
-
The player MUST play one of their Pirate Captain cards.
-
To out-sail the merchant, the player adds the total Sailing value of their ship to the Sailing value of the Pirate Captain card they just played. If it is higher than the merchant ship's Sailing value, then the pirate has out-sailed the merchant.
-
To out-gun the merchant, the player adds the total Gunnery value of their ship to the Gunnery value of the Pirate Captain card they just played. If it is higher than the merchant ship's Gunnery value, then the pirate has out-gunned the merchant.
-
If the player has both out-sailed and out-gunned the merchant, he plunders it. The player takes the merchant card and places it on his Pirate Ship Display in the plundered merchant ship space. He then takes 1 Piece of Eight PLUS all plunder resources shown on the merchant card, and places both treasure and plunder in the hold of his ship.
Each resource piece (be it Pieces of Eight, resource or hostage) takes up 1 space in the hold. If there is not enough space for a piece, it may not be taken. The player may choose which pieces to take if he cannot take all of them.
Dumping pieces: A player may dump pieces from their hold at any time to make place for something more useful, or just to show off.
-
If the player was not able to both out-sail AND out-gun the merchant, then the plunder attempt fails and the merchant ship card is left where it is on the game board.
-
Finally, the player must discard the Pirate Captain card they used. Pirate Captain cards that have been discarded may not be used again this turn.
Example: After moving to location 3, Anja decides to plunder a merchant ship! She plays her Pirate Captain card with the values 2 in Sailing and 2 in Gunnery. These values are added to the total current values on her ship display, therefore giving Anja a final total of 3 in Sailing and 3 in Gunnery. Because both values are higher than both of the merchant ship's values (see the picture below to see the merchant ship's values), Anja succeeds and places the merchant ship's card on her Ship Display Board. She also takes 1 Piece of Eight, 2 pieces of Rum and 1 piece of Cargo and places them in her Cargo Hold. HHAAARRR, it's good to plunder!!!
Remember to take the additional 1 Piece of Eight when you have plundered a merchant ship, as this is not highlighted on the merchant ship card!
Ply The Trade Winds
A player in a trade route location or Transit location may choose to ply the trade winds. They may do this even if there is a merchant ship or another pirate in the location.
Plying the trade winds allows the player to take a Trade Winds counter. This counter allows them to:
- Add or subtract 1 to the value of a buccaneering dice that they use to make a future move. The counter is placed under the dice to represent this.
OR
- Add 1 to the player's Notoriety when adjusting their Notoriety during phase 3 of the turn of play.
No player may have more than 1 Trade Wind counter at a time, but if they use one up in one buccaneering phase they can get another one. Unused Trade Wind counters must be discarded in phase 6 - use them or lose them!
Example: After his first move to Transit location 1, Jonah has no option to plunder, so decides to ply the Trade Wind. He takes a Trade Wind counter and places it on his Pirate Ship Display in the appropriate space. In his next movement, he will be able to add or subtract 1 from the value of the dice he chooses to use, if he wants to.
Smuggle Goods
A pirate in a port space may choose to smuggle goods. The port location will show what pieces are smuggled from that port. In regions 1 and 2 the player chooses 1 resource from the ones available, and in region 3, either 2 of the same type of resources from the ones available or 2 pieces of Eight in Port of Spain. Smuggled pieces are taken from the supply and are placed in the hold of the Pirate Ship Display. Each piece takes up 1 space in the hold. If there is not enough space for a piece, it may not be smuggled. The player may choose which pieces to smuggle if he cannot smuggle all of them.
Smuggled pieces may be used to purchase upgrades in Nassau in exactly the same manner as resources plundered from a merchant ship.
Loot Port
A pirate in a port space may choose to loot that port. In order to do this, the player must first out-gun the port. Ports have a gunnery value equal to 4 plus the value of the region they occupy (i.e. 5 in region 1, 6 in region 2, and 7 in region 3).
To find out if the player is able to do this, follow this procedure:
- The player MUST play one of their Pirate Captain cards.
- To out-gun the port, the player adds his ship's current total Gunnery value to the Gunnery value of the card he played. If it is higher than the port's Gunnery value, then the pirate has out-gunned the port.
- If the player has out-gunned the port, he loots it, taking a number of Pieces of Eight equal to double the value of the region the port is in (i.e. you take 2 Pieces of Eight in region 1, 4 in region 2, and 6 in region 3).
- If the player was not able to out-gun the port, then nothing happens.
- A Looted Port counter is placed on the port when this is looted. Once a port has been looted, players may not smuggle goods, ransom hostages, or make loot port actions in it for the remainder of the game.
- Finally, the player must discard the pirate card they used. Pirate cards that have been discarded may not be used again this turn.
Example: Ewan moves to location 1, which is the port of La Havana, and decides to loot the port. In his previous turn he purchased a Great Cannon for his hull (+2 Vs. Ports), therefore his ship has a current total Gunnery value of 3 against ports. He plays his 3 Gunnery - 3 Sailing value Pirate Captain card, giving him a total Gunnery value of 6. He has looted the port! He gains 2 Pieces of Eight and places a Looted Port counter on the now looted port of La Havana.
Hostages
Hostages can be captured from merchant ships and are kept in the hold. They may either be ransomed or made to walk the plank.
Ransom a Hostage. A pirate in a port space who has hostage pieces may choose to ransom one of them when carrying out a smuggle goods action. Only one hostage can be ransomed per smuggle goods action. Ransoming a hostage does not count as an action and can therefore be carried out in addition to taking the smuggle goods action.
Ransoming a hostage allows the player to take a number of Pieces of Eight equal to the value of the region the port is in (i.e. you take 1 Piece of Eight in region 1, 2 Pieces of Eight in region 2, and 3 Pieces of Eight in region 3). Each Piece of Eight takes up 1 space in the hold. If there is not enough space, it may not be taken. Once Ransomed, the hostage piece is returned to the general supply.
Make 'Em Walk the Plank. Alternatively players may make any captured hostages 'walk the plank'. This may be done at any time, even in the adjust Notoriety phase, and does not count as an action. The hostage piece is removed and placed with the merchant ships the player has captured that turn on his ship display. In the adjust Notoriety phase a player gains +3 Notoriety for each hostage they made walk the plank.
3. Adjust Notoriety
Once all players have taken three buccaneering actions, they must adjust their Notoriety. Pirates love to brag about their exploits.
Players must move their Notoriety markers in turn, starting with the player with the highest Notoriety. Each player gains Notoriety equal to the combined Sailing and Gunnery values of all the merchant ships they plundered during the turn, plus 10 for each port they looted during the turn, plus 3 for each hostage made to walk the plank during the turn, and, if they choose to, plus 1 if they have an unused Trade Wind counter.
No more than one Notoriety marker may occupy each space on the track. If a Notoriety marker is moved to an occupied space, the player whose marker it is must place it on either the next highest unoccupied space or the next lowest unoccupied space, as they see fit. Note that this can lead to the marker jumping over several other markers.
Once the player's Notoriety has been adjusted, plundered merchant cards are returned face down to the bottom of their respective card stocks. Trade Wind counters and hostages are returned to the general supply.
If a player's Notoriety goes over 100, start again from the 1 space. Add 100 points to their Notoriety at the end of the game. You can place a piece of eight under the Notoriety marker to represent this.
4. Evade Royal Navy
After a fine voyage, pillaging and plundering, the players must get back to Nassau, evading the Royal Navy squadrons that have been sent to hunt them down.
Starting with the player with the lowest Notoriety and working up, each player must take one of the face-up Royal Navy cards and resolve it as described next. The player is free to choose any of the face-up Royal Navy cards that are remaining in the Royal Navy section of the game board.
Players that pick open seas cards (the cards with no ship on them) are safe; nothing happens to them. Players that pick a card with a ship on, must try to out-sail and out-gun it. To find out if the player is able to do this, follow this procedure:
- The player MUST play one of their Pirate Captain cards.
- To out-sail the Royal Navy, the player adds the total Sailing value of their ship to the Sailing value of the Pirate Captain card they just played. If it is higher than the Royal Navy's Sailing value, then the pirate has out-sailed the Royal Navy.
- To out-gun the Royal Navy, the player adds the total Gunnery value of their ship to the Gunnery value of the Pirate Captain card they just played. If it is higher than the Royal Navy's Gunnery value, then the pirate has out-gunned the Royal Navy.
- If a player out-sails AND out-guns the Royal Navy, he gets away scot free and sails back to Nassau without suffering any penalty.
- If the player only either out-sails OR out-guns the Royal Navy but not both, they must either lose half their Notoriety points or discard half the pieces in their hold (rounding in favour of the player); they decide.
- If the player fails to both out-sail AND to out-gun the Royal Navy, they must lose half their Notoriety points AND discard half the pieces in their hold (rounding in favour of the player).
- The Royal Navy card is then put back face down under the Royal Navy Card deck.
- Finally, the player must discard the Pirate Captain card they used.
Example: After adjusting Notoriety, the Notoriety track is as follows: Jonah has 8, Anja has 10, Jon has 11 and Ewan has 13. Above, are the available Royal Navy cards. Jonah is first to pick and chooses an "Open Seas" card as does Anja. Both cards are returned to the bottom of the Royal Navy deck. Jon is next and picks the 2 Sailing - 3 Gunnery Royal Navy card, plays his Captain card with 3 Sailing and 3 Gunnery value that, added to his current total ship values, gives him a total of 4 Sailing and 4 Gunnery. He is therefore able to get away "scot free". Ewan is left with the 4 Sailing and 4 Gunnery value Royal Navy card. He plays his Captain card with 2 Sailing and 1 Gunnery values that, added to the values of his ship (3 Sailing, 3 Gunnery thanks to previously purchased upgrades), gives him a total of 5 Sailing and 4 Gunnery. He has out-sailed the Royal Navy but not out-gunned them. He decides to lose half of his Notoriety, giving him a new Notoriety score of 7.
5. Return to Nassau
Next, all players return to Nassau and make upgrades to their ship. The players work through the following sequence.
- The players remove all of the buccaneering dice and their pirate Ship markers from the gaming board.
- Next the players may purchase ship sections, and any upgrade and crew counters that are in the Nassau space. Players take it in turn to purchase 1 ship section or 1 counter spending their resources one at a time, starting with the player with the highest Notoriety. The cost of the upgrades can be found on the table below. Once all players have purchased one section or counter, the sequence starts again, until all players declare they no longer wish to purchase any ship sections or counters. The cost of each ship section or counter is also shown on the player's Pirate Ship Display.
| Upgrade | Cost in resources |
|---|---|
| 1 Mizzen counter | 1 Gun Powder + 1 Cargo + 1 Rum |
| 1 Sail counter | 2 Cargo + 1 Rum |
| 1 Hull counter | 2 Gun Powder + 1 Cargo |
| 1 Crew counter | 1 Gun Powder + 2 Rum |
| 1st additional ship section (brig) | 2 Gun Powder + 2 Cargo + 2 Rum |
| 2nd additional ship section (galleon) | 2 Gun Powder + 2 Cargo + 2 Rum |
Counters must be placed on a free space on the ship display that has the same shape and border colour as the counter but not on top of the initial sailing and gunnery values (some counters have restrictions, more details can be found in Appendix One). Counters either provide a permanent bonus to the ship's Gunnery or Sailing value, or have a special ability that may be used once per turn. All Hull counters and all Sail counters apart from Mizzen counters grant a permanent bonus. All Mizzen counters and all Crew counters are one use, special ability counters. One use counters are flipped face down when used.
A new counter may replace one that is already on a ship; in this case the replaced counter is discarded and returned to the game box. A description of each counter can be found at the end of the rules in appendix one. Counters may not be used on the same turn that they are purchased. Ship sections are added to the ship, by sliding the existing sections apart and slotting the new section in between them. A maximum of two extra sections can be purchased for each ship. The first ship section turns your ship into a Brig. The second turns it into a Galleon.
At any time during the Return to Nassau sequence, a player may exchange one or more Pieces of Eight in their hold for resources. Each Piece of Eight may be exchanged for two resource pieces that have to be of the same type. These resource pieces do not have to be placed in the ship's hold, and may be taken even if there are not enough hold spaces left for them. Bear in mind, however, that if at the end of this sequence there are leftover resources that do not fit in your cargo hold, you must return them to the general supply. 3. Finally the player may bury Pieces of Eight by moving them from their ship's hold to their treasure chest, starting with the player with the highest Notoriety. In this step the player may exchange resource pieces for Pieces of Eight at the rate of 3 resource pieces of any type for 1 Piece of Eight.
Note that once Pieces of Eight are added to the chest, they cannot be used again to purchase upgrades in future turns. Buried treasure is used to determine who is the Richest Pirate when assigning Victory Points.
Golden Doubloons: If the Pieces of Eight run out, players may replace 5 Pieces of Eight from their treasure chest (NEVER from their cargo holds) with a single Golden Doubloon, returning the Pieces of Eight to the general supply. At the end of the game, each Golden Doubloon counts as 5 Pieces of Eight.
6. Replenish Royal Navy Cards
Deal out a number of Royal Navy cards equal to the number of players taking part in the game, and place them in a face up row beside the Royal Navy deck. If the Game End card is revealed, then the game finishes immediately.
7. Move Merchant Ships
The players move any surviving merchant ships up the board as described below, and then fill any empty trade route location with new merchant ships.
Move Up. All merchant ships in region 1 are removed (they have sailed off to Europe). Remaining Merchants then 'move up a region'. Start with the right-most merchant ship in region 2, and place it in the right-most location of region 1. Work from right to left through region 2, placing each ship in the highest numbered free location in region 1. See the image on the Move Merchant Ships example for an example.
Then repeat this process to move the ships in region 3 to the empty spaces in region 2.
Fill Empty Locations. Lastly, fill all empty trade route locations with new merchant ship cards, from the stock for their respective region, from left to right. Note that the trade route locations in region 3 will always be empty, so you will always place new ships in this region.
8. Replenish Nassau
Discard all of the counters remaining in the Port of Nassau space on the game board, and return them unused to the game box. Then draw as many replacement counters as there are players from each set, and place them face-up in the Port of Nassau space. For example, in a 4 player game you would randomly select 4 Hull Upgrade counters, 4 Crew counters, and 4 Mast counters. The order that the counters are drawn in doesn't matter. If any of the sets of counters run out, shuffle the discarded counters from the game box to create a new set of counters to draw from.
9. Prepare for Next Voyage
Finally, each player that has used any single-use counters during the turn must turn them back face-up, ready for use in the following turn, and all used Pirate Captain cards are returned to the hands of the respective players.
Ending the Game
The game ends immediately at the end of step 6, on the turn that the "Game End" Royal Navy card is drawn.
Winning the Game (Detailed Scoring)
At the end of the game, each player scores Victory Points for the following achievements:
- Most Notorious Pirate (most Notoriety points)
- Most Motley Crew (most Motley Crew points)
- Best Ship (most Best Ship points)
- Richest Pirate (most treasure)
In each category, the highest rated player scores 7 Victory Points, the second highest rated player scores 5 Victory Points, the third highest player gets 3 Victory Points, and the fourth highest scores 1 Victory Point. The fifth highest score scores 0 points.
If two or more players are tied, they all score the points. For example, if two players were tied in 1st place they would both score 7 points, and the third highest scorer(s) would score 3 points.
Most Notorious. To start with, Victory Points are scored for Notoriety. Each player looks up their Notoriety on the Notoriety track to determine how many Victory Points are scored, as described above. For example the most Notorious Pirate will score 7 Victory points.
Most Motley Crew. All Crew counters have a Motley Crew value printed on them (the small number in blue). Each player adds up these values for all of the counters on their ship in order to determine how "Motley" their crew is. Victory Points are scored as described above.
Best Ship. All Ship Upgrade counters (Hull, Mizzen and Sail) have a value printed on them in the lower left corner in green. Each player adds the values for all of the counters on their ship, including the starting ones printed on the Pirate Ship Display, to determine their total Best Ship value. Victory Points are scored as described above.
Richest Pirate. Next every player reveals how many Pieces of Eight and Golden Doubloons they have in their chests. Each player counts up the amount of treasure they have. Victory Points are scored as described above.
The player with the most total Victory Points wins the game. If players are tied on Victory Points, then the player with the most buried treasure wins; if this is also tied, the most Notorious pirate wins.
Appendix One: Upgrades and Crew Counters
Hull Upgrades
| Qty & Name | Best Ship points | Type | Effect (Permanent Bonus) |
|---|---|---|---|
| 15 x Cannons | 2 | Hull | +1 to the Ship's Gunnery Value |
| 5 x Great Cannons | 3 | Hull | +2 to the Ship's Gunnery Value ONLY when looting ports |
| 3 x Bow Chaser | 2 | Hull | +1 to the Ship's Gunnery Value ONLY against merchant ships |
| 1 x Basic Figurehead | 3 | Hull | None |
| 1 x Good Figurehead | 4 | Hull | None |
| 1 x Majestic Figurehead | 5 | Hull | None |
The bonuses granted by the Hull and Sail upgrades are permanent effects that are considered to be always in play. Bow Chasers and Figure Heads can only be placed on the front of the ship, on the Fore section. Stern Chasers and Captain's Cabins can only be placed at the rear of the ship on the Aft section.
Ships may have a maximum of one Bow Chaser or one Figure Head and a maximum of one Stern Chaser or one Captain's Cabin.
Sail Upgrades
| Qty & Name | Best Ship points | Type | Effect (Permanent Bonus) |
|---|---|---|---|
| 15 x Top Sail | 2 | Sail | +1 to the Ship's Sailing Value |
| 5 x Jib Sail | 2 | Sail | +1 to the Ship's Sailing Value ONLY against Merchant ships |
| 5 x Spanker Sail | 2 | Sail | +1 to the Ship's Sailing Value ONLY against the Royal Navy |
Jib Sails can only be placed on the front of the ship. Spanker Sails can only be placed at the rear of the ship. Ships may have only one Jib Sail and one Spanker Sail.
Mizzen Upgrades
| Qty & Name | Best Ship points | Type | Effect (ONE use per turn) |
|---|---|---|---|
| 15 x Jolly Roger | 1 | Mizzen | Re-set face up 1 crew counter, so that it can be used again in the same turn |
| 5 x Crows Nest | 2 | Mizzen | Attack 1 merchant ship, 1 space away if you are in an empty Trade Route location (do not move your ship marker) |
| 5 x Ratlines | 3 | Mizzen | None |
Ships may have a maximum of one of each Mizzen counter. Mizzen Counters are one use per turn special ability counters.
When you use a "ONE use per turn" counter, flip it face down to show that it can't be used any more this turn. Remember to flip it over again at the end of the turn in step 9, before your next buccaneering rolls.
Crew Counters
| Qty & Name | Motley Crew points | Type | Effect (ONE use per turn) |
|---|---|---|---|
| 2 x Quartermaster | 1 | Crew | During Step 5 (Return to Nassau), convert 1 Piece of Eight into 3 resource pieces of your choice. This follows the same rules of a normal exchange |
| 2 x First Mate | 1 | Crew | +1 either to the Ship's Sailing or Gunnery Value. This bonus can only be applied to 1 encounter with a Merchant Ship or with the Royal Navy |
| 2 x Carpenter | 2 | Crew | Add 1 cargo piece to your hold. There must be space for it (except when used during phase 5) |
| 2 x Navigator | 2 | Crew | Add +1/-1 to a buccaneering dice for your next move |
| 2 x Coxswain | 2 | Crew | Count one buccaneering dice as being a 6 when making your next move, no matter what the face-up value |
Ships may not have 2 of the same Crew counter. Crew counters are one use per turn special ability counters. Unless specified, they can be used at any time during each turn.
Summary of a Turn of Play
- Roll three dice, and place them on your Pirate Ship Display without changing their face-up value - page 6.
- Use one of the dice to move your ship on the board - page 6 - and then take one of the following actions: Plunder Merchant - page 7; Ply The Trade Winds - page 8; Smuggle Goods - page 8 - and additionally Ransom a Hostage - page 9; Loot Port - page 8; Pass. This process is repeated 3 times.
- Adjust Notoriety on the Notoriety track - page 9.
- Fend off the Royal Navy - page 9.
- Return to Nassau, make upgrades to your ship and hire additional crew - page 10.
- Reveal Royal Navy cards. If the Game End card is revealed, then the game finishes immediately - page 11.
- Move any surviving merchant ships up the board, and fill any empty trade route location with new merchant ships - page 11.
- Remove any counters that remain in the Port of Nassau space and replace them with a new set of counters - page 11.
- Turn face-up any face-down counters that were used during the turn, and take back your used Pirate Captain cards - page 11.