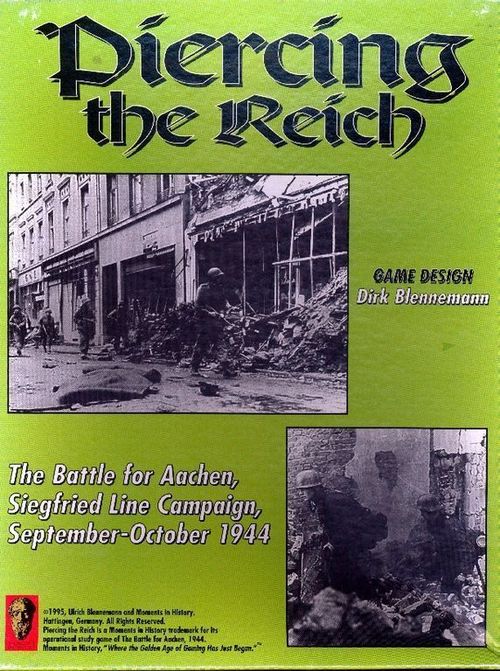
Piercing the Reich: The Battle for Aachen, Siegfried Line Campaign, Sep-Oct 1944
Piercing the Reich: The Battle for Aachen, Siegfried Line Campaign, Sep-Oct 1944 Rulebook
Table of Contents
Table of Contents
- 1.0 Introduction
- 2.0 Equipment
- 3.0 Standard Procedures
- 4.0 Preparing for Play
- 5.0 The Turn
- 6.0 Formations and Independent Units
- 7.0 Replacements
- 8.0 Reinforcements and Withdrawals
- 9.0 The Operations Cycle
- 10.0 The Formation Activation Segment
- 11.0 Actions
- 12.0 Ground Movement
- 13.0 Zones of Control
- 14.0 Stacking
- 15.0 Combat
- 16.0 Effectiveness Check
- 17.0 Supply
- 18.0 Command Range
- 19.0 Interdiction Level
- 20.0 Headquarters
- 21.0 Scenarios
- 22.0 Optional Rules
- 23.0 Designer's Notes
1.0 Introduction
1.1 The Situation
A. At the beginning of September 1944, the grand Allied pursuit of the German Army across France and Belgium was coming to an end. Fatigue, strained supply lines, increasingly difficult terrain, stiffening German resistance, worsening weather, and the seemingly fearful Siegfried Line (German term: Westwall) were all beginning to put the brakes on what had been a glorious and dizzying race. In the north, Montgomery was preparing for Operation Market-Garden while in the south, Patton was fuming impotently without supplies. Hodges of First Army was hopeful because as his leading elements approached the Westwall below Aachen, it was still not clear that it would not be possible to drive right through the fortified line and at least up to the Roer River. If successful, the Roer River was to be crossed and the drive continued up to the Rhine River. After that, who knew, maybe home by Christmas?
B. Although initial resistance from battered remnants of the Wehrmacht was light, before the US 3rd Armored Division and 1st Infantry Division (The Big Red One) could cut through all Westwall lines, the German 9th Panzer Division and 12th Infanterie Division met them head on with desperate counterattacks. While the VII Corps was bogged down southeast of Aachen, the XIX Corps was committed into a set piece assault on the fortified line along the Wurm Stream west of Aachen. Instead of the one-day operation that would clear the last few miles to link up with the VII Corps and surround Aachen, the US 2nd Armored Division and 30th Infantry Division ran into an escalating storm of German counterattacks that included the new German type of infantry division (Volksgrenadier, consisting of Tigers, Sturmgeschütze, Sturmpioniere and two SS-Kampfgruppen). After nine days of intense fighting, the 30th Infantry Division linked up with the riflemen of the Big Red One, cutting off Aachen. Meanwhile the 1st Infantry Division proceeded to storm the city itself and by October 21st, the last German resistance collapsed. Aachen was the first German city that was captured by Allied soldiers in World War II.
1.2 The Game
Piercing the Reich is an operational level simulation of the Battle for Aachen which took place from 12 September to 21 October 1944. The game is basically intended for two players, one on each side, although it is also suitable for solitaire and team play. One side represents the German forces organized into the Seventh Armee's LXXXI Korps. The other side controls the US forces comprising the First US Army's VII and XIX Corps. The cardboard playing pieces represent the actual units which participated in the campaign, while the map represents the terrain over which the battle was fought.
1.3 Course of Play
The game is played in turns, each representing anywhere from two to eight days. The focal point of each turn is the Operations Cycle (OC), consisting of a variable number of Formation Activation Segments. During each Formation Activation Segment, the side currently holding the initiative activates a formation to undertake numerous Actions, conducted through the expenditure of available Action Points (APs). The same formation may be activated several times within a given OC, based on its Formation Activation Level. Meanwhile, the Reaction side may undertake Formation Reactions to counter the enemy's maneuvers.
1.4 Object of the Game
The US side must attempt to repeat or improve upon the historical victory gained in the Battle for Aachen, while the German side attempts to rewrite history by bringing the US offensive to a grinding halt. Other than the campaign game, shorter scenarios allow players to become better acquainted with the nuances of the game system.
1.5 Abbreviations
Terms have been abbreviated per this table:
| Abbr | Meaning | Abbr | Meaning |
|---|---|---|---|
| AFV | Armored Fighting Vehicle | FAM | Formation Activation Marker |
| AP | Action Point | FAT | Formation Activation Track |
| ASP | Attack Support Point | HQ | Headquarters |
| ATP | Anti-Tank Point | MA | Movement Allowance |
| CH | Combat Hit | MP | Movement Point |
| CR | Command Range | OC | Operations Cycle |
2.0 Equipment
A. Each copy of Piercing the Reich includes:
- One 22" x 34" map
- 360 die-cut counters
- One Rules Booklet, with Historical Commentary
- Four Player Aid Cards
- One 10-sided die
B. If any of these parts is missing or damaged, contact the publisher's authorized distributor for replacement parts. (Contact details omitted.)
2.1 The Rules
2.1.1 Organization
A. Each major section of the rules is assigned a whole number (1.0, 2.0, 3.0, etc.). Subordinate rules are assigned a corresponding number to the right of the decimal place, with each division separated by another decimal (e.g., 2.1, 2.1.1, 2.1.1.1, etc.).
B. The rule book is also interspersed with designer comments and examples of play in special offset boxes to help clarify or explain various game mechanics.
2.1.2 Answering Rules Questions
If any questions concerning play arise, the publisher will gladly answer them. Please follow the guidelines printed below to expedite the process and assure a response:
A. Please refer to the numbered rules section(s) applicable to each question.
B. If possible, phrase your questions so they can be answered with a simple yes or no. (If you cannot manage this, we understand!)
C. [Mailing and e-mail contact details omitted.]
D. Sorry, phone or fax questions will not be answered.
2.2 The Map
A. The map represents the area in Western Europe in which the Battle for Aachen was fought. A hexagonal grid (hexes) is superimposed on the map to regulate the movement and positioning of the playing pieces, and to delineate the various terrain features which affect play. Each hex has a four-digit identification number, used for game reference purposes only. Example: The town of Rott is located in hexes 2022 and 1922.
B. To make the map lie flat on the playing surface, first back-fold the map sheet against its creases. Small pieces of drafting tape may be used to hold the map taut, as this type of tape may be removed later without causing any damage. For best results, you may wish to cover your game map with Plexiglass, or laminate it to provide additional protection.
2.3 Charts and Tables
The map and Player Aid Cards contain charts, tables, tracks and displays used to assist players throughout play. These are listed below, in alphabetical order:
| Item | Description |
|---|---|
| Action Point Table | Determines the number of APs that an activated formation receives. |
| Action Track | Records the expenditure of APs for each activated formation during an Operations Segment. |
| Combat Results Table (CRT) | Resolves ground combat between opposing forces. |
| Formation Activation Track (FAT) | Records the number of times a formation may be activated during the OC and indicates the Activation Level it will receive once activated. |
| Turn Record Track (TRT) | Shows the passage of time, and indicates when reinforcements are eligible for both sides. |
| German Infiltration Chart and Table | Shows all modifiers and results of German Infiltration Combat (optional rule). |
| German Reorganization Chart | Identifies German units that may be reorganized. |
| HQ Recovery Chart | Shows the ability of a headquarters (HQ) to recover depending on the HQ's Recovery Class and the Interdiction Level (German HQs only). |
| Initiative Track | Indicates the current Initiative die roll modifier (DRM) and specifies if Sudden End is in effect. |
2.4 The Playing Pieces
There are two basic types of colored, die-cut playing pieces: military units and game markers. When removing the counters from the counter sheet, cut them out using scissors or a sharp knife for best results. Then trim any remaining dog ears off with a fingernail clipper. This will facilitate handling and stacking during play, plus enhance the unit's overall appearance.
Note: The countersheets include one unit not belonging to Piercing The Reich. It is a replacement for the misprinted counter from Triumphant Fox. Its designation is 151-50, the 151st Infantry Brigade of 50th Division. We thought you would like the gesture.
Errata: The German 3-3 is a motorized engineer and should have wheels added to its unit type symbol as illustrated on the player aid card.
2.4.1 Military Units
A. The military units represent the combat formations that participated in the Battle for Aachen. There are two different classes of military units:
- Combat units
- Headquarters (HQ) units
B. Combat units are further divided into infantry-type units and support-type units, see chart C1 for details.
C. The numbers and symbols on the pieces represent the size, strength, and various capabilities of each type of unit as detailed below.
2.4.1.1 How to Read the Military Units
2.4.1.1.1 Combat Unit
Each combat unit counter shows, in the positions printed on it: the Parent (the unit's parent brigade or division formation, e.g., "116-1/156"), the Unit ID, the Type (see 2.4.1.3), the Entry Turn, the Effectiveness Rating (ER), the Combat Strength (CS), the Movement Allowance (MA), and the Tank/Anti-Tank value.
All combat units possess Tank Points (TPs, a white number in a black box) or Anti-Tank Points (ATPs, a black number in a white box).
2.4.1.1.2 Headquarters
Each HQ counter shows, in the positions printed on it: the Parent (e.g., "LXXXI -9 Pz"), the Unit ID, the Type (HQ), the Reaction Rating, the Command Range, the Attack Support Points (ASPs), and the Relocation Points.
2.4.1.2 Military Unit Attributes
| Attribute | Explanation |
|---|---|
| Anti-Tank Points (ATPs) | The special combat value (CV) of a unit when confronting enemy armor units. |
| Attack Support Points (ASPs) | The bonus an HQ can provide eligible subordinate and assigned units conducting a Regular or Prepared Attack Action. |
| Combat Strength (CS) | The normal value a ground combat unit uses in attack and defense. |
| Command Radius | The range measured in hexes over which an HQ can fully support its subordinate and assigned units. |
| Effectiveness Rating (ER) | A unit's ability to conduct various actions, withstand battle fatigue, and remain in good order, from 2 (low) to 7 (high). |
| Movement Allowance (MA) | The maximum number of MPs that a unit can spend to move during a Movement Action. |
| Reaction Rating | An HQ's ability to have eligible subordinate and attached units become active during the course of enemy movement and combat. |
| Relocation Points | The number of APs an HQ has to spend to undertake an HQ Relocation Action. |
| Tank Points |
2.4.1.3 Combat Unit Type Symbols
A combat unit's type has importance on movement, combat, and certain abilities as covered in the appropriate sections.
| Leg Unit Type | Motorized Unit Type |
|---|---|
| Non-Motorized Engineer | Armored Engineer |
| Non-Motorized Infantry | Motorized Engineer |
| Bicycle Infantry | Armored Infantry |
| Machine Gun | Motorized Infantry |
| Fortress Infantry | Reece |
| Fortress Machine Gun | Armored Car* |
| Headquarters | Assault Gun* |
| Tank* | |
| Tank Destroyer* |
* support type
2.4.1.4 Mobility Classes
All military units are part of one Mobility Class: leg or motorized. A military unit's mobility class has importance on movement as covered in the appropriate rules sections.
2.4.1.5 Nationality
A unit's nationality, and therefore the side to which it belongs, is indicated by its color scheme:
| Nationality | Color |
|---|---|
| German Heer | Gray |
| German Waffen-SS | Black |
| US Army | Green |
2.4.1.6 Organization
A. Most combat units are subordinate to a division formation, each with its own unique color printed inside the unit type box.
B. The name or number to the right of the bullet signifies the unit's parent brigade or division formation.
C. The designation to the left is the unit's own individual military designation.
D. German historical abbreviations are:
| Abbr | Name |
|---|---|
| LXXXI | LXXXI Korps |
| 3 | 3rd Panzergrenadier Division |
| 9 | 9th Panzer Division |
| 12 | 12th Infanterie Division |
| 49 | 49th Infanterie Division |
| 116 | 116th Panzer Division |
| 183 | 183rd Volksgrenadier Division |
| 246 | 246th Volksgrenadier Division |
| 353 | 353rd Infanterie Division |
| 526 | 526th Infanterie Division |
E. US historical abbreviations are:
| Abbr | Name | Abbr | Name |
|---|---|---|---|
| VII | VII Corps | 3A | 3rd Armored Division |
| XIX | XIX Corps | 29 | 29th Infantry Division |
| 1 | 1st Infantry Division | 30 | 30th Infantry Division |
| 2A | 2nd Armored Division |
2.4.1.7 Special German Terms
| Term | Meaning |
|---|---|
| Abteilung | Roughly a battalion in size |
| Alarm | Alert or ad-hoc unit |
| Auffanglinie | Prepared position |
| Ausbildung | Training |
| Bataillon | Battalion |
| Batterie | Battery |
| Berger | Commanding officer's name |
| Bucher | Commanding officer's name |
| Eisenbahn | Railway |
| Ersatz | Replacement |
| Feldjäger | Military police |
| Festung |
2.4.2 Markers
Markers are used as record-keeping devices on the map.
| Marker | Use |
|---|---|
| Formation Activation | Tracks the Activation Level of each side's formation during play. |
| Action Points | APs currently available to an activated formation (one for each side). |
| Current CS (0-13) | The 0-marker is only used for HQs whose HQ Attack Support Rating has been reduced to zero. |
| Improved Defense | Indicates a unit or stack occupying an Improved Defense. |
| Turn | Tracks the current turn. |
| Initiative +DRM | Tracks the side receiving a DRM during Initiative Determination. |
| Combat Multiplier | Determines combat multipliers when resolving combat (one for each side). |
| Sudden End | Tracks OCs 1-10 of each turn. (Sudden End becomes possible with OC 11 and thereafter.) |
| Railroad Gun | Optional rule 22.3 |
| Funk-Panzer | Optional rule 22.7 |
2.5 Scale
A. Each hex on the map is 1.2 kilometers from side to side.
B. Each turn represents two to eight days.
C. Unit scale is German infantry-type units (200-800 men), German support-type units (4-27 armored fighting vehicles), US infantry-type units (400-1200 men), and US support-type units (12-30 armored fighting vehicles).
3.0 Standard Procedures
There are several standard conventions used during play.
3.1 The Die
The game uses a ten-sided die. A zero (0) is always treated as ten (10), not zero.
3.2 Fractions and Rounding Rule
When making a calculation for a unit that produces a fraction, retain the fraction. When the values for all units on the same side are added together for a particular combat or other game function, round any remaining fraction up to the next whole number.
Exception: Always retain fractions throughout a unit's movement; never round fractions up.
3.3 Cumulative Effects
All possible modifiers are cumulative.
3.4 Limited Intelligence
A. A player may examine the contents of an enemy stack only after having declared a ground attack against the defending hex. Reduced strength markers beneath units may never be inspected.
B. At all other times, only the topmost unit in an enemy stack may be viewed. Ignore any game markers on top of the topmost combat or HQ.
3.5 Hex Control
A. At the start of each scenario, the US controls only those hexes containing friendly units and their ZOCs. All other hexes are controlled by the Germans. If both US and German ZOCs extend into a hex, both coexist and the hex is mutually controlled by both players.
B. The control of a hex switches from one side to the other whenever a combat unit from the other side first enters it or exerts a ZOC upon a hex free of enemy units. Control switching is immediate, and may occur and reoccur in the same hex(es) any number of times during play; see 13.0 for further details.
4.0 Preparing for Play
A. Once players mutually agree upon a scenario and choose sides, be sure to follow all special instructions for the selected scenario that supersede the standard rules. Each side places units and markers on the map per the Initial Deployment instructions. Once placement is complete, begin normal play.
B. Before play, all 29 Combat Chits must be put into a container from which they are drawn easily at random during play. When playing the campaign scenario (Scenario Five: The Battle for Aachen), all seven Plan chits must be placed into a second container from which they are drawn easily at random as well.
5.0 The Turn
Piercing the Reich lasts up to eight turns (or fewer for shorter scenarios). A turn is a sequence of events that must occur in a certain order. The sequence of play must be strictly followed in the order presented below.
5.1 Sequence of Play Outline
A. Recovery Phase
B. Organization Phase
C. Plan Phase
D. Replacement Phase
E. Reinforcement Phase
F. Operations Cycle
G. End Turn Phase
5.2 Expanded Sequence of Play
5.2.1 Recovery Phase
A. Place the Initiative + DRM marker and the Sudden End marker in the 0-box on the Initiative Track. It does not matter at this point on which side the Initiative+ DRM is placed.
B. Place all flipped-over HQs back on their front sides if determined to be in supply.
C. Advance each Activation marker of US HQs a number of spaces on the FAT according to the HQ Recovery Chart, if the formation's HQ on the map is currently in supply. Never advance an Activation marker past a formation's Maximum Activation Level listed on its Formation Activation Counter.
D. The US rolls one die and consults the Interdiction Table to determine the Interdiction Class of the turn. (Skip this step on the first turn of a scenario.)
E. Advance each Activation marker of German HQs a number of spaces on the FAT according to the HQ Recovery Chart, if the formation's HQ on the map is currently in supply. Never advance an Activation marker past a formation's maximum activation Level listed on the unit's Formation Activation Counter.
Play Note: In the first turn of a scenario, do not advance the HQ Activation Markers on the HQ Track.
F. Each disrupted unit determined to be in the Command Range (CR) of its parent or currently assigned HQ automatically recovers from disruption, regardless of the HQ's supply status.
G. Each unit that is still disrupted and isolated conducts an Attrition Check.
5.2.2 Organization Phase
A. Independent units maybe assigned or reassigned.
B. All eligible, independent reinforcements must be assigned to one qualifying formation.
C. Each eligible formation may have its Formation Activation marker (FAM) flipped over onto its In Reserve (back) side, or return to its standard (front) side.
5.2.3 Plan Phase
A. This applies only to Scenario 4.
B. Starting with Turn 2, the US draws one Plan chit.
C. The Germans roll one die. On a 9 or 10, the Germans may inspect any single drawn Plan chit currently held by the US.
5.2.4 Replacement Phase
A. The US receives two infantry, two armored infantry, and three tank Replacement Points (RPs). The US may expend any available RPs to rebuild reduced-strength units.
B. The Germans may reorganize reduced-strength units that are part of the same formation.
5.2.5 Reinforcement Phase
A. All eligible reinforcements for both sides may enter play.
B. The Germans must withdraw specific formations on Turns 3 and 4.
5.2.6 Operations Cycle
An OC is composed of a variable number of Operations Segments. Perform the following steps for each Operations Segment:
A. Each side rolls one die to determine Initiative. If the unmodified die roll (DR) of both sides is 10 and the first ten Operations Segments are resolved, the turn is over and play proceeds immediately to the End Turn Phase. Otherwise, the side with the higher DR after the DRM gains the Initiative. The opponent becomes the Reaction side. In case of ties, the US gains the Initiative.
B. If the Initiative +DRM marker is currently in the 0-space on the Initiative Track, place it so that the symbol matches the side that lost the initiative, and move it to the 2-space on the track. Otherwise, move the marker two spaces higher if the side indicated on the marker lost the initiative this cycle, or move the marker directly to the 2-space if the side indicated on the marker won the initiative (9.2).
C. The side holding the Initiative chooses one of these options:
- Act: Perform a Formation Activation.
- Transfer Initiative: The Reaction side becomes the Initiative side and must either Pass or Act (but may not Transfer Initiative).
- Pass: The Passing side may only transfer initiative for the rest of the OC. Proceed to Initiative Determination if this is the first Pass declared in the OC. If it is the second Pass, the OC ends; proceed immediately to the End Turn Phase.
D. If Act is chosen, the side that won or has received the Initiative performs a single Formation Activation. The Reaction side may under certain conditions interrupt the Actions and perform a Formation Reaction.
E. Start another Operations Segment unless both sides have declared a Pass or neither side can conduct further Formation Activations.
5.2.7 End Turn Phase
Advance the Turn marker to the next higher numbered box on the TRT to indicate the start of a new turn. If the final turn has been completed, the game ends and victory is determined.
Design Note: The purpose of the rather elaborate turn sequence, particularly the OC, is to portray the fluidity and unpredictability of formation-based operations during the Second World War and to prevent players from planning too far or too effectively in advance. As a result, actions will tend to alternate randomly between the opposing sides an indefinite number of times per turn, providing little advance warning of what will transpire next on the battlefield. This makes play highly interactive, and approaches the simultaneity of events and reactions possible during the course of modern warfare.
Most if not all games include a fixed time scale per turn. Not so with Piercing the Reich! The battles of the Second World War were marked by short bursts of intense activity, interspersed with lulls during which both sides would refit and regroup. A turn in Piercing the Reich can vary anywhere from two to eight days. The number of OCs actually conducted provides the true measure of activity in a particular turn.
6.0 Formations and Independent Units
Formations are the key organizing concept in Piercing the Reich. Players must think of their forces in terms of formations to use them effectively, just as the historical commanders had to.
6.1 Formations
A. Most combat units are permanently organized by formation. All units belonging to a specific formation are easily identifiable by the unique color coding in their unit type box which they share in common. With the exception of the US 9th Infantry Division and US 29th Infantry Division which both were only partly involved in the battle for Aachen, all formations are divisional-level.
B. A formation consists of an HQ and up to 14 combat units, including any Independent units currently assigned to the formation. Only units belonging to a formation may conduct an action assigned to the formation.
C. Some US units may be detached and reassigned to friendly HQs as specified below. These units are treated as independent units if assigned, reassigned, or detached.
- Up to three infantry battalions (three counters) belonging to the same infantry regiment and part of the 1st Infantry Division may be reassigned to the 3rd Armored Division.
- Up to two tank task groups (two counters) that are part of the 3rd Armored Division may be reassigned to the 1st Infantry Division.
- Up to three infantry battalions (three counters) belonging to the same infantry regiment and part of the 30th Infantry Division may be reassigned to the 2nd Armored Division.
- Up to two tank task groups (two counters) that are part of the 2nd Armored Division may be reassigned to the 30th Infantry Division.
D. Units subordinate to a German formation may never be assigned to another formation.
Exception: An isolated (18.4) German unit may be assigned to another German formation in CR (18.0). Such a unit must be detached and reassigned to its regular formation if it can trace a Command Path (18.2) of any length to its regular formation HQ in the first Organization Phase it is able to do so.
Design Note: One of the outstanding characteristics of the German military system during World War II was unity of command. This rule deals with a pocket-like situation.
6.2 Independent Units
A. Units that do not permanently belong to any one formation are Independent. An Independent unit can be assigned to friendly HQs as specified below (6.2.3).
B. Independent units must be assigned to a qualifying formation during play at all times.
6.2.1 Assigning Independent Units
A. Independent units may be assigned, reassigned, or detached only during the Organization Phase. To be assigned, the Independent unit must be undisrupted and within the CR of the Formation HQ wishing to attach it.
B. Record any Independent unit assignment on the Independent Units Record Sheet. A side need not announce any Independent unit assignments to the opposing side, although if challenged, the side will need to show written proof that such an assignment has indeed been made.
C. Once assigned, an Independent unit is treated exactly like any other subordinate unit in the formation. All eligible, Independent reinforcements must be assigned to one qualifying formation before entering the map.
6.2.2 Reassigning Independent Units
Once assigned, Independent units remain subordinate to the formation indefinitely until the owner elects to reassign it to another formation during the Organization Phase of each turn. A unit must qualify for reassignment the same way it does for assignment (6.2.1), except that it must also be in the CR of its current parent HQ to be detached.
6.2.3 Assignment Restrictions
These independent units may be assigned to any friendly formation as specified below.
A. German Independent Units: Any German formation.
B. US 299th Engineer Battalion: Any formation of the VII Corps (1st Infantry, 3rd Armored, or 9th Infantry Divisions).
C. US 1128th Engineer, 1129th Engineer, and the 99th Infantry Battalions: Any formation of the XIX Corps (2nd Armored, 29th Infantry, or 30th Infantry Divisions).
7.0 Replacements
A. Starting Turn 2:
- The US receives RPs during the Replacement Phase of each turn.
- The Germans may cannibalize and reorganize certain units during the Replacement Phase of each turn.
B. Replacements can only be used for specified unit types that are:
- Undisrupted, and
- Within the CR of a parent HQ, and
- Currently in supply.
C. Additional special restrictions are listed below.
- Units in enemy ZOCs (EZOCs) can receive replacements as long as all other restrictions are met.
- Expend RPs immediately as they become available; unused points are lost. An RP recovers 1 SP.
- There is no limit to the number of RPs a single unit may receive during a Replacement Phase or game, but eliminated units may not be rebuilt and no unit can increase its CS above its original, printed strength.
7.1 US Replacements
A. Certain reduced US units may be brought up to strength by expending RPs.
B. The US receives 2 Infantry RPs (only for non-motorized infantry combat units), 2 Armored Infantry RPs (only for armored infantry combat units), and 3 Tank RPs (only for tank combat units) per turn.
C. No other type of US combat unit (including HQs) can be rebuilt.
7.2 German Reorganizations
A. The Germans may cannibalize combat units to receive RPs, regardless of their current strength, as long as they are eligible. To be eligible, a unit must be:
- Undisrupted, and
- Within the CR of a parent HQ, and
- Currently in supply.
B. Simply remove from play an infantry-type unit to cannibalize for RPs. Each SP becomes a RP; the RP's type is based on the cannibalized unit's type; see German Reorganization Chart.
C. As specified in the German Reorganization Chart, these RPs may be expended to recover SP losses of qualifying combat units that are part (subordinate or attached to) of the same formation as the cannibalized unit.
D. Only infantry-type units that are part of the same formation may reorganize based on the German Reorganization Chart. Infantry-type units that are not part of the same formation, support-type units, HQs, and units that do not qualify in conjunction with the German Reorganization Chart, are not available for reorganization.
Design Note: In contrast to the US, the Germans did not use available replacements to strengthen reduced units but to rebuild totally destroyed formations. To preserve their formation's effectiveness, German formation commanders rebuilt reduced units by cannibalization of other units.
8.0 Reinforcements and Withdrawals
Design Note: For the Germans, reinforcements often represent (in conjunction with withdrawals) the reorganization and cannibalization of tattered formations. Exceptions are the German 9th Panzer Division and 116th Panzer Division, which were withdrawn on a Weisung des Führers (Führer's directive). They were supposed to be conserved and rebuilt for the Battle of the Bulge.
A. Beginning with Turn 2, both sides receive reinforcements per the Reinforcement Chart.
B. Entry of reinforcements can be delayed to the next turn at the owner's option, including those previously delayed.
C. Reinforcements can be identified by the blue number to the right of their unit type box, indicating the turn of entry.
D. The Germans place reinforcements before the US.
E. All reinforcements of one side are considered to be placed simultaneously.
8.1 Placement of Reinforcements
A. Eligible reinforcements enter play during the Reinforcement Phase on any specific entry hex(es) according to the Reinforcement Chart. To be placed on an entry hex, a reinforcement must be:
- Not adjacent to an enemy unit, and
- Within the CR of a parent HQ, and
- Currently in supply, and
- Not overstacked.
B. If no friendly entry hex is available, reinforcements may enter in a hex that is nearest to a entry hex and that fulfill the requirements (use common sense).
C. Independent reinforcements must be assigned to one qualifying formation before placed on the map (In the Organization Phase).
8.2 Withdrawals
8.2.1 In General
A. During Turn 3's Reinforcement Phase, the Germans must withdraw the 353rd Infanterie Division formation.
B. During Turn 4's Reinforcement Phase, the Germans must withdraw the 9th Panzer Division and 116th Panzer Division formations.
C. Simply pick up all units that are part of these formations and remove them from play.
D. Whereas 9th Panzer Division and 353rd Infanterie Division are removed permanently, 116th Panzer Division enters play again as reinforcement on Turns 6 and 7 at full strength, even if units were eliminated or reduced before (but see 8.2.2).
8.2.2 Victory Points
A. For victory determination, SP losses of withdrawn German units are calculated like other German SP losses. A withdrawn unit must be:
- Within the CR of a parent HQ, and
- Currently in supply, and
- Undisrupted.
B. Otherwise, the withdrawn unit is treated as eliminated and counted for VPs (21.5, 21.6).
Play Note: To avoid nasty surprises, players may study the reinforcement and withdrawal schedule carefully in advance. However, the commanding officers fighting the Battle of Aachen did not know much about reinforcements and withdrawals as well!
9.0 The Operations Cycle
Most game activities take place during the OC. A variable number of Operations Segments will occur until both sides have chosen to Pass, or Sudden End occurs.
Play Note: This section is the heart of the game. It is longer and more detailed than most other sections and may, at first glance, appear somewhat daunting. Take heart: in practice, most of the mechanics become self-evident and, after a few runs, performing an OC becomes second nature.
9.1 The Initiative Track
The Initiative Track printed on the map is used to record the first 10 completed Operations Segments in a turn's OC, plus the positive DRM currently applied to the Reaction side's Initiative DR.
9.2 Initiative Determination
9.2.1 Procedure
A. During Initiative Determination that begins each Operations Segment of the OC, both sides roll a single die. Add the number found in the box currently occupied by the Initiative +DRM marker (2.4.2) to the side whose symbol appears on the marker. (The Germans are represented by a German cross; the US by a white star.)
B. Also add the current Interdiction Class of the turn to the US DR (19.0).
C. The side with the higher modified result wins the Initiative for the Operations Segment. This side is termed the Initiative side, while the other side is termed the Reaction side. In case of a tie, the US wins the Initiative.
9.2.2 Initiative Determination DRMs
A. After determining the Initiative and Reaction sides for a particular Operations Segment, move the Initiative +DRM marker.
B. If the marker is currently in the 0-box, then place it so that the Reaction side's symbol is faceup, and move it into the 2-box.
C. If the marker is in any space other than zero, move it two spaces higher if the Reaction side's symbol currently appears on the marker. If the Reaction side's symbol is not showing, move the marker directly to the 2-space on the Operations Track.
Example: The following shows how the placement of the Initiative +DRM marker would be adjusted:
| OPS Segment Number | Initiative Winner | Reaction Side | Symbol Showing on Marker | Initiative +DRM Marker in Space # |
|---|---|---|---|---|
| 1 | Germans | US | Star | 2 |
| 2 | Germans | US | Star | 4 |
| 3 | Germans | US | Star | 6 |
| 4 | US | Germans | Cross | 2 |
| 5 | Germans | US | Star | 2 |
9.3 Sudden End
A. An OC can end even if neither side wishes it. This is called Sudden End.
B. If the unadjusted Initiative DRs for both sides are 10 during Initiative Determination of any Operation Segment, Sudden End occurs.
Play Note: Do not modify the DRs for any reason when determining Sudden End. If Sudden End does not occur, make the Initiative and Interdiction DRM normally.
C. No Sudden End is possible during the first ten Operations Segments of each turn. Simply ignore the occurrence of Sudden End if both players roll an unadjusted 10 during those Operations Segments. Beginning with Operations Segment 11, Sudden End may occur normally.
D. Use the Sudden End marker and the Initiative Track to keep track of Operations Segments 1-10 of each turn.
9.4 Initiative Options
The side winning Initiative for an Operations Segment must announce one of these options:
A. Act: Perform a single Operation.
B. Transfer Initiative: The Reaction side becomes the Initiative side and must either Pass or Act (but may not Transfer Initiative).
C. Pass: Proceed to Initiative Determination.
9.4.1 Act
The side holding the Initiative can decide to conduct a Formation Activation (10.1). Once all activities of the Formation Activation are concluded, proceed to the next Operations Segment.
9.4.2 Transfer Initiative
A. The Initiative side may give the Initiative to the opposing side, unless that side has already decided to Pass (9.4.3) for the current turn.
B. The Initiative side must either Act or Pass. It may not transfer the Initiative back to the original Initiative side.
C. Transferring the Initiative does not alter the Initiative +DRM marker's location in any way. The side receiving the Initiative from the opponent is still considered to have lost the last Initiative Determination.
Design Note: Winning the initiative can also translate to making the enemy commit its forces first on the field of battle, thus allowing you the opportunity to better ascertain the enemy's intentions, especially if you can muster a strong reaction with your own forces.
9.4.3 Pass
A. If the Initiative side Passes, no further operations may be conducted by that side for the remainder of the OC. The Passing side may still conduct Formation Reactions (10.2). Proceed to the next Operations Segment.
B. Since the Passing side has forfeited the right to undertake any further Operations except Reaction during the current OC, Initiative Determination is only conducted to see if Sudden End occurs.
C. Both sides still roll a die, and the Initiative +DRM marker is still adjusted normally.
D. If Sudden End does not occur, and the Passing side wins the Initiative, no operation can occur this segment; immediately proceed to the next Operations Segment. If the non-Passing side wins the Initiative, it must either Act or Pass. It cannot transfer the Initiative back to the Passing side.
E. Once both sides have declared Pass, the OC immediately ends and play proceeds to the End Turn Phase (5.2).
9.5 End of the Operations Cycle
A. The OC ends immediately when one of these occurs:
- Both sides elect to Pass (9.4.3);
- Sudden End occurs (9.3);
- Neither side has any unit formations capable of conducting a Formation Activation;
B. Play immediately proceeds to the End Turn Phase (5.2).
10.0 The Formation Activation Segment
The player now holding the Initiative declares one Formation Activation. A player may conduct one Formation Activation per Formation Activation Segment.
10.1 Formation Activation
Design Note: The key to successful warfare in the Second World War was the formation. The structure of a formation, its ability to control the attached units and support them effectively meant the difference between victory and defeat.
A. Activating a formation allows all subordinate units, including Independent units currently assigned to the formation, to conduct one or more of the following Actions in succession.
B. Under certain circumstances, the Reaction side can undertake Formation Reactions during an operation of the Initiative side.
10.1.1 Formation Activation Levels
A. Each formation has its own FAM on the FAT. The marker's position indicates the corresponding formation's current Activation Level.
B. Each time a formation is activated during an Operations Segment, move the FAM to the next lower space on the FAT. Formations can be activated as long as their FAM does not currently occupy the 0-space on the FAT. If it does, the formation cannot be activated until the marker is moved out of the 0-space. This occurs as a result of Recovery (10.3).
10.1.2 Determining the Number of Action Points
A. An activated formation's APs are determined randomly by DR, resulting in 1-7 APs available to the formation for the current Formation Activation Segment.
B. The activated formation's current Activation Level governs the column on the AP Table used to determine the number of APs available to the formation. Roll one die, cross-referencing it with the proper column on the AP Table to obtain the result. The bold number lists the number of APs available to the formation for the current Formation Activation Segment. Place the AP marker in the space on the AP-Track containing the same number.
Example: A formation with its FAM in the 4-space on the FAT above would receive an Activation Level of 4 when activating. The FAM would then be adjusted downward one space (assuming that the formation HQ is in supply at time of activation) to the 3-space. Assuming that the activating player rolls an 8 on the AP Table, the AP marker would be placed in the 5-space (Bold DR) on the AP-Track to indicate that the activated formation has 5 APs available for expenditure.
C. If the formation is an OOS formation having previously expended Emergency Supply (17.6), the FAM would then be adjusted downward to the 0-space of the FAT.
10.1.3 Activating Unsupplied Formations
A. Supply is determined for formations at the instant of activation. (See 17.0 for details.) The penalty for activating an unsupplied formation depends whether the HQ has already expended Emergency Supply (17.3).
B. If an HQ is out of supply (OOS) at the instant its formation is activated and its supply symbol on its back side is not currently showing, it can activate normally if it expends Emergency Supply (17.3). Flip the HQ over to its back side containing the special supply symbol. The HQ remains flipped over until the Recovery Phase (5.2).
C. Expending Emergency Supply is mandatory; if an HQ can do it, it must do it.
D. If an OOS HQ cannot expend Emergency Supply, move the formation marker down the track to the 0-space, regardless of its previous position.
10.1.4 Expending Action Points
A. Each time a formation selects an action (11.0), adjust the AP marker on the AP-Track down the appropriate number of spaces corresponding to the AP cost of the selected action.
10.2 Formation Reaction
Design Note: Unlike many other games, both sides are actively involved in the playing process of Piercing the Reich. The Reaction side does not simply sit idly by while the opponent runs circles around friendly troops! Instead, the Reaction side can do what its label implies: it has the ability to react to some enemy threats.
10.2.1 Triggering Reaction Attempts
A. When a unit or stack of units performing a Movement Action (12.0) enters or attempts to exit a hex adjacent to an enemy combat unit currently belonging to an enemy formation, the Reaction side may announce a Formation Reaction attempt.
B. A Reaction attempt can only be declared if at least one of the Reaction side's combat units adjacent to the moving unit or stack:
- Is not disrupted, and
- Is not an HQ by itself in its hex, and
- Is within CR of its parent HQ, and
- Is the first from its formation to make a Reaction attempt during the opposing side's Movement Action. (Only one Reaction Attempt per formation can be made during the course of each of the Initiative Formation's Movement Actions).
C. If an Acting unit enters or attempts to exit a hex adjacent to units from more than one of the Reaction side's formations, only one Formation Reaction attempt can be made with one of the qualifying formations. The Reaction side will therefore have to weigh carefully when a Formation Reaction attempt should be made.
10.2.2 Adjacent HQs
A. When a unit or stack performing an Movement Action moves adjacent to an enemy HQ located alone in a hex:
- The HQ is immediately displaced (20.2).
- No other adjacent combat units currently belonging to the displaced HQ's formation can attempt Formation Reaction until a subsequent enemy Movement Action.
B. Units belonging to another formation that does not suffer HQ displacement may still make a Reaction Attempt, but only after any friendly HQ suffers displacement.
10.2.3 Resolving Reaction Attempts
A. The HQ of the formation selected to make a Reaction Attempt unit must pass a Reaction Check. Roll the die; if the result is equal to or less than the HQ's printed Reaction Rating (white printed number to the left of its unit type box), the Formation Reaction Attempt is successful. Otherwise, it fails.
B. A successfully reacting formation receives a number of APs equal to the non-bold number on the AP Table. Place the friendly AP marker on the AP-Track space corresponding to the number.
C. The reacting formation then adjusts its FAM downward one space on the FAT.
D. If the HQ of a reacting formation is OOS at the instant of activation, all penalties for activating an OOS formation (10.1.3) are in effect.
E. If a Reaction Attempt fails, the formation suffers no adverse results. Its FAM remains where it is on the FAT. However, neither it nor any other formation may attempt Formation Reaction against the Initiative unit or formation currently moving for the duration of that Movement Action. If a formation undertakes another Movement Action in the same Operations Segment, another Formation Reaction attempt can be made.
Example: A formation with its FAM in the 6-space on the FAT would receive an Activation Level of 6 when activating due to Formation Reaction. The FAM would then be moved (assuming that the formation HQ is in supply at time of activation) to the 5-space. Assuming that the activating player gets a DR of 5 on the AP Table, the AP marker would be placed in the 3-space (non-bold DR) on the AP-Track to indicate that the activated formation has 3 APs available for expenditure.
10.2.4 Effect of Reaction on Initiative Side
A. Whenever an enemy reaction is successful, the unit or stack performing movement must stop in the hex it just entered or attempted to exit. The Initiative formation's Action immediately ends and cannot be resumed. To perform another Action, the Formation must survive the Reaction and have at least 1 AP remaining on the AP-Track.
B. Any units overstacked as a result of an interrupted Action or enemy Reaction must immediately be displaced to the nearest vacant hex, preferably along the same path they had just traveled to reach the hex. Players must exercise common sense and follow normal guidelines for stacking (14.0) and retreat (15.5.5). A unit may never jump over enemy units while being displaced. If displacement is impossible due to the presence of enemy units and prohibited terrain, the owner eliminates overstacked units in a hex until stacking limits are met.
C. Once the Reaction side completes Formation Reaction, the Initiative side resumes the current Operations Segment with the previously selected formation. The formation must select and begin a new Action. It may expend any remaining APs, but each Movement Action undertaken is subject to a Formation Reaction attempt.
10.2.5 No Counter-Reactions
During a Formation Reaction, no counter-reaction by the Initiative side is possible. Movement Actions by Reaction units cannot trigger a Reaction.
10.3 Formation Activation Recovery
A. During the Recovery Phase of each turn, adjust upward on the FAT all FAMs of supplied formations. Activation Recovery is handled differently for US and German formations.
B. Do not adjust the FAM for an HQ determined to be OOS during the Recovery Phase.
C. A given formation's Activation marker may never be adjusted above its Maximum Activation Level (white number printed to the left of the Activation marker's ID box).
D. An HQ which is currently flipped over from having expended Emergency Supply recovers if it is in supply; flip the HQ back to its front side.
10.3.1 US Formation Activation Recovery
During each turn's Recovery Phase, adjust upward on the FAT the FAMs of supplied US formations (but never exceeding their Maximum Activation Level) a number of boxes equal to their Formation Activation Recovery Rating listed on the HQ Recovery Chart.
Example: The US 1st Infantry Division finds its FAM located in the 5-box on the FAT during the Recovery Phase of a new turn. Although the Formation Activation Recovery Rating of 1st Infantry Division is +5, the FAM may not be raised above the 7-box on the FAT since this represents 1st Infantry Division's Maximum Activation Level. If the US 1st Infantry Division's HQ is OOS, its FAM would not be increased.
10.3.2 German Formation Activation Recover
A. The Activation Recovery of German formations is not fixed but based on the individual Formation Activation Recovery Rating and influenced by the Interdiction Level (19.0) of the current turn.
B. The Germans check the Formation Activation Recovery Rating of their supplied formation, cross-referencing this rating with the Interdiction Level on the HQ Recovery Chart to obtain the result. Adjust the FAM upward on the FAT a number of boxes equal to the determined result.
Example: During the Recovery Phase of a new turn, the German 9th Panzer Division's FAM is located in the 3-space of the FAT, and the Interdiction Level of the new turn is 1. Although the Formation Activation Recovery Rating of 9th Panzer Division is 4 and the Maximum Activation Level of 9th Panzer Division is 7, the FAM may not be raised above the 6-box on the FAT because of an Interdiction Level of 1.
10.4 Formation Reaction Example of Play
For purposes of this example, assume that all formations are in supply and all combat units are within CR of their parent formation HQ.
[Example diagram omitted from this transcription.]
A. The Germans hold the Initiative and have activated the 116th Panzer Division. The 60 Panzergrenadier regiment in hex 2013 is conducting a Movement Action to reach the town of Oberforstbach in hex 2114, two hexes distant.
B. The Panzergrenadier unit begins its Movement Action by entering the forest/pillbox hex 2014. Normally, attempting to exit hex 2013, which is adjacent to the US 1-745 Tank Battalion in hex 2113, would trigger a possible Formation Reaction attempt by 1st Infantry Division. However, the 1-745 Tank Battalion is disrupted, so the Panzergrenadier unit can ignore the presence of the enemy unit for purposes of its Movement Action. (A disrupted unit exerts no ZOC and cannot trigger a Formation Reaction.)
C. Upon entering hex 2014, the Panzergrenadier unit moves adjacent to the US 1-634 Tank Destroyer Battalion in hex 2015. Formation Reaction is now possible by the 1st Infantry Division because the 1-634 Tank Destroyer Battalion is in CR of its respective formation HQ. Since the present Activation Level of the 1st Infantry Division is only 2 (denoted by the present position of the FAM on the FAT), and only one Formation Reaction attempt can be declared per enemy Movement Action, the US decides not to attempt a Formation Reaction attempt.
D. Upon entering the town of Oberforstbach in hex 2114, the Panzergrenadier unit enters a hex adjacent to the US 1-634 Tank Destroyer Battalion in hex 2015 and the US 3A-B/36 Armored Regiment in hex 2215. Since the forest/pillbox hex 2014 blocks the 1-634 Tank Destroyer Battalion's ZOC into hex 2014, the Panzergrenadier unit is free to continue its Movement Action. Had a clear or broken or pillbox hex been present in hex 2014, or the US unit in hex 2015 would be an infantry-type unit, the German Panzergrenadier unit would have been forced to halt its Movement Action. Proceeding into the town of Oberforstbach in hex 2114, the Panzergrenadier unit must end its Movement Action there since it has now entered a hex containing an EZOC (exerted by the 3A-B/36 Armored Infantry Regiment in hex 2215).
E. Formation Reaction is now possible by either the 1st Infantry Division or the 3rd Armored Division since both the 1-634 Tank Destroyer Battalion in hex 2015 and the 3A-B/36 Armored Infantry Regiment in hex 2215 are in CR of their respective formation HQs. Since the German 116th Panzer Division still has 5 APs remaining on the AP-Track for the current Operation Segment, the US decides that a Formation Reaction attempt will now be made.
F. Assume that the present Activation Level of the 3rd Armored Division is 6, but only 2 for the 1st Infantry Division (denoted by the present position of the FAM on the FAT). Since only one Formation Reaction attempt can be declared per enemy Movement Action, the US elects to attempt Formation Reaction with 3rd Armored Division since its Formation Activation Level is considerably higher.
G. Referring to the 3rd Armored Division's HQ, its Reaction Rating is a 5. The US now rolls a single die and resolves the Reaction Check (10.2.3) for the 3rd Armored Division's HQ. The US rolls a 2, three less than the HQ's Reaction rating, so the Formation Reaction attempt is successful. Had 3rd Armored Division failed its Formation Reaction attempt, 1st Infantry Division would not be able to attempt its own Formation Reaction since only one Formation Reaction attempt is allowed per enemy Movement Action.
H. The Operation Segment for the German 116th Panzer Division is now temporarily suspended, and no further Actions may be declared. The US checks the number of APs received for the Reacting 3rd Armored Division. Its FAM is in the 6-space on the FAT (indicating its current Activation Level), and the US rolls one die, consulting the AP Table. Assuming that the US rolls a 9, the 3rd Armored Division receives 3 APs (non-bold result on the AP Table because the formation is conducting a Reaction) and the US places the AP marker in the 3-space on the AP-Track. The 3rd Armored Division's FAM is then adjusted one space downward on the FAT.
I. Once the US has concluded all Actions for the Reacting 3rd Armored Division, play immediately reverts back to the 116th Panzer Division which had been suspended, and the next Action may be declared by the 116th Panzer Division.
Important: The Germans may not attempt Formation Reaction while the Reacting formation (US 3rd Armored Division) is activated (10.2.5).
11.0 Actions
An activated formation may undertake Actions. A formation receives the number of APs indicated on the FAT at the time of activation (or half for Reaction) (10.1).
11.1 AP-Tracks
A. Each side has an AP-Track, used to record the number of APs available to an activated formation during an Operations Segment in which the formation is chosen to Act (or React). Place the AP marker in the appropriate numbered space on the AP-Track.
B. Each Action costs a number of APs. Any Action may be chosen, provided the activated formation has sufficient APs remaining on its Action Track.
C. As APs are expended, adjust the AP marker to record the number remaining. A side need not expend all available APs in a given Operations Segment.
D. Unused APs are lost when the owner decides to conclude the Formation Activation.
11.2 Procedure
Follow these steps when conducting Actions during the Operations Segment.
11.2.1 Select Eligible Units
Any units subordinate or assigned to an activated formation are eligible to conduct Actions.
11.2.2 Select One Action and Check CR
A. Deduct the number of APs required for the Action from the AP-Track. A CR check is required since this has a direct impact on each activated unit's ability to perform the selected Action, and associated AP cost involved.
B. A disrupted unit is strictly limited to a Refit Action (11.4).
11.2.3 Perform the Action
A. The Action is now carried out by activated unit(s) able to do so. If no units perform the Action, it is canceled but the APs are still lost.
B. Remember that an Operations Segment may be temporarily suspended due to a successful Formation Reaction attempt (10.2).
11.2.4 Select Another Action
If enough APs remain and the owner wishes to do so. Otherwise, conclude the Operations Segment.
11.3 Effects of Command Range
Units belonging to a formation outside the parent HQ's CR (18.0) may only perform Movement or Hasty Attack Actions, and the AP cost for these actions is doubled. Isolated units (18.4) may not carry out Actions.
Play Note: Refer 18.0 for complete details on adverse effects resulting from units being Out of Command (OOC) or isolated.
11.4 List of Actions
| Type | AP Cost | Type | AP Cost |
|---|---|---|---|
| Movement | 1 | Combat: Hasty | 1 |
| HQ Relocation | 1-3 | Combat: Regular | 2 |
| Refit | 1 | Combat: Prepared | 3 |
| Improved Defense | 1 | Infiltration (optional 22.1) | 1 |
11.4.1 Movement Action
A. A combat unit (or a stack of combat units belonging to the same formation) may conduct movement. Use the printed MA of the slowest unit in the stack. Units may not be picked up or dropped off from a moving stack. See rules for Movement (12.0), ZOCs (13.0), and Stacking (14.0) for further details.
B. An HQ may never undertake a Movement Action. A stack of units including an HQ cannot move as a stack; an HQ moves by conducting an HQ Relocation Action (11.4.2).
11.4.2 HQ Relocation Action
A. The number of APs required to undertake an HQ Relocation Action is equal to the HQ's number of Relocation Points (2.4.1.2). An HQ Relocation Action is the only Action an HQ may undertake. An HQ must always be located on a town, city, or industrial hex.
B. Pick up the HQ, placing it in its destination hex. The destination hex must be a friendly-controlled (3.5) town, city, or industrial hex in the HQ's CR.
C. To move the HQ, it must be possible to establish a path of contiguous hexes free from enemy units and/or EZOCs between the start hex and the destination hex. Friendly units negate the effects of EZOCs in the hex they occupy, including the start and destination hex.
D. An HQ violating the above limitations is subject to the penalties of HQ Displacement (20.2).
Design Note: Players should view the formation HQ as the organizational center of each formation. This center is relocated by conducting an HQ Relocation Action.
11.4.3 Refit Action
A. A unit currently belonging to the same formation and in the parent HQ's CR, may attempt to remove disruption. Each disrupted unit must conduct a Refit Action individually; it is not possible to refit a stack of units with a single Refit Action.
B. A unit may perform any number of Refit Actions, as long as the APs are available during the Operations Segment.
C. Make an Effectiveness Check (16.0) for the disrupted unit; if it passes, flip it over to its normal (undisrupted) side. If it fails, it remains disrupted.
D. A Refit Action is the only Action a disrupted unit may undertake.
11.4.4 Improved Defense Action
A. A combat unit (or a stack belonging to the same formation) may conduct an Improved Defense Action to strengthen its position; a unit or stack defending an Improved Defense uses the Improved Column of the drawn Combat Chit if attacked.
B. To conduct an Improved Defense Action, simply place a Improved Defense marker on top of the unit/stack.
C. The Improved Defense marker is removed immediately if any unit in the hex:
- Becomes disrupted,
- Is eliminated,
- Leaves the hex for any reason, or
- Conducts any Action.
D. If another unit ends a Movement Action or retreat in the hex, immediately remove the Improved Defense marker. It is not possible that only some units in a hex are in Improved Defense; it is an all or nothing affair.
Play Note: Do not remove the Improved Defense marker if reinforcements are placed in the hex.
[The source prints a stray paragraph label "E." after 11.4.4 with no text; no content is omitted.]
11.4.5 Combat Actions
A. The side performing the Action must declare a Hasty Attack, Regular Attack, or Prepared Attack with a single unit or stack of units against any one adjacent enemy-occupied hex. The attacker decides which units in the attacking hex will actually participate; all defending units must participate.
B. In a Regular Attack, Attacker Combat Support (15.4.2.1) and HQ Attack Support (at half strength, see 15.4.3) is allowed.
C. In a Prepared Attack, Attacker Combat Support (15.4.2.1) and full HQ Support (15.4.3) is allowed, and Air Support (15.3) is possible.
12.0 Ground Movement
Design Note: The MA for each unit represents not only the time it takes a unit to travel from one point to another, but also its maneuverability relative to different unit types, taking into consideration the unit's Effectiveness, Command Control, and Tactical Doctrine employed.
A. Units conduct movement by declaring a Movement Action (11.4).
B. Units are moved through contiguous hexes in any direction or combination of directions by expending one or more MPs from their MA to enter each hex or cross certain hexsides.
C. Movement may be affected or entirely prevented by the presence of enemy combat units and EZOCs, terrain, stacking restrictions, etc. Consult the Terrain Effects Chart by cross-referencing the unit type with the terrain entered.
D. There is no limit to the number of friendly units which can pass through a single hex during play.
E. A unit cannot jump over or skip a hex when conducting movement.
12.1 Moving Stacks
Units currently belonging to the same formation which begin a Movement Action in the same hex may move together as a stack at no extra cost in APs.
A. Expend the necessary AP cost for the entire stack.
B. The stack's MA is set by the printed MA of the slowest unit in the stack.
C. A moving stack may never drop off or pick up any units while conducting movement.
D. All units that begin moving as a stack must end movement in the same hex, unless they are forced to displace due to overstacking (14.2) for any reason.
E. A stack of units including an HQ cannot move as a stack; an HQ always moves by conducting an HQ Relocation Action (11.4).
12.2 Maximum Movement
A. A unit can never exceed its MA (or its stack's MA) during a single Movement Action.
Exception: A unit can always move one hex, as long as it does not:
- Enter an enemy-occupied hex;
- Enter or cross prohibited terrain;
- Move directly from one EZOC to another; Exception: Infiltration Movement (13.4).
- Trigger a successful enemy Formation Reaction before exiting its hex of origin.
B. Units are not required to expend their entire MA, but unused MPs cannot be accumulated or transferred.
C. Each hex contains a terrain type. The Terrain Key on the map identifies the terrain types, and the TEC lists the differing movement point entry costs a unit spends to enter various terrain types based on its unit type.
D. A unit or stack can be involved in any number of Movement Actions during an Operations Segment, as long as the APs are available to allow it to participate.
E. A friendly unit may not enter a hex containing an enemy combat unit. When moving adjacent to a hex solely occupied by an enemy HQ, the HQ is immediately displaced per 20.2.
Play Note: The borders of Belgium, Germany and The Netherlands are shown for historical purposes only. Border hexes do not affect movement, combat, etc.
12.3 Road Movement
Design Note: Units moved along roads in columns whenever they could to take full advantage of the increased mobility roads afforded and to reduce wear on equipment. This could not be done when in close proximity of the enemy. It also made roads ideal sites for enemy mines and ambushes!
A. A road is considered to be any road hex; town, city, or industrial hexes are not road hexes. A unit which moves from one road hex directly into another adjacent road hex through a hexside crossed by the road symbol spends MPs according to that type of road and ignores all other terrain in the hex entered and hexside crossed (including Pillbox hexes).
B. Units may not use the road movement rate when entering or exiting an EZOC.
C. US units classified as leg pay only ½ MP if using a road. This is even possible if the Increased MA (12.4) is used.
Design Note: The US Army used independent truck pools to increase the mobility of leg units along roads.
12.4 Increased Movement Allowance of Leg Units
Design Note: If contact with the enemy is unlikely and the unit is not deployed battle-ready, a non-motorized unit can increase its mobility enormously.
Combat units classified as leg have their MA increased by 2 if they do not move adjacent to an enemy unit during their entire Movement Action (including both the starting hex and the final hex).
12.5 German Movement Restriction
During Turns 1-3, German units are not permitted to enter any hex to the west of the pillbox-line running from hex 1806 to hex 5503.
Exception: The Bulge of Kerkrade (3403, 3503, 3504, 3603, 3604, 3605, 3606; 3704, 3705, 3804, 3805).
Design Note: The 49th Infanterie Division had fallen back before the XIX Corps from the Albert Canal to the Westwall northwest of Aachen because the OKH had ordered the usage of the Westwall as Auffanglinie (prepared position) for its battered remnants and as the Widerstandslinie (line of resistance) of the arriving reinforcements. This resulted in nearly no German resistance in front of the Westwall.
12.6 Streams and the Roer River
A. Leg units pay +1 MP to cross a stream hexside.
B. Motorized units must expend their entire MA to cross a stream. In other words, they must begin a Movement Action adjacent to a stream hexside in order to cross it, and cease movement immediately after crossing. These additional MPs are not paid if the unit in question is following the path of a road or if the crossing starts and/or ends in a town or industrial hex.
C. US units cannot cross the Roer River. German units can cross the Roer River only between the hexes 5321-5421, 5420-5421, and 5420-5520.
13.0 Zones of Control
A. The hex a combat unit occupies and the six hexes immediately surrounding it constitute that unit's ZOC. A unit's ability to exert a ZOC depends on the unit's type and the terrain detailed in the ZOC Chart.
B. Hexes into which a unit exerts a ZOC are called controlled hexes and inhibit the movement of enemy units, the tracing of an enemy CR Path and an enemy supply path.
Design Note: The hex a unit occupies represents only the center of the unit's action area. Most units in the game are capable to project their combat ability and firepower to the six surrounding hexes. However, other units, which are limited in size or firepower capability, do not exert a ZOC in certain terrain types, or at all.
13.1 Units Exerting a ZOC
All units exert a ZOC except:
A. A disrupted unit.
B. An HQ.
13.2 Limits of ZOCs
A. All non-disrupted combat units exert a ZOC into all six surrounding hexes at all times, except when negated due to terrain effects as specified in the ZOC Chart.
B. If both enemy and friendly ZOCs extend into a hex, both coexist and the hex is mutually controlled by both sides.
C. There is no additional effect when more than one unit (enemy or friendly) exerts a ZOC into a given hex.
D. Friendly units always ignore other friendly ZOCs.
13.3 Effects on Movement
A. A friendly combat unit must immediately cease movement upon entering an EZOC and may move no further during that Movement Action, even if the hex is already occupied by another friendly combat unit.
B. A unit which begins its Movement Action in an EZOC may leave that hex, but may not move directly into another EZOC.
Exception: Infiltration Movement (13.4).
13.4 Infiltration Movement
13.4.1 In General
A. Any friendly unit or stack that begins a Movement Action in a hex may try to move directly from one EZOC to another EZOC by expending its entire MA. This is an exception to the rule that no friendly combat units may directly move from one enemy ZOC to another during a given Movement Action.
B. Conduct an Effectiveness Check (16.0). Units that fail this Effectiveness Check become disrupted and do not move; units that pass this Effectiveness Check are placed into the new hex.
13.4.2 Infiltration Movement Example of Play
A. German stack A in hex 2922 is composed of 116-116 Reece, 116-228 Tank Destroyer, and LXXXI-506 Panzer, which is attached to 116th Panzer Division. This hex is located in an EZOC of US 3-B/36 Armored Infantry Regiment in hex 2921, but not in an EZOC of US 3-703 Tank Destroyer Battalion from hex 3023 because the forest/pillbox hex in 2922 blocks the 3-703 Tank Destroyer Battalion's ZOC.
B. 116-228 and LXXXI-506 in hex 2922 wish to conduct a Movement Action to join with 12-12 Engineer located in hex 3022. 116-116 in hex 2922 stays where it is.
C. This Action requires infiltration movement since hexes 2922 and 3022 both contain an EZOC. The Germans roll one die for a 7 and compare the DR to the ERs of the involved units. Since 7 is equal to or less than the ER of LXXXI-506 Panzer (ER = 7), this unit passes the infiltration movement and is placed in hex 3022. However, 7 is greater than the Effectiveness Rating of 116-228 Panzerjäger (ER = 6), so this unit fails, does not move, and becomes disrupted.
D. If the Germans had rolled an 8 or greater, both units would have failed the infiltration movement attempt.
E. If the Germans had rolled a 6 or less, both units would have passed the attempt.
13.5 Effects on Command and Supply
Units may trace a CR or Supply Path into but never through an EZOC hex. However, the presence of a friendly combat unit, even when disrupted, automatically negates all EZOCs in the hex it occupies.
13.6 Effects on Retreat
A retreating unit or stack suffers additional penalties when entering a retreat hex containing an EZOC. See Retreat Hexes (15.5.5) and Withdrawal (15.5.6) for details.
14.0 Stacking
Placing more than one unit in a hex is referred to as stacking. Each side is free to stack units in any order desired. The position of a unit in a stack has no effect on play, although units can be hidden beneath the top unit in a stack. Opponents may remove markers from the top of a stack until the first unit is revealed.
14.1 Stacking Limits
A. Only combat units and HQs are subject to stacking limitations. Markers never count for stacking purposes.
B. Units from different formations can stack together in the same hex without penalty, although only units in a hex from the same formation may conduct a single Action together.
C. Any number of friendly units may pass through a hex during a given Movement Action, but stacking limits must be met at the end of each Action or retreat.
D. Each side may place one infantry-type unit in the same hex with:
- Two support-type units, or
- One HQ.
Design Note: Stacking limits do not represent the maximum number of troops or vehicles which could theoretically physically occupy one hex but more appropriately the numbers which could fight effectively and support each other.
14.2 Overstacking
A. All combat units in an overstacked hex at the end of a Movement Action or retreat suffer an automatic disruption. If a hex contains two or more HQs, each HQ loses one Support Point from its current total, and only one HQ may remain; others are immediately displaced per 20.2. If HQ overstacking occurs (but not for combat units), the HQ overstacking must be immediately corrected; friendly combat units are unaffected.
B. The opponent may displace overstacked units, as desired, one at a time into any adjacent hex(es) until the stacking limit of the hex is met. The opponent may not displace a unit into a fully stacked hex unless no other alternative hex is available.
C. Displaced units that end up in overstacked hexes trigger the same disruption and displacement results in those hexes.
D. Any unit that cannot be displaced due to the presence of enemy combat units is eliminated.
Exception: HQs per 20.2.
15.0 Combat
Design Note: The combat system reflects the interaction of weapons, size, quality, support, and command coordination. While no single factor overshadows all others, a unit's ER is crucial since it determines the ability of a unit to withstand a combat in good order.
A. Combat occurs between opposing units in adjacent hexes during a Combat Action.
B. Combat is always voluntary; a unit is never required to attack.
C. If one side inflicts more damage on the opponent than it suffers, Battle Victory (15.6) is achieved.
15.1 Resolving Combat
15.1.1 Step A: Attack Declaration
The side performing the Action declares a Combat Action (Hasty, Regular, or Prepared Attack) with one friendly unit or one stack of friendly units adjacent to a single one enemy-occupied hex. Multi-hex combat is not permitted.
15.1.2 Step B: Combat Chits
Each player draws one Combat Chit to determine the Combat Multipliers.
15.1.3 Step C: Strength Determination
A. The attacker multiplies the CS of each attacking unit with its Combat Multiplier to get the individual Battle Strength. The Battle Strength of all units participating in the attack is summed to get the attacker's CV.
B. The defender multiplies the CS of each defending unit with its Combat Multiplier to get the individual Battle Strength. To calculate the defender's CV, all defending units in a hex combine their Battle Strength even if subordinate/assigned to different formations.
15.1.4 Step D: Combat Results Table
A. Compare the attacker's and defender's CV. If the attacker's CV (A) is at least equal to the defender's (D), divide A by D and drop any fraction. If D is larger than A, divide D by A and round any fraction up.
B. Cross-reference the ratio with the type of terrain occupied by the defender(s), listed on the CRT.
C. If the ratio is greater than the one listed in the far-right column for the indicated terrain type, use the far-right column before applying any applicable column modifiers.
D. If the ratio is less than the one listed in the far-left column for the indicated terrain type, the attack is treated as a 5/0 result. (APs are still considered expended.)
E. If the attacker is conducting a Prepared Attack, also roll for Air Support (15.3). Apply any column shifts, with any shifts beyond the leftmost or rightmost column being ignored.
F. The attacker rolls one die, applying all required DRMs. Treat results of less than 1 as 1, and results of more than 20 as 20. (Remember that 0 is treated as 10). Cross-reference the modified result with the ratio located on the proper Terrain line to obtain the combat result. Apply combat results (15.5) immediately.
15.2 Combat Strength Determination
Design Note: In reality, the combat value of a unit changed often, sometimes dramatically, for differing reasons; the results were often reflected in all those too well-known situations as "one company stops a division." Unlike most other games, in Piercing the Reich, players cannot count factors to achieve that favorable 3:1 column before declaring an attack. Closer to reality, a player must always calculate the worst case to be successful in Piercing the Reich.
15.2.1 Procedure
A. Before starting play, all 29 Combat Chits must be placed in one container where they can be drawn easily at random. The strength of an attacking or defending unit is calculated before each battle.
B. The attacker draws randomly (without looking into the container) one Combat Chit to find the Combat Multiplier (1-3) for this Combat Action by cross-referencing the unit's ER with the appropriate column of the Combat Chit. The Combat Multiplier found in this way is then used to multiply the unit's current CS to get the Battle Strength of this unit. If there is more than one unit attacking, the procedure is repeated for each involved unit, but there is only one Combat Chit drawn by the attacker.
C. The defender draws one Combat Chit and repeats the procedure described above to get the Battle Strength of its unit(s) involved in the combat.
D. There are three columns for the Combat Chits: left (red), center (yellow), and right (green). They are used as follows:
| Side | Situation | Column |
|---|---|---|
| Attacker | Hasty Attack | Left |
| Attacker | Regular Attack | Center |
| Attacker | Prepared Attack | Right |
| Defender | Disrupted | Left |
| Defender | Undisrupted | Center |
| Defender | Improved Defense | Right |
Play Note: Draw only one Combat Chit drawn per side regardless of the number of participating units.
E. Once a Combat Action has been resolved, both players return the drawn Combat Chits to the container.
15.2.2 Combat Strength Determination Example of Play
| Side | Combat Chit ER | Multiplier |
|---|---|---|
| German | 5 | 2 Regular Attack |
| German | 6 | *2 Regular Attack |
| German | 7 | *3 Regular Attack |
| US | 5 | *2 Undisrupted |
| US | 3 | *1 Disrupted |
A. German stack A in the town hex of Mariadorf in 3912 is doing a Regular Attack Action against US stack B defending in hex 3911. The German stack consists of elements of 116th Panzer Division: 116-II/156 (current CS: 8/ER: 7), 116-II/16 (4/6) and independent LXXXI-217 (2/5) attached to 116th Panzer Division.
B. The US stack consists of elements of 30th Infantry Division: 30-1/117 (7/5) and 30-823 (disrupted; 4/3).
Each side draws one Combat Chit.
C. The German Battle Strength is calculated as follows:
| Unit | CS | Combat Multiplier | Total |
|---|---|---|---|
| 116-II/156 | 8 | 3 | 24 |
| 116-II/16 | 4 | 2 | 8 |
| 217 | 2 | 2 | 4 |
| TOTAL | 36 |
D. The US Battle Strength is calculated as follows:
| Unit | CS | Combat Multiplier | Total |
|---|---|---|---|
| 30-1/117 | 7 | 2 | 14 |
| 30-823 | 4 | 1 | 4 |
| TOTAL | 18 |
E. The combat ratio is 36:18 = 2:1 column on the CRT.
Play Note: Playtesters often calculated the CS incorrectly. Draw only one Combat Chit for the attacker and one Combat Chit for the defender, however, the Combat Multiplier is calculated individually for each involved unit, based on the unit's ER, the kind of attack/defense, and the status.
15.3 CRT Column Modifier: Air Support
A. The only CRT Column Modifier in Piercing the Reich is Air Support.
Exception: Optional rules 22.2 and 22.7.
B. Air Support only occurs when the attacker is conducting a Prepared Attack Action.
C. When conducting a Prepared Attack Action, roll one die to resolve air support. DRs are:
| DR | Germany | US |
|---|---|---|
| 0 | NE | 1L |
| 1 | 1R | 1R |
| 2 | NE | 2R |
| 3 | NE | 3R |
| 4-9 | NE | NE |
D. Results are column shift(s) left (1L), right (1R, 2R, 3R), or no effect.
E. Any shifts beyond the leftmost or rightmost column are ignored.
15.4 Combat DRMs
A. There are four possible Combat DRMs: Terrain Effects, Combat Support, HQ Support, and Armor Superiority. Exceptions: Optional Railroad Guns (22.3), Brummbär assault guns (22.6), and Funkpanzer-Kompanie 311 (22.7).
B. Add all positive modifiers, then subtract all negative modifiers to yield the final DRM.
C. Apply the final DRM to the DR.
D. Results less than one are treated as one; results greater than 20 are treated as 20.
15.4.1 Terrain Effects DRM
A. Only the defender receives a Terrain Effects DRM. All Terrain Effects DRMs are the result of a hexside: stream, dragonteeth, anti-tank ditch, combined embankment/stream, or combined dragonteeth/stream. A Terrain Effects DRM is in effect if the attacker is attacking across such a hexside.
B. As the attacker is always attacking across one hexside only, the defender cannot receive more than one Terrain Effects DRMs per Combat Action.
C. These DRMs are listed and described in full detail on the Player Aid Card.
15.4.2 Combat Support
Friendly combat units adjacent to the attacker/defender may be eligible to provide combat support. Units providing combat support are immune to any adverse combat results, and cannot be used to absorb losses.
15.4.2.1 Attacker's Combat Support
A. Combat support for a Hasty Attack Action is not allowed.
B. Combat support for a Regular Attack Action or Prepared Attack Action depends on the type of Attack Action and other factors.
| Attack Action | Same Formation | ZOC Exerted | In CR | DRM |
|---|---|---|---|---|
| Regular | Y | Y | Y | +1 |
| Prepared | Y | Y | Y | +2 |
| Prepared | N | Y | Y | +1 |
C. Same formation means the friendly unit belongs to the same formation as the attacking stack.
D. ZOC Exerted means the friendly unit exerts a ZOC into the hex under attack.
E. In CR means the friendly unit is in CR of its parent HQ.
F. Combat support is not allowed for any combinations other than the chart above.
G. The DRM is per hex providing combat support.
15.4.2.2 Defender's Combat Support
A. Combat support is not possible for the defender if any defending unit is disrupted.
B. Combat Support depends on the type of defense.
| Defense | Same Formation | ZOC Exerted | In CR | DRM |
|---|---|---|---|---|
| Regular | Y | Y | Y | -1 |
| Improved | Y | Y | Y | -2 |
| Improved | N | Y | Y | -1 |
C. Same formation means the friendly unit belongs to the same formation as the attacking stack.
D. ZOC Exerted means the friendly unit exerts a ZOC into the attack hex.
E. In CR means the friendly unit is in CR of its parent HQ.
F. Combat support is not allowed for any combinations other than the chart above.
15.4.2.3 Combat Support Example of Play
Assume the two German units of 116th Panzer Division in hex 2122 are attacking the US 9-I/47 infantry battalion defending the town of Rott (hex 2022). All units are in CR of their parent HQs. Attacker's Combat Support would be determined as follows based on the type of Attack Action conducted:
A. Hasty Attack Action
- Attacker: No combat support is possible.
- Defender: DRM of -1 by 9-III/47 because it belongs to same formation and exerts a ZOC into hex 2122.
- Final DRM of -1.
B. Regular Attack Action
- Attacker: DRM of +1 by 116-228 because it belongs to same formation and exerts a ZOC into hex 2022.
- Defender: DRM of -1 by 9-III/47 because it belongs to same formation and exerts a ZOC into hex 2122.
- Final DRM of 0.
C. Prepared Attack Action
- Attacker: DRM of +3 by 116-228 (+2) because it belongs to same formation and exerts a ZOC into hex 2022, and 353-547 (+1) because it belongs to different formation and exerts a ZOC into hex 2022.
- Defender: DRM of -1 by 9-III/47 because it belongs to same formation and exerts a ZOC into hex 2122.
- Final DRM of +2.
- The German 116-675 in hex 2121 does not provide combat support because it does not exert a ZOC into hex 2022. The US 9-III/47 in hex 2223 does not provide combat support because it is disrupted so does not exert a ZOC into hex 2122. If the defender in hex 2022 were in an Improved Defense, the defender's DRM would be -2.
15.4.3 HQ Attack Support DRM
A. To qualify for HQ Attack Support, the attacking unit or stack must be:
- In CR of its parent HQ; and
- Conducting a Regular or Prepared Attack Action.
B. There is no limit to the number of times HQ Attack Support may be received during a single OC or Operations Segment. The defending side is never eligible for HQ Attack Support. The amount of ASPs received is determined as follows:
C. The attacker receives half of the parent HQ's current ASPs (round fractions up) when performing a Regular Attack.
D. The attacker receives all of the parent HQ's current ASPs when performing a Prepared Attack.
Design Note: Besides various types of artillery tubes, ASPs represent engineers, all kinds of supporting assets of a formation and small-scale air support. The HQ Support of defending units is included in the CRT in an abstract manner based on the fact that the attacker has the initiative and can conduct its Schwerpunkt (main effort) as desired.
15.4.4 Armor Superiority DRM
A. To determine if either side has Armor Superiority and is entitled to a DRM in its favor, the attacker's TP value must be compared to the defender's TP or ATP value.
Play Note: TPs are found inside a black box on a unit. ATPs are found inside a white box. A unit will have TPs or ATPs, but not both.
B. If the defender has both TPs and ATPs, it must use TPs. Neither side can withhold a unit; both sides must always use their most favorable unit to achieve Armor Superiority. Pick up the unit containing more current CS if values of two units are equal; player's choice if current CS of two units is equal, as well.
Design Note: Players cannot withhold units because of the game's scale. To save units, these units must be pulled out of the front line.
15.4.4.1 Neither Side Has TPs
No Armor Superiority and neither receives a favorable DRM.
15.4.4.2 Attacker Has TPs and Defender Has ATPs
A. Select the attacking unit with the most TPs.
B. Check defender's terrain for any possible modifiers and round down, if necessary, to get the attacker's final TP value.
C. Select the defending unit (even if disrupted) with the most ATPs. Add to this number the defensive Terrain Bonus (if applicable), to increase the ATPs for the defending unit, to get the defender's final AT value.
D. Subtract the defender's ATP value from the attacker's TP value to determine Armor Superiority. If the final result is a positive number, the attacker can establish Armor Superiority and the final result is its favorable DRM.
E. If the final result is a negative number or a zero, there is no Armor Superiority and neither side receives a favorable DRM because ATPs can never establish Armor Superiority.
Play Note: Even if a unit has no 0 ATPs, it is still eligible to receive a defensive Terrain Bonus.
15.4.4.3 Both Sides Have TPs
A. Select the attacking unit with the most of TPs.
B. Check defender's terrain for any possible modifiers and round down, if necessary, get the attacker's final TP value.
Example: 0,9 becomes 0.
C. Select the defending unit (even if disrupted) with the most TPs. Its TPs is the defender's final TPs value because defending TPs are never modified due to terrain.
D. Subtract the defender's TP value from the attacker's TP value to determine Armor Superiority. The final result is the Armor Superiority DRM of the combat action.
15.4.4.4 Attacker Has ATPs and Defender Has TPs
A. The defender automatically receives Armor Superiority, and the full TP value of the defender's unit with the most TPs is used as a favorable Armor Superiority DRM for the defender.
B. The defender's TPs are never modified due to terrain and the attacker cannot use ATPs against the defender's TPs.
15.4.5 Armor Superiority Example of Play
A. German stack A in hex 3806 is conducting a Combat Attack Action across a stream hexside against US 3-23 of 3rd Armored Division defending in the town hex of Herzogenrath in 3705. The German stack consists of elements of 116th Panzer Division: 116-II/156 (no TPs) and the attached LXXXI-506 (12 TPs). 3-23 is disrupted and has 1 ATP.
B. As the attacker can use TPs only, the Germans must pick up the attached LXXXI-506, modifying the available 12 TPs due to terrain (attacking across stream hexside = ¼) to the final attacker's TP value of 3.
C. The defender's 3-23 unit is modified due to terrain (defending in a town hex = +1) to the final defender's ATP value of 2. To determine Armor Superiority and the Armor Superiority DRM of this Combat Action, the US as the defender subtracts the final ATP value (2) from the Germans' final TP value (3). This results in Armor Superiority for the German attacker and a favorable Armor Superiority DRM of +1.
15.5 Combat Results
A. Combat results consist of two numbers separated by a slash. The number to the left of the slash applies to the attacker and the number to the right of the slash applies to the defender.
B. The numbers themselves indicate how many combat hits (CHs) a side suffers.
C. Results against the defender are always applied before those against the attacker.
D. Hits printed in boldface require that all participating units on that side must make an Effectiveness Check (16.0).
15.5.1 Combat Hits
The numbers on the CRT represent the number of CHs the attacker and defender must absorb. Each CH counts as a step loss or retreat hex.
15.5.2 Distributing Combat Hits
The following guidelines are presented in priority order. In case of conflicts, apply the rule which appears higher on the list.
A. Units which support a combat never take CHs.
B. The first CH must always be taken as a SP loss.
C. The mandatory first SP loss must be from a unit that:
- Attacked with TPs; or
- Defended with TPs or ATPs.
D. All SP losses must be equally distributed among all involved units; no unit may absorb 2 SP losses before all other units have each absorbed 1 SP loss.
E. The attacker and the defender may convert one CH into a retreat hex; further CHs must be absorbed as SP losses.
F. Neither the attacker nor the defender may retreat more than one hex.
15.5.3 Boldface Combat Hits
A. The affected side must make an Effectiveness Check (16.0) for each friendly unit prior to applying any CHs.
B. Units failing an Effectiveness Check must perform Withdrawal (15.5.6 [printed as "15.56"]).
15.5.4 Step Losses
A. Each SP loss is applied to a single unit, and causes the unit's current CS to be reduced by one. SP losses are distributed as the owner wishes among non-HQs, following the guidelines of 15.5.2.
- Record the unit's new strength by placing a Current CS marker underneath it that is either one less than its printed CS or one less than its current Reduced Strength marker, whichever is lower in value.
- If a unit currently has a strength of 1 and takes another SP Loss, it is eliminated. Remove it from play.
- A units' MA, TPs or ATPs, and ER are never adversely affected due to SP losses.
B. HQs are never affected by combat nor do they absorb CHs; their presence in a stack is simply ignored.
C. HQs cannot retreat; an HQ is immediately displaced (20.2) if it suddenly finds itself alone in a hex as a result of combat.
D. HQs are only removed from play the instant all units subordinate or assigned to its formation have been eliminated.
15.5.5 Retreat Hexes
A. One CH taken as a retreat hex requires that all attacking or defending units that have not already performed Withdrawal (15.5.6) must retreat one hex.
B. Neither the attacker nor the defender may apply more than 1 CH toward retreat. All remaining hits must be absorbed as SP losses.
C. Units that begin retreat in a stack may not split up. Units may not be picked up or dropped off from a retreating stack.
Exception: Movement Prohibitions (15.5.5.D) and Withdrawal (15.5.6).
D. A unit or stack must retreat toward the nearest friendly map edge hex (17.4), but must avoid placement adjacent to enemy units. Use common sense and resolve any disputes with a DR; high roller wins the argument.
E. Hexes and hexsides prohibited to retreat include:
- Enemy occupied hexes (including those occupied solely by HQs);
- EZOCs (Exception: Withdrawal);
- Roer River hexsides;
- Off the map.
F. A hex containing an EZOC must be entered if a unit is forced to conduct Withdrawal (15.5.6) and no other hex is available. Each retreating unit takes one additional SP loss, which does not count toward satisfying any remaining CHs.
G. Each unit that must conduct Withdrawal, but cannot retreat, takes two additional SP losses, which do not count toward satisfying any remaining CHs.
15.5.6 Withdrawal
A. Units that fail an Effectiveness Check (16.0) in combat must perform a special kind of retreat if they have to take more than one CH. The first CH must always be a SP loss.
B. If only some units must withdraw while others do not, this does not satisfy the remaining CHs. Any units left in the hex must still absorb all remaining Hits as SP losses.
Play Note: For those cases involving only some units in a stack having to withdraw while others do not, the following requirements are in effect. Those units which must withdraw conduct their retreat prior to and separately from any other friendly units which voluntarily decide to treat one CH as a retreat hex, but all withdrawing units still retreat as a stack. This has very important implications for checking any overstacking caused by units retreating into a friendly-occupied hex.
15.6 Battle Victory
A. The side receiving the lower CH number in a combat wins the battle, unless all of that side's units involved in the combat are eliminated. In that case, or when ties occur, neither side wins a victory. The winning unit or stack immediately receives one bonus AP as long as:
- All units in the hex are currently assigned to the same formation; and
- They are within CR of the parent HQ.
B. One or more units in the stack must immediately expend the bonus AP, or it is lost. No other units, including those supporting the combat, can use the point or be involved in the Action chosen.
Exception: Units stacked in the attacker's hex, but not involved in the Combat Action, may use the bonus point if currently assigned to the same formation.
C. The bonus point can be supplemented with any or all remaining APs on the friendly AP-Track.
Example 1: A defending stack achieves Battle Victory and is awarded the bonus AP. It must immediately expend this bonus AP and does so by declaring a Refit Action because one defending unit is disrupted. It could also expend the bonus AP by declaring a Movement Action, Hasty Attack Action, or Infiltration Combat Action.
Example 2: An attacking stack achieves Battle Victory and is awarded the bonus AP. It must immediately expend this bonus AP and does so by declaring an Attack Action. There are still 2 APs available on the AP-Track, so any kind of Attack Action (Hasty, Regular, or Prepared Attack Action) may be declared (one bonus AP plus two remaining APs on the AP-Track).
Design Note: The AP bonus provided by Battle Victory should be viewed as momentum.
16.0 Effectiveness Check
The following game functions require participating combat units to make an Effectiveness Check:
A. Any boldface combat result
B. Refit Action
C. Isolated units attempting to conduct an Action
D. German SS-Scharfschützen-Rudel (optional, 22.4)
16.1 Conducting a Check
Roll one die for each unit and compare the result with the ER of each effected unit.
A. A unit passes if the result is equal to or less than its ER.
B. A unit fails if the result is greater than its ER.
16.2 Failing An Effectiveness Check
Any combat unit failing an Effectiveness Check automatically disrupts. HQs are not subject to Effectiveness Checks and never disrupt.
A. A currently disrupted unit that fails another Effectiveness Check remains disrupted, and may suffer an additional SP Loss if this additional disruption is resulting from combat, overstacking, German SS-Scharfschützenrudel or US Tiger-Tank Scare.
B. If disruption occurs during combat, Withdrawal (15.5.6) is required for absorbing the second CH.
Play Note: Units conducting a Refit Action do not lose SPs if they fail their Effectiveness Check.
16.3 Disruption Effects
A. Disrupted units are flipped to their back side to indicate their disrupted state. Note that a disrupted unit possesses a lower printed ER and fewer TPs or ATPs.
B. Disrupted units:
- Cannot conduct a Movement Action (indicated by a d where the MA is usually printed);
- Do not exert a ZOC;
- Cannot trigger possible Formation Reaction;
- Cannot be in an Improved Defense;
- Use the Combat Chit's left column (red) if defending;
- The only Action a disrupted unit can perform is the Refit Action (11.4) to recover from Disruption.
16.4 Disruption Recovery
A. During the Recovery Phase of every turn, a disrupted unit recovers if it is currently in the CR of its parent HQ.
B. Units may also recover from disruption by conducting a successful Refit Action during an Operations Segment.
C. Units which recover from disruption are flipped back over to their undisrupted (front) side.
17.0 Supply
A. Each HQ must be in supply at the moment it activates in order to function up to its full effectiveness. Supply is not checked, again until the HQ wishes to activate again. An OOS HQ may be able to remain in supply using Emergency Supply Expenditure (17.6).
B. A combat unit never checks for supply itself; this is done by the controlling HQ itself at time of activation. Instead, each combat unit must check to determine if it is in CR (18.0) of its parent HQ when wishing to undertake any given Action.
17.1 When to Check Supply
Units must check for supply as indicated below.
17.1.1 Recovery Phase
HQs performing Formation Activation Recovery (10.3)
17.1.2 Operations Segment
A. HQs activating their formation (10.1).
B. HQs making a Formation Reaction attempt (10.2).
17.2 Tracing a Supply Path
The HQ must be connected by an unbroken chain of hexes of any length to any friendly map edge hex.
17.3 Broken Supply Paths
A. A Supply Path is considered broken if the path enters any hex:
- Containing an enemy unit of any type (including HQs), or
- Containing an EZOC, unless at least one friendly unit of any type is also present. The friendly unit may be disrupted;
B. Or the path crosses an anti-tank ditch.
17.4 Supply Sources
A. A supply source for a supply path can be any friendly map edge hexes. These hexes are printed on the map.
B. The southern map edge hexes 1000-1015 are friendly to the US.
C. The southwestern map edge hexes 1100-5500 become friendly to the US at Turn 4 and thereafter, too.
D. The northern map edge hexes 5511-5527 and northeastern map edge hexes 4127-5428 are friendly to the Germans.
E. A friendly map edge hex ceases to function as a supply source the instant:
- An enemy combat unit ends its Movement Action in its hex, or
- An enemy HQ ends its HQ Relocation Action in its hex.
F. Supply Sources regain to function the instant enemy occupation ends, a process that may occur any number of times each game for each map edge hex.
17.5 Penalties
Effect on OOS HQs:
A. If the supply symbol on the HQ's back side is not currently showing, it can activate normally if it expends Emergency Supply (17.6).
B. If an HQ has already expended Emergency Supply (17.6) and therefore cannot do so now, it can activate normally, but its formation marker is moved down the Formation Track to the 0-space (regardless of its previous position).
C. Combat units are not affected if their HQ is OOS, but penalties may apply to the combat units themselves should they be OOC or Isolated (18.5).
17.6 Emergency Supply
A. An HQ which cannot trace a proper supply path must expend Emergency Supply, if it can do so. An HQ displaying the side with the HQ symbol showing is capable of expending Emergency Supply. An HQ on the side with the Supply Symbol showing [on the back of the counter)-is not capable of expending Emergency Supply.
B. To indicate that an HQ is expending its Emergency Supply, simply flip the HQ to its back side, containing the supply symbol.
C. Once an HQ receives Emergency Supply, it may not do so again until it is flipped back over to its front HQ side during a Recovery Phase. To do so, the HQ must be able to trace a proper supply path at the instant it attempts supply recovery.
18.0 Command Range
A. Unlike HQs, a combat unit never checks for supply itself; this is done by the controlling HQ itself at time of activation. Instead, each combat unit must check to determine if it is in CR of its parent HQ when wishing to undertake any given Action.
B. A unit is In CR when it can trace a path of contiguous hexes between the hex it occupies and its parent HQ at a length equal to or less than its parent HQ's CR number.
18.1 When to Check CR
Combat units must check for CR as indicated below.
18.1.1 Recovery Phase
Unit recovering from disruption (16.0)
18.1.2 Organization Phase
Assign/Reassign Independent units (6.2)
18.1.3 Replacement Phase
A. US units wishing to receive replacements (7.1)
B. German units wishing to Reorganize (7.2)
18.1.4 Operations Segment
A. Units wishing to undertake an Action (11.4)
B. Units attempting to qualify their parent HQ for a formation
C. Reaction attempt (10.2)
D. Receive HQ Attack Support (15.4.3)
E. Receive Combat Support (15.4.2)
F. Qualify to receive Battle Victory AP Bonus (15.6)
18.2 Tracing a CR Path
A. Trace the CR Path from a combat unit to its parent HQ.
B. The number of hexes in a CR path must be equal to or less than the parent HQ's printed CR number. Count the HQ's hex, but not the unit's hex when determining if it is in CR.
C. Otherwise, the combat unit is OOC.
18.3 Broken Command Paths
A Command Path is considered broken if it enters any hex:
A. Containing an enemy unit of any type;
B. Containing an EZOC, unless at least one friendly unit of any type is also present. The friendly unit may be disrupted; or
C. Prohibited to the tracing unit.
18.4 Isolation
A unit is considered Isolated if it cannot trace a CR Path of any length to its formation HQ.
18.5 Penalties
18.5.1 Effect on OOC Units
A. May only take part in Movement and Hasty Attack Actions and pays 2 APs instead of 1 AP;
B. Cannot be used for triggering Formation Reaction; and
C. Does not recover from disruption during the Recovery Phase.
18.5.2 Effect on Isolated Units
A. Isolated units suffer the same effects as OOC and must first pass an Effectiveness Check (16.0) to conduct an Action.
B. Each isolated unit that fails the check disrupts and may not participate in the action. The APs are still expended even if no units participate or the owner decides to call off the Action.
18.6 Attrition Check
Each unit found isolated and disrupted in the Recovery Phase of a turn must conduct an Attrition Check.
A. Roll one die for each affected unit, subtracting the ER of the affected unit from the DR. If the final result is a positive number, the unit suffers a SP loss equal to that number.
B. A unit may be eliminated due to an Attrition Check.
Example: The German Volkspionierbataillon 219 (full strength, 2 SPs) with an ER of 3 is found isolated and disrupted in the Recovery Phase. The Germans roll one die for a 4. This result causes the unit to lose one SP (4 - 3 = 1). Nothing would have happened if the DR had been a 1-3. A DR of 5 or more would have eliminated the unit.
19.0 Interdiction Level
Design Note: The Interdiction Level of each turn represents the US air interdiction of German supply and communication lines and harassing fire on German movement behind the front by artillery and air attacks. The Interdiction Table is based on the historical facts: weather, supply, available artillery tubes and air attacks, and other US/Allied operations like Operation Market-Garden.
A. Each turn, during the Recovery Phase, the US rolls one die and consults the Interdiction Table to determine the current turn's Interdiction Level (0-2).
B. The US applies the Interdiction Level as an additional Initiative DRM (9.2.1).
C. The Germans use the Interdiction Level to determine German Formation Activation Recovery levels (10.3.2).
20.0 Headquarters
Design Note: In keeping with the focus on the formation, the parent formation HQs are the key assets in Piercing the Reich. These units coordinate the various actions and reactions of their formation throughout play.
A. HQs are crucial to formations, command control, and supply. Each formation has its own parent formation HQ.
B. Each HQ is assigned the following values:
- CR number dictates the maximum number of hexes that comprise a subordinate unit's CR path. A combat unit subordinate or assigned to a parent formation/HQ must be in CR to conduct various actions without penalty or to receive any of the special benefits of HQs mentioned below. See Command Range (18.0) for details.
- ASPs are used to support combat units of its formation conducting a Regular or Prepared Attack (15.4.3 [printed as "15.43"]). An HQ's ASPs may be permanently reduced due to overstacking (14.2) or displacement (20.2). Place a Current SP marker corresponding to the new support point total beneath the HQ.
- The Reaction Rating is used to determine whether the HQ's formation can perform Reaction (10.2).
C. Furthermore, HQs have the following characteristics:
- HQs are not treated as combat units.
- No more than one HQ may occupy a hex.
- HQs may not be activated together with combat units.
- HQs move by conducting an HQ Relocation Action (11.4).
- HQs must always be located in a town, city, or industrial hex.
- HQs do not exert a ZOC. They may not enter a hex containing EZOCs unless the hex already contains a friendly combat unit (disrupted or not).
- HQs are removed from play only if all their subordinate or currently assigned to units have been eliminated.
Design Note: Besides the formation staff and control units, an HQ represents the sum of all assets; including medium and heavy artillery, engineers, transport columns, etc. These formation assets are represented by an HQ's various factors, including SPs, CR and Reaction Rating. Players should view the formation HQ as the organizational center of each formation.
20.1 HQ Combat
A. HQs are never affected by combat nor do they absorb CHs; their presence in a stack is simply ignored. HQs cannot retreat; an HQ is immediately displaced (20.2) if it suddenly finds itself alone in a hex as a result of combat.
B. An HQ located alone in a hex under attack:
- Consider the defending HQ as a combat unit with a Battle Strength of 1 and 0 ATPs; no Combat Chit is drawn.
- Draw a Combat Chit for the attacking unit(s) and handle the rest of the Combat Action in the regular way (15.0).
- Displace (20.2) the HQ immediately if it receives any CHs (regardless of the number of CHs that must be absorbed).
- Handle the attacker's result in the regular way.
20.2 HQ Displacement
A. Place the HQ in the friendly town, city, or industrial hex (owner's choice).
B. The destination hex is in the HQ's CR and a path of contiguous hexes can be traced between the start hex and the destination hex. The hexes must be free from enemy units and/or EZOCs; friendly units negate the effects of an EZOC in the hex they occupy, including the starting and destination hexes.
- Subtract one from the HQ's current Attack Support Point total; if currently 0, it remains 0; and
- Move the corresponding FAM one box down on the FAT; if currently in the 0-box, it remains in the 0-box.
C. The destination hex is not in the HQ's CR and a path of contiguous hexes can be traced between the start hex and the destination hex. The hexes must be free from enemy units and/or EZOCs; friendly units negate the effects of an EZOC in the hex they occupy, including the starting and destination hexes.
- Subtract two from the HQ's current ASP total; if currently 0, it remains 0; and
- Move the corresponding FAM two boxes down on the FAT; if currently in the 0-box, it remains in the 0-box.
D. The destination hex is not in the HQ's CR and a path of contiguous hexes cannot be traced between the start hex and the destination hex. The hexes must be free from enemy units and/or EZOCs; friendly units negate the effects of an EZOC in the hex they occupy, including the start and destination hex.
- Reduce the HQ's current ASP total to 0; if currently 0, it remains 0; and
- Move the corresponding FAM down to the 0-box on the FAT; if currently in the 0-box, it remains in the 0-box.
Play Note: We believe we have hammered this into your head because we have said it more times than it is worth, but here it goes one last time for memory's sake! The golden good rule of thumb for players to keep in mind throughout play is that an HQ will only benefit those units assigned or subordinate to it that are able to trace a LOC back to it whose length does not exceed the parent formation HQ's CR. If units stray away, bad things start happening; most Actions are not possible or APs are doubled. Keep your formations together and well-coordinated as a cohesive, fighting force!
21.0 Scenarios
A. Piercing the Reich comes with five scenarios and each scenario comes complete with an initial deployment listings and reinforcement and withdrawal schedule, special rules, and victory conditions. Please note that the special scenario rules included supersede any and all general rules of the game. The initial deployment listing begins with a hex number, followed by which units should be set-up in a given hex. Units are normally listed by unit type and historical identification abbreviation as printed on their counters.
B. On the first turn of a scenario, the US does not roll for Replacements (7.0), nor on the Interdiction Table to determine the Interdiction Class (19.0).
C. With the exception of Scenario One (21.1), the US is automatically considered to have won Initiative Determination for the first Operations Segment of Turn 1. In effect, the Initiative DRM marker is automatically adjusted down to the space, showing the German Cross.
D. When playing Scenario Five (21.5), the initial deployments list a range of hexes in which units maybe set-up (e.g., 3412 w/i 5 means the specified units may be set-up in any hex within five hexes of hex 3412, inclusive). When an entire formation is referenced for initial deployment, this includes the parent formation HQ and all its subordinate combat units.
E. With the exception of Scenario Five, both players set up their units simultaneously since all units have fixed starting locations. When playing Scenario Five, the Germans set up first.
F. All reinforcements and withdrawals are listed at the Reinforcement and Withdrawal Schedule (21.6). When playing Scenario Two (21.2) or Scenario Three (21.3), only parts of the reinforcements are available and only parts of the withdrawals are in effect (as noted in the scenario's instructions). If playing Scenario One, reinforcements are not available and withdrawals are not in effect.
G. When an entire formation enters play as a reinforcement, be sure to also place its HQ Activation marker at its maximum level (i.e., as printed on the left side of the counter itself).
H. In all scenarios, no unit starts in an Improved Defense.
I. These abbreviations are used for scenario setup:
| Abbr | Meaning | Abbr | Meaning |
|---|---|---|---|
| AG | Assault Gun | Mot | Motorized |
| Arm | Armored | Pz | Panzer |
| Bcl | Bicycle | PZG | Panzergrenadier |
| Div | Division | RG | Railroad Gun |
| Eng | Engineer | Tk | Tank |
| Inf | Infantry/Infanterie | Tk Dest | Tank Destroyer |
| MG |
21.1 Scenario One: First Blood
This is a training scenario created specifically with solitaire, first-time, players in mind. It recreates the opening blows of the US Big Red One 1st Infantry Division against German 526th Infanterie Division southeast of Aachen. This scenario can be completed well under one hour, allowing players to get their feet wet with the game system. Experienced gamers may prefer to skip this scenario.
21.1.1 Special Rules
A. There is no sequence of play to follow. Simply put, all you do is activate the 1st Infantry Division formation until victory is achieved or 1st Infantry Division has been activated five times.
B. The German forces are considered static units; they may not activate, react, earn Battle Victory, recover from disruption, etc. They simply sit and absorb any and all CHs as SP losses unless forced to conduct a Withdrawal (15.5.6).
21.1.2 Level of Performance
Performance is based upon the number of Formation Activations it takes to achieve victory.
| Activations | Victory Level |
|---|---|
| 2 | Decisive |
| 3 | Substantial |
| 4 | Satisfactory |
| 5 | Poor performance; try again. |
21.1.3 Duration
Five Formation Activation Segments
21.1.4 Map Area
Use only the portion of the map spanning from hexes 1000-1015, 1015-2215, 2215-2200, and 2200-1000.
21.1.5 Victory Conditions
The US must clear hexes 1807, 1808, and 1809.
21.1.6 Initial US Deployment
| Hex | Unit(s) | Hex | Unit(s) |
|---|---|---|---|
| 1105 | 1-I/16 Inf | 1206 | 1-II/16 Inf |
| 1107 | VII-1 Inf 1st Inf Div HQ | 1210 | 1-III/26 Inf |
| 1109 | 1-II/26 Inf | 1305 | 1-III/16 Inf |
| 1110 | 1-I/26 Inf, 1-745 Tk |
21.1.7 FAM Placement
| Formation | FAT Space |
|---|---|
| 1st Inf Div | 7 |
21.1.8 US Reinforcements
None
21.1.9 Initial German Deployment
| Hex | Units | Hex | Units |
|---|---|---|---|
| 1709 | 526-454 Inf | 1809 | 526-77 Inf |
| 1710 | 526-453 Inf | 1813 | 526-473 Inf, LXXXI-394 AG* |
| 1711 | 526-253 Eng | 1905 | 526-16 Inf |
| 1712 | 526-328 Inf | 2005 | LXXXI-Gen Inf* |
| 1806 | 526-18 Inf | 2105 | 526-58 Inf |
| 1807 | 526-412 Inf | 2205 | 526-37 Inf |
| 1808 |
* attached to 526th Inf Div
21.1.10 German Reinforcements
None
21.2 Scenario Two: The Stolberg Corridor
This scenario recreates the actions which took place during the initial stages of the Battle for Aachen. This is the optimum starting point for experienced gamers, particularly for those with limited playing time on their hands.
21.2.1 Special Rules
Only the southern map edge hexes from 1000 -1015 are friendly to the US in this scenario.
21.2.2 Duration
Turns 1-3
21.2.3 Map Area
Use only the portion of the map south of the line 4000-4028.
21.2.4 Victory Conditions
21.2.4.1 Victory Points
A. Only the US receives VPs for certain territorial objectives, as listed below. VPs are awarded at the end of Turn 3.
B. To receive these VPs, the US has to occupy the hex in question or be the last to have occupied the hex with a friendly unit. In addition, the US must be able to trace a line from a map edge supply source to the VP hex that is free of enemy units and EZOCs. Friendly units negate EZOCs in the hex they occupy.
| Hex | VPs | Hex | VPs | Hex | VPs |
|---|---|---|---|---|---|
| 1808 | 5 | 2321 | 5 | 3421 | 15 |
| 1812 | 5 | 2418 | 10 | 3422 | 15 |
| 1813 | 5 | 2419 | 5 | 3423 | 15 |
| 1905 | 5 | 2514 | 15 | 3520 | 15 |
| 1922 |
21.2.4.2 US Decisive Victory
The US wins a decisive victory if any friendly units occupy an Aachen city hex at scenario's end. (As described above, the US has to trace a line free of enemy units or EZOCs from a map edge supply source to the Aachen city hex; friendly units negate EZOCs in the hex they occupy.)
21.2.4.3 German Automatic Victory
The Germans win an instant decisive victory the moment a German combat unit reaches the southern map edge from hexes 1000-1015 (inclusive). The unit has to be In Command to qualify for this Sudden Decisive victory.
21.2.4.4 Victory Point Schedule
If neither side wins a decisive victory above, use the schedule below to determine the winner.
| VPs | Victory Level | VPs | Victory Level |
|---|---|---|---|
| 71+ | US Decisive | 30-39 | German Marginal |
| 61-70 | US Substantial | 15-29 | German Substantial |
| 51-60 | US Marginal | 0-14 | German Decisive |
| 40-50 | Draw |
21.2.5 Interdiction Level
| Turn | Level |
|---|---|
| 1 | 1 |
21.2.6 Initial US Deployment
| Hex | Unit(s) | Hex | Unit(s) |
|---|---|---|---|
| 1012 | 3A-703 Tk Dest | 1206 | 1-II/16 Inf |
| 1015 | 3A-A/36 Arm Inf, 3A-I/32 Tk, 3A-II/32 Tk | 1207 | 1-II18 Inf |
| 1105 | 1-I/16 Inf | 1210 | 1-III/26 Inf |
| 1107 | VH-1 Inf 1st Inf Div HQ, 1-III/18 Inf | 1214 | 3A-83 Arm Car |
| 1108 | 1-I/18 Inf | 1305 | 1-III/16 Inf |
| 1109 | 1-II/26 Inf | 1322 | 9-I/47 Inf |
| Hex | Unit(s) |
|---|---|
| 1111 | VII-3 Arm 3rd Arm Div HQ, 3A-III/32 Tk, 3A-III/33 Tk, 3A-23 Arm Eng |
| 1114 | 3A-B/36 Arm Inf, 3A-I/33 Tk, 3A-II/33 Tk |
21.2.7 US FAM Placement
| Formation | FAT Space |
|---|---|
| 1st Inf Div | 7 |
| 3rd Arm Div | 7 |
| 9th Inf Div | 2 |
21.2.8 US Reinforcements
| Turn | Units |
|---|---|
| 2 | 1st Inf Div: 1-238 Eng, 1-257 Eng |
| 3 | 1st Inf Div: 1-745 Tk, 1-634 Tk Dest, 1-4 Eng |
21.2.9 Initial German Deployment
Set aside: LXXXI-Sch Sharpshooters (optional, see 22.4).
Play Note: Make sure to set up the correct units of 116th Pz Div.
| Hex | Unit(s) | Hex | Unit(s) |
|---|---|---|---|
| 1709 | 526-454 Inf | 2208 | LXXXI-526 Inf: 526th Inf Div HQ, LXXXI-Pol Inf* |
| 1710 | 526-453 Inf | 2318 | 9-9 Reece, 9-50 Tk Dest |
| 1711 | 526-253 Eng | 2514 | LXXXI-116 Pz 116th Pz Div HQ** |
| 1712 | 526-328 Inf | 2627 | 353-XX Inf |
| 1806 | 526-18 Inf | 2725 | 353-12 Inf |
| 1807 | 526-412 Inf | 2824 | 353-313 Inf |
* attached to 526th Inf Div
** weaker HQ
21.2.10 German FAM Placement
| Formation | FAT Space | Formation | FAT Space |
|---|---|---|---|
| 353rd Inf Div | 4 | 116th Pz Div | 3 |
| 526th Inf Div | 5 | 12th Inf Div* | 6 |
| 9th Pz Div | 6 | 353rd Inf Div* | 4 |
* upon arrival
21.2.11 German Reinforcements
| Turn | Units |
|---|---|
| 2 | Entire 12th Inf Div, LXXXI-1012 AG |
21.2.12 German Withdrawals
| Turn | Units |
|---|---|
| 3 | Entire 353 Inf Div |
21.3 Scenario Three: Across the Wurm
This scenario recreates the actions of XIX US Corps across the Wurm stream, which took place during the final stages of the Battle for Aachen. This scenario is recommended for those players with limited playing time on their hands.
21.3.1 Special Rules
Only the southwestern map edge hexes from 1100-5500 are friendly to the US.
21.3.2 Duration
Turns 5-8
21.3.3 Map Area
Use only the portion of the map north of the line 2900-2927.
21.3.4 Victory Conditions
21.3.4.1 Victory Points
A. Only the US receives VPs for certain territorial objectives, as listed below. VPs are awarded at the end of Turn 8.
B. To receive these VPs, the US has to occupy the hex in question or be the last one to have occupied the hex with a friendly unit. In addition, the US must be able to trace a line from a map edge supply source to the VP hex that is free of enemy units and EZOCs. Friendly units negate EZOCs in the hex they occupy.
| Hex | VPs | Hex | VPs | Hex | VPs |
|---|---|---|---|---|---|
| 3010 | 10 | 3807 | 5 | 4210 | 5 |
| 3012 | 10 | 4010 | 5 | 4405 | 5 |
| 3409 | 5 | 4109 | 5 | 5104 | 5 |
| 3410 | 5 | 4110 | 5 | 5205 | 5 |
| 3509 |
21.3.4.2 US Sudden Death Victory
The US wins a Sudden Death victory anytime a friendly unit is able to move adjacent to a Roer River hex (5519-5327). The unit must meet the requirements in 21.3.4.1. If this happens, the game immediately ends.
21.3.4.3 Victory Point Schedule
| VPs | Victory Level |
|---|---|
| 60 | US Decisive Victory |
| 40-59 | US Marginal |
| 30-39 | Draw |
| 15-29 | German Marginal |
| 0-14 | German Decisive |
21.3.5 Interdiction Level
| Turn | Level |
|---|---|
| 5 | 1 |
21.3.6 Initial US Deployment
| Hex | Unit(s) | Hex | Unit(s) |
|---|---|---|---|
| 3305 | 2A-82 Arm Car | 4500 | 30-105 Eng |
| 3401 | XIX-2 Arm 2nd Arm Div HQ, 2A-702 Tk Dest | 4601 | XIX-30 Inf: 30th Inf Div HQ, 30-III/120 Inf |
| 3403 | 2A-A/41 Arm Inf, 2A-I/67 Tk, 2A-II/67 Tk | 4801 | 30-II/120 Inf |
| 3701 | 2A-17 Arm Eng, A-III/66 Tk, 2A-III/67 Tk | 5001 | 30-I/120 Inf |
| 3703 | 2A-B/41 Arm Inf, 2A-I/66 Tk, 2A-II/66 Tk | 5100 | 30-602 Eng |
| 4002 | 30-II/117 Inf, 30-823 Tk Dest | 5201 | 30-III/119 Inf, 30-743 Tk |
21.3.7 US FAM Placement
| Formation | FAT Space |
|---|---|
| 2nd Arm Div | 7 |
| 30th Inf Div | 7 |
| 29th Inf Div | 4 (when it arrives) |
21.3.8 US Reinforcements
| Turn | Units |
|---|---|
| 6 | Entire 29th Inf Div |
| 7 | XIX-1128 Eng, XIX-1129 Eng, XIX-99 Inf |
21.3.9 Initial German Deployment
| Hex | Unit(s) | Hex | Unit(s) |
|---|---|---|---|
| 3009 | 49-MG 78 MG | 4203 | LXXXI-504 Bcl Inf* |
| 3208 | 49-1423 Inf | 4205 | LXXXI-506 Bcl Inf*, LXXXI-217 AG* |
| 3307 | 49-XI Inf | 4403 | 183-II/351 Inf |
| 3408 | 49-305 Inf | 4603 | 183-I/351 Inf |
| 3409 | 49-I Inf | 4706 | LXXXI-183 VG: 183rd VG Div HQ |
| 3507 | 49-VI Inf | 4706 | 183-219 Eng |
| 3706 |
* attached to 183rd VG Div
** optional (22.3)
21.3.10 German FAM Placement
| Formation | FAT Space |
|---|---|
| 49th Inf Div | 4 |
| 183rd VG Div | 5 |
| 3rd PZG Div | 6 (when it arrives) |
21.3.11 German Reinforcements
| Turn | Units |
|---|---|
| 7 | Entire 3 PZG Div |
21.4 Scenario Four: The Battle for Aachen (Campaign Game)
This scenario recreates the entire conflict which stretched over five weeks of fierce fighting. This scenario is the centerpiece of the game, allowing one to recreate the Battle for Aachen in its entirety.
21.4.1 Special Rules
None
21.4.2 Duration
Turns 1-8
21.4.3 Map Area
The entire map is used.
21.4.4 Victory Conditions
21.4.4.1 Victory Points
The US receives VPs for German SP losses and for certain objectives.
21.4.4.2 SP Losses
German step losses are recorded on the German SP Loss Tabulator. Furthermore, the German SP Loss Tabulator indicates the VP value of each German SP loss.
21.4.4.3 Objectives
Design Note: The US troops started the Battle of Aachen without determined plans and objectives. Three different plans were discussed during the battle and the Pocket-Plan was selected finally. These effects and German intelligence attempts (captured materials, prisoners etc.) are reflected in this rule.
A. Before the start of the game, the Germans put the seven US Plan Chits (three plans, four dummies) in a container where they can be drawn easily at random. Starting with Turn 2, the US draws one Plan Chit from of the container randomly. In the Plan Phase of each turn, the US repeats this procedure until the container is empty. Once (and only once) during each game the US can refuse a drawn Plan Chit (regardless if plan or dummy) by placing it back in the container; in this case the US does not draw another Plan Chit in that turn.
B. Starting with Turn 2, the Germans may undertake one intelligence attempt in the Plan Phase of each turn; if the US is still drawing Plan Chits, the German intelligence attempt is done following the US having finished its plan activities for the turn. To resolve the intelligence attempt, the Germans roll one die. On a DR of 9-10, the Germans may inspect any one drawn Plan chit of their choice. Any other DR has no effect.
C. The first drawn (and not refused) non-dummy Plan Chit determines the US objectives for the scenario. VPs are awarded in conjunction with the US Objectives Chart.
D. Only the US receives VPs for objectives, earning them at the end of Turn 8.
E. Only one US unit has to be adjacent to the Roer River to earn VPs. To receive the VPs for Aachen, Alsdorf, Würselen, or Eschweiler, the US must occupy all hexes of the town or city or be the last to have passed through all hexes.
F. To receive VPs for objectives, the US must occupy the hex in question or be the last one to occupy the hex with a friendly unit. In addition, it has to be possible for the US to draw a line free of enemy units and EZOCs from a map edge supply source to the objective hex. Friendly units negate EZOCs in the hex they occupy.
21.4.4.4 Victory Point Schedule
| VPs | Victory Level | VPs | Victory Level |
|---|---|---|---|
| 49+ | US Decisive | 22-28 | German Marginal |
| 43-48 | US Substantial | 16-21 | German Substantial |
| 36-42 | US Marginal | 0-15 | German Decisive |
| 29-35 | Draw |
21.4.4.5 German Automatic Victory
The Germans win an instant decisive victory the moment an in-Command German combat unit reaches the southern map edge between hexes 1000-1015 (inclusive).
21.4.5 Interdiction Level
| Turn | Level |
|---|---|
| 1 | 1 |
21.4.6 Initial US Deployment
Same as 21.2.6.
21.4.7 US FAM Placement
Same as 21.2.7.
21.4.8 US Reinforcements
All
21.4.9 Initial German Deployment
Same as 21.3.9.
21.4.10 German FAM Placement
Same as 21.3.10.
21.4.11 German Reinforcements
All
21.4.12 German Withdrawals
All
Play Note: The Germans (especially) should take a look at the withdrawal schedule. (Turn 4 removes the 9th Pz Div.)
21.5 Scenario Five: The Battle for Aachen: Free Deployment
This scenario recreates the Battle of Aachen while using free deployment. In effect, the US can now find out if a breakthrough in the center or a direct approach toward the Roer River is the best long-term strategy, while the Germans can use free deployment to stop the US offensive. Setup and Victory Conditions are the same as for Scenario Four except where specified below.
21.5.1 Special Rules
The Germans set up first.
21.5.2 Objectives
After the Germans have set up, the US elects one out of the three available US plans. The US announces the choice to the Germans.
21.5.3 Initial German Deployment
A. No German unit can be placed south or southwest of the pillbox line running from 1527-1806 and from 1905-5503.
B. All HQs must be placed in a town, city, or industrial hex.
| Location | Units |
|---|---|
| 2310 (w/i 10) | Entire 526th Inf Div |
| 2816 (w/i 10) | Entire 9th Pz Div |
| 3122 (w/i 10) | Entire 353rd Inf Div |
| 2216 (w/i 5) | LXXXI-116 Pz: 116th Pz Div HQ |
| Free | 116-KG 60 Arm Inf, 116-KG 156 Mot Inf, 116-KS 24 Tk, 116-KS 16 Tk, 116-228 Tk Dest |
C. These four units are attached to any formation: LXXXI-Pol Inf, LXXXI-Gen Inf, LXXXI-394 AG, LXXXI-Sch Sharpshooters (optional, 22.4).
21.5.4 Initial US Deployment
A. No US unit can be placed adjacent to or north or northwest of the pillbox line running from 1527-1806 and from 1905-5503.
B. All HQ must be placed in a town, city, or industrial hex.
| Location | Units |
|---|---|
| 1210 (w/i 10) | Entire 1st Inf Div* |
| 1216 (w/i 10) | Entire 3rd Arm Div |
| 1319 (w/i 5) | Entire 9th Inf Div |
* excluding reinforcements
21.5.5 US Reinforcements
Place aside VII-OSS Commando (optional, 22.5).
| Turn | Code | Units |
|---|---|---|
| 2 | A | 1st Inf Div: 1-238 Eng, 1-257 Eng |
| 3 | A | 1st Inf Div: 1-745 Tk, 1-634 Tk Dest, 1-4 Eng |
| 4 | B | XIX-2 Arm: 2nd Arm Div HQ 3*, 2A-B/41 Arm Inf, 2A-I/67 Tk, 2A-II/67 Tk, 2A-82 Arm Car |
| 4 | C | independent VII Corps: VII-299 Eng |
| 4 | D | XIX-30 Inf: 30th Inf Div HQ 5*, 30-I/117 Inf, 30-II/117 Inf, 30-III/117 Inf, 30-I/119 Inf, 30-II/119 Inf, 30-III/119 Inf, 30-743 Tk, 30-823 Tk Dest |
| 5 | E | 30th Inf Div: 30-I/120 Inf, 30-II/120 Inf, 30-III/120 Inf, 30-105 Eng, 30-602 Eng |
| 6 | F | XIX-29 Inf: 29th Inf Div 4*, 29-I/116 Inf, 29-II/116 Inf, 29-III/116 Inf |
| 6 |
* indicates Activation Marker Placement
21.5.6 US Reinforcement Key
| Code | Placement |
|---|---|
| A | Place adjacent to or stacked with any unit that is part of the controlling formation (1st Inf). It may not be placed outside the HQ's CR, without a LOC to the HQ, or adjacent to enemy units. Place the unit in any hex at the southern map edge (1000-1015) controlled by the US if the formation is isolated. |
| B | On or adjacent to Spekholzerheide (3401). |
| C | Independent unit: The unit must be attached to a supplied Formation of VII Corps. It is placed adjacent to or stacked with any unit that is part of the controlling formation. It may not be placed outside the HQ's CR, without a LOC to the HQ, or adjacent to enemy units. |
| D | On or adjacent to any hex of Scherpenseel (4500, 4601), Teveren (4900), of Eugelshoven (4002). All units must be in CR of the formation's HQ (30th Inf Div). |
| E | Place adjacent to or stacked with any unit that is part of the controlling formation (30th Inf). It may not be placed outside the HQ's CR, without a LOC to the HQ, or adjacent to enemy units. Place the unit in any hex at the southwestern map edge (1100-5500) controlled by the US if the formation is isolated. |
| F | On or adjacent to Bauchem (5201). |
| G | Place adjacent to or stacked with any unit that is part of the controlling formation (2nd Arm). It may not be placed outside the HQ's CR, without a LOC to the HQ, or adjacent to enemy units. Place the unit in any hex of the southwestern map edge (1100-5500) controlled by the US if the formation is isolated. |
21.5.7 German Reinforcements
Play Note: Make sure to set up the correct units of 116th Pz Div.
| Turn | Code | Units |
|---|---|---|
| 2 | B | Entire 12th Inf Div 6* |
| 2 | C | Entire 49th Inf Div 4* |
| 2 | E | Independent LXXXI: 1012 AG |
| 3 | D | Entire 183rd VG Div 5* |
| 3 | A | Entire 246th VG Div 5* |
| 3 | E | Independent LXXXI: 503 Bcl Inf, 504 Bcl Inf, 506 Bcl Inf, 902 AG |
| 4 | E | Independent LXXXI: 275 Inf, 506 Tk, 519 Tk Dest, 311 Tk (set aside, optional, 22.7) |
| 5 | E | Independent LXXXI: Dür Inf, Jül Inf, 600 Eng, 601 Eng, 602 Eng, 108 Arm Inf, 108 Tk, 723 RG (set aside, optional, 22.3) |
* indicates Activation Marker Placement
** This is the same unit that starts in Turn 1; it returns.
21.5.8 German Reinforcement Key
| Code | Placement |
|---|---|
| A | On or adjacent to any hex of Jülich (5421, 5520, 5521), Aldenhoven (4817, 4818, 4917), Eschweiler (3920, 4020, 4021, 4119, 4120, 4121, 4221), Alsdorf (4010, 4109, 4110, 4210), Würselen (3409, 3410, 3509), or Eilendorf (3013, 3014). |
| Code | Placement |
| --- | --- |
| B | On or adjacent to any hex of Stolberg (3421, 3422, 3423, 3424, 3520, 3521, 3522, 3620). |
| C | On any pillbox hex of the Westwall line between 4004-2304, and/or Kerkrade (3603, 3703) and/or Herzogenrath (3705). Placee the formation's HQ in any hex of Kohlscheid (3206, 3207, 3306). All units can only be placed in pillbox or town hexes. |
| D | On any pillbox hex of the Westwall line between 5503-4103. The formation's HQ is placed in Beggendorf (4706). |
| E | Independent unit: The unit must be attached to a supplied formation. Place adjacent to or stacked with any unit that is part of the controlling formation. It may not be placed outside the HQ's CR, without a LOC to the HQ, or adjacent to enemy units. |
| F | In CR of the Formation's HQ (116 Pz Div). Use Code A if the formation is isolated. |
21.5.9 German Withdrawals
| Turn | Units |
|---|---|
| 3 | Entire 353rd Inf Division |
| 4 | Entire 9th Pz Div, 16th Pz Div* |
* all six units currently in play
22.0 Optional Rules
A. These optional rules are provided to add more flavor to the game.
B. Those units with special capabilities discussed in 22.2 and beyond are designated with a red asterisk (and, when applicable, their modifier) on their counter to remind players of their special capabilities.
C. Players may freely mix and match these optional rules as they see fit, bearing in mind the impact each will have on play balance. None may be used when playing the solitaire training scenario (21.1).
22.1 Infiltration Attack Action
Design Note: As a result of their inferior numbers and the lack of heavy equipment, the Germans used small unit and infiltration tactics to attack US troops. The success of this actions was heavily influenced by weather, terrain, the experience and morale of the engaged troops, and luck.
22.1.1 In General
A. Only the Germans can perform an Infiltration Attack Action, using one of their infantry-type units and expending 1 AP.
B. An Infiltration Attack Action is a special form of combat and has nothing to do with the general Combat Actions described in 15.0. The mechanics, effects, results, etc. are totally different.
C. The result of an Infiltration Attack Action can be no effect, disruption, and/or SP loss(es).
22.1.2 Procedure
A. The Germans roll one die, adding to the DR the ER of the infiltrating unit. The Germans may further add Terrain Modifiers (as specified on the Terrain DRM Chart) to the DR to get their final DR.
B. The US rolls one die, adding to the DR the ER of the defending infantry-type unit, even if disrupted; if there is no infantry-type unit in the hex, the US adds to the DR the ER of any one support-type unit present in the hex under attack. The US may subtract Terrain Modifiers (as specified on the Terrain DRM Chart) from the DR to get its final DR.
C. The US subtracts its final DR from the German final DR to get the infiltration result (to be found on the Infiltration Results Chart).
D. A US HQ placed alone in a hex cannot be the target of an Infiltration Attack Action.
22.2 Tiger Tank Scare
Design Note: Some German weapons had a strong psychological effect on US soldiers. Among these were the 8,8 dual purpose gun, the MG 42, the Nebelwerfer, railroad guns – but none was more generally feared than the Tiger tank. In addition, especially Allied infantry had seen so few German panzers since Normandy that they could hardly identify the German types they encountered during the Battle for Aachen. As a result, Tiger panzers were seen everywhere because everything being big, tracked and mounting a gun, was identified as a Tiger tank.
A. In any combat where the German Tiger tank unit LXXXI-506 is involved, the Germans receive one combat shift modifier in their favor (left if defending, right if attacking). This unit has been designated with a red asterisk beside its CS as a reminder of this benefit.
B. In any combat where a German support-type unit other than the Tiger tank unit contributes TPs, the US rolls one die, adding to the DR the ER of the US unit contributing either TP or ATPs. If the final modified result is less than or equal to the number given on the Tiger Tank Scare Chart, the involved US unit identifies the German unit as Tiger panzers, and the Germans receive one combat shift modifier in their favor (left if defending, right if attacking) exactly as if the German support-type unit would be the Tiger tank unit.
22.3 Railroad Guns
Design Note: The Germans deployed one railroad gun battery (Eisenbahn-Batterie 723) during the Battle for Aachen. The effect of these railroad guns was mainly psychologically because Allied soldiers thought that these guns were part of the feared V (or Secret Weapons).
A. The Germans may support one German Prepared Attack Action with LXXXI-723, receiving a DRM (15.4) of +2 (as indicated on the counter).
B. The LXXXI-723 is never affected by combat nor does it absorb CHs.
C. The Germans may use the LXXXI-723 once per turn during Turns 5-8.
22.4 SS-Scharfschützen-Rudel
Design Note: Scharfschützen (sharpshooters) were organic to German rifle squads or platoons. But in September 1944, the Waffen-SS formed special SS-Scharfschützen-Rudel (units about 20-30 sharpshooters) to delay the Allied advance. One of these units saw action during the Battle for Aachen (please study the Historical Commentary for further details).
A. The Germans may place the LXXXI-Sch if an US unit or stack ends its Movement Action adjacent to a German unit or stack exerting a ZOC into the hex of the US unit or stack.
B. Make an Effectiveness Check (16.0) for each US unit just entering the hex. Units already located in a hex are unaffected. Apply a +2 DRM to each DR and apply results (as indicated on the counter).
C. The Germans may use LXXXI-Sch once during Turn 1 only. The unit is permanently removed from play afterward.
22.5 OSS Company
Design Note: The US Army deployed an OSS Company (Office of Strategic Services) during the Battle for Aachen. This OSS Company was composed of German-speaking US soldiers dressed in German uniforms and armed with German weapons. (See the Historical Commentary for further details.)
A. The OSS Company may be placed with any unit (part or assigned to) the 1st Infantry Division during the Organization Phase of Turn 6. It may not be placed outside the HQ's CR or without a LOC to the HQ.
B. VII-OSS can move or retreat with any unit or stack in its hex. It is never affected by combat nor does it absorb CHs, but it is immediately removed from play if it suddenly finds itself alone in a hex, or a supported unit fails its Effectiveness Check (see below).
C. The US may use VH-OSS only during Turns 6-8.
D. If VU-OSS is stacked with an unit or stack which conducts Infiltration Movement (13.4), apply the relevant DRM below from the unit or stack's ER DRs:
| DRM | Use |
|---|---|
| -3 | First |
| -2 | Second |
| -1 | Third and beyond |
22.6 Brummbär Assault Guns
Design Note: Caused by experiences on the east front, Hitler ordered the development of special assault guns for dose infantry support in urban areas. The first result was the Stunnpanzer IV Brummbär, the chassis of a PzKw IV mounting a 150 mm howitzer. One of the units equipped with the Brummbär saw action during the Battle for Aachen, but it (Sturmpanzer-Abteilung 217) was a mixed unit consisting of six Brummbärs and three regular assault guns Sturmgeschutz III for a total of nine assault guns.
The Germans receive an additional +2 DRM when conducting an Attack Action against a town, city, or industrial hex and LXXXI-217 is part of the attack. This unit has been designated with a red asterisk beside its CS as a reminder of this benefit.
22.7 Funkpanzer-Kompanie 311
Design Note: Funkpanzer-Abteilung 311 was equipped with radio controlled "tanks," actually mobile demolition charges. The unit was quite ineffective during the Battle for Aachen. (See the Historical Commentary for further details.)
A. The Germans may support one German Prepared Attack Action with LXXXI-311. Roll one die:
| DR | Shift |
|---|---|
| 1-7 | None |
| 8 | 1R |
| 9 | 2R |
| 0 | 3R |
B. The LXXXI-311 cannot not absorb any CHs.
C. The Germans may use LXXXI-311 once during Turns 4-8. Permanently remove the unit after its use.
22.8 Formation Reserve Mode
Reserve mode status is indicated by the In Reserve label on the reserve side (back) of a formation's Activation marker. The reserve side of a FAM shows the DRM (0, -1, or -2, printed in red next to the word Reserve) when conducting a Formation Reaction attempt. Be sure to have the correct side of the FAM facing on the FAT to indicate the mode each formation is in.
22.8.1 Changing Mode
A. Each time a formation's mode changes, flip its FAM to the appropriate side. An eligible formation may go into or out of Reserve Mode only during the Organization Phase, but may change each turn.
B. A formation must leave Reserve Mode:
- After successfully conducting a Formation Reaction (10.2); or
- After its HQ is displaced (20.2).
Play Note: A formation remains in Reserve Mode even when one or more of its units are attacked.
22.8.2 Eligible Formations
A formation may enter Reserve Mode only when:
A. Its formation HQ is in supply, and
B. All subordinate and assigned combat units are undisrupted and within the parent HQ's CR.
22.8.3 Effects of Reserve Mode
These apply to a formation in Reserve Mode:
A. It may receive its DRM when conducting a Formation Reaction attempt (although some formations do not receive a DRM, indicated by -0).
B. When attempting Formation Reaction, the formation receives a number of APs equal to the bold number of the AP Table instead of the non-bold (in brackets) number which is normally used for successful Formation Reactions.
C. When conducting Formation Activation, the formation receives a number of APs equal to the non-bold (in brackets) number of the AP Table instead of the bold number which is normally used for Formation Activation.
22.8.4 Special Scenario Restrictions
No formation may enter Reserve Mode on Turn 1 of Scenarios Two, Three, or Four.
Exception: 116th Pz Div must be deployed in Reserve Mode on Turn 1 of Scenarios Two and Four.
23.0 Designer's Notes
Normally, there is no ideal solution to military problems; every course has its advantages and disadvantages. One must select that which seems best from the most varied aspects and then pursue it resolutely and accept the consequences. Any compromise is bad.
-- Feldmarschall Erwin Rommel
I have been living in the city of Aachen since 1986 and from the very beginning the Battle for Aachen has always been closest to my heart. Therefore, I began serious research about this battle not keeping a game in mind. But after some time, I noticed that the Battle for Aachen is an interesting and excellent subject for a wargame because the variety of different combat actions regarded this battle as one of the most instructive of the entire war in Europe.
23.1 Research
A. Really careful research for a wargame of this scale is an immense amount of work, and that is doubly true for the Battle for Aachen. Whereas the US OOB caused little problems because of the US Army's penchant for standardization, the German OOB became a nightmare because German units were difficult to pin down as much of their organization was independent and ad-hoc in nature. Without numerous local sources and the assistance of veterans of both sides, a serious German OOB would not have been possible.
B. The intention to present a highly playable game that fits on a standard-sized dining table with play time kept at a reasonable level, dictated a limitation to battalion-sized units, omitting the myriad sub-battalion outfits used especially by the Germans. Military buffs may argue that units like German Alarm-Kompanien played a sometimes-significant role in the battle, but including them would have been both cumbersome to the players and minimal in effect. Instead, I decided to represent this aspect abstractly in various game mechanics like ZOC rules, Infiltration Movement, and German Infiltration Combat.
C. The map is a story of its own. Topographical maps about the area were classified as Streng Geheim! (top secret) between 1938 and 1945 because of the Westwall and other military installations. Modified map versions containing numerous mistakes and lacking all significant military aspects completely were published for official use whereas the correct versions were available to high-ranking officers only. Even today, modified map versions are published officially. Over 40 research hours were devoted to give the players the most accurate map ever done on this subject in game form.
D. The map boundaries are caused by two reasons: I neither wanted to include the British Army nor the fighting for the Hurtgen Forest. The 1.2 km hexes are ideal in terms of presenting the typical frontage of an infantry battalion when the variable ZOC rules are included. Only terrain features that affected military operations significantly at the chosen scale were deemed worthy of inclusion. The roads shown on the game map are paved roads over six meters in width, including parts of the Autobahn Aachen-Cologne. Roads below six meters in width, unpaved roads, and all kinds of trails and tracks were generally omitted from the map because they were considered to run through virtually every hex on the map; this aspect has been incorporated into the movement factors. Railroads were generally omitted from the map, too, because they did not affect tactical/operational maneuvers at this scale.
23.2 The Game System
A. Piercing the Reich is supposed to be a serious study of the Battle for Aachen and is meant to offer more than the typical so-called beer and pretzels game. A traditional Igo-Yugo, non-interactive game system was out of the question from the very beginning because, caused by my experiences and understandings, such a system is too limited to capture and simulate the decisive aspects of World War II ground warfare in an interesting and playable manner based on the confines of the game scale and complexity level chosen. Therefore, I decided to use a modified version of the Triumphant Fox (MiH, 1994) system.
B. Even if the greater part of the design elements and concepts of Piercing the Reich are similar to those of Triumphant Fox (e.g., the concept of the OC) Piercing the Reich represents a different kind of battle shown at another scale. In addition, player's comments, and ideas about Triumphant Fox were integrated and the whole game system was streamlined and revised. As a result, standard game mechanics like activation, supply, independent units, or armor superiority are faster and easier to handle. For that reason, very interesting aspects like Combat Chits, different US Objective Plans, German Infiltration Combat, or US Infiltration Attempts could be added to the game system without increasing the complexity of the game or lengthening the rules.
C. As a designer, I find it imperative to find a special focus and stick to it. Therefore, and to make the game really playable, the design concentrated on identifying and capturing the most important factors of the Battle for Aachen. Piercing the Reich is an operational simulation with its main focus on command control and strong emphasis upon uncertainty and combined arms warfare.
23.3 Selected Design Comments
I will now take the opportunity to highlight some of the various design decisions made in the conception phase of this game.
23.3.1 Air
The exact numbers of ground support sorties flown during the battle by both air forces probably could be determined, and it has become somewhat of a tradition in games dealing with this theater to raise the air elements to the level of an almost independent sub-game. But I was never satisfied with such sub-games, and finally decided to drastically simplify the air rules. There is no question that the Allied Air forces played significant role in the ultimate defeat of Germany. Throughout the period covered by Piercing the Reich, Allied aircraft were most important in keeping German aircraft at bay and disrupting German supply columns and rear echelons. However, Allied aircraft never were the decisive element and direct Allied air support of front-line troops was not of significant importance during the Battle for Aachen because of lacking techniques for air-ground cooperation, other Allied operations (Market-Garden), and weather conditions that severely hampered air operations. In addition, the Germans had quickly learned to use night movement and cover to minimize the effects of Allied tactical air support. Therefore, I incorporated the effects of Allied air power directly into the basic game system rather than portraying them as an independent function under the player's direct control.
23.3.2 Combat System
A. The combat system is based on analytic combat research and produces, unlike most wargames at the scale, realistic combat results. This time-consuming research has allowed exact determination of typical combat actions and results: the Battle for Aachen had been a battle of attrition fought by reinforced infantry battalions. Therefore, combat actions are limited to one hex for each side and combat results place an emphasis on step losses. Nevertheless, the combat results represent the range of combat outcomes encountered, including losses, retreats, inconclusive combat, or combinations of them. A wholesale elimination of a full-strength unit will seldom occur, although the CRT, in conjunction with the retreat limit of just one hex, produces pretty bloody results.
B. World War II combined arms warfare is an important aspect at the operational scale which needs to be reflected throughout the system. Generally, unit types have been tailored to reflect the strengths and weakness of their historical counterparts. Although the armor seems most glamorous, keep in mind that it is the infantry often called the "queen of battle," that makes or breaks most combat actions. In Piercing the Reich, the proper cooperation of tanks and infantry and their interaction with terrain is vital for successful combat. But combined arms effects are not only reflected in combat, but have been further integrated into various aspects of the game as well; please take a look at the stacking or ZOC rules as examples.
C. It has become somewhat of a tradition in games of this scale and complexity level to treat the artillery almost independently and in great detail. However, when I designed Triumphant Fox, I found a way to simulate the effects of artillery without specific artillery rules and actual artillery counters. This design decision was well-received and therefore I transferred this concept to Piercing the Reich, too. The corps and army artillery assets are represented by the individual HQ's Attack Support Rating. This roughly equates to the quantity and quality of artillery and heavy weapons which the formations have at their disposal. In addition, ammunition shortages of certain gun types were integrated into the Attack Support Ratings as well as the artillery doctrines. Furthermore, I integrated field and medium artillery guns into the Combat Strengths of the individual combat units themselves.
D. Some players may be amazed when they compare the Attack Support Ratings of certain German formations to US formations. Please keep in mind that US artillery ammunition was not available on the usual lavish US scale, and that often a great part of the US corps and army artillery assets were wasted for targets of very limited military importance.
E. I am really glad that the combat system integrates various important aspects of combat like armored warfare, battle attrition, unit cohesion, uncertainty, different types of attack and defense, etc., but is still easy to handle and can be resolved quickly. I would like to especially mention the Combat Chits which introduce uncertainty into each combat as well as general C3I problems without time-consuming subsystems.
23.3.3 Combat Control
Without any doubt, command control is the main focus of Piercing the Reich, and players will soon realize that all actions are based on the abilities of the individual HQs. Coming up with command control as the main focus was a relatively simple task because over the history of recorded warfare, this factor generally stands out among the others, often representing the decisive factor of the battle itself. In essence, any serious study involving the Battle of Aachen without touching upon command control would be missing the boat. Moreover, the command control mechanics, especially independent units and Formation Activation Recovery, model leadership, different doctrines, and the rarely simulated effects of fatigue and recovery on a formation during battle as well.
23.3.4 Combat Units
The counters represent the fighting formations actually used rather than the administrative organizations usually depicted in most wargames. In the following, I like to give additional insight into certain counter values.
23.3.4.1 Anti-Tank Point
Piercing the Reich is lacking counters representing towed AT-guns (including German FLAK) because these guns were never used as a cohesive force, but spread out to support various (infantry-type) units. Following this concept, the value of towed AT-formations was integrated into the ATPs of infantry-type units of the same formation.
23.3.4.2 Combat Strength
The numerical estimates of the Combat Strengths of units were determined by using a firepower score method of the Bundeswehr. The only adjustment to that method was the integration of field and medium artillery guns organic to the formation. Realistic combat results are impossible without the exact determination of Combat Strengths.
23.3.4.3 Effectiveness Rating
This is the measure of a unit's morale, training, experience, leadership, cohesion, and esprit de corps. While no single counter factor overshadows all others, a unit's ER is crucial since it determines the ability of a unit to withstand a combat in good order and influences the final combat value (Combat Chits).
23.3.4.4 Movement Points
Piercing the Reich's movement system is straightforward and realistic being based on march tables from the US Army and the German Wehrmacht. The basic data was modified by analyzing the actual battle. Please note the absence of any kind of strategic movement because it did not occur during the Battle for Aachen.
23.3.4.5 Tank Points
Units containing tanks, tank destroyers, or German assault guns have a TP value. TPs represent the quality of an AFV type. The open top of the M-10 US tank destroyer caused a low TP value.
23.3.5 Headquarter Units
The game system operates at the divisional level. Exercising control over its portion of the front is the task of HQs. The values of an HQ represent its ability to conduct this task successfully.
23.3.6 Panzeraufklärungs-Abteilungen
The German Panzeraufklärungs-Abteilungen are classified as infantry-type units whereas US recon-armored car battalions are depicted as support-type units. In combat, German Panzeraufklärungs-Abteilungen were supported regularly with tanks, armored infantry and engineers, AT-guns, and artillery, thereby representing the core of a Kampfgruppe. The Germans used these Kampfgruppen as maneuver forces while the Americans tended to use their recon-armored car battalions in a support role.
23.3.7 Reaction
The ability of formations to conduct reactions is a crucial aspect of the game system. The concept of Formation Reaction provides a realistic, historical feel because the non-phasing side does not simply sit idle by while the opponent runs circles around friendly troops. In addition, both sides are actively involved in the playing process. In my opinion, the possibility of Reaction is a must for serious game systems of this subject and at this complexity level.
23.3.8 Supply
A. The supply rules are part of the command control concept and take into account the administrative requirement that formations remain in communications with their supply head. This requires players to manage to keep their formations fairly organized.
B. Piercing the Reich does not contain an elaborate supply sub-system for four reasons.
- First, supply did not play a decisive role during the Battle for Aachen. The general fuel shortage of the Wehrmacht did not influence the battle directly because of the limited space the battle was fought in. Please keep in mind that the ammunition shortages of both sides were integrated into the Attack Support Ratings.
- Second, the game puts players into the seats of a C-in-C. Players have plenty of decisions to make each turn, however, they are not bothered by the kind of decisions a supply depot clerk has to fell.
- Third, elaborate supply rules at this scale involve a lot of time-consuming computations and bookkeeping. I wanted to avoid that to concentrate on more interesting aspects.
- Fourth, elaborate supply systems tend to dominate a game. Often players do not fight the opponent's combat functions, but the opponent's supply lines and dumps.
23.3.9 Uncertainty
Battles normally develop a dynamic course of their own which can never be fully controlled by the opponents. To reflect this and to avoid an unrealistic chess-like game play, Piercing the Reich stresses the importance of uncertainty, chaos, and fog of war. This aspect has been integrated into various game mechanics; like Initiative and AP determination, Formation Reaction, Combat Chits, and the open-ended turn, including a Sudden End possibility.
23.3.10 Conclusion
A. Piercing the Reich is a wargame which is, like the subject matter itself, close to my heart. I will consider the design a success if the gamer finds themself fighting their opponent rather than the game system. But it is unfortunate that sometimes we gamers lose the friendly, social dimension of gaming in the competitive scramble for victory. Let us not forget the first objective of a game is to have fun, not to humiliate our opponents.
B. I hope the above information has provided some insight into the game system and specific design decisions. [Acknowledgements and sign-off omitted.] Enjoy the game!
[Sections 23.3.11 "About the Designer" and 23.3.12 "Hobby Background" (designer biography and credits) and Section 24.0 "Credits" are omitted from this transcription as attribution material.]