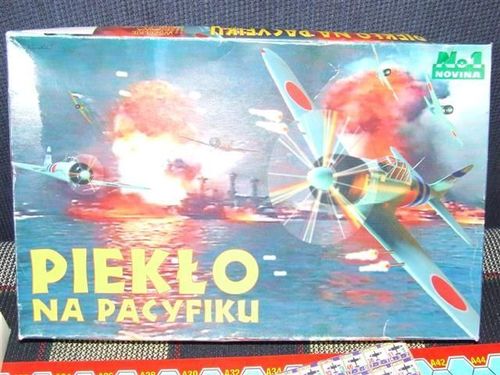
Piekło na Pacyfiku
Piekło na Pacyfiku Rulebook
Table of Contents
Table of Contents
- 1. Introduction
- 2. Components
- 3. Phases and turns
- 4. Movement rules
- 5. Combat
- 6. Anti-aircraft guns
- 7. Bombing and torpedo attack
- 8. Victory conditions
- 9. Scenarios
- 10. Combat table
- 11. Aircraft technical data
- 12. Ship tactical data
- 13. Aircraft card
- 14. Ship card
- 15. Bombing and torpedo attack tables
- 16. Anti-aircraft fire tables
1. Introduction
"Piekło na Pacyfiku" is a tactical-strategic game. It simulates air combat between Japanese and American aviation. The game presents both historical and fictional episodes of the war in the Pacific Ocean. Only some of the air battles are included, while keeping the real variety of aircraft and ships and the realism of combat.
The game is intended for two players, but because many scenarios involve a large number of aircraft, it is advisable to have more players, each controlling particular flights or individual aircraft.
The aim of the game is to accomplish the task given in the scenario. One of the players usually tries to sink the opponent's ships, while the other tries to prevent this by shooting down as many enemy aircraft as possible. The battle scenarios are described in chapter 9.
Victory conditions are given in chapter 8.
2. Components
2.0 Game board
The board shows a small fragment of ocean with a small island. Buildings and the more important strategic points that may be targets of enemy attacks are marked. Larger areas of cloud cover are also marked. Although they constantly move, their layout on the board is fixed. In addition, a hexagonal grid is printed to organise movement and the position of aircraft. Each hex (field) is identified by its coordinates; e.g. A4 and B7 means that it lies at the intersection of the vertical row numbered A4 with the diagonal row numbered B7. The board also shows the TURN TRACK, on which the current turn is marked. If the game lasts longer, after the last turn the turn marker is placed on the field "turn 1".
2.1 Counters
Before the game starts, all counters are glued together so that both sides of each counter show an aircraft of the same type with the same number, and then carefully cut out.
Altitude counters show the height of aircraft: from altitude 1 (lowest), then 2 (very low), 3 (low), 4 (high). The absence of an altitude counter means the aircraft is at altitude 5 (very high).
The manual illustrates the following counter types (the illustrations themselves are not reproduced here):
- Aircraft under fire: counter marking an aircraft under fire;
- Jammed machine guns: counter marking jammed guns;
- Anti-aircraft guns: anti-aircraft gun counters;
- Turn marker: turn counter;
- Ships: ship counters;
- Aircraft: aircraft counters.
2.1.1 Aircraft counter data
- Aircraft number - an artificial numbering of units has been introduced for the purposes of the game, so that they can easily be found on the aircraft card.
- Minimum speed - a value expressed in points, meaning the minimum speed an aircraft must have to stay in the air.
- Maximum speed - a value expressed in points, meaning the potential for moving the unit. Each aircraft has a pool of movement points. It pays 1 point to enter each hex.
- Manoeuvrability - a value expressed in points describing how manoeuvrable the aircraft is. It means the minimum number of fields the aircraft must cover before it can turn.
- Attack strength - a value expressed in points, indicating the usefulness and effectiveness of the given aircraft in an attack.
- Bomb/torpedo load - a value expressed in points, meaning the number of bomb runs or torpedo attacks the aircraft carries. Each point means the possibility of one bombing or torpedo attack during the whole game.
Each aircraft has a front and a back side, which differ in firepower, maximum speed and manoeuvrability. At the start of the game all counters should be placed with the front side up. A counter is turned over (back side up) at the moment the aircraft it represents is seriously damaged (see 2.2).
2.2 Aircraft card
This card shows, as boxes, the durability of each aircraft, that is the number of hits it can receive during the game. When a hit is taken, the corresponding number of boxes is crossed out. If the damage (number of crossed-out boxes) is greater than or equal to half of the durability, the counter of that aircraft is turned over, back side up. If all the boxes are crossed out, the aircraft has been shot down and its counter is removed from the board. Damage cannot be repaired.
On the aircraft card, for bomber and torpedo aircraft, boxes are also marked corresponding to the number of bombing runs or torpedo attacks the aircraft can make during the whole game. After each torpedo attack or bombing run, one box is crossed out.
2.3 Ship card
This card shows, as boxes, the durability of each ship, that is the number of hits it can receive during the game. When a hit is taken, the corresponding number of boxes is crossed out. If all the boxes are crossed out, the ship has been sunk and its counter is removed from the board. Damage cannot be repaired.
2.4 Sun counters
Props may also be sun counters made by the players, 10 hexes long, representing the disc of the sun. The difference in the shape of these counters makes it possible to place the "sun" on each edge of the map. The meaning of the "sun" and the way it is placed are described in 5.0.1.
3. Phases and turns
The game "Piekło na Pacyfiku" is played in cycles called turns, during which each side has the right or the duty to perform a number of specified actions. To mark the successive turns, the TURN TRACK placed at the side of the board and the TURN marker are used. To keep order and sequence of play, all actions performed in each turn are divided into 6 parts called phases. Specific actions are performed in each phase. It is not allowed to perform any game action outside its assigned phase.
A turn is considered finished after all actions foreseen in the 6 consecutive phases have been performed in order. After the turn ends, the TURN marker is moved one field forward, and then phase 1 begins again.
3.0
The players are obliged to observe the fixed order of phases. A phase may be skipped when the actions foreseen in it need not be performed, or are not performed by the players' choice. Within a phase, actions may be performed in any order.
Phase 1 - American aircraft movement phase All American aircraft must be moved during this phase, in accordance with the movement rules.
Phase 2 - Japanese anti-aircraft fire phase In this phase American aircraft within range of Japanese ships and anti-aircraft guns may be fired upon.
Phase 3 - Attack phase with American initiative In this phase American aircraft may attack enemy units located in their line of fire, bomb, and make torpedo attacks. In this phase Japanese aircraft may also shoot, if any American aircraft is on their line of fire (see 5.4).
Phase 4 - Japanese aircraft movement phase All Japanese aircraft must be moved during this phase, in accordance with the movement rules.
Phase 5 - American anti-aircraft fire phase In this phase Japanese aircraft within range of American ships and anti-aircraft guns may be fired upon.
Phase 6 - Attack phase with Japanese initiative In this phase Japanese aircraft may attack enemy units located in their line of fire, bomb, and make torpedo attacks. In this phase American aircraft may also shoot, if any Japanese aircraft is on their line of fire (see 5.4).
3.1
Because phases 1, 2, 3 are identical to phases 4, 5, 6, for brevity later in the manual phases 1 and 4 are called movement phases, phases 2 and 5 are called anti-aircraft fire phases, and phases 3 and 6 are called combat phases.
4. Movement rules
During the movement phases, players must move all their aircraft. The order in which aircraft are moved is free. Units must move through successive hexes in a continuous motion. Jumping is not allowed. At the start of each movement phase all aircraft have strictly defined movement point allowances. Upon entering each next hex, an aircraft loses 1 point, and it may move until its allowance is used up.
Maximum speed - determines the movement point allowance. Minimum speed - determines the minimum number of movement points that must be used in this phase (so that the aircraft stays in the air).
4.0 Detailed rules
4.0.1
In the game the direction and facing of a moving aircraft is important. Therefore players should place counters so that it is always known which way a given aircraft is pointing.
4.0.2
During one turn an aircraft may make only one turn of 60 degrees. Other ways of turning are forbidden. The point at which an aircraft may make a turn is determined by its MANOEUVRABILITY. Manoeuvrability = 0 means that an aircraft already on the field where it starts its move may turn 60 degrees, and then move forward by a number of fields within its minimum and maximum speed. An aircraft with manoeuvrability = 0 may make such a turn on any other field too, e.g. first move 3 fields forward, then turn, and then move on with the remaining movement points (if the player wishes).
It is necessary that after making a turn the aircraft moves at least 1 field. Manoeuvrability = 1 means that at the start of the movement phase the aircraft must move one field forward. Only then may it choose whether to turn or to fly straight on. Similarly, an aircraft with manoeuvrability = 2 must move two fields forward and only then has the choice between turning and its current direction. It should be remembered, however, that an aircraft may turn only once, and afterwards must move at least 1 field.
The SBD-3 Dauntless aircraft with manoeuvrability 2 moved 2 fields forward, then made a turn to the right and moved a further 2 fields straight ahead. (Fig. 2)
4.1 Supplementary rules
4.1.1
An aircraft may not enter a hex occupied by another aircraft, unless the latter is at a different altitude - see 4.2 Flight altitudes.
4.1.2
An aircraft may not spend in a given phase more movement points than its maximum speed.
4.1.3
An aircraft does not have to use up its whole movement allowance in a given phase.
4.1.4
Movement points not used in one phase may not be used in the next.
4.1.5
Movement points may not be transferred from one unit to another (from aircraft to aircraft).
4.1.6
Once the player takes their hand off a moved aircraft, its move is considered finished. Repositioning it again may only be done with the opponent's consent.
4.1.7
Because aircraft move in the air, the type of terrain on the surface, e.g. buildings, trees, etc., has no effect at all on the movement of aircraft.
4.2 Flight altitudes
4.2.1
The game has five different altitudes at which aircraft may fly: 1 - lowest, 2 - very low, 3 - low, 4 - high, 5 - very high. During the movement phase the player may change the flight altitude of their aircraft.
4.2.2
If an aircraft descends from a higher altitude to a lower one, 1 is added to its maximum speed movement allowance. This increased allowance applies only in this phase. During each phase an aircraft may lower its altitude by 1 or 2 levels.
4.2.3
If an aircraft climbs to a higher altitude, 1 is subtracted from its maximum speed movement allowance. This reduced allowance applies only in this phase. If the allowance reduced in this way is smaller than the aircraft's minimum speed, this means that the aircraft is unable to climb and must remain at its current altitude. An aircraft may not climb two or more altitude levels in one phase.
4.2.4
Thanks to the five flight levels, up to five aircraft may be on one hex, but each at a different altitude. A counter showing the altitude at which the aircraft flies is placed on each aircraft. Only aircraft at the highest altitude are without a counter.
4.2.5
It may happen that an aircraft must enter a hex occupied by another aircraft at the same altitude. This happens only when the minimum speed and manoeuvrability force it to do so. In such a situation the aircraft must change altitude - climb higher (if its movement points allow it) or descend to a lower altitude. If this is also impossible, e.g. because all altitudes are occupied by other aircraft, a die is rolled. A roll of 6 means a collision: both aircraft are destroyed and removed from the board. A roll of 1-5 means that both aircraft are at the same altitude and no collision takes place.
4.3 Leaving the board
It may happen that an aircraft is forced to leave the board (or does so by the player's choice). In such a case the aircraft's counter is removed and placed on the TURN TRACK, on the field marked with a number 5 higher than the current turn. When the turn marker reaches the same field as the aircraft counter, the aircraft is placed in the movement phase on any edge hex within a radius of 5 fields from the field from which it left the board.
5. Combat
Each aircraft has a defined attack strength. It reflects not only the number of machine guns and cannons on board, but also the efficiency of the aircraft in combat, i.e. its agility, size, speed and the training of the pilot. In the game "Piekło na Pacyfiku" attack strength determines the probability of hitting an enemy aircraft.
5.0.1
Attack strength may be modified. In the first turn the players set up the sun. They place a long strip of 10 hexes in length in the middle of one of the edges of the board. Which edge this will be may be decided at random (die roll: 1, 2 - east, 3, 4 - south, 5, 6 - west), or the players may agree and put the "sun" wherever they wish. If the extension of the line of fire (see 5.1) crosses the sun disc, 1 is subtracted from that aircraft's attack strength (it fires into the sun).
5.0.2
Clouds are of greater significance, as they reduce the probability of a hit. If the attacker fires at a unit located in a cloud (i.e. a hex containing a cloud), 2 is subtracted from the attack strength; if the attacked unit is on the edge of a cloud (a hex that contains a cloud and another type of terrain), 1 is subtracted. If the attacker fires from within a cloud, 2 is subtracted from the attack strength; when it is on the edge of a cloud, 1 is subtracted.
5.0.3
If an aircraft fires into a cloud, the influence of the sun is not taken into account.
5.0.4
All clouds on the board are at altitudes 3, 4 and 5. If an aircraft occupies a hex with a cloud but flies at a different altitude, that hex is treated as a hex without a cloud (no effect on combat at all).
5.0.5
A modified attack strength may not be negative. If after the modifications the attack strength is less than 0, it is equal to 0.
5.0.6
Some aircraft have a firepower expressed by two digits; in such a case the first digit is the firepower when shooting forward and the second digit is the firepower when shooting to the rear.
5.0.7
A shorter description of attack strength modifications is found in the table at the end of the manual.
5.1 Line of fire
Each aircraft has its line of fire, i.e. the fields under its fire. If any aircraft finds itself on one of these fields (in the line of fire), it may be fired upon in the combat phase. The line of fire extends 5 fields in front of the aircraft and is shown in Fig. 3.
Some aircraft with an attack strength expressed by two digits have a line of fire as shown in Fig. 4.
5.1.1
An aircraft located in a cloud has its line of fire reduced to one field.
5.2 Shooting
In its own combat phase an aircraft may fire at any other aircraft located on its line of fire, provided both aircraft are at the same altitude - this is the condition for combat. To decide whether the fire was effective, the COMBAT TABLE placed at the end of the manual is used. In the table find the column corresponding to the distance between attacker and target. Then find the row corresponding to the modified attack strength. At the intersection of the column and row the numbers and the corresponding number of hits are given. For example, for attack strength 4 and distance 2, a roll of 7 or 8 causes 1 hit, 9 or 10 causes 2 hits, and 11 causes three hits. Any other total means the attack was ineffective.
The hits received must immediately be marked on the aircraft card by crossing out boxes on that aircraft's card - as many boxes as the aircraft received hits in this attack. If the number of crossed-out boxes is greater than half of all the boxes for the given aircraft, it is seriously damaged and its counter is turned over. If all the boxes of the given aircraft are crossed out, the aircraft has been shot down and its counter is immediately removed from the board.
In Fig. 6 aircraft A with attack strength 4 fires at aircraft B. Distance 2 hexes. The modified attack strength is 3 (4 - 1 for the cloud). The player rolls the dice and gets a total of 10. At the intersection of column 2 and row 3 it is found that a roll of 10 caused 2 hits.
5.3 Supplementary rules
5.3.1
A given unit may fire at only one aircraft during one phase.
5.3.2
If more than one aircraft is on the line of fire, only the one closest to the attacker may be fired upon. It is not allowed to shoot through aircraft (either one's own or the enemy's).
5.3.3
If the player, while checking the effectiveness of fire, rolls a 1 on one of the dice, and at the same time the total indicates that the aircraft receives some damage, the attacked aircraft is shot down (regardless of the number of hits it received) and is removed from the board.
5.3.4
If the player, while checking the effectiveness of fire, rolls a total of 2 or 12, this means that the machine guns of the shooting aircraft have jammed. From then on the aircraft may not fire (it has no combat phase). A jammed-machine-gun counter is placed on the counter of this aircraft. In each turn, in its own combat phase, an attempt may be made to unjam the machine guns. The player then rolls a die. If the player rolls 6, their efforts succeed and from the next turn onward the aircraft behaves normally. The player may make only one attempt to unjam the machine guns per turn.
5.3.5
Each aircraft may be the target of attacks by any number of units during one turn.
5.3.6
Attacking is not compulsory. An aircraft need not fire, even though an enemy is on its line of fire.
5.3.7
If one aircraft is attacked by several enemy machines, these attacks are resolved one after another, and their results are applied to the game immediately (before the next attack is made).
5.3.8
The attacking player (in their own combat phase) resolves all attacks in any order they choose.
5.4 Crossing lines of fire
5.4.1
If during its own movement phase aircraft A (see Fig. 6) ends its move on the line of fire of an enemy, then in its own combat phase, before any possible attack of its own, it must check whether it has been hit by the enemy machine B. The enemy aircraft B makes its attack (even though it is not its combat phase!). Only after the effects of this fire have been applied may aircraft A make its own fire.
This situation is shown in Fig. 7.
When the lines of fire of both aircraft coincide, the aircraft fire at each other simultaneously. The players commanding them may roll their dice in turn, but any losses are treated as simultaneous. For example, if according to Fig. 8 aircraft A shoots down aircraft B and aircraft B shoots down aircraft A, then both aircraft crash to the ground and both counters are removed from the board.
6. Anti-aircraft guns
The game has two kinds of anti-aircraft (p-lot) guns: guns installed on ships and guns of land batteries. Furthermore, guns are divided into heavy-calibre guns and light-calibre guns.
6.0.1
Heavy-calibre guns may fire at any aircraft within a radius of 8 fields at all altitudes. Each hit causes 3 damage to the aircraft. The effectiveness of heavy-calibre guns is shown in table 9: Heavy guns - 3 damage.
6.0.2
Light-calibre guns may fire at any aircraft within a radius of 5 fields that is not flying at the maximum altitude. Each hit causes 2 damage to the aircraft. The effectiveness of light-calibre guns is shown in table 10: Light guns - 2 damage.
6.1 Detailed rules
6.1.1
The number of guns and ships, as well as the type and manner of their placement, are given in each scenario.
6.1.2
Only one land anti-aircraft gun may be placed on one land hex. Placing land guns on the ocean is not allowed.
6.1.3
Each ship has a certain number of anti-aircraft guns given in the scenario.
6.1.4
The distance over which a ship's anti-aircraft gun fires is measured from any hex occupied by that ship.
6.1.5
Land guns and ships may not be moved during the whole game.
6.2 Anti-aircraft fire
A player controlling anti-aircraft guns may attempt to shoot down an enemy machine during their own anti-aircraft fire phase. For each gun separately, the player chooses the aircraft it fires at. The player then rolls two dice and compares the total rolled with Table 9: Heavy guns - 3 damage (if firing with a heavy-calibre gun), or with Table 10: Light guns - 2 damage (if firing with a light-calibre gun). In the selected table, at the intersection of the column corresponding to the distance between the aircraft and the gun and the row corresponding to the altitude of the aircraft being fired upon, the player finds a range of numbers. If the rolled total falls within the given range, the aircraft is under fire (the "aircraft under fire" counter must be placed on that aircraft), which reduces the probability of a hit by a bomb or torpedo, see chapter 7. In addition, if the rolled total falls within a range marked with the letter "u", this means the aircraft has been hit. The number of hits is 2 for light-calibre guns and 3 for heavy-calibre guns. The loss of durability must immediately be marked on the aircraft card. The "aircraft under fire" counter is removed at the end of the phase.
6.3 Supplementary rules
6.3.1
One anti-aircraft gun may make only one shot per turn.
6.3.2
Each aircraft may be attacked by several anti-aircraft guns during one turn.
6.3.3
If more than one gun makes an attack on one aircraft, these shots are resolved separately, in any order.
6.3.4
Firing with guns is not compulsory. The player need not attack an aircraft even though it is within the required distance.
6.3.5
If the fired-upon aircraft is in clouds or against the background of the sun, 2 is subtracted from the rolled number.
6.3.6
An anti-aircraft gun may be destroyed as a result of bombing the hex it occupies (see 7.0.6). A destroyed gun is removed from the board and does not return to the game. From the moment the damage to a ship exceeds half of its durability, the ship has its number of anti-aircraft guns reduced until the end of the game. See Table 3: Ship tactical data.
7. Bombing and torpedo attack
Some aircraft carry a bomb load or a torpedo (see Table 2: Aircraft technical data). In most scenarios the main objective of one side is to sink the enemy's ships by bombing or torpedo attack.
7.0 Bomb drop
Each bomber has its bomb load shown on its counter. For simplicity it is assumed that this factor means the number of bombing runs for the given aircraft during the whole game. Each bombing run is marked on the aircraft card as a box. When an aircraft bombs, one box beside the name and number of the given aircraft is crossed out on the aircraft card. If all boxes are crossed out, this means the given bomber has already dropped all its bombs.
7.0.1
An aircraft may drop its bombs wherever the player commanding it wishes. However, victory points (see 8 Victory conditions) are awarded only for bomb drops on hexes where ships or strategic objects are located.
7.0.2
To drop bombs, an aircraft must in this phase end its move on that hex or fly over the hex it wishes to bomb.
7.0.3
Bombing takes place in the attack phase. An aircraft may bomb any hex it has flown over in this turn.
7.0.4
During one turn an aircraft may bomb a given hex only once. If it wishes to bomb the same field again, it must turn back, and only then may it drop the next series of bombs.
7.0.5
During one turn a bomber may bomb as many hexes as its bomb load allows, bearing in mind rule 7.0.4.
7.0.6
If a series of bombs falls on a field occupied by a land anti-aircraft gun, a die is rolled. A roll of 4, 5 or 6 means the gun has been destroyed and it is immediately removed from the board.
7.0.7
Each field may be bombed any number of times.
7.0.8
If an aircraft is shot down before dropping its bombs, the bombs it carried are lost with it.
7.0.9
For obvious reasons, a series of bombs once dropped may not be used again by either side.
7.1 Bombing
Two kinds of bombing are possible in the game: level bombing and dive bombing.
7.1.1
Level bombing may be performed by all bombers (see Table 2: Aircraft technical data). To bomb a given hex, an aircraft must fly over it at one of the two highest altitude levels (4 or 5) without changing that level in this turn.
7.1.2
Dive bombing may be performed only by certain types of aircraft (see Table 2: Aircraft technical data). To bomb a given hex, an aircraft must fly over it while descending by two altitude levels (from altitude 3 - low to altitude 1 - lowest).
7.2 Effects of bombing
To determine the damage inflicted on a ship, the player rolls two dice and compares the total with Table 6: Level bombing (if it was level bombing) or Table 7: Dive bombing (if it was dive bombing). If the aircraft was in this turn under anti-aircraft fire (see 6; it has the "aircraft under fire" counter on it), the player checks the result of the bombing in the column "aircraft under fire"; if the aircraft is not fired upon (there is no "aircraft under fire" counter over it), the player checks the column "aircraft not fired upon".
If the rolled total is contained in the appropriate column of the table corresponding to the type of bombing, the number of hits is found in the "number of hits" column in the row corresponding to the rolled total. The hits must immediately be marked on the ship card by crossing out as many boxes of the ship's durability as the damage amounts to. If the rolled total is not in the appropriate column of the table, the bombing caused no damage.
7.3 Torpedo attack
Some aircraft may be equipped with torpedoes (see Table 2: Aircraft technical data). Each scenario specifies which aircraft carry torpedoes (in some scenarios torpedo aircraft are used as bombers).
7.3.1
To make a torpedo attack, an aircraft must in that turn fly straight at the lowest altitude. It may attack only ships located directly ahead at a distance of 1 to 3 hexes.
7.3.2
The method of determining damage is analogous to the method described in 7.2, but the player uses Table 8: Torpedo attack.
8. Victory conditions
8.0.1
Each scenario specifies the conditions the players must fulfil to achieve victory. For example, a player achieves a decisive victory if they sink all enemy ships, and a minimal victory when they merely damage an aircraft carrier.
8.0.2
The game ends at the moment when only units (aircraft, ships, anti-aircraft guns) of one player remain on the board. This does not necessarily mean that the remaining units have been destroyed. At any moment of the game each aircraft may leave the board through any edge of the map. After such an exit the player may declare that the given aircraft does not return to the game. From then on this unit does not return to the board for the rest of the game; it should be remembered, however, that this aircraft has not been destroyed.
9. Scenarios
At the start of the game the players must decide which scenario they will play. This may be one of the scenarios given in this chapter, or any variant of the game prepared by the players themselves (for beginning players the use of ready-made scenarios is recommended). Each variant contains the information necessary for play, e.g. number and types of aircraft, reinforcements, game objectives. In addition, the conditions for victory for each side are given. The scenarios are arranged in no random order. The first game variants involve fewer aircraft, which are easier to manoeuvre. These scenarios are recommended for beginning players. In some scenarios the American or the Japanese side receives reinforcements. Additional aircraft must be introduced onto the board according to the scenario at the given turn, in the movement phase of the player receiving reinforcements.
9.0.1
Once a scenario has been chosen it may not be changed during the game.
9.0.2
Each scenario contains so-called starting hexes, i.e. hexes on which the players place their aircraft and ships before the game; from these hexes they begin movement in turn 1. E.g. Americans within a radius of 5 fields (hexes) from hex A46, B43.
9.0.3
At the start of the game aircraft are at the altitudes chosen by the players.
9.0.4
Tactical data of ships, such as number of anti-aircraft guns, their type, durability, length, are given in the table.
9.0.5
On the Aircraft Card each aircraft is marked separately, by entering its type, the number of the counter representing it, its durability (if durability is e.g. 4, leave 4 boxes uncrossed), and the number of bombs (the number of uncrossed boxes means the number of bombs).
9.0.6
On the Ship Card enter the type and name, the number of anti-aircraft guns of each kind, and the durability of the ship (leave as many free boxes as the durability of the given unit). Ship data are given in Table 3: Ship tactical data.
9.0.7
Aircraft and ship cards are for repeated use; they should be filled in with a pencil and wiped clean after each game. If necessary, players may make copies of these cards.
9.1 Own scenarios
The authors of the game encourage advanced players to create their own scenarios depicting other air battles. The game deliberately contains more counters of units, to make it possible to create even more interesting scenarios of individual battles or whole campaigns.
SCENARIO 1: Attack on Pearl Harbor
From 1940 onwards, Admiral Yamamoto, commander-in-chief of the Japanese fleet, was preparing a plan for a daring attack on Hawaii and the main base of the Pacific Fleet located there. The aim of the operation was to destroy the core of the American fleet - aircraft carriers and battleships - during a surprise air attack. After many weeks of training the final date of the attack was set for 7 December.
The Japanese attack was a complete surprise for the Americans. All battleships were sunk or seriously damaged, and most aircraft were destroyed. However, the fuel reserves were not destroyed, and no aircraft carriers were sunk, as they were at sea on the day of the raid. The operation thus became a tactical success but a strategic failure. The consequence of the attack was the entry of the United States into the war.
Over 200 aircraft took part in the whole operation on the Japanese side alone; the scenario presents only a fragment of the raid - the hypothetical clash of American Wildcats with Japanese aircraft. It is the easiest of the scenarios and is intended for beginning players.
Japanese:
- 6 A6M Zero aircraft, within a radius of 2 fields from hex A49-B39
Americans:
- 4 F4F-3 Wildcat aircraft, within a radius of 2 fields from hex A10-B7
Note: In this scenario an aircraft that leaves the board is considered shot down; the game continues until all aircraft of one player are eliminated.
Victory conditions: Subtract the number of American aircraft shot down from the number of Japanese aircraft shot down, and compare the result with the table below.
   4-3           Decisive Japanese victory
   2-1           Minimal Japanese victory
   0             No clear winner
   (-1)-(-2)     Minimal American victory
   (-3)-(-6)     Decisive American victory
SCENARIO 2: Air campaign in the Philippines
The Japanese command planned to attack the Philippines at the same time as the attack on Pearl Harbor. Taking these islands was the first step on the road to the Dutch East Indies, the main target for Japan. The whole campaign lasted until spring 1942, but in the first week the Japanese gained air superiority. The scenario presents one of the last attacks by American aircraft, carried out on 12 April on Cebu. The game includes Japanese aircraft that could have been in the area of the attack (in reality the Japanese base was defended only by fighter flying boats).
Americans:
- 3 B-17 aircraft, within a radius of 2 fields from hex A50-B55, each carrying a load of 4 bombs.
- 4 B-25 aircraft, within a radius of 2 fields from hex A50-B38, each carrying a load of 2 bombs.
Japanese:
- 2 A6M Zero aircraft, within a radius of 2 fields from hex A11-B12
- 2 A6M Zero aircraft, within a radius of 2 fields from hex A3-B24
- 2 A6M Zero aircraft, within a radius of 2 fields from hex A17-B9
- 8 heavy anti-aircraft guns (the player may place them freely anywhere on the whole island)
Note: In this scenario American aircraft leaving the map through an edge other than the one along the line of hexes A1 are considered destroyed.
Victory conditions: The aim of the game for the Americans is to bomb the strategic objects located on 8 hexes: A3-B10, A4-B9, A6-B13, A9-B8, A10-B10, A11-B8, A13-B11, A16-B12. An objective is considered bombed if at least 1 bomb hits it (the number of hits is not important). For each bombed objective the Americans receive 1 point. From the number of points obtained, 2 points are subtracted for each bomber shot down, and the result is compared with the table.
   6-8           Decisive American victory
   2-5           Minimal American victory
   (-2)-1        No clear winner
   (-6)-(-3)     Minimal Japanese victory
   (-14)-(-7)    Decisive Japanese victory
SCENARIO 3: Air-naval battle off Kuantan
In November 1941 the British Admiralty sent to Singapore a squadron of ships, whose core consisted of two battleships: "Prince of Wales" and "Repulse". Admiral Tom S. V. Phillips was appointed commander of the squadron. The strategic aim was to hinder the Japanese army from landing on the Malay Peninsula. On 8 December the squadron left Singapore and headed for Kuantan with the intention of breaking up the Japanese landing. On 10 December the British ships became the target of an attack by Japanese aircraft. Both battleships sank; 840 officers and sailors died, including Admiral Phillips. Japanese losses amounted to 4 aircraft, and a further 20 were damaged. The brilliant Japanese success was the result of the use of torpedo aircraft flown by excellently trained crews and the absence of British fighter cover.
Because of the considerable number (more than 80 machines) used by the Japanese air force, the scenario covers only a fragment of the battle. It presents the attack of Japanese aircraft on one of the British battleships.
Americans (heading as printed in the manual; editor's note: the ship in this scenario is the British battleship "Prince of Wales", so the side label appears to be a source error, kept as printed):
- Battleship "Prince of Wales" on hexes from A25-B35 to A29-B35
Japanese:
- 8 G4M1 Betty aircraft with an aerial torpedo, within a radius of 3 fields from hex A2-B2
- 4 G4M1 Betty aircraft with two bombs, within a radius of 2 fields from hex A2-B30
Victory conditions: Decisive Japanese victory: sinking the battleship, destroying at most 3 Japanese aircraft. Minimal Japanese victory: sinking the battleship, destroying 4-6 Japanese aircraft. No clear winner: (the conditions of one of the points given below must be fulfilled).
- Sinking the battleship, destroying at least 7 Japanese aircraft.
- Heavy damage to the battleship (at least 13 damage), destroying at most 4 aircraft. Minimal American victory: heavy damage to the battleship, destroying 5-8 American aircraft. Decisive American victory:
- Heavy damage to the battleship, loss of at least 9 American aircraft.
- The battleship is not heavily damaged (at most 12 damage), any losses of American aircraft.
SCENARIO 4: Air-naval battle in the Coral Sea
In May 1942 the Japanese command decided to land infantry at Port Moresby. The Japanese transports were covered by considerable surface forces with the two aircraft carriers "Shokaku" and "Zuikaku" and the light carrier "Shoho". The whole operation was directed from Rabaul by Vice Admiral Shigemi Inouye.
Thanks to the decryption of large parts of Japanese radio messages, the Allies knew the enemy's intentions. To prevent the landing, Task Force TF.17 was organised, consisting of the carriers "Lexington" and "Yorktown". Rear Admiral Frank J. Fletcher was appointed commander of the force. This was the first battle fought exclusively by carrier aviation, without any exchange of fire between the ships of the two sides. The Americans lost the carrier "Lexington", a destroyer and 79 aircraft. The Japanese lost the light carrier "Shoho", a destroyer and 107 aircraft, and the other two carriers were damaged. Strategically, the American side was successful, halting the Japanese offensive.
The whole battle consisted of many attacks aimed at different targets. The scenario presents the attack of American aircraft on the Japanese light carrier "Shoho" and the attack of Japanese aircraft on the carrier "Lexington".
Variant 1: Attack on the light carrier "Shoho" Americans:
- 6 F4F-3 Wildcat aircraft, within a radius of w fields from hex A50-B49 [sic: "w" as printed]
- 12 SBD-3 Dauntless aircraft with a bomb, within a radius of 2 fields from hex A49-B42
- 12 TBD-1 Devastator aircraft with a torpedo, within a radius of 3 fields from hex A44-B51 Japanese:
- Light carrier "Shoho" on hexes from A9-B17 to A9-B20
- Cruiser on hexes from A10-B27 to A12-B27
- Destroyer on hexes from A12-B18 to A13-B19
- 6 A6M2 Zero aircraft, within a radius of 4 fields from hex A5-B11
Victory conditions: Decisive American victory: sinking the carrier, with the loss of at most 4 American aircraft. Minimal American victory: sinking the carrier, with the loss of 5-8 American aircraft. No clear winner: (the conditions of one of the points given below must be fulfilled).
- Sinking the carrier, with the loss of at least 9 American aircraft.
- Heavy damage to the carrier (at least 7 damage), with the loss of at most 4 American aircraft. Minimal Japanese victory: heavy damage to the carrier, destroying 5-8 American aircraft. Decisive Japanese victory:
- Heavy damage to the carrier, destroying at least 9 American aircraft.
- The carrier is not heavily damaged (at most 6 damage), any losses among American aircraft.
Variant 2: Attack on the American carrier "Lexington" Japanese:
- 6 A6M Zero aircraft, within a radius of 2 fields from hex A4-B20
- 9 D3A-1 Val aircraft with a bomb, within a radius of 2 fields from hex A2-B12
- 9 B5N2 Kate aircraft with a torpedo, within a radius of 3 fields from hexes A2-B18 Americans:
- carrier "Lexington" on hexes from A36-B40 to A40-B40
- Destroyer on hexes from A30-B40 to A31-B41
- 3 F4F-3 Wildcat aircraft, within a radius of 4 fields from hex A26-B30
- 4 SBD-3 Dauntless aircraft, within a radius of 2 fields from hex A20-B26
Victory conditions: Decisive Japanese victory: sinking the carrier, with the loss of at most 3 Japanese aircraft. Minimal Japanese victory: sinking the carrier, with the loss of 4-6 Japanese aircraft. No clear winner: (the conditions of one of the points given below must be fulfilled).
- Sinking the carrier, with the loss of at least 7 Japanese aircraft.
- Heavy damage to the carrier (at least 9 damage), with the loss of at most 3 Japanese aircraft. Minimal American victory: heavy damage to the carrier, destroying 5-8 Japanese aircraft. Decisive American victory:
- Heavy damage to the carrier, destroying at least 9 Japanese aircraft.
- The carrier is not heavily damaged (at most 8 damage), any losses among Japanese aircraft.
SCENARIO 5: Air-naval battle near Midway
From the very beginning of the war Admiral Yamamoto aimed to sink the American aircraft carriers. After the inconclusive battle in the Coral Sea he wished to speed up the moment of the decisive clash. The admiral knew that an attack on Midway would force the Americans to defend that island with their carriers. After sinking the American carriers and occupying the island, the road to Hawaii would be open. Yamamoto prepared his plan very carefully, including a strike on the Aleutians to mislead the enemy as to the main objective of the attack. For the task he assigned a powerful naval force including 8 carriers. The Americans had at their disposal only three ships of this class, and the aviation stationed at the bases. American intelligence also decrypted Japanese messages indicating that the main target of the attack was Midway. The battle, whose greatest intensity fell on 4 June, was a great defeat for the Japanese fleet. Japan lost 4 large carriers, and the Americans only one. The scenario presents the attack of American aircraft on the carrier "Kaga" and the attack of Japanese aircraft on the carrier "Yorktown".
Variant 1: Attack on the carrier "Kaga" Americans:
- 12 SBD-3 Dauntless aircraft with a bomb, within a radius of 2 fields from hex A2-B20 Japanese:
- Carrier "Kaga" on hexes from A42-B39 to A46-B39
- Destroyer on hexes from A33-B40 to A34-B40
- 3 A6M2 Zero aircraft, within a radius of 4 fields from hex A36-B30
Victory conditions: Decisive American victory: sinking the carrier, with the loss of at most 5 American aircraft. Minimal American victory: sinking the carrier, with the loss of 6-10 American aircraft. No clear winner: (the conditions of one of the points given below must be fulfilled).
- Sinking the carrier, with the loss of at least 11 American aircraft.
- Heavy damage to the carrier (at least 10 damage), destroying at most 6 American aircraft. Minimal Japanese victory: heavy damage to the carrier, destroying 7-10 American aircraft. Decisive Japanese victory:
- Heavy damage to the carrier, destroying at least 11 American aircraft.
- The carrier is not heavily damaged (at most 9 damage), any losses among American aircraft.
Variant 2: Attack on the American carrier "Yorktown" Japanese:
- 6 A6M Zero aircraft, within a radius of 2 fields from hex A3-B20
- 9 D3A-1 Val aircraft with a bomb, within a radius of 2 fields from hex A3-B25 In the fifth turn of the game the following aircraft appear:
- 3 A6M Zero aircraft, within a radius of 2 fields from hex A2-B20
- 9 B5N2 Kate aircraft with a torpedo, within a radius of 3 fields from hexes A2-B15 or A2-B12 Americans:
- carrier "Yorktown" on hexes from A38-B40 to A42-B40
- destroyer on hexes from A34-B38 to A35-B38
- 6 F4F-3 Wildcat aircraft, within a radius of 4 fields from hex A40-B40
Victory conditions: Decisive Japanese victory: sinking the carrier, with the loss of at most 3 Japanese aircraft. Minimal Japanese victory: sinking the carrier, with the loss of 4-6 Japanese aircraft. No clear winner: (the conditions of one of the points given below must be fulfilled).
- Sinking the carrier, destroying at least 7 Japanese aircraft.
- Heavy damage to the carrier (at least 7 damage), with the loss of at most 3 Japanese aircraft. Minimal American victory: heavy damage to the carrier, destroying 5-8 Japanese aircraft. Decisive American victory:
- Heavy damage to the carrier, destroying at least 9 Japanese aircraft.
- The carrier is not heavily damaged (at most 6 damage), any losses among Japanese aircraft.
SCENARIO 6: Operation "I"
In April 1943 Admiral Yamamoto attempted to halt the Allied offensive in the Solomon Islands. The main aim of the operation, code-named "I", was the destruction of ammunition and fuel stores and of the aircraft stationed on Guadalcanal. The Japanese could also sink numerous transport ships and warships circling the island. For this operation, in addition to the army air force, the Japanese used carrier-borne aircraft.
The scenario presents the raid of 7 April on Tulagi and a convoy sailing nearby.
Japanese:
- 12 A6M Zero aircraft, within a radius of 4 fields from hex A50-B40
- 12 D3A-1 Val aircraft with a bomb, within a radius of 4 fields from hex A50-B50 Americans:
- Destroyer on hexes from A20-B25 to A21-B25
- 2 transport ships on hexes from A14-B24 to A16-B25 and from A10-B19 to A12-B21
- 6 F4U Corsair aircraft, within a radius of 4 fields from hex A4-B4
- 4 P-39 Airacobra aircraft, within a radius of 2 fields from hex A12-B20
- 4 light anti-aircraft guns (placed freely on the island)
Victory conditions: The aim of the game for the Japanese is to bomb the strategic objects located on 4 hexes: A16-B12, A10-B10, A7-B9, A4-B9. An objective is considered bombed if at least 1 bomb hits it (1 or more damage). For each bombed objective the Japanese receive 2 points. Furthermore, for each sunk transport ship the Japanese receive 10 points. From the number of points obtained, 2 points are subtracted for each Japanese aircraft shot down, and the result is compared with the table.
Note: A Japanese aircraft that leaves the map through the edge (vertical or horizontal) to which hex A1-B1 belongs must return to the game in accordance with the rule described in 4.3. An aircraft leaving the board through another edge does not have to return to the board.
   14 and more     Decisive Japanese victory
   6 - 13          Minimal Japanese victory
   0-5             No clear winner
   (-7)-(-1)       Minimal American victory
   (-14) and less  Decisive American victory
SCENARIO 7: Battle in the Philippine Sea
In 1944 the American advantage was already clear. The American fleet possessed more carriers than the Japanese fleet, and further units were under construction and soon to enter service. The Japanese, however, did not intend to surrender and fought fiercely for every islet. The Americans began pushing the Japanese out of successive archipelagos, aiming to take control of the whole Pacific area. In June 1944 a battle between the fleets of both sides took place in the Philippine Sea. This scenario presents hypothetical attacks on the Japanese carrier "Hiyo" and the American carrier "Bunker Hill".
Variant 1: Attack on the carrier "Hiyo" Americans:
- 6 F6F Hellcat aircraft, within a radius of 2 fields from hex A2-B20
- 6 SB2C Helldiver aircraft with a bomb, within a radius of 2 fields from hex A2-B30 from turn 10
- 8 F4U Corsair aircraft, within a radius of 2 fields from hex A8-B5
- 12 TBF Avenger aircraft with a torpedo, within a radius of 3 fields from hex A9-B31
- 6 SB2C Helldiver aircraft with a bomb, within a radius of 2 fields from hex A1-B19 Japanese:
- Carrier "Hiyo" on hexes from A42-B41 to A46-B41
- Cruiser on hexes from A36-B35 to A36-B37
- 8 A6M6 Zero aircraft, within a radius of 4 fields from hex A46-B30 from turn 5
- 4 A6M Zero aircraft, within a radius of 2 fields from hex A47-B55 from turn 10
- 8 A6M Zero aircraft, within a radius of 2 fields from hex A50-B38
Victory conditions: Decisive American victory: sinking the carrier, with the loss of at most 10 American aircraft. Minimal American victory: sinking the carrier, with the loss of 11-20 American aircraft. No clear winner: (the conditions of one of the points given below must be fulfilled).
- Sinking the carrier, with the loss of at least 21 American aircraft.
- Heavy damage to the carrier (at least 9 damage), destroying at most 14 American aircraft. Minimal Japanese victory: heavy damage to the carrier, destroying 15-20 American aircraft. Decisive Japanese victory:
- Heavy damage to the carrier, destroying at least 21 American aircraft.
- The carrier is not heavily damaged (at most 8 damage), any losses among American aircraft.
Variant 2: Attack on the American carrier "Bunker Hill" Japanese:
- 12 A6N1 Zero aircraft, within a radius of 2 fields from hex A2-B20
- 12 D4Y1 Judy aircraft with a bomb, within a radius of 2 fields from hex A2-B30 from turn 8
- 8 A6M6 Zero aircraft, within a radius of 2 fields from hex A8-B5
- 12 B6N Jill aircraft with a torpedo, within a radius of 3 fields from hex A9-B31 Americans:
- Carrier "Bunker Hill" on hexes from A42-B41 to A46-B41
- 2 destroyers, on hexes from A36-B35 to A36-B36 and the second from A30-B21 to A31-B31
- 8 F6F Hellcat aircraft, within a radius of 4 fields from hex A46-B30
- 4 F4U Corsair aircraft, within a radius of 2 fields from hex A47-B55 from turn 5
- 4 F6F Hellcat aircraft, within a radius of 2 fields from hex A50-B38
Victory conditions: Decisive Japanese victory: sinking the carrier, with the loss of at most 8 Japanese aircraft. Minimal Japanese victory: sinking the carrier, with the loss of 12 Japanese aircraft. No clear winner: (the conditions of one of the points given below must be fulfilled).
- Sinking the carrier, destroying at least 13 Japanese aircraft.
- Heavy damage to the carrier (at least 9 damage), with the loss of at most 8 Japanese aircraft. Minimal American victory: heavy damage to the carrier, destroying 9-12 Japanese aircraft. Decisive American victory:
- Heavy damage to the carrier, destroying at least 13 Japanese aircraft.
- The carrier is not heavily damaged (at most 8 damage), any losses among Japanese aircraft.
10. Combat table
Table 1: Combat table. Columns are the distance between attacker and target (1-5 hexes); rows are the modified attack strength (1-5). Each cell lists the rolled totals that cause 1 hit, 2 hits and 3 hits, in that order, separated by "/". A dash means there is no entry for that number of hits. Any other total means the attack was ineffective.
| Attack strength | Distance 1 | Distance 2 | Distance 3 | Distance 4 | Distance 5 |
|---|---|---|---|---|---|
| 1 | 9–10 / 11 | 10–11 | 11 | - | - |
| 2 | 8–9 / 10–11 | 9–10 / 11 | 10–11 | 11 | - |
| 3 | 7–8 / 9–10 / 11 | 8–9 / 10–11 | 9–10 / 11 | 10–11 | 11 |
| 4 | 6–7 / 8–9 / 10–11 | 7–8 / 9–10 / 11 | 8–9 / 10–11 | 9–10 / 11 | 10–11 |
Editor's note: in the printed table the first total for attack strength 5 at distance 1 reads "5–5"; the key printed beside the table gives "5–6" for one hit, so the key value is probably intended. The printed value is kept here as printed.
Key printed beside the table (example for attack strength 5, distance 1):
| Attack strength | Distance | Result |
|---|---|---|
| 5 | 1 | 5–6: 1 hit; 7–8: 2 hits; 9–11: 3 hits |
Attack strength modifications
- Towards the sun: -1
- Firing at a target:
- in a cloud: -1 / -2 (edge / fully within the cloud)
- from a cloud: -1 / -2 (edge / fully within the cloud)
A roll of 2 or 12 means the machine guns have jammed (see 5.3.4).
11. Aircraft technical data
Table 2: Aircraft technical data. Column meanings: Lp. = aircraft number; Max speed; Min speed; Manoeuvrability; Attack (front/rear, see 5.0.6); Bomb/torpedo load; Durability (boxes on the aircraft card); Dive (+ = can dive-bomb, see 7.1.2); Torp. (+ = carries a torpedo, see 7.3); Counters (number of counters).
| Lp. | Type and name | Max speed | Min speed | Manoeuvrability | Attack | Load | Durability | Dive | Torp. | Counters |
|---|---|---|---|---|---|---|---|---|---|---|
| 1 | A6M Zero | 6 | 1 | 0 | 4/0 | - | 4 | - | - | 12 |
| 2 | A6M6 Zero | 6 | 2 | 0 | 4/0 | - | 6 | - | - |
12. Ship tactical data
Table 3: Ship tactical data. Anti-aircraft gun columns are given as normal / damaged (the number of guns a ship has when undamaged, and when it has passed the damage threshold in 6.3.6). Length is in hexes.
| Type and name | Durability | Light AA guns (normal / damaged) | Heavy AA guns (normal / damaged) | Length |
|---|---|---|---|---|
| Carrier BUNKER HILL | 18 | 3 / 2 | 4 / 2 | 5 |
| Carrier LEXINGTON | 18 | 2 / 1 | 1 / 0 | 5 |
| Carrier YORKTOWN | 14 | 2 / 1 | 3 / 1 | 5 |
| Carrier HIYO | 17 | 5 / 2 | 2 / 1 | 5 |
| Carrier KAGA | 20 | 3 / 1 | 2 / 1 | 5 |
13. Aircraft card
Table 4: Aircraft card. This is a blank record sheet, reproduced here as a description only. It has numbered rows (1 to 26) with the columns: Lp. (number), Type and name, Counter number, Dive, Torpedo, Bombs (boxes), and Durability (boxes). Instructions for filling it in are given in 9.0.5 and 2.2.
14. Ship card
Table 5: Ship card. This is a blank record sheet, reproduced here as a description only. It has numbered rows (1 to 17) with the columns: Lp. (number), Type and name, Counter number, Durability (boxes), Light AA guns, and Heavy AA guns. Instructions for filling it in are given in 9.0.6 and 2.3.
15. Bombing and torpedo attack tables
Table 6: Level bombing (7.2). The column headings are "Aircraft not fired upon" and "Aircraft under fire".
| Number of hits | Aircraft not fired upon | Aircraft under fire |
|---|---|---|
| 4 | 12 | - |
| 3 | 11 | 12 |
| 2 | 10 | 11 |
| 1 | 9 | 10 |
Table 7: Dive bombing (7.2).
| Number of hits | Aircraft not fired upon | Aircraft under fire |
|---|---|---|
| 4 | 10 - 12 | - |
| 3 | 8 - 9 | 11 - 12 |
| 2 | 7 | 9 - 10 |
| 1 | 6 | 7 - 8 |
Table 8: Torpedo attack (7.3.2).
| Number of hits | Aircraft not fired upon | Aircraft under fire |
|---|---|---|
| 7 | 12 | - |
| 6 | 10 - 11 | 12 |
| 5 | 8 - 9 | 10 - 11 |
| 3 | 7 | 9 |
16. Anti-aircraft fire tables
Table 9: Heavy guns - 3 damage (6.2). In each cell the first range is "aircraft under fire" (no hit); the range after "U" is a hit ("u" in the printed table).
| Altitude | Distance 0-4 | Distance 5-6 | Distance 7-8 |
|---|---|---|---|
| 1-3 | under fire 8–9; hit 10–12 | under fire 8–9; hit 10–12 | under fire 8–9; hit 10–11 |
| 4 | under fire 8–9; hit 10–12 | under fire 8–9; hit 10–11 | under fire 8–9; hit 11–12 |
| 5 | under fire 9–10; hit 11–12 | under fire 9–10; hit 11 | under fire 8–9; hit 12 |
Table 10: Light guns - 2 damage (6.2). Same layout as Table 9.
| Altitude | Distance 0-4 | Distance 5-6 | Distance 7-8 |
|---|---|---|---|
| 1-3 | under fire 7–8; hit 9–12 | under fire 7–8; hit 9–12 | under fire 8–9; hit 10–12 |
| 4 | under fire 8–9; hit 10–12 | under fire 8–9; hit 10–12 | under fire 8–9; hit 10–11 |
| 5 | under fire 9–10; hit 11–12 | under fire 9–10; hit 11 | under fire 10–11; hit 12 |
Editor's note: the rule in 6.0.2 says light-calibre guns cannot fire at an aircraft flying at the maximum altitude, yet Table 10 has a row for altitude 5. Both are kept as printed.