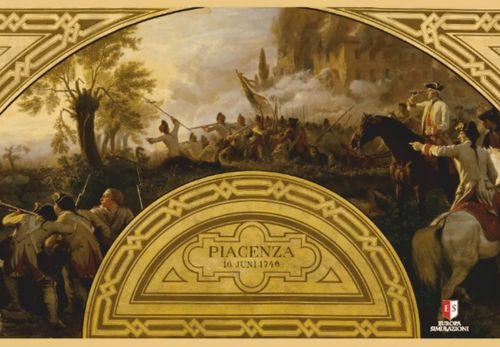
Piacenza 1746
Piacenza 1746 Rulebook
Table of Contents
Table of Contents
- 1.0 Introduction
- 2.0 Components of the Game
- 3.0 Sequence of Play
- 3.1 Wing Activation
- 4.0 Commanders
- 5.0 Movement
- 6.0 Stacking
- 7.0 Zone of Control (ZOC)
- 8.0 Bombardment
- 9.0 Combat
- 9.2 Melee Combat
- 10.0 Cavalry
- 11.0 Disorder and Rout
- 12.0 End of Game Turn
- 13.0 Victory
- Learning Scenarios
- Examples of Play
- Abbreviated Sequence of Play
- Errata and Q&A (07/05/2022)
1.0 Introduction
Piacenza 1746 is a historical simulation game for two players, which aims to simulate the epic battle around its walls, decisive for the fate of the War of the Austrian Succession.
One of the players controls the Franco-Spanish army, the other controls the Austrian army of the Prince of Liechtenstein.
- Piacenza Walls: The hexsides occupied by the Piacenza ramparts (marked in orange on the map) are impassable and no form of movement or combat is possible through them.
- River Po, River Trebbia: It is not possible to enter a hex whose center is occupied by the River Po or the River Trebbia. It is possible to cross the River Po on the bridge. It is not possible to cross the River Trebbia.
2.0 Components of the Game
2.1 The Map
The map represents the terrain to the south, east and west of the city of Piacenza at the time of the battle. The map is superimposed with a grid of hexagons, which is used to regulate the movement and fire of the troops. Each hex is characterized by a terrain type; the different types of terrain are indicated on the Terrain Effects Charts (TEC), and discussed in this booklet.
Note: The half-hexes are not playable.
2.1.1 Types of Terrain
Here are some notes on the main types of terrain on the map. For the effects on movement and combat of all types of terrain, see the TEC.
- Clear: Meadows, Wheat, Provender, Farmstead. The map is mostly covered by crops. Two different types of crops are symbolized (wheat and provender), but both have the same effects for the game.
- Stream: Many streams are drawn on the map. Streams are always considered to run along the hexside, never the hex. Unlike other games, the original geography has not been altered to conform to the grid of hexagons. On the contrary, in hexes where there is ambiguity, the blue hexagon sides indicate on which hexside the streams run along.
- Cover Level 1: Farmhouse, Entrenchment.
- Cover Level 2: Redoubt, Chateau, Village.
Historical note: Fights for villages were often the most bitter actions of an entire battle, as shelters offered "defensible space" from which troops were reluctant or unable to leave. The battles of Kesselsdorf (1745), Rocoux (1746), Laffeldt (1747) and Hochkirch (1758) all opened with a fight in the village.
All terrain types listed above are collectively considered "Cover". Whoever occupies a hex with a Cover is the defender; attacks usually take place from the outside towards the inside of the cover. This is important for Melee Combat and Charge (see Par. 9).
2.2 The Counters
There are three main types of counters in the game: Commanders (explained in detail in Chapter 4), Combat units and the markers of various game situations (explained in the rules).
2.2.1 Commanders
Each army is divided into 4 "Wings" used to better organize the command.
There are three types of Commanders: Commander in Chief (CiC), Wing Commanders (WC), Formation Commanders (FC).
2.2.2 Combat Units
These counters represent the military units actually present on the battlefield. They are mainly "Regiments", and can be of:
- Infantry
- Cavalry
- Artillery
An Infantry counter represents one, two or three battalions, (ie the equivalent of a regiment from later ages, then called a brigade). A Cavalry counter represents approximately four squadrons. An Artillery counter represents a field heavy battery. Each combat point therefore equates to 500-800 men.
The colored band at the top of the pieces represents the Formation they belong to; at the bottom right, the pieces have a triangle in the color of the Wing they belong to.
Many combat units have a front and a back side (the background color of the back is darker, and has different values). The front represents the unit at full strength, the back represents the unit at reduced strength, due to combat. Units with a back side are called "two-steps", those without are "single-step".
Infantry. Each Infantry counter has two numerical values: the movement capacity expressed in Movement Points (or MPs) (smaller black number) and the Strength (red number), expressed in Strength Points (or SPs, "Strength Points"). The strength of the Infantry units is expressed in number of battalions.
Infantry essentially includes line troops, some light volunteer troops (indicated by an "L") and Grenadiers (indicated by a rectangle around the strength).
Note: The Volunteers of Gantés, the Catalan Micheletti, the Parma fusiliers, the Austrian frontiers (Grenzer like the Schiavoni and the Croats of Warasdin, even if in reality they were regular troops thanks to the Teresian reform), the Hussars and the Cavalleggeri are considered light troops (all indicated by an "L" on the counter).
Cavalry. Cavalry includes Heavy Cavalry (including Cuirassiers and Carbineers) which has 5 MP and Light Cavalry (in general Hussars and Dragoons) which has 6 MPs. The strength of a Cavalry counter is expressed in number of squadrons.
The Dragoons (marked with Strength values in yellow) can also operate on foot and are therefore represented: either by a pair of Cavalry counters, or by a single Infantry unit, which allows the recomposition of the Dragoon counters into a foot battalion. Not all Dragoon units can be set on foot. Some are too scarce in number and remain Cavalry units. During the initial setup, each player chooses how to deploy the Dragoon units, as Cavalry or as Infantry (see 10.5).
Artillery. Only 6, 7, 8, 12 lb Heavy Field Artillery is represented in the game. Battalion Light Artillery is considered part of the battalion(s) counter. Artillery has a theoretical range of more than 3 hexes, but to be effective it must fire at shorter ranges. If adjacent, it bombards with "grapeshot" and can be lethal. Artillery can only bombard and never adds its strength to other units.
The reverse side is marked FIRED to indicate that it has already fired for that round.
Artillery units are commanded directly by their Wing Commander (they do not have a Formation Commander).
2.2.3 Orientation
Artillery combat units must have their "front" oriented towards a vertex of a hex in order to Bombard. By convention, the two hexes adjacent to the cannon's direction represent the "front" of the Artillery unit.
For Infantry and Cavalry units, however, the orientation is irrelevant.
2.3 Game Charts
The three game charts present the initial setup of the armies, the Terrain Effects Chart and the various other tables that are used for the game (explained in the rules).
2.4 Game Scale
A game turn represents 1 hour, sometimes two, of real time. The distance between two hexsides is approximately 300m.
2.5 Turn Record Track
The game has 12 turns, almost all of one hour, during which players take turns activating the "Wings" of their army. The battle began at 6 am on June 16, 1746 and ended at dusk (the sun set in Piacenza at 7.59pm).
2.6 Die
The game uses a 10-sided die (d10). Zero is and remains zero.
3.0 Sequence of Play
Players setup their army following the instructions on the Initial Setup chart.
The game consists of a series of Turns at the end of which (or before, see Victory Conditions) the Victory Conditions are checked and the Winner proclaimed.
Each game turn consists of the following Phases:
A) Wing Selection Phase
This phase is used to determine which Wing will activate among those not yet activated in the turn. Each player must choose a Wing Commander. Whoever wins the die roll (see below), may decide to go with his Wing Commander OR let the other go. These two Wing Commanders must activate, one in step A.1 and the other one in step A.2.
Exception: in the first game turn, the Spanish left wing begins, followed by the Austrian right wing.
Each player secretly chooses one of its wing activation markers and places it in front of him, not seen by the opponent. Then each player rolls a d10. The player with the lowest score reveals the Wing of his choice. The player with the highest score decides whether he activates first (step A.1) or if he leaves the initiative to his opponent and must activate his Wing second (step A.2). Draw? Reroll.
If a player allows his opponent to start, he is not required to (but may) reveal his chosen activation marker.
A.1) Activation of the first Wing. The player who activates places the Active Wing marker on the turn track above or below the turn marker. Then he checks the command status of his Wing, considering that the Commanders who are out of Command cannot act in that Turn. Then he gets to the activation of the Wing (see Wing Activation, par. 3.1) which he has chosen.
If the Wing Commander is out of command, he can't activate, the marker is placed on the track and for that turn that Wing can only defend.
A.2) Activation of the second Wing. The opposing Wing Commander, that is the one who did not activate in point A.1, now activates, following the same procedure as in point A.1 above.
A.3) After both Wings have activated, the entire procedure is repeated for two more Wings, until all Wing Commanders have had a chance to activate. At this point players move on to the next phase, Reorganization and End of Turn.
B) Reorganization and End of Turn
B.1) Reorganization. The troops can try to recover good order thanks to the contribution of non-commissioned officers and lower ranked commissioned officers by performing a particular Training Die Roll (TDR). See Reorganization, par. 11.4.
B.2) Markers removal. All "Smoke" markers (8.2.1), but not the Feu de Billebaude markers (9.1), are removed. "Changing" markers are also removed (8.5.3).
B.3) Turn. The current Game Turn marker is advanced by a box on the track and players proceed with a new Game Turn, beginning with Step A) of the Wing Selection Phase.
C) Proclamation of the Victor
If the Austrian Player does not obtain an Automatic Victory (see 13.2) before the end of the last game turn, check whether one of the two players has reached his Victory Conditions. In this case, he is proclaimed the Winner.
3.1 Wing Activation
The activation of a Wing implies the execution of four game segments in sequence involving all and only the Formations of that wing. Each of the four segments is carried out by completing the activities for all the Formations of the activated Wing, one Formation at a time, in the order chosen by the owner player, before moving on to the next segment.
- a) Removal of Feu de Billebaude markers. Units of the activated Wing Formations may try to remove the Feu de Billebaude markers (see 9.1.2).
- b) Movement. Move all, some or none of the units of the activated Wing Formations. For details see par. 5.
- c) Bombardment. Bombardment by artillery units, as described in par. 8., is performed.
- d) Combat. Fire, Melee or Charge combats as described in par. 9. are conducted by one Formation at a time for the activated Wing, in the order chosen by the owning player.
4.0 Commanders
Commanders-in-Chief have an unlimited movement allowance, however, they can only move into Farmstead, Farmhouse, Chateau, Village "named" hexes. Once you have moved a CiC, he must remain stationary for the next two game turns (use spare markers to indicate this).
Formation and Wing Commanders have a movement allowance equal to 6 MP (see par. 5, Movement). Wing Commanders move at the end of the activation of their Wing, the CiC at the end of the activation of any Wing once per turn. Formation Commanders can move at the end of the movement of their Formation, and must always stay with, or adjacent to, a unit of their Formation.
4.1 Command Range
The Commander-in-Chief and Wing Commanders counters display the Command Range, expressed in number of hexes, to the command (a number enclosed in a square).
To check if a Commander is in Command, i.e. within the Command Range of his superior, draw an imaginary line from the Commander to his superior, counting the hex where the superior is, but not that of the Commander: the Commander is in Command if that line has a length, in hexagons, less than or equal to the superior Commander's Command Range.
The CiC is a superior of all the Commanders, the WC is a superior of all the FC of his Wing.
This command line cannot pass through enemy occupied hexes or into/through forbidden terrain (eg, the Po River). A Commander who cannot draw a command line due to impassable terrain or enemy units, or beyond the Command Range of his superior, is termed "Out of Command" (see also 4.5).
4.2 Commanders in Chief (CiC)
Each side has one CiC. The CiC serves to keep the Wing Commanders in command. A Wing Commander is in command if he is within Command Range of the CiC.
CiCs CANNOT help with Reorganization.
Note: CiCs are always in command.
4.3 Wing Commanders (WC)
A Wing Commander controls every Formation Commander of his own Wing that is within his Command Range. Each player checks if subordinate FC are in command, tracing a command line to their WC (or CiC, if the WC is deceased).
Each WC has a corresponding marker, which is used to determine the activation order in the game turn. The out of command WCs cannot be activated in that turn and their marker is temporarily set apart.
Each WC displays a Fire Bonus that will be used as a fire modifier of a Firing unit, when the WC is adjacent to or stacked with a unit of his Wing (see 9.1.4). The WC Fire Bonus supersedes any Bonus provided by a FC (4.4).
The WC CANNOT help with Reorganization.
4.4 Formation Commanders (FC)
The Formation Commanders (FC) are the counters with the symbol of the army and distinguished by a colored band at the top corresponding to their Formation. To adequately have combat, a Formation containing infantry units must be moved in "Lines" formed by adjacent units, side by side, according to the schemes described hereinafter (see "Line Formation", par. 5.5).
The Formation Commander:
- can help with Reorganization
- can be stacked or adjacent to a Firing unit of his Formation, giving its units a Fire bonus (see 9.1.4)
- they also have a modifier (Sergeants' Factor, blue number, abbrev. SF) which must be subtracted from the die roll of adjacent or stacked units on Training Die Rolls (see 5.11, 9.12, 10.2 and 11.4).
The Formation Commander may move at the end of his Formation's movement, but must always end his movement with or adjacent to a unit of his Formation.
4.4.1 In Command Units
A Formation Commander who is in Command extends the command to all units of his Formation, as long as these units are adjacent to or within two hexes (one intermediate) from the closest unit of the same Formation. The intermediate hex between two in command unit counters must not be occupied by an enemy unit, but may be occupied by enemy Zones of Control (Rule 7.1) or friendly units.
There is no need for combat units to be within a certain distance of their Formation Commander, although this can facilitate movement and combat.
A unit part of a Formation without a Commander or whose Commander is out of command, is Out of Command also and suffers effects on Movement (5.9 and 7.1), Combat (9.1, 9.2.1, 9.2.6, 10.2) and Reorganization (11.4).
A combat unit checks whether it is in Command prior to Movement, Combat and Reorganization.
4.5 Out-of-Command Commanders
An Out of Command Commander (beyond the command range of a superior Commander) cannot extend command to subordinate Commanders or units (these are Out of Command for all purposes).
Beyond this, his counter can act without other restrictions (movement, support, etc.).
A WC must check if it is in Command at the time of its activation. A FC checks if it is in Command together with its own units, before Movement, Combat and Reorganization of its own units.
4.6 Capture of Commanders
A Commander (CiC, WC, FC) is captured if it is the last piece that is in a hex together with enemy units, following a Melee Combat or Cavalry Charge; or it is solitary in a hex that an opposing combat unit enters. The Commander is turned back to the Staff side and is placed with a unit from his own Wing / Formation. If the captured Commander was already a Staff, the counter is given to the opponent as a trophy (worth 3 VP if FC, otherwise 5 VP).
4.6.1 Staff Standard Bearer
In case of elimination of a WC, his counter is flipped to its "Staff" side and the "Standard Bearer" piece appears in play, in the same hex as the Staff, with a movement capacity of 6 MP. A Flag Bearer within the Command Range of his Staff may command units of his Wing within a Command Range equal to that of the Staff.
Standard bearers do not offer combat bonuses, but they can aid in manoeuvre, in the case of Training Die Rolls, and in Reorganization.
In fact, they too have a TDR modifier (Sergeants' Factor, blue number) that must be subtracted from the die roll result of adjacent or stacked units during a TDR.
Historical note: the sergeants or Serre Gentes were non-commissioned officers capable of helping the troops in field manoeuvres and tidying up those who went into Disorder.
A Standard Bearer is captured in the same way as Commanders and earns the enemy 5 VPs.
4.7 Commanders' Retreat
A Commander in a hex with combat units forced to retreat (see Rule 9.2.8), for Fire, Melee or Charge Combat, must make a d10 roll:
- 0-1-2: the Commander is turned to the Staff side; if the counter is already a Staff, it is captured by the enemy side (see 4.6) and the counter is given to the opponent as a trophy.
- 3-9: the Commander is unharmed.
In any case, the Commander / Staff can retreat with the units it was stacked with or it can be relocated to the closest unit of the same Formation (if any, otherwise it is eliminated and earns VPs to the enemy side, see 4.6).
5.0 Movement
Movement points cannot be accumulated from one game turn to another. The movement of a unit or a stack of units must be completed, before switching to another unit in the same Formation.
Movement is carried out into one of the six hexagons of the unit's Zone of Control (ZOC, see 7.1), and continues until either the unit wishes to stop or the exhaustion of MPs. During movement stacking rules must always be observed.
Commanders follow their movement rules (explained in the paragraphs related to the Commanders).
All moving units are subject to the effects of terrain (see TEC) and enemy ZOCs (see 7.1 for details).
A unit moving from an Entrenchment or Redoubt hex into another hex of the same type pays 1 MP.
To cross a Stream, a unit must spend additional movement points, only when the hexside is actually traversed by a Stream.
5.1 Artillery Movement
Artillery units can move but, in this case, they cannot bombard in the same turn (they are flipped to the Fired side also to indicate that they have moved).
Artillery units move like other units, but, at the end of their movement, they must face their front towards a vertex of the hex (see 2.2.3, Orientation). This manoeuvre is not considered movement and does not involve the expenditure of MPs.
Historical note: "In column" formation combat was not seriously considered in the Age of Reason. Two great authorities of the age, Frederick the Great and Maurice of Saxony, after the War of Austrian Succession, spoke about that, concluding that the reduced frontage and its enormous depth made it singularly vulnerable to fire from the flank. Other critics pointed out that the column lacked firepower.
5.2 Engagement Zone (EZ)
Combat units are grouped into Formations according to their command, identified by the color of the top bar on the counter.
This organization operates with the activation rules and units of the same Formation always move in the same segment.
A combat unit, or a Commander, of an activated Formation, may move all or part of its movement allowance each Movement segment. To enter a hex costs a certain number of movement points (MPs) for the moving unit. The costs of each type of terrain entered, or crossed, are shown in Terrain Effects Chart or (TEC).
All Infantry units in good order (not Disordered or Routed) exert an Engagement Zone (EZ) within a range of 3 hexes (two interposed hexes). The EZ is not interrupted by the presence of terrain features or game units.
Exception: The EZ does not extend into City hexes.
The EZ has influence on movement (par. 5.3 et seq.).
Old hands note: during playtesting, we called it the "Red Zone".
5.3 Free Movement
Free Movement means that a unit or Commander can freely manoeuvre outside the three hex EZ, spending MPs as required according to the TEC. Once an infantry unit moves into an EZ, however, it must also conform with Line requirements (as described below).
Movement is free for:
- all in command Infantry units starting movement outside of a EZ, as long as they remain outside the EZ. An Infantry unit out of a EZ can enter a EZ, only if towards the nearest location that puts it in Line formation (see 5.5)
- all in command Cavalry and Artillery units
- all Commanders (see however restrictions on their movement, see Rule 4.5).
5.4 Minimum Movement
Regardless of the terrain cost (except for the impassable terrains and ZOC limitations, see 7.1), a unit capable of free movement (par. 5.3) can always move one hex (always respecting the requirements for Free Movement).
5.5 Line Formation
Historical note: The line formation was the format adopted for combat. Armies did not approach within shooting range, except in this formation.
A Formation can assume the "Line" disposition following the prescriptions of this paragraph. This disposition is necessary during the Formation's activation, when the Formation is in the proximity of the enemy infantry. Line formation is not relevant when a Formation is attacked.
A set of at least two Infantry units of the same Formation form a "Line" if:
- all the units of the "Line" are adjacent to each other, or at most within two hexes of another unit of the same Formation
- if there is an intermediate hex between two units on a Line, it must not be occupied by enemy units, nor by friendly units of other Formations (except Commanders), but it can be occupied by enemy ZOCs (par. 7.1)
- all the units are positioned in a hex crossed or adjacent (that is, one hexside superimposed) to an imaginary line that connects the center of the hex of the first and the last unit of the Line
A line can be composed only of Infantry units and can be of any length, provided that all the units of the Line satisfy the requirements listed above.
5.6 "Line" Infantry Movement
All in command Infantry units (see 4.4.1 "In Command Units") and in good order (not Disordered or Routed) of an activated Formation who are in an enemy EZ move "in line" and must deploy in this way whenever possible at the end of their movement, following the requirements of par. 5.5 "Line formation".
Such units during the Movement segment may only:
- stay still in their hex and or
- move, forming a Line or maintaining the Line of their Formation (if already in Line) or
- do a Realignment (see par. 5.8)
A Line in an EZ can move in any direction, even away from the enemy units, but at the end of the movement all units must maintain the Line Formation whenever possible.
A unit that moves "in line" must try to join a line with any of the units of its Formation. Voluntary movement of a unit that breaks the Line is not permitted.
Exception: Advance, 9.2.9.
Each Formation can create at most one line. During movement, the player declares into which positions he intends to create the Line with the units that are already inside a EZ or will enter a EZ, thus indicating the positions that the units of the Line will occupy at the end of the movement. This declaration is mandatory and cannot be changed during the Movement segment.
Note: The above rules imply that an Infantry unit can only enter an enemy EZ if the player is able to move another unit of the same Formation to flank the first unit, thus creating a Line.
5.7 Misalignment
A unit that enters a hex in a EZ that is "Cover", "Ditch" terrain or through a "Stream" hexside, before entering the hex or passing through the hexside, must do a TDR (see par. 5.11), applying any modifiers for the terrain (see TEC). Exception: No TDR is done if the unit enters the hex via a Road. If the TDR is passed, the unit moves and the Line remains orderly. On the other hand, if it fails the unit stops and its Line may present a hole (this will affect the firing capacity of the Formation at that point).
If a unit moving as part of a Line fails a TDR due to terrain, the Line could become misaligned if the other units, who had no need of a TDR, had moved first.
Note to players: It is best to see if the unit(s) have passed a TDR before moving other units that are part of the line. Since leaders capable of assisting complex movements move at the end of the activation of their Formation, the player will have to predict which units will have complex terrain in the next round and support them in advance.
5.8 Re-alignment
Realignment is intended as movement of an infantry unit moving into a hex with an enemy EZ to enter or re-enter a "Line".
To perform a Realignment an in command unit may only move toward the closest position that brings it back into the Line of its Formation. As an alternative, if already in a EZ, it can remain stationary. He can enter a ZOC (par. 7.1) and Fire (possibly with the penalty of being "Non-side by side", 9.1.3), but he cannot perform Melee combat until it is back in Line.
5.9 Out-of-Command Units Movement
A combat unit out of command or without its Formation Commander can move, in the activation of its Formation, to try to re-enter within the command range of its Formation Commander (or of its superior, if the FC is deceased); or, if already within that Range, to move away from the nearest enemy unit. An out-of-command Infantry unit in a EZ moves primarily to perform a Realignment, if its Formation is in Line. Otherwise it can only move as in the previous cases.
An out of command unit may never enter enemy ZOCs.
An out of command unit cannot initiate combat. It can perform Defensive Fire if targeted by enemy Fire.
Exception: Light Infantry (see 9.2.6).
5.10 Cavalry Refusal
In Piacenza 1746 Cavalry always refuses to remain in enemy Infantry ZOC (see 7.1).
[Errata 07/05/2022, applied:] The moment an Infantry unit moves adjacent to an enemy Cavalry unit, the latter must Retreat (see Retreat, 9.2.8) one hex without suffering Reaction Fire (7.2). The Infantry unit may continue moving if it has residual MPs. Cavalry retreats even if Melees/Charges had already been declared against it.
Note to players: something to consider if the Line's movement would frustrate your plans!
Any Commander present in the hex also retreats together with the Cavalry. Two cavalry units may retreat in different directions and the Commander may choose which one to follow.
5.11 Training Die Roll
| Army | Infantry | Grenadiers | Cavalry(*) |
|---|---|---|---|
| Austria | 7 | 8 | 8 |
| France | 7 | 8 | 7 |
| Spain | 6 | 7 | 7 |
(*): Dragoons included.
Some game operations require a Training Die Roll (TDR) to see if the combat unit is successful in the operations. To pass a TDR, it is necessary to roll a d10, with a result equal to or lower than the value indicated on the table above (see game chart for modifiers).
6.0 Stacking
Historical note: The first line was the longest and strongest one. The second line was positioned approximately 250m behind. This interval put it beyond the range of small arms of enemy fire and gave enough space to allow movement and transfer of forces between the two lines, carried out without confusion. The great difficulty was trying to move the lines forward, in any kind of order. Deployed in three rows, a single Prussian battalion (or an Austrian grenadier battalion) occupied a 162m front, while Austrians, French and Spaniards lined up in four rows of companies side by side ... A line of ten battalions covered about 1700m divided by gaps of 9m each for the battalion artillery.
An infantry unit (including dismounted dragoons) may stack with an artillery unit. Two cavalry units may stack together. No other combinations are allowed.
These limits are applied at all times of the game.
Exception: During a Retreat a unit may momentarily exceed the stacking limits, to retreat to a non-overstacked hex (see "Retreat", 9.2.8).
Commanders do not count towards stacking limits and any number of them of any type may remain in the same hex.
Historical note: For regimental or multi-battalion counters a hypothetical deep deployment with reserve battalions behind is assumed. Superior firepower is justified by the swift replacement of casualties suffered in the shooting. Larger units are also more difficult to retreat or rout.
7.0 Zone of Control (ZOC)
Units, excluding Commanders and Artillery, exert a Zone of Control (ZOC) in the six adjacent hexes, which affects the enemy units positioned in these hexes.
ZOC is not exerted by a unit in a Woods or Cover (Level 1 or 2) hex (Exception: the ZOC of a unit in an Entrenchment and/or Redoubt hex (see TEC) extends into an adjacent Entrenchment and/or Redoubt hex). The ZOC is not exerted through hexsides prohibited for movement.
7.1 ZOC Properties
A ZOC has the following properties:
- a) A unit must stop movement upon entering an enemy ZOC. It is not required to attack.
- b) Before entering an Infantry eZOC, a Cavalry unit must perform a TDR with a +2 Modifier. If the TDR is successful, it can enter the hex. Otherwise the Cavalry unit remains in place, in Disorder and stops moving.
- c) A unit freely retreats or advances into or through an eZOC and suffers no enemy reaction.
- d) An out of command unit can never enter an eZOC.
- e) Units cannot move directly from one eZOC to another eZOC during its Movement segment.
- f) Voluntarily leaving an eZOC does not cost anything in MP but causes a Reaction Fire, see 7.2 (die modifier: –3) by all enemy Infantry units exerting the ZOC. Units exiting the eZOC do not return fire.
- g) Performing a TDR in an eZOC causes a +1 die modifier.
- h) eZOCs do not block the chain of command (see 4.1).
- i) A Commander or an Artillery unit cannot voluntarily enter a hex in an eZOC, unless the hex is already occupied by a friendly combat unit.
7.2 ZOC Reaction Fire
Leaving an enemy ZOC causes Reaction Fire by any enemy unit exerting a ZOC, with a die modifier of –3, in addition to any other standard fire modifier (see the Fire Table). The unit suffers all fire effects as specified in par. 9.1 and then leaves the hex.
8.0 Bombardment
Historical Note: The heaviest cannonball could be effectively shot up to approximately 680m, including bouncing forward. The short-range shots, about 300m or less, were made using the so-called "grapeshot fire", which transformed the cannon into a gigantic shotgun, firing a tin can full of small projectiles that ripped open at the muzzle, spraying a field of fragments and splinters. Austrian howitzers were stocky artillery pieces that fired explosive shells in curved trajectory. They were used much less frequently than the conventional cannon, but had a distinctive "signature" in the projectile that swept a thin trail of smoke across the sky, spinning and sizzling, after hitting the ground, and finally exploding with a howl.
Battalion (light) artillery is incorporated in the Infantry Strength Points. The Franco-Spanish artillery in Piacenza (on the walls) was of no effect and is not represented.
8.1 Artillery Fire
In command Artillery units of an activated Formation can bombard in the dedicated segment of the Wing activation.
If they have not fired, they can do Defensive fire (one volley only) if subjected to enemy Infantry Fire, only against the enemy Infantry itself. In this case, they are flipped to the "Fired" side (it means they have already fired).
The maximum range of the artillery is three hexagons. An Artillery unit fires in the direction of its frontal hexes (cone of fire - see diagram, M means grapeshot fire). The battery, at the end of the movement, MUST always be oriented on a vertex of the hexagon.
[Diagram in the original: a cone of fire from the battery "G" over hexes 1, 2 and 3 along the Cadimeta road, with "range" marked toward Podenzano.]
To fire, a d10 is rolled and the Bombardment and Fire Modifiers Table (par. 8.2) is consulted, which may indicate die roll modifiers. Then the Bombardment Table is consulted, cross-referencing the modified die roll result and the number of Strength Points of the firing Artillery unit. The chosen column on the Bombardment Table is shifted one to the left, but not beyond the first column, if the hex contains more than a certain number of Strength Points (see "Effect on units staggered in depth", 8.5.2). At the intersection, the Bombardment Table indicates the effects of the Bombardment (par. 8.5).
It is not possible to combine the Bombardment of more than one Artillery unit.
8.1.1 Line of Sight (LoS)
When firing at a distance of two or more hexes, an Artillery unit must have an unblocked Line of Sight (LoS) to the target enemy hex.
A Line of Sight is a straight line drawn from the center of the firing hex to the center of the target hex. Any hex crossed by a LoS is an intermediate hex.
A LoS is blocked by any intermediate hex: with friendly or enemy units; with Woods or Cover terrain.
It is always possible to fire directly into, and from, a blocking hex.
A LoS can only be traced along a hexside when one of the two hexes sharing the hexside is non-blocking.
8.2 Fire Modifiers
Fire modifiers are listed in the Bombardment and Fire Modifiers Table.
Some terrains and the Smoke marker give an advantage to units occupying them during bombardment or fire. These modifiers apply to Bombardment and Infantry Fire.
Range modifiers apply only to Artillery units.
All modifiers are cumulative down to a negative minimum of –4 (including Smoke).
8.2.1 Presence of Smoke
The presence of Smoke gives a modifier to the Fire or Bombardment die roll to those units who fire inside or from inside or through the hex with the marker and in the six adjacent hexes. The modifier is –2 in the hex with the Smoke marker, –1 in each hex adjacent to the marker.
The Smoke marker is placed on the hex of the firing unit that fires in two cases:
- a) after the first artillery barrage
- b) in the event of the appearance of the marker of Feu de Billebaude ("Fire at will" or "Fire at random", see 9.1 et seq.).
The effects of two different Smoke markers add up, but never under than the minimum of –2.
All Smoke markers are removed at the end of the turn, but not the Feu de Billebaude markers.
Note: A TDR in a hex with a Smoke marker causes a +2 modifier, +1 if adjacent.
8.3 Rate of Fire
In one turn, any artillery unit can fire twice. The first volley immediately precedes the second one.
After firing the first time, a "Smoke" marker must be placed on the firing battery.
The second volley suffers the Smoke penalty. After firing the second time, the Artillery unit is flipped to its FIRED side.
8.4 Cannon Failure
It is not mandatory to do a second volley, the Artillery counter can also be turned immediately after the first volley. If you fire twice, however, you must check for a possible battery failure by rolling a d10 after the second volley. On a result of 0-1, the counter will remain on the Fired side for the rest of the day and will no longer be able to shoot.
8.5 Bombardment Effects
The results of the Bombardment Table consist of:
- E = one unit eliminated
- 1R = one unit loses a step (flip a counter) and Routs
- RR = one unit Routs and Ricochet (8.5.2)
- 1 = one unit loses a step
- D1-2-3 = one unit is Disordered and retreats 1-2-3 hexes
- D = one unit is Disordered but remains in position
- NE = no effect
For the application of results, see par. 8.5.1.
8.5.1 How to Apply Bombardment (or Fire) Effects
The owning player always chooses which unit of the stack subject to fire will suffer the effects of the shot, if the case arises.
An Artillery unit cannot suffer effects, if an infantry unit is present in the same hex. If instead it is alone in the hex, a result of Elimination, step loss or retreat, eliminates the unit. Disorder has no effect.
8.5.2 Ricochet
The player owning a unit hit by the RR result (Rout and Ricochet):
- Routs the affected unit and
- chooses a unit present in the same hex or, as a second priority, immediately behind the direction of the volley and executes a Bombardment die roll (column: battery 1-2 strength points), applying the standard modifiers. Ricochet's further results are ignored.
In case of a Grapeshot fire (one hex range), the RR result becomes a normal R (Rout) result.
8.5.3 Changing of Ranks
Historical Note: Firefighting involves a line that advances, stops, fires, and proceeds again. The gaps left by enemy fire were immediately replaced by soldiers deployed in the second or third row (ranks).
The first time in a game turn that an Infantry unit of at least 2 SP in good order (that is not "Disordered" or "Routed") suffers a D or Dr # (Disorder) result as a result of Bombardment (or Fire), roll a die (d10); if the result, modified by stacked or adjacent Leaders, is a number between 0 and 3, the unit returns to good order by changing ranks. Subtract one to the die roll result if the unit is, or it is adjacent to, a Grenadiers unit in good order. If it fails the roll, it suffers the "Disorder" result.
A unit may attempt Changing of Ranks several times per turn, but successfully performed only once per turn and for this reason the unit must be marked with a special marker ("Changing"). The marker will be removed at the end of the turn.
8.5.4 Effect on Units Staggered in Depth
Historical note: Although the biggest units may seem more crowded and therefore more easily targeted by guns, the front unit was still a battalion; the rest (eg of the regiment) were staggered behind on reserve lines. The larger the units, the easier it was to replace lines that were momentarily in crisis under enemy fire, with as many companies in good order.
If the target of the Bombardment (or Fire) is an Infantry unit greater than 2 strength points, the column of the bombarding (or firing) force shifts 1 to the left.
Example: A 5 SP battery against a regiment of more than two battalions fires as if it only had 1-2 SPs.
[Errata 07/05/2022, applied: the example reads "more than two battalions" (printed as "more than three battalions"). The rule itself is unchanged, and the player aid is to read 3+ SP rather than 2+ SP.]
9.0 Combat
There are two forms of Combat: Fire and Melee.
Infantry (or Dismounted Cavalry) units of an activated Formation may conduct Fire Combat on adjacent enemy units. Infantry and Cavalry units may under certain conditions during the Movement segment declare a Melee (par. 9.2, "Melee") against adjacent enemy units. Only Cavalry units can carry out Charges (par. 10.1 "Cavalry Charge").
Artillery units do not fight, but bombard or execute Defensive Fire if subject to fire, but always using the Bombardment Table.
Attack is never mandatory.
The activated player is called the attacker, his opponent is called the defender.
9.1 Fire Combat
Historical note: The standard front-loading, smooth-bore, flintlock musket shot a lead pellet nearly 1.9 cm in diameter. The bullet left the barrel at a speed of about 400m per second, and at close range it had enough strength to penetrate a 13cm thick pine log. As for penetration and accuracy over long distances, the Prussian muskets of the 18th century gave the following results; the target was a 15cm thick and 38cm wide pine board. In the test reported by Scharnhorst (1813, 80-3) 200 shots were fired for each different distance:
| meters | 76 | 150 - 230 | 304 | 380 | 456 |
|---|---|---|---|---|---|
| centers | 92 % | 64 % | 42 % | 26 % | 19 % |
| Penetr. | 56 % | 56 % | 23 % | 28 % | 2 % |
| Pen.cm | 8,4 | 8,4 | 3,45 | 4,2 | 0,3 |
At about 270m the hits were scarce; at 180m there were some losses, at 90m many more and at 45m (50 yards) it was a mass execution. The soldiers, then, tended to fire in a disorderly manner and from too long a distance. It was not uncommon for those who, after a battle, taking off their clothes and shaking them, felt balls of iron fall to the ground, which reached their target with low speed. For all the reasons mentioned, to correct long trajectories, shooting was taught by aiming: at the enemy's knees from 115 m / at the chest or at the abdomen from 230 m / at the head from 285 m and at the hat or over the hat itself from 270. Considering the steps in preparing to fire, it was optimistic to manage two discharges within a minute. In the battles of Parma and Guastalla in 1734 most of the French and Austrian infantry sank to their knees and ended up crawling on the battlefield and firing "in the fashion of the Croats". Much more frequently conventional fire discipline became chaotic and troops fired at will (feu de billebaude, Plackerfeuer or Bataillenfeuer).
In command Infantry (or Dismounted Cavalry) units of an activated Formation may conduct Fire Combat on adjacent enemy units (Offensive Fire). Out of command units cannot Fire during an activation, but if attacked they respond to Fire (or Melee) normally.
Firefighting consists of a double volley of reciprocal fire. "Reciprocal" means that the units of the active Formation, after moving, can fire, using up to two volleys on the same targets. After each volley, enemy units subject to fire (including any Artillery present in the hex) fire in turn (Defensive Fire), using as targets only the enemy units which Fired offensively. However, Offensive and Defensive fire of each volley is considered simultaneous, all friendly and enemy units suffer casualties after having both fired in each volley.
The second volley is conditional upon the success of a Training Die Roll for each unit that intends to fire (if it fails, place the Feu de Billebaude marker on the unit - it will not fire until the marker is removed). This TDR is performed, both for the attacker and for the defender, before the reciprocal Fire of the second volley.
In each volley, each unit of the active Formation can Fire and each enemy unit can be subjected to Fire any number of times in the same Fire phase. If a unit is subject to fire from more than one enemy unit, the latter do not combine fire, they fire one at a time; and the unit subjected to the fire will be able to exert defensive fire against only one of the enemy units that fired at it.
If a unit suffers Fire from multiple enemy units, all step losses add up, while only the highest level of Disorder is suffered (in order: D1, D2, D3, Rout).
At the beginning of each volley, the attacking player first defines all the targets of the "Fire". Then the defender indicates all the targets of his Defensive Fire. Then Fire is executed, first the attacker, then the defender.
A unit that fires cannot initiate a Melee combat in the same activation.
9.1.1 First Volley
To fire, a d10 is rolled and the Bombardment and Fire Modifiers Table (see 8.2) is consulted, which may indicate die roll modifiers. Then the Fire Table is consulted, cross-referencing the modified die roll and the number of Strength Points of the firing unit. The column chosen on the Fire table is shifted one to the left, but not beyond the first column, if the hex contains more than a certain number of Strength Points (see "Effect on units staggered in depth", 8.5.4).
At the intersection, the Fire Table indicates the Fire effects (9.1.5).
The basic fire is of three types:
- a) Normal - Strength points of the firing unit equal to 1 SP (generally corresponds to a battalion)
- b) Extended - Strength points of the firing unit equal to 2 or 3 SP (corresponds to regimental units)
- c) Intense - Strength points of the firing unit equal to 4 SP or more (corresponds to large regimental units)
9.1.2 Second Volley and Feu de Billebaude
For each unit of the active Formation, still adjacent to the enemy after the first volley, that the player wishes to fire a second time (including therefore units performing defensive fire) a TDR must be performed. If the die roll is successful (also with the possible help of a Commander) the unit fires with the same procedures as in the first volley; if the TDR fails, a Feu de Billebaude marker is placed on the unit.
Note: the Feu de Billebaude marker also implies a Smoke marker.
Design Note: the Feu de Billebaude means that the unit starts firing at will and continues until order is restored in the troops.
The inactive player in turn can trigger the second volley, in the same way as the active player (TDR, Feu de Billebaude).
Both players must announce their intention to fire a second volley before Fire is resolved.
At each subsequent activation of the Formation, before the Movement segment, the player may do a TDR to try to remove the Feu de Billebaude markers on the activated units.
Historical note: Here we refer to the loss of fire capability of a unit without the direction of the Formation Commander. Attributing the command bonus to the fire ability, but especially to the fire discipline, allows players to move Commanders to intensify fire in sectors that prove critical during battle.
As long as a unit carries a Feu de Billebaude marker, it cannot move, Fire or Melee. It defends normally if attacked in Melee.
9.1.3 Modifiers for "Non-side by Side" Units
During Offensive, Defensive or Reaction Fire, the Line formation is not considered. [Errata 07/05/2022, applied (reworded):] A firing unit fires at full strength if it is adjacent to at least one unit of his Formation which is also adjacent to the enemy unit being fired at. Otherwise the unit still suffers the die modifier of –2 (See also Examples of Play).
9.1.4 Formation or Wing Commander Fire Bonus
The Formation Commander adjacent to or stacked with a firing unit of his Formation (or, but not also, the WC), adds his "Fire Bonus" to the strength of the firing unit (so, for example, a 1 SP unit, with a Commander with a Fire Bonus of 2, becomes a 3 and uses the Extended Fire column). The WC Fire Bonus supersedes that of the FC, if both are applicable.
9.1.5 Fire Effects
The results of the Fire Table consist of:
- E = one unit eliminated
- R = one unit Routed
- 1 = one unit loses a step (flip the counter)
- 1R = one unit loses a step (flip the counter) and Routs
- D1-2-3 = a unit is Disordered and retreats 1-2-3 hexes
- D = a unit is Disordered, but remains in position
- NE = no effect
For the application of results, see par. 8.5.1.
9.1.6 Changing of Ranks
As for Artillery Bombardment (see par. 8.5.3).
9.1.7 Effect on Units Staggered in-Depth
As for Artillery Bombardment (see par. 8.5.4).
9.1.8 Flanked Fire
A unit receives the benefit of the Flank (+2) if at least one other unit of the same Formation is adjacent to the unit receiving Fire, but not adjacent to the firing unit.
9.2 Melee Combat
Historical note: Infantry's use of cold steel bayonets (perhaps advancing in order) was not unknown in the Age of Reason, but documented cases are much rarer than might be assumed and are associated with specific circumstances. Prince de Ligne, drawing on everything he had seen and heard during his many years of service in the Austrian army, said it was "almost impossible to attack an enemy force, in the open, without firing". When, then, did the so-called bayonet victories take place? Many of them were skirmishes between houses or entrenchments; in those types of terrain, no doubt, hand-to-hand actions took place.
9.2.1 Generalities
Melee is a form of combat that can be performed by an Infantry or Cavalry unit against an adjacent enemy unit (for Cavalry Melee see par. 10.2). Infantry cannot melee combat against Cavalry.
During the movement segment, by expending the required number of movement points (MP), an in command unit of an activated Formation may declare a Melee (Melee) against an adjacent enemy unit.
Out of command units cannot Melee during an activation; if attacked they respond to Melee (or Fire) normally.
The MP cost to declare a Melee is equal to the number of MPs needed to enter the enemy hex (eZOCs are not considered in this count, impassable hexsides impede Melee combat, "Free movement" (5.3) is allowed). Place a "Melee" marker on the unit that intends to attack, pointing in the direction of the attacked unit. If the unit does not have enough MPs, Melee is not possible.
Note: the placement of the "Melee" marker occurs during the Movement segment of the Wing Activation, while Melee is resolved during the Combat segment.
An enemy hex may be subject to only one Infantry or one Cavalry Melee Combat per Wing activation. Each Combat (Melee or Charge) always involves only one counter on each side and the effects of the combat only apply to combatting units.
Exception: a unit stacked with a unit that retreats or is eliminated as a result of a Melee or Charge must retreat from the hex. An Artillery unit is eliminated.
9.2.2 Command Requirements
Melee combat by an Infantry unit can only be initiated if the attacking unit moves on direct command, ie its Formation Commander's counter is stacked or adjacent at the start of movement. There is no such requirement for Cavalry units.
9.2.3 Infantry Melee
An Infantry unit of an activated Formation can declare a Melee against an adjacent enemy Infantry and/or Artillery unit, only if the latter occupies a hex with Cover, Level 1 or 2, or City of Piacenza. Exception: an Artillery unit alone in a hex can always be attacked in Melee, regardless of the type of terrain occupied.
Infantry cannot conduct Melee Combat against Cavalry.
An Infantry unit that has fired cannot Melee in the same turn.
An attacked Infantry unit in Melee fires before resolving the melee.
Melee Combat against an Infantry unit (or an Infantry unit with Artillery) takes place as follows:
- first the defender executes a single volley on the Fire Table for each defending unit (the attacker cannot fire)
- then the attacker, if it is still in the hex, combats using the Melee Table (see par. 9.2.4). Artillery SPs are not computed in Melee resolution. IF the Infantry unit is forced to retreat, the Artillery unit is eliminated.
An Artillery unit alone in a hex that is attacked in Melee by the Infantry is eliminated, after the Defensive Fire, if the attacking unit is still in place.
9.2.4 Melee Resolution
To resolve Melee Combat, the ratio between the attacker's strength and the defender's strength is calculated and rounded down towards the closest odds ratio in the first row of the Melee Table. The base column can be shifted to the right for several reasons (see the Melee Table). Roll a d10 and modify the die result for Terrain effects (see the Terrain Effects Table). The modified die roll is cross-referenced with the column of the correct odds ratio so to obtain the Melee result.
9.2.5 Attack on Redoubts and Field Fortifications
Infantry Melee versus units in Cover Level 2 units has a –2 die modifier for attackers.
9.2.6 Light Infantry
All Light Infantry (indicated with an "L" on the counter):
- a) always have a die modifier of –1 in all TDR
- b) ignore Disorder results on the Melee Table (but not Retreat), either when attacking or defending
- c) if out of command they can Fire, but not Melee attack
9.2.7 Effects of Melee Combat
The results of the Melee Table consist of:
- Ax: result for the attacker
- Dx: result for the defender
- E = one unit eliminated
- 1 = one unit loses one step, becomes Disordered and retreats one hex
- R = one unit is Disordered and retreats one hex
An already Disordered Infantry unit may Rout (see 11.1, e).
Historical note: Contrary to the panic triggered by "breaking ranks" due to lethal fire, after a melee retreats were not over long distances. Exhaustion prevailed.
9.2.8 Retreat
After a Melee or Charge, if the unit has to retreat, it will do so by moving away from the attacking enemy unit by the required number of hexes, respecting the following priorities:
- into an adjacent hex not in violation of Stacking limits and not in an eZOC
- into an adjacent hex in violation of the Stacking limits and not in eZOC
- into an adjacent hex in eZOC
- towards the friendly edge of the map (west for Franco-Spaniards, east for Austrians)
Retreat after combat and for a Cavalry Refusal (5.10) does not cause Reaction Fire.
When overlapping friendly units, the retreating unit passes over and crosses any friendly units without consequence for both units (translocation), until, when possible, it finds a free hex in which to retreat without incurring a stack penalty.
It is not possible to retreat over enemy units or into or through forbidden terrain such as the Po River or the walls of Piacenza or outside the map. In these cases, if there are no alternatives, the unit is eliminated (it surrenders).
Two units in the same hex that are forced to retreat may do so in different directions.
9.2.9 Losses and Advance
The first step loss is assigned by turning the unit on its back, if the unit has two steps. If a unit is already turned on its back, or it is single-step, and suffers a loss, the unit is removed from the game.
At the end of the Melee combat, the winning attacking unit must enter the attacked hex. The defender cannot advance.
10.0 Cavalry
Cavalry can fight on horseback (Melee or Charge) or dismounted, that is on foot (Dragoons only can do this). Dismounted Cavalry fights under the Infantry rules, either by Fire or Melee.
Historical note: The basic unit of Cavalry was relatively small, namely the squadron of 130-160 between officers and cavalrymen. Cavalry usually lined up in two or three rows, as opposed to the three or four lines of Infantry, and a cavalry trooper usually occupied at least 90cm, compared to 60cm for a foot soldier. In addition, the infantrymen had the ability to inflict wounds on horses, before suffering any loss, and in close combat the infantryman had a weapon (musket and bayonet) about 1.80m long, which aimed at a cavalryman, whose sword measured only just over 90 cm.
Historical note: Melee between Infantry vs Cavalry was usually a long affair that ended when one of the two sides went into disorder and gave way. Cavalry was favored when striking defenseless Infantry in the flanks or when Infantry units were small and messy (even if they managed to form a rough square). There was no training to make squares of battalions or companies. In any case, cavalry in charge had a terrible psychological impact and it took well-trained troops to withstand the shock of the attack.
Historical note: Cavalry charges were not such frequent occurrences. First, training had not yet reached the near perfection of the Napoleonic imperial period; in the armies there was still a lot of bravado and improvisation, especially among light cavalry, more suitable for reconnaissance missions. Moreover, cavalry, when possible, avoided attacking infantry units because, beyond the squares, their bayonets had the same function as the pikes of the Tercios, directed against the chests of the horses. The horses of the time were not provided by the state but were personally owned by their riders who regarded them as treasured possessions. In clashes between cavalry units, it was customary to avoid injuring horses if possible.
10.1 Cavalry Combat
In Piacenza 1746 linear cavalry formations and massive charges are not possible. Cavalry can move as a stack or as a single unit. It can fight against enemy units, performing Melee against Cavalry, Infantry and/or Artillery units or Charge against enemy Cavalry (for details, see 10.2 and 10.3).
Cavalry combat always resolves as a Melee between the attacking Cavalry and only one of the enemy units in the defending hex.
Cavalry does not need an adjacent FC to Melee or Charge.
The attacking Cavalry (Melee or Charge) immediately becomes Disordered after the attack. An already Disordered Cavalry unit may Rout (see 11.1, e). Cavalry does not pursue.
10.2 Cavalry Melee
Cavalry Melee follows the prescriptions at par. 7.1 and 9.2.1, it is resolved between adjacent hexes and with the same procedure (see par. 9.2.4 and following).
A Cavalry unit of an activated Formation may declare a Melee against an adjacent enemy unit, only if this occupies a Clear or Ditch terrain hex.
Artillery units attacked by Cavalry are wiped out and eliminated without recourse to the table, unless they are together with Infantry. In this case, the Infantry unit defends the hex alone and the Artillery follows the fate of Infantry (if forced to retreat, the Artillery is eliminated).
If the defending unit is an Infantry unit out of command, Disordered or Routed, it does not defend from Cavalry. In this case the Infantry retreats two hexes (as per 9.2.8) in the opposite direction to the direction of attack, where possible, and in any case away from the attacking Cavalry. The retreat is performed immediately upon the placing of the Melee marker.
Otherwise the defending Infantry unit must perform a TDR:
- If the TDR is successful the Infantry unit follows this procedure:
- a) Performs a Defensive volley before the impact, with the modifiers for Defensive Fire (see paragraph 9.1.3). Fire results apply: any result other than "No Effect" and "Disorder" aborts the procedure. Then ...
- b) the Melee is executed.
- If the TDR is unsuccessful, the Cavalry Melee takes place with one column advantage for the Attacker.
10.3 Cavalry Charge
Historical note: A cavalry charge began at a walking pace, then breaking into a trot and accelerating to the speed of about 16 km/h, finally passing to the gallop (40 km/h). Gallop could be held for about 130m, after which the horses would throw themselves against the enemy horses. If two opposing squadrons faced each other, the impetus was such that the two units passed each other, each emerging from the back of the enemy formation. The charge of Cavalry against Cavalry was more reminiscent of an aerial combat of the Great War.
Historical note: Orientation was soon lost, friends and opponents suddenly appeared to the right or left, not to mention that horses are curious and bizarre animals; capable of not flinching from the bang of a cannon, but able to go wild for a shaken handkerchief (I had a horse that went crazy if someone opened an umbrella). Cavalry was trained to strike from the front. These were fatal wounds but then it was necessary to stop and draw the weapon. During that time Hussars or Dragoons had slashed 3 or 4 times more.
Charge always takes place only between opposing Cavalry units.
A Cavalry unit of an activated Formation may declare a Charge against an enemy Cavalry unit, only if:
- the hex occupied by the enemy cavalry unit and ...
- the one adjacent to it from which the Charge is launched
are Clear terrain (see Examples of Play).
Cavalry Charge (and Counter-Charge) is resolved as a Melee combat, following the prescriptions at par. 7.1 and 9.2.1 and using the same procedure (see par. 9.2.4 and following), though providing a +1 Column Right advantage on the Melee Table.
It is not possible to declare a Charge against a unit that is beyond a Stream hexside. A unit cannot declare a Charge against an enemy Cavalry unit that is adjacent to itself at the start of Movement.
10.3.1 Countercharge
If the charged Cavalry is still in the hex after combat is resolved and losses taken, it must immediately countercharge the initial attacking unit, before the charging cavalry retreats. Countercharging is performed exactly like a charge, with parts (attacker and defender) reversed. After the Countercharge results are applied, the initially attacked cavalry retreats (or Routs, or is eliminated). Cavalry that suffers a double Retreat result in this process always retreats once.
10.4 Flanked Melee and Charge
A Cavalry unit that conducts Melee or Charge receives the Flank benefit (+1 Column to the Right), in addition to other column modifiers, if at least one other Cavalry of the same Formation is adjacent to the attacked unit, but not adjacent to the attacking unit. This also applies to the Counter-Charge.
10.5 Dragoons
Historical note: Cavalry fire was a myth. At a distance of more than 40m, a pistol shot and a well-thrown stone have almost the same effect. In a Melee an unloaded pistol is useless, it does not serve to parry the blows, the only thing that could be done was to throw it, because in the time it took to put it in its holster and extract the sword, you would have received a blow that would have detached an ear!
Dragoons are Cavalry units that fire only on foot. They are marked with Strength values in yellow. Each Dragoon unit corresponds to a single infantry counter or two counters if on horseback. During setup, the owning player decides whether to deploy the Dragoons on foot or on horseback. During the game, at the beginning of the Movement step, every two mounted SPs stacked in the same hex can be replaced by a dismounted Infantry SP, or vice versa (so for example 4 Cavalry SPs on two counters can form 2 Infantry SPs, in a single counter).
Mounted Dragoons can move freely, but cannot end movement in a Engagement Zone unless stacked; at the beginning of the next movement step, they must dismount and must enter the "Line formation" as soon as possible.
In Piacenza 1746, mounted Dragoons cannot enter Infantry eZOCs, and cannot perform Charges unless they are charged by enemy Cavalry and are mounted. In this case the Charge procedure is used.
Dragoons are considered Cavalry for the purposes of TDR.
11.0 Disorder and Rout
A unit that suffers a Disorder result from combat (Fire or Melee) receives a Disorder marker.
11.1 Disordered Units
Being Disordered affects the way an Infantry or Cavalry unit fights. Artillery is immune to Disorder. A unit in Disorder:
- a) cannot Melee or Charge
- b) if an Infantry unit, it cannot remain in Line and remains stationary until it is Reorganized (par. 11.4); further, it doesn't project a EZ (5.2). Cavalry can move normally
- c) every type of unit, if attacked by Cavalry, retreats (as per 9.2.8) two hexes in the direction opposite to the direction of attack, when possible, and in any case away from the attacking Cavalry. They do not defensive fire before retreat. The retreat is performed immediately upon placing the Melee/Charge marker.
- d) If Infantry in command, it can Fire offensively and defensively. It performs a single volley and then goes into Feu de Billebaude.
- e) if they suffer a new Disorder result, they take a Training Die Roll with a +2 die modifier; if they fail, they Rout (otherwise they remain Disordered with no other effects).
- f) cannot do Changing of the Ranks (8.5.3)
Disorder markers are removed at the end of the turn in the Reorder phase.
11.2 Routed Units (Panic)
A unit that suffers a Rout result or fails a TDR after a second Disorder result (see point "e)" above) Routs.
A Routed unit cannot engage in combat, not even fire combat. It no longer projects a ZOC. If attacked or subjected to Fire, they retreat three hexes (see 11.3). Any movement other than that imposed by the state of Rout is prohibited.
[Errata 07/05/2022, added:] Any Feu de Billebaude marker on a unit which routs is removed.
11.3 Drift Caused by Panic
A routed unit must immediately retreat to the friendly edge of the map (west for Franco-Spanish, east for Austrians) following the least expensive route in movement points and following the rules of Retreat after combat.
When a unit routs after a combat or a bombardment it immediately retreats three hexes.
With each further activation, the routed unit moves another three hexes, regardless of the type of terrain it crosses (prohibited terrain is excluded).
Routed units may cross friendly troops.
If a Routed unit is forced to leave the map or encounters only impassable hexes during its rout, it is eliminated.
11.4 Reorganization
In the Reorganization Phase, Routed or Disordered units can try to recover to good order, thanks to the contribution of non-commissioned and lower ranking commissioned officers by performing a TDR.
A d10 is rolled which is modified as follows, in addition to the standard TDR modifiers:
- Out of command unit: +2
- Unit in enemy ZOC: +2 (overrides standard +1)
- Routed units: +2
If the TDR succeeds, the unit recovers a level of disorder, that is: from "Routed" it goes to "Disordered"; from "Disordered" to Good Order.
If the TDR fails, no effect.
If the result of the d10 before the modifications is "9", the TDR always fails.
12.0 End of Game Turn
At the end of the Reorganization attempts the Game Turn marker is moved forward one space on the track and all the Smoke markers are removed, but not the Feu de Billebaude, which remain on the map.
13.0 Victory
Historical note: "The city was in short supply of all kinds of food. Only cheese was superabundant, because there was a great deal of trade in it, and in those days, for fear of looting, they did not dare to display it. The Austrians had also ruptured the canals that brought water into the city, which was used to turn the grinding stones to mill flour. The people were beginning to feel hungry. The future was only going to get worse. On 13th June, General Maillebois arrived in Piacenza. He led twelve thousand French to aid of the Spaniards. On the 15th, a Council of War was held in the Citadel between Maillebois and De Gages. Also present were the Infante, Don Philip, and the Duke of Modena. It was decided to quickly come to grips with the enemy." (F. Giarelli, History of Piacenza from its origins to the present day, Vol. II, Piacenza, V. Porta Librajo-Editore 1889, page 13).
The Franco-Spanish player wins if he manages to drive away the Austrians and prevent their siege of the city of Piacenza, which would have been ruinous for the city.
To do this, the Franco-Spanish player has 4 geographical objectives (to be chosen and noted separately on these eight geographical locations: Castellaro, Turro, Gariga, Le Mose, Mucinasso, Montale, San Bonico, San Lazzaro, marked on the map with an angel symbol). The Austrian player does not know them, but at the end of the 12 game turns he will check if the objectives chosen by the opponent are still in his possession.
At the end of the game, check how many strategic objectives the Franco-Spanish player occupies:
- 1: Victory goes to the Austrian player
- 2: Conditional Draw (see below)
- 3 or +: Victory goes to the Franco-Spanish player
13.1 Conditional Draw
In the case of a "Conditional Draw", at the end of the game troop losses by each side will be counted, namely:
- Flags captured (5 VPs)
- Captured Enemy Commander Staff (3 VPs if FC, 5 VPs if WC)
- Routed units still on the map (1 VP)
- Eliminated units (1 VP)
If the count is even, the game is a draw. Otherwise whoever has obtained the most VPs is declared the Winner.
13.2 Automatic Austrian Victory
The game ends and the Austrian player wins an Automatic Victory at the end of the 3.00 pm game turn if the Franco-Spanish player does not occupy at least one of the geographic objectives chosen at the beginning of the game (the Franco-Spanish player must reveal that the occupied one is one of his geographic objectives).
Learning Scenarios
Scenario 1: The Battle of San Lazzaro
This is an introductory scenario that reproduces the decisive events that took place on the left wing of the French-Spanish army.
Duration: 5 Game Turns (from 6-7 a.m. Game Turn, inclusive).
Forces:
- Franco-Spanish: Left wing of De Gages (LW), all units.
- Austrians:
- Right wing of Pallavicini (RW), all units.
- Center of Browne (CE), units: Comm. Kheul; Daun Infantry (3 - 3); Haganbach Infantry (3 - 3); 1 Artillery Unit.
Setup: As in the campaign game.
Playable Area: Only the portion of the map north of the Scenario 1 hexrow (included, see Setup chart).
Victory conditions:
- the Franco-Spanish player wins the scenario if one of his units occupies San Lazzaro or Le Mose at the end of the Scenario
- otherwise the Austrian player is the winner
Special Rules: All Formation Leaders are always considered to be in Command. It is not necessary to deploy the CiC and the WCs (although it is possible to do it to give color to the battle).
Scenario 2: Assault on the Centre
Duration: 5 Game Turns (from 10 a.m. included).
Forces:
- Franco-Spanish:
- Center of De Croix (CE):
- Within 2 hexs of Galliana, West of Refudo Stream (Galliana is located 8 hexs SE of Piacenza):
- Comm. Petit Bois
- Saboya, Africa, Asturias Inf., 3 X (2 – 3)
- Giacomone, Besler, Flandes Inf., 3 X (1 – 3)
- Within 3 hexs of Mte.Cucco (which is 4 hexs W of Galliana):
- Comm. De Mailly
- Perigord, Foix Inf., 2 X (2 – 3)
- Vol. Gantes Inf. (1 – 3)
- Vieufville Cav. (2 – 5), Descras Cav. (1 – 5)
- Within 2 hexs of Bossoli (which is 3 hexs S of Galliana), West of the Refudo Stream:
- Comm. Senecterre
- La Reine, De Vigier, Provence Inf., 3 X (2 – 3)
- Tournaisis, Agenois Inf., 2 X (1 – 3)
- Gd.Lorraines Inf. (2 – 4)
- Within 2 hexs of Galliana, West of Refudo Stream (Galliana is located 8 hexs SE of Piacenza):
- Center of De Croix (CE):
- Austrians:
- Center of Browne (CE), only the following units:
- Within 2 hexs of Torricelle, East of Refudo Stream:
- Comm. Piccolomini
- Andlau Inf. (3 – 3), Forgtasch Inf. (4 – 3)
- Within 2 hexs of Torricelle, East of Refudo Stream:
- Center of Browne (CE), only the following units:
Setup: See "Forces". The Austrian player set up first.
Playable area: Only the portion of the map between Scenario 2 hexrows (hexrows included, see Setup chart).
Victory conditions:
- the Franco-Spanish player wins if one of his units occupies San Bonico or Castellaro at the end of the Scenario
- otherwise the Austrian player is the winner
Scenario 3: Battle of Gossolengo
Duration: 3 Game Turns (from 12 a.m. included).
[Errata 07/05/2022, applied: the two cavalry formations below are listed with the wing they belong to. The printed scenario listed Lobkowitz Cav. under Franco-Spanish and Rochefocauld Cav. under Austrian forces.]
Forces:
- Franco-Spanish:
- Right Wing of Mirepoix (RW):
- North of Gossolengo, at least 3 hexs distance:
- Comm. Larnage
- Guyenne, Auxerrois, Montmorin, Vivarais, Gatinais Inf., 5 X (2 – 3)
- Rochefocauld Cav., 2 X (2 – 5) [errata: these cavalry units are considered part of the Larnage formation]
- North of Gossolengo, at least 3 hexs distance:
- Right Wing of Mirepoix (RW):
- Austrians:
- Left Wing of Nadasdy (LW):
- South of Gossolengo, at least 2 hexs distance:
- Comm. Lucchesi, with only the following units:
- Tripps Cav., 2 X (2 – 6)
- Baranyai Cav., 2 X (2 – 6)
- Bartholotti Cav., (2 – 6)
- Lobkowitz Cav., 2 X (2 – 5) [errata: these cavalry units are with the Austrian commander, Nadasdy]
- Comm. Lucchesi, with only the following units:
- South of Gossolengo, at least 2 hexs distance:
- Left Wing of Nadasdy (LW):
Setup: See "Forces". The Austrian player set up first.
Playable area: Only the portion of the map within 5 hexs of Gossolengo (which is South East of the map), East of the River Trebbia.
Victory conditions: The player who occupies, or has been the last to do so, Gossolengo at end of the Scenario is the winner.
Special Rules: All Formation Leaders are always considered to be in Command.
Examples of Play
The diagrams of the original examples (hex maps with units A to Z) are not reproduced here.
Wing Selection
The French player wants to activate his Center with De Croix, while the Austrian player wants to activate his Reserve of Bottas. Both players secretly select their Wing markers and place them in front of themselves, unseen to the opponent. Both players roll a die. The French rolls a 5, while the Austrian a 7. So now Bottas may decide to go first as a Wing Commander or let the De Croix go. He decides his opponent go. So De Croix activates all his wing and conducts the four segments of the wing activation. When De Croix has finished, Bottas must activate with his wing (step A.2 of the Sequence of Play).
Line Movement
The French formation of Comm. Larnage intends to move towards the formation of Comm. Lucchesi, entering the Zone of Engagement of the latter. The French player then declares that he will form a Line from Vallera, five hexes to the south. The base Morale value of the French Infantry units is 7, see Training Die Roll table.
Unit A then moves one hex, to Vallera. Unit B, at Quartazzola, before entering the hex south of Vallera, which contains a "Ditch", must do a TDR (see Terrain Table): roll a 9, -1 due to the presence of the adjacent Formation Command, totals 8, failed. Unit B cannot move. Similarly, units C and D must perform a TDR, both enjoying -1 for the presence of the Commander. They roll a 5 and an 8 respectively, both pass. Unit E rolls an 8 and does not move. At the end of the movement segment, the French Line is broken.
Cavalry Engagement
The Austrian cavalry unit in A moves freely in hex B. Before entering hex C, which is covered by an enemy Infantry unit's ZOC, it must roll a TDR. He rolls a 5, +2 because he is attempting to enter an enemy Infantry ZOC (rule 7.1, second paragraph), equals 7. Since his base Morale is 8, he can enter the hex.
In a subsequent activation, the Spanish player would like to advance his formation. Note that the Spanish infantry units in X, Y and Z, being in the Engagement Zone of the Austrian units E and F, can only move in Line (rule 5.6). For example, a permitted movement is the one which brings the X, Y and Z units along the dotted line shown in the figure. Also note that if the units behind do not move, the unit in X cannot move (it can Fire on the Cavalry unit).
The Spanish player may freely move the infantry units behind the X, Y and Z units. However, if one of these units moves into the Enemy Zone of Engagement, it must line up along the line of its formation (see Rule 5.6 and 5.8).
Fire
First Volley
Upon activation of the Com. Douchez's formation, the Spanish player declares Fire: units A and B fire at unit X, C against Y, D against Z.
Now the Austrian player declares defensive fire: X against B (he must choose between A and B units), Y against C, Z against D.
Then the Spanish player fires the first volley, rolling on the Fire Table:
- A, B: 3 SP + 1 SP for the adjacent Formation Leader = 4 SP, Intense Fire, which becomes Extended, because unit X has 2 or more SPs; -2 to the die roll for the Terrain (Cover Level 1)
- C: 2 SP + 1 SP for the adjacent Formation Leader = 3 SP, Extended Fire, which becomes Normal, because unit Y has 2 or more SPs; -2 to the die roll for the Terrain (Cover Level 1)
- D: 2 SP, Extended Fire, which becomes Normal, because unit Z has 2 or more SPs; -3 to the die for the Terrain (Cover Level 2); an additional -2 because the unit fires without a unit of the same formation on the flank (rule 9.1.3). Total -4, because this is the maximum negative modifier.
[Errata 07/05/2022, applied: for D, the sentence reads "unit Z" (printed as "unit Y").]
Now the Austrian player executes the defensive fire.
- X, Y: 3 SP + 1 SP for the adjacent Formation Leader = 4 SP, Intense Fire, which becomes Extended, because unit B has 2 or more SPs and so does unit C.
- Z: 2 SP + 2 SP for the adjacent Formation Leader = 4 SP, Intense Fire, which becomes Extended, because unit D has 2 or more SPs; -2 to the die roll, because the unit fires without a unit of the same formation on the flank (rule 9.1.3).
[Errata 07/05/2022, applied: when Z fires, it fires at D (printed as B).]
Second Volley
Assuming that all units after the first volley have remained in position, the Spanish player decides for a second burst for units A, B and C (he is not obliged to have all units fired a second time).
Now the Austrian player decides to react with a second burst with only unit X.
At this point all the TDRs are rolled for units A, B, C and X. The units that succeed can carry out the second volley, whoever fails goes to "Feu de Billebaude" (rule 9.1.2).
Abbreviated Sequence of Play
A) Wing Selection Phase
Each player must choose a Wing Commander. Whoever wins the die roll (see below), may decide to go with his Wing Commander OR let the other go. These two Wing Commanders must activate, one in step A.1 and the other one in step A.2. Exception: in the first game turn, the Spanish left wing begins, followed by the Austrian right wing.
- A.1) Activation of the first Wing. Activate one of the two Wing Commanders (see Wing Activation, 3.1 or below).
- A.2) Activation of the second Wing. Same as point A.1 above.
- A.3) Repeat from A.1 with other two Wing Commanders until all WC have been activated.
B) Reorganization and End of Turn
- B.1) Reorganization. Both players may try to restore units to Good Order. See Reorganization, par. 11.4.
- B.2) Markers removal. All "Smoke" and "Changing" markers are removed. Feu de Billebaude markers are not removed.
- B.3) Turn. Advance the current game turn and start a new game turn.
C) Proclamation of the Victor. If the Austrian Player does not obtain an Automatic Victory (see 13.2) before the end of the last game turn, check whether one of the two players has reached his Victory Conditions. In this case, he is proclaimed the Winner.
Wing Activation
- a) Removal of Feu de Billebaude markers. Units of the activated Wing Formations may try to remove the Feu de Billebaude markers (see 9.1.2).
- b) Movement. Move all, some or none of the units of the activated Wing Formations. For details see par. 5.
- c) Bombardment. Bombardment by artillery units, as described in par. 8., is performed.
- d) Combat. Fire, Melee or Charge combats as described in par. 9. are conducted by one Formation at a time for the activated Wing, in the order chosen by the owning player.
Errata and Q&A (07/05/2022)
Published by the publisher (Europa Simulazioni) as a separate errata and Q&A document ("Errata as of 07/05/2022"). The rule corrections above are applied in place in their sections; the Q&A is reproduced here.
Q1) If a Formation/Wing Commander is adjacent to more than one (In command) unit during Fire, can the commander apply his Fire Bonus to each firing unit or only one?
- To each one.
Q2) There appear to be several leaders armies that have no units assigned to them and have various superior WoCs. (Bandera, Drapeau, Fahne, for instance) How are they used?
- These are not leaders, but standard-bearers. They appear when a Wing Commander is eliminated. Bandera, Drapeau, Fahne are the same in different languages ... See rule 4.6.1 for details.
Q3) On the set-up chart, D'Argouger appears to have space for two Spanish units in his set-up area but no actual units appear to be available to go there. What happens?
- There is actually one only Spanish Cavalry with him (Gds. De Corps): place this unit in either box with the Spanish flag. The other cavalry unit was present on the battle, but it is not setup, as it is only a squadron. Someone would want to invent rules for this unit only, but we did not ...
Q4) Is there a convenient way of telling the difference between Cover 1 Fortifications and Cover 2? (an example of each might be helpful). They look very similar on the map.
- Apart from chateaux and towns, which should be clear, the only Cover 2 fortifications on the map are those facing one another in the upper east part of the map, namely near Moulin degli Horti, Moulin de la Motta and the hex north of the location Santo Spirito (all are close to one another).
Q5) A unit suffering a Dr1 result from Fire, per 8.5.3, rolls for Changing Ranks and succeeds, so it does not Disorder. Must it retreat anyway?
- Yes. Changing Ranks avoids Disorder, not Retreat.
Q6) If cavalry successfully melees enemy infantry, routs it, and then advances into the vacated hex, if the hex advanced into is in the ZOC of an(other) enemy infantry unit, must that cavalry perform a TDR to advance? If so, does it still do so at +2?
- No, the TDR is only for Cavalry entering Infantry ZOC during Movement. ZOC are ignored during advances or retreat (another way to say 7.1.c).
Q7) An enemy formation activates first in the round and in its fire phase, a friendly Infantry unit is routed (by fire), so it must immediately retreat three hexes. Correct? Now, the friendly formation activates. The just-routed friendly formation must then retreat an additional three hexes in its movement phase before it gets to try and Rally (in the Reorg Phase). Is this correct?
- Yes, it is. You should consider to renounce to activate the friendly formation, if you haven't already selected it, if you want to avoid this.
Q8) If a Disorganized unit or a unit with a Feu de Billebaude marker in a Line starts in an enemy ZOC, may be pulled out of that Line to try and rally, leaving the Line otherwise intact?
- No. Such units cannot move, their good order comrades can ...
Q9) Can an entire Line pull out of an enemy ZOC simultaneously?
- Yes! Suffering Reaction Fire (7.2) of course. Note that units in Cover hexes have no ZOC.