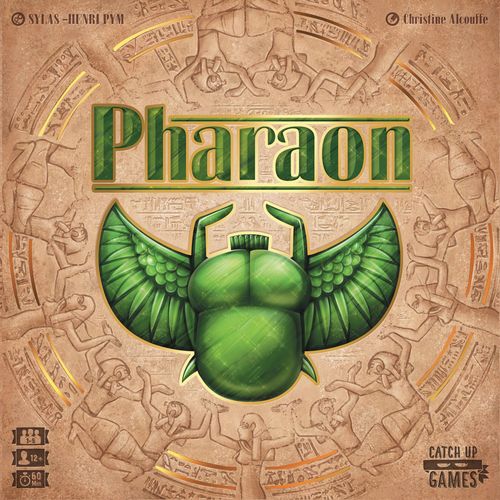
Pharaon
Pharaon Rulebook
Table of Contents
Table of Contents
- Components
- Setup
- 1 Tablet of the Gods game board
- 1 Pyramid of Time board
- 30 Jar tiles
- 1 Direction token
- 1 First Player token and 1 Pharaoh token
- 5 large wooden disks, 5 wooden cubes and 30 little wooden disks
- 120 resource tokens
- 1 bag of Offerings and 40 Offering tokens
- 26 Noble cards
- 30 Artisan cards
- 5 Traitor tiles
- Before the Start of the Game
- First Play Mode
- Game Objective
- Gameflow
- A. Carrying out an Area's Action
- Resources
- Actions
- B. Pass
- End of the Round and Next Round's Setup
- Pharaoh's Succession
- Gods' Objectives
- Final Scoring
- Two Player Rules
- Solo Mode: Traitor's Conspiracy
- Noble Cards in Details
- Game Summary
- Explanation of Symbols
- Acknowledgments
Components
- 1 central Tablet of the Gods game board (made of 5 Areas + 1 Wheel of Actions)
- 1 Pyramid of Time board
- 30 Jar tiles
- 1 First Player token
- 1 Pharaoh token
- 1 Direction token
- 120 resource tokens
- 1 bag of Offerings
- 40 Offering tokens
- 30 Artisan cards
- 26 Noble cards
- 40 wooden pieces (5 large disks, 5 cubes, 30 small disks)
- 5 long Traitor tiles
- 1 scorepad
Note: the following setup instructions are intended for games with 3 to 5 players. The illustrations included here display a setup for 3 players. The adjustments required for 2 players or for the solo mode are detailed on page 8.
Setup
1 Tablet of the Gods game board
Randomly assemble the five big Areas of the Tablet of the Gods into a circle, at the center of the table. Insert the Wheel of Actions at the center of this circle, using it to attach the five Areas together. It must be possible to rotate the upper part of the wheel without moving the rest of the board.
1 Pyramid of Time board
Place it next to the Tablet of the Gods.
30 Jar tiles
Shuffle all tiles and place them in a pile close to the pyramid, face down. Reveal as many Jars as there are players in the game.
1 Direction token
Place this token randomly on one of its two sides, within everyone's sight. This token indicates the direction the Wheel of Actions will rotate during this game.
1 First Player token and 1 Pharaoh token
Randomly determine which player will go first. This player takes the First Player token in front of them. The Pharaoh token is placed near the Pyramid of Time.
5 large wooden disks, 5 wooden cubes and 30 little wooden disks
Each player chooses a color and takes the eight corresponding wooden tokens.
They then place their large disk on the pyramid board, on the first spot of the turn track.
The player's cubes should be placed on the Burial Chamber Area, on the left of the first step of the construction path.
Each player places one of their small disks under each of the tracks on the Nile Area. They keep the last remaining disk in front of them in order to indicate each player's color.
120 resource tokens
Form six pools, one for each color, next to the game board.
1 bag of Offerings and 40 Offering tokens
Put all the Offering tokens into the bag and place it close to the Offerings Area. Draw sets of two tokens from the bag and place them on the dedicated spots on the Offerings Area. There has to be as many sets of two Offering tokens as there are players in the game, plus one additional set. Then draw as many extra tokens as there are sets, and place them on the Bonus Zone, located at the center of the Area.
26 Noble cards
Shuffle these cards into a facedown pile, near the Nobles Area. Reveal one Noble card on each of the three spots of this Area.
30 Artisan cards
Shuffle the Artisan cards into a facedown pile, and place it near the Artisans Area. Reveal one Artisan card on each of the four spots of this Area.
5 Traitor tiles
These tiles are only used in the solo mode (see page 8).
Before the Start of the Game
Starting with the player sitting on the first player's right and going counterclockwise, each player fulfills the three following steps:
- Draw two Noble cards, choose one and place it face up in front of them. This will be each player's starting Noble. The Noble's abilities are all detailed on page 10.
- Choose one of the Jars among the ones available face up next to the Pyramid of Time. Take the three resources indicated on the Jar from the pool, then discard this Jar.
- Take two Silver tokens from the pool.
All Nobles that have not been picked by the players are shuffled back into the Noble draw pile. Reveal as many Jars as there are players again, to replace the ones that players just picked. The game is now ready to begin!
First Play Mode
We strongly suggest that the standard Noble selection rules should be replaced by the following rules during a player's first play through of the game: sort out the five Scribe cards, shuffle them together and deal one to each of the players that opted for the First Play mode. This will be their starting Noble.
Note: in a given game, some of the players can opt for the First Play mode, and the others for the normal mode.
Game Objective
The objective is to have the most Prestige Points (PP) at the end of the game. You will need to manage your resources to make the best of the Tablet of the Gods actions. This requires building a sumptuous Burial Chamber, obtaining the support of powerful Nobles, recruiting Artisans, making Offerings, and overall prospering along the Nile. These actions will help you fulfill the ritual demands of Gods, and will give you prestige! The key will be the central wheel, which determines the access cost of each action.
Gameflow
A game of Pharaon plays in five rounds. During each round, starting with the first player, players take successive turns, going clockwise. The round continues until all of the players have decided to pass.
On their turn, a player can either:
- A. Use an Area's action
- or
- B. Pass
The turn then goes to the next player.
A. Carrying out an Area's Action
The Tablet of the Gods is composed of five Areas, each separated from the others by the columns of Gods. On their turn, a player can take one action, on the Area of their choice. To do so, the player must pay the Area's access cost, and then the Action Cost of this Area.
Access Cost
In front of each Area, the Wheel of Actions indicates one of the five base resources of the game. To be allowed to take an Area's action, the player has to pay one resource of the requested type, to one of the free spots of the wheel. A token can never be placed on a spot where there is already a token. If there are no more free spots available, it is no longer possible to take this action for the remainder of this round.
Important: the fourth spot in front of each Area is used only in games with 4 and 5 players. Ignore it if there are fewer players in the game.
Action Cost
Once the Access Cost on the wheel has been paid, the player can use the Area's action. To achieve this, they must pay the Action Cost that is indicated on the Area.
The resource just spent on the wheel to access this Area can always be deducted from this Action Cost, if it matches. Therefore, it is often wise to make sure that the Access Cost can be included in the Action Cost.
The resources spent to pay the Action Cost are put back into the pool right away.
Example: the action of the Artisan's Area requires three of the same resources. Sylvain already spent 1 to pay for the Access Cost, so he can spend 2 additional to fulfill the Action Cost. He also could have paid 3 of the same resources of another color, instead of the 2.
Resources
There are five different base resources that players earn and spend throughout the game. These resources represent different fields of influence, and sources of power in ancient Egypt.
- Agriculture
- Justice
- Royalty
- Construction
- Trade
In addition to these 5 base resources, there is a wild resource, Silver, the symbol of wisdom. It can be used to replace any single resource at any time.
The resource icons can be found in two different shapes on the game elements:
- A square resource icon indicates a cost. The player spends this resource.
- A circle resource icon indicates a gain. The player earns this resource.
Players keep their own resources visible in front of them, in their Personal Zone. Whenever they earn resources, they take them from the pool to add them to their Personal Zone. Whenever they spend resources, they do it from their Personal Zone. If a resource pool is empty when a player should earn one of this resource, this gain is ignored.
Jars
Whenever a player earns a Jar, they earn the three resources indicated on this Jar tile, then they discard it. If there is no Jar tile in the draw pile anymore when one should be revealed, shuffle all the discarded Jars back to make a new draw pile, then reveal a Jar.
Actions
Each Area on the board grants access to a specific action. The Action Cost is different in each Area.
Offerings Area
Action Cost: 1 resource of your choice + 1 optional resource of the same type
Take one of the sets of 2 Offering tokens among the ones still available on the Area. You have the option to pay one additional resource of the same type in order to take one additional bonus token.
This bonus token can be taken either:
- from the Bonus Zone
- or randomly from the bag of Offerings.
Example: Christine spends 1 to access the Offerings Area. The Access Cost is deducted from the Action Cost and Christine takes one set of 2 tokens. She decides to spend 1 additional to take a third token, which she chooses to take from the Bonus Zone.
Christine could also have paid any 2 of the same resources, in addition to the Access Cost, to get the same gain.
The sets and bonus tokens picked by players are only replaced after the end of each round.
At any time, if you try to reveal a token from the bag and the bag is empty, all the discarded Offering tokens are shuffled back into the bag.
If there are still not enough to complete, form as many complete sets of 2 Offering tokens as possible, then place the remaining tokens on the Bonus Zone.
The 3 Offering token Types
- 3 of each kind — These tokens can be spent at any time to replace the corresponding resource.
- 3 of each kind — These tokens can be spent at any time to replace the resource of your choice for the Access Cost or Action Cost on the depicted Area.
- x6 / x4 — These tokens are worth 1 or 2 extra Prestige Points at the end of the game.
Noble Area
Action Cost: 5 different resources
Take one Noble, either among the three lying face up on the area, or randomly from the draw pile. Place it face up in front of you. There should always be three face up Nobles available on the Area. As soon as a spot is empty, reveal a new Noble from the draw pile to refill it. A spot cannot remain empty unless the draw pile is exhausted.
Once you have a Noble in front of you, you can benefit from its ability, which is depicted in the bottom of the card.
The 3 Ability types
- Lightning bolt icon — You only benefit from this ability once, when you acquire this Noble.
- Infinity icon — This ability has a permanent effect.
- Sun icon — You can only use this ability once per round. Place the card at a 90° angle when you activate it, in order to indicate that it has been used.
Each Noble also earns you Prestige Points at the end of the game, according to the conditions displayed in the upper area of the card.
Noble's abilities and scoring conditions are detailed on page 10.
Nile Area
Action Cost: 2 resources
Earn the gains indicated under the cost that you chose to pay.
The 3 gain types
- Earn the depicted resource — earn the depicted resource.
- Randomly draw a Jar — randomly draw a Jar.
- Arrow with two colors — Move your token up one space on one of the two tracks corresponding to the colors depicted inside of the arrow. If there is no color depicted, you can move up one space on any of the tracks.
Note: when an arrow depicts two specific colors, they always correspond to the two resources requested as this action's payment.
At the end of the game, each token earns Prestige Points, depending on the position that it reached on its track.
Example: Henri spends 1 to access the Nile Area. He wants to move his tokens on the blue track and on the red track. So he spends 1 and 1 to pay for the Action Cost, in addition to the .
He earns and and moves his two tokens one space up on the blue and red tracks. Instead, he could have moved one token 2 spaces up, either on the blue track, or on the red track.
Artisans Area
Action Cost: 3 of the same resources of your choice.
Take one Artisan, either among the four laid face up on the Area, or randomly from the draw pile. Place it face up in front of you and immediately gain the resources indicated on its right-hand side. If there is a Jar, randomly take one from the draw pile and earn the resources that it depicts. Each Artisan also earns Prestige Points at the end of the game.
There should always be four artisans face up on the area. As soon as a spot is empty, reveal a new Artisan from the draw pile to refill it.
A spot cannot remain empty, unless the draw pile is exhausted.
Burial Chamber Area
Action Cost: 2 to 4 resources, indicated on the subsequent construction step of the Burial Chamber.
Move your construction cube to the next construction step of the Burial Chamber. At the end of the game, you earn the Prestige Points showed on the step that you reached.
B. Pass
When a player passes, they take their token from the turn-track, on the Pyramid of Time. They place it on the leftmost square of the lowest token-less line of the pyramid. They then choose one of the Jars available below the pyramid and gain the indicated resources.
Example: Maël (yellow) passes. He places his token on the very left side of the second line because the first one is occupied. He then chooses one of the remaining Jars and takes , , and from the pool.
A player who passed can no longer take actions until the end of the current round. When the turn comes back to them, they move their token one space to the right on their line. They then take the gain indicated either on their square, or on one of the squares more to the left on this line. A player who already reached the last square of their line can no longer progress or earn anything.
Example: Sebastien (red) already passed earlier in the round. When the turn comes back to him, he moves his token one square to the right on the Pyramid of Time. He takes 1 from the pool. He could instead have chosen to take a base resource of his choice, because it was the gain of a previous square on his line.
Gains on the Pyramid of Time
- First Player token icon — The player takes the First Player token. They will go first on the next round. At the end of the game, the First Player token is worth 3 PP.
- Base resource icon — The player takes 1 base resource of their choice from the pool. They cannot take a Silver.
- Silver icon — The player takes 1 Silver from the pool.
- Offering token icon — The player takes 1 Offering token. They take it either from the Bonus Zone on the Offerings Area, or randomly from the bag of Offerings.
End of the Round and Next Round's Setup
As soon as all the players have passed, the round ends. No one plays nor progresses on their line of the pyramid anymore. The player who last passed moves their token one space forward on the turn-track, instead of placing it on the pyramid. Other player's tokens are then piled on it, and a new round is set up.
- Place all the tokens currently on the wheel back into the pool.
- Draw as many tokens as needed from the bag of Offerings to complete the Offerings Area. There must be as many sets of 2 Offering tokens as there are players, plus one. The Bonus Zone at the center of the area must contain as many Offering tokens as there are sets. If there are not enough tokens left in the bag, all the discarded Offering tokens are shuffled back into the bag. If there are still not enough to complete, form as many complete sets of 2 Offering tokens as possible, then place the remaining tokens on the Bonus Zone.
- Rotate the wheel one step ahead in the direction indicated by the Direction token, until the next columns alignment is created.
- Reset Noble cards with a ability to their normal position.
- Underneath the Pyramid of Time, reveal as many new Jars as there are players. Note: ignore this last step when you set up the fifth round. No one earns a Jar when they pass during this last round.
When the last fifth round ends, players proceed to final scoring.
Pharaoh's Succession
The first player to both have two Nobles in front of them and to have reached the third construction step of the Burial Chamber becomes the new Pharaoh. They take the Pharaoh token in front of them, which earns them 7 Prestige Points at the end of the game.
Gods' Objectives
The Gods depicted on the columns that split the Areas compose five objectives, which vary each game depending on how the Areas are assembled. Above each God, on its left and on its right, a gain in Prestige Points and the condition to be fulfilled in order to earn it are indicated.
Fulfilling a God's objective is all or nothing. At the end of the game, if the player fulfills all of the left and right conditions, the objective is fulfilled. The player then earns the sum of Prestige Points indicated on the left and right of this God.
If they only partially fulfill any of these conditions, they do not fulfill the objective and do not earn points for this God.
Gods' Objectives Conditions
In order to satisfy a God, two conditions must be met, one for each of the Areas surrounding it. Thus, each Area depicts the same type of condition on the left and on the right.
- 2 — Build at least 2 steps of the Burial Chamber by the end of the game.
- 3 — Possess at least 3 Offering tokens in front of them at the end of the game.
- 2 — Possess at least 2 Noble cards in front of them at the end of the game.
- 3 — Possess at least 3 Artisan cards in front of them at the end of the game.
- 3 — Have a token on at least 3 tracks of the Nile Area at the end of the game.
Important: to fulfill the conditions of the two Gods surrounding a same Area, the player cannot count the same element twice.
Any number of players can fulfill the conditions of a given God.
Example: to satisfy these 2 Gods, you must build 4 steps of the Burial Chamber, possess 3 Offering tokens and be present on 2 tracks of the Nile Area. This is worth 16 PP. In the same situation, if a player has less than 3 Offering tokens, they only score 6 PP because they only satisfy one God's conditions (the bottom one).
Final Scoring
After five rounds, the game ends and players proceed to final scoring. Grab the score pad, fill in all the indicated columns for each player, then calculate the total score.
Gods' Objectives
The player checks to see if they have met the two requisite conditions for each of the five Gods. For each God that is fully satisfied, they earn the sum of Prestige Points indicated on the left and on the right of this God. Any partially satisfied God is worth nothing.
Nobles
The player sums up the Prestige Points earned by all of their Nobles. Nobles' scoring conditions are detailed on page 10.
Artisans
The player sums up the Prestige Points indicated on all of their Artisan cards.
Burial Chamber
The player earns the Prestige Points indicated on the last step that they reached.
Nile tracks
For each track of the Nile Area that has a token, the player earns the Prestige Points corresponding to the line that they reached: 0, 3 or 7 PP.
Resource/Offering tokens
The player earns 1 Prestige Point for each resource (including Silver) or Offering token that they have kept. They add the Prestige bonuses indicated on their Offering tokens.
Pharaoh/First Player
The player holding the Pharaoh token earns 7 Prestige Points.
The player holding the First Player token earns 3 Prestige Points.
The player with the highest total Prestige Points is the winner. In case of a tie, the player with the Pharaoh token wins or, failing that, the player with the most resource and/or Offering tokens in front of them.
If there is still a tie, tied players share the victory.
Two Player Rules
The game is the same as with more players, with one exception.
Jars available under the Pyramid of Time
Place three Jars face up under the Pyramid of Time during setup and reveal three new Jars at the end of a round.
At the start of the game, and each time a new round is set up, the resources indicated on the Jar that no one picked are placed on corresponding spots on the wheel.
Example: Christine and Maël both passed during this round and picked their Jar. They place the resources of the remaining Jar on the Wheel of Actions. 3 squares, , and are unavailable for the next round. There will only be 2 squares available on the red Area, and only 1 on the yellow Area.
Solo Mode: Traitor's Conspiracy
Succession time is fast approaching, but some Nobles gravitating around your father, the Pharaoh, have high ambitions. It is now clear that one of them is planning a conspiracy to take advantage of your young age and rule in your place.
In this game mode, you play solo against a virtual opponent, the Traitor. Your goal is to foil their plot by ending the game with more Prestige Points than them. Set up your strategy, but do not forget to monitor the progress of this powerful opponent.
Setup
Proceed with the setup as explained on pages 2 and 3. Only reveal two Jars next to the pyramid. Choose a color for the Traitor's wooden tokens, as you would for a normal player, and place them on the board.
Randomly place the five Traitor tiles side by side, with their clearer side face up. Take one of each five base resources and randomly allocate one of them to each of the five tiles. Place these resources at the bottom of each tile, on the first available square. That way, each tile is associated to one of the five base resources for the duration of the game.
Leave some space available near the Traitor tiles, for keeping all the elements possessed by the Traitor.
Take as many Jars as indicated on the bottom of the leftmost Traitor tile, without looking at them, and gather them face down into a draw pile, in the Traitor play area.
On the Offerings Area, complete the three sets of Offering tokens on the left column. Draw three tokens for the central Bonus Zone, and make sure that you place them into one column.
Select your starting Noble, one of the available Jars, and take 2, just like in a normal game.
As in the two player rules, the resources depicted on the Jar that have not been picked are placed on corresponding spaces on the wheel, then this Jar is discarded. Afterwards, reveal two new Jars.
Place the Noble card that you do not keep inside the Traitor Zone. It is the Traitor's starting Noble, which represents them for this game.
Note: If you play with the First Play mode, the Traitor randomly starts with any one of the four remaining Scribes.
Randomly determine who will start the game between you and the Traitor. The game is then ready to start.
Increase the Traitor's Difficulty Level
You can increase the difficulty of the solo mode by flipping 1 to 5 Traitor tiles onto their darker side. The more tiles you flip, the harder the Traitor will be to defeat.
Game flow
The game is sequenced as normal. Like a real opponent, the Traitor takes turns. They can pass before you and progress on the pyramid, or go on playing after you have passed.
What changes is what this opponent does on their turn.
On the Traitor's Turn
Reveal a Jar from the Traitor Zone to resolve their turn. Start by placing on the Traitor's tiles the resource indicated on the bottom of the Jar. Then, among the two resources on the upper part of the Jar, choose one to place on the Traitor tiles, and place the other on the Wheel of Actions. No matter what you would like to choose, all the Jar's resources must be allocated.
Place a resource on the Traitor Tiles
Place the resource on the Traitor tile that has been associated to this resource (see solo mode's setup).
Lay it on the first empty space of that tile, starting from the bottom. If there are any icons beside the covered square, the corresponding effects are immediately resolved (see the effects at right).
If the Traitor tile on which you are supposed to place a resource is full, place this resource on the next tile, to the right. When you cannot place a resource on the rightmost tile, place it on the leftmost tile.
Place a resource on the Wheel of Actions
Lay the resource on an available free space of the corresponding color.
If the three spots of a color are already occupied, you are not allowed to choose this resource to place it on the wheel.
Note: if there is no place for any of the two resources on the wheel, then both must be placed on the Traitor tiles, beginning with the leftmost resource.
Example: after having played his own turn, Fred reveals a Jar from the Traitor Zone. He first places 1 on the corresponding Traitor tile.
Therefore, he has to discard the 3rd Noble on the Noble's Area, starting from the left.
Fred then chooses to place the on the Wheel of Actions, covering the last remaining available space of this color for the remainder of this round.
So, he is forced to place the remaining on the associated Traitor tile. By doing so, the Traitor validates the objective of the depicted God and will score the corresponding PP at the end of the game.
Traitor Tiles Effects
- Burial Chamber icon — The Traitor moves their cube one step forward on the Burial Chamber Area.
- God icon — At the end of the game, the Traitor scores the Prestige Points for this God's objective.
- 2 (red) — The Traitor takes the available Noble corresponding to the indicated number, starting from the left, and keeps it in front of them. Ignore the content of these Noble cards.
- 9 — At the end of the game, each Noble card that the Traitor possesses earns them the highest level of Prestige Points reached, instead of the scoring conditions depicted on the card.
- 1 with X — Discard the available Noble corresponding to the indicated number, starting from the left. This Noble is not taken by the Traitor and does not count for their score at the end of the game.
- + (blue) — The Traitor takes the Artisan with the highest Prestige value among the four available on the Artisans Area and keeps it in front of them. In case of a tie, the Traitor takes the leftmost relevant Artisan.
- − (blue) — The Traitor takes the Artisan with the lowest Prestige value among the four available on the Artisans Area and keeps it in front of them. In case of a tie, the Traitor takes the leftmost relevant Artisan.
- + and − with X — Discard the Artisan with the highest or lowest Prestige value among the four available on the Artisans Area. This Artisan is not taken by the Traitor and does not count for their score at the end of the game. In case of a tie, the Traitor discards the leftmost relevant Artisan.
- 1 (pentagon) — The Traitor takes the set corresponding to the indicated number, starting from the top. The Traitor lays all the Offering tokens that they take in front of them. If there are no tokens left on the spot designated for the Traitor, they take nothing.
- 3 (offering token) — The Traitor takes the Offering token corresponding to the indicated number from the central Bonus Zone, starting from the top. The Traitor keeps in front of them the tokens that they take. If there is no token left on the spot designated for the Traitor, they take nothing.
- Nile "most full" icon — The Traitor moves one space up on one of the tracks of the Nile Area, choosing the one corresponding to the color of their most full Traitor tile. In case of a tie, opt for the leftmost relevant tile. If the Traitor already reached the highest level on the corresponding track, ignore this effect.
- Nile "less full" icon — The Traitor moves one space up on one of the tracks of the Nile Area, choosing the one corresponding to the color of their less full Traitor tile. In case of a tie, opt for the leftmost relevant tile. If the Traitor already reached the highest level on the corresponding track, ignore this effect.
Passing and end of the round
Whenever you are unable to reveal a Jar for the Traitor because they have no Jar left in their zone, they pass. The Traitor does not take a Jar among the ones available. However, they place their token on the first line of the pyramid as normal, and progress on it if you continue playing and the turn comes back to them.
If the Traitor earns a resource of their choice, you give them any kind of resource. If they earn an Offering token, you randomly take one from the bag for them. The Traitor never uses their tokens, but their tokens earn them Prestige Points as normal at the end of the game.
Whenever you decide to pass, take the Jar of your choice among the two available. If the Traitor has not passed yet, place your token on the first line of the pyramid, as normal. If the turn comes back to you, take your gains as in a multiplayer game. The Traitor only passes when they are unable to reveal a Jar from their zone on their turn.
When both players have passed, set up a new round like in a multiplayer game, except for the following differences:
- Complete the Offerings Area until there are 3 sets of two Offering tokens. The Bonus Zone on the Offerings Area must be refilled to contain 3 Offering tokens, displayed in one column.
- As in the two player rules, the resources indicated on the Jar that were not picked are placed on corresponding spaces on the wheel, then this Jar is discarded.
- Reveal two new Jars (ignore this step when you set up the fifth round).
- Starting from the left, look at the Traitor tile corresponding to the number of the upcoming round. Without looking at them, draw as many Jars as indicated in the bottom of this tile and place them into a face down pile in the Traitor Zone. Example: during the third round's setup, look at the number of Jars depicted on the 3rd Traitor tile, starting from the left.
When the fifth and final round ends, proceed to final scoring.
Pharaoh's Succession (Solo Mode)
Just like you, the Traitor can win the Pharaoh token if they are the first to fulfill its conditions through the Nobles that they have in front of them and through steps that they reached on the Burial Chamber's path.
Final Scoring (Solo Mode)
You score your points as in a normal game. The Traitor scores their points as normal, based on the elements that they have in front of them, but with two exceptions.
Gods' Objectives
Each Traitor tile shows the icon of one of the five Gods at a certain level. If the Traitor reached or exceeded this level, they score the PP for this God. Otherwise, they score nothing for this God. For the Traitor, this replaces the conditions depicted on the Areas.
Nobles
Consider the level of Prestige per Noble card reached by the Traitor on the tile that includes these icons. They score this amount of Prestige Points for each of the Noble cards that they have in front of them. For the Traitor, this replaces the scoring conditions depicted on each Noble card.
Clarification: in the very rare case in which the Traitor would not even reach the first step, each of their Nobles would be worth 6 PP.
You win the game if you total up more prestige than the Traitor. In case of a tie, they win.
Noble Cards in Details
Each of the Noble cards shows a number on the top right part of its illustration. Here you will find all the details about all of the Noble cards in the game.
Permanent Abilities
Scribes [1 to 5]
Prestige Points: the 5 Scribes all work in a similar way. Each earns 4 PP, plus a bonus of 4 additional PP for each of the two Gods surrounding the depicted Area, if you fulfill their objective.
Ability: Scribes' ability permanently allows you to use one of the two indicated resources in replacement of the other, exactly as if it was this other resource. For example, with Scribe [1], you can always pay as if it was , or as if it was .
Clarifications: the resource considered paid for the Access Cost remains the one indicated on the wheel. You can spend an Offering token depicting one of these two resources as if it was the other indicated resource.
General [6]
Prestige Points: earn 7 PP. You earn a bonus of 4 additional PP if you possess the Pharaoh token. You earn a bonus of 4 additional PP if you possess the First Player token.
Ability: when you declare that you are passing during a round, directly move one space forward on your line of the Pyramid of Time, and earn the indicated gain.
Clarifications: if the turn comes back to you, you then progress normally, by one single space. If you are the first player to pass, you take the First Player token before applying this ability. This ability has no effect if you are the last player to pass in a round.
Architect [7], High Priestess [8], Foreman [9] and Chief of the Attics [10]
Ability: on the indicated Area, you can always pay any resource of your choice on the wheel for the Access Cost. This resource counts for its own color instead of the one indicated on the wheel.
Judge [11]
Ability: on the Nobles Area, you can always pay the five resources of your choice instead of the five different ones that are normally required. This does not exempt you from paying the indicated Access Cost as normal.
Grand Vizier [12]
Prestige Points: earn 3 PP. You earn a bonus of 3 additional PP for each Noble that you possess, including Grand Vizier.
Ability: this Noble provides no ability.
Once Per Round
Doctor [13]
Prestige Points: earn 6 PP. You earn a bonus of 2 additional PP for each different PP value that you possess among your Artisan cards.
Ability: once per round, you can take the action on the Artisans Area even if there is no available spot left on the wheel. This does not exempt you from paying the indicated Access Cost.
Prime Contractor [14]
Prestige Points: earn 6 PP. You earn a bonus of 2 additional PP for each step of the Burial Chamber that you achieved.
Ability: once per round, you can take the action on the Burial Chamber Area even if there is no available spot left on the wheel. This does not exempt you from paying the indicated Access Cost.
High Priest [15]
Prestige Points: earn 6 PP. You earn a bonus of 2 additional PP for each Offering token that you possess.
Ability: once per round, you can take the action on the Offerings Area even if there is no available spot left on the wheel. This does not exempt you from paying the indicated Access Cost.
Governor [16]
Prestige Points: earn 5 PP. You earn a bonus of 3 additional PP for each track of the Nile Area on which you reached the highest level.
Ability: once per round, you can take the action on the Nile Area even if there is no available spot left on the wheel. This does not exempt you from paying the indicated Access Cost.
Wise Woman [17]
Prestige Points: earn 3 PP. You earn a bonus of 3 additional PP for each of the five Gods objectives that you fulfill.
Ability: once per round, you can trade off one base resource token for another base resource token of your choice.
Clarifications: you can spend an Offering token depicting one of the five base resources. You can use this ability when you are passing and picking one of the available Jars.
Treasurer [18]
Prestige Points: earn 8 PP. You earn a bonus of 2 additional PP for each Silver that you possess.
Ability: once per round, you can trade one base resource token for a Silver.
Clarifications: you can spend an Offering token depicting one of the five base resources. You can use this ability when you are passing and picking one of the available Jars.
Tutor [19]
Prestige Points: earn 7 PP. You earn a bonus of 1 additional PP for each base resource token that you possess.
Clarification: your Offering tokens depicting one of the five base resources count towards this bonus calculation.
Ability: once per round, when you gain a Jar, you choose and earn one additional of the five base resources.
Clarification: you can use this ability when you are passing and picking one of the available Jars.
Diplomat [20]
Prestige Points: this Noble earns you as many PP as another Noble of your choice among the ones that you possess.
Ability: once per round, you can discard a Jar that you just earned. Instead of the resources that it depicts, you earn three base resources of your choice.
Clarification: you can use this ability when you are passing and picking one of the available Jars.
Instant Abilities
High Official [21]
Ability: when you acquire this Noble, you progress three spaces on the Nile track(s) of your choice and you earn two Silver. This ability has no further effect after that.
High Official [22]
Ability: when you acquire this Noble, you earn two bonus Offering tokens and you go two spaces up on the Nile track(s) of your choice. This ability has no further effect after that.
Clarification: each Offering token can be taken either from the Bonus Zone or randomly out of the bag of Offerings.
High Official [23]
Ability: when you acquire this Noble, you earn one of the four available Artisan cards, or you randomly draw one from the pile, and you earn one Silver. This ability has no further effect after that.
Clarification: you earn the resources and Jars depicted on this Artisan card.
High Official [24]
Ability: when you acquire this Noble, you earn one of the four available Artisan cards or you randomly draw one from the pile and you earn two bonus Offering tokens. This ability has no further effect after that.
Clarifications: you earn the resources and Jars depicted on this Artisan card. Each Offering token can be taken either from the Bonus Zone or randomly out of the bag of Offerings.
High Official [25]
Ability: when you acquire this Noble, you progress one step forward on the Burial Chamber's path and you earn one Silver. This ability has no further effect after that.
High Official [26]
Ability: when you acquire this Noble, you progress one step forward on the Burial Chamber's path and you earn one bonus Offering token. This ability has no further effect after that.
Clarification: the Offering token can be taken either from the Bonus Zone or randomly out of the Bag of Offerings.
Game Summary
Players take successive game turns, going clockwise.
On their turn, a player can either:
- Take one single action
- Pass
Take an Action
- Pay the Access Cost on the wheel,
- Then pay the Action Cost of the Area.
The Access Cost can be deducted from the Action Cost.
Pass
- Pick one of the available face up Jars,
- Place your Turn Tracking token on the pyramid,
- When it is your turn to play again, earn a gain.
End of the Round
This occurs as soon as all the players have passed.
New Round Setup
- Remove and discard all the tokens on the wheel,
- Complete the Offerings Area,
- Rotate the wheel one step ahead in the direction indicated by the Direction token,
- Reveal new Jars (ignore this for fifth round setup),
- Reset all Noble cards with a ability to their normal position.
End of the Game
The game is over at the end of the fifth round. The player with the highest PP total is the winner.
In case of a tie, the player with the Pharaoh token wins or, failing that, the player with the most resource and/or Offering tokens in front of them wins. If there is still a tie, tied players share victory.
Explanation of Symbols
- Pay one Agriculture resource.
- Pay one Construction resource.
- Pay one Trade resource.
- Pay one Royalty resource.
- Pay one Justice resource.
- Pay any one of the 5 base resources.
- Earn one Agriculture resource.
- Earn one Construction resource.
- Earn one Trade resource.
- Earn one Royalty resource.
- Earn one Justice resource.
- Earn any one of the 5 base resources.
- Earn one Silver, symbol of wisdom. This works as a wild resource.
- Earn one randomly drawn Jar.
- The First Player token.
- The Pharaoh token.
- Earn one bonus Offering token, either among the ones available on the Area's Bonus Zone, or randomly out of the bag of Offerings.
- An Offering token.
- An Artisan card.
- A Noble card.
- Artisans Area.
- Burial Chamber Area.
- Nile Area.
- Nobles Area.
- Offerings Area.
- A God surrounding the Artisans Area.
- A God surrounding the Burial Chamber Area.
- A God surrounding the Nile Area.
- A God surrounding the Nobles Area.
- A God surrounding the Offerings Area.
- One of the 5 Gods on the game board.
- Move your token one space up on one of the two corresponding tracks on the Nile Area.
- Move your token one space up on any one of the tracks of your choice on the Nile Area.
- A track on the Nile Area on which you have reached at least the first space.
- A track on the Nile Area on which you have reached the third space.
- A step of the Burial Chamber's path.
- The Wheel of Actions.
- The Pyramid of Time.
Acknowledgments
The designers want to thank Le FLIP de Parthenay for their reception of Pharaon, Clément for believing in this project, and Seb and Christine, for their pharaonic work on the game.
Christine wants to thank Clément and Sébastien for their renewed trust, her dad and mom, whom she loves very much, and Maël for supporting her the whole project through.
Catch Up Games thanks Sylvain, Henri and Christine.
The Shrubburo, Maël, Matthieu, Fred, Alex, Laurent, Seb, Denis, JB and all the other friends that helped us with the play tests or proofreading.