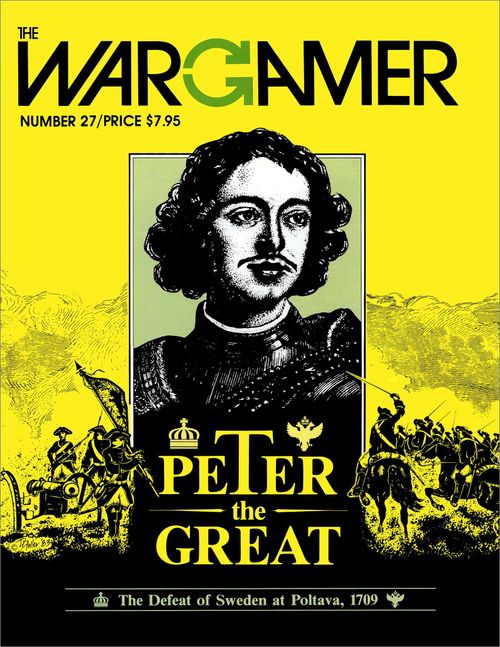
Peter the Great
Peter the Great Rulebook
Table of Contents
Table of Contents
- 1.0 Introduction
- 2.0 Equipment
- 3.0 Sequence of Play
- 4.0 Movement
- 5.0 Stacking
- 6.0 Command Control
- 7.0 Combat
- 8.0 Leaders
- 9.0 Rallying
- 10.0 Army Morale
- 11.0 Victory Conditions
- 12.0 Russian Alert
- 13.0 Optional Rules
- 14.0 Scenarios
1.0 Introduction
1.1 Background
Peter the Great is a simulation game of the Battle of Poltava, the climax of the Swedish warrior-king Charles XII's invasion of Russia. The battle took place on June 28th, 1709, north of the town of Poltava in the Ukraine. The game is intended for two players, one commanding the Swedish army under Charles XII, the other the forces of Peter I (Peter the Great) of Russia. It can also be played solitaire.
1.2 Scale
A. Superimposed on the map of the battle area is a grid of hexagons (hexes), which regulate the movement and combat of the playing pieces. Each hex represents an area of terrain about 160 meters across.
B. Each strength point (2.1) represents approximately 150 men, or 1 to 2 artillery pieces.
C. Each turn represents 45 minutes of time.
2.0 Equipment
The game consists of these rules, a map, and 200 die-cut counters. Also needed for play is a six-sided die.
2.1 How to Read the Units
The die-cut cardboard playing pieces (units) represent the actual military units and leaders that took part in the original battle. The numbers and symbols on these pieces indicate the combat strength (CS) in strength points (SPs), morale rating (MR), movement capability, and type of the units represented.
2.1.1 Sample Units
[Sample unit diagrams from the printed rules (2.1.1.1 Sample Infantry Unit, 2.1.1.2 Sample Artillery Unit, 2.1.1.3 Sample Leader Unit) are artwork and are not reproduced here. The text notes that follow are transcribed in full.]
A. The two sides of infantry and cavalry units represent the same unit at different levels of strength. All units begin the game at their higher (full) strength.
B. The reverse sides of leader units show replacement leaders, (8.3).
C. Units with their combat strengths in brackets do not count for stacking (5.0.4).
2.1.2 Unit Nationalities
A. All Swedish units are printed on a blue background, all Russian units on a green background.
B. The lighter shades of blue and green indicate optional units, used only when the hypothetical scenario (14.3) or certain optional rules (13.0), are played.
2.1.3 Unit Types
The printed rules show the following unit types (each with its own counter art):
- Leader
- Replacement Leader
- Regular Infantry
- Grenadier Infantry
- Garrison Infantry
- Engineers
- Regular Cavalry
- Irregular Cavalry
- Dragoons
- Pickets
- Grenadier Cavalry
- Light Artillery*
- Medium Artillery*
- Heavy Artillery*
- Mortar Artillery
- Horse Artillery
- Aide
*Artillery is classified as light (2-4 lb), medium (6-8 lb), or heavy (12 lb and above).
2.2 Markers
A. A number of the ½" counters are not units but markers to indicate specific functions in the game. Their use is explained in the rules. However, several types of markers are used only when optional rules (13.0) are being played.
B. The Game Turn marker is used to record the passage of time on the Turn Record Track (TRT). All scenarios start with the 04:00 turn.
C. The morale markers and the grapeshot ammunition supply markers (13.8) are used to record the state of each side's morale and grapeshot ammunition expenditure on the Morale Track.
The printed rules illustrate the following markers (artwork not reproduced): Routed; Unit Out of Command; Redoubt; Redoubt Under Construction; Fire Zone; Infantry Square; Grenade Equipped; Assault Equipment; Ammunition Depleted; Dismounted Dragoons; Repulsed; Charge; Game Turn; Morale; Grape Ammo.
3.0 Sequence of Play
Peter the Great is played in successive game-turns (turns), each composed of alternate player-turns. During each player-turn, the side whose turn it is moves its units and performs combat and rally, according to the following sequence.
3.1 Sequence Outline
Each turn is divided into a Swedish player-turn and a Russian player-turn. The Swedish player-turn comes first (except in Scenario 4). The player whose player-turn is currently in progress is termed the phasing side, while the opponent is the non-phasing side.
3.1.1 Swedish Player-Turn
3.1.1.1 Movement Phase
The phasing side may move all, some, or none of his units as desired within the restrictions of the Movement rules (4.0). The non-phasing player's units may not move.
3.1.1.2 Combat Phase
The phasing side attacks the non-phasing player's units pursuant to the Combat rules (7.0).
3.1.1.3 Rally Phase
The phasing side may attempt to rally its routed units (9.0).
3.1.2 Russian Player-Turn
The Russian player now becomes the phasing player and repeats the three phases above.
3.1.3 Game-Turn Record Interphase
At the end of each turn, advance the Game Turn marker one space on the TRT to signal the start of another turn.
3.2 Duration of Game
The game lasts a maximum of eleven turns, from 04:00 to 11:30. If neither side has gained a decisive victory before then, the victory conditions are consulted and a winner is determined (11.0).
3.3 Terms and Abbreviations
3.3.1 Terms
3.3.1.1 Artillery
All light artillery, medium artillery, heavy artillery, and mortar artillery units.
3.3.1.2 Cavalry
All regular cavalry, irregular cavalry, and dragoons units.
3.3.1.3 Combat Unit
All units with a CS are combat units. Leaders and game markers are not combat units.
3.3.1.4 Enemy
All forces of the player's opponent.
3.3.1.5 Friendly
All forces of a player's own side.
3.3.1.6 In Command
All combat units that begin their Movement Phase within the command radius of a friendly leader are in command for that Movement Phase (6.0).
3.3.1.7 Infantry
All regular infantry, grenadier infantry, garrison infantry, and engineers units. Also includes dismounted dragoons if optional rule 13.12 is used.
3.3.1.8 Morale Check
Roll one die and compare with the unit's MR. If the roll is equal to or less than the MR, the unit passes; if the roll is greater, then it fails. The unit's MR may be increased by the Leadership Rating of any one friendly leader in the same hex.
3.3.1.9 Owner
The player controlling the side to which the units belong.
3.3.1.10 Step
A. A unit which loses a step in combat flips over from its stronger to its weaker side or is eliminated from play if already at its weaker strength.
B. Units with no weaker side to their counter (including all artillery units) are immediately eliminated if they lose one step.
3.3.2 Abbreviations
| Abbr | Meaning | Abbr | Meaning |
|---|---|---|---|
| AML | Army Morale Level | LOS | Line of Sight |
| MP | Movement Point | LR | Leadership Rating |
| CRT | Combat Results Table | MR | Morale Rating |
| CS | Combat Strength | MA | Movement Allowance |
| OOC | Out of Command | TRT | Turn Record Track |
| EZOC | Enemy ZOC | ZOC | Zone of Control |
| SP |
4.0 Movement
A. During the Movement Phase, the phasing side may move as many or as few of its units as desired.
B. Units may move in any direction or combination of directions.
C. Units are moved one at a time, tracing a path of contiguous hexes through the hex grid of the map. As a unit enters each hex, it expends one or more Movement Points (MPs) from its Movement Allowance (MA).
4.1 Movement Limitations
A. A unit may never exceed its MA; during the Movement Phase, each unit may only move as far as its MA permits.
B. Each unit expends MPs for each hex it enters during movement as shown by the Terrain Effects Chart (TEC).
C. Certain hexsides cost additional MPs to cross.
4.1.1 Occupied Hexes
A unit may never enter a hex containing an enemy unit. It may enter and move through hexes containing other friendly units.
4.1.2 Enemy Unit Movement
Each side may move its units only during the friendly Movement Phase, except for any movement as a result of combat.
4.1.3 Unused MPs
Unused MPs may not be accumulated from turn to turn or transferred from one unit to another.
4.1.4 Combat
No combat takes place during the Movement Phase, except for Fire Zone attacks (7.7).
4.1.5 Prohibited Terrain
A. No unit may cross a lake hexside.
B. Cavalry units may not enter redoubts.
4.2 Road Movement
Both sides may use the road net to speed up the movement of their units.
4.2.1 In General
A unit which moves from one road hex directly to an adjacent road hex through a hexside crossed by the road expends only ½ MP, regardless of the other terrain in the hex.
4.2.2 Enemy Zones of Control
A unit may never use road movement on road hexes that are in enemy zones of control (EZOC, 4.3). To enter such hexes it must pay the normal terrain cost.
4.2.3 Streams
Road movement does not negate the extra +1 MP cost for crossing streams at bridges.
4.3 Zones of Control
Each unrouted combat unit exerts a Zone of Control (ZOC) into the six hexes surrounding the hex it occupies. ZOCs never stop the movement of enemy units, but they do force combat.
4.3.1 In General
A. All unrouted combat units exert a ZOC throughout both player-turns, regardless of the phase.
B. The existence of a ZOC is never negated by any units, enemy or friendly.
4.3.2 Exceptions
Leaders and routed units have no ZOC.
4.3.3 Multiple ZOCs
A. If there are both enemy and friendly ZOCs exerted over the same hex, both ZOCs coexist.
B. There is no additional effect from having more than one unit exerting ZOCs into a single hex.
4.3.4 Effect on Friendly Units
ZOCs never affect friendly units in any way. The movement of enemy units is affected only by EZOCs (4.2.2) and Command Control (6.0).
4.3.5 Mandatory Combat
Combat is mandatory for all phasing unrouted combat units which end their Movement Phase in an enemy ZOC (EZOC). Exception: Cavalry cannot attack enemy units in certain types of terrain (see TEC).
4.3.6 Effect on Retreats
ZOCs do not block the retreat or rout of enemy units (7.4, 7.5).
5.0 Stacking
5.1 Definition
More than one unit may occupy the same hex, in a process known as stacking, subject to the following limits.
5.2 Stacking Limits
A. Stacking limits apply only at the end of the Movement Phase; however, see 7.4.3 and 7.4.4 concerning displacement in the Combat Phase.
B. There is no limit to the number of friendly units which may occupy the same hex during movement.
5.2.1 General Limit
Only one infantry or cavalry unit may occupy a hex at the end of the Movement Phase; they may not stack with other infantry or cavalry units. Exception: Engineers and units with parenthesized CSs may stack with other units (5.2.3, 5.2.4).
5.2.2 Specialized Units
Artillery, picket, and engineers units may always stack with one other friendly combat unit of any type.
5.2.3 Free-Stacking Units
Leaders, combat units with parenthesized CSs, and markers are never counted in stacking.
6.0 Command Control
6.1 In General
A. Only units that begin their Movement Phase within the command radius of a friendly leader are in command.
B. Command control only affects the movement of phasing units; it never affects combat, including advance and retreat after combat.
6.2 Command Effects
6.2.1 Units in Command
Units in command function normally for all purposes; they may freely move in and out of EZOCs.
6.2.2 Units Out of Command
Units out of command (OOC) are those which begin their Movement Phase outside the command radius of a friendly leader.
6.2.3 Restrictions on OOC Units
A. OOC units may not enter EZOCs.
B. OOC units which begin their Movement Phase in an EZOC may:
- Remain in place without moving; or
- Leave their hex, but may not enter any other hex containing an EZOC.
C. This means that units out of command that are surrounded by EZOCs may not move.
7.0 Combat
In combat situations, the phasing side's units are the attacking units and the non-phasing side's units are the defending units, regardless of the overall strategic situation.
7.1 General Rules
7.1.1 Mandatory Combat
A. Combat between unrouted adjacent opposing units in each other's ZOC is mandatory. Exceptions: Terrain Effects on Combat (7.3) and Fire Zones (7.7).
B. All non-phasing units that have phasing units in their ZOC must be attacked, and all phasing units in the ZOC of a non-phasing unit must participate in an attack.
7.1.2 Procedure
A. To resolve each attack, the phasing side totals the CSs of its participating units, subtracting the total CSs of all defending units in the hex or hexes under attack to yield a differential (attacking SPs less defending SPs).
B. The phasing side then chooses one attacking unit, comparing its MR with that of a defending unit (of the non-defender's choice). This comparison is also expressed as a differential (attacking unit's MR less defending unit's MR).
C. The SP differential shows which column on the Combat Results Table (CRT) to use. The MR differential is then used as a die roll modifier (DRM), positive if the attacker's MR is greater, negative if the defender's MR is greater.
D. The phasing side may always resolve any attack at a lower CS differential than that calculated (a column further to the left on the CRT). This option must be exercised after the MR differential has been decided but before the die is rolled.
E. Roll one die, applying the MR differential as a DRM.
F. The indicated combat result is applied immediately.
G. Attacks are resolved one at a time, in any order the phasing side chooses. The results of each attack are applied before the next is resolved.
7.1.3 Multi-Hex Combat
A. Each attack may involve any number of attacking and defending units in different hexes.
B. For an attack to be resolved as a single combat (one die roll), all attacking units must be adjacent to all defending units. Exception: Artillery (7.2).
7.1.4 Restrictions
A. No phasing unit may attack more than once per Combat Phase.
B. No non-phasing unit may be attacked more than once per Combat Phase. Exception: Fire Zones (7.7).
C. A unit's CS and MR are unitary and may not be divided between different combats.
D. All defending units in a single hex are considered a total; they cannot be attacked individually.
E. Artillery are the only units able to attack non-adjacent enemy units.
7.2 Artillery
A. Unlike other combat units, artillery may participate in combat from a non-adjacent position. Artillery may attack in one of three ways:
- When in the ZOC of enemy units, artillery are forced to attack, using the CRT in the normal way.
- Artillery may support the attack of a friendly unit by adding its CS to the total attack strength, again using the CRT.
- An artillery unit may attack non-adjacent enemy units on their own using the Bombardment Table.
B. Artillery units are never forced to attack an enemy unit simply because it is within range; they are only forced to attack when in an enemy ZOC.
C. The requirement that all non-phasing units in the ZOCs of phasing units must be attacked may be satisfied by non-adjacent artillery units attacking alone on the Bombardment Table.
7.2.1 Eligible Targets
A. Artillery may only attack targets that are within their range, calculated by counting the target hex but not the artillery unit's hex.
B. If friendly units are attacking enemy units in more than one hex, supporting artillery must be within range of at least one of the defending units' hexes.
7.2.2 Combat Results Affecting Artillery
A. Artillery attacking from a non-adjacent position never suffer any adverse combat results.
B. Artillery may never advance after combat, though they may retreat normally.
C. The phasing side may only use artillery to satisfy exchange losses on EX and EE combat results if it has no other units to use. Exception: Artillery with a zero MA (7.2.7).
7.2.3 Line of Sight
A. Artillery units may only attack hexes to which they have an unblocked Line of Sight (LOS), judged by tracing a straight line from the center of the artillery unit's hex to the center of the target hex.
B. If any of the hexes or hexsides between the artillery unit and the target contain blocking terrain, then the LOS is blocked and the target may not be attacked.
7.2.4 Blocking Terrain
A. Woods, ravines, buildings, and redoubts (both built and under construction) constitute blocking terrain.
B. Entrenchment hexsides also constitute blocking terrain, but only if neither the artillery unit nor its target are in a hex of which that hexside forms a part.
C. Hexes containing combat units of either side also block LOS.
7.2.5 Other LOS-Terrain Considerations
A. For LOS purposes, hexes are considered to be entirely filled by their terrain type, regardless of the vagaries of artwork and printing.
B. If the LOS runs exactly along a hexside then it is blocked only if both hexes contain blocking terrain or if the hexside itself is an entrenchment hexside.
C. LOS is never blocked by terrain or other units in the artillery unit's hex or the target hex.
7.2.6 Range Attenuation Table
The CS of an artillery unit attacking from a non-adjacent position is subject to range effects per the Range Attenuation Table. This table must be consulted each time an artillery unit attacks a non-adjacent target, whether on the CRT or the Bombardment Table.
7.2.7 Zero-MA Artillery Units
Artillery units with an MA of 0 may never move and are eliminated if called upon to retreat or rout after combat.
7.3 Terrain Effects on Combat
A. Combat units defending in, or attacking across or into certain terrain types may have their CS altered.
B. Certain unit types are also prohibited from attacking into certain terrain (this is an exception to the rule that combat is mandatory between adjacent opposing units).
C. Terrain effects are cumulative (so a unit whose CS is halved for two reasons ends up with its CS quartered), and are fully summarized on the TEC.
7.3.1 Applying Fractions
Where fractions occur, each unit individually has its CS rounded up to the nearest whole number after all modifications have been applied, and before the CS differential is calculated.
7.3.2 Column Shifts
Stream, bridge, and entrenchment hexsides require the combat to be resolved using the CS differential column to the left of that calculated. See also rule 13.0.B.
7.4 Retreats
Units are required to retreat by both r (retreat) and R (rout) combat results, and the following considerations apply to both types of retreat.
7.4.1 In General
A. Retreats are always conducted by the owner, who must retreat each affected unit separately the full number of hexes required.
B. The following retreats are prohibited:
- No unit may retreat into or through an enemy-occupied hex, or into a hex containing a friendly unit which cannot be displaced (7.4.3), where stacking limitations would be exceeded.
- Units in ravines may not retreat, nor may any unit retreat into a ravine hex. Exception: Units attacked solely by units in ravines or solely by non-adjacent artillery are not subject to this restriction.
- No unit may retreat off the eastern edge of the map.
C. Units unable to retreat pursuant to this rule are eliminated instead.
7.4.2 Retreat Priorities
Subject to 7.4.1, units must retreat per the following order of priorities:
- The unit must end its retreat as far away as possible from the nearest enemy unit.
- The unit must retreat into or through non-enemy-controlled hexes rather than hexes in EZOCs (friendly-occupied or not).
- The unit must retreat into or through vacant hexes rather than hexes containing friendly units.
7.4.3 Displacement
A. If the only hex open to the retreating unit is one to which it could not normally move owing to stacking restrictions, then a unit in that hex may be displaced one hex.
B. Displaced units are moved by the owner, and are subject to the same rules as retreating units.
C. Displaced units can then themselves displace other friendly units in a sort of chain reaction, if this is required.
D. There is no limit to the number of units which may be thus displaced, and a unit may be displaced more than once in the same Combat Phase.
7.4.4 Displacement Restrictions
Units with an MA of 0 and units in EZOCs whose combat in that Combat Phase has yet to be resolved, cannot be displaced. If such a unit were forced to displace as part of a chain reaction, then the entire chain reaction would be prohibited.
7.4.5 Retreat Off the Map
Units may retreat off the north, south, or west edges of the map. They are not counted as eliminated, but may not return.
7.5 Routing
A. When a combat result requires a unit to rout, the owner must immediately retreat those units the required number of hexes (infantry: three hexes; cavalry: five hexes) pursuant to the Retreat rules (7.4).
B. In addition, one of the routed units loses one step.
7.5.1 Effects of Rout
A. Routed units are marked with R markers. They have no ZOC and may not attack.
B. If routed again, they are eliminated.
C. Routed units may only move as a result of combat.
7.5.2 Displacement During Rout
A. Routed units may displace other friendly units in the hex in which they end their rout. Units in hexes that routed units simply pass through are unaffected.
B. Units displaced by routed units must immediately take a morale check. If they also rout, they do not lose any steps.
C. Again, this displacement may cause a sort of chain reaction.
7.5.3 Effect of Rout on Artillery
Artillery units may not rout; they are eliminated instead.
7.5.4 Rally
A. During the Rally Phase, the phasing side may attempt to rally its routed units (9.0).
B. Units that rally function normally.
C. Units that fail are removed from the map, but are not counted as eliminated for Army Morale purposes (10.0).
7.6 Advance After Combat
A. Whenever a hex is vacated as a result of combat, one victorious unit involved in that combat may advance into the vacated hex.
B. Where more than one hex is vacated by a single combat, one victorious unit may advance into each vacated hex.
C. The option to advance must be exercised immediately, before any other combat is resolved.
D. A unit is never forced to advance.
E. Artillery units may not advance after combat.
F. Neither side may advance after a Br combat result.
7.7 Fire Zones
Units in completed redoubts are not forced to attack adjacent enemy units. They may instead exert a fire zone (FZ) into one adjacent hex. Fire zones allow for opportunity fire.
7.7.1 Use of Fire Zone Markers
A. The phasing side places Fire Zone markers (one for each occupied redoubt) on the map at the end of the friendly Combat Phase.
B. All Fire Zone markers of the non-phasing side are automatically removed at the end of the phasing side's Movement Phase.
C. All units in redoubts may exert new FZs again at the end of their next Combat Phase.
7.7.2 Opportunity Fire
A. When an enemy combat unit enters an FZ, it is immediately attacked using the Fire Zone Table.
B. Roll one die, cross-referencing it with the total number of SPs in the redoubt. Apply the result immediately.
C. These attacks take place during the Movement Phase.
7.7.3 Hex in FZ of Multiple Redoubts
More than one redoubt may exert an FZ into the same hex. In this case, all units exerting an FZ into the same hex combine their CSs to determine the column of the Fire Zone Table to be used. Only one die is rolled.
7.7.4 Multiple FZ Attacks
FZs may attack any number of times during the enemy Movement Phase. Results achieved against one unit have no effect on other enemy units subsequently entering the same hex.
7.7.5 Repulse Effects
Units repulsed by FZs must retreat pursuant to 7.4, and displacement may occur.
7.7.6 Units Beginning in an FZ
Units which begin the Movement Phase in an enemy fire zone are not affected by it, whether they leave or choose to remain in the hex.
7.7.7 Range of FZs
FZs may only be exerted into adjacent hexes; artillery units in redoubts may not use their range to cast an FZ farther away.
7.7.8 Units in Redoubts
Units in redoubts under construction cannot exert FZs and are obliged to attack adjacent enemy units in the normal way.
7.8 Redoubts
The rules of this section apply to both types of redoubts (completed and under construction). See 7.7 and the TEC for the differences between the two types.
7.8.1 Effect on Combat Results
Certain results against units defending in redoubts are modified.
| Result | Treat As |
|---|---|
| Br | Ar |
| Dr | NE |
| Ex | D1 + step loss to attacker |
| DR | D1 |
7.8.2 Units in Redoubt at Start
A. Units that begin the game in a redoubt may not be moved, retreated, displaced, or voluntarily destroyed.
B. They retain their ZOC, whether or not they are exerting an FZ.
C. Redoubts are never destroyed, and their benefits apply to units of both sides.
7.9 Pickets
A. Pickets have no ZOC, and may never attack, only defend.
B. Pickets cannot be displaced and are eliminated if forced to retreat.
C. Units adjacent to pickets in the Combat Phase are not obliged to attack them.
8.0 Leaders
A. Leaders have no CS as such, nor a ZOC.
B. Each leader has a Leadership Rating (LR) which may be used to augment the CS of friendly units and to help rally friendly routed units.
8.1 Leader Effects on Combat and Rallying
8.1.1 Use in Combat
At the option of the owner, the LR of one leader may be added to the CS of a friendly unit in the same hex. Exception: Artillery attacking non-adjacent targets cannot be assisted by leaders.
8.1.2 Use of Multiple Leaders
There is no limit to the number of leaders that may assist in a combat, either in attack or defense, provided that no combat unit is supported by more than one leader.
8.1.3 Leadership Rating in Combat
The LR is always added to a unit's CS after all adjustments are made for terrain and/or other effects, but before any column-shifts on the CRT are applied (13.0).
8.1.4 Leadership Rating in Rally
The LR of any friendly leader within one hex of a routed unit may be added to its MR when it attempts to rally.
8.1.5 Restrictions
A. No more than one leader may contribute its Leadership Rating to the MR of a routed unit.
B. However, a leader may contribute its LR to as many friendly routed units as it is stacked with and adjacent to.
8.2 Stray Bullets
A. Combat units may freely enter and move through hexes occupied solely by enemy leaders.
B. When a combat unit enters the same hex as an enemy leader, one die is rolled per leader in the hex.
| Roll | Result |
|---|---|
| 1-2 | Leader is eliminated (8.3) |
| 3-6 | Leader survives.* |
*Immediately remove him from that hex and place him in the nearest hex occupied by a combat unit friendly to that leader (the non-phasing side has the choice where two or more such hexes are equidistant). Leaders moving in this way are not moved through the hex grid, nor do they expend any MPs or observe any movement restrictions.
8.2.1 Unaccompanied Leaders
Unaccompanied leaders may not enter hexes occupied by enemy leaders.
8.2.2 Effect of Combat Results on Leaders
A. Leaders are never affected by combat results. They may never follow retreating or routed units; they simply remain in place.
B. Leaders may accompany units that advance after combat.
8.3 Battlefield Promotions
A. Whenever a leader is eliminated, flip over the counter to its reverse side. This new replacement leader is then placed with any friendly combat unit at the end of the current player-turn.
B. If a replacement leader is eliminated, the counter is permanently removed from play.
9.0 Rallying
9.1 In General
A. During the Rally Phase, the phasing side may attempt to rally any or all of its routed units.
B. When rallied, remove a unit's R marker. The unit functions completely normally again.
C. Remove units from the map that remain routed at the end of the friendly Rally Phase. They are not considered eliminated but may not return to play.
9.2 Rallying Units
9.2.1 Procedure
A. When attempting to rally a routed unit, the phasing side rolls one die. If the roll is equal to or less than the unit's MR then the unit rallies. If the roll is greater than the MR then the unit is removed from the map.
B. All phasing units that end their Rally Phase in a routed condition are removed from the map, even if there was no attempt to rally them.
9.2.2 Effect of Leaders on Rally
Each unit attempting to rally may subtract from the die roll the LR of any one friendly leader that it is stacked with or adjacent to. (See also 8.1.5.)
9.2.3 Effect of EZOCs on Rally
If a routed unit is in an EZOC, apply a +1 DRM to the rally die roll.
9.2.4 Voluntariness of Rally
The phasing side is never forced to attempt rally, but may prefer, for example, a unit to rout off the map rather than face possible elimination if it fails to rally.
10.0 Army Morale
10.1 In General
A. Each army has a starting Army Morale Level (AML), representing its spirit and will to fight. Adverse combat results lower an army's AML until it is demoralized and then broken.
B. Demoralization has an effect on the combat performance and morale of an army. When an army is broken, the game immediately ends in a decisive victory for the opponent.
10.2 Loss of Morale Points
A. An army loses one morale point per:
- Artillery unit eliminated;
- Non-artillery SP eliminated;
- LR point eliminated (applies both to original and replacement leaders).
B. Units which flip from their stronger to their weaker sides count the SP difference as eliminated.
C. Units which retreat or rout off the map (including those that fail to rally), however, do not count their current strength as eliminated.
10.3 Demoralization
A. Once an army is demoralized, it may not recover.
B. The effects of demoralization are:
- For units of a demoralized army to pass a morale check or rally, the roll must be less than the unit's MR (as opposed to less than or equal to).
- In all attacks performed by a demoralized army, use the special demoralization differential line on the CRT.
C. Demoralization takes effect the moment it occurs.
10.4 Broken Army
A. When an army's AML is reduced to zero, the army is broken and the game immediately ends in a decisive victory for the opponent.
B. If both armies become broken at the same instant, the phasing side is the winner.
10.5 Tracking Morale
A. Each side keeps track of its AML on the Morale Track, adjusting the morale markers to record each change in AML immediately it occurs.
B. The AML for each army is:
| Army | At Start | Demoralized | Broken |
|---|---|---|---|
| Russian | 100 | 33 | 0 |
| Swedish | 70 | 23 | 0 |
10.6 Special Adjustment to Russian AML
The first time that three Swedish combat units end their Movement Phase inside the Russian camp, immediately reduce the Russian AML by 15 morale points.
11.0 Victory Conditions
A. If an army is broken (AML reaches 0), the game immediately ends with the opponent automatically winning a decisive victory.
B. If neither side has won an automatic victory at the end of Turn 11, the following victory levels apply.
11.1 Swedish Marginal Victory
At the end of the game the Russian army is demoralized and the Swedish army is not, or both armies are demoralized.
11.2 Swedish Substantive Victory
As Swedish Marginal, except that the Swedes must have unrouted combat units in at least two of these hexes at the end of the game: 0607, 1005, 2006, 3220 (marked on the map with stars).
11.3 Russian Marginal Victory
At the end of the game the Swedish army is demoralized and the Russian army is not.
11.4 Russian Substantive Victory
As Russian Marginal, except that the Russians must have exited at least five unrouted combat units off the south edge of the map from any of these three hexes: 1241, 2441, 3441 (marked on the map with arrows).
11.5 Draw
If neither army is demoralized at the end of the game.
12.0 Russian Alert
The Russians are subject to certain restrictions regarding the deployment and movement of their forces in the early stages of the game.
12.1 Turn 1 Restrictions
A. No Russian units at all may move on Turn 1, except as a result of combat.
B. All Russian units outside the Russian Camp (including the single infantry unit which begins at hex 3824 in the Historical Scenario) may move and function normally from Turn 2 onward.
C. All Russian leaders may move and function normally from Turn 2 onward, even if they start inside the Camp.
12.2 Units in Russian Camp
A. The Russian combat units inside the Camp may move around inside the Camp from Turn 2 onward, but may not leave the Camp.
B. On Turn 4, the Russians may choose five units in the Camp to leave it. Only these five units are eligible to leave. No other Russian units may leave the Camp even if any of those five units reenters it.
C. Beginning with Turn 6, all Russian units inside the Camp are free to leave it.
D. Units which start outside or leave the Camp before Turn 6 are not obliged to stay in the Camp if they enter or reenter it, but other units may not leave in their place.
E. The moment a Swedish combat unit moves within five hexes of the Russian Camp (i.e. five hexes or less from any hex inside the Camp), all Russian units inside the Camp are alerted, and all may leave the Camp in the ensuing Russian Movement Phase. This rule takes precedence over the other rules in this subsection.
12.3 Combat Ability of Units in Russian Camp
Russian units engage in combat and may exert FZs normally, even if they are not free to move. They also retain ZOCs in the normal way.
13.0 Optional Rules
A. These optional rules may be added to any of the scenarios with the consent of both players. The players may use all, some, or none of these rules. They add some detail to the game (some call it realism, others call it chrome), at the expense of slightly increased complexity and playing time.
B. A number of optional rules require column-shifts to be made on the CRT. This is done by computing the CS differential in the normal way, including any addition for LR, and then reading the combat result from the column to the left or right (as appropriate) of that indicated on the CRT.
C. All column-shifts are cumulative, so it is possible for these to cancel each other out, or for there to be multiple column shifts to the right or left.
13.1 The Russians Surprised
The Swedes tried to surprise the Russians on the morning of the 28th. In many previous battles they had succeeded, but for a number of reasons they failed this time. What if the Russians had been surprised?
A. The MA of all Swedish units is doubled on Turn 1.
B. All Swedish attacks on Turn 1 are shifted one column to the right on the CRT.
13.2 Charles XII Unwounded
Many of the command control problems the Swedes suffered during the battle were due to the fact that Charles XII had been wounded a couple of days earlier, and was unable to lead the army himself as he was confined to a stretcher. What if he had not been wounded?
A. Replace the Charles XII 3-0-6 leader counter with the 33-12 counter.
B. Raise the Swedish AML at start to 75 morale points, and to 90 in the Maximum Swedish Strength scenario.
13.3 Assault Equipment
When the Swedes marched into battle on that fateful morning, they were not equipped for assault operations. Consequently, their attempts to storm the Russians' redoubts were an almost complete failure. What if the Swedes had better prepared themselves for this type of combat?
A. The Swedes receive four Assault Equipment markers. Assign them to specific infantry units during setup. The markers may not be transferred to other units during play.
B. Infantry units with assault equipment do not have their CS halved when attacking redoubts. The defender is still doubled, and other attacking units without assault equipment are still halved.
C. After units with assault equipment have attacked a redoubt, each one individually must check for depletion. Roll one die.
- On a 1-2, the assault equipment is depleted. Remove the marker from the unit, which may only attack normally thereafter.
- On a 3-6, the unit retains the Assault Equipment marker and may continue to attack redoubts at its full strength.
13.4 Hand Grenades
A. Each grenadier infantry unit has a one-time hand-grenade combat bonus.
B. The hand-grenade bonus may be used by each grenadier infantry unit in attack or defense. The owner announces hand-grenade use after the CS differential has been calculated, but before the die is rolled.
C. When the hand-grenade bonus is used, shift the CS differential one column in favor of the side with the grenadier unit (right for the attacker, left for the defender).
D. No more than one bonus column-shift per side may be used per combat.
E. Special Hand-Grenade markers are provided for the grenadier units. Remove them when the bonus has been used.
13.5 Fatigue
A. During Turns 10 and 11, both armies are considered fatigued. All combat units of both sides expend 2 MPs to enter a clear terrain hex, and 1 MP per hex of road movement.
B. Use normal movement costs for all other terrain.
C. Leaders are unaffected.
13.6 Prisoners of War
A. When an army has been demoralized, the owner may declare that any of its units that are about to be attacked surrender and become prisoners of war. Surrendered units are immediately removed from the map, and may not return.
B. Each surrendered unit reduces the owner's AML only by half as many morale points as if the unit had been eliminated in combat (fractions rounded up).
C. The owner announces surrender immediately before rolling the die for a specific combat.
D. Units that were going to attack any units that surrender may not attack other units instead.
E. All units in the same hex must surrender if any does.
F. Routed units and leaders may not surrender.
13.7 Visibility
The smoke from almost 60 cannons, tens of thousands of muskets, and the dust stirred up by over 100,000 men and horses, inevitably restricted visibility at certain times. Visibility varied according to the strength of the wind and intensity of the battle.
13.7.1 Determining Visibility
A. From Turn 3 onward, determine visibility at the beginning of each turn.
B. The Swedes roll one die.
- On a 1-3, visibility is good.
- On a 4-5, visibility is bad.
- On a 6, there is no change from the previous turn (good if rolled on Turn 3).
13.7.2 Effects
The effects of the different visibilities are as follows:
13.7.2.1 Good Visibility
There is no effect. All units function normally.
13.7.2.2 Bad Visibility
A. All MAs are halved (fractions rounded up).
B. Artillery may fire at a maximum range of three hexes. The effectiveness of artillery within three hexes is not affected.
C. Leader units may only add their LR to the MR of units attempting to rally in the same hex. They cannot use it for those in adjacent hexes.
13.8 Grapeshot and Ammunition Supply
A. Artillery engaged in combat with adjacent units, alone or in combination with infantry or cavalry, may use grapeshot.
B. Grapeshot may be used both in attack and defense, and results in a shift of one column on the CRT in favor of the side using the grapeshot.
C. The grapeshot shift applies in addition to the CS of the unit.
D. A maximum of one grapeshot shift per side may be applied per specific combat.
E. Use of grapeshot is limited by Ammunition Supply. Each side has a limited number of rounds available: Russia has 32 rounds, and the Swedes have four. These do not have to be assigned to individual artillery units.
F. Each use of the grapeshot bonus expends one round.
G. When all of a side's rounds have been expended, that side may no longer use the grapeshot bonus.
H. Ammo Supply markers are provided so that a record of grapeshot expenditure can be kept, using the Morale Track.
13.9 Cavalry Charges
Only Swedish regular cavalry units and dragoons may charge; Russian units and Swedish irregular cavalry (Vallacks) may not.
13.9.1 Requirements
A. A charging unit must start its Movement Phase outside EZOCs. It must be moved through at least two clear terrain hexes immediately prior to ending its movement adjacent to enemy units in clear terrain.
B. Cavalry units may not charge through or into any other terrain than clear hexes, and may only attack units in clear terrain at the end of the charge.
13.9.2 Effects
A. Shift the combat differential one column to the right for units successfully performing a cavalry charge.
B. No more than one column shift can be applied to a specific combat, regardless of the number of charging units.
C. Use the special markers to indicate charging cavalry and the units they are charging.
D. Charging cavalry may combine with non-charging units in combat.
13.10 Flank Attacks
Whenever attacking units occupy or are adjacent to each hex (all six) surrounding a defending unit, the attack is termed a flank attack. The surrounding units must be actually attacking the flanked unit.
13.10.1 Effect
Flank-attacked units have their CS halved (fractions rounded up).
13.10.2 Restrictions
Flank attack is not possible when more than one unit is attacked in a single combat, when the defender occupies a redoubt (including a redoubt under construction), or the defender is in an infantry square (13.11).
13.11 Infantry Squares
The phasing side may form a square during the friendly Movement Phase with any of its unrouted infantry units. Each unit expends 1 MP to form a square and 1 MP to leave a square.
13.11.1 Requirements
A. Squares are indicated by placing the appropriate marker on top of the infantry unit.
B. Units may not form a square in an EZOC.
C. Infantry in square that are forced to attack or move in any way during combat automatically exit square at no MP cost.
13.11.2 Effects
A. A square may not be subject to flank attack (13.10).
B. Cavalry units attacking a square have their CS halved (fractions rounded up).
C. Infantry units may not move while in square formation, except as a result of combat.
13.12 Dismounted Dragoons
A. The phasing side may dismount any of its unrouted dragoon units in the friendly Movement Phase.
B. Each unit expends 1 MP to dismount and 1 MP to remount.
13.12.1 Restrictions
A. Mounting and dismounting may only be done at the beginning of the phasing side's Movement Phase.
B. Units in EZOCs may not mount or dismount.
13.12.2 Other Requirements
A. Place the appropriate marker on dismounted dragoons to indicate their status.
B. Dismounted dragoons are treated exactly as infantry units, with an MA of 5.
13.13 Rapid Fire
Every infantryman carried about 40 rounds of ammunition with him. A well-trained soldier could load, aim, and fire one round in about half a minute. This meant that units had to restrict their rate of fire to avoid running out of ammunition too soon. This rule gives players the chance to use the firepower of their units to the maximum.
13.13.1 Effects
A. Either side may choose to double the CS of any of its infantry units (only) in any combat, defending or attacking.
B. This may only be done once per unit.
C. After a unit has used this rapid fire doubling, its CS is halved (fractions rounded up) for the remainder of the game.
13.13.2 Ammo Depleted Marker
Place an Ammo Depleted marker on each unit that uses rapid fire. The subsequent halving of its CS should not be confused with step losses; the unit is not flipped over and retains the same number of combat steps that it had originally.
13.13.3 Restrictions
Neither side may use rapid fire during the last three turns of the game (Turns 9-11).
13.14 Cavalry Retreat Before Combat
A. A cavalry unit attacked solely by infantry and/or artillery units may avoid combat by voluntarily retreating one hex before the combat is resolved.
B. The attacking units may then advance into the vacated hex or attack other unit(s), subject to the normal rules of combat.
C. Cavalry may not retreat before combat when attacked by artillery using the Bombardment Table.
13.15 Cavalry vs Routed Infantry
Cavalry units attacking routed infantry have their CS doubled.
13.16 Aides
Each player receives a limited number of aides, who can serve as an emergency leader. The Russians have three aides, and the Swedes have two.
13.16.1 Abilities
Aides function in the same way as leaders but for one player-turn only, after which they are removed from the map and may not return.
13.16.2 Deploying and Using Aides
A. Aides do not begin the game on the map, but are placed by their owner at the start of any friendly Movement Phase in the hex occupied by the highest ranking leader (Sheremetev for the Russians, Rehnsköld for the Swedes, or Charles XII for the Swedes if optional rule 13.2 is being used).
B. The aide may then move normally and act as a leader for that player-turn, at the end of which the counter is permanently removed from play.
13.16.3 Restrictions
A. Aides may not be placed if the side's highest-ranking leader has been eliminated.
B. Each side may bring on no more than one aide per player-turn, even if that aide is immediately removed under rule 13.16.4.
13.16.4 Stray Bullet
As soon as an aide is placed on the map, the owner must roll one die.
A. On a 1-5, the aide may function normally.
B. On a 6, the aide has been hit by a stray bullet and is immediately removed from the game.
13.17 Horse Artillery
There is evidence that the Russian cavalry was supported by a detachment of horse artillery. This rule makes use of the two Russian horse artillery units shaded light green.
13.17.1 Deployment
The two Russian horse artillery units are used with all four scenarios, and set up, one per hex, stacked with any Russian cavalry units.
13.17.2 Abilities
A. Horse artillery are treated as cavalry for movement purposes, and cannot enter terrain prohibited to cavalry.
B. However, for combat and AML purposes, treat them as artillery.
[Editor's note: the source numbering skips from 13.17.2 to 13.18.3; no sections 13.18.1 or 13.18.2 appear in the source rulebook, and none are supplied here.]
13.18.3 Gun Carriage Breakdown
The Russian horse artillery suffered some serious trouble during the battle; more than half of the gun carriages of these units broke down.
Whenever a Russian horse artillery unit moves its full MA, roll one die.
A. On a 1-4, there is no effect.
B. On a 5-6, the majority of guns in the battery have suffered carriage breakdown, and the unit may not move for the remainder of the game. Treat it as having an MA of 0.
14.0 Scenarios
A. There are four scenarios.
- The Standard Scenario (14.1) gives each player the forces actually present at the battle with a fairly free choice of setup. The Historical Scenario (14.2) introduces the added restriction of the actual historical initial dispositions.
- The Maximum Swedish Strength Scenario (14.3) looks at what might have happened had Charles XII concentrated all his available forces.
- The Battle on June 22nd Scenario (14.4) examines the possibility of the battle taking place six days earlier, before the Russian defensive positions had been prepared.
B. Each scenario lists the forces available to each side, their initial placement, which side sets up and moves first, and any special considerations that apply.
C. All scenarios last a maximum of eleven turns.
D. Victory is determined in accordance with 11.0.
E. All units begin all scenarios at full strength, all leader counters with the original (not replacement) leader faceup.
F. Units must always set up within the stacking limits of 5.0.
14.1 The Standard Scenario: The Fight For the Ukraine
A. All Russian and Swedish units shaded dark green and dark blue respectively are used, plus all ten redoubt counters.
B. The Russians set up first and move second. The Swedes set up second and move first. There are two setup lines on the map, marked as the Russian and Swedish setup lines respectively, and these are used in the setup.
14.1.1 Russian Setup
A. All redoubts must be set up in any clear hex between the Russian and Swedish setup lines.
B. Redoubts may not be placed adjacent to one another.
C. The 13 combat units marked r must be placed in the redoubts.
D. Any other ten infantry units, and any four artillery units marked c (Russian player's choice) must be placed anywhere inside the Russian Camp.
E. All other Russian units, including all leaders, are placed in any woods, buildings, or clear hex north of the Russian setup line.
14.1.2 Swedish Setup
All Swedish units must be set up in any clear, woods, or buildings hex south of the Swedish setup line.
14.2 The Historical Scenario: The Fall of a Great Power
A. All Russian and Swedish units shaded dark green and dark blue respectively are used, plus all ten redoubt counters.
B. The Russians set up first and move second. The Swedes set up second and move first.
C. The setup lines are not used in this scenario.
14.2.1 Russian Setup
A. Place one redoubt per hex marked R (1533, 1727, 1732, 1830, 1927, 2029, 2128, 2328, 2529, 2729). The Russians may choose which two of these hexes contain the redoubts under construction.
B. The 13 Russian units marked r must be set up in redoubts (of either type).
C. Set up one picket unit per hex marked P (0120, 0923, 1326).
D. Set up cavalry units in any hex marked C (1925, 2023, 2025, 2124, 2126, 2224, 2226, 2324, 2326, 2424, 2426, 2525, 2527, 2625, 2627, 2725, 2727, 2825, 2827, 2926, 2928, 3026, 3028).
E. The general cavalry unit may stack freely (5.2.3).
F. Set up all other infantry units in any hex marked I (3018, 3019, 3020, 3021, 3022, 3118, 3123, 3217, 3219, 3220, 3222, 3317, 3321, 3323, 3416, 3420, 3422, 3516, 3521, 3523, 3620, 3622, 3721, 3723, 3824).
G. Set up artillery units marked c anywhere inside the Russian Camp.
H. Set up Baur and Mensjikov with any cavalry unit.
I. Set up Hallart and Golitsyn with any infantry unit.
J. Set up Peter I (Peter the Great) and Sheremetev in hex 3818 (marked HQ).
14.2.2 Swedish Setup
A. Set up one irregular cavalry unit per hex marked IC (3828, 3929).
B. Set up one picket unit per hex marked SP (2538, 3436).
C. Set up infantry units in any hex marked SI (0939, 1038, 1138, 1139, 1237, 1238, 1338, 1339, 1340, 1438, 1439, 1539).
D. Set up the artillery unit in hex 1439.
E. Set up leaders Charles XII and Rehnsköld in hex 1237, and Lewenhaupt in hex 1539.
F. All cavalry units and the leaders Creutz and Hamilton enter the map on Turn 1, via any hexes in Entrance Area A (0441-1441). Different units may enter on different hexes, and all are considered in command control on Turn 1.
14.3 Hypothetical Scenario: Maximum Swedish Strength
In planning the battle, Charles XII broke one of the cardinal rules of warfare: concentration of force. He refused to lift the siege of Poltava, and some 2000 men had to remain in the trenches around the city. Another 2400 were left in the Swedish camp (including almost all the available artillery), and a number of other small detachments were never drawn into the army, but were left scattered around Poltava. This scenario gives players a chance to find out what might have happened had Charles decided to maximize his strength.
A. All Russian units shaded dark green are used, together with all ten redoubt counters. The Swedish player adds all the optional units shaded light blue, with the exception of the Charles XII counter and the two aide counters.
B. The four optional units marked R replace their equivalent units in the Standard Scenario. Remove the dark-blue-shaded Livgardet II (infantry), Sodra Skanska (cavalry), Ducker and Livdragonerna (dragoon) units from the game.
C. The Russians set up first and move second. The Swedes set up second and move first.
14.3.1 Russian and Swedish Setup
These are in all respects identical to those of the Standard Scenario (14.1.1 and 14.1.2).
14.3.2 Special Rule
The Swedish AML is raised by 15 points to start at 85, but the demoralization level does not change.
14.4 Hypothetical Scenario: The Battle on June 22nd
When the Russians attempted to make contact with the besieged Poltava by fighting their way across the Vorskla failed, they changed strategy. On June 21st they started to cross the river upstream at Petrovka. The Swedes expected an immediate clash, and the next day regrouped to meet the Russians. The attack never came; the Russians simply moved closer to Poltava and dug in. This scenario gives players the chance to determine the outcome of a battle on June 22nd.
A. All Russian and Swedish units shaded dark green and dark blue respectively are used, but no optional units or redoubts.
B. The Russians set up second and move first. The Swedes set up first and move second.
14.4.1 Russian Setup
Set up all Russian units in any clear, woods, or buildings hexes north of the Russian setup line.
14.4.2 Swedish Setup
Set up all Swedish units in any clear, woods, or buildings hexes south of the Swedish setup line.
14.4.3 Special Rules
A. There are no redoubts or redoubts under construction in this scenario, and all entrenchment hexsides are ignored.
B. The Russian Camp does not exist.
C. Do not use the Russian Alert rule (12.0) in this scenario. All Russian units may move freely from the start.