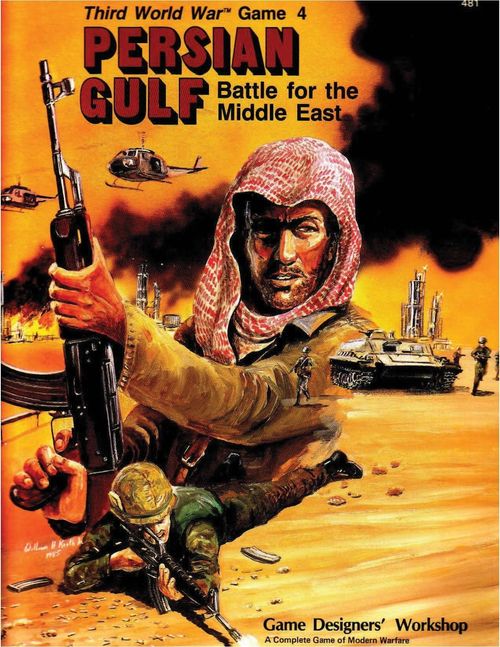
Persian Gulf: Battle for the Middle East
Persian Gulf: Battle for the Middle East Rulebook
Table of Contents
Table of Contents
- Introduction
- Game Components
- Sequence of Play
- Zones of Control
- Stacking
- Movement
- Ground Combat
- Regrouping
- Isolation
- The Air War
- Grounding
- Supply
- Air Transport and Airborne Assault
- Naval Transport and Amphibious Assault
- Weather
- Special Rules
- Neutrals
- Critical Losses
- Surrender
- New Units
- The Diplomacy Game
- Scenarios, Victory Conditions, and Victory Points
- Theaters of Operation (Optional)
- Nuclear Warfare (Optional)
- Chemical Warfare Abilities (Optional)
- Tactical Advantage (Optional)
- Game Clarifications
- Expanded Sequence of Play
Introduction
The Third World War is a two-player game covering a potential land war in Europe and the Middle East at the end of the 1980s. One player (the Pact player) commands the forces of the Warsaw Pact and allied nations and factions; the other player (the NATO player) commands the forces of the North Atlantic Treaty Organization and allied nations and factions.
Game Components
There are counter sheets with a total of ground units, air units, and markers. Ground units (hereafter called units for brevity) represent the actual divisions, brigades, and regiments deployed in Europe and the Middle East or committed to reinforce units already there.
Air units represent the combat aircraft of the combatants.
Markers are used for various informational purposes.
Diplomacy Cards
A set of diplomacy cards is included: Soviet diplomacy cards and U.S. diplomacy cards, plus one blank card for each side.
Sequence of Play
The Third World War is played in a series of turns, each representing the passage of one week. Each turn is divided into four segments, and the segments are divided into impulses, sub-impulses, and phases. To play a turn, follow the sequence of play from beginning to end, exactly as shown. Some phases may be skipped depending on the scenario played. No game activity may take place out of sequence.
A Game Turn Track is provided on one of the Player Aid Cards, as well as a Game Turn marker. The Game Turn marker has one side that indicates Pre-war, and one side that indicates War. See rule 20.5 for more information on pre-war and war turns. Additionally, informational markers are provided to track events that are key to game play.
The Sequence of Play
Initial Segment
- Diplomacy Phase
- Neutral Activation Phase
- Aircraft Maintenance Phase
- Weather Determination Phase
- Nuclear Restraint Phase (optional)
- Theater Air Superiority Phase
- Deep Strike Phase
- Supply Phase
- Critical Loss Determination Phase
Warsaw Pact Segment
- Strike/Interdiction Phase
- Warsaw Pact First Impulse
- First Echelon Sub-Impulse
- Movement Phase
- Combat Phase
- Second Echelon/Breakthrough Sub-Impulse
- Movement Phase
- Combat Phase
- Regroup Phase
- First Echelon Sub-Impulse
- NATO Reserve Impulse
- Movement Phase
- Combat Phase
- Regroup Phase
- Warsaw Pact Second Impulse
- The second impulse is identical to the first impulse.
- Warsaw Pact Surrender Phase
NATO Segment
- Strike/Interdiction Phase
- NATO First Impulse
- Movement Phase
- Combat Phase
- Regroup Phase
- NATO Second Impulse
- The second impulse is identical to the first impulse.
- NATO Surrender Phase
Final Segment
- Aircraft Landing Phase
- Unsupplied/Grounded Recovery Phase
- Overland Communication Phase
- Nuclear Escalation Phase (optional)
Phasing Player
This term is used in subsequent rules to refer to the player whose units are moving, attacking, or performing other operations during a particular phase. The Pact player is the phasing player during the Pact first and second impulses; the NATO player is the phasing player during the NATO first and second impulses and the NATO reserve impulse.
Complexity
The sequence of play shown may at first seem rather frightening. Notice, however, that many of the phases are repetitive: there are seven similar movement phases, each followed by a combat phase. Other phases are very easy to perform; the nuclear escalation phase, for example, requires only one die roll. Some phases are not used once certain events occur and some phases are omitted in certain scenarios. It is not as complex as it looks.
Expanded Sequence of Play
There is also a sequence of events which must be followed within some of the phases shown above. For ease of description, the rules do not completely address this sequence. The complete sequence of all game events is covered in the expanded sequence of play (printed separately on a Player Aid Card). Players should refer to the expanded sequence when playing the game.
Zones of Control
Every unit exerts a zone of control (abbreviated ZOC) into the six hexes adjacent to it.
Types of ZOCs
There are two types of ZOC: standard and airmobile. All airmobile units (mobility class; see the unit identification chart) and U.S. divisions have airmobile ZOCs; all other units have standard ZOCs. Counters with red text shown as their stacking points exert an airmobile ZOC.
Limits of ZOCs
Only airmobile ZOCs extend across full sea or lake hexsides (including bridged hexsides). Only airmobile ZOCs and the ZOCs of mountain and ski units extend into mountain and mountain pass hexes. Only airmobile ZOCs and the ZOCs of light mechanized, mountain, ski, and overland units extend into wilderness hexes. No ZOCs extend across the borders of neutral countries.
Effects of ZOCs
ZOCs have many effects, as explained in later rules.
Stacking
Several units may be placed in a single hex, one stacked on top of another. There is a limit to the number of units which may be present, based on the terrain of the hex and upon higher unit integrity.
All stacks are open to inspection from either player, at any time.
Stacking Points
Each ground unit counter provides a value for stacking points in the upper left corner of the counter. One stacking point represents one brigade or brigade-equivalent.
Each air unit counter represents one stacking point for Critical Loss calculations (see rule 17).
Stacking Limits
The stacking limits for all types of hexes are summarized on the stacking limits section of the terrain effects chart.
In most terrain types, up to 10 stacking points may stack in a hex. Only 7 stacking points may stack in a swamp hex, only 4 in a mountain pass hex, and only 3 in a mountain hex or wilderness hex.
The Arctic consists of all hexes north of the Arctic line shown on the map. The Arctic stacking limits are used for all hexes in the Arctic (up to 3 stacking points for most types of hexes; 1 stacking point for mountain, mountain pass, or wilderness hexes).
Note: Holding Boxes are available on Player Aid Cards, along with corresponding markers, lettered A through I, for both NATO and the Pact. Unwieldy stacks of counters may be moved from the map to the holding boxes, placing the corresponding marker in place of the stack. The holding boxes and counters in them are open to inspection from either player at any time.
Higher Unit Integrity
If units of more than one Pact army or NATO country are stacked in a hex, the stacking limit for that hex is reduced by 3. Note that units of different NATO countries or Pact armies may not stack at all in certain hexes.
Most Pact units have an army designation, below the unit type symbol, to the right of the slash. Pact armies also are identified with unique color bars and colors in the unit type symbol. Units with the same army designation belong to the same army. Some units have no army designation; these units may be stacked with the units of any army without reducing the stacking limit.
Some nations and factions that start the game neutral may join the Pact during play. Each of these nations or factions is treated as a separate army for the purposes of Pact stacking. For example, if the Syrians join the Pact, Syrian units are treated as a Pact army, separate from other Pact armies.
Example: Three Soviet divisions of the 76th Guards Army plus one Soviet airmobile brigade with no army ID (a total of 10 stacking points) may stack in a clear hex; but only two Soviet divisions of the 76th Guards Army and a Syrian brigade (a total of 7 stacking points) may stack in the same hex.
When Limits Apply
Stacking limits apply at the end of each movement phase and at the end of every advance or retreat during each combat. Thus, units may exceed the stacking limit while moving as long as the limit is not exceeded at the end of the phase.
Movement
Units move during the various movement phases, expending movement points from their movement allowances to move from hex to adjacent hex and to cross certain hexsides.
When Units Move
The Pact player may move any units during the movement phase of the first echelon sub-impulse in both Pact impulses. The NATO player may move any units during the movement phases of both NATO impulses. The Pact player may move any units which are not in enemy ZOCs during the movement phase of the second echelon/breakthrough sub-impulse in both Pact impulses. The NATO player may move any units which are not in enemy ZOCs during the movement phase of the NATO reserve impulse. It is possible for a Pact unit to move four times and a NATO unit three times in a turn, although this is rare in practice.
Note: Due to certain doctrinal and professional limitations, various regional forces are not able to operate to the same extent as regular Pact and NATO forces. These limits are given in rule 15.3.
Movement Allowance
Each unit has a movement allowance of 6 movement points in each friendly movement phase. This allowance may not be saved from phase to phase or transferred from unit to unit.
Mobility Classes
Each unit belongs to a particular mobility class, as shown on the unit identification chart. There are four classes: airmobile, mechanized, motorized, leg-mobile.
For brevity, units in the airmobile movement class are referred to as "airmobile units"; other classes are referred to similarly.
Note: An overland mountain unit is a mechanized unit. It moves as a mountain unit in mountain hexes, as an overland unit in wilderness hexes, and as a mechanized unit in all other hexes. In wilderness hexes, the light mechanized unit pays different MP costs than other mechanized units. These costs are given on the terrain effects chart.
Movement Limitations
Enemy Units. A unit may never enter a hex containing an enemy unit, with the exception of an opposed amphibious assault (see rule 13.3.1).
Neutral Countries. No unit may enter a neutral country (see rule 16).
Full Sea or Lake Hexes. Only airmobile and amphibious units may cross unbridged full sea or lake hexsides. Only airmobile units may enter full sea hexes, and airmobile units may never end a movement phase in full sea hexes; airmobile units may enter only full sea hexes which are adjacent to partial sea hexes unless their side has air superiority in that theater (see rule 9.4).
Mountain and Mountain Pass Hexes. Only airmobile and mountain units may enter mountain hexes. Units other than these units may enter or leave mountain pass hexes only through pass hexsides; airmobile and mountain units entering pass hexes across non-pass hexsides expend the movement cost to enter a mountain hex.
Wilderness Hexes. In wilderness hexes, overland units and the light mechanized unit pay different movement costs than other mechanized units; ski and mountain units pay different movement costs than other leg units. These costs are given on the terrain effects chart.
How Units Move
Units move from hex to adjacent hex, expending movement points to enter hexes, cross hexsides, and enter or leave ZOCs. A unit may enter a hex only if it has enough movement points remaining to pay the full cost of entering the hex (along with associated costs of hexsides or ZOCs). Movement costs depend upon the terrain of the hex (or hexside) and the mobility class of the unit; all costs are shown on the terrain effects chart. Exception: A unit may move one hex, regardless of cost, if that constitutes its only movement during the phase.
Example: A mechanized unit entering a swamp hex across a major river would expend 3 (2 + 1) movement points; it would then have 3 points remaining for further movement in the phase.
Effects of ZOCs (Movement)
Units also expend movement points to enter and/or leave hexes in enemy ZOCs. The cost depends on the unit's mobility class and the type of ZOC exerted into the hex, as shown on the terrain effects chart.
Note that airmobile units expend no movement points to enter or leave a standard ZOC, and that all units expend 2 movement points to enter or leave an airmobile ZOC.
The cost is only paid once per hex entered or left, regardless of how many enemy units exert ZOCs into the hex.
Example: A mechanized unit moving from a hex in an enemy airmobile ZOC to an adjacent clear hex in a standard ZOC would expend 4 movement points: 1 for the clear hex, 2 to leave an airmobile ZOC, and 1 to enter a standard ZOC.
Special Movement
Several types of special movement may be performed in a movement phase. Any unit may be moved by air transport (see rule 12.1) or naval transport (see rule 13.2). Airborne and mechanized airborne units may make airborne assaults (see rule 12.2). Amphibious units may make amphibious assaults (see rule 13.3).
Pact Off-Map Transport Net
Pact units may move off the map on any Pact map edge (edge of map in Soviet Union, Poland, Czechoslovakia, Hungary, or Romania) and re-enter the map on any Pact map edge. It takes one turn for such movement; a unit re-enters the map in the same movement phase in which it exited the map in the previous turn. A Warsaw Pact Off-Map Movement Track player aid is provided to track off-map movement.
Pact units may not use this rule to retreat off the edge of the map; no units may exit the map due to retreat.
Example: If a Soviet unit exits the map in the movement phase of the first echelon sub-impulse of the Pact second impulse on Turn 4, it re-enters the map on Turn 5 in the same phase.
Ground Combat
During the various combat phases, units of the phasing player may attack adjacent enemy units. Units attack with their attack strengths and defend with their defense strengths. Proficiency ratings are also important in combat.
When Units May Attack
Attacking is voluntary; no unit is ever required to attack.
The Pact player may attack during the combat phase of:
- the first echelon sub-impulse in both Pact impulses with any units;
- the second echelon/breakthrough sub-impulse in both Pact impulses with any units which did not begin the sub-impulse in an enemy ZOC.
The NATO player may attack during the combat phase of:
- the NATO first and second impulses with any units;
- the NATO reserve impulse with any units which did not begin the impulse in an enemy ZOC.
Note: It is possible for a Pact unit to attack four times and a NATO unit three times in a turn, although this is somewhat unlikely in practice.
Restrictions on Combat
Units may attack only adjacent enemy units.
In general, only airmobile and amphibious units may attack across a full sea or lake hexside (including bridged hexsides). However, all units may attack across the Bosporus, treating these sea hexsides as major river hexsides. The Bosporus consists of the following hexsides: C-1442/C-1443 and C-1442/C-1342.
Only airmobile and mountain units may attack into mountain hexes. Units other than airmobile and mountain units may attack into mountain pass hexes only through pass hexsides.
Only units which may move into wilderness hexes may attack into wilderness hexes.
A single unit may attack or be attacked at most once per phase. Each attack must be directed at the units occupying a single hex. All units in a hex defend together and may not be attacked separately. All units attacking a single hex attack together.
If a unit retreats into a hex which is attacked later in the same phase, it contributes nothing to the defense of the hex but suffers the effects of the combat result.
Any number of units may attack a single hex. However, only as many stacking points may attack from a single hex as could stack in the defender's hex. For example, only 3 stacking points could attack a mountain hex from any single other hex; thus a maximum of 18 stacking points could attack a mountain hex (3 from each adjacent hex).
A unit with an attack strength of 0 may attack. (Reasons why this might be desirable include raising the average proficiency of an attack and gaining the ability to advance after combat.)
Declaring Attacks and Determining Odds
In each combat phase, the phasing player declares all of their attacks before any are resolved. An attack is declared by placing an odds marker on the hex being attacked. Once an attack has been declared, it must be carried out.
Determine Attack Strength. For each attacking unit, determine their modified attack strength. Units' attack strengths may be modified by terrain effects or by unsupplied status. All strength modifiers are cumulative; a unit halved twice is quartered. When halving strengths, retain fractions; half of 7 is 3½.
- Attack Strength Modifiers, Terrain. Attack strengths are halved when attacking into certain hexes or across certain hexsides, depending on unit type; see the Terrain Effects Chart.
- Attack Strength Modifiers, Supply. The attack strengths of unsupplied units are also halved (see 11.3).
- Determine Total Modified Attack Strength. Total the modified attack strength for each unit participating in the attack.
Determine Total Defense Strength. Total the defense strength for all units being attacked.
Determine Initial Odds. To determine initial combat odds in a single battle, divide the total modified attack strengths of all attacking units by the total defense strengths of all defending units. Express this ratio as one of the odds levels found on the combat results table, rounding down in favor of the defender.
Example: In an attack of 39 strength against 8, the initial odds level is 4:1.
The initial odds may also be modified; see below. Odds before modification may be higher than 10:1 in integral increments (11:1, 12:1, etc.) or lower than 1:5 (1:6, 1:7, etc.).
Initial odds and subsequent modifications can be tracked on the Combat Odds Track.
Determine Odds Modifiers. A battle's odds may be modified by terrain effects, unit proficiency, or by the effects of air missions during combat (see Air War rules).
Negative modifiers reduce odds; a modifier of -1 reduces odds by one level; 14:1 becomes 13:1, 1:2 becomes 1:3, 2:1 becomes 1.5:1, etc. Positive modifiers increase odds.
All modifiers are cumulative. For example, separate modifiers of -1, -2, and +2 combine for a -1 modifier, which reduces odds by one level.
Odds Modifiers, Terrain. A battle's odds may be modified by terrain effects, see the Terrain Effects Chart. All terrain effects are negative odds modifiers.
Odds Modifiers, Proficiency. Odds in an attack are affected by the difference in average proficiency of the attacking and defending units. To determine each side's average proficiency, total the proficiencies, as modified by disruption, isolation, and demoralization, of all units involved and divide by the number of units. The side with the higher average proficiency receives an odds modifier in its favor (positive if attacking, negative if defending); the size of the modifier depends on the size of the proficiency difference, as shown on the proficiency modifiers chart.
| Difference | Modifier |
|---|---|
| Greater than 0, but less than 2 | 1 odds level |
| At least 2, but less than 4 | 2 odds levels |
| At least 4, but less than 6 | 3 odds levels |
| At least 6 | 4 odds levels |
Example: Three units with proficiencies of 5, 4, and 7 attack two units with proficiencies of 6 and 6. The attacker's average proficiency is (5+4+7)/3, or 5⅓. The defender's average proficiency is 6. Since the defender's proficiency is higher than the attacker's but less than 2 higher, the odds are modified by -1.
In practice, it is often possible to determine modifiers without calculating average proficiencies.
Example: If three units with proficiencies of 6 are attacked by two units with proficiencies of 6 and 7, it is obvious that the attacker's proficiency is higher than the defender's but less than two higher.
Declare Attacks. After calculating the modified odds for an attack, place the appropriate odds marker on the defender's hex. For attacks with odds less than 1:1 or greater than 10:1, players will need to make a note to remember the exact odds. Placing the odds marker serves as a declaration of attack, meaning the attack must be carried out.
Repeat this process to declare all attacks to be carried out during the combat phase.
Combat Resolution
After all odds are marked and attacks are declared, they are resolved one by one in any order the attacker desires. One attack must be completely resolved before the next can begin.
Each attack consists of the following steps:
- Declare Air Missions: Both sides declare ground attack and top cover missions.
- Resolve Nuclear Attacks (optional): If the nuclear warfare rule is in use and the conflict level is 1 or more, both sides may allocate and resolve artillery NAPs. Nuclear attacks cause disruptions and eliminate units, which may require combat strengths and proficiency differences to be recalculated.
- Resolve Air Missions: Air missions declared in step 1 are resolved, including air combat and air defense fire. Successful ground attack missions result in odds modifiers.
- Determine the Combat Result: After re-computing the odds necessary after steps 2 and 3 plus possible isolation of the defender resulting from advances after previous attacks, find the corresponding column of the combat results table. At this point, odds of greater than 10:1 become 10:1 and odds of less than 1:5 become 1:5. Roll a die and cross-index the odds with the die roll to determine the result. Apply the result immediately.
After applying the combat results, return to step 1 to carry out the next attack.
Combat Results
There are four types of combat results (in addition to "no effect") on the combat results table. Results to the left of the slash affect the attacker and those to the right affect the defender. Only units participating in the attack are affected; all units in the defending hex are involved, but there may be units in the attacking hex which are attacking other hexes or not attacking at all.
- E — Eliminated. All units of the affected side participating in the attack are eliminated.
- D, 2D, 3D, 4D — Disrupted. All units of the affected side participating in the attack receive the number of disruptions indicated.
- EX — Exchange. All defending units are eliminated. The attacker must eliminate attacking units whose total printed (unmodified) attack strength equals or exceeds the total defense strength of the eliminated defending units. Surviving attacking units suffer one disruption each.
- R — Retreat. All defending units must retreat two hexes.
Disruption
Units may become disrupted in a variety of ways: through combat results, retreating through zones of control, air strikes, and failure of an airborne or amphibious assault.
When a unit becomes disrupted, most units may be flipped to their reverse side, which reflects one disruption. (Players may choose to not use the reverse side of the counters and simply place a one-disruption marker on the unit when receiving an initial disruption.) If receiving more than one disruption, place a disruption marker (red for the Pact, blue for NATO) of the correct denomination on top of the unit. Disruptions are cumulative.
To conserve markers (and avoid unwieldy stacks), one marker can be used to mark the disruption of all units below it; place undisrupted units on top of the marker.
Example: If a unit, which already has one disruption and has been flipped to its reverse side, suffers an additional disruption, the player has two options: 1) flip the unit to its front side, then place a two-disruption marker on the unit, or 2) leave the unit on its back side, then place a one-disruption marker on the unit. For consistency, we recommend both sides use the same approach throughout the game.
Each level of disruption reduces a unit's proficiency by one. Thus a unit with an unreduced printed proficiency of 7 and three disruptions would have a proficiency of 4. If a unit's total number of disruptions ever equals or exceeds its unreduced printed proficiency, the unit is eliminated. (Note the term printed proficiency; a unit is not made easier to eliminate if it is isolated or demoralized.)
Units recover from the effects of disruption by regrouping (see Regrouping).
Retreats
The defending player chooses the retreat path of their own units within the following restrictions. A retreating unit must be moved two hexes away from the hex it occupied during combat. If more than one unit was in the hex, all must retreat to the same hex. A unit may not retreat into a hex it could not enter, or across a hexside it could not cross during regular movement.
There are priorities for the retreat path, which apply in the order given:
- A unit may not retreat into or through a hex containing a strike marker, if possible.
- A unit may not retreat into or through an enemy zone of control, if possible. A unit suffers one disruption for each such hex entered during retreat.
- A unit must retreat to a hex so that the stacking limits are not violated, if possible. (This applies to the final hex of the retreat only.) If not possible, the unit must continue to retreat one or more hexes (following the retreat rules) until it reaches a hex in which the stacking limits are not violated.
- Each hex of retreat must be one hex farther away from the original hex occupied by the unit.
A unit in a major city may ignore a retreat result, although it may retreat if the defender desires. If any units do retreat, all must retreat. A unit which reaches a major city may end its retreat there, even if it has only retreated one hex.
If a unit is unable to retreat the full required distance, it remains in place and suffers four disruptions.
If a unit retreats into a hex which is attacked later in the same phase, it contributes nothing to the defense of the hex but suffers the effects of the combat result.
Advance after Combat
If, at the conclusion of an attack, there are no defending units remaining in an attacked hex (through retreat or elimination), at least one attacking unit MUST advance into the defender's hex and remain there. Each other attacking unit may (but is not required to) advance one or two hexes. The first hex of the advance must be the hex vacated by the defending units. No movement point costs are paid in the advance and the advancing units ignore enemy ZOCs. However, the advancing units may not move into or through terrain they could not enter during the movement phase.
Certain terrain types limit advance to only one hex. See the terrain effects chart. If the defender's hex is one of the listed terrain types or if the attacker's first hex of advance is across a major river hexside, the advance stops in that hex. (Note that the terrain of hexes other than the defender's hex does not limit advances to only one hex.)
Regrouping
Units may recover from disruption by regrouping.
When Units May Regroup
Units of the phasing player which did not move or attack during an entire impulse and which are not in enemy ZOCs may regroup in the regroup phase. There are two Pact regroup phases, one at the end of each Pact impulse, and three NATO regroup phases, one at the end of the NATO reserve impulse and one at the end of each impulse of the NATO segment.
How to Regroup
Each unit which regroups removes one level of disruption; for example, a unit with two disruptions would be reduced to one disruption.
Regroup Limits
Pact units, and units from neutral countries which join the Pact, with only one disruption may not regroup; when a Pact unit or unit from a neutral country that joins the Pact becomes disrupted, it carries at least a single disruption for the rest of the game.
Isolation
Isolation affects unit proficiency during the combat phase, and limits regrouping during the regroup phase. Units unable to trace a line of communication are isolated. Note that isolation is a completely separate concept from being out of supply. A unit may be in either condition, or both, or neither.
In the combat phase, immediately before each battle takes place, determine if any participating units (attacker or defender) are isolated.
In the regroup phase, immediately before regrouping, determine if any regrouping units are isolated.
Line of Communication
A line of communication is a path of hexes of any length from a unit to a friendly source. The line may not enter terrain the unit could not enter using regular movement (not including air or naval transport); it may not enter a wilderness hex except for lines for airmobile units (only); it may not enter a hex in an enemy ZOC unless the hex is occupied by a friendly unit.
Friendly Source
A friendly-controlled port or city is one which friendly units were the last to occupy or which is in a friendly country and has never been entered by an enemy unit.
NATO units may trace to:
- any hex on the west edge of map A in France;
- any non-mountain hex on the east or south edge of map C or the west edge of map E in Turkey;
- any friendly-controlled port in the North Sea, Central Mediterranean, Aegean, or Persian Gulf naval zone;
- any friendly-controlled port in the Turkish Straits naval zone if the port is not closed to NATO;
- any friendly-controlled port in the Norwegian Sea naval zone if the naval zone is controlled by NATO;
- NATO units that are initially setup in West Berlin are never isolated, as long as they remain in West Berlin;
- Danish and Norwegian units may trace to any friendly-controlled city in their home countries;
- Turkish units may trace to any friendly-controlled major city in Turkey.
Pact units may trace to:
- any hex on any map edge in the Soviet Union, Poland, Czechoslovakia, Hungary, Romania, or Afghanistan;
- any friendly-controlled port in the Black Sea, Bothnia, Caspian Sea, and Barents Sea naval zones;
- any friendly-controlled port in the Norwegian Sea naval zone if the zone is Pact controlled;
- any friendly-controlled port in the Baltic Sea naval zone if the Pact controls both Kiel and Lubeck;
- any friendly-controlled port in the Turkish Straits naval zone if the port is not closed to the Pact;
- Bulgarian units may trace to any friendly-controlled city in Bulgaria.
Romanian units may trace to any friendly-controlled city in Romania, in addition to tracing to Pact sources when controlled by the Pact and NATO sources when controlled by NATO.
Austrian, Finnish, Swedish, and Yugoslav units may trace to any friendly-controlled city in their home countries, in addition to tracing to NATO sources when they join NATO.
Regional forces may trace their communications to the same sources as their controlling side or to any friendly-controlled city in their home country.
Regional forces are Iraq, Iran (both Army and Revolutionary Guards), Saudi Arabia, Kuwait, Qatar, the United Arab Emirates, and Oman. Units from countries with no printed cities may trace to friendly-controlled ports in their countries instead.
Regional intervention forces may trace communications to the same sources as their controlling side. In addition, Jordanian units may trace to any hex on the west edge of the map in Jordan, and Syrian units may trace to any hex on the west edge of the map in Syria.
Iranian factional forces (Iranian Communists, the Tudeh, the Kurds, and the Mujahideen) are not affected by isolation and do not have to trace communications.
Effects (Isolation)
Combat Phase. Isolated units have their proficiency reduced by one.
Regroup Phase. Isolated units may not regroup.
Locations
Certain rules depend on whether or not a city, port, airfield, or oilfield is isolated. Such a location is isolated if the owning player cannot trace communications as for a mechanized unit from the city to a communications source.
The Air War
Both players have air units, each representing groups of approximately 100 aircraft. Air units are rated for range and serviceability (maintenance), and effectiveness in three types of missions: air superiority, ground attack, and strike. In general, each air unit may be assigned to one mission each turn. For the remainder of this rule, the term unit refers to air units.
Basics
Some basic concepts of the air rules are explained here.
Theaters. For the purposes of air operations, the game maps are divided into six theaters — Northern, Western Europe, Southwestern, Balkan, Western Asia, and Persian Gulf. These theaters are denoted with light purple borders on the game maps. A seventh theater — the Eastern European theater — appears on Map D; this theater is ignored for current game purposes.
All air operations are handled separately for each theater, although it is possible for units to transfer between theaters or fly missions in other theaters. Each theater is adjacent to one or two other theaters; a theater is adjacent to the theater immediately preceding or following its listing in the list:
- Northern
- Western Europe
- Southwestern
- Balkan
- Western Asia
- Persian Gulf
(Note that the Balkan and Western Asia theaters are adjacent, even though the European and Middle East maps are separate; note that the Western Europe and Balkan theaters are not adjacent.)
Range. Air units may fly missions in or be committed to air superiority to theaters as limited by their range: short- and medium-range air units only in the theater in which they are based; long-range air units in the theater in which they are based or in any adjacent theater; intercontinental-range air units in any theater.
Note: Players may wish to place a generic marker underneath long-range air units as a reminder that they were based in an adjacent theater before the mission.
When transferring from the available box, air units may transfer to any theater. When transferring after flying a mission or returning from an abort, medium-range air units may transfer to an adjacent theater, and long- and intercontinental-range air units may transfer to any theater.
Air Theater Displays. Each player has an air theater display for each theater. All air units, except when actually flying a mission, are kept in one of the boxes on the display.
At the beginning of a turn most units will be in the flown box (if they flew a mission last turn) or in the available box.
In the maintenance phase, units in the flown box which make their maintenance die rolls are moved to the available box.
In the theater air superiority phase, units which will fly air superiority missions are moved from the available box to the air superiority box.
Units in the available box and the air superiority box may fly missions during the turn, after which they are placed in the flown box or the shot down box, depending on the result of air combat and air defense fire.
In the aircraft landing phase of every turn, all units remaining in the air superiority box are moved to the flown box.
Every turn, half the units in the shot down box are returned to the flown box and half are eliminated from the game.
The grounded box contains units which are grounded and the crater track records the amount of cratering of theater airfields.
The flow of air operations is explained in more detail below and in the expanded sequence of play. All air theater displays (and the units on them) should always be in full view of both players.
Participation. Air units from multiple friendly nations, even rivals (see rule 15.4), may participate in a single air mission.
Example: A West German Tornado may provide top cover for a U.S. A-10 on a ground attack mission supporting combat with a French ground unit.
Maintenance
During the aircraft maintenance phase, each player rolls one die for each unit in the flown box of the air theater display. If the die roll is less than or equal to the unit's maintenance rating, place it in the available box of the same theater. Units which fail their maintenance rolls remain in the flown box and are not available to fly missions in that turn.
Crater Repair
During the aircraft maintenance phase, after units have been grounded, each player rolls one die per theater and reduces the number of craters by the number rolled, recording this on the crater track on the appropriate air theater display.
Air Superiority Allocation
During the theater air superiority phase, both sides determine which of their units will be committed to air superiority missions each turn in each theater. In order to be committed to air superiority, a unit must have an air superiority rating of at least 1.
Units allocated to air superiority are moved from the available box to the air superiority box. Long-ranged units may be moved to the air superiority box of the theater in which they are based or an adjacent theater; short- and medium-ranged units may be moved only to the air superiority box in the theater in which they are based.
The Pact player allocates their units first, and the NATO player makes their allocations after examining the Pact allocations.
In each theater, the player who has committed more units to air superiority has gained air superiority in that theater and may send up to two units on each air superiority mission flown during the turn; the other player (or both players if there is a tie) may send only one. Players can denote which side has air superiority in each theater by placing an Air Superiority marker on the air theater display.
Only units in a theater's air superiority box may fly air superiority missions in that theater, and units in the box may only fly air superiority missions. Units remaining in the available box may fly ground attack and strike missions.
Missions
There are three basic types of air missions: ground attack, strike, and air superiority. Air transport missions are a fourth type, but these are performed not by air units but by air transport points, for which there are no counters (see Air Transport and Airborne Assaults). Air superiority missions are subdivided into escort, interception, and top cover missions. Strike missions are subdivided into logistical strike, runway cratering, and strike/interdiction missions.
In order to fly a mission, a unit must have a rating of at least 1 for that mission. The various types of missions are flown at several points in the turn; see the expanded sequence of play for details. In general, the Pact player declares their missions before the NATO player does. Units which fly air superiority missions must start in the air superiority box; units which fly ground attack or strike missions must begin in the available box. In order to perform their missions, ground attack and strike units must first survive air combat and air defense fire before completing their mission.
Air Superiority Missions. There are three types of air superiority missions, all basically similar to each other:
- top cover,
- escort,
- interception.
Each air superiority mission consists of one unit, or up to two if the side has air superiority.
Top Cover Missions both protect friendly ground attack missions and attack enemy ground attack missions in a single hex. One top cover mission is allowed per player per hex.
Escort Missions protect friendly strike missions.
Interception Missions attack enemy strike missions. Short-range units may not escort logistical strike or runway cratering missions but may intercept them. One air superiority mission is allowed per player per strike mission.
Ground Attack Missions. Ground attack missions are flown in any combat phase, before each attack by ground units is resolved. Each player may commit one mission (composed of one unit) to each attack; missions fly to the defender's hex.
Ground attack missions are protected by friendly top cover air superiority missions and attacked by enemy top cover missions.
If the unit survives air combat and air defense fire, its ground attack rating is applied during the ground battle as an odds modifier in favor of the owning player.
It is possible for both players to have successful ground attack missions in a single battle, in which case both would receive modifiers.
Example: A U.S. F-18 (ground attack rating of 1) and a Soviet Su-24 (ground attack rating of 2) both flew ground attack missions over the same battle and survived air combat and air defense fire; there would be an odds modifier of 1 in favor of NATO and 2 in favor of the Pact, for a net modifier of 1 in the Pact's favor.
Strike Missions. There are three types of strike missions:
- logistical strike,
- runway cratering,
- strike/interdiction.
Logistical strike and runway cratering missions are similar to each other and are referred to collectively as deep strikes.
Strike missions are protected by friendly escort air superiority missions and attacked by enemy interception missions.
Deep Strike Missions take place in the deep strike phase. Short-range units may not fly these missions. Units do not fly to any particular location on the map, but the missions take place within a theater.
Logistical Strike Missions. If the unit survives air combat and air defense fire, roll the die a number of times equal to its strike rating. The total of the rolls is divided by two, with fractions rounded down to a whole number. This is the number of enemy stacking points which become unsupplied in the theater in which the strike occurs (see rule 11.1).
Runway Cratering Missions. If the unit survives air combat and air defense fire, roll the die a number of times equal to its strike rating. Each roll of 4 or 5 adds one crater to the enemy crater track in the theater in which the strike occurs; record the number of craters on the crater track of the Air Theater display, using the crater marker.
Each roll of 6 destroys one enemy air unit in the theater in which the strike occurs; record the number of units destroyed on the crater track of the Air Theater Display, using the destroyed on runway marker. In the aircraft maintenance phase of the next turn, after rolling for maintenance, randomly choose that number of units from the available box and move them to the shot down box.
Strike/Interdiction Missions. This mission takes place in either strike/interdiction phase. (Both sides may fly missions in each phase.) Units fly to any hex. Each player may commit one mission (one unit) to a hex. If the unit survives air combat and air defense fire, place a strike marker with a value equal to the unit's strike rating showing the correct player turn (NATO or Pact) in the hex in which the strike occurred.
Each ground unit present in the hex is attacked. For each ground unit in the hex, roll the die a number of times equal to the air unit's strike rating; each roll of 5 or 6 is a hit and causes one disruption. At the end of the strike/interdiction phase, the air unit returns to the flown box, but the strike marker remains in the hex for one full turn (until the beginning of the same phase of the next turn). Each ground unit (friendly or enemy) which enters a hex containing a strike marker is attacked; in addition to disruptions, each hit reduces the unit's remaining movement allowance for that phase (if any) by one.
Sequencing
The Pact player allocates their missions before the NATO player. (This is a simple, yet accurate, way of incorporating NATO's advantage in AWACS aircraft.)
Strike Mission Sequencing. Missions in the deep strike and both strike/interdiction phases follow this sequence:
- the Pact allocates strike missions (each with one unit) and escorts (up to one unit without air superiority; up to two units with air superiority);
- NATO allocates interceptors to Pact strike missions (up to one unit without air superiority; up to two units with air superiority);
- NATO allocates strike missions (each with one unit) and escorts (up to one unit without air superiority; up to two units with air superiority);
- the Pact allocates interceptors (up to one unit without air superiority; up to two units with air superiority) to NATO strike missions.
Ground Attack Mission Sequencing. In each combat phase, before each battle, this is the sequence:
- the Pact allocates any ground attack mission (one unit) and top cover (up to one unit without air superiority; up to two units with air superiority);
- NATO allocates any ground attack mission (up to one unit) and top cover (up to one unit without air superiority; up to two units with air superiority);
- the Pact may allocate a top cover mission (up to one unit without air superiority; up to two units with air superiority) if no ground attack or top cover mission was allocated in step one.
If the Pact does not allocate a ground attack mission in step 1, proceed to step 2.
Air Combat
Air combat takes place before each strike or ground attack mission is resolved. Air combat occurs in up to two rounds. Each round is resolved only once per air combat.
First Round. Units escorting and intercepting the same mission, or flying top cover over the same hex, fire at each other. (If there are not units for each side escorting and intercepting a strike mission, or there are not units for each side providing top cover for a ground attack mission, there is no first round of air combat, proceed to the second round.)
Units fire once, in order of their air superiority ratings, with the highest rating firing first. If two units have the same rating, they fire simultaneously.
If there are two enemy air superiority units in the mission, the attacker chooses either one as the target.
The attacker rolls a die and consults the air combat table, cross-indexing the roll with the firing unit's air superiority rating, to determine the result.
Second Round. If, at the start of the second round, there are no enemy escort or top cover air units present, surviving interceptors or top cover may fire at enemy strike or ground attack units; these units may not fire back. Add one to the air combat die roll in the second round.
If, at the start of the second round, there are units for each side escorting and intercepting a strike mission, or there are units for each side providing top cover for a ground attack mission; or if there are no units escorting and intercepting a strike mission or there are no units providing top cover for a ground attack mission, then no air combat in the second round occurs. Proceed to air defense fire.
Air Combat Results. There are four possible results (in addition to no effect).
- H — Halved. The unit's rating (air superiority, ground attack, or strike) is halved for the remainder of the turn. Round fractions to the nearest whole number, rounding .5 up; perform all halving before rounding off.
- A — Aborted. If this occurs in the first round, the unit may still fire (if it has not already fired) but returns to the flown box at the conclusion of the round. If this occurs in the second round, the unit returns to the flown box immediately without performing its mission.
- SH — Shot down and halved. At the conclusion of the round, the unit is placed in the shot down box. If hit in the first round, it may still fire (if it has not already fired); if hit in the second round, it may still perform its mission; in both cases its rating is halved.
- SX — Shot down immediately. The unit is immediately shot down; it may not fire (unless it was firing simultaneously with the unit which shot it down) or perform its mission.
If two units are flying an air superiority mission, both fire at the same unit. Even if the first unit to fire shoots down or aborts the enemy unit, the second unit may still fire at it. If a unit is hit twice, the effects of both results occur. Thus SX supersedes all other results, SH supersedes A in the first round, SH plus A equal SX in the second round, two H results combine to quarter an aircraft's ratings, and so on.
Air Combat Example: A Pact (Syrian) MiG-21 and NATO (Iraqi) MiG-23 and MiG-19 are flying top cover in a hex. (NATO achieved theater superiority and thus can fly two units per mission.)
In the first round, the MiG-23, with a rating of 3, fires first. It rolls a 3, for a result of H. The MiG-21, with a rating of 2, fires next. Since it was halved, its rating is 1. It fires at the MiG-23, rolling a 5, for a result of H. The MiG-19, with a rating of 1, fires at the MiG-21 last. It rolls a 6, for a result of A. At the end of the first round, the MiG-21 is placed in the flown box.
In the second round, the MiG-23 and the MiG-19 may fire at any Pact ground attack unit in the hex; note that the MiG-23's rating will be 2, since it suffered an H result in the first round.
Air Defense Fire
If it survives air combat, a unit flying a strike or ground attack mission is subject to air defense fire.
Roll a die for each unit and consult the column of the air defense table corresponding to its mission. Results are identical to those of air combat. (The results in the airborne assault column are explained in rule 12.) Units which receive an H or SH result perform their missions with their ratings halved; units which receive an A result do not perform their missions.
Terrain Effects (Air)
The strike and ground attack ratings of units performing strike/interdiction and ground attack missions in woods or woods plus rough hexes (including wilderness woods and wilderness woods plus rough) are halved (as shown on the terrain effects chart); rounding is performed as explained for the H combat result above.
Loss Consolidation
Both players consolidate their air losses in the aircraft maintenance phase. Remove all units from the shot down box and place them in a cup or other opaque container. If the box contained an odd number of units, randomly draw one unit from the cup and return it to the shot down box. Then randomly draw half the units from the cup and place them in the flown box. The air units remaining in the cup are permanently eliminated and count toward critical losses (see rule 17); set them aside.
Transfer
Units may transfer from one theater to another.
Transfer after mission or abort. Medium-range units may transfer to an adjacent theater upon completing a mission or receiving an abort result. Long- and intercontinental range units may transfer to any theater upon completing a mission or receiving an abort result. Return them to the flown box of the theater to which they are being transferred.
Transfer from available box. Any units which are in the available box during the aircraft landing phase may transfer to any theater; place them in the flown box of the other theater. Pact units transfer first in the phase.
Special Air Units
Carrier Aircraft. The U.S. F-14 units represent the air groups of U.S. carriers. They are not based on land and thus are never subject to the effects of runway cratering missions.
The F-14 air unit which begins based in the Balkan theater represents the air group from U.S. aircraft carriers in the Mediterranean, and may only base in the Southwestern or Balkan theaters.
The F-14 air unit which is received as an Alert reinforcement represents the air group from U.S. aircraft carriers in the Persian Gulf and Indian Ocean, and may only base in the Persian Gulf theater.
The F-14 units may fly missions outside these theaters as long as they return to one of these theaters when landing.
U.S. B-52. The U.S. B-52 air unit would not be based in the theater of operations and thus is never subject to the effects of runway cratering missions.
Note: B-52s would most likely be based at Diego Garcia if operating in the Persian Gulf, or based in the UK or US if operating in Europe.
When using the optional nuclear warfare rules, the U.S. B-52 air unit is no longer available for use once the conflict level reaches level 3 and it is removed from play. (This removal represents removal of the B-52 fleet from tactical missions, and re-tasks them for strategic nuclear missions.)
Grounding
Air units may become grounded due to runway cratering or, optionally, the effects of a Pact logistics breakdown or strategic nuclear exchange.
Grounding Procedure
All grounding occurs during the aircraft maintenance phase.
First, randomly choose a number of air units from the available box equal to the number of craters on the crater track and place them in the grounded box.
Then perform other grounding caused by a strategic nuclear exchange or Pact logistics breakdown. In both cases, one or more dice are rolled to determine the number of air units grounded. Unlike grounding for craters, the owning player chooses which units are taken from the available box and placed in the grounded box.
Grounding Effects
Grounded air units may not fly that turn. All grounded units are returned to the available box in the unsupplied/grounded recovery phase of the turn.
Supply
Units may be placed out of supply (becoming unsupplied) through the effects of logistical strikes or, optionally, the effects of a Pact logistics breakdown or strategic nuclear exchange. Note that being out of supply, in this game, is a completely separate concept from isolation. A unit may be in either condition, both, or neither.
Determining Which Units Are Unsupplied
During the supply phase, players determine which enemy units are out of supply. First, total the number of stacking points which are out of supply as a result of the causes given above. The order for determining unsupplied units is:
- Determine how many Pact stacking points are unsupplied, NATO player determines which ones.
- Determine how many NATO stacking points are unsupplied, Pact player determines which ones.
Each player chooses which enemy units are out of supply and places unsupplied markers on them. If more stacking points are to be placed out of supply than stacking points are available to be placed out of supply, any excess is lost.
Example: If it is determined that four Pact stacking points are unsupplied, the NATO player may choose any Pact units totaling four stacking points.
Emergency Supply Priorities
After units have been placed out of supply, a player may place any of these units back in supply by giving affected units emergency supply priority. In order to do so, the player must place out of supply other units totaling twice as many stacking points as the units placed back in supply. The units placed back in supply and the units providing emergency supply must be located in the same theater. The order for determining emergency supply is:
- Pact determines any emergency supply priorities.
- NATO determines any emergency supply priorities.
Example: If the Pact player in the example above wished to remove the unsupplied markers from all those units representing the four stacking points, they would have to place markers on other units, located in the same theater, totaling eight stacking points.
Out of Supply Effects
Units which are unsupplied have their movement allowances halved (to three movement points per phase) and their attack strengths halved (retaining fractions). Units which are unsupplied remain unsupplied until the unsupplied/grounded recovery phase, when all unsupplied markers are removed.
Air Transport and Airborne Assault
Both sides possess air transport capabilities, measured in air transport points. The available air transport points are shown in the setup information for each scenario.
Air transport points have two uses: air transport and airborne assault. Different units require different amounts of air transport points to move, as shown on the unit identification chart.
The NATO player may use air transport points in each movement phase of the NATO first and second impulses; no air transport occurs in the NATO reserve impulse.
The Pact player may use air transport points in the movement phases of the Pact first and second impulses (in either movement phase of the impulse).
Example: Assume the Pact has five air transport points available. In the Pact first impulse the Pact player could use one point in the movement phase of the first echelon sub-impulse and four in the movement phase of the second echelon/breakthrough sub-impulse, or two in the first and three in the second, or five in the first and none in the second, etc.
Air Transport
Any unit may be moved by air transport. It must start the phase in a city or airfield not in an enemy ZOC and may move to any city or airfield not in an enemy ZOC. The destination city or airfield must be friendly-controlled at the start of the impulse for units to be air transported there. The unit may not otherwise move in the phase and may not attack.
Units moving by air transport are not isolated for one full turn following their transport.
Airborne Assault
Airborne assault is a special type of air transport. Only airborne and mechanized airborne (desant) units may make airborne assaults. The unit must start the phase in any city or airfield not in an enemy ZOC and may move to any hex on the board except a full sea, mountain, or mountain pass hex, any hex in a neutral country, or any hex occupied by an enemy unit. It may not otherwise move in the phase, although it may attack.
Units making an airborne assault are not isolated for one full turn following their assault.
Air Transport Costs
The number of points required to transport a unit depends on its type and number of stacking points. The number of points required to transport a stacking point of each type is shown on the unit identification chart. For airborne assaults, double the cost. Thus, an airborne assault by an airborne brigade costs 2 points.
Air Combat and Air Defense (Air Transport)
Air transport missions (both regular air transport and airborne assault) are similar to other air missions for purposes of air combat and air defense. For purposes of air combat, all units being transported by air to the same destination constitute a single air transport mission.
Air Combat. Air transport missions may be escorted and intercepted by air units. Escorts and interceptors must be in the air superiority box of the theater containing the destination of the air transport mission. The player flying the transport mission first assigns escorts; then the other player assigns interceptors.
Air combat occurs as described in the Air War rules, treating the ground unit being transported as an air unit. If the unit receives:
- an A (abort) or H (halved) result, it returns to the hex it came from; the unit may not otherwise move in the movement phase and may not attack in the following combat phase.
- for a SH (shot down, halved) or SX (shot down, immediately) result, the effects of the result depend on the type of air transport mission:
- For regular transport, the unit returns to the hex it came from and receives two disruptions; the unit may not otherwise move in the movement phase and may not attack in the following combat phase.
- For airborne assaults, the unit is eliminated.
In either case, a shot down result permanently destroys half (round fractions up) of the air transport points being used for the mission.
Air Defense Fire. Airborne assault missions are subject to air defense fire. Roll a die, adding 1 if the hex assaulted is in an enemy ZOC, and consult the air defense table. If the result is AD or A2D, the unit returns to the hex it came from. On AD, it receives one disruption; on A2D, it receives two disruptions. When aborted, the unit may not otherwise move in the phase and may not attack in the following combat phase.
Naval Transport and Amphibious Assault
Any unit may move by means of naval transport. Only amphibious units may conduct amphibious assaults. Both may occur during any friendly movement phase except the movement phase of the NATO reserve impulse.
Naval Zones
Sea hexes on the maps are divided into naval zones. Units may use naval transport and make amphibious assaults in the following naval zones:
NATO:
- North Sea
- Norwegian Sea (unless Pact controlled)
- Central Mediterranean
- Aegean
- Turkish Straits (if open to NATO)
- Persian Gulf
Warsaw Pact:
- Barents Sea
- Bothnia
- Baltic (if both Kiel and Lübeck are Pact-controlled)
- Norwegian Sea (unless NATO controlled)
- Black Sea (including hexes C1414 and C1415)
- Aegean (if the Black Sea Fleet has sortied)
- Turkish Straits (if open to the Pact)
- Caspian Sea
Naval Transport
A unit moving by naval transport must start the movement phase in a port in a naval zone where that side may use naval transport and may move to any friendly-controlled port in a naval zone where that side may use naval transport. The port must be friendly-controlled at the start of the impulse. The unit may not move thereafter in the phase. The destination may be in an enemy ZOC; the starting point may be in an enemy ZOC if another friendly unit begins the movement phase in the hex and remains there for the entire phase.
Units moving by naval transport are not isolated for one full turn following their transport.
In addition to ports marked on the map, all one-hex islands (that is, an island contained within a single hex) are ports.
NATO Naval Transport. NATO has three naval zone groups for naval transport:
- the Norwegian Sea/North Sea group,
- the Central Mediterranean/Aegean/Turkish Straits group,
- the Persian Gulf zone.
NATO Naval Transport Within a Naval Zone Group. NATO may use naval transport within a naval zone group by starting the movement phase in a port and may move to any friendly-controlled port in that naval zone group.
NATO Naval Transport Between Naval Zone Groups. NATO may use naval transport between a port in one naval zone group to a friendly-controlled port in another naval zone group; one full turn is required for movement from one naval zone group to another.
A NATO Naval Movement track is provided on a Player Aid Card to assist in tracking movement from one naval zone group to another.
Example: If a NATO unit left a North Sea port in the movement phase of the NATO first impulse of War Turn 2, it could arrive at a Persian Gulf port in the movement phase of the NATO first impulse of War Turn 3.
Pact Naval Transport. The Pact has four naval zone groups for naval transport:
- the Barents Sea/Norwegian Sea group,
- the Bothnia/Baltic group,
- the Black Sea/Turkish Straits/Aegean group,
- the Caspian zone.
The naval zone groups in which the Pact player may use naval transport are separate. While Pact units may use naval transport between ports within a naval zone group, they may not use naval transport between ports in different naval zone groups.
Pact Naval Transport Within a Naval Zone Group. The Pact may use naval transport within a naval zone group by starting the movement phase in a port and may move to any friendly-controlled port in that naval zone group.
Pact Naval Transport Between Naval Zone Groups is not allowed.
Amphibious Assault
Amphibious assault is a special type of naval transport. Amphibious assaults may only be conducted by amphibious units. The unit making the assault must begin the movement phase in a port and may move to any partial sea hex in the area where that side may use naval transport; the destination hex may not be a mountain or mountain pass hex or any hex in a neutral country. The unit may not otherwise move in the phase, although it may attack.
Units making an amphibious assault are not isolated for one full turn following their assault.
Opposed Landings. Amphibious units may make opposed landings: they may move to an enemy-occupied hex. The amphibious unit must attack in the combat phase. In addition to all other combat effects, the unit's attack strength is halved. The attack may be made in conjunction with other units; the amphibious unit has no ZOC during this combat phase. If the hex attacked is vacated by enemy units due to combat, the amphibious unit remains in the hex. If the attack does not cause the hex to be vacated, the amphibious unit suffers two disruptions (in addition to any caused by the combat) and returns to the port it came from.
Amphibious Evacuation. An amphibious unit may be evacuated from any partial sea hex except a mountain or mountain pass hex. The hex must be in a naval zone where naval transport is allowed for the owning player. The amphibious unit may be withdrawn from the hex and transported by sea to a friendly-controlled port. The unit need not start the phase in the evacuation hex, but it may not move after evacuating. A unit that is evacuated immediately suffers two disruptions. The unit may not otherwise move in the movement phase or attack in the combat phase.
Amphibious Assault Special Rules
Pact limited amphibious assault/evacuation capability. The Pact has a limited amphibious assault/evacuation capability. In each Pact naval zone group, the capability for Pact amphibious and amphibious-trained units is three stacking points per impulse.
A Pact unit may make an opposed landing only if the entire Pact capability of a naval zone group is used for a single brigade.
Pact amphibious-trained motorized rifle units have very limited amphibious assault abilities. They may make amphibious assaults only in port hexes and only if the port hex is not occupied by an enemy unit.
The British commando brigade is an amphibious unit.
Special Naval Rules
Adjacent Ports. Units of either side may always use naval transport to move between adjacent friendly-controlled ports, regardless of naval zones.
Also, communications may be traced across a sea hexside between adjacent friendly-controlled ports, regardless of naval zone.
Example: If the Pact player controls C-1137 and C-1238, then Pact units may use naval transport between the two ports and trace communications across the hexside, regardless of whether or not the Straits are open to the Pact to these ports.
Weather
Since the game is assumed to take place in the late spring and early summer, weather does not have a profound effect on play. However, weather effects are not negligible, either, and so are considered.
Weather Determination
In each turn's weather determination phase, roll a die separately for each air theater and consult the first column of the weather table. Two results are possible: clear or poor. Clear weather has no effect. If poor weather is rolled, roll again and consult the second column. Three results are possible: overcast, storms, and severe storms.
Weather Effects
Adverse weather can affect air units, air transport and assault, airmobile units and ZOCs, and amphibious assault.
Poor weather affects the theaters differently. In the Persian Gulf theater, only overcast poor weather may occur. In all other theaters the full range of poor weather (overcast, storms, and severe storms) occurs.
Overcast. Overcast weather affects only aircraft flying missions in the theater with overcast weather. All aircraft ratings which do not have all-weather capability (denoted by black circle around the rating) are halved, rounding fractions down. (This precedes all other halvings performed on aircraft ratings.) Note that if the unit's rating was 1, it is now 0, and a unit may not perform a mission for which its rating is 0.
Example: An Su-24 has an air superiority rating of 1, a ground attack rating of 2, and a strike rating of 3. Only the strike rating has all-weather capability. Thus, in overcast the Su-24 would have an air superiority rating of 0 and could not perform air superiority missions. It would have a ground attack rating of 1 and a strike rating of 3.
Storms. Air units in a theater with storm weather may only fly missions for which their ratings have all-weather capability.
Example: The Su-24 cited above could fly only strike missions during storm turns.
Storms also affect the ability of units to conduct amphibious and airborne assaults in the theater. Whenever the destination hex of a unit attempting such an assault is in a theater with storm weather, roll a die. On a roll of 1-3 the unit is turned back and must return to the city or port from which it came. The unit may not otherwise move in the movement phase and may not attack in the following combat phase.
This die roll is made separately for each unit attempting such an assault. For air assaults, check for turning back before the other player assigns interceptors.
Severe Storms
- No aircraft may conduct any mission in a theater with severe storm weather.
- No aircraft may transfer into or out of a theater with severe storms.
- No unit may conduct an amphibious or airborne assault with a destination hex in a theater with severe storms.
- The movement allowances of all airmobile units that start in or enter a theater with severe storms are reduced to 3.
- All units with airmobile ZOCs in a theater with severe storms are instead considered to have only standard ZOCs.
- No air transport is allowed into or out of a theater with severe storms.
Special Rules
Territorial Reservists
Units with a "T" in the upper right corner of the counter are territorial reservists. Austria, Belgium, Denmark, Iraq, the Netherlands, Sweden, and West Germany have territorial reserves.
Territorial reservists are scheduled to enter play on (War) Turn 1, but these units do not automatically enter play this turn. At the beginning of the movement phase of the first impulse of each NATO segment, roll one die for each territorial unit which has not yet entered play. If the die roll is less than or equal to the current turn number, the unit appears. If the die roll is higher, the unit remains in waiting to appear in a subsequent turn.
Territorials appear in cities in their country in the same way other units appear.
Territorials may never leave their home country (including retreat as a result of combat).
Partisans
Partisans may be active in some countries/regions as outlined below. Partisans are not represented by unit counters, but impact the tracing of communications as listed below for the specified country/region.
Units of a side may not trace communications for the purpose of determining isolation through the terrain types specified below in a region or nation containing partisans active against that side, unless the hex is occupied by or in the ZOC of a friendly unit when communications are traced.
Once activated, the effects of partisans remain in force for the rest of the game, even if the country becomes shaken, becomes demoralized, or even surrenders.
Afghan partisans are always active in Afghanistan and are always active against the Pact.
Affected units may not trace communications through any non-clear terrain hex, unless the hex is occupied by or in the ZOC of a friendly unit.
Finnish partisans. Starting with the game turn following the entry of Finland into the war, partisans in that country are active against the Pact for the rest of the game.
Affected units may not trace communications through any wilderness hex, unless the hex is occupied by or in the ZOC of a friendly unit.
Kurdish partisans may be active in all or part of Kurdistan and may be active against either the Pact or NATO (see rule 20.3.7).
Affected units may not trace communications through any non-clear terrain hex, unless the hex is occupied by or in the ZOC of a friendly unit.
Yugoslav partisans. Starting with the game turn following the entry of Yugoslavia into the war, partisans in that country are active against the Pact for the rest of the game.
Affected units may not trace communications through any mountain or mountain pass hex, unless the hex is occupied by or in the ZOC of a friendly unit.
Limited Military Abilities
Due to doctrinal, professional, and training limits, the military forces of some nations and all factions have limited abilities. Units of these forces do not engage in operations to the full extent the sequence of play allows. Instead, they are limited to a single movement, combat, and regroup phase per turn.
The units from nations/factions with limited military abilities are denoted with an "L" on the top left corner of their counter.
If committed to NATO, they operate in the NATO first impulse only; they do not operate in the NATO second impulse or the NATO reserve impulse.
If committed to the Pact, they operate in the Pact first impulse in the first echelon sub-impulse and the regroup phase; they do not operate in the movement and combat phases of second echelon/breakthrough sub-impulse of the Pact first impulse or in the Pact second impulse.
The following nations and factions have limited military abilities: Afghanistan, Iraq, the Iranian Army, the Iranian Revolutionary Guards, the Iranian Communists, the Kurds, Kuwait, the Mujahideen, Oman, Qatar, Saudi Arabia, the Tudeh, and the United Arab Emirates.
Rivalry
Due to national, ethnic, or religious animosities, certain nations have limited abilities to co-operate with one another when on the same side.
Effects of Rivalry
- Rival units may never stack together.
- Units may not voluntarily enter any hex of a rival nation. During combat, if no other retreat route is available, a unit may retreat into a rival nation. Once in the country, the unit may remain there, but if it subsequently leaves the country it may not voluntarily re-enter.
- Rival ground units may not attack together. If units of one nation are attacking a hex, units of a rival nation may not participate in the attack. Air units are not affected by rivalry restrictions.
- Units may not regroup when in the territory of a rival nation.
The following nations are rivals:
- Greece is rival to Turkey.
- Iraq is rival to Syria and the Islamic Republic government of Iran.
- Israel is rival to all Arab nations (Iraq, Jordan, Kuwait, Oman, Qatar, Saudi Arabia, Syria, and the United Arab Emirates), the Islamic Republic government of Iran, and all Iranian factions (Communists, Kurds, Mujahideen, and Tudeh).
- The Kurds are rival to various nations or factions, depending on what side they join; see the diplomacy game rules.
Example: Israel and Iraq are both on the same side, fighting the Islamic Republic government of Iran; units of both nations are in Iran. These units may not stack or attack together. Israeli units may not voluntarily enter neighboring Iraq. If attacked, they may retreat into Iraq only if there is no other retreat route possible.
Soviet Mountain Divisions
The Soviet player has the ability to organize several motorized rifle divisions as mountain divisions. These divisions have two counters in the game, one for each organization. When the Soviet player deploys or receives as a reinforcement any of these motorized rifle divisions, they may choose to take the unit as a mountain division instead. Simply substitute the mountain division with the same ID for the motorized rifle division. Once in play, such a unit may not have its organization changed.
Revolutionary Guard Replacements
Eliminated Iranian Revolutionary Guard units may be replaced. Each turn, the owning player may replace one of these units, placing it in any friendly-controlled city in Iran at the start of the movement phase of the player's first impulse (that is, the same as reinforcements).
Pact Logistical Breakdown (Extended Game)
The following rules are added to Extended Game scenarios to simulate the gradual breakdown of the Warsaw Pact logistical system.
Die rolls
Beginning Turn 6. Beginning in the supply phase of turn six, the NATO player rolls the die twice for Pact supply deficiencies. The first die roll is the number of air units grounded. The second die roll is the number of ground units unsupplied. This die roll is repeated each supply phase for the rest of the game.
Beginning Turn 8. Beginning on turn eight, the die is rolled once for air units and twice for ground units.
Beginning Turn 10. Beginning on turn ten, the die is rolled twice for air units and twice for ground units.
Beginning Turn 12. On turn twelve, the die is rolled twice for air units and three times for ground units.
Choosing units affected. The NATO player picks which Pact ground units are unsupplied; the Pact player picks which air units are grounded. If the rolls require more air or ground units to be grounded than there are in the theater, the extra results are ignored.
Neutrals
Neutral nations may enter the game depending on the actions of the Pact against them; or, for Albania, Austria, Finland, Greece, Iraq, Oman, Sweden, and Yugoslavia, their neutral reaction chits.
Note: Greek and Albanian chits are used only in the Balkan Entente scenario, and Yugoslavian chits are not used in the Balkan Entente scenario.
Neither player's units may enter a country while it is neutral. A country receives reinforcements even when it is neutral. Ground unit reinforcements for neutrals are placed on the map by the NATO player at the same time as NATO reinforcements are received. Air units of neutrals are received in step 1 of the aircraft maintenance phase. This is immediately after the neutral activation phase (see the Combined Sequence of Play).
Neutral Nations
Switzerland is always neutral and may not be invaded.
Albania may enter the game due to the result of their neutral reaction chits.
Austria, Finland, Greece, Iraq, Oman, Sweden, and Yugoslavia may enter the game due to Pact invasion or as a result of their neutral reaction chits.
Pakistan. Although a small portion of Pakistan appears on the game map, Pakistani involvement is outside the scope of this game. Thus, neither side may enter any hex of Pakistan, nor may either player invade Pakistan.
Kuwait, Qatar, the UAE, and Oman are neutral but may be invaded by the Pact (and would then join NATO).
Other Middle East countries start neutral but may become committed to a side per the diplomacy game rules.
Bahrain. For game purposes, Bahrain (a sovereign island country) is treated as part of Qatar.
Invasion
The Pact player may invade neutral nations during any turn, except as restricted by the Diplomacy Game rules (see The Diplomacy Game, below). The invasion must be announced during the neutral activation phase of the turn in which the invasion occurs. Immediately upon announcing the invasion, the forces of the invaded country are controlled by the NATO player and the countries are treated as NATO countries for all purposes.
Invasion of Sweden and/or Finland. The Pact player may violate the neutrality of Sweden and/or Finland during any turn, declaring this action during the neutral activation phase of the turn. During the phase, the Pact player states whether they are seeking Arctic passage or making an outright invasion.
In Arctic passage, Pact units may only move and attack in Arctic hexes of the violated neutral.
The neutral reaction chits of Sweden and Finland will dictate how the invaded country reacts to the announcement of Arctic passage.
In outright invasion, Pact units may operate anywhere in the invaded country.
The Pact player may declare Arctic passage in one turn and then declare an outright invasion in a subsequent turn against the same country.
Neutral Reaction
Some neutral countries have neutral reaction chits, which determine how the country reacts during the war. Albania, Austria, Finland, Greece, Iraq, Oman, and Sweden each have three neutral reaction chits. Yugoslavia has two different sets of three neutral reaction chits. Use of the chits, and which set of chits to use for Yugoslavia, is outlined in the Playbook for each scenario.
As outlined for each scenario in the Playbook, before the game begins, the designated player randomly draws one chit from the neutral's set and places it face down on the map in the neutral country. All drawn chits may be examined by the drawing player, except Iraq and Oman. The remaining chits are placed aside.
When a country joins the war, regardless of the cause, that country's chit is displayed to the other player. If the country does not join the war at all, the chit is shown to the other player at the end of the game.
Iraq Neutral Reaction Chits
The NATO player draws, but does not examine, one neutral reaction chit before the game, and places it face down on the map inside Iraq.
If Iraq is not committed to either side by the neutral activation phase of the first war turn, Iraq remains neutral for the rest of the game unless invaded by the Pact.
The Iraqi neutral reaction chit is revealed to the players in the neutral activation phase of the first war turn.
- "—" (two chits) Iraq does not voluntarily participate in any military action.
- Limited Participation Turn 1 (one chit) — Iraq stays neutral but sends an expeditionary force into Iran. The side that invaded Iran chooses and controls this force.
The force consists of any 10 Iraqi brigades and one Iraqi air unit. The air unit is treated as a reinforcement air unit. The ground forces must enter Iran before they may operate fully. Before then, they may not attack.
Once they enter Iran, they are treated the same as other units controlled by that side and may not subsequently re-enter Iraq while neutral. If the Pact player controls the expeditionary force, Iraq may not subsequently be invaded.
Oman Neutral Reaction Chits
The NATO player draws, but does not examine, one neutral reaction chit before the game, and places it face down on the map inside Oman.
The NATO player may examine the Omani neutral reaction chit, without revealing it to the Pact player, when the U.S. Rapid Deployment Force is alerted.
- Neutral (one chit) — means that Oman remains strictly neutral.
- Pro-U.S. (two chits) — means that Oman remains neutral but allows the presence of U.S. forces in Oman. During any neutral activation phase, the NATO player may reveal the chit to the Pact player. Once the Pro-U.S. chit is revealed, U.S. units may enter and be present in Oman.
Critical Losses
After certain nations have taken substantial losses, the morale of their armed forces will decline. Two effects are possible; in order of severity, they are shaken and demoralized.
Critical loss levels are determined in the critical loss determination phase of each turn. At that time, the losses of each nation subject to critical losses are counted to determine if the nation has reached either critical loss level. If it has, the effects of that loss level are in effect for that nation for the remainder of the game. If a nation is shaken and later takes losses sufficient to demoralize it, the effects of demoralization replace those of being shaken.
See the national/factional data chart for the shaken and demoralization levels for vulnerable nations. If a nation has dashes (—) for these items, then that nation is not vulnerable to critical losses.
Counting Losses
All losses are counted by stacking points. Air units in the shot down box do not count toward critical losses. Air units removed from play due to loss consolidation count as one stacking point each for critical loss purposes. The number of stacking points each susceptible nation must lose to become shaken or demoralized is given on the critical loss chart. For example, in the Persian Gulf scenario Turkey will become shaken after losing 11 stacking points, and will become demoralized after losing 10 more (for a total of 21).
Two Critical Losses Displays are provided to track losses by nation. Simply use eliminated counters from the corresponding nation as markers on these displays.
Vulnerable Nations
The following nations are susceptible to becoming shaken and demoralized: Afghanistan, Austria, Belgium, Bulgaria, Czechoslovakia, Denmark, Finland, France, Greece, Hungary, Iraq, Italy, Jordan, Netherlands, Norway, Poland, Romania, Saudi Arabia, Spain, Sweden, Syria, Turkey, and Yugoslavia. Other nations are not susceptible and their losses need not be recorded.
Shaken
Once a nation becomes shaken, place the shaken marker for that nation somewhere within its borders.
Effects of Shaken Status
- No unit of that nation may attack unless the unit and the hex it is attacking are both within that nation's boundaries.
- Air units of shaken nations:
- may not fly the logistical strike or runway cratering missions,
- may not fly strike/interdiction missions except to hexes within their own nation,
- may not fly escort missions except to escort strike/interdiction missions within their own nation, and
- may not fly ground attack missions or top cover missions unless at least one of the ground units involved in the battle (attacker or defender) is of their own nationality.
Demoralized
Once a nation becomes demoralized, flip the shaken marker to the demoralized side.
Effects of Demoralized Status
-
All surviving ground units must return to their own national territory by the quickest route. Any demoralized units outside their national territory in the next critical loss determination phase are removed from play.
-
No unit of that nation may attack under any circumstances.
-
All surviving units have their proficiencies reduced by 1.
-
Air units of demoralized nations may fly only interception, ground attack, and top cover missions.
Interception missions may only be flown against strike/interdiction and air transport missions in a hex in the demoralized nation.
Ground attack and top cover missions may only be flown in support of a ground unit of the demoralized country which is inside the country.
Surrender
Under certain circumstances, certain countries may surrender. See the national/factional data chart for which nations will surrender.
Conditions for Surrender
A country will surrender if, during the owning player's surrender phase, all cities and ports in that country are controlled by the opposing player. (That is, the opposing player's units occupy all cities and ports or were the last to pass through the cities and ports.)
Effects of Surrender
If a country surrenders, all ground and air units of that country are immediately removed from play.
New Units
During the game both players receive reinforcements. Reinforcements are shown on the Reinforcement Displays and listed in the Playbook, which indicate the turn of their arrival. Air units and ground units are received at different points in the turn, as explained below.
Air Units (New)
Air units are received at the start of the aircraft maintenance phase. They are placed in the available box of the appropriate theater on the air theater display, and thus are available to fly missions that turn.
Ground Units (New)
Ground units are received at the start of the movement phase of a player's first impulse. The units of different nations are received differently.
Appearing. Units which are stated as appearing are placed in a hex on the board and have their entire movement allowances available in that phase. Units may appear in friendly-controlled cities and ports (as detailed in the Reinforcement Displays and the Playbook), only one to a hex. If no such hex is available (for example: if three units are to appear in cities and there are only two cities in that country), the unit is delayed until the next turn (at least).
Entering. Units which are stated as entering must move into a hex on the edge of the map, expending the movement cost of the hex as they do so. Units which enter using air or naval transport may make airborne or amphibious assaults when they enter, if they are normally capable of doing so.
Example: In the Persian Gulf scenario, once Israel intervenes, Israeli units may appear in any friendly-controlled port in the Persian Gulf naval zone; or may enter using air transport, airborne assault, or naval transport.
The NATO player could place all four Israeli airborne units in a single friendly-controlled port in Iran. However, only one unit would be considered "appearing" (due to the limit in rule 19.2.1) and would have its entire movement allowance available in that phase; the other three units are considered to arrive by naval transport and would not be able to move or attack in that phase (see rule 13.2).
The Diplomacy Game
The Persian Gulf scenario and the Combined Game cover the events leading up to the outbreak of the Third World War. These events occur through play of diplomacy cards in the diplomacy phase and through operations on the map because of the diplomatic maneuverings.
Introduction
The game starts with both the Soviet Union (represented by the Pact player) and the United States (represented by the NATO player) attempting to gain influence and control in post-Khomeini Iran and in the Middle East. Through diplomacy and other means (as represented by the diplomacy cards), Iranian factions and groups and Middle Eastern nations will commit themselves to one side or the other. The players may use these committed forces in military operations against hostile forces to try to gain outright occupation and control of regions on the map. They may decide to directly involve U.S. or Soviet forces. At some point, the Soviet Union will order general mobilization, which will lead to the general outbreak of war.
Groups and Factions in Iran
Groups and factions in Post-Khomeini Iran are assumed to be divided politically by a number of power groups and factions, as follows:
The Islamic Republic Government (abbreviated IRG) of Iran is the official government of Iran. The Revolutionary Guards and Iranian Air Force are loyal to the IRG.
The Iranian Army starts loyal to the IRG, but part or all of the Army may rebel against the Islamic Republic.
Iranian Factions. The various Iranian factions may be loyal, neutral, or rebel to the IRG. The Centrists have no military forces of their own but have influence over the Iranian Army. The Iranian Communists, Tudeh Party, Mujahideen, and Kurds all have their own forces.
Nations and Factions
Afghanistan is a Pact nation. Afghan units may not leave Afghanistan and are eliminated if forced (by combat) to do so. Afghan partisans (see Partisans, above) start the game (and always remain) active against the Pact in Afghanistan.
Minor Arab States. Kuwait, Qatar, and the United Arab Emirates are neutral. Oman may be neutral or pro-U.S. (see Oman Neutral Reaction Chits, above).
Iran begins the game neutral. Either player may invade Iran, by playing their Invade/Intervene card while the Islamic Republic Government is not committed to their side. If not yet committed when invaded by a side, the IRG automatically joins the other side. When the IRG commits to a side, that side gains control of all Iranian forces loyal to the IRG.
The Iranian Revolutionary Guards and Iranian air units always remain loyal to the IRG.
The Iranian Army is loyal to the IRG at the start of the game. Its units are set up with their loyalist-color side face up. The Iranian Army may rebel against the IRG. If the IRG and Iranian Army diplomacy track markers ever become committed to opposing sides, the Iranian Army rebels.
Example: If the Iranian Army is already U.S. committed and the IRG commits to the Soviets during a subsequent diplomacy phase, the Iranian Army rebels.
When a rebellion occurs, its extent is determined in the diplomacy phase. Roll one die for each Iranian Army unit; subtract one from the die roll if the Centrist faction is committed to the same side as the Iranian Army.
If the modified die roll is less than or equal to the unit's printed proficiency, the unit rebels and is flipped over to its rebel-color side. The side to which the Iranian Army is committed controls the rebel Iranian Army units; the other side controls the units which remain loyal.
The Centrist faction is the only Iranian faction with no military forces of its own. Instead, it has influence over the Iranian Army. If the Iranian Army rebels and the Centrists are committed to the same side as the Iranian Army, the rebellion die roll is favorably modified, as described above. If the Centrist faction is not committed when the Iranian Army rebels but subsequently commits to the side controlling the rebel Iranian Army, a second rebellion occurs.
In the diplomacy phase in which the Centrists become committed to the side controlling the rebel Iranian Army, roll one die for each loyal Iranian Army unit. There is no modification to the die roll, and the unit rebels only if the die roll is less than the unit's printed proficiency.
The other Iranian factions (the Tudeh, the Iranian Communists, the Kurds, and the Mujahideen) have their own military forces and are controlled by the side to which they commit. While uncommitted, they are neither loyal nor rebel to the IRG. While a faction is uncommitted, a player may ignore its units for all game purposes: they do not affect the movement, stacking, or communications of their units.
Example: The Pact player has units in Tehran, and there is an uncommitted factional unit in Tehran. The NATO player attacks Tehran with ground units supported by a ground attack air mission. The uncommitted unit is ignored for combat. If the Pact forces in Tehran are destroyed, NATO units may advance into Tehran, stacking with the uncommitted unit.
An uncommitted unit is affected by the results of a strike/interdiction mission or theater missile NAP strike against its hex, in the same manner as other units in the hex are affected.
If a side flies a strike/interdiction mission or uses any NAPs (not just theater missiles) against a hex containing an uncommitted unit, the unit's faction commits to the other side at the end of the phase in which such an action occurs.
Example: In the previous example, if the NATO player used an artillery NAP in their attack on Tehran, the uncommitted unit's faction would commit to the Soviet Union at the end of the NATO player's combat phase.
When the Iranian Army rebels or when a faction commits to a side, opposing units may be occupying the same hex.
When this happens, each player totals the attack strength, defense strength, and current proficiency of all of their units in the hex. The player with the higher total remains in the hex; the other player's units must retreat.
If both side's totals are equal, roll a die, if the result is:
- 1, 2, 3 the Pact units retreat;
- 4, 5, 6 the NATO units retreat.
The rules of retreat (see Retreats, above) are followed, except that zones of control of enemy units in the contested hex are ignored. If no retreat is possible, the units required to retreat are eliminated instead.
Iraq begins the game neutral and remains so until it commits to a side or is invaded by the Pact. When Iraq commits to a side, it fully joins the side and its forces are controlled by that side from that point. Even when neutral, Iraq may send an expeditionary force against the IRG (see Iraq Neutral Reaction Chits, above).
Israel begins the game neutral and remains so until the NATO player plays the Israeli Intervention card. (Israel remains neutral even after committing to the U.S. unless the intervention card is played.) Once the card is played, Israel joins the NATO player's side, and Israeli forces are controlled by the NATO player. When the card is played, the Israeli forces are placed in the U.S. force pool box, from which they may enter play (see The Force Pool Boxes, below).
Jordan begins the game neutral and remains so until the NATO player plays the Jordanian Intervention card or unless invaded by the Pact. (Jordan remains neutral even after committing to the U.S. unless invaded or the intervention card is played.) Once the card is played, Jordan joins NATO's side, and Jordanian forces are controlled by the NATO player.
Kurdistan is a region in the Middle East split among Turkey, Syria, Iraq, and Iran; its extent is marked by the Kurdish border hexsides on the map.
Until either player plays their Kurdistan card, the Kurdish faction is uncommitted and Kurdistan is ignored.
If the Pact player plays their Kurdistan card first, the Kurdish faction commits to their side and Kurdish partisans are active against NATO in the Iraqi and Iranian portions of Kurdistan.
If the NATO player plays their Kurdistan card first, the Kurdish faction commits to their side, Kurdish partisans are active against the Pact in the Iraqi and Iranian portions of Kurdistan. Additionally, the shaken and demoralization levels for Turkey are each reduced by 5 (to show Turkish concern over such a move by the U.S.).
If both players play their Kurdistan cards in the same diplomacy phase, the Kurds commit to the Soviet Union. In this case, however, Kurdish partisans are active against NATO everywhere in Kurdistan.
Kurdish units are always rival (see Rivalry, above) to units of the nations that control Kurdistan, when both are on the same side: Iraq, Iranian Army (loyal or rebel), Iranian Revolutionary Guards, Syrian, and Turkish.
Saudi Arabia begins the game neutral and remains so until it commits to a side or is invaded by the Pact. If Saudi Arabia commits to the U.S., it joins NATO's side and the NATO player controls Saudi forces. However, Saudi units may not voluntarily leave Saudi Arabia until the turn after U.S. units enter Iran. For example, if U.S. units enter Iran on Turn 6, then Saudi units may voluntarily leave Saudi Arabia starting on Turn 7.
Syria begins the game neutral and remains so until the Pact player plays the Syrian Intervention card. Syria remains neutral even after committing to the Pact unless the intervention card is played. Once the card is played, Syria joins the Pact player's side, and Syrian forces are controlled by the Pact player.
Turkey is a NATO country, and Turkish forces are controlled by the NATO player. However, Turkey is inactive and is treated as neutral until War Turn 1 or until the turn following the turn the NATO player played the General Mobilization card.
Diplomacy Phase
Each player has a deck of eleven diplomacy cards (plus one blank), which define the various diplomatic, political, and military options available to the two superpowers. When setting up the game, the Pact player takes the deck of Soviet diplomacy cards, and the NATO player takes the deck of U.S. diplomacy cards.
During the diplomacy phase of each turn (pre-war or war), each player plays one card. In general, any card may be played, although some cards have prerequisites that must be met before they can be played. Once a card is played, its effects go into force. Most cards influence the various Middle East nations and factions, while other cards allow the players to undertake various military actions.
Diplomacy Chart. One Player Aid Card contains the diplomacy charts (which includes an influence track as well as four holding boxes), the game turn chart, victory point track, nuclear war level track, and Norwegian Sea Control track.
The game turn track is used to record the passage of time. At the start of the game, place the Game Turn marker on its Pre-War side on the 1 box on the track. At the end of each turn, the marker is moved one box to the right to mark the beginning of the next turn.
The influence track is used to record the degree of U.S. and Soviet influence on the uncommitted nations and factions of the Middle East.
At the start of the game, the Soviet Union and Afghanistan are Pact nations, Turkey is a NATO nation, and all other nations and factions are uncommitted. When setting up the game, place the markers for these nations and factions on the appropriately labeled boxes on the track. (The Kurdish faction marker has no place on the track, place this marker aside, as the Kurdish faction is subject to special rules.)
The committed nations/factions boxes are used to hold the diplomacy track markers of nations and factions which commit to either side.
Example: If the Tudeh commits to the Soviet Union, the Tudeh marker is placed in the Soviet committed nations/factions box.
The force pool boxes are used to hold forces that are controlled by a side and available for use but are not yet deployed on the map.
Example: If Israel intervenes, the Israeli intervention force units are placed in the U.S. force pool box and may enter play from there as reinforcements.
Diplomacy Resolution. During the diplomacy phase, each player selects one diplomacy card and places it face up (to be played) or face down (to be discarded) in front of themselves, without showing the other player the card or its positioning. (Use the game box, a player aid card, or any other convenient method to screen the cards for this sequence.) A player may choose any available card to be played except those that have unmet prerequisites (see Diplomacy Card Prerequisites, below). A player may choose any card to be discarded, even if the prerequisite has not been met.
After both players have chosen their cards, they are then revealed to both players. Face-down cards are discarded. A discarded card has no effect; its influence and/or abilities are ignored. Discarded cards may be examined and read by both players. Each card — whether discarded or played for effect — can only be played once.
Effects of Diplomacy Cards. A face-up card is being played, and the effects of cards that are played are resolved. Most cards are diplomatic actions that influence various nations/factions of the Middle East. The cards state the degree and direction of the influence in terms of the number of boxes the nation's/faction's marker is shifted toward either side on the influence track.
Example: A result of "2" in the "To Soviet" column would shift the markers two boxes toward the Soviet end of the track.
The net influence of both players' cards is used.
Example: If the influence on Iraq is on one card is "2 To US" and on the other card is "1 to Soviet", then the Iraqi marker is shifted one box toward the U.S.
Note that a player does not always influence a nation or faction in favor of their side.
Example: If the Pact player plays the Denounce Israel card, Syria and Iraq are influenced toward the Soviet Union, but Israel is influenced toward the U.S.
On certain cards, the influence result for Iraq or Syria is marked with an asterisk. The asterisked result is used if the Islamic Republic Government is already committed to the side named in the text at the bottom of the card.
Example: If the Pact player plays the Syrian Intervention card, the influence result on Iraq usually is "2 To U.S.". However, if the IRG is committed to the U.S., then the result for Iraq is "1 To Soviet" instead.
Committed Nations/Factions. If a marker is shifted off either end of the influence track, then the marker is placed in the appropriate side's committed nations/factions box. The nation or faction corresponding with the marker is committed to that side for the rest of the game.
Once committed, the nation or faction is no longer subject to influence; influence results for it on subsequently played diplomacy cards are ignored.
Diplomacy Card Prerequisites. Certain cards have prerequisites that must be met before the card may be played. If the prerequisite for a card is not met at the start of the diplomacy phase, that card may not be played for effect in that phase. (A player may discard such a card even if the prerequisite is not met.)
Commitment. Certain cards require a nation to be committed to a player's side before that player may play the card. For example, Syria must be committed to the Soviet Union before the Pact player may play the Syrian Intervention card.
All factions and some nations are immediately controlled by a side when they commit to it, while others must intervene after committing before the side controls their forces (see Nations and Factions, above).
Middle East Crisis. A crisis in the Middle East is assumed to occur when both sides have at least one committed nation/faction each. If neither side has any committed nations/factions or if only one side has any, then a Middle East crisis has not occurred. Once a crisis does occur, the cards with a Middle East crisis as prerequisite may be played.
RDF Alerted. The NATO player must have played the Alert the RDF card in a preceding turn in order to meet this prerequisite.
Southern MDs Mobilized. The Pact player must have played the Mobilize Southern Military Districts card in a preceding turn in order to meet this prerequisite.
U.S.-Soviet Conflict. If at any time during a turn U.S. forces enter a nation containing Soviet forces or Soviet forces enter a nation containing U.S. forces, U.S.-Soviet conflict occurs. (No actual ground or air combat at game scale need occur for this; simply the presence of both forces in the same nation means that at least one side has decided to allow direct U.S.-Soviet conflict.) Once this situation occurs, cards requiring U.S.-Soviet conflict may be played.
Special Abilities and Effects. Many cards represent diplomatic actions that have no effect on the game other than influencing nations and factions during the diplomatic phase. Other cards allow special abilities or cause special events:
Support an Independent Kurdistan. Each player has one of these cards. The player who plays this card first places the Kurdish faction marker in their committed nations/factions box; the Iranian Kurdish faction is committed to the player's side for the rest of the game. The other player may not subsequently play their Kurdistan card (though they may choose to discard it).
If both sides play their Kurdistan cards simultaneously (in the same diplomacy phase), the Kurdish faction commits to the Soviet Union. However, the influence effects of both cards are used; the NATO card's influence is not ignored in this case.
See Kurdistan, above, for the effects of the Kurds committing to either side.
Jordanian Intervention. The NATO player gains control of Jordanian forces when the Jordanian Intervention card is played. Jordan must be U.S. committed when this card is played.
Syrian Intervention. The Pact player gains control of Syrian forces when the Syrian Intervention card is played. Syria must be Soviet committed when this card is played.
Israeli Intervention. The NATO player gains control of Israeli forces when the Israeli Intervention card is played. Israel must be U.S. committed when this card is played.
Mobilize Southern Military Districts. Soviet forces on the map and in the Western Asia air theater are not available for military operations until the southern military districts of the Soviet Union are mobilized. Once mobilization for these districts is ordered, the Soviet forces become available for operations, and reinforcements from these districts will be received in later turns. There must be a Middle East Crisis when this card is played.
Note: On the turn this card is played, place the Pact SMD M+6 marker on the game turn track six turns after the current turn. So, if the card is played in game turn 7, place the marker on the game turn track on turn 13.
Alert the RDF. Alerting the U.S. Rapid Deployment Force allows the NATO player to deploy U.S. forces to the Middle East. There must be a Middle East Crisis when this card is played.
Note: On the turn this card is played, place the NATO RDF Alert marker on the game turn track in the current turn.
Invade/Intervene. Each player has one of these cards. The Pact player must play this card in order to allow Soviet forces to enter Iran; the NATO player must play this card in order to allow U.S. forces to enter Iran. (These forces may not enter Iran if the owning player has not played the invade/intervene card.) In order for the U.S. player to play this card, the Alert the RDF card must have been previously played. In order for the Soviet player to play this card, the Southern MDs Mobilized card must have been previously played.
If the IRG is not committed to the side playing the card, that side is invading Iran and the IRG automatically becomes committed to the other side. If the IRG is committed to the side playing the card, that side is intervening and sending forces into Iran at the request of the IRG.
If both players play their Invade/Intervene cards in the same diplomatic phase and the IRG is not committed to either side, roll a die to determine which side invaded first:
- 1, 2, 3 the Soviet Union (Pact player) invaded first
- 4, 5, 6 the U.S. (NATO player) invaded first.
The player who invades first is the actual invader, causing the IRG to commit to the other side. The other player is intervening.
When both players play their Invade/Intervene cards in the same turn, the sequence of play for the Pact and NATO segments of that turn is slightly altered, in order to show the confused nature of operations.
If the Soviet Union invades first, the sequence becomes:
- Pact segment:
- Pact first impulse,
- NATO first impulse,
- Pact second impulse;
- NATO segment:
- NATO reserve impulse,
- NATO second impulse.
If the U.S. invades first, the sequence becomes:
- NATO segment:
- NATO first impulse,
- Pact first impulse,
- NATO reserve impulse;
- Pact segment:
- Pact second impulse,
- NATO second impulse.
Phases within the segments and impulses are unchanged. (Note that the major change in the sequence of play is that the first two impulses consist of each side's first impulse, allowing both players to receive reinforcements early in the turn.)
General Mobilization. Each player has one of these cards. When one of these cards is played, it means that the player's side has ordered general mobilization throughout the alliance (NATO or Warsaw Pact). There must be U.S.-Soviet Conflict (see above) in order to play this card.
Players receive additional reinforcements following general mobilization.
In a diplomacy phase, if one player plays their General Mobilization card and the other player does not, the other player may substitute their General Mobilization card for the card actually played. The card pre-empted by the General Mobilization card is shown to the opposing player and returned to the owning player's deck. However, in subsequent turns, the owning player may only discard this card; it may not be played for effect. (It's assumed that the diplomatic effort represented by the card was interrupted due to the sudden mobilization, and favorable conditions for that diplomatic situation cannot be restored.)
If the NATO player plays their General Mobilization card in a game turn and the Pact does not, special rules apply to this situation.
Note 1: On the turn the Pact player plays this card, place the War Turn 0 marker on the Game Turn track on the current turn, and place the Pact Mobilization 1 and War Turn 1 markers on the track on the following game turn.
Note 2: On the turn the NATO player plays this card, place the NATO Mobilization 0 marker on the Game Turn track on the current turn.
Victory Point Penalty. Once one side has ordered general mobilization, the other side must do so in the same turn or suffer a victory point penalty.
(This reflects mobilization considerations outside the scope of Persian Gulf.) At the start of each diplomacy phase, a 5 victory point penalty is assessed if one side has ordered general mobilization and the other side has not. The penalties are subtracted from the Pact victory total at the end of the game if the Pact receives the penalty (mobilizes late); they are added to the Pact victory total if NATO receives the penalty (mobilizes late).
Types of Game Turns, Mobilization, and Outbreak of War
There are two general types of game turns in the Diplomacy Game: pre-war turns and war turns. A pre-war turn is a game turn that occurs before the general outbreak of the Third World War. A war turn is a game turn that occurs at the outbreak of The Third World War. The standard sequence of play is used in both types of turns.
World War III breaks out once the Pact player plays their General Mobilization card. The turn the Pact player plays this card is always War Turn 0.
In the Persian Gulf scenario, War Turn 0 is always considered a pre-war turn.
Note: All turns in any scenario other than Persian Gulf and the Combined Game are considered war turns.
Pre-war Turns
A pre-war turn is a game turn that occurs before the general outbreak of the Third World War. Note that military action in the Middle East may (and almost certainly will) occur during pre-war turns.
During the pre-war period, it is assumed that both sides, although unable to prevent the Middle East confrontation and conflict from escalating, try to limit the extent of hostilities.
Pre-war Turn Special Rules. Some of the game's rules are modified during the pre-war turns.
Neither side may fly logistical or runway cratering strike missions.
A player may not use air transport or naval transport until the Alert the RDF card (NATO player) or Mobilize Southern Military Districts card (Pact player) is played. Furthermore, a player may not make any airborne or amphibious assaults until their Invade/Intervene card is played.
Either side may invade Iran by playing their Invade/Intervene card. The Pact player may not invade any other neutrals until War Turn 1; the NATO player may never invade any neutrals.
NATO forces may not enter, attack into, or fly missions in any hex in the Soviet Union. NATO zones of control do not extend across the Soviet border.
Nuclear weapons (see Nuclear Warfare) may not be used during the prewar period. The nuclear conflict level is automatically 0, and the nuclear escalation phase is skipped during each pre-war turn.
War Turns
A war turn is a game turn that occurs following the general outbreak of the Third World War.
Note: All turns in any scenario other than Persian Gulf and the Combined Game are considered war turns.
First War Turn Special Rules. On the first war turn (War Turn 0 or 1, depending upon whether the Pact player launches an early attack or not), the following rules are used to mark the transition to full war:
In the first echelon movement phase of the Pact first impulse, NATO zones of control do not extend across the Pact borders in Europe or across the Soviet border in the Middle East.
NATO air units may not fly strike missions during the deep strike phase and may not fly strike/interdiction missions in Pact nations in Europe or anywhere in the Soviet Union during the strike/interdiction phase of the Pact segment. NATO air units may intercept Pact strike missions.
Timing of Reinforcements
Turn Number Reinforcements. Reinforcements identified with a turn number are received following general mobilization. When a side orders general mobilization in a turn, that turn is mobilization turn 0 for that side.
Note: While a mobilization turn for the Pact will always correspond to the same-numbered war turn, the same may not be true for NATO.
Reinforcements for a side are received on the mobilization turn corresponding to the turn number on the Reinforcement Display or as listed in the Playbook. For example, Pact "Turn 1" units are received on Pact mobilization turn 1, and NATO "Turn 1" units are received on NATO mobilization turn 1.
If NATO ordered general mobilization one turn after the Pact did so, then Pact "Turn 1" units enter on war turn 1 (Pact mobilization turn 1), while NATO "Turn 1" units enter on war turn 2 (NATO mobilization turn 1). Reinforcements for neutral nations are received based on NATO's mobilization turn number. For example, Austrian territorial reserves become available on NATO mobilization turn 1.
Southern Military Districts Mobilization + 6 turns Reinforcements. Pact reinforcements identified with Southern Military Districts Mobilization + 6 turns are received six turns after the Pact player plays their Mobilize Southern Military Districts card.
Example: If the Pact player plays their Mobilize Southern Military Districts card on turn 7, then these reinforcements will be received on turn 13.
Alert Reinforcements. NATO reinforcements identified with 'Alert' are received on the turn the NATO player plays their Alert the RDF card, and reinforcements identified with 'Alert + #' are received on the indicated number of turns following the turn the NATO player plays their Alert the RDF card.
Example: If the NATO player plays their Alert the RDF card on turn 7, then Alert reinforcements are received that turn; Alert + 1 reinforcements are received on the following turn; etc.
NATO Ordering General Mobilization First
It is possible (although not usual) for NATO to order general mobilization before the Pact does. Use the following rules when NATO has played the General Mobilization card in a turn before the Pact plays their General Mobilization card. This turn is considered NATO mobilization turn 0.
On and after NATO mobilization turn 1, NATO units may move (including using air and naval transport) and air units may transfer, following the regular sequence of play.
Diplomacy Game Options
Uncertainty Option. To add more uncertainty to the diplomacy game, use the following option. Each player should:
- remove the number 9, 10, and 11 cards (Alert the RDF or Mobilize Southern Military Districts, Invade/Intervene, and General Mobilization) from their deck,
- add one blank diplomacy card to the deck,
- shuffle the deck, and
- randomly choose one card from the deck. This card is placed aside and is not used in the game. The owning player may examine it, but the opposing player may not examine it until all other diplomacy cards have been revealed during play.
- Each player then adds the number 9, 10, and 11 cards to their deck, and play of the game may begin.
Random Option. For players uninterested in the play of the diplomacy game or wanting a random and unpredictable diplomacy game, the following option may be used:
- Each player removes the number 9, 10, and 11 cards from their deck, shuffles the remaining cards, and places this deck face down next to the map.
- During the diplomacy phase, each player turns over the top card of the deck. If the card's prerequisites are met, the card is played; if not, it is discarded. When all of these cards are played, the players receive their number 9, 10, and 11 cards and may play them in following diplomacy phases.
Marker Starting Positions. Middle East politics are quite complicated and uncertain; players are encouraged to experiment as they wish.
For example, changing the starting position of markers on the influence track of the diplomacy chart is one way to show a different international situation in the Middle East.
It is suggested that all rivalries (see Rivalry, above) be kept as a basic framework for the Middle East.
Scenarios, Victory Conditions, and Victory Points
Scenarios and Victory Conditions
Scenarios and Victory Conditions along with setup and reinforcement schedules are listed in the Playbook.
Victory Points
In each scenario, victory is determined by means of victory points, which are based on the number of objectives (cities, ports, airfields, and oilfields) controlled by the Pact.
Pact Control. An objective is considered controlled by the Pact if a Pact unit occupies it or was the last unit to pass through it, or if it is in the Soviet Union, a Warsaw Pact country, Afghanistan, or a country that joins the Pact and the hex has never been occupied by a NATO unit.
Earning Victory Points
Objectives. At the end of a scenario, the Pact player receives victory points as follows:
- 2 VP: each major city controlled
- 1 VP: each minor city controlled
- 1 VP: each mainland, non-city port (includes ports on islands connected by a bridge to the mainland) controlled
- 1 VP: each airfield or oilfield controlled
- 2 VP: each invaded neutral that surrenders
No points are received for ports on islands (such as Chios, C0636) or for ports that are also cities (such as Kiel, A3118).
Cities, ports, and airfields in neutral nations invaded by the Pact are not counted for victory, although oilfields in these nations are.
All objectives in Iran are counted for victory, regardless of which player invades Iran.
In order to be counted, a city, port, or airfield may not be isolated (see Locations, above). An oilfield is counted even if it is isolated.
Example: If the Pact player invades Iraq and forces Iraq to surrender, two victory points are received for the surrender and one victory point is received for each Iraqi oilfield controlled.
The Pact player may receive victory points for NATO-controlled objectives in territory that was controlled by the Pact at the start of the game. Victory points for such an objective are received if 1) it is isolated from NATO sources of communications and 2) no un-isolated NATO unit is within two hexes of the objective.
Theaters of Operation (Optional)
Areas of Operation
Various nations are unlikely to allow their forces to be sent far afield, as their units are assigned to specific areas of operation. Ground and air units have colored bars on the top of their counters indicating the theaters in which they may operate, refer to the NATO and Warsaw Pact Organization player aid cards.
Theaters of Operation are defined as:
- AFNORTH (NATO) / Northwestern TVD (Warsaw Pact) — Northern air theater
- AFCENT / Western TVD — Western Europe and Eastern Europe air theaters
- AFSOUTH / Southwestern TVD — Southwestern and Balkan air theaters
- CENTCOM / Southern TVD — Western Asia and Persian Gulf air theaters
Restrictions on Operations
Units have the following restrictions:
- ground units assigned to the various theaters of operation may only move and perform combat in their assigned theaters and may not be sent to other theaters; and
- air units may not be based outside of their assigned theater of operations.
Example 1: Units assigned to the NATO AFNORTH theater of operations (indicated by the blue bar at top of counter) must be used only in Norway, Sweden, Finland, Denmark, northern East and West Germany (Schleswig-Holstein), Poland, and the areas of the Soviet Union on Map B; these areas comprise the Northern air theater.
Example 2: Units assigned to the Pact Southern TVD (indicated by the salmon bar at top of counter) must be used only on the Persian Gulf maps (Maps E and F); this area comprises the Western Asia and Persian Gulf air theaters.
Nuclear Warfare (Optional)
Both sides held considerable inventories of tactical nuclear warheads, and it is distinctly likely that a conventional conflict in Europe and the Middle East could have escalated to include the use of these weapons. No game on this subject would be complete without rules for nuclear warfare, and the rules below are extensive.
However, if even only tactical nuclear warfare begins, its effects tend to dominate the game, to the exclusion of the more interesting interactions created by the rest of the rules. For that reason, the nuclear rules have been made optional despite opinions of the true probabilities.
Conflict Level
There are six possible levels of nuclear conflict, numbered 0 (no nuclear weapons in use) through 5 (strategic exchange). They differ in the types and quantities of nuclear weapons (nuclear attack points or NAPs) available in each turn and in the limitations placed on their use.
Escalation and Restraint
At the start of the game, the nuclear conflict level is at 0 (no nuclear weapons use). This may change during the game. Players, as theater military commanders, do not have the authority to escalate, although they do have some influence over the political leaders who make the decision.
Escalation. In the nuclear escalation phase of each turn, either player rolls a die. The nuclear warfare table shows, for each level, the die roll needed to escalate to the next level.
Nuclear escalation phase die roll. Either player rolls a die, if the roll is less than or equal to the number shown, the level is increased by one. The new conflict level is in effect until it is altered in a later escalation phase. It is also possible to de-escalate (return to the next lower level). If the die roll is 7 or greater, de-escalation occurs.
Types of Nuclear Attacks
Players may receive NAPs of three types:
- field artillery shells (including short-range missiles),
- aircraft bombs, and
- theater level missiles.
See the Nuclear War Table for the NAPs available to be used each turn at each level.
The count of available NAPs may be tracked on the Nuclear Attack Points Track player aid card using the NAP markers, to ensure that the limit is not exceeded each turn.
Field Artillery (Artillery NAPs). Field artillery nuclear attacks include cannon-launched warheads and short-range battlefield rocket and missile systems (such as the NATO Lance missile and the Pact SS-21). Field artillery attacks are used to support ground units engaged in ground combat. Field artillery nuclear attacks may be made during any combat phase. The primary effect of artillery NAPs is to lower the proficiency of enemy units in an attack.
Any ground unit with nuclear attack capability, denoted by an "N" in the upper left corner of the counter, may use NAPs in a battle.
Before each battle is resolved, both players secretly decide whether a nuclear attack will be made and, if so, how many NAPs will be used. The number of points used may be written down on a sheet of paper, players may conceal disruption markers in their hands, or any other convenient means may be used. They are revealed simultaneously.
Each NAP used places one disruption upon one involved enemy unit of the using player's choice. No more disruptions may be applied to a single unit than the number of the conflict level.
Example: The nuclear conflict level is 2. A nuclear-capable Pact unit is attacking a hex with two NATO units. The Pact player may use up to 4 artillery NAPs in the attack, placing no more than two disruptions on each unit. If the nuclear conflict level were at 1, then the Pact player may use up to 2 artillery NAPs in the attack, placing no more than one disruption on each unit.
Aircraft Bombs (Air NAPs). Any air unit with nuclear strike capability (marked with an "N" on the counter) may carry a number of aircraft bomb NAPs less than or equal to its strike rating. NAPs are used to conduct strike missions.
At conflict level 2 only nuclear strike/interdiction missions are allowed.
At conflict level 3 and higher, any strike mission may be a nuclear strike mission.
To run a nuclear strike mission, place a disruption marker of the correct denomination under the air unit. If no NAPs are to be carried, place another type of marker (shaken, odds, etc.) under the unit. Nuclear strikes are in addition to the conventional strike run by the air unit.
If the air unit is shot down or aborted, all NAPs it carries are lost. If the air unit's rating is halved, the number of NAPs delivered is also halved, rounded to the nearest whole number (although the full number are used up).
Nuclear Logistical Strikes. Nuclear logistical strikes are resolved in the same way as conventional strikes; a die is rolled for each NAP used; however, the number rolled is not halved (as in a conventional logistical strike), but is multiplied by 1.5 (round fractions to the nearest whole number, rounding .5 up).
Nuclear Runway Cratering. A die is rolled for each NAP used, with the number rolled being the number of hits; for each hit, roll another die; the hit causes a crater on a roll of 1-4 and destroys an air unit on a roll of 5 or 6.
Nuclear Strike/Interdiction. Place a nuclear strike marker in the target hex. Each NAP delivered may be used to attack a single enemy unit in the hex, no more than one NAP per unit.
For each attack, roll a die for the number of disruptions placed on the unit. Each unit which enters the hex during the next turn is attacked by one NAP.
Theater Nuclear Missiles (Missile NAPs). Theater missile NAPs are intermediate range missiles such as the U.S. Pershing and ground launched cruise missiles and the Soviet SS-20 and SS-22. Also included in the NATO NAPs are Poseidon submarine-launched warheads dedicated to theater tactical support.
All attacks by theater nuclear missiles are conducted as if they were aircraft strike missions except that they may not be shot down, halved, or aborted. Just designate a mission for each NAP and resolve it.
Strategic Nuclear Exchange
Conflict level 5 is a strategic exchange, in which the major nuclear powers will selectively destroy strategic targets in the enemy homeland. This drastic step has several effects. All but the first remain in effect even if the conflict level later de-escalates.
Strategic Nuclear Strikes. Once the conflict level escalates to a strategic nuclear exchange, a number of each side's cities (depending on the scenario(s) being played) is hit by a strategic nuclear strike per turn.
- Single game scenario: 1 city
- Two game scenarios: 2 cities
- Three or more game scenarios: 3 cities
If playing only the Persian Gulf scenario, strategic strikes on cities are not made. However, all other effects of reaching level 5 are still in force. (It is assumed that those strikes are being used in other theaters outside of the scope of this scenario.)
In the escalation phase of each turn, including the phase in which the conflict escalates to level 5, each player writes down the name of the allotted number of cities.
All cities have devastation markers placed on them in the next escalation phase, at which time both players write down the name of another number of cities. This continues as long as the game remains at conflict level 5.
Any units in a city hex at the time it is devastated are destroyed and removed from play. No unit may enter or move through the devastated hex for the next turn, and entry costs two extra movement points for all units for the remainder of the game; the city is no longer a city for all purposes (air transport, victory, combat effects, etc.). Units may not regroup in devastated cities. Strategic devastation does not use available NAPs.
Pact Off-Map Movement. The Pact off-map transport net may not be used (even if the conflict level later de-escalates).
Reinforcements. Neither side receives any additional reinforcements, either ground or air, for the rest of the game. Reinforcements which have not yet arrived are removed from play and, in the case of those countries subject to critical losses, are considered eliminated in combat.
Regrouping. Beginning with the first regroup phase after escalation to conflict level 5, and in every subsequent regroup phase for the rest of the game, both players are limited to regrouping a maximum of two units per theater per phase. (Since regrouping simulates not only reorganization, but also the absorption of replacements, this reflects the drying up of replacements from home.)
Supply. Beginning in the first initial segment after escalation to conflict level 5, and in every subsequent initial segment for the rest of the game, for each theater both players roll the die to determine supply shortages of their opponent.
Air Unit Supply. The first die roll, during the aircraft maintenance phase, is for the total number of air units that are grounded for lack of supply that turn.
Roll the die once for each theater to determine the total number of air units grounded.
The owning player selects which of their air units will be grounded.
Ground Unit Supply. The second die roll, during the supply phase, is for the total number of ground units which are unsupplied that turn.
Roll the die once for each theater to determine the number of ground units unsupplied.
The player selects which of their opponent's ground units will be unsupplied. Units placed out of supply may be re-supplied using emergency supply (see Emergency Supply Priorities, above).
Limits on Use
Neither side may target NAPs against a city hex in a nation which has surrendered or in a nation currently a friendly belligerent.
Example: A NATO attack intended to recapture an Iraqi city could not use field artillery NAPs to disrupt the Pact defenders in that city, if Iraq had committed to NATO. However, Pact troops attacking out of such a city against NATO troops could be disrupted by field artillery NAPs.
Victory Point Adjustments
The effects of the nuclear rules on game balance are very complex, depending on the exact level reached in each turn. The following table constitutes only a simple guideline, for the Persian Gulf column (PG):
| Reaches Level 1, but not beyond | Each turn at Level 2 or 3 | Each turn at Level 4 or 5 | For each major city devastated | For each minor city devastated | |
|---|---|---|---|---|---|
| PG | -2 | +½ | -½ | — | — |
If the conflict reaches level 5, victory is a strange term to use, whatever the outcome, but the war continues nonetheless.
Chemical Warfare Abilities (Optional)
The Third World War system assumes that combat occurs in a chemical-warfare environment. For convenience, the game assumes that all forces have chemical warfare abilities. However, various forces in the Middle East have minimal or no chemical warfare abilities, and the following rule may be used to cover this factor.
Chemical Warfare Ability
Units which have chemical warfare abilities are denoted by a "C" in the top left corner of the unit counter.
Chemical Warfare Combat Effects
In a combat, if any enemy unit has chemical ability, then all friendly units with no chemical ability receive one disruption during combat resolution in addition to the regular combat result.
Example: If a Soviet force with chemical ability attacks a U.S. unit (with chemical ability) and Mujahideen unit (no chemical ability) and achieves a result of —/R against them, the U.S. unit retreats and the Mujahideen unit receives one disruption and retreats.
In a combat, if all enemy units have no chemical ability, then the combat result to all friendly units (with or without chemical ability) is reduced by one disruption. Exception: A one-disruption result is not automatically reduced to no disruption. Instead, roll the die once per battle for such a result; on a roll of 1, 2, 3 it is reduced to no disruption and on any other roll it remains at one disruption.
Example: A force of Revolutionary Guards (no chemical ability) attacks a rebel Iranian Army unit (chemical ability), and the result is D/3DR. The Revolutionary Guards units receive two disruptions (one additional disruption due to chemical warfare) and the Iranian Army unit receives two disruptions (one less disruption) and retreats.
Tactical Advantage (Optional)
The possession, and use of, the Tactical Advantage marker allows the owning player to re-roll one die or dice roll by either player.
The Marker
The Pact player receives the Tactical Advantage marker starting in War Turn 1, unless specified otherwise in the scenario-specific rules.
Procedure
Immediately after a die or dice roll by either player, the player possessing the Tactical Advantage marker can state they are invoking Tactical Advantage.
The die or dice are then re-rolled immediately and the result shown is final — whether advantageous or not to the player invoking Tactical Advantage.
After the re-roll, the Tactical Advantage marker is passed to the opposing player, who may then use the marker starting anytime in the next game turn. If a player does not invoke Tactical Advantage during a turn, the marker is still passed to the opposing player at the end of the turn.
Game Clarifications
[clarification 6.6.1] add sentence at end: "The reverse side of most counters has the proficiency value surrounded by a box; this represents one disruption."
[addition, Diplomacy Chart] use two blank counters in Iranian Army colors to create diplomacy markers for placement on the influence track as follows:
- Iranian Army Diplomacy
- Iranian Centrist Diplomacy
Note: The Iran Diplomacy marker can be set aside or discarded since the Iranian Army Diplomacy marker replaces it.
[correction, Syrian Intervention card] Soviet Diplomacy card #8 is missing the word "committed" in the header. It should read, "Prerequisite: Syria must be Soviet committed."
[clarification] The replacement counters for the IRG 8P and 25P CdoD are shown with a brigade [X] unit size symbol; the correct unit size symbol should be division [XX]. The stacking points on these two counters (3) are correct.
Expanded Sequence of Play
Initial Segment
- Diplomacy Phase. Both sides choose and resolve diplomatic moves.
- Neutral Activation Phase. Announce invasion or entry into the war of neutrals.
- Aircraft Maintenance Phase. (1) Receive new air units. (2) Roll for maintenance. (3) Destroy and ground air units due to craters, grounding, Pact logistical breakdown, strategic nuclear exchange. (4) Repair craters. (5) Consolidate losses.
- Weather Determination Phase. Roll for weather for each theater.
- Nuclear Restraint Phase (optional). Announce restraint in use of nuclear weapons.
- Theater Air Superiority Phase. (1) Pact places air units in the air superiority box. (2) NATO places air units in the air superiority box.
- Deep Strike Phase. (1) Pact assigns deep logistical strikes, runway cratering, and escort missions. (2) NATO intercepts and assigns deep logistical strikes, runway cratering, and escort missions. (3) Pact intercepts. (4) Resolve air combat, air defense fire, and missions.
- Supply Phase. (1) Determine how many Pact stacking points are unsupplied; NATO determines which ones. (2) Determine how many NATO stacking points are unsupplied; Pact determines which ones. (3) Pact determines any emergency supply priorities. (4) NATO determines any emergency supply priorities.
- Critical Loss Determination Phase. Both sides determine whether any of their countries have suffered critical losses.
Pact Segment
- Strike/Interdiction Phase. (1) Remove strike markers left from this phase last turn. (2) Pact declares strikes and escorts. (3) NATO intercepts and declares strikes and escorts. (4) Pact intercepts. (5) Resolve air combat, air defense fire, and missions.
Pact First Impulse
First Echelon Sub-Impulse
Movement Phase. Pact receives new ground units. Move Pact units, including air transport and naval transport; air transport missions may be escorted and intercepted by air units; units may breakdown/buildup.
Combat Phase. For each attack: (1) Determine total attack strength. (2) Determine total defense strength. (3) Determine initial odds. (4) Determine odds modifiers. (5) Declare attack with odds marker. Resolve attacks one by one: (1) Declare air missions — Pact allocates ground attack and top cover; NATO allocates ground attack and top cover; Pact allocates top cover if no ground attack or top cover was allocated first. (2) Resolve nuclear attacks (optional). (3) Resolve air combat and air defense fire; apply odds modifiers for successful missions. (4) Determine and apply combat result.
Second Echelon/Breakthrough Sub-Impulse. Only units which do not begin the sub-impulse in enemy ZOCs may move or attack in this sub-impulse. Movement Phase, Combat Phase as above.
Regroup Phase. All Pact units which did not move or attack in the first impulse and are not in an enemy ZOC may regroup.
NATO Reserve Impulse. Only NATO units which do not begin the impulse in an enemy ZOC may move or attack in this impulse.
Movement Phase. Move NATO units; no air or naval transport may be performed; new units are not received.
Combat Phase. As described above for the Pact First Impulse combat phase.
Regroup Phase. All NATO units which did not move or attack in this impulse and not in an enemy ZOC may regroup.
Pact Second Impulse. This impulse is identical to the Pact First Impulse except that new units are not received.
Pact Surrender Phase. Determine if any Pact country surrenders.
NATO Segment
Strike/Interdiction Phase. (1) Remove strike markers left from this phase last turn. (2) Pact declares strikes and escorts. (3) NATO intercepts and declares strikes and escorts. (4) Pact intercepts. (5) Resolve air combat, air defense fire, and missions.
NATO First Impulse
Movement Phase. NATO receives new ground units. Move NATO units, including air transport and naval transport; air transport missions may be escorted and intercepted by air units.
Combat Phase. As described above.
Regroup Phase. All NATO units which did not move or attack in this impulse and not in an enemy ZOC may regroup.
NATO Second Impulse. This impulse is identical to the NATO First Impulse, except new units are not received.
NATO Surrender Phase. Determine if any NATO country surrenders.
Final Segment
- Aircraft Landing Phase. All air units in the air superiority box return to the flown box and transfer missions occur; Pact units transfer first.
- Unsupplied/Grounded Recovery Phase. Remove unsupplied markers from ground units; return grounded air units to the available box.
- Nuclear Escalation Phase (optional). Roll to determine if nuclear escalation occurs.
Nations and factions with Limited Military Abilities (see above) only operate in the Pact First Impulse first echelon sub-impulse and its regroup phase, or the NATO First Impulse (as applicable). Those nations and factions are: Afghanistan, Iraq, the Iranian Army, the Iranian Revolutionary Guards, the Iranian Communists, the Kurds, Kuwait, the Mujahideen, Oman, Qatar, Saudi Arabia, the Tudeh, and the United Arab Emirates.