Perry Rhodan Sammelkartenspiel
Perry Rhodan Sammelkartenspiel Rulebook
Table of Contents
Table of Contents
- 1. Introduction
- 2. Card Structure
- 3. Game Rules
- 4. Missions
- 5. Use of Special Effects
- 6. Special Features of Higher Game Phases
- 7. Ending a Game Phase – Phase Change
- 8. Tournament Rules Supplement
- 9. Flow Diagrams
1. Introduction
Welcome to the largest science fiction universe ever created by humans. In PERRY RHODAN – the Collectible Card Game (PRSKS) you experience the adventures of Perry Rhodan, Bully, Atlan and other personalities and take part in the rise of the Terrans to galactic supremacy. Over the course of the game you expand humanity's influence, establish bases on other planets, try to gather information on hostile worlds with your agents, solve Galactic Riddles and work with allied peoples to secure peace in the Milky Way.
But the rise of humanity arouses many envious rivals who will do everything they can to undermine the Terrans' plans and to dominate Earth. You also take over the role of these opponents. Only by mastering both sides can you win the struggle for supremacy.
The plot of the PERRY RHODAN novel series spans several thousand years of human history, a vast period in which technology and consciousness undergo enormous changes. The designers chose to serve this huge universe in small portions, so that newcomers who do not know the novel series can better understand the chronological structure of the story. The designers stayed as close as possible to the pulp novel originals to achieve a high degree of authenticity. The PERRY RHODAN card game is therefore a simulation of the PERRY RHODAN universe, and the focus of the game system is on capturing the mood of the novels as well as possible.
The PERRY RHODAN card game is divided chronologically into individual sections which we call game phases (Spielphasen). Each game phase covers a small section of the story of the PERRY RHODAN universe. Several game phases together form a complete story cycle. The game so far consists of game phases I – V (see page 7, "The Game Phases").
PRSKS can be played by 2–4 people. The optimal number of players is 2–3. In theory there is no upper limit on the number of participants, but the game slows down considerably already with 4 players. Each player assembles a card deck, which we call the Matter Source (Materiequelle). If you already own cards from further game phases, a Matter Source is assembled for each game phase you want to play (for example one Matter Source for game phase I, one for game phase II and one for game phase III, and so on).
To understand the game flow you should at first restrict yourself to game phase I or game phase V. For this, use only cards with the corresponding phase number on the back. Study the corresponding victory conditions well and select from the cards available to you those that are needed to achieve them. Later, once you are familiar with the rules, you can add new cards, replace old ones, remove from the Matter Source cards you do not consider useful, and extend the game to further game phases.
By acquiring new cards and tuning your card deck you will achieve ever better results against your fellow players. A large part of the strategy and skill of the game lies in the correct composition of the Matter Sources.
1.1 History of the Game
The PERRY RHODAN card game was developed by the company Fantasy Productions GmbH under the direction of Robert Simon. The first cycle, "Die Dritte Macht" (The Third Power), started in autumn 1996 with game phases I – III, where phase I came to market as starters and phases II – III, "Topsider & Springer", as boosters. In spring 1997 the first expansion, game phase IV "Vorstoß nach Arkon" (Advance to Arkon), was published. The 2nd edition of game phases I – III followed in winter 1997/1998, and in autumn 1998 the unlimited 3rd edition of these game phases appeared.
After Fantasy Productions GmbH subsequently set other priorities, the PRSKS went quiet for a while. In 2003, however, it succeeded (for Between The Stars GmbH) in continuing the game with the second cycle, "Atlan und Arkon". This cycle was started with "Die 2. Epoche" (The 2nd Epoch), the 1st edition of game phase V. Further game phases are in preparation.
1.2 Object of the Game
The object of the PRSKS is to score as many victory points (Siegpunkte) as possible. To do this you must expand the influence of your Terran side, solve Galactic Riddles and carry out missions in order to advance humanity's development. The Terran side is called the Pro side below. At the same time you also try to increase the influence of Terra's opponents, in order to make life as difficult as possible for the other players; this side is called the Anti side below. You therefore play both sides and must be successful on both the Pro side and the Anti side in order to win.
Each game phase of the game has different victory conditions, and whoever fulfils them first and carries out a so-called phase change (Phasenwechsel) has won the phase. You can also play several game phases in succession and make a campaign out of them. The winner of the game is then the one who has achieved the most victory points overall. To learn the game mechanisms, however, it is recommended to start by restricting yourself to game phases I or V. Once you feel reasonably practised in one of these game phases, you extend the game with further game phases.
Note: Even when playing one phase, the winner of that phase (that is, the one who made the phase change) does not necessarily have to be the winner of the game. If another player has reached more victory points, that player is the winner.
The phase change is the declared end of a game phase and, in campaign play, the transition to the next game phase. A player can only trigger a phase change if, at the start of his turn, in his Reactivation section (Abschnitt Reaktivierung), he meets the victory conditions for the running game phase (see page 48, "Ending a Game Phase – Phase Change"). This means he must already have met the victory conditions in his last turn and held them for one full round of play. After the phase change the victory points for the ended game phase are then awarded.
The object of the game is easy to define, but reaching it first is not quite so simple. To fulfil a victory condition several things must be achieved. First the influence of the Terrans must be built up by means of locations (Orte). This must then be consolidated by ships, units and accessories. At the same time the influence of the anti-Terran forces must not be neglected, so that you can prevent other players from fulfilling the victory conditions. Naturally these in turn build up their anti-Terran forces to prevent you from winning, so that above all it is a matter of keeping the right balance.
A player automatically loses and is immediately eliminated from the game together with all of his cards if it is established that he broke the rules when assembling a Matter Source (page 16, "Game Preparation").
1.3 The Game Phases
The division of the PERRY RHODAN card game into different game phases can be seen from the different card backs of the resource cards (see Fig. 2b on page 10). The individual game phases represent different story sections of the PERRY RHODAN series.
- Game phase I deals with the building of the Third Power with the help of the Arkonides stranded on the Moon, against the resistance of the terrestrial great powers, the formation of the Mutant Corps and the conflicts with the Individual Shapechangers and the Fantan people (issues 1 to 9). In terms of story this phase is really a build-up phase, in which humanity prepares for the coming conflicts (of game phases II, III and so on). The opposition is not yet as numerous as in later story sections.
- Game phase II deals with the confrontations with the Topsiders in the Wega system and the search for the super-intelligence ES and the planet Wanderer, the planet of eternal life (issues 10 to 19).
- In game phase III we then encounter the Galactic Traders and the Overheavies in the Beta-Albireo and Tatlira systems, where confrontations take place. On Terra the supermutant Overhead, with his followers, is meanwhile active (issues 20 to 37).
- In game phase IV "Vorstoß nach Arkon" the story expands into the globular cluster M-13, 34,000 light years away, the home of the Arkonides and Aras. Here the Terrans must prevent the Robot Regent of Arkon from reaching the coordinates of Earth. At the same time it is necessary to prevent the fleets of the Springers and the Overheavies from devastating Earth (issues 38 to 49).
- Game phase V deals, 56 years later, with clarifying the situation on various planets in the galaxy, for we are now writing the year 2040. But not only the Terrans send out their agents; the Robot Regent of Arkon also wants to reach the coordinates of the Solar System. In addition we meet the Arkonide Atlan, who appears in the story for the first time, as well as the Upright Democrats and the Nature Philosophers on Terra (issues 50 to 72). This phase is a rather quiet phase, dominated mainly by build-up and agent missions.
- Future expansions will present new cards, with people, planets, spaceships and alien peoples, in other words everything that appeared in the light of the PERRY RHODAN universe as the story continued.
The game is played until the end of a game phase, or as a campaign across several game phases. Which conditions must be met to end a game phase can be found on page 49, "Victory Conditions". Which victory points you can receive can be found on page 49, "Victory Points".
2. Card Structure
There are three different types of card so far: action cards, resource cards and auxiliary cards.
2.1 Action Cards
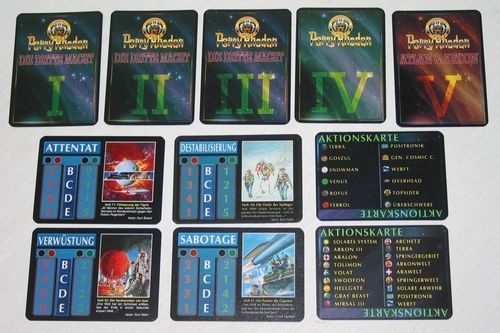
Action cards contain two components relevant to the game: the letter strip and the mission field with the mission target (see illustration on page 9).
The mission field fixes the attack target of an offensive mission. There are four different attack targets for offensive missions: assassination (Attentat), destabilisation, sabotage and devastation (see also page 30, "Offensive Mission"). If the mission is successful, a particular resource card in play belonging to the opponent is removed, depending on the attack target of the mission.
The letter strip serves to determine random numbers and is mainly used for combat. From the game values attack strength, defence strength and stealth, the attack value, the defence value and the stealth value or the stealth difference are determined by means of an action card (see also page 37, "Combat Resolution").
The letter strip consists of three columns. The middle column is the same on all action cards and always contains the letters B, C, D and E. The right and left columns contain the random numbers that result from this. Thus beside the letter B there are always the random numbers 1 or 2, beside the letter C always the random numbers 1, 2 or 3, and so on.
Action cards are kept face down in a separate card stack, the action card stack. Whenever a random number has to be determined, you draw an action card from the action card stack and read the random number in one of the two columns beside the corresponding letter.
When the stack is used up, the action card discard pile is shuffled and is available as a fresh action card stack.
Figure 1 – "Action card front"
If two random numbers have to be determined at once, as when determining the attack and defence values or the stealth difference of two ships or units in combat, only one action card is drawn. The left column then determines the stealth value of the attacker in the case of the stealth difference, and the right column always determines the stealth value of the defender. Then, on a newly drawn action card, the attack value is determined on the left (red) and the defence value of your own card on the right (green).
Example: An attacking ship has stealth C, the defending ship has stealth B. To determine the stealth difference in combat the attacker draws an action card. In the middle column the letters B and C are relevant here. To the left of the C stands the random number 2. The stealth value of the attacking ship is therefore 2. To the right of the letter B stands a 1, so the defender has a stealth value of only 1. The stealth difference is therefore 1 in favour of the attacker.
Note: The value A always corresponds to the number 1. No action card therefore needs to be drawn here.
Some game values carry a bonus, such as "E+1", or give other cards a bonus or malus such as "+1" or "–1". A bonus or malus only takes effect after the random number has been determined, i.e. first the random number is determined, and then any bonuses or maluses are applied.
Example: A ship has an attack strength of D+1. To determine the attack value in combat an action card is drawn and the letter D is looked for in the middle column. To the left of it stands a 3 in this case. Random number 3 plus bonus of +1 gives an attack value of 4.
Note: Some card effects only occur if a particular value was determined with an action card. This is specified on the card, for example by "D(red)=3". This means in this case that the effect only occurs if the number 3 stands in the left column beside the letter D on the action card drawn.
Action cards have a different card back from resource cards. Some important premise symbols are explained on the card back of the action cards. These can sometimes also be symbols from other game phases.
2.2 Resource Cards
As already mentioned, every resource card is assigned to a game phase, which is shown by the different card backs. The game phase indicates in which Matter Source the card may be contained. All resource cards with the same card back belong to the same game phase and form one card stack, the Matter Source of the corresponding phase.
Example: All cards that have a "V" on the card back form, in this case, the Matter Source V.
Figure 2b – "Resource card backs" of game phases I – V
Resource cards that are discarded or destroyed during the course of the game go on a discard pile called the Matter Sink (Materiesenke). Discarded action cards go to the action card discard pile.
Note: Many players form a separate discard pile for each game phase as the Matter Sink. This makes it easier to clear the card deck afterwards and to prepare for the next game. For game effects, however, there is only one Matter Sink.
2.2.1 The Card Front
Every resource card in the PRSKS carries certain symbols that provide information about the possible uses, strengths and weaknesses of this card. The illustration on page 11 explains the structure of a typical PERRY RHODAN card.
- Side affiliation: Resource cards have one of three background colours: green, red or blue. Green cards are Pro cards and are played on the Pro side. Red cards are Anti cards and are played on the Anti side. Blue cards are called dual cards, because they can be played on both the Pro side and the Anti side.
- Pro premise: Every Pro card and every dual card has (with few exceptions) a Pro premise (i.e. the condition for playing on the Pro side, on the left in the area), which states which other cards of the player must already be located at a location in order to bring this card into play there. Premises are shown either directly as symbols or, if there is no symbol for a premise, as numbers in a circle. In the text field of the card these premises are then defined under the same number in a circle (see also page 19, "Premises").
- Unique (Unikat): Some cards are unique (recognisable by the unique symbol). In the PERRY RHODAN universe these are one-of-a-kind. The cards so marked are subject to certain restrictions on when and how they can be played and how often they may be contained in a Matter Source (see also page 15, "Unique Cards").
- Anti premise: Every Anti card and every dual card has an Anti premise (i.e. the condition for playing on the Anti side, which is located on the right in the player's area), which states which other cards of the player must already be present at a location in order to bring this card into play there.
- Card name: This contains the exact designation of the card.
- Card type: The PRSKS distinguishes the following resource card types: Event, Fleet, Galactic Riddle, Location, Person, Spaceship, Status, Troop and Accessory. All cards of the same card type also have the same game properties. Most cards, however, carry additional information explaining what exact function the card has in the game (see also page 12, "Card Types").
- – 11. Game values: There are up to five game values:
- Range (Reichweite): States which kind of propulsion the card has. The greater the range, the further the card can move and the more distant locations it can reach under its own power. Persons and troops, for example, have a range of 1, ships a range of 0 – 6 (see also page 26, "Range").
- Transport capacity (Transportkapazität): States whether the card can transport other cards. Only ships have a transport capacity, which allows them to take units or even other ships to distant locations (see also page 27, "Transport Capacity").
For game flow this white background text has no significance at all.
Special symbols that may appear in the text field are explained on page 14 under "Card Symbols".
- Illustrator: Here is the name of the artist who made the picture of this card.
Note: Effects and premises for later phases are already built into the cards of game phase V. This partly also concerns premise symbols that are not yet explained on the action card backs.
2.2.2 Card Types
There are various card types in the game, which have different meanings. Restrictions on playing are either explained on the cards themselves or on page 21, "Restrictions on Playing".
Some card types or cards are often grouped together under collective terms:
- Unit (Einheit): Covers troops and persons.
- Location (Ort): Covers Location/Sphere of Influence, Location/Planet, Location/Space Sector, Location/Solar System and Location/Star Cluster.
- Ship (Schiff): Covers spaceships and fleets.
- Unit accessory (Zubehör Einheit): Covers accessory: person and accessory: troop.
- Location accessory (Zubehör Ort): Covers accessory: planet, accessory: sphere of influence and accessory: space sector.
- Ship accessory (Zubehör Schiff): Covers accessory: spaceship and accessory: fleet.
- Transmitter (Sender): Covers hyperradio transmitters and micro transmitters.
Event (Ereignis): Events are cards that influence or change the course of the game through their effect. Most events can be prevented from taking effect with the help of the card "Counter" (Konter), which is also an event.
Fleet (Flotte): Fleets are assemblies of several spaceships and, like spaceships, serve to connect with other locations. Missions to locations with a different name are as a rule only possible with the help of ships. Fleets have range, transport capacity, stealth, attack and defence strength. Fleets can take units, accessories and smaller ships along according to their transport capacity.
Galactic Riddle (Galaktisches Rätsel): A Galactic Riddle is solved by fulfilling its premises and is then set aside. A Galactic Riddle may be contained more than once in the corresponding Matter Source, provided this is not restricted on the card and the card is not a unique, but it can only be solved once by each player.
Location/Sphere of Influence (Ort/Einflußsphäre): Locations are the basis for playing other cards. Cards of the type Location/Sphere of Influence represent important areas of the galaxy that are under the influence of certain peoples. They in turn contain various planets and solar systems, which however do not appear individually in the course of play. Units, ships and accessories can be played on spheres of influence. Spheres of influence cannot be targets of offensive and agent missions.
Location/Planet (Ort/Planet): Cards of the type Location/Planet represent important planets from the PERRY RHODAN story. Like all locations they are the basis for playing other cards and may be contained as often as desired in the respective Matter Sources. Many cards have premises that require locations. Units, ships and accessories can be played on cards of the type Location/Planet. Planets can be targets of missions.
Location/Space Sector (Ort/Raumsektor): Does not yet exist in phases I – V, but will occur in future expansions and will be described there.
Location/Solar System (Ort/Sonnensystem): Cards of the type Location/Solar System are also locations and represent a whole solar system from the PERRY RHODAN story. A solar system consists of its central sun and its planets. Many cards have premises that require locations. Units, ships and accessories can be played on solar systems. Solar systems can be targets of missions.
Location/Star Cluster (Ort/Sternhaufen): Each star cluster consists of a large number of solar systems which, where relevant to the story, are additionally present as cards (Location: Planet). Each star cluster can only be reached with ships of a certain minimum range. This also applies to every Location: Planet that is located in this star cluster. If a Location: Planet is located in the star cluster, the name of the star cluster stands after the name of the system (for example Aralon/Kesnar/M-13). All locations that are located in a star cluster can only be reached from one another with ships of range >2. Since star clusters represent a specific area of space, units that have travelled there with ships must remain loaded in the ships.
Person: These cards represent important persons of the PERRY RHODAN universe. They have various skills and possess range, stealth, attack and defence strength. Persons can be assigned Accessory: Person or Accessory: Unit. They can take part in missions, but for missions to locations with a different name they must as a rule be transported there by ships.
Spaceship (Raumschiff): Spaceships belong to the umbrella term ships and, like fleets, serve to connect with other locations. Missions to locations with a different name are as a rule only possible with the help of ships. They usually possess range, transport capacity, stealth, attack and defence strength. Spaceships can take units, accessories and smaller ships along according to their transport capacity. In combat, spaceships cannot give escort protection to fleets.
Status: A status is a permanent event. It may be contained as often as desired in the Matter Source, provided this is not restricted on the card and the card is not a unique. A status is played in the Expansion section (Abschnitt Ausbau) and set aside. It then has a permanent effect for as long as stated on the card. After that it goes to the Matter Sink. A status can affect the player himself or an opponent. Several cards with the same name may also be set aside if, for example, the cards affect different opponents. If a status becomes obsolete after a phase, it goes to the Matter Sink at the phase change and thereby loses its effect. A status cannot be countered.
Troop (Truppe): These cards represent important groups of several persons of the PERRY RHODAN universe. They have various skills and possess range, stealth, attack and defence strength. Troops can be assigned Accessory: Troop or Accessory: Unit. They can take part in missions, but for missions to locations with a different name they must be transported there by ships. Troops cannot be escorted by persons in combat.
Accessory (Zubehör): Accessories are cards which, depending on their further name suffix, can be assigned to the corresponding cards (for example units, fleets, planets) (see also page 28, "Accessories" and page 29, "Permanently Assigned Accessories").
2.3 Auxiliary Cards
Auxiliary cards serve to record various point or modifier totals (for example the coordinates of Sol in game phase V), as a short overview of the rules, and as a cover card for agents. Some auxiliary cards have the same card back as action cards.
2.4 Card Symbols
2.4.1 Active and Passive Cards – Passivate Symbol and Activate Symbol
Cards lying picture-side up are called active; cards lying picture-side down are called passive. If a card bears the passivate symbol (a U-shaped icon), this active card becomes passive by being turned over, i.e. its card back now lies on top, and the special effect printed behind it takes effect. If the card bears the activate symbol (an arch-shaped icon), the affected passive card can become active again and is turned picture-side up.
A passive card has the following disadvantages in the game:
- Its stealth value is 1 (plus any special effects).
- Its attack value is 0. This cannot be increased by anything.
- As escort protection (Geleitschutz) or escort (Eskorte) it provides no bonus.
- Assigned escort ships or escorts only give it a bonus if they have been assigned to the defence value.
- It cannot use accessories that were assigned to it. Excepted from this are those accessories that give a permanent bonus, i.e. do not need to be passivated for the effect (Arkonide suit, bioplastic mask, etc.).
Example: Allan D. Mercant has been assigned the following accessories: Arkonide suit, hypno block and psycho-beam. If he is now passivated by the opponent in combat, he can no longer use the psycho-beam, since this must be passivated to achieve its effect. The other two accessories continue to supply their special effects and bonuses.
- It does not count as a premise (see page 19, "Premises").
- Events, skills and statuses that increase the stealth value no longer have any effect on it (for example Dreimal Glockenschlag, Solare Abwehr, Tulin, Die Slums von Trulan).
- Units that are passive cannot take on or give up accessories in combat.
- Unit/person/troop accessory that is passive cannot be newly assigned in combat.
- It cannot be taken up by the player and thrown into the Matter Sink in order to achieve a special game effect (for example Ara-Geheimdienst, Port Venus, Strukturtasterstation).
- Agents who became passive during an agent mission through their exposure cannot pass on their accessories, nor receive new accessories, as long as they are at the enemy location.
- It can no longer take part in any mission of its own. If a unit becomes passive during a mission, it can still bring that mission to a conclusion, but it cannot reduce the mission target.
- Cards or special effects that would require it to be passivated again (for example Evasive Manoeuvre (Ausweichmanöver), Medicine) cannot be played on it.
- At the end of an offensive mission it cannot make a reduction of the attack target.
- It cannot be loaded into a ship for a space battle.
These disadvantages take effect immediately if the card is passivated by an opponent's game effect, or if it was already passive at the start of the combat round.
These disadvantages only take effect at the end of the combat round if the player passivates the card himself in this combat round.
So if a player passivates a card himself in combat in order to use certain skills, the card keeps its values for this combat round, i.e. its stealth and attack strength remain (the defence strength always remains), and it still counts as escort protection or escort and so on. From the next combat round, however, the disadvantages listed above also apply to it.
Passive cards become active again in their own turn in the Reactivation section (except for agents exposed on enemy locations in game phase V, Pro-Atlan before the duel is fought, and where the card states something to the contrary).
2.4.2 Unique Cards
If a card is unique, this is marked at the top of the card with a unique icon. A player may only have one copy of the unique card in question in his area or set aside. Unique cards marked as dual cards (blue border), or which exist for both the Pro side and the Anti side, can only be in play or set aside on one side (Pro or Anti) of a player. It is however entirely possible for different players to each have the same unique in play or set aside once.
If two identical uniques meet in a mission, the card of the attacking player (including its accessories, and for ships also including transported units) goes directly into the Matter Sink, which cannot be prevented by any game effect. The card of the other player becomes passive until the mission is concluded.
2.4.3 Further Symbols
Destroy symbol (arrow-into-box icon): This card is destroyed and placed in the Matter Sink.
Discard-trigger symbol (arrow icon): a) The card already in play goes into the Matter Sink and thereby triggers a game effect. The effect cannot be countered, since the card is not played as an event. If the player wants to throw it into the Matter Sink himself in order to achieve a game effect, it must be active (for example with Ara-Geheimdienst, Port Venus). b) Another card already in play (the player's own or an opponent's) goes directly into the Matter Sink through the effect of a game effect, unless the game effect contains other provisions. This cannot be prevented by further game effects (for example Evasive Manoeuvre, Medicine), since the card is not destroyed. The triggering game effect also sends the card to the Matter Sink if it is passive.
Hand-play symbol (arrow-from-hand icon): This card goes from the hand into the Matter Sink as an event. Since the card is played as an event, it can also be countered. Unless the card contains other instructions, it must in this case therefore be played in the Expansion section.
Obsolescence symbol (crossed-clock icon): This card becomes obsolete after the game phase stated there. It is shown at the bottom right of the text field of the card.
3. Game Rules
3.1 The First Cosmic Law
Certain cards allow the player to change the rules in places or to break them in certain points. This is intended.
The first rule of PRSKS is that the rules and texts on the cards always take precedence over the rules in this booklet.
3.2 The Playing Area
The area on which you lay out your cards on the table in front of you is called your area (Raum). Next to this area your Matter Source(s) and your action card stack are placed face down. Next to them, during the further course of the game, your Matter Sink and your action card discard pile are placed face up (see illustration on the right). Every player may look through the Matter Sink(s) of the other players at any time. Nobody (except the referee at tournaments) may look at the contents of the Matter Sources during the game, not even yourself.
Note: Cards set aside and cards in a depot do not belong to your area.
3.3 Game Preparation
First you must assemble a playing deck from the resource cards for the phases to be played. Consider the victory conditions carefully and for the first games include only the most necessary cards in the deck (see page 16, "Assembling the Card Deck" and page 49, "Victory Conditions"). This way you can gain experience better. Later you can add further cards to your deck that are matched to your strategy and allow you to reach the goal faster and more effectively. When assembling the Matter Sources you must observe the rules for Matter Sources (see page 16, "Matter Source"). You also still need an action card stack (see page 16, "Action Card Stack").
Both the action cards and the resource cards must be oriented the same way in their card stacks!
A sheet of paper and pen, or dice and tokens, can prove helpful for recording the duration of events and the victory points in campaign play. Skills increased by a hypnotraining or a mutant training can also be noted here. It is however not permitted to note on the sheet the resource cards lying in front of opponents or the action cards already used.
Before the start of the game the players agree on which game phases are to be played, and then each shuffle their Matter Sources several times in front of the other players' eyes, with the player to the left cutting once each time. If only game phase I or V is played, each player needs only his Matter Source I or V; if a campaign of several game phases is played, or the game begins with phase II for example, look up "Starting the Game at a Later Game Phase" on page 50.
3.3.1 Assembling the Card Deck
3.3.1.1 The Matter Source
The following guidelines are to be observed when assembling a Matter Source:
- Each unique may only be present once in a Matter Source, dual uniques (blue cards) twice. Uniques that exist for both the Pro side and the Anti side (with both green and red borders, that is) may be contained once for each side (unless the corresponding cards say otherwise).
Note: In Matter Source V, for example, the Pro-Atlan may be contained once and the Anti-Atlan four times (because this is stated on the card).
- Each event may be present up to four times in a Matter Source, unless the corresponding card states otherwise.
3.3.1.2 The Action Card Stack
At least 8 action cards are needed for the action card stack, and each mission target must be contained at least once. For tournaments the supplementary tournament rules apply instead (see page 50).
3.3.2 Different Editions
Over time, different versions of some cards have accumulated through the various editions. Therefore, in order to play them together more easily, the following rules apply:
Cards of different editions may be contained in the card deck during play, but for all cards the card texts of the 3rd edition (unlimited edition) apply. Exception: for Wanderer the text of the current card from the starters of phase V applies.
The following cards are excluded from play: Ortungsstation of game phase I, Ortungsstation Freedom I of game phase II, S-7. These cards only existed in the 1st edition.
The card Geheimnis of game phase IV is no longer required.
Faulty cards are to be played according to the correct card texts. (Information on this at www.prsks.de/turnier/hilfen/kartenfehler.htm).
The following cards become obsolete after game phase IV, even though this is not yet noted on the cards: all expansions, Arkon I, Scheinangriff auf TAL CLIII.
3.4 Game Start
A coin is tossed: on heads each player plays with his own action cards; on tails the action cards are passed to the neighbour clockwise. When swapping, the players may now look at the new action cards, after which the action card stack must be shuffled again. At the end of the game each player receives his action cards back.
Each player draws an action card. The player with the highest random number on E (red) begins. If several players have drawn the highest number, they draw a further action card until a clear decision is made. After the first player has completed his turn, play continues clockwise to the next player.
Each player draws the top 10 cards from an accessible Matter Source. If the game is started with the first phase of a cycle (so far phase I or phase V), each player draws his 10 cards from that phase. If the game starts with a higher phase, the players may draw their first 10 cards within a cycle also from the lower phases beneath it. If a player draws either only locations or no locations at all, he may show his cards to the other players, shuffle them back into the Matter Source and draw 10 new cards. If he then again draws only locations or no locations at all, he may not do this a second time.
Example: When starting the game with phase III, one may draw one's first 10 cards from phases I, II and/or III.
3.5 Game Round
The game round is the single pass through the individual turns of all participating players in a game, so that a game round can be defined for each individual player. Some cards have special effects that refer to the game round. Unless stated otherwise, these refer to the round of the player who triggered/played the special effect.
A player's round always begins when that player starts his turn (with the Reactivation section) and ends when the player to his right has ended his turn (after that player's Discard section)! A round never begins or ends within a turn.
3.6 The Turn
A player's turn is divided into 5 sections, which must be carried out in exactly the order given. If a player forgets or skips a section, it lapses and he must wait for that section until his next turn. Sections 3: Matter Source and 5: Discard must however be carried out, and are made up at once as soon as it is noticed that one or both of them were forgotten.
See also page 52, "Turn Flow Diagram".
Section 1: Reactivation
The player's passive cards may become active again, unless they have to remain passive for a longer time (see page 14, "Active & Passive Cards"). Cards that have been set aside return (see page 22, "Setting Aside").
Section 2: Mission
The player may carry out a mission or sacrifice the mission (see page 24, "Missions"). Both a sacrificed mission and carried-out missions, as well as cards played in this section, are only possible on either the Pro side (left) or the Anti side (right)!
Section 3: Matter Source
The player draws a resource card from his Matter Source I (or from another accessible Matter Source). If, through the use of certain game effects (for example GCC, Aralon and so on), the player wants to draw several cards, he announces the number before drawing and uses the effects required for this. He must then decide before drawing how many cards he wants to draw from which Matter Source and likewise announce this. The same applies if he can draw several cards through effects already in play (for example Wirtschaftsboom). If on the other hand he wants to draw cards for which he must first discard other cards, he may also do this afterwards (for example Port Venus, Alterung, Materialausgabe, Höhlensystem auf Honur).
If the player wants or has to draw from a Matter Source that no longer contains any cards, all cards with the corresponding card back are picked out of the Matter Sink. All uniques and obsolete cards (see page 48, "Ending a Game Phase – Phase Change") from this stack are returned to the Matter Sink, and the remaining cards are shuffled anew and are again available as a Matter Source. As a penalty the player receives –0.5 victory points and misses his next turn.
Section 4: Expansion (Ausbau)
The player may play a location and a certain number of other cards, which must all be played either on the Pro side (left) or on the Anti side (right) (see page 19, "Playing Cards").
Section 5: Discard
If the player has more than 10 cards in his hand, he must throw surplus cards of his choice into his Matter Sink.
3.6.1 Pro and Anti-Terran Side
Every player fields both the Pro and the Anti-Terran forces in order to win the game. Pro and Anti cards are played, laid out and kept apart from one another and cannot interact with each other. They have nothing to do with each other. The player fights with his Pro side (left) against the Anti side (right) of the other players, and he also fights with his Anti side against the Pro side of the others. It is however not possible for one player's Pro side to come into contact with another player's Pro side, just as the meeting of the Anti sides of two players cannot take place. Furthermore it is not possible for the Pro and the Anti side of the same player to meet.
A player must however, in his turn, decide in both the Mission section and the Expansion section for one side in each case (Pro or Anti side) on which he wants to be active. He may not play both sides in any section, but he may choose one side in the Mission section and the other side in the Expansion section.
Figure 5 – "Laying out Pro and Anti side"
3.6.2 Searching for Cards from Matter Source(s)/Sink
If a player can search for cards from one or more Matter Sources through certain game effects, the respective Matter Sources must afterwards be shuffled several times in front of the other players' eyes, with the player to the left cutting once each time. This is not always separately mentioned on the cards.
If a player can search out a card by name from a Matter Source or the Matter Sink, this card must be shown clearly to the other players!
3.7 Playing Cards
The player lays out cards for the Pro side (green and blue cards) always on the left in his area, and cards for the Anti side (red and blue cards) always on the right. Cards are in principle only played in one's own area, unless the card states otherwise.
On both sides – Pro and Anti – the cards are placed in three rows according to the scheme in Figure 5 (see page 18). Each location forms its own column. Locations of the same name (for example Terra/Sol) are placed on top of one another if they were played on the same side, so that the player's area may then look as in Figure 5.
In this way individual stacks are formed. Only the top card of each stack must be visible to the other players. However, the player who laid it out may look through this stack at any time. Where identical locations from different game phases are in play (for example Aralon phase IV and Aralon phase V), the card of the highest phase must always lie on top (here therefore Aralon phase V). The card text for this location then also applies from the top card, regardless of which cards lie beneath it.
If location cards of older editions are in play, the text of the latest edition still always applies for this phase (for Aralon of phase IV therefore the text of the 3rd edition).
Note: Figure 5 shows that the location Terra has been played both on the Anti side and on the Pro side. How can it be possible for Terra as a single planet to be present several times? Well, the locations do indeed also represent planets. First and foremost, however, they represent the influence or activity that one side displays on this planet. That is why a location can also be played on both sides, for different factions often fight for supremacy on one world. A single location means that it now plays a role in the story, has been discovered or has been visited. With two identical locations the side in question is already making military and economic use of it, but it is still in the build-up phase of its development. Each further location means a further expansion of this planet as a military and economic base. In the figure, Terra as the Terrans' base is currently in the build-up phase. On the Anti side there is likewise a Terra, a sign that the superpowers are slowly becoming active. Terra is a dual card.
3.7.1 Premises
All cards have premises (playing conditions), which state which cards must already be laid out at a location in order to be able to play the card there. The premises often consist of several components. Premises must always all be on the same side at the same location (except where different locations are required or this is cancelled on the card). The card is always played where its premises are fulfilled. It may also in principle only be played in the player's own area, unless the card states otherwise. The premise "0" means that no other card is a prerequisite for laying out.
Example: The Pro card Anne Sloane has the premise: 1 Terra + Telepath. For her to be played on the Pro side, the player must have played at least 1 Terra on the Pro side, and a Telepath must be located on Pro-Terra.
Some cards have several premises for one side, separated by a "/", so-called alternative premises. With these cards the player may choose which premise he wants to fulfil for the card.
Pro cards (green cards) have only premises for laying out on the Pro side (left); these are always in the left part of the card. Likewise Anti cards (red cards) have only premises for laying out on the Anti side (right), which are in the right part. Dual cards (blue cards) generally have premises for laying out on the Pro side and on the Anti side, each on the left and right respectively.
3.7.2 Incorrectly Played Cards
If a player plays cards incorrectly (for example a second location in one round, or a card whose premises he cannot fulfil), these cards are placed in the Matter Sink and the turn is ended. If this is only noticed later, this card goes into the Matter Sink immediately and the player's next turn is forfeited.
3.7.3 Number of Cards and Side
In his turn, in the Expansion section, the player may lay out a location and a number of other cards in his area. If it is a dual card (blue card), he must decide whether to place it on the Pro or the Anti side. Locations of the same name are stacked on top of one another (see above).
Example: Uschi lays out her second Terra card on the Pro side. Both Terra cards are stacked on top of one another on the Pro side. She could however also lay out the Terra card on the Anti side. If it were her first Terra card there, a new column would be formed; if it were her second Terra card there, a stack would again be formed.
All cards that are laid out must be placed on one side, i.e. all must be laid out either on the Pro side (left) or all on the Anti side (right). In the event that a card is played at the opponent's (this is only possible if it is noted on the card), this counts as playing for the corresponding own Pro or Anti side.
The chosen side (Pro or Anti side) applies to all cards that can be played in the Expansion section (both for cards that are laid out, for Galactic Riddles that are solved, and for all events that are played in this section). Cards played in other sections (for example the Mission section) have no influence on the choice of side in the Expansion section.
Example: After Peter has solved a Galactic Riddle on the Pro side in his Expansion section, he may play further cards only on the Pro side. Likewise he may only play Pro or dual events that are played for the Pro side.
Note: It is therefore not possible to lay out Pro and Anti cards at the same time in one's Expansion section; at most Pro and dual cards, if the dual card is also played on the left side, or Anti and dual cards if the dual card is played on the right.
In his turn, in the Expansion section, a player may lay out at each location of one side as many other cards as there are location cards present there. Events, Galactic Riddles and statuses do not however count against this limit.
Example: After Peter has laid out his first Anti-Terra, he may play a further card there in the same turn, for example the Saboteurs (but no further location). In the next round he lays out his second Anti-Terra and may play 2 further cards there.
3.7.4 Restrictions on Playing
- Cards can only be laid out at the location where the required premises are present. The player announces aloud the card he is laying out (unless it bears the addition "Geheim" (secret)) and the location at which he is doing so.
Example: "I am laying out Saboteurs on Anti-Terra."
Locations of the same name are stacked on top of one another on the respective side. Units (persons and troops) are laid out in the middle row at a location and form a stack. Ships (spaceships and fleets) are laid out in the third row. Accessories are each placed under the card that is to receive the accessory. An accessory: location is therefore placed under a location.
-
Anti ships: cannot be laid out at a location if ships of a different loyalty are already there.
-
Anti units: cannot be laid out at a location if units of a different loyalty are already there.
Note: In phase I there are three different loyalties on the Anti side: Fantan people, IVs and Saboteurs. If there are IVs on Anti-Terra, no Fantan people can be played there, but a spindle ship of the Fantan people can, as long as no IV spaceship has yet been laid out there.
- Accessory: Location/Planet: cannot be laid out at a location if an accessory: location/planet of the same name is already played there, unless the card contains a contrary note. The term accessory: location always also includes accessory: planet, accessory: sphere of influence and accessory: space sector.
Note: That means only one positronic (Positronik) per location, one fortress and so on.
- Accessory: unit/person/troop: can only be played on a unit/person/troop on which no accessory has yet been played. If this is not possible, this accessory cannot be laid out. An accessory: person can only be played on a person, an accessory: troop only on a troop. An accessory: unit requires either a person or a troop. Where we speak of accessory: unit or where special effects refer to it, this always also means accessory: person and accessory: troop.
Each unit in play can only ever possess accessories suited to it (unless the card regulates this otherwise). For example, three troops are required if one wants to lay out three accessory: troops. Since accessory: unit is only assigned in combat (see page 28, "Accessories"), the upper limits for accessories state the maximum number of accessory: unit/person/troop that may be laid out.
For more on the transport of accessory: unit see page 28, "Accessories".
- Accessory: ship/spaceship: A ship may have any number of accessory: ship/spaceship, but each must be a different accessory (different names), unless the card has a contrary note. Furthermore it must be a suitable accessory. For example an accessory: spaceship may only be assigned to a spaceship, not to a fleet. An accessory: ship, on the other hand, may be played on both a spaceship and a fleet. The term accessory: ship comprises the terms accessory: spaceship and accessory: fleet. See also page 29, "Permanently Assigned Accessories".
Note: Accessories can in principle only be played on one's own units, ships or locations.
-
Galactic Riddles: are played and set aside. Each Galactic Riddle can only be laid out once by a player. When playing Galactic Riddles, by analogy with "Sacrificing Missions", the cards named in the premises need neither be set aside nor passivated. Only those cards that supply the Galactic Riddle points needed to solve the Galactic Riddle must be passivated (see page 43, "Normal Skills"). Otherwise the card text of the 3rd Edition cards always applies here (for Wanderer the text of the current card from the phase V starters applies).
-
Events: Unless otherwise stated on the card, are generally played in the player's own Expansion section and thrown directly into the Matter Sink. If, however, they have a game effect over several rounds, such as Wirtschaftsboom, the player places the cards on the table in front of him and only throws them into the Matter Sink after the game effect has expired. This means that when laying out cards on the Pro side one cannot play Anti events, and vice versa. Events that are played in another section (where this is noted on the card) have no influence on the laying out of cards in the Expansion section.
-
Uniques: Cards marked as unique may not be laid out if the player already has a unique of the same name in his area, regardless of whether it is in play on the Pro or the Anti side. This restriction applies both to dual uniques (for example Thora) and to uniques that exist as both a Pro and an Anti card (for example Atlan).
Example: The spaceship STARDUST II is a dual card and unique. Klaus has a STARDUST II in his hand and another one in play on his Anti side. He cannot lay out the STARDUST II from his hand a second time, but only once the one in play has disappeared into the Matter Sink. It makes no difference that Peter and Gudrun each have a STARDUST II in play.
A unique of which a card with the same name, but belonging to another game phase, is already in the Matter Sink may not be laid out again (unless card effects regulate this otherwise). Such a unique is, if necessary, discarded from the hand and a replacement card is drawn. For dual uniques this only applies once both uniques of the same name are already in the Matter Sink.
Example: When playing phase V, Frank already has Crest (phase I), Talamon (phase IV), Anti-Atlan (phase V) and Fellmer Lloyd (phase V) in the Matter Sink, one copy each. He may now not lay out Crest from phase V and Fellmer Lloyd from phase I again. Talamon from phase V he may lay out, since the Talamon of phase IV is a dual unique. He may likewise lay out Anti-Atlan (phase V) again, as well as the Pro-Atlan of phase V, since these cards do not belong to a different game phase.
- Upper limits: Every location has upper limits, which determine how many cards of a certain type may be present there. It is not possible to lay out cards there, or to move them there by defensive or agent missions, if an upper limit is thereby exceeded. The upper limit is:
a) Accessory: planet/location = 1 per location in play. b) Accessory: unit = 1 per unit in play. c) Units = 1 per location in play plus 1. d) Ships = 1 per location in play plus 1. e) Deployed agents = 1 per location in play plus 1. f) Agents on enemy locations: Agents of several opposing players on agent missions may not be at the same location at the same time. g) Pro-side agent missions: Each player may have agents in play at a maximum of 2 probing locations (Sondierungsorte) simultaneously for each opponent.
Example: A player has laid out 2 Terra on his Pro side. If 3 units (each with one accessory), 3 ships (each with one accessory) and 2 accessory: location are present there, all upper limits for this location have been reached and no further cards of this type can be laid out there.
Example: Peter has deployed a Cosmic Agent at Florian's on Tolimon. As long as the Cosmic Agent is there, Gudrun cannot deploy agents there. Peter may also deploy agents at one further location (for example on Volat) at Florian's. After that he has agents in play at 2 locations simultaneously at Florian's. Further agents he can only deploy at other players' locations. Gudrun could deploy agents at Florian's at only 2 other locations, as long as no agents of another player are there.
Note: For the observance of the upper limits in the case of a defensive mission or a retreat, see also page 38, "Retreat".
3.7.5 Secret Cards
The game also contains secret cards. These bear the note "Geheim" (secret) in red print in the text field. When a secret card is laid out, its card name and card type are not announced.
To keep them secret, they should, where possible, be placed under other cards that are not secret. The former card Geheimnis of game phase IV is no longer required.
3.7.6 Setting Aside
Cards that are set aside (for example Gazelle and Space Jet in phase V) have, apart from the effect stated on the card, no influence whatsoever on the course of the game and cannot be affected by game effects. Unless they contain other instructions, the cards return to play after the stated period in the Reactivation section (at the starting or target location).
3.7.7 Exchanging Cards
In higher game phases it can happen that you have drawn a card which is already in play under the same name from a lower game phase, but which has an improved or additional game effect. In this case you may exchange the old card for the new card.
To do so, you must sacrifice a mission in the Mission section (see page 25, "Sacrificing a Mission") and exchange the old card for the new card in the Expansion section. This is only possible at the same location and with the premises of the new card fulfilled, i.e. the exchange must be carried out at the location where the premises of the new card are fulfilled.
Note: Locations are not affected by exchanging, since they are always stacked on top of one another.
If a card (a ship or a unit) is exchanged that has a permanently assigned accessory, the permanently assigned accessory passes to the exchanged card, provided the identical use of the accessory is possible. If this is not possible, the accessory goes into the Matter Sink.
Note: Identical use comprises use for the same skill and the same skill level.
Example: Raphael wants to exchange André Noir from game phase I for André Noir of phase V. Since he already has a Pro-Solar System in play (the premise of the new André Noir), he can exchange him there, and for this he first sacrifices a mission in the Mission section. André Noir of game phase I had previously received a Mutant Training from Orter 1 to Orter 2 as permanently assigned accessory. Since this is also possible with André Noir of phase V, the Mutant Training passes to the exchanged André Noir. Had the Mutant Training instead raised the skill Hypno 1 to Hypno 2, it would have gone into the Matter Sink, since the exchanged André Noir already has Hypno 2.
3.7.8 Placing Cards in the Matter Sink
For the use of some game effects it is important whether a card is destroyed, whether it goes to the Matter Sink after a reduction, or whether it is placed directly in the Matter Sink.
Destroy (vernichten): If a card is destroyed (for example in combat), the accessories it carries are also destroyed.
Reduce (reduzieren): We speak of a reduction when, after the mission target has been reached in an offensive mission, a card must be placed in the Matter Sink (see also page 40, "Reduction"). Accessories carried by a unit do not go into the Matter Sink along with it, except permanently assigned accessories.
Cards placed directly in the Matter Sink: This generally concerns cards that are played incorrectly, or that during missions lead to upper limits being exceeded. These cards are placed directly in the Matter Sink and cannot be prevented from doing so by any game effects.
3.8 Target Selection
A player is not permitted to look at the card stacks of the other players; he may not even touch them! Only the top laid-out card of a stack must be visible to every player. (Exception: the Matter Sinks may be looked through by all players. The Matter Sources and the action card stacks may not be looked through by anyone, not even by the player to whom they belong.) At tournaments, however, the referee may look through all cards in play.
If a player must name a target card, for example in order to use a skill or an accessory, he must name the card by name. If, however, the named card is not there, nothing happens.
Example: In a spaceship a player wants to use a Hypno 1 on board a spaceship to knock out a person with the skill Space Combat. Since he may not look under the spaceship, he uses the Hypno against the only ship with transport capacity 3, because he suspects that several persons are on board. He passivates (passivate symbol) the Hypno and says: "I use the Hypno against John McClears on board the TERRA. If John McClears is really on board the TERRA, then he will be passivated (passivate symbol). If he is not there, the Hypno has had bad luck."
Note: In their Expansion phase the players must announce aloud and clearly which cards they have laid out (except for secret cards). One should also take care with this, so that later there are no nasty surprises.
3.9 Play with More Than 3 People
When playing with more than 3 people, only missions to the left and right neighbours are possible. Furthermore, events and special effects may only be played on the left and right neighbours. Cards that however have a special effect with the addition "against each opponent" also apply to every opposing player.
3.10 Game Abort, Game Surrender
Although the point of the game is really to play, under certain circumstances it can happen that players want to give up or abort the game.
Players who give up the game receive –2 victory points for leaving. Points already achieved from completed game phases remain theirs.
From the current game phase, departing players receive no positive victory points. If, however, a player has already firmly accumulated negative points (for stirring up a used-up Matter Source, for reshuffling, for destroying Atlan and for Arkon bombs), these remain with him.
3.10.1 Joint Surrender (All Players Want to Abort the Game)
A joint surrender exists when all players uniformly abort the game. This can be the case, for example, when the players have, through each other's actions, brought about a game situation in which no player can any longer achieve a phase change or any partial points.
The victory points of the departing players are calculated as described above! In the case of a joint surrender, however, no player receives the –2 victory points.
3.10.2 Game Abort (One Player Wants to Continue)
A game abort occurs when only one player still wants to continue the game and the others give up and no longer play on. The remaining player cannot continue the game alone.
In this case this player receives, in addition to the points already scored from completed game phases, all victory points for the phase changes that would still have had to be played in this campaign. Furthermore he receives, in the corresponding game phases, the points for solving the most Galactic Riddles. Where partial points are awarded in a game phase whose solution is additionally also an indispensable component of the victory condition (for example being the first to achieve Reduction on Aralon in phase IV), he also receives these partial points. From the current game phase no further positive partial points are awarded, even if some have already been scored. Only negative partial points are counted as described above.
The victory points of the departing players are likewise calculated as described above!
3.10.3 Continuing the Game After One Player Surrenders (Several Players Want to Continue)
If at least 2 players remain after a player surrenders, the remaining players continue the game.
The victory points of the departing players are calculated as described above!
4. Missions
Missions are the heart of the game, and for this reason the Mission section is also the most extensive.
A mission means the movement of any number of ships and/or units from one location to another location (the target location). The way in which ships and units can move depends on their range (see page 26, "Range") or on the range of the ship transporting them (see page 27, "Transport Capacity"). The target location must lie within the range of all ships and units that carry out this mission. Ships and units are therefore often transported by others so that they can reach locations that lie outside their own range.
Only one agent, defensive or offensive mission is possible per turn, regardless of whether it is carried out or sacrificed. Independently of this, the player may carry out a defence mission (Abwehrmission) at each location where enemy agents are present. Further missions are only possible with the skill Initiative.
4.1 Sacrificing a Mission
To play some cards it is necessary for the player to sacrifice one or more missions. To do so, before playing the card in the Mission section (i.e. in the same turn), he must forgo carrying out a mission, and must also announce this clearly to the other players. He must further state for which side (Pro or Anti side) he is sacrificing the mission. The card for which he sacrifices the mission is set aside face down (this does not apply to cards already in play, which remain where they are). In the Expansion section the card that was set aside is then taken up and played. If the player forgets this, or cannot play the card because premises are missing, the card set aside goes into the Matter Sink.
If two or more missions must be sacrificed, the player must forgo carrying out these missions in immediately consecutive turns, otherwise all sacrifices lapse. The corresponding card is only played after the last mission has been sacrificed. If sacrifices are forgotten or lapse, the corresponding card goes into the Matter Sink.
If in the same turn a mission is to be sacrificed and a mission carried out (with the skill Initiative), the sacrifice of the mission always comes first. Carrying out the mission is then only possible on the side of the sacrificed mission.
In each turn only one mission can be sacrificed; this cannot be increased with the skill Initiative either. The sacrifice of a mission takes place regardless of whether a mission can be carried out at all. A defence mission cannot be sacrificed.
This rule applies to all sacrifices of missions, regardless of which edition or game phase the card comes from. It follows for 3rd edition cards that when sacrificing missions the cards named in the premises need neither be set aside nor passivated.
4.2 Carrying Out Missions
In game phases I – IV only defensive and offensive missions are possible. In game phase V there are two further mission types, the agent mission and the defence mission. The player decides whether he wants to carry out a defensive, offensive, agent or defence mission. An action card to determine the mission target is only drawn for an offensive mission. In principle only active ships and units (together with their accessories) can carry out a mission (see page 14, "Active and Passive Cards").
The player who carries out an offensive, agent or defence mission is the attacker; the player whose area is the target of the mission (not in the case of a defence mission) is the defender. Special effects of accessory: location can only be used in one's own area, i.e. at the target location. Normally therefore the defender uses them; only in the case of a defence mission does the attacker do so.
Missions to a location of the same name, i.e. to the same planet, but only on the opposing side, are also possible without the involvement of ships; the units can, so to speak, get to the opponent "on foot". The attacker merely has to decide whether he carries out his mission with or without ships. If he decides to involve ships, the units involved must also be loaded! If ships of another player are present at the target location of an agent or offensive mission, then (if the attacker arrives with ships) the space battle comes first (see page 34, "Combat"). If units are also present there, then in an offensive mission the ground battle follows afterwards. If the defender has no units there, the offensive mission is successful and a reduction of the attack target follows directly (see page 40, "Reduction"). Otherwise both players are now involved in the mission, may use skills and mutant skills (see page 41, "Use of Special Effects") and play events.
Anti ships may not be moved in a defensive mission to a target location where ships of another loyalty are present; the same applies to Anti units. It is not however required that ships and units at the same location have the same loyalty. If, through certain game effects, units or ships of different loyalty nonetheless end up at one location, the ships or units of the newly added loyalty must be placed at once in the Matter Sink. If it cannot be determined which loyalty was newly added, the player himself selects the loyalty that must be placed in the Matter Sink.
4.2.1 Range
The locations in PRSKS are at different distances from one another. Some orbit the same sun, such as Venus and Terra, which both orbit the star Sol; others are separated by thousands of light years. The range of a ship or a unit determines which locations it can reach with a mission. There are seven different ranges. Each range automatically also includes the movement possibilities of all lower ranges, with the exception of range "0".
Example: A card with range 3: Interstellar also has ranges 1: Planetary and 2: Stellar.
0 = Fixed location (Fester Standort): Cannot carry out missions.
1 = Planetary range (Planetare Reichweite): Can only carry out missions to a location of the same name.
Note: Cards with planetary range therefore cannot leave the planet on which they are by their own power. These cards can thus also not carry out defensive missions (unless they are transported), since no location other than one of the same name is reachable for them. A defensive mission must however always go to a different location (of a different name).
2 = Stellar range (Stellare Reichweite): Can only carry out missions to a location in the same solar system.
Most fighters and other smaller ships have range 2.
Note: The name of the system in which a planet is located always stands after the planet's name (for example Terra/Sol, Ferrol/Wega, Aqua/Beteigeuze, Tolimon/Revnur, Volat/Heperés, etc.).
Example: The space fighter squadron has range 2 (stellar), so it can carry out missions from Terra to Venus and back, and from Ferrol to Rofus and back. It cannot carry out missions from Terra to Ferrol, since Terra lies in the Sol system and Ferrol in the Wega system.
3 = Interstellar range (Interstellare Reichweite): Can only carry out missions to locations in the nearer surroundings.
Example: The Kaulquappe has range 3 (interstellar), so it can fly from Terra/Sol to Rofus/Wega or from Tolimon/Revnur to Hellgate/ZW-2536-K957.
4 = Galactic range (Galaktische Reichweite): Can only carry out missions to locations in the same galaxy.
Note: All locations of game phases I – V are in the galaxy Milky Way, i.e. in our home galaxy. This is not specially mentioned on the cards. Therefore all locations are reachable for ships with range 4. In future expansions there will be locations that cannot be reached by ships of range 4.
5 = Extragalactic range (Extragalaktische Reichweite): Can also carry out missions to locations outside the same galaxy, except to those locations that can only be reached with range 6 (intergalactic range) or higher.
Note: Ships with range 5 can, among other things, push forward to locations in the empty space between galaxies.
6 = Intergalactic range (Intergalaktische Reichweite): Can carry out missions to all locations, except to those locations that can only be reached with a higher range.
All ships taking part in a mission fly as a formation (Verband). Splitting the formation is not possible!
Note: A fleet formation is only as fast as its slowest ship.
Example: The Space Jet in phase V needs 2 rounds to reach locations in range 4. If a STAATEN-class ship and several Space Jets take part in a mission, not all Space Jets can be loaded. In this case the entire formation needs 2 rounds to reach a target in range 4.
4.2.2 Transport Capacity (TK)
Certain ships can transport units as well as other smaller ships. This is important, for example, so that ships and units can reach locations outside their own range together with the transporting ship during a mission, which they could not otherwise reach within this turn. Ships can in principle only transport ships and units of the same loyalty. Ships may only be transported if they cannot reach the target location of a mission under their own power, or not at all within this turn. Units may always be transported, provided the transport capacity permits. At the end of a mission all transported ships and units must be unloaded and placed again regularly in the player's own area. If this is not possible, they go into the Matter Sink. If a ship, after an offensive or agent mission from an opposing location, cannot return to the player's own area because its range is too low and it has no transport capacity, it goes into the Matter Sink. With agent missions, agents may remain at the opposing location.
Only ships that have a transport capacity stated can transport. The transport capacity of a ship may be modified by card effects (for example Hangar hit). This modification, however, always refers only to the ability to transport other ships and units. If the ship itself is transported, its transport capacity remains unmodified.
Example: If the STARDUST II (TK = 4) receives a hangar hit (TK – 2), it can then only transport 1 troop or any number of persons (i.e. TK = 2). If it itself is to be transported, however, it keeps transport capacity 4.
Five different transport capacities are distinguished, where higher transport capacities automatically also include the capacity of the lower ones:
- Transport capacity 0 (no transport capacity): The ship can take any number of accessory: ship + accessory: unit.
- Transport capacity 1: In addition to 0: 1 person.
- Transport capacity 2: In addition to 0: 1 troop OR any number of persons.
- Transport capacity 3: In addition to 0: any number of units + (any number of ships with transport capacity 1 OR 1 ship with transport capacity 2).
- Transport capacity 4: In addition to 0: any number of units + any number of ships with transport capacity 1 – 3.
4.2.3 Accessories
Accessories can always take part in missions together with ships or units. Each unit can only take one accessory: unit (plus accessories that do not count against the limit) along on a mission.
An accessory: ship stays with the ship to which it was played until the ship or the accessory goes into the Matter Sink. It is therefore permanently assigned to the ship. For more detail see point 4.2.4 "Permanently Assigned Accessories" on page 29.
For accessory: unit it is different. Here there are 3 possibilities for assignment of accessories.
a) Free accessory: This means all accessories that do not belong to the group of "permanently assigned accessories". An accessory: unit remains "free" until it is used in combat; nevertheless it is always assigned to a corresponding unit. An accessory: unit may be assigned to another unit each time the player carries out a mission himself or the location concerned is the target of an opposing mission (and at the end of each combat round).
b) Used accessory: An accessory: unit counts as "used" when it has been employed in combat, or its special effect has been used. Once an accessory: unit is "used", it cannot be newly assigned in this ground combat, i.e. it must remain with this unit for the rest of the combat. At the end of the combat this assignment lapses again and the accessory is "free" again.
Example: In combat a unit carries, for example, an Arkonide combat suit and a thermal beam. If in the first combat round it uses the stealth bonus of the Arkonide combat suit, that is "used", but the thermal beam is not yet.
If a unit that has a "used" accessory is taken back into the hand or returned to the Matter Source by certain game effects (i.e. before the accessory is "free" again), this accessory also returns to the hand or to the Matter Source. The accessory: unit is then "free" and may, if the premises are met, be played again at will.
c) Permanently assigned accessory: Units may receive accessories which after being played are permanently assigned to them. See point 4.2.4 "Permanently Assigned Accessories" on page 29.
Note: Accessory: unit is played onto a unit but, unless it is a permanently assigned accessory, it can be left behind at the location by the unit when the unit carries out a mission. If the unit does not return to this location, this accessory is first used for further units arriving, if possible. The accessory that is not permanently assigned can also be transported to another location with a ship in a mission without the unit, but at the target location it must be assigned to a unit again. If this is not possible, the accessory goes into the Matter Sink.
Passive units cannot give up accessories or take on other accessories (see page 14, "Active and Passive Cards"). Passive accessories cannot be handed on to other units.
An accessory: location can never be transported.
4.2.4 Permanently Assigned Accessories
Units may receive accessories which are then permanently assigned to them (for example Hypnoblock). This accessory cannot be destroyed/reduced (exception: R-17). It remains permanently assigned to this unit and cannot be newly assigned (it therefore always stays under this card and is also transported together with it).
The permanently assigned accessories for units so far are:
- Bioplastic mask
- Hypnoblock
- Hypnoschulung (hypno training)
- Mutant training (Mutantentraining)
- R-17
(R-17 can, however, be destroyed or reduced.)
Accessory: ship is always permanently assigned to a ship and likewise cannot be newly assigned, but it can be destroyed.
If a unit or ship with a permanently assigned accessory is taken back into the hand or returned to the Matter Source by certain game effects, the permanently assigned accessory is set aside for the period until the unit / ship is played again in the area. Afterwards the accessory returns to the unit / ship under identical assignment (for example Hypnoschulung from Initiative 1 to Initiative 2).
Note: Identical use comprises use for the same skill and the same skill level.
If a unit or ship with a permanently assigned accessory is exchanged, see page 23, "Exchanging Cards".
If a unit or ship with a permanently assigned accessory is destroyed or reduced, then this accessory is also destroyed/reduced.
A permanently assigned accessory: unit/ship loses its assignment only when the unit or the ship reaches the Matter Sink.
4.3 Defensive Mission
This takes place only within the player's own area. The mission is carried out from one location to another location (i.e. a location of a different name) on the same side. Here only a movement from one Pro location to another Pro location, or from one Anti location to another Anti location, is possible. A movement from a Pro location to an Anti location in the same area, and vice versa, is not possible in a defensive mission! Since the defensive mission always leads to a different location, ships are always involved in it (exception: Ferrol/Rofus).
Note: It is called a defensive mission because through it there cannot be any confrontation with ships or units of other players, and therefore no combat either. It serves as a rule to reorganise forces, reinforce locations and prepare for offensive missions. A player's Pro and Anti side never come into contact with each other in the game.
If through a defensive mission the upper limits of the target location are exceeded, the surplus cards among those taking part in the mission must immediately be destroyed (see page 22, "Upper Limits").
Example: The player has 1 Pro-Ferrol in his area and 1 Sichas troop there. He can fly to Pro-Ferrol with a maximum of 2 ships and carry and unload a maximum of one unit there.
EXECUTION:
- At the start the player announces the defensive mission and names the target location of the mission.
- The player takes into his hand all active ships and units with accessories that are to take part in the mission, where sufficient transport capacity (page 27) must be present.
- All cards are transported to the target location and placed there as in "Playing Cards" (page 19). See also page 56, "Flow Diagram Defensive Mission".
4.4 Offensive Mission
This takes place from the area of one player to the area of another player. The mission is carried out from one location to a location of the other side, whereby this location – in contrast to the defensive mission – may also bear the same name.
Note: A mission therefore takes place from a Pro location to an Anti location or from an Anti location to a Pro location. Likewise in the offensive mission a movement from, for example, Anti-Terra to Pro-Terra and vice versa is possible. A mission from a Pro location to a Pro location, or from an Anti location to an Anti location, is not possible with an offensive mission! Offensive missions generally lead to combat (see page 34, "Combat") with ships and/or units of the opponent, and have the aim of destroying or reducing ships, units, locations and accessories of the other player, and thereby lessening his influence on this side. The Pro sides of two players never come into contact with each other in the game, nor do the Anti sides. Once more, because it is so important: your Pro side fights or defends itself against the Anti sides of the other players, while your Anti side engages with the Pro sides of the other players.
EXECUTION:
- At the start of an offensive mission the player announces the offensive mission and names the target location of the mission and the affected player.
- The player draws an action card for the mission target and lays it out face up.
- If the mission is an:
- Assassination (Attentat): he must name a target unit by name. If several units of the same name are at the location, no further distinction is made between them.
- Sabotage: he must name an accessory: location/unit by name. Permanently assigned accessories (see page 29) cannot be named.
- Destabilisation: the target is always the location.
- Devastation (Verwüstung): the player names the target (card type and name) only after the combat. If there is then a reduction at the end of the combat, the card named at the start of the mission (for devastation the card now to be named) is reduced at the target location, i.e. goes into the Matter Sink, provided the card is at the target location when the mission target is reached (see page 40, "Reduction").
Note: At the start of an assassination mission, for example, Reginald Bull is named. If he now takes part in the space combat in defence and during the combat has to withdraw to another location, then at the reduction he is no longer at the target location and therefore cannot be reduced!
- The player takes into his hand all active ships and units with accessories that are to take part in the mission, where sufficient transport capacity (see page 27, "Transport Capacity") must be present. Since these cards may not be combined with the other cards in the hand, we call this the combat hand (Kampfhand). If there are ships or units at the target location, combat takes place (see page 34, "Combat") and, depending on the outcome, a reduction (see page 40, "Reduction"), i.e. destruction of the attack target. If there are no ships or units there, a reduction of the attack target takes place directly.
See also page 57, "Flow Diagram Offensive Mission".
Note: If it is established that only ships take part in the offensive mission on both players' sides, or there is no possibility of a reduction, no action card needs to be drawn, since without units no reduction can take place.
Note: A reduction is only considered achieved if a card is actually reduced, or if there were no reducible cards at the location at the start of the mission and the other criteria for a reduction are met.
4.5 Agent Mission
This takes place from the area of the player to the area of another player. The mission is carried out from one location to a location of the other side, whereby this location – as with the offensive mission – may also bear the same name. Agent missions serve to gain information at opposing locations. The aim is to bring an agent "in disguise" to the opposing location and deploy him there. Agents are those units which carry the note "Agent" in red print in the text field. When deploying, agents are not announced; they are laid out face down with a cover card (Tarnkarte) and remain disguised until they may be exposed.
To gain information, deployed agents must remain at the opposing location until the next round and survive. Only those agents that have the skills Probing (Sondierung) or Coordinates of Sol (Koordinaten von Sol) can gain information. The information gained is, however, only of use once it is transmitted to ships or locations of the same loyalty on one's own side, by means of a transmitter (in the Mission section) or by the agent himself. An agent mission therefore extends over several game rounds.
The differences from the offensive mission are as follows:
- No action card is drawn at the start of the mission.
- No ground combat takes place. If the agent is deployed with a ship, the ship, any escort ships, and units that were not deployed must afterwards withdraw again.
- Only agents (with their accessories) may be unloaded at an opposing location.
- The agent is picked up again in a later game round. Deploying and again picking up an agent is part of a single agent mission. Picking up is not an independent mission.
Note: From the start of the mission to the end of the space combat, the agent mission therefore runs the same course as the offensive mission.
The agent mission divides into three parts:
a) The deployment of the agent at the opposing location. b) The agent must survive at the opposing location at least until the next round. c) Transmission of the information gathered, by picking up the agent or with the help of a transmitter (the agent may then attempt to remain at the location for a further round).
Only agents of one opposing player may be present at a location. Another player cannot then deploy agents there, but he may attack the location with offensive missions, although the deployed agents of the other player are then taboo!
Note: Regular units (e.g. space fighters) may also take part in an agent mission, but they cannot be deployed at the opposing locations and remain there. Likewise agents may also take part in offensive missions, but then they must return with the other units; they may not remain there.
EXECUTION:
- At the start of an agent mission the player announces the agent mission and names the target location of the mission and the affected player. No action card is drawn. At the opposing location at most as many agents may be deployed as there are location cards stacked there, plus 1. If the player is unsure how many location cards are at the opponent's, he may, after naming this location as the target of his agent mission, ask the other player. The latter must give him information about the number of location cards.
- The player takes into his hand all active ships and units with accessories that are to take part in the mission, where sufficient transport capacity (page 27) must be present.
- If the target location is a location with a different name, the agent must be transported there with a ship. Afterwards, at the opposing location, the following possibilities arise:
- Either the opponent has no ships there,
- or, if defending ships are present at the target location, a space combat (see page 34, "Combat") takes place and:
- either the ship with the agent can now break through,
- or all enemy ships are destroyed,
- or the opponent withdraws his ships to another location. If none of these possibilities has occurred, the ship must withdraw after 3 space combat rounds at the latest and no agents can be deployed.
- If the target location is a location with the same name, the agent can be laid out directly there in disguise.
Example: Daniel announces an agent mission from his Pro-Tolimon to Peter's Anti-Tolimon and lays out his agent with accessories secretly, face down with a cover card, above Peter's Anti-Tolimon.
- If the agent (several are also possible, see page 22, "Upper Limits") could be deployed, it is laid out active above the three card stacks of the location, but face down with a cover card. In an agent mission, only agents may be unloaded at the opposing location. Regular units must remain on the ships and withdraw with them.
Note: It is not absolutely necessary to deploy an agent. After the space combat one may also withdraw directly. This is important, for example, if one finds that it would become too dangerous for the agent at this location.
- The affected opposing player may now, on his turn, attempt through a defence mission to expose and capture the disguised agent (see page 33, "Defence Mission").
- If the agent has survived the opposing defence mission, then on his own turn he may either be picked up again, or, if he was not exposed and has the skill Probing or Coordinates of Sol, transmit his information or messages by means of a radio message to locations or ships within the range of a transmitter (micro transmitter or hyper radio set) of his own side. Hyper radio messages have a range of 4 and normal radio messages a range of 2. They are collectively termed radio messages (Funksprüche). After sending a radio message, the agent's own stealth value falls by 1 for the next round, so the agent can be exposed more easily.
Again, to repeat: in one's own Mission section the agent may send a radio message and remain a further round at the location and again gather information. Sending the radio message itself, however, does not count as a mission!
Note: It is also possible to carry out an offensive mission with a ship to the agent's location and, at the moment the ship reaches the location, send the radio message and thereby receive probing points or points for Coordinates of Sol. Incidentally, these points are also gained if the ship is afterwards destroyed. It has certainly passed the message on with its powerful hyper radio transmitter.
Picking up the agent, one or more rounds later, is part of the original agent mission (like the withdrawal in the offensive mission); it is carried out in the player's Mission section, but is not an independent mission. Since it is however part of the original agent mission, the player may carry out other missions in the same round only on the same side. The player may therefore, in addition to picking up, afterwards also carry out his regular mission. Ships and units that took part in the pick-up may also still take part in the regular mission. The pick-up must however always be carried out before all other missions.
The picking up of agents is announced in the same way as deployment. If the agent must be picked up with ships, then, if enemy ships are present, a space combat also takes place here.
Note: During one turn, agents may be picked up from different locations at the same time. A player may, in an agent mission, also pick up other agents at the same time as deploying agents. During the picking up itself no new agents can be deployed.
- Shortly before the pick-up (i.e. in the same turn) an agent that has not been exposed and is active may destroy an accessory: location, whereby he becomes passive. Agents without the skills Probing or Coordinates of Sol can support the other agents in combat and, before the return, also destroy an accessory: location, but they supply no information after their return or with the help of a transmitter.
- Directly after the return of the agent, if he is active, he may use his skill Probing to deliver his information. This is only possible directly after the return. If he forgets this, the information is lost in the next turn!
4.5.1 Agent Missions of the Pro Side
Through agent missions to certain Anti locations, which we call probing locations (Sondierungsorte), the player can obtain probing points, i.e. through these missions the Terrans receive information about the situation in the galaxy. Each player records his probing points on his auxiliary card Probing (Hilfskarte Sondierung). If an agent with the skill Probing succeeds in remaining at a probing location for one round, he has gathered enough information and the player receives probing points, provided the information gathered can be transmitted to the Pro side.
Through careless radio messages, however, the Robot Regent of Arkon can obtain information about the position of Earth and other Terran worlds. Radio messages have a stealth value, which is determined with an action card when the message is sent. If a Pro agent during an agent mission on the Anti side sends a radio message with a stealth value <2, the message has been intercepted and the player receives a minus point for Coordinates of Sol.
Table: Probing locations in game phase V where agent missions are possible to obtain probing points:
- Aralon: +2 probing points
- Arkon III: +2
- Swoofon: +1
- Tolimon: +1
- Volat: +1
4.5.2 Agent Missions of the Anti Side
The aim of agent missions of the Anti side is for the opponent to receive minus points for Coordinates of Sol, because when a value of –9 is reached his Solar System can be attacked from the Arkonide Empire (this is however still rather unlikely in game phase V; in phases VI and VII it continues). In addition, the player with the fewest minus points, i.e. the highest value for Coordinates of Sol, receives 0.5 victory points at the phase change, while the player with the most minus points receives –0.5 victory points for it. Each affected player records the points for Coordinates of Sol on his auxiliary card Coordinates of Sol (Hilfskarte Koordinaten von Sol).
On the other hand, the Pro locations of game phase V cannot initially be attacked by the Anti side's units and ships of the loyalty Arkonide Empire, because the Arkonides do not know the positions of the Pro planets (with a few exceptions). Thanks to Rhodan's skilful manoeuvring, the Robot Regent of Arkon has so far not been able to find out the coordinates of Earth.
For missions of the Anti side, the following applies to units and ships of the loyalty Arkonide Empire against Pro locations:
| Pro location | Attackable? |
|---|---|
| Gray Beast | Cannot be attacked in game phase V. |
| Hellgate | Can only be approached by Anti ships with a stealth value >3. |
| Mirsal III | Cannot be attacked. |
| Solar System (Sol) | Can only be attacked once this player's Coordinates of Sol are below –8. |
| Swoofon | Can be attacked. |
| Tolimon | Can only be attacked by an opponent whose own Anti-Tolimon has already been the target of an offensive or agent mission by any player. |
The agent missions of the Anti side run in exactly the same way as those of the Pro side, except that agents with the skill Coordinates of Sol are needed here. Here too the Pro side can of course carry out defence missions against the deployed agents.
See also page 62, "Flow Diagram Agent Mission".
4.6 Defence Mission
This takes place in the player's own area and serves to capture enemy agents at one's own locations. An opposing player has, on his turn, deployed agents at a location of a player. On his own turn the affected player can now attack the opposing agents with the units present at the location. In the defence mission there are no ground combat limits, so that every agent can also be attacked. If enemy agents are at several locations of the player, he may carry out defence missions at each of these locations and attack each once, i.e. he may carry out defence missions both on the Pro and on the Anti side in the same turn. Carrying out a further defence mission at the same location in the same turn is however only possible with the skill Initiative and then only with other units.
Defence missions do not count against the limit of one mission per game round, i.e. the player may additionally carry out a further (different) mission with the same units (before or after). If the player carries out defence missions on one side only (Pro or Anti side), further missions in the same turn are also only possible on this side. If the player has no units at the location (or not suitable ones), he may, before the defence mission, through his regular mission (e.g. a defensive mission), fly units in with ships from another location.
Through capturing Terran agents at Anti locations during their mission, the Anti side can obtain information about the coordinates of Sol with the help of brainwashing (Gehirnwäsche).
Again, because it is so important: each unit may, in your Mission section, take part in a defence mission and in another mission. The use of the skill Initiative is only required for further missions.
EXECUTION:
- At the start of a defence mission the player announces the defence mission and names the location at which he carries it out. No action card is drawn.
- The player takes all active units with accessories that are to take part in the defence mission into his combat hand (Kampfhand). He is now the attacker and may use special effects of accessory: location at his location. The opposing player is the defender and takes his agent(s) present at the location with accessories into the combat hand.
- A ground combat round without ground combat limits takes place (see page 39, "Ground Combat"). During combat setup the agent's cover card is first removed. The stealth values are then determined. If the agent then has a positive stealth difference in combat, he remains disguised at the location and gets his cover card back (it is placed under the cover card again). If on the other hand the agent's stealth is less than or equal to that of the opponent, he is captured, loses his cover card and must fight the opponent.
- If he loses in this, he may be destroyed immediately. A Pro agent may first still be subjected to brainwashing (separate card), and then supplies Coordinates of Sol –1 for the owner of the agent. Afterwards he is placed in the Matter Sink. The Anti side also receives, for the next agent mission from this location (no matter when it takes place, but only in the same game phase) against this player, stealth +1 for 1 ship or for 1 unit.
- If the agent was captured but survived the one combat round, he becomes passive and is placed on the cover card. He remains passive as long as he is at this location. He can however still be attacked. If a passive agent is picked up, he cannot supply information. Exposed agents are generally placed passive on the cover card; disguised agents go under the cover card. Passive agents lying under the cover card can become active again in the next Reactivation section. Passive agents lying on the cover card can only become active again in the player's own area in the next Reactivation section.
Note: If during a defence mission both disguised and exposed agents are present on the defending side, the exposed agents must be clearly marked with game pieces or coins.
See also page 78, "Flow Diagram Defence Mission".
4.7 Combat
Depending on the type of forces involved, we distinguish between a space combat and a ground combat. First, if possible, the space combat takes place, and only after that the ground combat.
Both combats are fought out in combat rounds, which consist of the following sections:
Space and ground combat round:
- Combat setup Take combat hand Lay out cards Deploy escort protection/escort
- Combat resolution Determine stealth value (only in the 1st space or 1st ground combat round) Fire at will
- Decision on retreat The attacker decides on retreat and announces it if applicable The defender decides on retreat and announces it if applicable Between combat rounds take the combat hand, provided neither the attacker nor the defender has announced a retreat. A new combat round again begins with combat setup!
- Retreat (only if announced) Players withdraw The combat rounds are repeated until either
- all participating ships or units of one player have withdrawn
- or they have disappeared into the Matter Sink
- or three ground or space combat rounds have been played. After the ground combat has ended, a reduction of the attack target may follow.
Since the space and ground combat need some room, the ships and units are laid out on a free area of the playing table, the combat area (Kampfgebiet).
4.7.1 Space Combat
Space combat takes place when both players have ships at the target location. If only one of the two players has ships there, ground combat takes place instead (page 39). All units and accessories (except accessory: location) taken along by the attacker must be located in the ships during space combat. Units and accessories (except accessory: location) that the defender wants to use during space combat must likewise be located on his ships; units and accessories that he only wants to use in the subsequent ground combat do not have to be loaded.
Note: During space combat, units cannot be transferred between the individual ships. It is therefore important that all units taking part are assigned precisely to the individual ships before take-off! This is also important, for example, if special effects are played on the ships!
4.7.1.1 Combat Setup
After the attacker has taken all participating ships, transported units and their accessories into his combat hand, he asks the defender to take all ships into his combat hand. Accessory: location that the defender may want to use does not take part in the combat setup, but is laid out next to the combat area, so that the attacker can see with which cards he has to reckon at this location. Accessory: location marked "Geheim" (secret) remains face down at the location and is only laid out in the combat area when it comes into use. Only before the 1st space combat round can the defender load units and their accessories from this location and likewise take them into his combat hand (see page 27, "Transport Capacity"). Ships that had to be transported to the target location because of their smaller range are unloaded in the following.
The attacker lays out a ship first in the combat area; accessories as well as transported units and their accessories are placed directly under the respective ship (see also the figure "Combat setup" on page 36).
Note: Some players are skilful at placing the cards underneath so that the other player does not see that cards still lie beneath. Under no circumstances may the other player touch your cards or move them.
The defender then places a ship (and the transported units with accessories) opposite the enemy ship.
The players now lay out their ships alternately according to the following rules, until all ships are placed in the combat area:
- A ship must always first be laid out against an enemy ship that has not yet been given an opposing ship of one's own. If this is not required, one can lay the ship EITHER as escort protection behind one's own ship, provided there are not already 2 ships there. Here one must now decide whether, with the escort protection, one wants to increase the attack value or the defence value of the ship lying in front. Escort ships that are to increase the attack value are placed behind the own ship offset to the left; those that are to increase the defence value are placed slightly offset to the right.
Spaceships cannot however be used as escort protection for fleets.
OR lay it beside one's own ship that is not assigned as escort protection, thereby opening a new combat pairing.
Note: In space combat there is no limit on the number of possible combat pairings.
After all ships have been laid out, those ships to which no enemy ship has been assigned may afterwards be used as escort protection. If this is not possible (max. 2 escort ships per ship), they cannot take part in this space combat round.
Escort protection: Active ships assigned to escort protection each give the ship lying in front a bonus of +1 to the attack or defence value.
Example: Günther wants to use two fleets as escort protection for a spaceship in one combat pairing. He can give the fighting spaceship either a bonus of +2 to the attack value, +2 to the defence value, or +1 each to the attack and defence values.
See also page 61, "Example of Possible Combat Pairings".
4.7.1.2 Combat Resolution
Each time the two ships lying directly opposite each other fight, whereby their escort protection can influence the attack and/or defence value. The two ships (including their escort protection) form a combat pairing. Each combat pairing is resolved separately, whereby the attacker can decide whether the combat pairings are resolved from left to right or from right to left. In the first of the three possible space combat rounds the stealth value plays an essential role. It decides who has the element of surprise on his side. All events and special effects, however, unless otherwise stated, act only on ships and units (including accessories) that were placed in the combat.
Stealth: Both players may now alternately use special effects and events that are to be played before the modification of the stealth value (for example a teleporter's jump onto an enemy ship, Fiktivtransmitter, close transition, emergency transition) or that modify the stealth value itself.
Then the attacker draws one action card for each combat pairing and determines the stealth difference from the stealth values of the two ships, by looking up the value for his own ship in the left column (red) and for the enemy ship in the right column (green). The stealth value of a passive ship is 1 (plus any special effects). If the stealth value of the attacking ship is greater than that of the defending ship, this ship can break through (see below). Otherwise the ship with the higher stealth value can use the stealth difference (higher stealth value minus lower stealth value) either as a bonus on the attack value or as a bonus on the defence value. If the stealth difference is greater than 1, it may also be split between the attack and defence values. One must decide immediately on one of the options (break through, or bonus on attack or defence value).
Note: The defender can never break through.
Example: In a combat pairing an IV spaceship (stealth C) faces a Kaulquappe (stealth A), and the IV spaceship has attacked. Its owner draws an action card and so determines a stealth value of 2 for the IV spaceship. The Kaulquappe has a stealth value of 1. Stealth value 2 minus stealth value 1 gives a stealth difference of 1 in favour of the IV spaceship. The IV spaceship can therefore either break through, or receive a bonus of +1 on the attack or defence value.
Ships that break through are placed beside the combat area. Space combat is over for them, and they can unload units at the beginning of the ground combat. If escort protection was assigned to the ship that broke through, then for it the first combat round is over. It only takes part in the combat again in the next combat round, but can still use skills and special effects in this combat round. The stealth values are not redetermined in the next combat round.
Fire at will: Both players first use special effects to modify the attack and/or defence value. Then each player draws an action card and determines from his ship's attack strength (which may have been modified by escort protection, stealth difference and special effects) the attack value of his ship, the left column (red) of the random bar being decisive. Using the right column (green) of the random bar, the players determine from the defence strength the defence values of their ships; any bonuses again come into play.
If the attack value of a ship is greater than the defence value of the enemy ship, this ship, together with all transported units and accessories, goes into the Matter Sink. The result of the next combat pairing is then determined. As soon as all results have been determined, we come to the point of retreat.
Note: Escort ships are never affected by the combat result, only the two ships lying directly opposite each other.
4.7.1.3 Retreat
At the end of the 1st and 2nd space combat round the attacker or the defender may withdraw. The attacker decides first whether he wants to withdraw. At the end of the 3rd space combat round the attacker must withdraw if enemy ships are still present. This does not apply, however, to ships that have broken through. A retreat must always be carried out with all ships, except those that have broken through. These may join a retreat, but do not have to. After a retreat all transported units must be unloaded and placed regularly. If this is not possible (for example because upper limits would be exceeded), they go into the Matter Sink. A ship that has broken through may in any case unload its units at the location, which then carry out a ground combat. The ship afterwards returns to the same location together with the other ships in the event of a retreat as well.
Where does the attacker retreat to? All ships of the attacker retreat to a location of the corresponding side in his area.
Where does the defender retreat to? All ships of the defender must retreat to another location (of a different name) of the corresponding side in his area. He can however not take units from this location along on his retreat, only those that have already been transported in the space combat.
Note: Pro ships and units must retreat to a location on the Pro side, Anti ships and units to a location on the Anti side.
Further restrictions: This retreat location must lie within the range of all retreating ships, whereby smaller ships may be transported by larger ones. A retreat may not cause upper limits to be exceeded, nor may ships and units of different loyalty be present at this location afterwards. If ships retreating would exceed upper limits, only as many of the retreating ships may be placed as until the upper limits are reached. Ships that cannot be placed go into the Matter Sink. Only those ships that can be placed may unload their units. Units that cannot be unloaded because upper limits would be exceeded also go into the Matter Sink.
Note: One does not necessarily have to retreat to the location from which one began the offensive mission, but at another location one must ensure that there are no problems with regard to range, loyalty and upper limits.
These further restrictions on retreat correspond to the guidelines for missions and are only repeated here for completeness.
What happens if neither player retreats or must retreat? If both players still have ships at the target location, a new space combat round begins (the ships are taken into the hand again and laid out anew), unless only the attacker has ships there that have broken through. Then he may begin the ground combat, in which he unloads the transported units at the location. If only the attacker still has ships there, the ground combat likewise begins with unloading.
4.7.2 Ground Combat
Ground combat takes place after space combat if both players have units at the target location. Ground combat also takes place if the defender has no ships there and the attacker unloads units, or if the attacker undertakes a mission only with units to a location of the same name (for example from Pro-Terra to Anti-Terra). If then only the attacker has units at the target location, the reduction follows directly (page 40).
Ground combat is carried out according to the same rules as space combat. Instead of ships, units are involved here. Instead of the term "ship" the term "unit" is simply used, instead of "fleet" "troop", instead of "spaceship" "person", instead of "space combat round" "ground combat round", and instead of "escort protection" the term "escort".
4.7.2.1 Combat Setup
There are slight differences in the setup. For one thing, only units and their accessories are taken into the combat hand (no ships). Units cannot be loaded into ships by the defender; they must take part in the setup of the ground combat. Accessory: unit may be assigned to a different unit than the one on which it was originally laid out. Accessory: unit need not be assigned in the 1st ground combat round; however, once an accessory: unit has been assigned, it cannot be newly assigned in this ground combat. An accessory: unit is assigned in combat as soon as it has been used, or its special effect has been employed.
4.7.2.2 Ground Combat Limits
There is furthermore a limit on the number of possible combat pairings. This "limit" is printed in red on the location/planet cards and states how many combat pairings may be formed, i.e. how many units may at most be laid out next to one another. The limit is set by the target location and modified by the mission target.
Modification of the limit:
- Destabilisation, devastation: +1
- Assassination, sabotage: –1
- No action card drawn to determine the mission target: –1 (the limit is however always at least 1)
The limits apply only to ground combat, not to space combat.
Example: The target location of the mission is Terra/Sol. The limit for ground combat pairings there is 2. The mission target is destabilisation. Consequently no more than 3 units may be laid out next to one another.
Note: The rule on the limit for ground combat pairings was only introduced after the expansion "Vorstoß nach Arkon", or before the publication of the 2nd edition of phases I – III. The ground combat limits apply however in principle to all game phases. The limit was earlier usually stated on the cards as "Ground combat pairings: limit x".
For completeness, the ground combat limits for all locations are as follows:
| Location | Phase I | Phase II | Phase III | Phase IV | Phase V |
|---|---|---|---|---|---|
| Terra | 2 | 2 | 2 | 2 | 2 |
| Venus | 1 | 1 | 2 | 1 | 1 |
| Ferrol | 2 | – | – | – | – |
| Rofus | – | 1 | 1 | 1 | 1 |
| Goszuls Planet |
(A dash (–) marks a phase for which no value is printed in the source table.)
4.7.2.3 Combat Resolution
Ground combat is resolved as in space combat, but the escort protection is called escort (Eskorte) in ground combat. Units that break through are likewise placed beside the combat area and can reduce the attack target at the end of the ground combat (page 40).
4.7.2.4 Retreat
As in space combat, but with the following changes: the defender's units can also withdraw in ground combat to the same location; in this case the attacker can then carry out his reduction afterwards. After the 3rd ground combat round, units that have broken through must also withdraw, but before their return they may still carry out their reduction. The attacker's units can be loaded back onto ships during a retreat if these ships are still at the target location.
4.7.2.5 Reduction
A reduction of the attack target takes place when the attacker has set a mission target AND:
a) has broken through with units in ground combat, OR b) is the only player with units at the target location, OR c) the defender withdraws BEFORE the attacker.
For a reduction, an active unit of the attacker is in any case required (see page 14, "Active & Passive Cards")!
Depending on the attack target drawn with the action card, a specific card at the target location goes into the Matter Sink:
- Assassination (Attentat): The target unit named at the start of the mission. No distinction is made between units with the same name. Example: If, for example, the opponent has named Saboteure as target unit, and Saboteure are still in play, these are reduced.
- Destabilisation (Destabilisierung): 1 location, only if more than 1 location is stacked there and the attacker has an active troop there. If locations of the same name from different game phases lie on top of one another, the location of the highest game phase (also the last one played) goes into the Matter Sink first.
- Sabotage: The target accessory named at the start of the mission.
- Devastation (Verwüstung): The attacker names only now either a unit, an accessory (but not accessory: ship) or the location, the latter however only if he has an active troop there. If at least one unit of the defender was destroyed in the preceding ground combat, the reduction lapses. If no cards of the corresponding type are present, the reduction lapses.
After the reduction all attacking units and ships must withdraw into the player's own area.
Note: Through a reduction (for example of location cards) upper limits at a location may change and thereby possibly be exceeded. In this case the surplus cards are not removed, and they do not need to be moved to another location by a mission. The restrictions on laying out cards, defensive missions, retreat and so on still apply. Upper limits do not change merely because they have been exceeded!
5. Use of Special Effects
Many cards have special effects, which are listed in the text field of the card. Unless otherwise stated, these special effects may only be used in the player's own turn, or while the card is at a location that is the target of an opposing mission. Where a special effect of a card can be used at another point in time, this is stated on the card, as is the case where the point in time is defined more precisely. For many special effects the card must be passivated (passivate symbol). Special effects where the card does not have to be passivated may be used as often as desired in one turn. Special effects of cards in play only act on cards at the same location (unless stated otherwise). Special effects used in combat can only affect cards at the location of the combat.
Special effects for stealth must be used before the stealth value is determined.
Unless otherwise regulated, special effects for attack and defence must be used before the combat values are determined.
Special effects also include so-called skills (Fertigkeiten). Further information on special effects can be found on page 41, "Skills" and page 44, "Timing".
Special effects can never reduce the stealth value below 1, nor the attack and defence values below 0.
Attention: Unless otherwise stated, all events and special effects played in combat act only on ships and units (including accessories) that were actually placed in the combat.
Example: If the card Nahtransition (close transition) is played in space combat, this special effect can only be played on two ships in the laid-out combat pairings.
5.1 Skills
Some units have skills, which are a form of special effect and can considerably influence the game. We distinguish skills of level 0 (the unit is untrained and can only gain an advantage from the skill once this value is raised by other cards), of level 1 (the unit is trained in the skill) and of level 2 (it is experienced in handling the skill). Units with skill level 2 can always also use the special effect of skill level 1.
Most skills are preceded by the passivate symbol. If the unit wants to use such a skill, it must be active and becomes passive through using the skill.
Skills can as a rule only be used in the player's own turn, or when the player is the target of an opposing mission. A skill can only be used against ships and units that take part in the mission. Skills marked (Selbst) apply only to the card that triggers the effect, or to the card to which this card is assigned (accessory). Skills of units can in space combat only be used if these units are transported by a ship.
Skills that can be used at another point in time, or where the point in time is defined more precisely, carry a corresponding note.
There are two kinds of skills: mutant skills (Mutantenfertigkeiten) and "normal" skills ("Normale" Fertigkeiten). Mutant skills are printed in red on the card and are subject to additional restrictions on their use. "Normal" skills are printed in green.
Pro units may use only one mutant skill in each mission. On the Anti side any number of mutant skills may be used in one mission.
5.2 List of Skills
Symbols used below: "(passivate symbol)" marks the passivate symbol (a U-shape) on the card, and "(activate symbol)" marks the activate symbol (an arch-shape), which makes a passive card active again.
5.2.1 Mutant Skills
- Antihypno(tin) 1: Cancels the effect of a Hypno, Hypno-beam, Psycho-beam or Suggestor.
- Antihypno(tin) 2: As with 1; the unit is made active again for this (activate symbol), but cannot use Antihypno(tin) again in this combat.
- Desintegration 1: One accessory: unit of the opponent that is in play in combat is removed and placed face down on top of the corresponding Matter Source (does not apply to permanently assigned accessories). OR a person with this skill may, in ground combat after combat setup, exchange the combat pairing with another unit, and afterwards becomes active again (activate symbol), but cannot use Desintegration again in this combat.
- Desintegration 2: One accessory: unit of the opponent that is in play in combat is removed, placed face down on top of the corresponding Matter Source, and the Source is then shuffled (does not apply to permanently assigned accessories).
- Hypno 1: 1 person is passivated (passivate symbol).
- Hypno 2: 1 unit is passivated (passivate symbol).
- Materieumwandler 1 (matter converter 1): 1 accessory: unit is passivated (passivate symbol) (does not apply to permanently assigned accessories).
- Materieumwandler 2 (matter converter 2): 1 accessory: unit is destroyed (does not apply to permanently assigned accessories) OR 1 accessory: location/planet (not Arkon I / Äußerer Festungsring / Innerer Festungsring / Robotregent / Tiefseekuppel) is passivated (passivate symbol) in ground combat.
- Orter 1 (locator 1): Stealth –1 for one active fleet or troop.
- Orter 2 (locator 2): Stealth –1 for one active spaceship or person.
Note: For the purposes of this game, locators (Orter) also include frequency viewers, eavesdroppers, direction finders and teleoptics.
- Späher 1 (scout 1): Played in ground combat during combat setup, when this unit is already laid out in a combat pairing: the opponent must, in this combat round (possibly several times), name all accessories assigned to the opposing units, also before you lay your units against them.
- Späher 2 (scout 2): Look at the top two cards of an accessible Matter Source of any player and put them back in the same order. May be used at any time in one's own turn, but not in the Reactivation section.
- Suggestor 1: 1 person is passivated (passivate symbol).
- Suggestor 2: 1 unit is passivated (passivate symbol).
- Telekinet(in) 1: 1 accessory: unit is passivated (passivate symbol) (does not apply to permanently assigned accessories).
- Telekinet(in) 2: 1 accessory: unit is passivated (passivate symbol) OR made active again (activate symbol) OR destroyed (does not apply to permanently assigned accessories).
- Telepath(in) 1: Stealth –1 for one active unit.
- Telepath(in) 2: Played when the opponent announces a mission to your location where the telepath 2 is located. You may look at the opponent's hand of cards.
- Teleporter(in) 1: +3 defence value for itself (used after the combat values are determined) OR stealth +1 for 1 active person and itself, OR at the start of space combat it can jump with 1 person from the same ship on board an active opposing spaceship; it then becomes (activate symbol) and ground combat takes place. Only 1 combat round is fought (without use of planetary bonuses and accessory: location/planet). If this leads to a breakthrough, the spaceship is passivated (passivate symbol) or 1 accessory: ship is reduced. If the teleporter is destroyed, the persons accompanying it are destroyed too. Otherwise it and its companions return to the starting ship and are passivated (passivate symbol).
- Teleporter(in) 2: +5 defence value for itself (used after the combat values are determined) OR stealth +1 for 2 active persons and itself, OR jump onto an opposing spaceship as in 1, but with 2 persons.
- Zünder 1 (detonator 1): In ground combat destroys one deployed person or one accessory: unit, or in space combat one deployed spaceship. Destruction of the spaceship can be cancelled by Ausweichmanöver (evasive manoeuvre) and by Kritische Treffer (critical hits).
5.2.2 "Normal" Skills
- Alarm 1: Activate, after the opponent has named the location of this card as the target of his mission, up to 2 passive cards at this location (activate symbol). Excepted are exposed agents, the depot and the card played. The latter cannot be made active again (activate symbol) until your next Reactivation section.
- Alarm 2: As with 1, but you may activate 3 passive cards (activate symbol).
- Bodenkampf 1 (ground combat 1): +1 attack or defence value (for itself).
- Bodenkampf 2 (ground combat 2): +2 attack value or +2 defence value or +1 attack and defence value (for itself).
- Galaktische Rätsel 1 bzw. 2 (Galactic Riddles 1 or 2): The unit contributes 1 or 2 point(s) towards playing a Galactic Riddle, provided it took part in no mission this turn. (Can only be used in your Expansion section.)
Note: Most Galactic Riddles have Galactic Riddle 3 or 4 as a premise. To play such a Galactic Riddle it is therefore necessary to have several units with this skill at one location and to combine the skills.
- Gift (poison): Used after the combat values are determined. Destroys the opposing unit in the combat pairing if your attack value is greater than or equal to the defence value of the opposing unit. Cannot be used against units of the people Roboter. (Self)
- Hypnoblock: The unit is immune to the effects of Hypnos, Suggestors, Psycho-beams, Hypno-beams and telepaths. Prevents brainwashing (Gehirnwäsche). (Self)
- Initiative 1: 1 additional mission on the side of the 1st mission (or of the sacrificed mission) for ships and units (including accessories) at the location and of the loyalty of this card, provided these cards have not yet carried out a mission in this turn, OR draw a new action card for a mission on the same side when determining the mission target. (Used in your Mission section.)
Note: Each unit may, per turn, take part in one defence mission and in one further, different mission!
- Initiative 2: 1 additional mission on the side of the 1st mission (or of the sacrificed mission) for ships and units (including accessories) of the loyalty of this card, provided these cards have not yet carried out a mission in this turn. (Used in your Mission section.)
- Innere Sicherheit 1 (internal security 1): Used after combat and before the reduction. You may choose which card type and which card of yours is reduced. You must however choose a card type that can also be reduced.
- Innere Sicherheit 2: As with 1, but you may also choose ships and their accessories.
- Koordinaten von Sol 1 bzw. 2 (coordinates of Sol 1 or 2): The opposing player receives immediately after your successful agent mission to his Pro location –1 or –2 points for Coordinates of Sol, provided the agent has not yet transmitted points for Coordinates of Sol by means of a transmitter in this round. Must be used immediately after the agent's return. Cannot be increased by Hypnoschulung. The Coordinates of Sol can also be transmitted by an agent with this skill as a message by means of a transmitter (in the Mission section), whereby only the transmitter used is passivated (passivate symbol), not the agent.
- Medizin 1 (medicine 1): In ground combat cancels the destruction of an active person (including accessories) (not applicable to the people Roboter and not to itself); the person is passivated (passivate symbol).
- Medizin 2 (medicine 2): In ground combat cancels the destruction of an active troop (including accessories) (not applicable to the people Roboter and not to itself); the troop is passivated (passivate symbol), and the card with this skill is placed face down on top of the corresponding Matter Source.
- Mutantenkorps 1 (mutant corps 1): Any number of mutant skills may be used in the mission if this card takes part in it.
- Mutantenkorps 2: As with 1, AND 1 mutant, after it has been passivated (passivate symbol) by using one of its mutant skills, can be made active again (activate symbol). However, it cannot use any of its skills again in this combat. Does not apply to exposed agents.
- Raumkampf 1 (space combat 1): +1 attack or defence value for the transporting ship.
- Raumkampf 2: +1 attack and defence value, or +2 attack value, or +2 defence value for the transporting ship.
Note: Spaceships can only be modified by 1 unit with the space combat skill; fleets by several.
- Robotik 1 (robotics 1): Modifies the stealth or defence value of a unit of the people Roboter (but not vehicle) by 1.
- Robotik 2: Modifies the stealth, attack or defence value of a unit of the people Roboter (but not vehicle) by 1.
- Rotes Universum +1 bzw. +2 (Red Universe +1 or +2): Provides 1 or 2 points for the sub-game system "Rotes Universum" in phase VI. Despite the red print, this is not a mutant skill. Further explanation in phase VI.
- Sondierung (probing): 1 or 2 probing points (depending on the location) after a successful agent mission on the probing location, provided the agent has not yet transmitted probing points by means of a transmitter in this round. Must be used immediately after the agent's return and unloading at a Pro location. The probing points can also be transmitted by an agent with this skill as a message by means of a transmitter (in the Mission section), whereby only the transmitter used is passivated (passivate symbol), not the agent.
- Spionage 1 bzw. 2 (espionage 1 or 2): Stealth +1 or +2 during an agent mission or a defence mission (for itself).
- Überlappungsfront 1 bzw. 2 (overlapping front 1 or 2): The card contributes 1 or 2 points towards playing a card that requires a certain minimum number of points in this skill. Only exists in phase VI, where this skill is then defined more precisely.
- Verhandlung 1 (negotiation 1): Used by the defender in ground combat (not during a defence mission) after combat setup in the 1st combat round: stealth values are immediately determined for all combat pairings. Opposing units that have no positive stealth difference, as well as all escorts, must withdraw immediately. In return all of one's own units at this location are (passivate symbol). This location can also no longer be the target of an opposing mission this turn. Opposing units with a positive stealth difference break through.
- Verhandlung 2: As with 1, except that one's own units are not passivated (except the person with this skill).
- Wirtschaft 1 (economy 1): If the card is at the location of a GCC, a trading base or at the location of Terrania and is passivated for this (passivate symbol), no card must be discarded. (Used in your Matter Source section.)
Note: GCC stands for "General Cosmic Company".
- Wirtschaft 2 (economy 2): If the card is passivated (passivate symbol) for the GCC, the trading base or Terrania, no card must be discarded. The card does not have to be at the same location. (Used in your Matter Source section.)
- Wissenschaft 1 bzw. 2 (science 1 or 2): The unit contributes 1 or 2 point(s) towards playing a card that requires a certain minimum number of points in this skill.
- Zellaktivator (cell activator): Immune to poison / infections.
5.3 Timing
If in combat both players want to trigger several special effects at the same time, for example through skills and/or events, these effects are used alternately, with the attacker beginning. The only exceptions are special effects which, as a response to the effect just played, cancel its effect (for example Konter (counter), Ausweichmanöver with Nahtransition, and so on). These may always be used in addition, outside the alternating sequence.
Special effects that modify a game value which is determined with the help of an action card must be used BEFORE the action card is drawn.
6. Special Features of Higher Game Phases
6.1 Game Phase IV
In phase IV the main story moves to the star cluster M-13. To understand the increasingly complex game flows some explanations are necessary. See also page 47, "Card Errata"!
6.1.1 The Robot Regent
In the course of the Perry Rhodan story the Robot Regent tries to get to the coordinates of Earth in order to teach the Terrans a lesson. Rhodan, however, skilfully manages to prevent this. For this reason ships of the loyalty Arkonides cannot carry out missions in phase IV to a location outside M-13 (but there is a back door through which this is in fact possible under certain circumstances, for which, however, the card Robot Regent must be used...).
The Robot Regent is initially not at all friendly towards the Terrans, but in the course of the novel's story, through various activities of the Terrans, becomes ever more cooperative, which however does not prevent him from continuing to hatch plots. The more strongly the Terrans engage for the Robot Regent, the "nicer" he is to them. In the game this means that he is more inclined to refrain from deploying massive forces against the Terrans.
All cards that have an influence on the attitude of the Robot Regent carry in red the note "Robot Regent +/– x"; this is the Robot Regent modifier, or RM. The RM always applies to the side on which the card is played. For dual cards it is therefore always noted which RM applies to the player for playing on the Pro or the Anti side.
Example: Admiral Kenos has the note "Robot Regent –1/+1 (Pro/Anti)". If he is played on the Pro side, he supplies an RM of –1 for the Pro side; if he is played on the Anti side, he supplies a bonus of +1 for the Anti side.
The RM for his Pro side is recorded in the Pro column of the auxiliary card Robot Regent, and the RM for his Anti side in the Anti column. All RMs of a player in one column are cumulative. Coins, counters and so on are suitable for recording them.
Example: Sascha lays out the card Robot Regent (RM +3 for the Anti side) and slides the counter in the Anti column to +3. In the next round he wants to play Admiral Kenos (–1/+1 Pro/Anti). If he plays him on the Anti side, he can slide the Anti counter to +4; if he plays him on the Pro side, he slides his Pro counter to –1.
If a card that has changed the Robot Regent modifier goes into the Matter Sink, the owner of the card must adjust his RM accordingly.
Robot Regent modifiers (RM): All cards that change the Robot Regent modifier are listed here.
Each player who carries out his first mission to M-13 or to a location in M-13 with a ship of the Arkonide type additionally receives an RM +1 for the Pro side!
| Cards with RM modifier for the Pro side | RM |
|---|---|
| Admiral Kenos | –1 |
| Dr. Orson Certch | –1 |
| Mooff | –1 |
| Motuner | –1 |
| Sergh | –2 |
| STARDUST class | +1 |
| TITAN / VEAST'ARK | +1 |
| Zalit | –2 |
| Zernif | –1 |
| Cards with RM modifier for the Anti side | RM |
|---|---|
| Admiral Kenos | +1 |
| Arkon I | +1 |
| Arkon III (for 1 mission) | +1 |
| Äusserer Festungsring (for 1 mission) | +1/+2 |
| Innerer Festungsring (for 1 mission) | +1/+2 |
| Motuner (for 1 mission) | +2 |
| Robot Regent | +3 |
6.1.2 Meaning of the Robot Regent Modifiers (RM)
Robot Regent #: Ships and units of the loyalty Arkonides are subject in game phase IV to certain restrictions on their use. If a player wants to carry out an offensive mission with these cards, he adds the RM (Pro) of the target player to his own RM (Anti). The sum is the Robot Regent #. Ships and units of the loyalty Arkonides whose Anti premise contains a number greater than the Robot Regent # cannot take part in an offensive mission against this player.
Example: Sascha is on turn. He has an RM (Anti) of 5, and a GOOD HOPE class ship (highest number in the premise is 2) as well as two STARDUST class spaceships (highest number in the premise is 3) available. Peter has an RM (Pro) of –3, Klaus an RM (Pro) of –2. When attacking Peter the Robot Regent # is 2 (5+(–3)=2), when attacking Klaus it is 3 (5+(–2)=3). If he wanted to attack Peter he would have to do so without the STARDUST class, since their highest premise is greater than the Robot Regent #. When attacking Klaus he could take all ships along.
6.1.3 The Aras
Perry Rhodan succeeds only piece by piece in getting to the bottom of the mysterious incidents in M-13 and in identifying the true puppet masters behind the dreadful actions.
All cards that contribute to the clarification or concealment of the Ara theme carry in red the note "Aras +/– x"; this is the Ara modifier, or AM. The AM always applies to the side on which the card is played. For dual cards it is therefore always noted which AM applies to the player for playing on the Pro or the Anti side.
The AM for his Pro side is recorded in the Pro column of the auxiliary card Aras, and the AM for his Anti side in the Anti column. All AMs of a player in one column are cumulative. Coins, counters and so on are suitable for recording them.
If a card that has changed the Ara modifier goes into the Matter Sink, the owner of the card must likewise adjust his AM accordingly.
Ara modifiers (AM): All cards that change the Ara modifier are listed here.
| Cards with AM modifier for the Pro side | AM |
|---|---|
| Exsar | –1 |
| Geläuterte | –1 |
| Gom | –1 |
| Höhlensystem auf Honur | –1 |
| Honur | –1 |
| Mooff | –1 |
| Mooff VI | –1 |
| Zalit | –1 |
| Cards with AM modifier for the Anti side | AM |
|---|---|
| Aralon | +1 |
| 2x Aralon | +2 |
| Gegul | +1 |
| Gom | +1 |
| Höhlensystem auf Honur | +1 |
| Keklos | +1 |
6.1.4 Meaning of the Ara Modifiers (AM)
The Ara modifiers are important, among other things, for offensive missions of the Pro side against Aralon. For the phase change a reduction on Aralon is first required, so an offensive mission against Aralon must be carried out. This is however only possible if the Ara # is < 1 (and one's own Aralon is in play). The Ara # is formed by adding one's own AM of the Pro side and the AM of the Anti side of the opposing player. As long as the Ara # is 1 or greater than 1, the Aralon of the corresponding fellow player is protected from one's own attacks. The opposing players will therefore try to obtain as high a value as possible for their AM (Anti) by playing the corresponding cards. At the same time you must of course try to bring your Pro AM as far as possible into the negative range by playing cards that supply an AM (Pro), so that the Ara # becomes < 1 and you can attack.
Please note: Because it is so important for phase IV, here is a reminder that ships of the loyalty Arkonides can normally not carry out missions to a location outside M-13 in this phase!
6.2 Transition from Game Phase IV to Game Phase V
Players who, during a campaign, move on to phase V after the end of game phase IV have some special points to observe.
- At the phase change the following cards lying on the Pro side are additionally taken into the hand: Talamon, and all units and ships (including accessories) that contain the premise Talamon.
- Goms lying at locations other than Laros go into the Matter Sink without replacement. From phase V, Goms can only be transported to Laros and to Aralon.
- The card Solares System (Sol) is played onto the already lying Terra/Sol (Venus/Sol is obsolete after game phase IV). The following specifications now apply:
- Upper limit = location cards Terra/Sol + location cards Solares System (Sol) + 1.
- Number of cards that can be played = location cards Terra/Sol + location cards Solares System (Sol).
- Premise for Sol: only the location cards Solares System (Sol) apply here.
- Premise for Terra: the location cards Terra/Sol + the location cards Solares System (Sol) apply here.
- Premise for Venus: only the location cards Solares System (Sol) apply here.
- If an Anti-Venus is laid out in your area, it remains lying separately from other locations until there are no more ships/units there.
- In the case of a destabilisation, the Solares System (Sol) is always reduced first, and only then Terra/Sol. The last Solares System (Sol) remains lying, however.
- Saboteurs of phases I and/or III may remain lying on Anti-Terra and do not hinder the laying out of new cards of the loyalty Saboteurs. If the Adventurous is played onto the Anti-Sol system, the "old" Saboteurs go into the Matter Sink, because they do not contain a premise for Gray Beast.
- All units and ships of the loyalties Aras, Arkonides, Springers and Overheavies of phases I – IV additionally possess the loyalty Arkonidisches Imperium from phase V.
- If in phase IV a player has managed, with ships of the loyalty Arkonides, to carry out an offensive mission to the Terra or Venus locations of an opponent and to return with at least one ship to M-13 or a location in M-13, then this opponent receives once, at the phase change to phase V, Coordinates of Sol –1, because the Robot Regent has already been able to locate the Solar System with him.
6.3 Game Phase V
In game phase IV, ships of the loyalty Arkonides could not leave M-13. From phase V this no longer applies to ships of the loyalty Arkonidisches Imperium. These can very well also operate outside M-13.
But: missions of ships of the loyalty Arkonidisches Imperium to the Solar System and to the planets in the Solar System (Terra and Venus) are in game phase V only possible for the player whose Coordinates of Sol are < –8.
Transitions: Through the structure scanner station (Strukturtasterstation, accessory: location) the Anti side can locate ships that have a stealth of A or B. If this ship was at the same location as the structure scanner, it can in the following round be pursued by Anti ships of the type Arkonides up to its target location. The target location may then continue to be approached at any time by Anti ships of the type Arkonides.
6.3.1 Special Rule Anti-Atlan (does not apply to tournaments)
A player who does not own a Pro-Atlan may also carry out the phase change with Anti-Atlan as follows:
After playing the event Psychoduell (psychological duel) on Hellgate, the stealth value for Atlan is drawn. If D(red) >3, the Anti-Atlan is not destroyed, but may be laid out passive on Hellgate and afterwards transported to Sol with a Pro ship. Here he now counts as a premise for the event Der Zweikampf (the duel). If this is played, the Anti-Atlan becomes active on Pro-Sol and counts as a victory condition for the phase change. He can however at no point be used for the Pro side.
After the phase change he goes immediately into the Matter Sink. The player further receives for the phase change not 2 points, but only 1 point.
This rule is not applicable if a player did have a Pro-Atlan in his deck, but this was destroyed by the opponent.
6.4 Card Errata
6.4.1 Card Errata Phase IV
-
On all cards from the boosters "Vorstoß nach Arkon" of the 1st edition, in the text field (but not in the card type) the term Raumschiff(e) (spaceship(s)) must be replaced by Schiff(e) (ship(s)), except for the following cards:
Chefingenieur Garand * Saugfeldgenerator Zugstrahlung M-13 Strukturkompensator
* For Chefingenieur Garand only the text "+1 defence strength for transporting spaceship" remains. Otherwise the term Raumschiff is likewise replaced by Schiff.
-
M-13 is a location/star cluster. No accessory: location can be assigned to it.
6.4.2 Card Errata Phase V
Because card texts had to be shortened (this was necessary, since otherwise the space on the cards would not suffice), 2 errors crept in, which must be corrected here (corrections in bold):
- Aralon and Arkon III: Search out an Anti location (red card) from Matter Source V, which then cannot be played again (hand-play symbol) in the same turn. (The symbol in the print is the hand-play symbol, see page 15.)
- Gray Beast: In phase V, missions here can only be carried out with Gazelle and with units that contain the premise Gray Beast. Only such units may be laid out here.
7. Ending a Game Phase – Phase Change
A game phase is ended when a player triggers a phase change (Spielphasenwechsel) in his Reactivation section. He can only do this if he fulfils the victory condition of the game phase at this point in time. He may trigger the phase change, but he does not have to!
As soon as a player triggers a phase change, certain cards go into the Matter Sink for all players, and the running game phase is ended. These cards bear the note that they go into the Matter Sink after a certain game phase, or become obsolete after a certain game phase. Corresponding cards from the starters of game phase V bear the note (obsolescence symbol): x.
Example: (obsolescence symbol): V = obsolete after phase V.
- The player who wants to trigger the phase change and fulfils the victory conditions announces the phase change loudly and clearly in his Reactivation section. (If he has already carried out a mission, drawn cards or laid out cards, the phase change cannot be caught up in this turn.) The following two points (2 and 3) are now carried out for all players at the same time:
- First all obsolete locations lying in play (including obsolete accessories) go into the Matter Sink, on which there are neither own units nor own ships. Accessories that are not obsolete are taken into the hand.
- Afterwards all obsolete Pro-side locations lying in play go into the Matter Sink, even if other cards are located there. These cards are taken back into the hand, except those that are also obsolete. These are likewise placed into the Matter Sink without replacement.
- Those players who did not trigger the phase change now set aside all obsolete hand cards until they are on turn. These cards are no longer usable.
- The player who triggered the game phase change now discards all obsolete cards from his hand and fills his card hand up to 10 from accessible Matter Sources (he may also draw from the next higher Matter Source, since it is now accessible for him). He must, however, announce before drawing how many cards he wants to draw from which Matter Source. He then has his regular turn and afterwards a second turn as a bonus.
- The other players may, on their turn in the Reactivation section, now likewise carry out this phase change, whereby they no longer have to fulfil the victory conditions for this game phase. As long as they do not carry out the phase change, however, they cannot draw cards from the new Matter Source. a) If they want to carry out the phase change, they announce this clearly, throw the set-aside obsolete cards into the Matter Sink and fill their card hand up to 10 cards. In doing so they may also draw from the next higher Matter Source, since this has now also become accessible to them. They do not, however, have a bonus turn. b) If they do not yet want to carry out the phase change, they throw the set-aside obsolete cards into the Matter Sink and only draw the same number of new cards from an accessible Matter Source, but not from the new one. They can then, in a later round, catch up the phase change in their Reactivation section. Only now do they fill their hand up to 10 cards, whereby the new Matter Source is now also available to them.
- Obsolete locations on the Anti side go into the Matter Sink for all players only at the moment when no more ships or units are present there (this can also happen in the middle of a turn and is carried out as described in point 2). Obsolete cards that are located in a depot remain there and only go into the Matter Sink without replacement when the depot is dissolved.
Note: With the phase change the next Matter Source therefore becomes accessible, i.e. resource cards can now also be drawn from it. Once a Matter Source is accessible, it remains so for the rest of the game.
Example: In game phase I only Matter Source I is accessible, in game phase II Matter Sources I and II, in game phase III Matter Sources I – III, and so on.
Example: During play in game phase III a player draws an obsolete card from Matter Source I. He must immediately put this card back into the Matter Sink and draw the replacement card likewise from Matter Source I.
Note: If at the phase change opposing agents are located at a location that is placed in the Matter Sink, the opposing player takes them back into his hand.
Continuing the game is now only possible with cards from the next higher game phase.
7.1 Victory Conditions
A player has ended a game phase when he fulfils the victory conditions for this game phase and triggers a phase change (page 48, "Ending a Game Phase – Phase Change"). The player who has achieved the most victory points in the game phase has won this game phase.
Victory conditions game phase I: The player has 4 Terra in play on his Pro side AND at least 1 ship with range >2 on the Pro side.
Victory conditions game phase II: The player has 3 Ferrol in play on his Anti side, AS WELL AS at least one unit of the loyalty Topsider on Anti-Ferrol AND 1 Galactic Riddle from game phase II solved.
Victory conditions game phase III: The player has 3 Snowman in play on his Anti side AND at least 1 ship of the loyalty Springer or Overheavy on Anti-Snowman AND either 1 Galactic Riddle from game phase III solved or the "GANYMED" on his Pro side.
Victory conditions game phase IV: The player has first achieved a reduction with units on Aralon AND afterwards on Pro-Aqua (or Pro-Terra, if no opposing Pro-Aqua is present). (Not with units of the loyalty Saboteure, Fantan people or Individual Shapechangers.)
Victory conditions game phase V: The player has a person with the skill Verhandlung (negotiation) on Pro-Mirsal III (or alternatively 2 Pro-Gray Beast, and the players to the right and left have neither Tolimon nor Volat on their Anti side) AND a person with the skill Verhandlung on Anti-Mirsal III AND Atlan active on Pro-Sol.
Note: Verhandlung 0 is sufficient for this.
7.2 Victory Points (VP) & Campaign Victory
As soon as a player ends a game phase, victory points are awarded as follows:
In all phases there are points as follows:
- a Matter Source was exhausted and was refreshed by cards from the Matter Sink: –0.5 VP each.
- a Matter Source was newly shuffled although this was not prescribed: –0.1 VP each.
Note: This is for players who believe they did not shuffle thoroughly enough.
Victory points in phase I (maximum 1 point):
- Phase change triggered: 1.0 VP
Victory points in phase II (maximum 2 points):
- Phase change triggered: 1.0 VP
- Most Galactic Riddles solved in phase II: 0.5 VP
- Reduction on Pro-Terra with units of the loyalty Topsider achieved in phase II: 0.5 VP
Victory points in phase III (maximum 3 points):
- Phase change triggered: 1.5 VP
- Most Galactic Riddles solved in phase III: 0.5 VP
- GANYMED lying on the Anti side: 0.5 VP
- Reduction on Pro-Terra with units of the loyalty Saboteurs achieved in phase III: 0.5 VP
Victory points in phase IV (maximum 4 points):
- Phase change triggered: 2.0 VP
- First to achieve a reduction on Aralon with units: 1.0 VP
- Highest Robot Regent modifier on the Anti side at the time of the phase change: 0.5 VP
- Lowest Robot Regent modifier on the Pro side at the time of the phase change: 0.5 VP
- Arkon bomb detonated at a location other than Aqua: –1.0 VP
Victory points in phase V (maximum 5 points):
- Phase change triggered: 2.0 VP
- Compensator direction finder (Kompensatorpeiler) built on the Anti side: 1.0 VP
- Highest value for "Coordinates of Sol", provided at least one fellow player has a lower value: 0.5 VP
- Lowest value for "Coordinates of Sol", provided at least one fellow player has a higher value: –0.5 VP
- Laury Marten & Graf Rodrigo de Berceo passivated at the same Pro location for this: 0.5 VP
- Envoy of Aurigel (Gesandte von Aurigel) played: 1.0 VP
- Opposing Atlan (Pro or Anti) destroyed, reduced or (discard-trigger symbol) during one's own mission in ground combat: –1.0 VP each
- Arkon bomb detonated at a Pro location: –1.0 VP
If several players have fulfilled a criterion for victory points, or there is a tie in the number of Galactic Riddles solved, the points are shared between the players. This sharing of points does not however apply to the refreshing of a Matter Source, the shuffling of a Matter Source, the detonating of an Arkon bomb and the destruction of Atlan.
The winner of the campaign is whoever has achieved the most victory points. In case of a tie, the one of these players who has triggered the most phase changes decides. If there is still a tie, the highest phase change triggered decides the victory.
Example: Game phases I – III were played. Klaus has ended game phases I and II and won 3 victory points. Peter has won game phase III and likewise 3 victory points. Klaus has therefore won the campaign, since he has ended 2 game phases.
7.3 Starting the Game at a Later Game Phase
If the game begins with game phase II, it is played with Matter Sources I and II. Cards that become obsolete after phase I are sorted out before the start of the game (not at tournaments; there the obsolete cards go into the Matter Sink and replacement cards are drawn immediately).
If the game begins with game phase III, it is played with Matter Sources I – III. Cards that become obsolete after phase I or II go into the Matter Sink and replacement cards are drawn (or are sorted out beforehand).
8. Tournament Rules Supplement
The game rules of this rulebook apply to tournament play. For rules questions, the FAQs on the Between The Stars homepage (www.prsks.de) apply.
At least 10 action cards are required for every game phase played in the tournament, and every type of reduction must be represented at least once per game phase (in a tournament over game phases I to V, therefore at least 5 times). Each action card may however appear at most 4 times in the action card stack. Furthermore all action cards and resource cards in the card stacks must be oriented the same way.
Per game phase a maximum of 10 cards may be placed in a sideboard (so 0 – 10 cards may be contained). The sideboard is a card stack that is not used during play, but with which a card exchange between individual games is possible. During the whole tournament the Matter Sources may only be altered by cards from the sideboard. A sideboard exists only for resource cards, not for action cards. At the tournament the same action cards must be used for all rounds.
The sideboard may not be altered after the game has begun (see page 17), i.e. after the coin toss for the action card exchange.
Faulty cards are always to be played according to the corrected texts (list under www.prsks.de/turnier/hilfen/kartenfehler.htm).
9. Flow Diagrams
The flow diagrams of the source are reproduced below as ordered step lists. Each step is followed by its remarks ("Bemerkungen") from the printed diagram.
9.1 The Turn
- Reactivation section. Passive cards may become active again. All passive cards (except cards that remain passive for several rounds) may become active again at the start of the round. Set-aside cards return to the target or starting location.
- Mission section. Offensive, defensive, agent and defence missions are possible in this section. Sacrificing a mission is also possible. When sacrificing missions, the 1st mission of a round is the one to be sacrificed. Only one mission may be sacrificed. With the skill Initiative several missions per round are possible. However, all missions (including sacrificed ones) are only possible on one side (Pro or Anti side). The exception is defence missions, which are possible on both sides at the same time. If defence missions were carried out on one side only, other missions are only possible on the same side as the defence mission.
- Matter Source section. Cards are drawn from an accessible Matter Source. Before drawing cards, the player announces from which accessible Matter Source he draws. If he can draw more than one card, he must state how many cards he draws from which accessible Matter Sources. He may also draw from several Matter Sources.
- Expansion section. Cards can be laid out. In this section cards may be played on one side (Pro or Anti side) in your area, unless the cards state otherwise. Cards that are played in other sections carry a special note!
- Discard section. Surplus cards must be discarded. At most 10 cards may be held in hand. At the end of the round all surplus cards are therefore discarded into the Matter Sink!
9.2 The Phase Change
- Player A has fulfilled the victory conditions of a game phase and is on turn, in the Reactivation section. All passive cards (except cards that remain passive for several rounds, and exposed agents) may become active again at the start of the round.
- Player A wants to carry out the phase change and therefore announces it. Remark: The next higher Matter Source becomes accessible for this player now.
- Handling obsolete Anti-side locations. Obsolete locations (including obsolete accessories) on which there are neither own units nor own ships go into the Matter Sink. Non-obsolete accessories are taken into the hand. The remaining obsolete Anti-side locations only go into the Matter Sink when no ships or units are present there any more. This can also happen in the middle of a turn.
- Handling obsolete Pro-side locations. Obsolete Pro-side locations go into the Matter Sink. Obsolete cards located on them also go into the Matter Sink. The remaining cards are taken into the hand. This takes place for all players at the same time.
- Handling the card hand. Player A throws all obsolete cards he has in hand into the Matter Sink. He can then refill his card hand to 10 cards, from the previous Matter Sources or from the newly accessible Matter Source. He must, however, announce before drawing how many cards he wants to draw from which Matter Source. The other players set their obsolete hand cards aside until they are on turn; these cards are no longer usable.
- Turn of player A. Mission section of A: A can carry out missions. Matter Source section of A: A draws cards from an accessible Matter Source. Expansion section of A: A can lay out cards. Discard section of A: if A has more than 10 cards, he must place surplus cards into the Matter Sink. Bonus turn of A: Remark: Player A has one further turn as a bonus.
- Procedure of the other players after the phase change. When another player is on turn, he may follow the phase change, without having to fulfil the victory conditions of this phase. He announces in his Reactivation section that he is following the phase change. The new Matter Source is now accessible for him too.
9.3 Galactic Riddles
- Reactivation section.
- Mission section. For some Galactic Riddles missions must be sacrificed. If required, a mission is sacrificed for the Galactic Riddle in this section. The card for which the mission is sacrificed is set aside face down; the card name need not be stated. It must also be stated for which side the mission is sacrificed. Remark: If a mission is to be carried out at the same time with the skill Initiative, the mission must first be sacrificed!
- Matter Source section.
- Expansion section. The Galactic Riddle is solved. Remark: The Galactic Riddle is solved in the Expansion section. If units are required that supply Galactic Riddle points, they become passive. Galactic Riddle points can only be given by active units that took part in no mission in the same turn (see skill Galactic Riddles). If the Galactic Riddle cannot be solved, e.g. because premises are missing, the card goes into the Matter Sink.
- Discard section.
9.4 Defensive Mission
- Mission section. Announce the defensive mission and name the start and target location. Remark: Defensive missions are always carried out on one's own side, from one Pro location to another Pro location, or from Anti location to Anti location.
- The player takes into his hand the ships, units and accessories that take part in the mission. Remark: Transported cards must be assigned to the transporting ships. Participating cards need not be named; only the number of participating units/ships must be stated on request (because of upper limits)!
- Beginning of flight. Remark: When the mission type changes, continue at the offensive mission at this point! Here, for example, a Fehltransition (misdirection) may be played. Using a Fehltransition, any opponent can redirect the ships to another location of any player within the range of the ships, and thereby turn a defensive mission into an offensive mission. If a defensive mission becomes an offensive mission, no action card is drawn to determine the mission target.
- End of flight. The player lays out ships, units and accessories at the target location. Remark: Observe loyalties and upper limits!
9.5 Offensive Mission
-
Mission section. Announce the offensive mission and name the start and target location.
-
Draw an action card to determine the mission target and, for assassination or sabotage, name the target object. Remark: If only a space combat is to take place, no action card needs to be drawn! For assassination a unit, and for sabotage an accessory: location/unit, is named as target.
-
Attacker takes combat hand. The attacker takes all ships, units and accessories that take part in the mission into his hand. Remark: Transported cards must be assigned to the transporting ships.
-
Is the target location a different location from the starting location (different name)?
- Yes: the target must be flown to with ships. Continue at the beginning of flight.
- No (same name): should a space combat also take place here? Yes: continue at the beginning of flight. No: continue with ground combat. Remark: The units then reach the opposing side on foot; ships are not involved in the mission at the same location if no space combat is to take place. Remark: If ground combat is to follow the space combat, the units must be loaded before the space combat!
-
Beginning of flight. Remark: When the mission type changes, continue at the defensive mission at this point! Here, for example, a Fehltransition may be played, which can turn an offensive mission into a defensive mission.
-
End of flight. Beginning of space combat. Are defending ships present? Yes: space combat. No: continue with ground combat. Remark: Units loaded into ships cannot be transferred during the whole space combat!
9.5.1 Combat Setup
Sequence of combat setup for space or ground combat:
- The attacker lays out the first card.
- The defender lays a card against it.
- The attacker, if possible, lays out a further card either as escort or as a new combat pairing.
- The defender now, if possible, lays out a further card. If the attacker previously laid out a card as a new combat pairing, the defender must lay his card against it. If the attacker laid a card as escort, the defender may choose whether to lay his card as a new combat pairing or as escort.
- The attacker and defender now alternate. They must lay out any further cards by the same rules as before, until all cards are laid out.
Restrictions on laying out:
- At most 2 ships/units may be laid out as escort.
- Spaceships may not be laid out as escort for fleets.
- Persons may not be laid out as escort for troops.
After all cards have been laid out, those cards to which no opposing card is assigned may afterwards be used as escort. If this is not possible, they cannot take part in this combat round.
- In ground combat the number of possible combat pairings is limited by the ground combat limits. The ground combat limit is modified again by the mission target, but is always at least 1!
9.5.2 Combat
Combat can occur in an offensive mission, an agent mission or a defence mission.
- Attacker takes combat hand. The attacker takes all ships, units and accessories that take part in the mission into his hand. Transported cards must be assigned to the transporting ships. Remark: To avoid confusion it is sensible to take the combat hand in an orderly fashion. It is best to stack one's cards from top to bottom in the following order: transporting ship, accessory of this ship, transported unit, accessory of this unit, possibly a further unit with accessory, transported ship, accessory of this ship, unit on this ship and accessory of this unit, and so on, until all cards of the combat hand are stacked.
- Does the attacker fly to the target location with ships? Remark: Whenever the target location has a different name from the starting location, it must be flown to with ships (exception: the transmitter connection Ferrol – Rofus). A target location of the same name may be flown to with ships, but need not be. If the target location is flown to with ships, a space combat takes place there if defending ships are present! No: continue with ground combat. Yes: beginning of flight. Remark: Events and special effects that are to act on the transiting ships may be played here, e.g. Fehltransition.
- End of flight. Beginning of space combat. Are defending ships present? Yes: continue. No: continue with ground combat.
- Defender takes combat hand for space combat. The defender takes all defending ships into his hand. Units and accessories that take part in the space combat are also taken into the hand (except accessory: location). Transported cards must be assigned to the transporting ships. Units of the defender that are to take part only in the later ground combat are not taken into the combat hand now. Remark: The defender's accessory: location that is to take part in the space combat is laid out visibly beside the combat area. Accessory: location bearing the note "Geheim" remains face down under the location and is only revealed when needed. It does not have to be used in the 1st space combat round.
- 1st space combat round. Remark: Maximum 3 space combat rounds, or until all ships of the attacker or the defender are destroyed, or the attacker or defender withdraws.
- The attacker lays out his 1st ship. The defender lays his 1st ship against it.
Editorial note on this sub-section: the source prints the 2nd and 3rd space combat rounds as full repeated flow diagrams. Their steps are the same as those given above for the 1st round (laying out ships, fire at will, outcome, retreat decision), with two differences: stealth is not determined again, and after the 3rd round the attacker must withdraw all ships that have not broken through. The repeated diagrams are therefore not reproduced step by step here.
- Ground combat (9.5.2 continued). The defender takes his combat hand for ground combat as set out in steps 18–28 of section 9.5 above. The ground combat round sequence (laying out units, stealth determination only in the 1st ground combat round, fire at will, breakthrough, withdrawal and reduction) is the same as for space combat, with units in place of ships and "escort" in place of "escort protection". The reduction takes place only in the offensive mission. Remark: Events and skills that must be played before the ground combat (for example Dreimal Glockenschlag in phase V) and special effects that are played at the beginning of ground combat (for example Arkonbombe) are played at the points shown in the source diagrams.
- Ground combat, retreat: if the defender withdraws, he stays at the location of the ground combat and does not have to move to another location. The attacker withdraws to a permitted area, which is the starting location or another location in his own area within range of the ships, if he arrived at the location with ships. After the 3rd ground combat round the attacker must withdraw; only broken-through units may still carry out a reduction beforehand. Remark: Only active units can carry out a reduction!
- Ground combat, example: the card Fehlalarm (false alarm) may be played before "Feuer frei" in the source diagram.
9.6 Agent Mission
The source repeats the space combat and retreat steps of the offensive mission in this diagram. Those repeated steps are summarised here by reference to section 9.5 and 9.5.2 above; every other step is given.
- Mission section. Announce the agent mission and name the start and target location. Remark: The agent mission counts as an independent mission; further missions are only possible with the skill Initiative! When asked by the attacker, the defender must state how many location cards lie at the target location. This is necessary because the limit on agents = number of locations +1.
- Attacker takes combat hand. The attacker takes all ships, units and accessories that take part in the mission into his hand. At least one agent must take part. Transported cards must be assigned to the transporting ships.
- Is the target location a different location from the starting location (different name)? Yes: must ships fly there? Yes: continue with the flight and space combat as in the offensive mission (sections 9.5 and 9.5.2). No: the agent is laid out in disguise. Remark: The agents reach the opposing side on foot; ships are not involved in this mission. If the target location has the same name, the agent is laid out in disguise directly there.
- Beginning of flight. Remark: When the mission type changes, continue at the offensive or defensive mission at this point! For example, a Fehltransition may be played, which can turn an agent mission into an offensive or defensive mission.
- End of flight. Beginning of space combat. Are defending ships present? Yes: space combat as in the offensive mission (defender takes combat hand; accessory: location; 1st to 3rd space combat round; laying out ships; stealth; breakthrough; fire at will; retreat). Remark: Units loaded into ships cannot be transferred during the whole space combat! No: the agent is laid out in disguise.
- Remark on breakthrough: A ship breaking through without an agent on board is only protected from destruction. An agent on board a breaking-through ship is laid out in disguise later, before the retreat. A small ship with short range (e.g. a shuttle) can also deploy the agent(s) and then fly away with the other withdrawing ships that have sufficient range! The ships and units that accompanied the agent withdraw into the player's own area after the deployment. The agent remains at the location until a later round of the player.
9.7 Defence Mission
Remark: In a defence mission the player who declares the mission is the attacker. He attacks the enemy agents located at his location.
- Mission section. An opposing agent is located at a location, either disguised or already exposed. Remark: At each Pro and Anti location one defence mission may be carried out per turn, in addition to an offensive or defensive mission. With the skill Initiative a further defence mission at the same location is possible, but only with units that have not yet taken part in a defence mission in the same turn!
- The attacker declares the defence mission and takes his combat hand. The defender takes the agent and the accessory into his hand. Remark: If required, the attacker may carry out a defensive mission before the defence mission to bring in units. Units just brought in may also take part in the defence mission. The attacker may use both agents and regular units for his defence mission.
- Only one ground combat round takes place. Remark: Attacker and defender may alternately use events, skills and accessories that are to be played before the ground combat, for example Kuri Oneré. The attacker's accessory: location that takes part in the ground combat is laid out visibly beside the combat area. Accessory: location bearing the note "Geheim" remains face down under the location until needed.
- The attacker lays out his 1st unit, and the defender lays his agent against it. If present, the attacker and then the defender alternately lay out further units or agents, either as escort or as a new combat pairing. Remark: At most 2 units per combat pairing may be used as escort.
- The attacker and defender alternately use events, skills and accessories that modify the stealth value; the attacker begins. Remark: Events, skills and accessories can change the stealth value of the front unit.
- The attacker draws an action card for each combat pairing and determines his own stealth value (left, red) and the defender's stealth value (right, green). Remark: Events, skills and accessories that modify the stealth value are played before the action card is drawn.
- Does the agent have a positive stealth difference? Yes: "The agent remains disguised". Disguised agents remain under the cover card; for them this defence mission is ended. No: "The agent is exposed!" Continue with "Fire at will!"
Page 80 of the source (the final page, product advertising for other card packs and for the forthcoming phase VI) is not rules text and is not reproduced here.